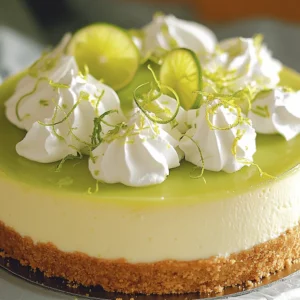
Are you ready to make a Key Lime Cheesecake that wows everyone? My simple and delicious recipe will guide you step-by-step. I’ll show you the must-have ingredients and secret tips for a perfect texture. Whether you’re a baking novice or a pro, this cheesecake is easy to whip up and sure to impress. Let’s dive in and turn those key limes into a delightful dessert!
Ingredients
Key Ingredients: Essential Items for Key Lime Cheesecake
To make a great key lime cheesecake, you need a few key ingredients. Here’s what you’ll need:
– 1 ½ cups graham cracker crumbs
– ½ cup unsalted butter, melted
– ¼ cup granulated sugar
– 3 (8 oz) packages cream cheese, softened
– 1 cup granulated sugar
– 3 large eggs
– 1 cup key lime juice (freshly squeezed, about 10-12 limes)
– Zest of 2 limes
– 1 teaspoon vanilla extract
– 1 cup whipped cream (for topping)
– Lime slices and zest curls (for garnish)
These ingredients combine to create a creamy and tangy cheesecake. The graham cracker crust gives it a nice crunch.
Optional Ingredients: Additions for Flavor and Garnish
You can add a few optional items to enhance your cheesecake. Here are some ideas:
– Coconut flakes for a tropical twist
– A pinch of salt to balance the sweetness
– Fresh mint leaves for a refreshing touch
These additions can make your cheesecake stand out. Feel free to mix and match based on your taste.
Measurement Units: Understanding Standard Baking Measurements
When baking, it’s important to use the right measurements. Here’s a quick guide:
– Cups: Used for dry and liquid ingredients.
– Teaspoons and Tablespoons: Useful for smaller amounts.
– Ounces: Often used for cream cheese and butter.
If you are unsure about conversions, a kitchen scale can help. Measuring accurately ensures your cheesecake turns out perfectly every time. For the full recipe, check out the detailed steps that follow.
Step-by-Step Instructions
Preparation: Getting Ready for Baking
First, gather all your ingredients. You will need graham cracker crumbs, butter, sugar, cream cheese, eggs, key lime juice, lime zest, and vanilla. This step makes the process smooth. Preheat your oven to 325°F (160°C). This ensures your cheesecake bakes evenly.
Next, mix your crust. In a bowl, combine 1 ½ cups graham cracker crumbs, ½ cup melted butter, and ¼ cup sugar. Stir until the crumbs are wet. Press this mix into a 9-inch springform pan. Bake this crust for 8-10 minutes. Let it cool while you prepare the filling.
Mixing the Filling: How to Achieve the Perfect Texture
In a large bowl, beat 3 packages of softened cream cheese with an electric mixer. You want it creamy and smooth. Gradually add 1 cup of sugar. Mix until everything is blended well. Add 3 large eggs one at a time. Make sure to mix well after each egg, but don’t overmix.
Now, pour in 1 cup of freshly squeezed key lime juice, the zest of 2 limes, and 1 teaspoon of vanilla extract. Gently mix until everything is combined. This is the key to a smooth filling.
Baking Tips: Ensuring a Perfectly Set Cheesecake
Pour the cheesecake filling over the cooled crust. Spread it evenly with a spatula. Bake in the oven for 50-60 minutes. The center should be set but may jiggle slightly. This is okay; it will firm up as it cools.
Once done, turn off the oven. Crack the door open and let the cheesecake cool inside for 1 hour. This helps prevent cracks. After an hour, let it cool to room temperature. Then, refrigerate for at least 4 hours or overnight.
Before serving, top with whipped cream and garnish with lime slices. This adds a fun touch. For the full recipe, check the details above. Enjoy your key lime cheesecake!
Tips & Tricks
Achieving the Best Key Lime Flavor: Tips for Freshness
To get the best key lime flavor, always use fresh limes. Freshly squeezed juice makes all the difference. The zest adds a nice kick too. I recommend buying limes that feel heavy for their size. They tend to be juicier. If you can, taste a lime before buying. This ensures a bright, tangy flavor.
Avoiding Common Mistakes: What to Watch Out For
One common mistake is overmixing the batter. Mix just until combined to keep it smooth. Another issue is baking too long. Keep an eye on the cheesecake. It should jiggle slightly in the center when done. Lastly, cooling is key. Let it cool slowly in the oven to avoid cracks.
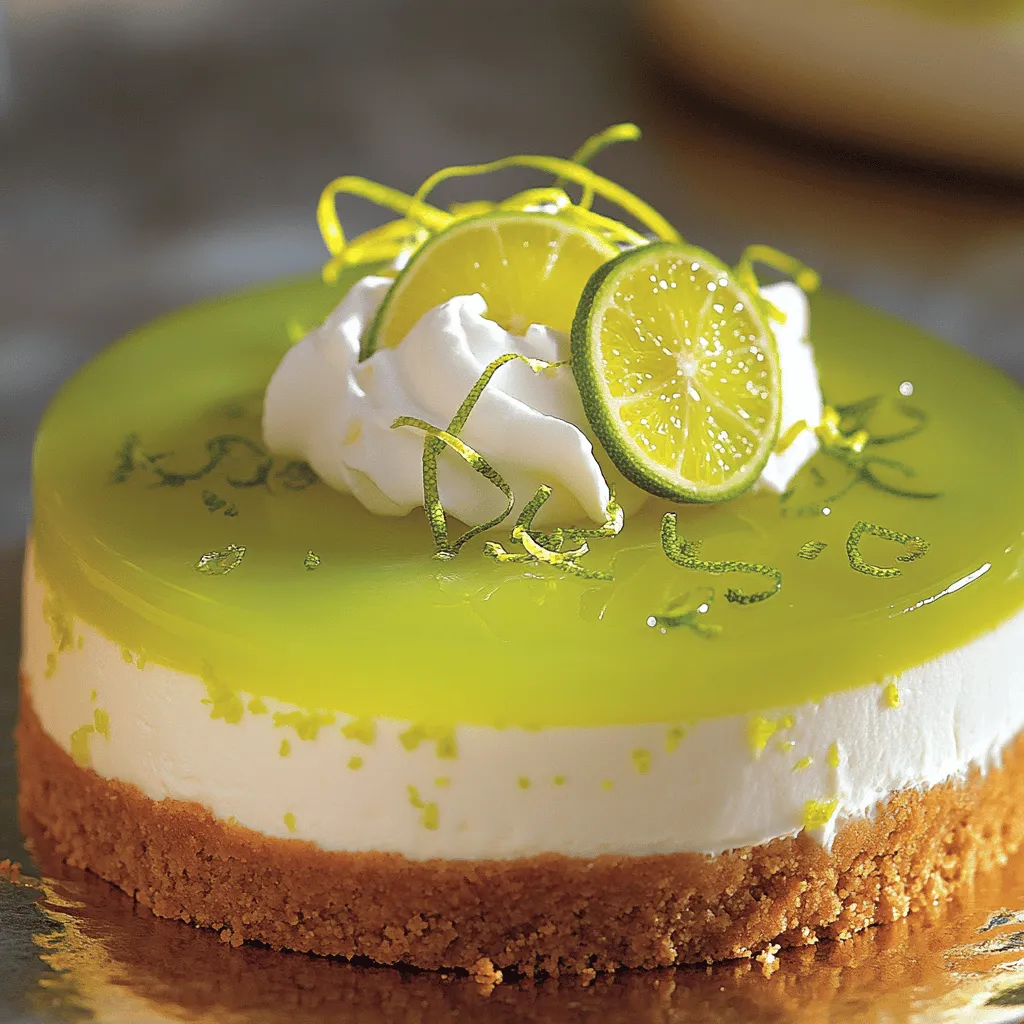
Serving Suggestions: Best Ways to Present Your Cheesecake
Presentation is important for any dessert. For key lime cheesecake, a dollop of whipped cream on top looks great. Garnish with lime slices and zest curls for color. You can also serve it with a side of fresh berries. This adds a nice contrast and enhances the flavors. For the full recipe, check out the link provided!
Variations
No-Bake Key Lime Cheesecake: A Quick Alternative
If you want a faster dessert, try a no-bake key lime cheesecake. This version skips the oven and saves time. Instead of baking the crust, you chill it in the fridge. Use the same graham cracker crumbs and butter for the crust. Mix cream cheese, sugar, lime juice, and zest in a bowl until smooth. Pour this creamy filling into your crust. Chill for at least four hours. You get a light and zesty treat without baking.
Vegan Key Lime Cheesecake: Dairy-Free Options
For a vegan twist, swap the cream cheese with blended cashews. Soak cashews in water for a few hours, then blend them until smooth. Use coconut cream instead of whipped cream for a rich topping. You can also use maple syrup instead of sugar. The key lime juice and zest will still give that bright flavor. This vegan option is creamy and delicious, perfect for everyone.
Flavor Variations: Infusing Other Citrus Fruits
While key limes shine in this recipe, feel free to experiment. You can mix in other citrus juices like lemon or orange. This gives your cheesecake a new flavor twist. Just keep the ratio of juice similar to the key lime juice. You can also add zest from these fruits for extra flavor. Each variation offers a unique taste while keeping the creamy texture we all love.
For the full recipe, check the main article.
Storage Info
How to Store Leftover Cheesecake: Best Practices
To keep your key lime cheesecake fresh, store it in the fridge. Place it in an airtight container or cover it tightly with plastic wrap. This helps prevent drying out. Make sure to keep it away from strong-smelling foods to avoid flavor changes. If you have already cut slices, use a piece of parchment paper between slices to keep them from sticking together.
Freezing Key Lime Cheesecake: Tips for Long-Term Storage
Freezing your cheesecake is a great option if you want to save some for later. First, allow it to cool completely in the fridge. Then, wrap it tightly in plastic wrap and aluminum foil to prevent freezer burn. You can also use a freezer-safe container. When you are ready to eat it, thaw it in the fridge overnight. This keeps the texture nice and creamy.
Shelf Life: How Long Does Key Lime Cheesecake Last?
When stored properly in the fridge, key lime cheesecake lasts about 5 to 7 days. If you freeze it, it can last for up to 3 months. Just remember, the longer it sits, the more the flavors may change. Always check for any signs of spoilage before serving. Enjoy your delicious cheesecake without worry! You can find the full recipe above.
FAQs
What is the best way to know if my cheesecake is done?
You can tell your cheesecake is done by looking at the edges. The edges should be firm, and the center may jiggle slightly. After baking, turn off the oven and crack the door. Let it cool in the oven for one hour. This helps set the texture and prevents cracking.
Can I use bottled key lime juice instead of fresh?
Yes, you can use bottled key lime juice if fresh is not available. However, fresh juice gives a brighter flavor. When using bottled juice, choose a brand that is 100% key lime juice for the best taste.
How do I prevent my cheesecake from cracking?
To prevent cracking, do not overmix your batter. Mix just until smooth. Cooling the cheesecake slowly in the oven also helps. After baking, leave the door ajar for an hour. This gradual cooling reduces temperature shock, which can cause cracks.
You learned about key ingredients for a tasty key lime cheesecake. We discussed preparation, mixing, and baking tips for success. I shared ways to enhance flavors and avoid common mistakes. You also discovered no-bake and vegan options for variety. Lastly, I covered how to store your cheesecake and answered common questions.
Remember, baking is fun! Use these tips to create your best cheesecake yet. Enjoy the process and share your creation with others. Happy baking!