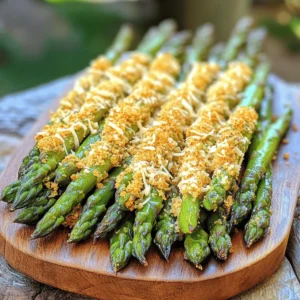
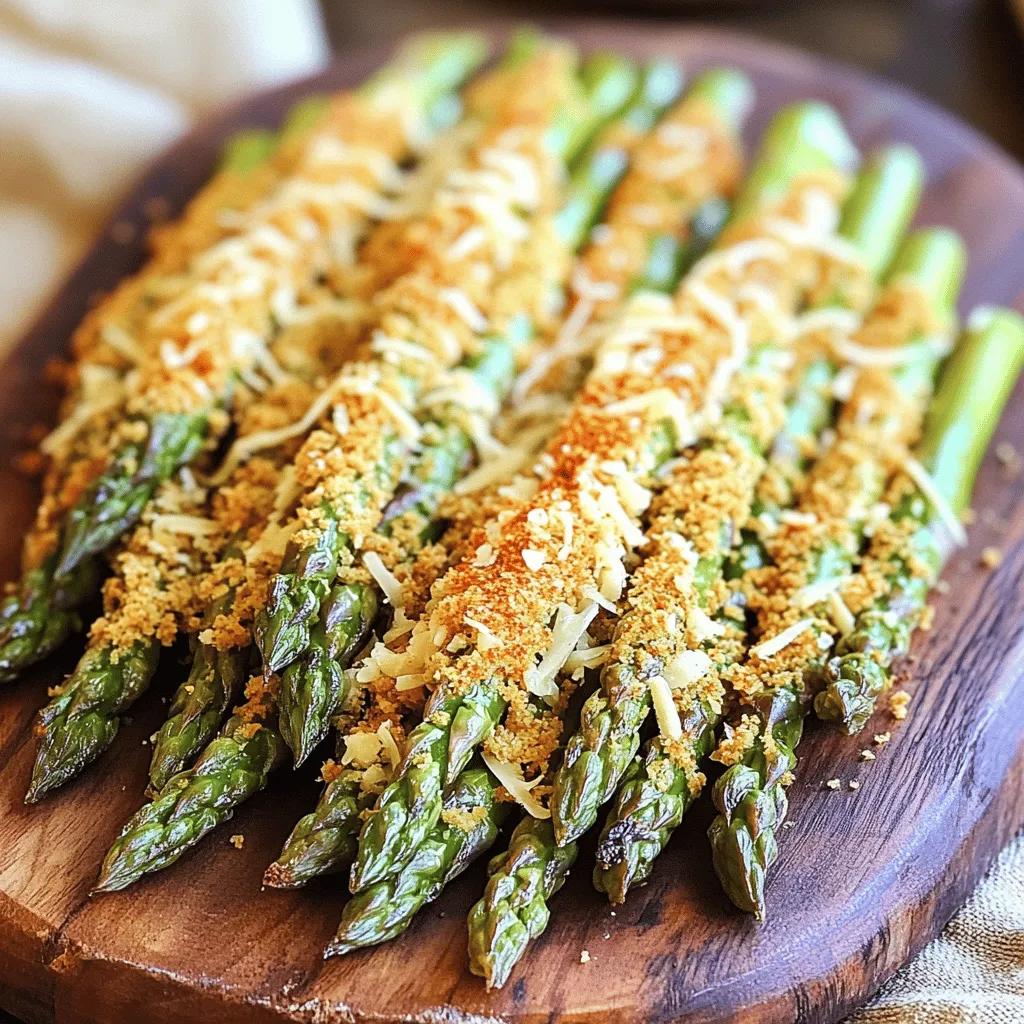
Looking for a quick and tasty side dish? I’ve got you covered with my Crispy Asparagus Asiago Spears recipe! It’s simple, fun, and perfect for any meal. This dish not only delivers on flavor but also surprises with its crunch. Join me as I share easy steps, handy tips, and mouthwatering variations to customize your spears. Let’s make this delicious treat together!
Ingredients
Main Ingredients Needed
To make crispy asparagus asiago spears, you need these main ingredients:
– 1 pound fresh asparagus, trimmed
– 1 cup shredded Asiago cheese
– 1 cup breadcrumbs (panko works best)
– 2 large eggs, beaten
– 1/2 cup all-purpose flour
– 1 teaspoon garlic powder
– 1 teaspoon paprika
– Salt and pepper to taste
– Olive oil spray
These ingredients come together to create a dish that is both tasty and fun to eat. The fresh asparagus adds a nice crunch, while the Asiago cheese gives that rich flavor.
Optional Ingredients for Customization
You can try some optional ingredients to make this dish your own:
– Lemon zest for a fresh kick
– Fresh herbs like parsley or basil
– Different cheese types like Parmesan or cheddar
– Hot sauce for a spicy twist
These extras allow you to play with flavors. Feel free to mix and match based on what you love!
Recommended Tools and Equipment
To prepare this dish, you will need the following tools:
– Baking sheet
– Parchment paper
– Three shallow dishes for breading
– Oven mitts for safety
– A whisk for the eggs
Having the right tools makes cooking easier and more fun. With these items on hand, you can create a beautiful plate of crispy asparagus asiago spears. For the full recipe, check the earlier section.
Step-by-Step Instructions
Preparation Steps Overview
To make crispy asparagus asiago spears, you need to prepare a few items. First, get your ingredients ready. You will need fresh asparagus, Asiago cheese, breadcrumbs, eggs, flour, garlic powder, paprika, salt, pepper, and olive oil spray. Next, preheat your oven to 425°F (220°C). This helps to make the spears crispy. Line a baking sheet with parchment paper. This will prevent sticking and make cleanup easy.
Detailed Cooking Process
1. Set up your breading station. Use three shallow dishes.
– In the first dish, add flour.
– In the second, pour in beaten eggs.
– In the third, mix breadcrumbs, shredded Asiago cheese, garlic powder, paprika, salt, and pepper.
2. Now, take one asparagus spear. Dip it into the flour. Shake off any extra flour.
3. Next, dip the floured spear into the egg. Let any excess egg drip off.
4. Finally, roll the asparagus in the breadcrumb mixture. Make sure it is well coated.
5. Place the breaded asparagus on your lined baking sheet. Make sure they are in a single layer.
6. Lightly spray the spears with olive oil. This step is key for crispiness.
7. Bake the asparagus in the oven for 15-20 minutes. Flip them halfway through for even cooking.
8. When they turn golden brown, remove them from the oven. Let them cool for a few minutes before serving.
Tips for Ensuring Crispiness
To get that perfect crunch, follow these tips:
– Use panko breadcrumbs for extra texture. They are lighter and crispier.
– Make sure the oil spray covers each spear lightly. Too much oil will make them soggy.
– Avoid overcrowding the baking sheet. Give each spear space to breathe.
– Flip the spears halfway through baking to ensure even crispiness.
By following these steps, you will enjoy crispy asparagus asiago spears that are perfect every time. For the complete recipe, refer to the Full Recipe section of this article.
Tips & Tricks
Best Practices for Breading
To get the best breading on your asparagus, set up a clean space. Use three shallow bowls. Keep one for flour, one for egg, and one for the breadcrumb mix. Make sure to coat the asparagus well in each step. Shake off extra flour and egg. This helps the breadcrumbs stick better. The more even the coating, the crispier the outcome.
How to Achieve Perfectly Baked Asparagus
Baking asparagus at 425°F (220°C) is key. This high heat allows the spears to cook quickly and evenly. Place the spears in a single layer. Avoid crowding them on the baking sheet. Flipping them halfway through baking ensures both sides get golden brown. Spraying with olive oil helps them crisp up. If you want extra crunch, try panko breadcrumbs. They add a great texture.
Additional Flavor Enhancements
To add more flavors, mix in herbs or spices. Try adding Italian seasoning or crushed red pepper for a kick. You can also sprinkle some lemon zest before serving. This adds a fresh taste that pairs well with the cheese. Another idea is to drizzle balsamic glaze on top. It gives a nice sweet-and-sour contrast. For more flavor ideas, check the Full Recipe.
Variations
Different Cheeses to Use
You can swap Asiago for other cheeses. Parmesan works well and adds a nutty flavor. Cheddar gives a rich taste, while mozzarella melts beautifully for a gooey texture. Each cheese adds its own twist to the dish.
Alternative Bread Crumb Options
Panko breadcrumbs give a great crunch. If you’re looking for a twist, try crushed cornflakes or even ground nuts. Both options bring a unique texture and flavor to the dish. Experimenting with different crumbs can make this dish even more exciting.
Seasonal Vegetable Substitutions
Asparagus shines, but other veggies can work too. Try zucchini, carrots, or green beans for a different taste. Just cut them to a similar size as asparagus for even cooking. You can enjoy this recipe all year long by using what’s fresh and in season.
For the full recipe, check out the detailed instructions above.
Storage Info
Best Ways to Store Leftovers
After you enjoy your crispy asparagus asiago spears, store leftovers in a sealed container. Make sure the spears are fully cooled before sealing. This keeps them fresh and prevents sogginess. You can keep them in the fridge for up to three days. For best results, avoid stacking them too tightly. This helps maintain their crispiness.
Reheating Instructions for Optimal Crispness
To reheat, preheat your oven to 350°F (175°C). Spread the asparagus spears on a baking sheet. Bake for about 10 minutes, or until they’re hot and crispy again. Avoid using the microwave, as it can make them soft. If you have an air fryer, use it for the best results. The air fryer works wonders for keeping them crispy.
Freezing Tips for Long-term Storage
If you want to freeze your crispy asparagus asiago spears, first cool them completely. Lay them flat on a baking sheet and freeze for about an hour. Once frozen, transfer them to a freezer-safe bag. They can last for up to three months. When you’re ready to eat, bake them straight from the freezer. Just add a few extra minutes to the cooking time. Enjoy your tasty snack anytime!
FAQs
Can I make Crispy Asparagus Asiago Spears ahead of time?
Yes, you can prepare Crispy Asparagus Asiago Spears in advance. Bread the asparagus and place them on a baking sheet. Cover the sheet with plastic wrap and store it in the fridge for up to 24 hours. When you’re ready to bake, just remove the wrap and spray with olive oil. This saves time and lets you enjoy fresh, crispy spears anytime.
What can I serve with crispy asparagus spears?
Crispy Asparagus Asiago Spears pair well with many dishes. You can serve them as a side with grilled chicken or fish. They also make a tasty snack or appetizer for parties. Try them alongside a fresh salad or pasta for a full meal. Serve with a dipping sauce like ranch or a tangy aioli for added flavor.
How do I make these gluten-free?
To make Crispy Asparagus Asiago Spears gluten-free, simply swap out the all-purpose flour and breadcrumbs. Use gluten-free flour and gluten-free breadcrumbs instead. There are many brands available that work well. Just ensure your Asiago cheese is free from gluten additives. This way, you can enjoy the same great taste without the gluten.
This blog post covered the key steps to make crispy asparagus asiago spears. We went over the main ingredients, cooking instructions, and tips for achieving that perfect crunch. I also shared options for variations and how to store leftovers.
In my view, making these tasty spears is worth the effort. They are a fun and healthy snack or side dish. Keep experimenting with flavors and enjoy your cooking adventures!