![For these Cherry Lime Mini Cheesecakes, you will need: - 1 cup graham cracker crumbs - 1/4 cup unsalted butter, melted - 2 cups cream cheese, softened - 1/2 cup granulated sugar - 1/2 cup sour cream - 2 large eggs - Zest of 2 limes - 1/4 cup fresh lime juice - 1 cup cherry pie filling These ingredients create a balanced flavor. The lime gives a bright taste, while the cherry topping adds sweetness. If you lack an ingredient, here are some great swaps: - For graham cracker crumbs, use crushed vanilla cookies. - Swap unsalted butter for coconut oil for a dairy-free option. - If you don’t have cream cheese, try mascarpone cheese instead. - For sour cream, Greek yogurt works well. - Use key lime juice if you want a stronger lime flavor. These swaps can change the taste slightly, but they’ll still be tasty! Choosing the right ingredients makes a big difference. Here’s what to look for: - Use fresh limes for zest and juice. They give the best flavor. - Look for full-fat cream cheese for a richer texture. - Buy high-quality cherry pie filling for a nice topping. - Check the expiration date on dairy products to ensure freshness. Quality ingredients lead to better cheesecakes. You’ll taste the difference in every bite! To start, gather all your ingredients. You’ll need graham cracker crumbs, butter, cream cheese, sugar, sour cream, eggs, lime zest, lime juice, and cherry pie filling. Preheat your oven to 325°F (160°C). This step is important for even baking. Line a muffin tin with cupcake liners or grease it with non-stick spray. This will help your cheesecakes come out easily. In a medium bowl, mix the graham cracker crumbs and melted butter. Stir until the crumbs are moist. Next, press about 1 tablespoon of this mixture into each muffin cup. This forms a crunchy crust. In a large bowl, beat the cream cheese until it’s smooth. Then, slowly add the sugar while mixing. This makes your filling sweet and creamy. Mix in the sour cream, lime zest, and lime juice. Make sure everything is well combined. Add the eggs one at a time. Mix well after each egg until the batter is smooth. Pour the cheesecake batter over the crusts, filling each cup about 3/4 full. Bake for 18-20 minutes. The centers should be set but still slightly jiggly. After baking, remove the cheesecakes from the oven. Let them cool to room temperature. Then, refrigerate them for at least 4 hours or overnight. This chilling time helps them firm up. Before serving, top each cheesecake with a spoonful of cherry pie filling. For extra flair, garnish with a slice of lime and some fresh cherries. These small touches make your mini cheesecakes look even more delightful. For the full recipe, check out the detailed instructions above. When making Cherry Lime Mini Cheesecakes, it’s easy to make a few common mistakes. First, don't skip softening the cream cheese. Cold cream cheese leads to lumps. Second, avoid overmixing. Too much mixing can add air and cause cracks. Lastly, don’t bake them too long. They should be set but still a little jiggly in the center. To get the best texture, mix your ingredients at room temperature. This helps them blend smoothly. When adding eggs, mix just until combined. Overmixing can make the texture dense. Bake at the right temperature, and let them cool gradually. Rapid cooling can create cracks in the cheesecake. For a beautiful presentation, top each mini cheesecake with cherry pie filling. Add a slice of lime on top for color. You can also place a few fresh cherries around the plate. Serve these on a nice platter. It makes them look fancy and fun. For the best effect, keep them chilled until you are ready to serve. Check the Full Recipe for all the details! {{image_2}} You can change the toppings on your mini cheesecakes. Instead of cherry pie filling, try fresh berries. Strawberries, blueberries, or raspberries add great color and flavor. You can also use whipped cream for a light touch. A drizzle of chocolate or caramel sauce makes it extra special. Experiment with different fruits for a fun twist. Feel free to mix up the flavors in your mini cheesecakes. You can swap lime juice for lemon or orange juice. This small change will give a new taste. Adding a few drops of vanilla extract can enhance the flavor. For a richer bite, fold in some chocolate chips or crushed cookies into the batter. The options are endless! If you need gluten-free options, use gluten-free graham crackers for the crust. You can also make a nut crust with almonds or walnuts. For a dairy-free version, try vegan cream cheese and coconut yogurt. They work well and taste great. Always check labels to ensure all ingredients meet your dietary needs. Enjoy these cheesecakes without worry! You can find the full recipe and make your own Cherry Lime Mini Cheesecakes. To keep your Cherry Lime Mini Cheesecakes fresh, store them in the fridge. Use an airtight container to prevent them from drying out. Place parchment paper between layers to avoid sticking. If you have leftovers, make sure to cover them well to keep them tasty. These mini cheesecakes last about five days in the fridge. You can freeze them for up to three months. To freeze, wrap each cheesecake in plastic wrap. Then, place them in a freezer-safe bag or container. When you want to enjoy one, just thaw it in the fridge overnight. You don’t need to reheat these cheesecakes. They taste best cold. If you want to serve them at room temperature, take them out of the fridge for about 30 minutes before serving. This will bring out the flavors without losing that creamy texture. For the full recipe, check out the details above. Yes, you can make these cherry lime mini cheesecakes ahead of time. I often prepare them a day before serving. This method allows the flavors to blend well. After baking, let them cool and chill in the fridge. They taste even better after sitting overnight. To prevent cracks, avoid overmixing the batter. Mix just until smooth. Also, make sure your cream cheese is soft. This helps create a creamy texture. Bake at a lower temperature, and don’t open the oven door while baking. A water bath can help, too. It keeps the heat even and moist. If you want a change, use fresh or frozen cherries. Cook them down with sugar and a bit of lime juice. You can also try blueberry or strawberry fillings. For a fun twist, use chocolate sauce or caramel. The options are endless! For the complete recipe, check out [Full Recipe]. This post covered how to make mini cheesecakes with ease. We explored ingredients, step-by-step instructions, and helpful tips. You learned about common mistakes to avoid and how to achieve the best texture. We shared fun variations, toppings, and storage tips for your treats. Remember, practice makes perfect. Each cheesecake is a chance to improve your skills. With these tips, you can create delicious mini cheesecakes that impress and delight. Enjoy your baking journey!](https://grilledflavors.com/wp-content/uploads/2025/05/72f39162-3f0c-4fee-b77f-907cda1ddf38.webp)
Are you ready to whip up a sweet sensation that’s both delightful and simple? These Cherry Lime Mini Cheesecakes are your answer! With a zesty twist and creamy texture, they bring a burst of flavor to any occasion. I’ll guide you through each step, ensuring you nail the recipe every time. Let’s dive into this tasty adventure and impress your taste buds with a treat so good, you’ll want to make them again and again!
Ingredients
Detailed Ingredient List
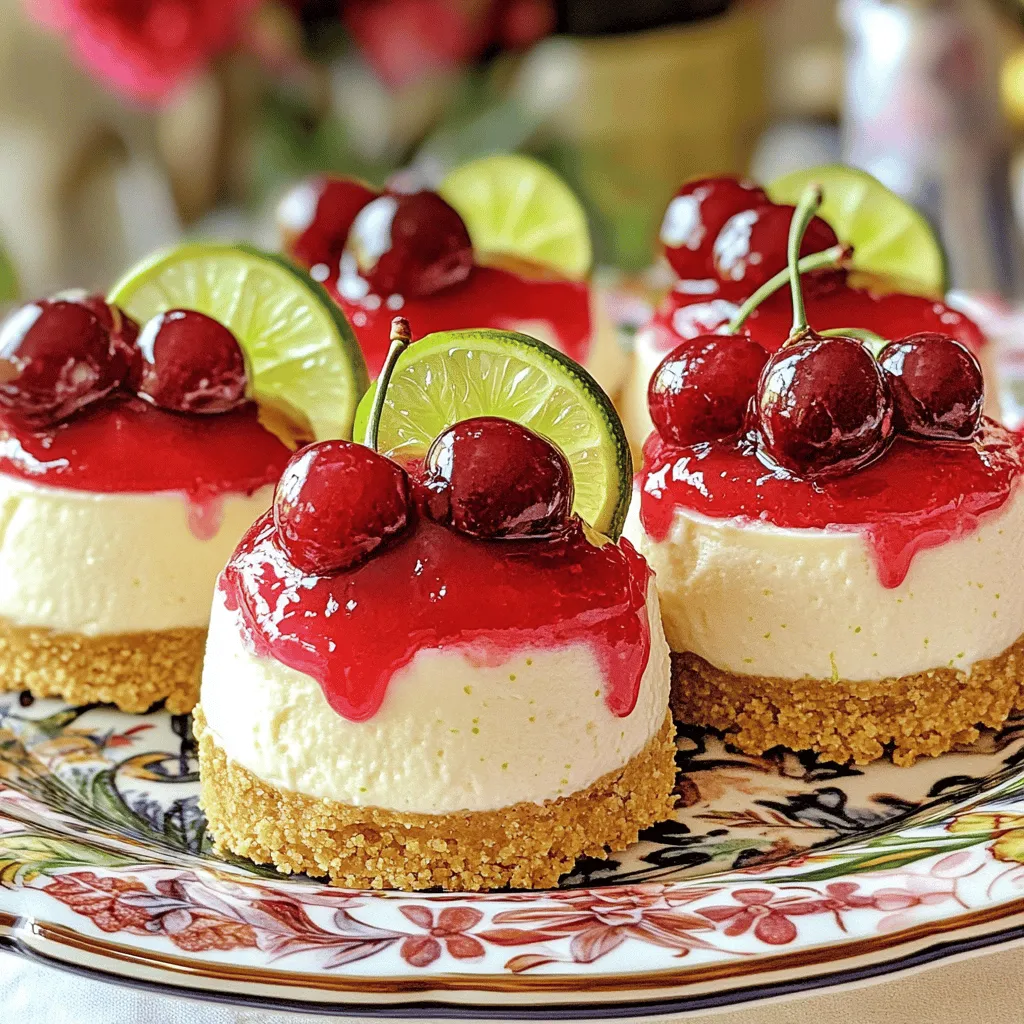
For these Cherry Lime Mini Cheesecakes, you will need:
– 1 cup graham cracker crumbs
– 1/4 cup unsalted butter, melted
– 2 cups cream cheese, softened
– 1/2 cup granulated sugar
– 1/2 cup sour cream
– 2 large eggs
– Zest of 2 limes
– 1/4 cup fresh lime juice
– 1 cup cherry pie filling
These ingredients create a balanced flavor. The lime gives a bright taste, while the cherry topping adds sweetness.
Possible Substitutions
If you lack an ingredient, here are some great swaps:
– For graham cracker crumbs, use crushed vanilla cookies.
– Swap unsalted butter for coconut oil for a dairy-free option.
– If you don’t have cream cheese, try mascarpone cheese instead.
– For sour cream, Greek yogurt works well.
– Use key lime juice if you want a stronger lime flavor.
These swaps can change the taste slightly, but they’ll still be tasty!
Tips for Ingredient Quality
Choosing the right ingredients makes a big difference. Here’s what to look for:
– Use fresh limes for zest and juice. They give the best flavor.
– Look for full-fat cream cheese for a richer texture.
– Buy high-quality cherry pie filling for a nice topping.
– Check the expiration date on dairy products to ensure freshness.
Quality ingredients lead to better cheesecakes. You’ll taste the difference in every bite!
Step-by-Step Instructions
Preparation Steps Overview
To start, gather all your ingredients. You’ll need graham cracker crumbs, butter, cream cheese, sugar, sour cream, eggs, lime zest, lime juice, and cherry pie filling. Preheat your oven to 325°F (160°C). This step is important for even baking. Line a muffin tin with cupcake liners or grease it with non-stick spray. This will help your cheesecakes come out easily.
Baking Process
In a medium bowl, mix the graham cracker crumbs and melted butter. Stir until the crumbs are moist. Next, press about 1 tablespoon of this mixture into each muffin cup. This forms a crunchy crust. In a large bowl, beat the cream cheese until it’s smooth. Then, slowly add the sugar while mixing. This makes your filling sweet and creamy. Mix in the sour cream, lime zest, and lime juice. Make sure everything is well combined. Add the eggs one at a time. Mix well after each egg until the batter is smooth. Pour the cheesecake batter over the crusts, filling each cup about 3/4 full. Bake for 18-20 minutes. The centers should be set but still slightly jiggly.
Cooling and Serving Instructions
After baking, remove the cheesecakes from the oven. Let them cool to room temperature. Then, refrigerate them for at least 4 hours or overnight. This chilling time helps them firm up. Before serving, top each cheesecake with a spoonful of cherry pie filling. For extra flair, garnish with a slice of lime and some fresh cherries. These small touches make your mini cheesecakes look even more delightful. For the full recipe, check out the detailed instructions above.
Tips & Tricks
Common Mistakes to Avoid
When making Cherry Lime Mini Cheesecakes, it’s easy to make a few common mistakes. First, don’t skip softening the cream cheese. Cold cream cheese leads to lumps. Second, avoid overmixing. Too much mixing can add air and cause cracks. Lastly, don’t bake them too long. They should be set but still a little jiggly in the center.
How to Achieve the Perfect Cheesecake Texture
To get the best texture, mix your ingredients at room temperature. This helps them blend smoothly. When adding eggs, mix just until combined. Overmixing can make the texture dense. Bake at the right temperature, and let them cool gradually. Rapid cooling can create cracks in the cheesecake.
Presentation Tips for Serving
For a beautiful presentation, top each mini cheesecake with cherry pie filling. Add a slice of lime on top for color. You can also place a few fresh cherries around the plate. Serve these on a nice platter. It makes them look fancy and fun. For the best effect, keep them chilled until you are ready to serve. Check the Full Recipe for all the details!
Variations
Alternative Toppings
You can change the toppings on your mini cheesecakes. Instead of cherry pie filling, try fresh berries. Strawberries, blueberries, or raspberries add great color and flavor. You can also use whipped cream for a light touch. A drizzle of chocolate or caramel sauce makes it extra special. Experiment with different fruits for a fun twist.
Flavor Adjustments
Feel free to mix up the flavors in your mini cheesecakes. You can swap lime juice for lemon or orange juice. This small change will give a new taste. Adding a few drops of vanilla extract can enhance the flavor. For a richer bite, fold in some chocolate chips or crushed cookies into the batter. The options are endless!
Gluten-Free and Dairy-Free Options
If you need gluten-free options, use gluten-free graham crackers for the crust. You can also make a nut crust with almonds or walnuts. For a dairy-free version, try vegan cream cheese and coconut yogurt. They work well and taste great. Always check labels to ensure all ingredients meet your dietary needs. Enjoy these cheesecakes without worry!
You can find the full recipe and make your own Cherry Lime Mini Cheesecakes.
Storage Info
Proper Storage Techniques
To keep your Cherry Lime Mini Cheesecakes fresh, store them in the fridge. Use an airtight container to prevent them from drying out. Place parchment paper between layers to avoid sticking. If you have leftovers, make sure to cover them well to keep them tasty.
Shelf Life and Freezing Tips
These mini cheesecakes last about five days in the fridge. You can freeze them for up to three months. To freeze, wrap each cheesecake in plastic wrap. Then, place them in a freezer-safe bag or container. When you want to enjoy one, just thaw it in the fridge overnight.
Reheating Instructions
You don’t need to reheat these cheesecakes. They taste best cold. If you want to serve them at room temperature, take them out of the fridge for about 30 minutes before serving. This will bring out the flavors without losing that creamy texture. For the full recipe, check out the details above.
FAQs
Can I make these cheesecakes ahead of time?
Yes, you can make these cherry lime mini cheesecakes ahead of time. I often prepare them a day before serving. This method allows the flavors to blend well. After baking, let them cool and chill in the fridge. They taste even better after sitting overnight.
How do I prevent cracks in my mini cheesecakes?
To prevent cracks, avoid overmixing the batter. Mix just until smooth. Also, make sure your cream cheese is soft. This helps create a creamy texture. Bake at a lower temperature, and don’t open the oven door while baking. A water bath can help, too. It keeps the heat even and moist.
What can I use instead of cherry pie filling?
If you want a change, use fresh or frozen cherries. Cook them down with sugar and a bit of lime juice. You can also try blueberry or strawberry fillings. For a fun twist, use chocolate sauce or caramel. The options are endless! For the complete recipe, check out [Full Recipe].
This post covered how to make mini cheesecakes with ease. We explored ingredients, step-by-step instructions, and helpful tips. You learned about common mistakes to avoid and how to achieve the best texture. We shared fun variations, toppings, and storage tips for your treats. Remember, practice makes perfect. Each cheesecake is a chance to improve your skills. With these tips, you can create delicious mini cheesecakes that impress and delight. Enjoy your baking journey!
![For these Cherry Lime Mini Cheesecakes, you will need: - 1 cup graham cracker crumbs - 1/4 cup unsalted butter, melted - 2 cups cream cheese, softened - 1/2 cup granulated sugar - 1/2 cup sour cream - 2 large eggs - Zest of 2 limes - 1/4 cup fresh lime juice - 1 cup cherry pie filling These ingredients create a balanced flavor. The lime gives a bright taste, while the cherry topping adds sweetness. If you lack an ingredient, here are some great swaps: - For graham cracker crumbs, use crushed vanilla cookies. - Swap unsalted butter for coconut oil for a dairy-free option. - If you don’t have cream cheese, try mascarpone cheese instead. - For sour cream, Greek yogurt works well. - Use key lime juice if you want a stronger lime flavor. These swaps can change the taste slightly, but they’ll still be tasty! Choosing the right ingredients makes a big difference. Here’s what to look for: - Use fresh limes for zest and juice. They give the best flavor. - Look for full-fat cream cheese for a richer texture. - Buy high-quality cherry pie filling for a nice topping. - Check the expiration date on dairy products to ensure freshness. Quality ingredients lead to better cheesecakes. You’ll taste the difference in every bite! To start, gather all your ingredients. You’ll need graham cracker crumbs, butter, cream cheese, sugar, sour cream, eggs, lime zest, lime juice, and cherry pie filling. Preheat your oven to 325°F (160°C). This step is important for even baking. Line a muffin tin with cupcake liners or grease it with non-stick spray. This will help your cheesecakes come out easily. In a medium bowl, mix the graham cracker crumbs and melted butter. Stir until the crumbs are moist. Next, press about 1 tablespoon of this mixture into each muffin cup. This forms a crunchy crust. In a large bowl, beat the cream cheese until it’s smooth. Then, slowly add the sugar while mixing. This makes your filling sweet and creamy. Mix in the sour cream, lime zest, and lime juice. Make sure everything is well combined. Add the eggs one at a time. Mix well after each egg until the batter is smooth. Pour the cheesecake batter over the crusts, filling each cup about 3/4 full. Bake for 18-20 minutes. The centers should be set but still slightly jiggly. After baking, remove the cheesecakes from the oven. Let them cool to room temperature. Then, refrigerate them for at least 4 hours or overnight. This chilling time helps them firm up. Before serving, top each cheesecake with a spoonful of cherry pie filling. For extra flair, garnish with a slice of lime and some fresh cherries. These small touches make your mini cheesecakes look even more delightful. For the full recipe, check out the detailed instructions above. When making Cherry Lime Mini Cheesecakes, it’s easy to make a few common mistakes. First, don't skip softening the cream cheese. Cold cream cheese leads to lumps. Second, avoid overmixing. Too much mixing can add air and cause cracks. Lastly, don’t bake them too long. They should be set but still a little jiggly in the center. To get the best texture, mix your ingredients at room temperature. This helps them blend smoothly. When adding eggs, mix just until combined. Overmixing can make the texture dense. Bake at the right temperature, and let them cool gradually. Rapid cooling can create cracks in the cheesecake. For a beautiful presentation, top each mini cheesecake with cherry pie filling. Add a slice of lime on top for color. You can also place a few fresh cherries around the plate. Serve these on a nice platter. It makes them look fancy and fun. For the best effect, keep them chilled until you are ready to serve. Check the Full Recipe for all the details! {{image_2}} You can change the toppings on your mini cheesecakes. Instead of cherry pie filling, try fresh berries. Strawberries, blueberries, or raspberries add great color and flavor. You can also use whipped cream for a light touch. A drizzle of chocolate or caramel sauce makes it extra special. Experiment with different fruits for a fun twist. Feel free to mix up the flavors in your mini cheesecakes. You can swap lime juice for lemon or orange juice. This small change will give a new taste. Adding a few drops of vanilla extract can enhance the flavor. For a richer bite, fold in some chocolate chips or crushed cookies into the batter. The options are endless! If you need gluten-free options, use gluten-free graham crackers for the crust. You can also make a nut crust with almonds or walnuts. For a dairy-free version, try vegan cream cheese and coconut yogurt. They work well and taste great. Always check labels to ensure all ingredients meet your dietary needs. Enjoy these cheesecakes without worry! You can find the full recipe and make your own Cherry Lime Mini Cheesecakes. To keep your Cherry Lime Mini Cheesecakes fresh, store them in the fridge. Use an airtight container to prevent them from drying out. Place parchment paper between layers to avoid sticking. If you have leftovers, make sure to cover them well to keep them tasty. These mini cheesecakes last about five days in the fridge. You can freeze them for up to three months. To freeze, wrap each cheesecake in plastic wrap. Then, place them in a freezer-safe bag or container. When you want to enjoy one, just thaw it in the fridge overnight. You don’t need to reheat these cheesecakes. They taste best cold. If you want to serve them at room temperature, take them out of the fridge for about 30 minutes before serving. This will bring out the flavors without losing that creamy texture. For the full recipe, check out the details above. Yes, you can make these cherry lime mini cheesecakes ahead of time. I often prepare them a day before serving. This method allows the flavors to blend well. After baking, let them cool and chill in the fridge. They taste even better after sitting overnight. To prevent cracks, avoid overmixing the batter. Mix just until smooth. Also, make sure your cream cheese is soft. This helps create a creamy texture. Bake at a lower temperature, and don’t open the oven door while baking. A water bath can help, too. It keeps the heat even and moist. If you want a change, use fresh or frozen cherries. Cook them down with sugar and a bit of lime juice. You can also try blueberry or strawberry fillings. For a fun twist, use chocolate sauce or caramel. The options are endless! For the complete recipe, check out [Full Recipe]. This post covered how to make mini cheesecakes with ease. We explored ingredients, step-by-step instructions, and helpful tips. You learned about common mistakes to avoid and how to achieve the best texture. We shared fun variations, toppings, and storage tips for your treats. Remember, practice makes perfect. Each cheesecake is a chance to improve your skills. With these tips, you can create delicious mini cheesecakes that impress and delight. Enjoy your baking journey!](https://grilledflavors.com/wp-content/uploads/2025/05/72f39162-3f0c-4fee-b77f-907cda1ddf38-300x300.webp)