Indulge your sweet tooth with my easy Oreo Dessert Cups recipe! This treat combines the classic Oreo flavor with creamy layers that will make your taste buds dance. Perfect for parties or a cozy night in, these dessert cups are fun to make and even more fun to eat. Ready to impress your friends and family? Let’s dive into the simple steps for crafting this tasty delight!
Ingredients
Main Ingredients for Oreo Dessert Cups
– 16 Oreos, crushed
– 1 cup cream cheese, softened
– 1/2 cup powdered sugar
– 1 teaspoon vanilla extract
– 1 cup whipped cream (homemade or store-bought)
– 1/2 cup mini chocolate chips (for garnish)
– Extra Oreos for crumbling on top
Tools Required
– Mixing bowls
– Electric mixer (or whisk)
– Zip-top bag or food processor
– Serving cups
To create Oreo dessert cups, you need simple and tasty ingredients. First, gather 16 Oreos. I love using these for a crunchy base. You also need one cup of softened cream cheese. This adds a rich, creamy layer to your dessert. Next, grab half a cup of powdered sugar. This sweetens the mix perfectly. Add one teaspoon of vanilla extract for flavor. It makes everything taste even better!
Whipped cream is key too. Use one cup, either homemade or store-bought. It lightens the dessert and makes it fluffy. Don’t forget the mini chocolate chips! You’ll need half a cup for a cute garnish. Lastly, keep some extra Oreos for crumbling on top. This will give your cups a nice finish.
For tools, have mixing bowls ready. You will need an electric mixer or a whisk to mix your ingredients. A zip-top bag or food processor is great for crushing the Oreos. Finally, get some nice serving cups to layer your dessert.
You can find the full recipe to create these delicious Oreo dessert cups in the next section.
Step-by-Step Instructions
Preparing the Cookie Base
– Crushing the Oreos
Start by crushing the Oreos. You can use a zip-top bag or a food processor. Aim for fine crumbs. This creates a great base for your dessert cups. Reserve about 2 tablespoons of the crushed Oreos for later.
– Mixing the cream cheese and sugar
In a large bowl, add the crushed Oreos, softened cream cheese, powdered sugar, and vanilla extract. Mix these together until they are smooth. This mixture should be creamy and well combined.
Assembling the Dessert Cups
– Layering the Oreo mixture
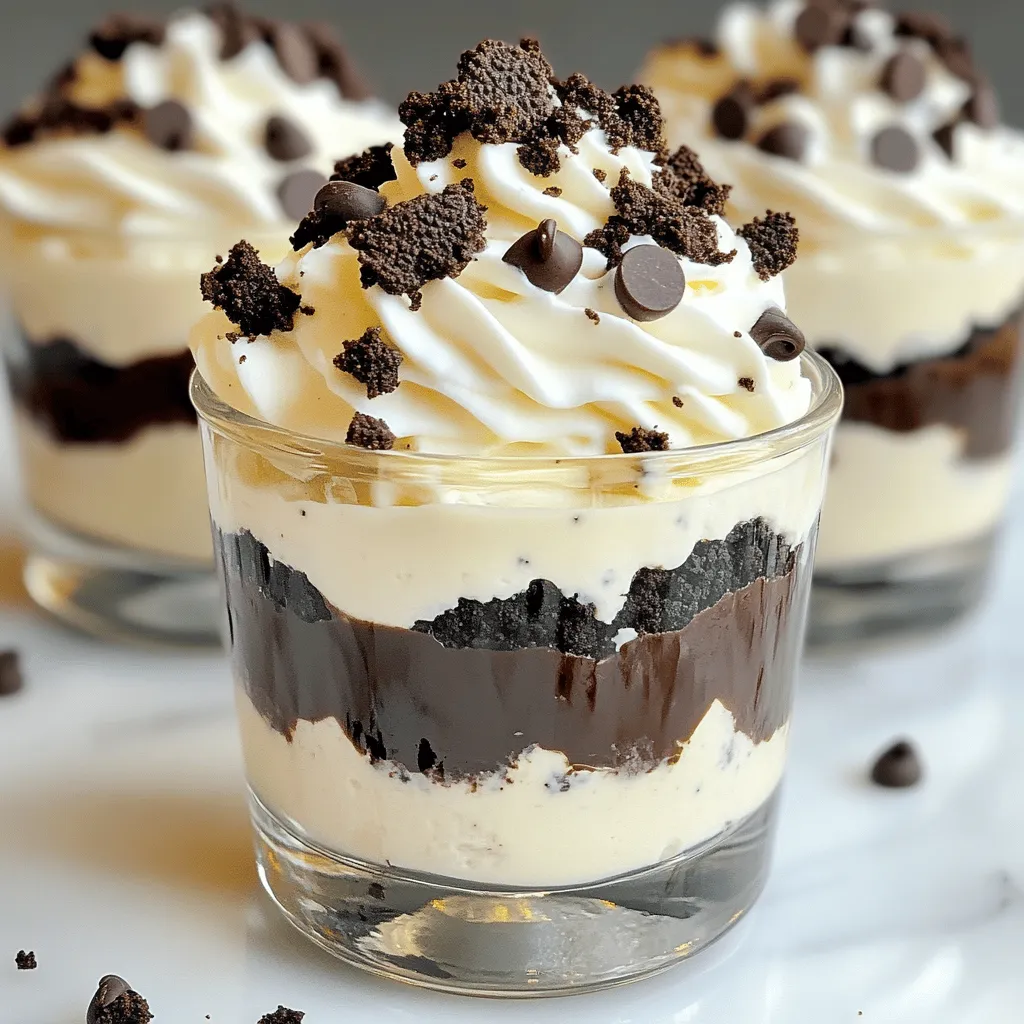
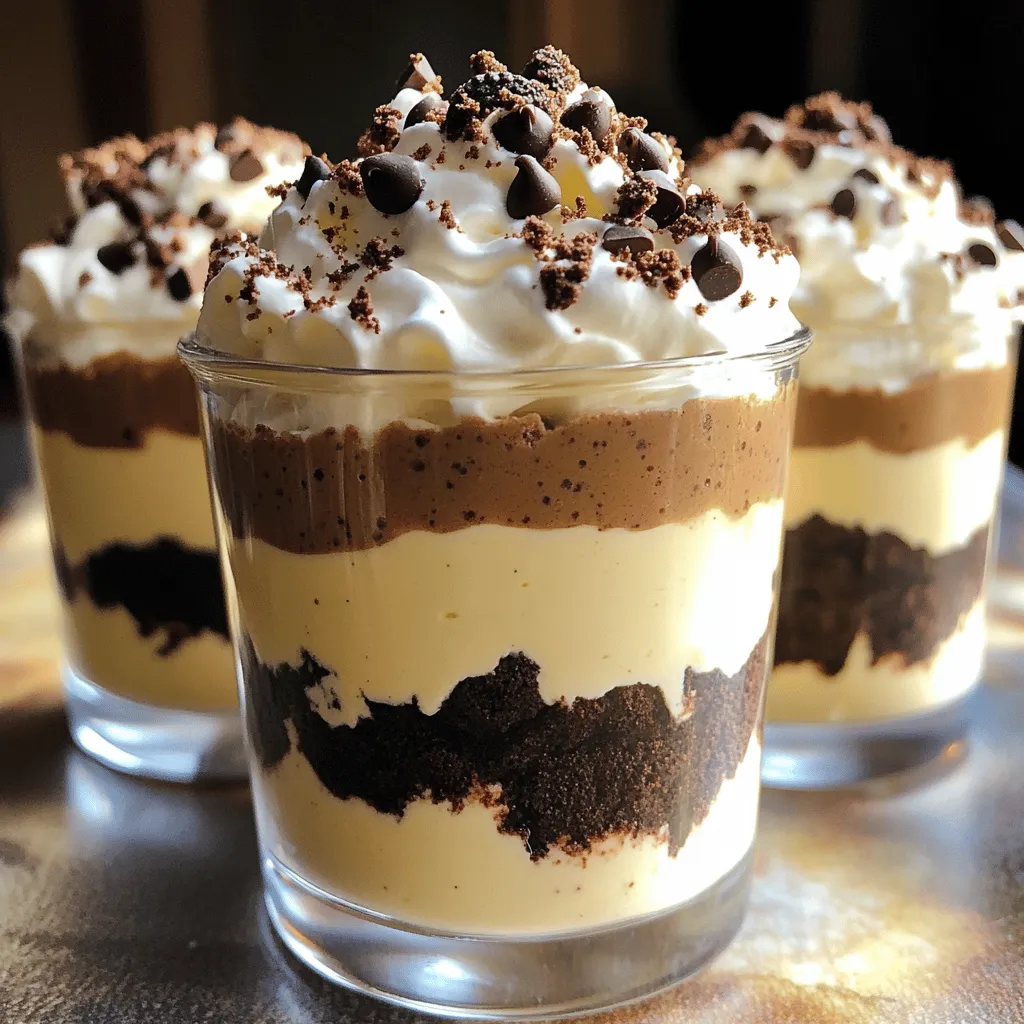
Grab your serving cups. Begin by adding a layer of the Oreo mixture. Fill each cup halfway. This will be the first layer of deliciousness.
– Adding whipped cream layers
Now, add a layer of whipped cream on top of the Oreo mixture. Spread it out evenly. Repeat the layers until the cups are nearly full. Leave some space at the top for the finishing touches.
Finishing Touches
– Topping with Oreo crumbs and chocolate chips
Sprinkle the reserved Oreo crumbs and mini chocolate chips on top of each dessert cup. This adds a nice crunch and looks great.
– Chilling time for optimal flavor
Place the dessert cups in the refrigerator. Chill them for at least 30 minutes. This helps the flavors blend together. The result is a tasty and refreshing treat.
For the full recipe, follow the steps above and enjoy making your Oreo Dessert Cups!
Tips & Tricks
Perfecting the Cream Cheese Mixture
To get the best cream cheese mixture, make sure your cream cheese is softened. Cold cream cheese does not mix well. Leave it out for about 30 minutes before you start. This makes blending easier and smoother.
When mixing, use a hand mixer or a whisk. Start on low speed to blend the cream cheese with the powdered sugar. Then, increase to medium speed until fluffy. This step is key for a light texture in the dessert cups.
Serving Suggestions
Presentation matters! For a fun party look, use clear cups. This way, everyone can see those delicious layers. Top each cup with a small dollop of whipped cream and a half Oreo for a cute touch. You can even add a few mini chocolate chips on top for some extra flair.
Try adding fresh berries for color. Strawberries or raspberries work well. They add brightness and a burst of flavor.
Common Mistakes to Avoid
One big mistake is overmixing the whipped cream. If you mix it too long, it can turn grainy. Mix gently just until it’s blended in. This keeps the fluffiness you want.
Another mistake is not chilling long enough. Let the dessert cups chill for at least 30 minutes. This helps the flavors blend and sets the layers. If you skip this step, the cups may not hold their shape when served.
Variations
Flavor Additions
You can change up the Oreo dessert cups in fun ways. Adding peanut butter or Nutella gives a rich twist. Just mix a few spoonfuls into the cream cheese layer. You can also layer in fresh fruit like strawberries or bananas. This adds a bright flavor and color. Try adding a layer of raspberries for a sweet and tart kick.
Dietary Alternatives
If you need gluten-free options, look for gluten-free Oreos. They taste great and work well in this recipe. For a vegan version, swap cream cheese with a plant-based cream cheese. Use coconut whipped cream instead of regular whipped cream. These swaps keep the dessert tasty while fitting different diets.
Creative Serving Ideas
Switch up how you serve these dessert cups. Mini jars work great for a fun look. They are perfect for parties or picnics. You can also use different types of cookies. Try chocolate cookies or vanilla wafers for a new taste. Each cookie will give your dessert a unique spin.
For more ideas, check the Full Recipe.
Storage Info
How to Store Oreo Dessert Cups
To keep your Oreo dessert cups fresh, store them in the fridge. Use an airtight container. This helps keep the layers from getting soggy. Make sure to cover them well. If you use plastic wrap, place it gently on top. Avoid pressing down on the layers. This way, they stay fluffy and tasty.
Shelf Life
Oreo dessert cups last about three days in the fridge. After this, they may lose their fresh taste and texture. You can freeze them if you want to keep them longer. However, the texture may change once thawed. If you freeze them, allow them to sit in the fridge overnight before eating. This helps keep the layers intact.
Reheating (if necessary)
You usually don’t need to reheat these dessert cups. They are best served cold. If you want to warm them, do it gently. Use a microwave for just a few seconds. This lets you enjoy the soft cream without ruining the layers. Avoid overheating, or the texture will get mushy. Enjoy your treat!
FAQs
What are the best toppings for Oreo Dessert Cups?
You can make your Oreo Dessert Cups look even tastier with fun toppings. Here are some ideas:
– Mini chocolate chips for extra crunch
– Crumbled Oreos for a classic touch
– Whipped cream dollops for creaminess
– Shaved chocolate for a fancy look
– Sprinkles for a pop of color
These toppings add flavor and texture, making your dessert more exciting.
Can I make Oreo Dessert Cups ahead of time?
Yes, you can prepare Oreo Dessert Cups in advance. Making them ahead saves time and stress. Here’s how:
– Assemble the cups and cover them with plastic wrap.
– Store them in the fridge for up to 2 days.
This way, the flavors meld together nicely. Just remember to add toppings just before serving for best results.
Where can I find pre-made Oreo Dessert Cups?
If you want a quick treat, look for pre-made Oreo Dessert Cups in stores. Check these places:
– Grocery stores often have them in the dessert aisle.
– Some bakeries sell their own versions.
– Online retailers like Amazon may offer them too.
Always read the labels to ensure they meet your taste needs.
For the full recipe, refer to the provided link.
In this article, we explored how to make Oreo Dessert Cups with simple steps. We looked at the main ingredients, tools needed, and the step-by-step process. I shared tips to avoid common mistakes and offered fun variations for flavors and dietary needs. Remember, chilling the dessert is key to great taste. Get creative with toppings and enjoy these cups at any event. Now it’s time to make your own delicious Oreo Dessert Cups!
