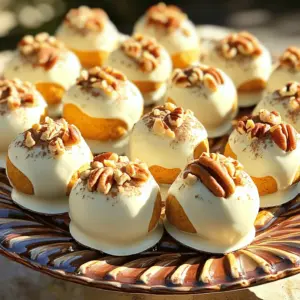
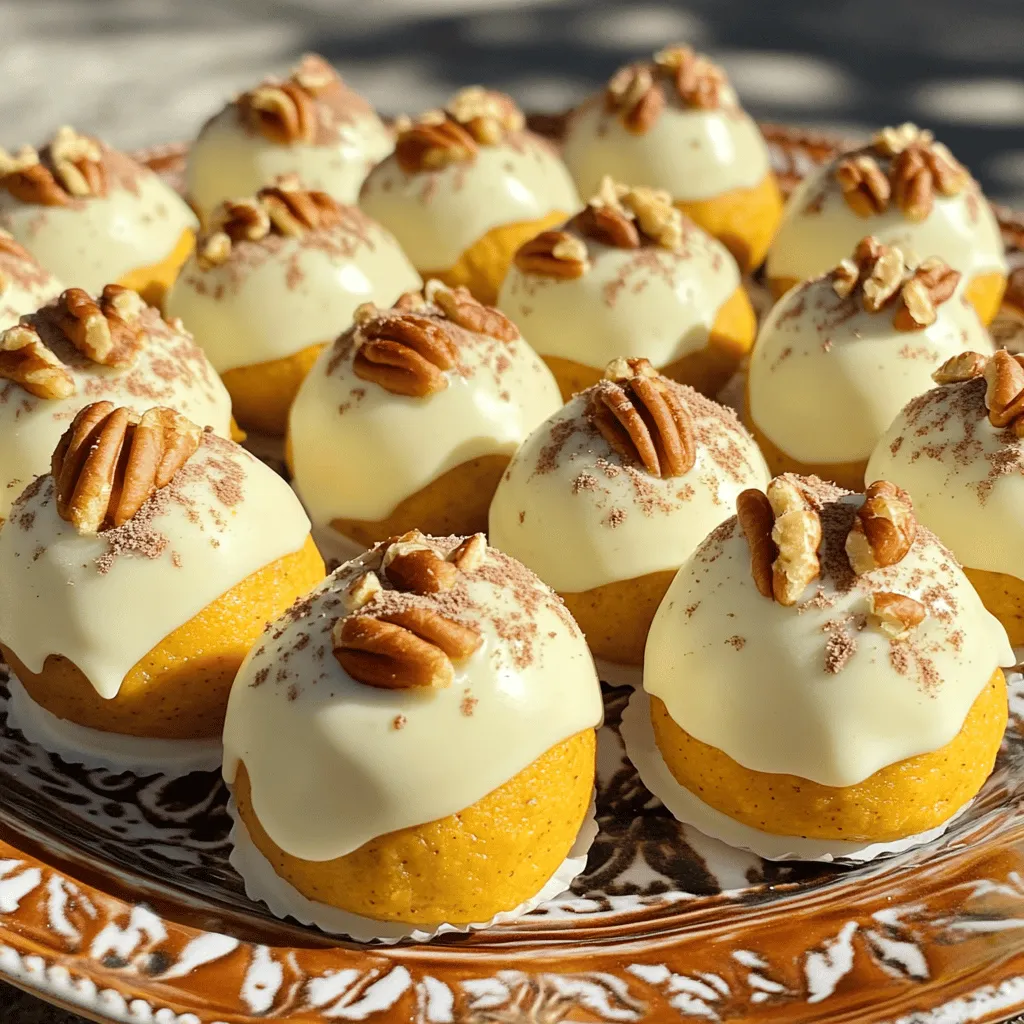
If you’re craving a simple, tasty treat, look no further! These No Bake Pumpkin Cheesecake Balls are the perfect fall dessert. They combine creamy pumpkin flavor with sweet spices for a delightful bite. Plus, there’s no baking involved! With just a few ingredients and easy steps, you can impress your friends and family. Let’s dive into how to make these irresistible goodies that are sure to become a favorite!
Ingredients
List of Ingredients
– 1 cup cream cheese, softened
– 1/2 cup pumpkin puree
– 1/4 cup powdered sugar
– 1 teaspoon vanilla extract
– 1 teaspoon cinnamon
– 1/2 teaspoon nutmeg
– 1/4 teaspoon ginger
– 1 cup graham cracker crumbs
– 1/2 cup white chocolate chips, melted
– Optional: Chopped pecans or walnuts for rolling
Important Notes on Ingredients
Substitutions for cream cheese
If you want a lighter option, try using Greek yogurt. It adds creaminess with fewer calories. You can also use a dairy-free cream cheese if you need a vegan choice.
Tips for choosing pumpkin puree
Always pick 100% pumpkin puree, not pumpkin pie filling. The filling has added sugar and spices. Check the label to avoid unwanted extras.
Why graham cracker crumbs matter
Graham cracker crumbs give the balls a sweet crunch and body. They help bind the mixture together. Use fresh crumbs for the best taste. You can crush whole graham crackers or buy pre-made crumbs.
These ingredients create a tasty and fun treat. For the full recipe, check out the steps that follow!
Step-by-Step Instructions
Preparation Steps
To start, gather your ingredients. In a large mixing bowl, combine the softened cream cheese and pumpkin puree. I like to use a hand mixer to make it smooth. Add the powdered sugar and vanilla extract next. Mix until it becomes creamy and well-blended.
Then, it’s time to spice things up! Add the cinnamon, nutmeg, and ginger to the bowl. Stir the spices in well, so every bite is full of flavor. Gradually fold in the graham cracker crumbs. This gives the mixture a nice texture. You want it to hold together well.
Forming the Balls
Now, cover the bowl and chill the mixture for about 30 minutes. This helps it firm up and makes it easier to shape. After chilling, use a small cookie scoop or your hands to form the mixture into bite-sized balls. Aim for about one inch in diameter.
Place your formed balls on a parchment-lined baking sheet. This way, they won’t stick, and clean-up will be easy.
Coating in Chocolate
Next, let’s melt the white chocolate. Use a microwave or a double boiler. If using a microwave, melt it in 30-second bursts, stirring between each. This helps prevent burning. Once melted, dip each ball into the white chocolate. Make sure they are evenly coated.
I find it helpful to use a fork to lift them out. Allow any excess chocolate to drip off. While the chocolate is still wet, roll the balls in chopped pecans or walnuts if you like. This adds a nice crunch!
Return the chocolate-coated balls to the parchment-lined baking sheet. Refrigerate them for about 15 to 20 minutes, or until the chocolate sets. You can find the full recipe for these delightful treats in the earlier sections.
Tips & Tricks
Perfecting the Texture
To make No Bake Pumpkin Cheesecake Balls, you need the right texture. Start with softened cream cheese. This helps the mixture blend well. Mix until it is smooth and creamy. Adding pumpkin puree gives it a rich flavor. Fold in the graham cracker crumbs gently. This keeps the mixture light. You want it to hold together but not be too dense.
Chilling is key in this recipe. After mixing, cover the bowl and refrigerate it for 30 minutes. This step helps the balls keep their shape. If you skip this, your balls may not form well. The chill time helps firm up the mixture, making it easy to scoop.
Serving Suggestions
When serving, think about how to make it festive. Use a decorative platter for a nice look. Sprinkle some cinnamon on top for a pop of color. You can also add whole pecans for a rustic touch.
Pair these treats with warm drinks. A spiced chai or hot coffee works well. They balance the sweetness of the cheesecake balls. You can also serve them with a scoop of vanilla ice cream for a treat.
Common Mistakes to Avoid
One big mistake is overmixing the ingredients. This can make the texture heavy instead of light. Mix just until everything is combined.
Another common error is not chilling long enough. If you don’t chill, the mixture will be too soft. Make sure to give it at least 30 minutes in the fridge. This step is crucial for forming balls that stay together.
Variations
Flavor Enhancements
You can make these pumpkin cheesecake balls even better. Try adding chocolate chips for a sweet twist. Just fold in half a cup of mini chocolate chips to the mix. Caramel is another great choice. Drizzle some melted caramel on top before chilling. Spice lovers can change up the flavors too. Chai spice adds a warm, cozy taste. Just swap out the cinnamon for chai spice in the recipe.
Dietary Adjustments
If you have dietary needs, there are easy swaps. To make these gluten-free, use gluten-free graham cracker crumbs. They work just as well and taste great. For a vegan option, use dairy-free cream cheese and a plant-based sweetener. This way, everyone can enjoy these tasty treats!
Seasonal Twists
You can change the theme based on the season. For Christmas, roll the balls in crushed peppermint instead of nuts. This gives a festive feel and taste. In summer, add fresh fruit like strawberries or blueberries. You can mix chopped fruit into the batter or use it as a topping. These adaptations keep the treat fresh and exciting all year long. You can find the full recipe to guide you through each variation.
Storage Info
Short-term Storage
To keep your pumpkin cheesecake balls fresh, store them in an airtight container. Place a piece of parchment paper between layers if stacking. This keeps them from sticking together. They can last in the fridge for up to five days. Always check for any signs of spoilage before eating.
Long-term Storage
If you want to save them for later, freezing is a great option. Place the cheesecake balls on a baking sheet in a single layer. Freeze them for about two hours until firm. After that, transfer them to a freezer-safe container or a zip-top bag. They can last for up to three months in the freezer. When ready to eat, thaw them in the fridge overnight.
Reheating and Serving Tips
These treats are best served chilled. To maintain their texture, avoid using a microwave. Instead, let them sit at room temperature for about 15 minutes before serving. This way, they stay creamy and delicious. Enjoy your no bake pumpkin cheesecake balls straight from the fridge or at room temperature for a delightful treat! For the complete preparation, check out the Full Recipe.
FAQs
Can I make No Bake Pumpkin Cheesecake Balls in advance?
Yes, you can make these dessert balls ahead of time. Just prepare them and chill them. They taste great after sitting in the fridge for a few hours or even overnight. This makes them perfect for parties!
How long do these dessert balls last?
These cheesecake balls last about 5 to 7 days in the fridge. Make sure to keep them stored well. They stay fresh and tasty for a week if you keep them sealed in an airtight container.
What is the best way to store leftover cheesecake balls?
Store leftover cheesecake balls in an airtight container. You can use plastic wrap or a sealed jar. Keep them in the fridge to maintain their creamy texture and flavor.
Can I use different types of chocolate?
Absolutely! You can use dark chocolate or milk chocolate instead of white chocolate. Each type gives a unique flavor. Try them all to see which you like best. For more fun, drizzle some melted chocolate on top for added flair.
This article covered the key ingredients and steps to make No Bake Pumpkin Cheesecake Balls. We discussed substitutes, texture tips, and festive serving ideas. I also shared common mistakes to avoid when making these treats.
These pumpkin cheesecake balls are fun to make and perfect for any celebration. Use your creativity to make them your own. Enjoy the process and the tasty results!