![To make these fudgy red velvet brownies, gather these main ingredients: - 1 cup (2 sticks) unsalted butter, melted - 1 1/2 cups granulated sugar - 1/2 cup brown sugar, packed - 4 large eggs - 1 tablespoon vanilla extract - 1 tablespoon red food coloring - 1 1/4 cups all-purpose flour - 1/2 cup unsweetened cocoa powder - 1 teaspoon baking powder - 1/2 teaspoon baking soda - 1/2 teaspoon salt - 1 cup semi-sweet chocolate chips These ingredients work together to create a rich and moist brownie. The red food coloring adds that classic red velvet look. The melted butter makes the brownies soft and rich. You will also need these ingredients for the cream cheese frosting: - 1/2 cup cream cheese, softened - 1 cup powdered sugar - 1 tablespoon milk - Optional: white chocolate chips for garnish The cream cheese frosting is smooth and creamy. It adds a tangy sweetness to the brownies, making each bite delightful. You can sprinkle white chocolate chips on top for extra flair. For the full recipe, check out [Full Recipe]. 1. First, preheat your oven to 350°F (175°C). This step is key for even baking. 2. Next, grease and line a 9x13 inch baking pan with parchment paper. Leave some paper hanging over the edges for easy removal later. 1. In a large bowl, combine the melted butter, granulated sugar, and brown sugar. Whisk them together until smooth. 2. Add four eggs, one at a time, mixing well after each addition. Then, stir in the vanilla extract and red food coloring. Mix until everything is bright and well blended. 1. In a separate bowl, sift together the all-purpose flour and cocoa powder. This helps to avoid lumps for a smooth batter. 2. Add baking powder, baking soda, and salt to this mix. These ingredients help the brownies rise and add flavor. 1. Gradually mix the dry ingredients into the wet ingredients. Stir gently until just combined. Do not over-mix, or the brownies will be tough. 2. Now, fold in the semi-sweet chocolate chips. These will melt slightly, giving your brownies a rich texture. 1. Pour the brownie batter into the prepared pan. Spread it evenly using a spatula. 2. Bake in the preheated oven for 25-30 minutes. To check for doneness, insert a toothpick in the center. It should come out with a few moist crumbs. 1. While the brownies bake, prepare the cream cheese frosting. In a mixing bowl, beat the softened cream cheese until smooth. 2. Gradually mix in the powdered sugar and milk. Beat until the frosting is creamy and well combined. 1. Once the brownies cool for at least 10 minutes, spread the frosting evenly on top. 2. For an extra treat, sprinkle white chocolate chips on top. This adds sweetness and looks great. For the complete recipe, check the Full Recipe page. Enjoy this delightful treat! To get that rich, fudgy texture, you must underbake the brownies slightly. Bake them for 25-30 minutes, but check at the 25-minute mark. Insert a toothpick, and if it comes out with a few moist crumbs, they are ready. Overbaking will lead to dry brownies. Even mixing is also key. After adding the dry ingredients, mix gently until just combined. This helps keep the brownies dense and fudgy. You can enhance the flavor by adding nuts or different types of chocolate. Chopped walnuts or pecans add a nice crunch. You can also use dark chocolate chips for a richer taste. Adjusting sweetness is simple too. If you prefer sweeter brownies, increase the sugar slightly. For a more intense cocoa flavor, add an extra tablespoon of cocoa powder. When making the cream cheese frosting, aim for a smooth consistency. Start by beating the cream cheese until it’s fluffy. Gradually add powdered sugar and milk. This mix should be creamy and easy to spread. You can get creative with frosting designs. Use a piping bag for swirls or simple patterns. Add white chocolate chips on top for a fun visual touch. Check the Full Recipe for more details on the frosting process. {{image_2}} You can make red velvet swirl brownies by adding cream cheese to the batter. Swirl the cream cheese mixture into the brownie mix before baking. This adds flavor and a beautiful look. You can also adjust the colors by using more or less red food coloring. For decorations, consider adding sprinkles or a drizzle of white chocolate on top. If you want a gluten-free version, simply swap the all-purpose flour for a gluten-free blend. There are many great mixes available that work well in brownies. Be sure to choose a blend that includes xanthan gum for the best texture. This way, you can still enjoy fudgy brownies without gluten. For a vegan version, replace the eggs with flaxseed or applesauce. To make flaxseed eggs, mix one tablespoon of ground flaxseed with three tablespoons of water. Let it sit for a few minutes to thicken. For the butter and cream cheese, use plant-based alternatives. This keeps the brownies moist and delicious while being completely vegan. Store your brownies in an airtight container. This keeps them fresh. You can also place them in the fridge. They will last up to one week this way. If you want them to stay soft, let them cool completely before storing. Avoid stacking them, as this can cause them to stick together. To freeze brownies, cut them into squares first. Wrap each square tightly in plastic wrap. Then place them in a freezer bag. They can last up to three months in the freezer. When you want to eat them, take out a square and let it thaw at room temperature. For best texture, don’t microwave them to thaw. To enjoy your brownies warm, preheat your oven to 350°F (175°C). Place the brownies on a baking sheet and warm them for about 10 minutes. This helps keep them fudgy. You can also use a microwave. Heat for about 10-15 seconds. Check to ensure they do not dry out. Enjoy them with a scoop of ice cream for a tasty treat! Fudgy brownies have a rich, soft texture. Key ingredients that create this texture include butter, sugar, and eggs. The melted butter adds moisture, while the sugars help with that chewy bite. The eggs bind everything together, making it dense. The recipe also calls for cocoa powder, which adds depth. To keep them fudgy, avoid overbaking. Just bake until a toothpick shows moist crumbs. Yes, you can make these brownies ahead. They stay fresh for about 3 to 4 days at room temperature. Store them in an airtight container to keep them soft. If you want to keep them longer, freeze them. Wrap the cooled brownies tightly in plastic wrap, then put them in a freezer bag. They can last up to three months this way. If you want a red velvet look without food coloring, you have options. Beet juice is a great natural choice. It gives a nice color and adds some sweetness. Another option is pomegranate juice, which also works well. Just remember, these alternatives may change the flavor a bit. To check for doneness, use a toothpick. Insert it into the center of the brownies. If it comes out with a few moist crumbs, they’re ready. If it’s wet with batter, they need more time. Always avoid a clean toothpick, as this means they are overbaked. The edges should look set, while the center remains slightly soft. Absolutely! Adding nuts can give your brownies a nice crunch. Walnuts or pecans work well. You can also mix in chocolate chips for extra chocolatey goodness. If you want a fun twist, try adding peanut butter or caramel swirls. Just remember to keep the balance, so the brownies don’t become too heavy. For the full recipe, check out the detailed steps. You learned how to make delicious brownies from scratch. We covered key ingredients, step-by-step instructions, and helpful tips. With variations for everyone, like gluten-free and vegan, everyone can enjoy these treats. Pay attention to baking times for that perfect fudgy texture. Store them properly for freshness, and don’t forget to try different frosting designs. Enjoy your baking journey, and impress friends and family with these yummy brownies!](https://grilledflavors.com/wp-content/uploads/2025/08/45c2e69e-851a-4197-b798-76ac889c14f1.webp)
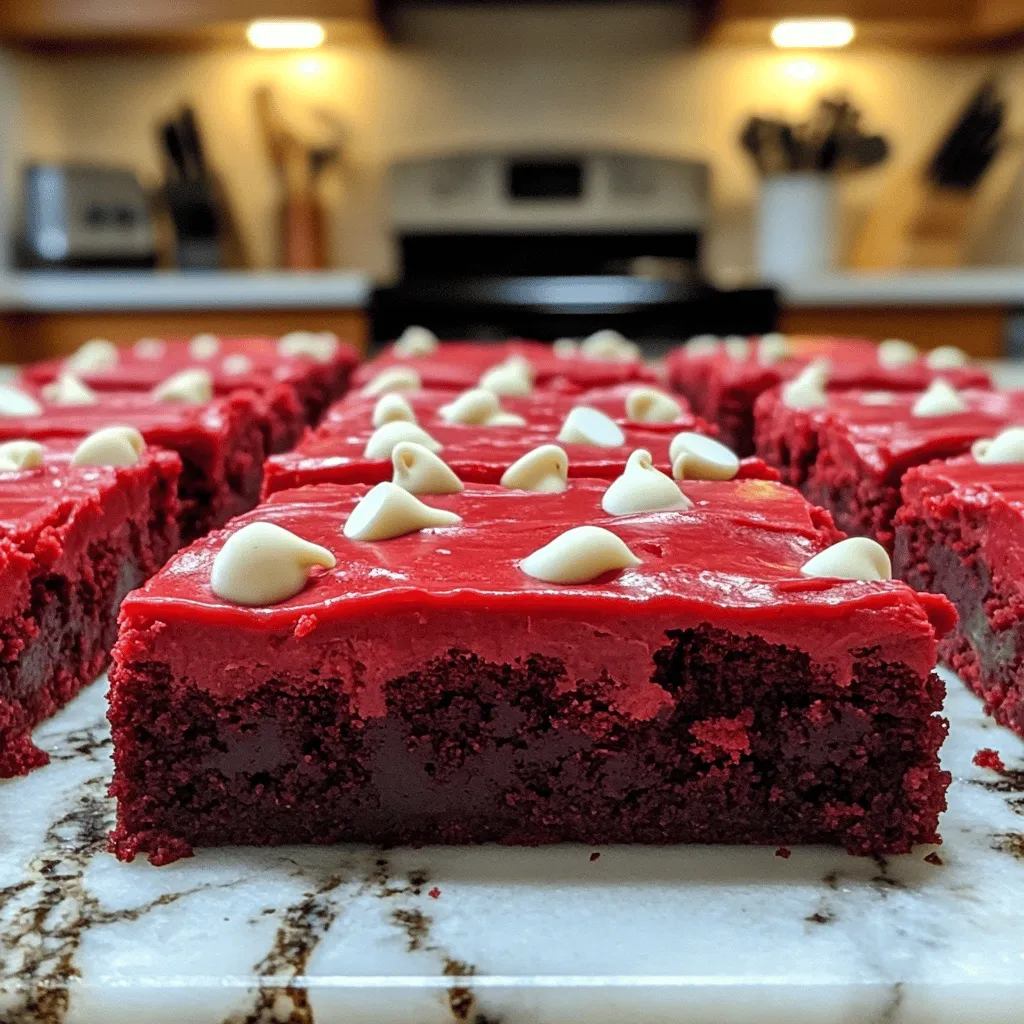
If you love rich, chocolatey treats, then you’ll adore these fudgy red velvet brownies! With a unique blend of cocoa and vibrant color, they’re perfect for any occasion. Follow my simple, step-by-step guide to create these delightful brownies, topped with luscious cream cheese frosting. Get ready to impress friends and family with this sweet treat that’s hard to resist! Let’s dive into the deliciousness!
Ingredients
Main Ingredients for Brownies
To make these fudgy red velvet brownies, gather these main ingredients:
– 1 cup (2 sticks) unsalted butter, melted
– 1 1/2 cups granulated sugar
– 1/2 cup brown sugar, packed
– 4 large eggs
– 1 tablespoon vanilla extract
– 1 tablespoon red food coloring
– 1 1/4 cups all-purpose flour
– 1/2 cup unsweetened cocoa powder
– 1 teaspoon baking powder
– 1/2 teaspoon baking soda
– 1/2 teaspoon salt
– 1 cup semi-sweet chocolate chips
These ingredients work together to create a rich and moist brownie. The red food coloring adds that classic red velvet look. The melted butter makes the brownies soft and rich.
Additional Ingredients for Frosting
You will also need these ingredients for the cream cheese frosting:
– 1/2 cup cream cheese, softened
– 1 cup powdered sugar
– 1 tablespoon milk
– Optional: white chocolate chips for garnish
The cream cheese frosting is smooth and creamy. It adds a tangy sweetness to the brownies, making each bite delightful. You can sprinkle white chocolate chips on top for extra flair.
For the full recipe, check out [Full Recipe].
Step-by-Step Instructions
Preparing the Oven and Baking Pan
1. First, preheat your oven to 350°F (175°C). This step is key for even baking.
2. Next, grease and line a 9×13 inch baking pan with parchment paper. Leave some paper hanging over the edges for easy removal later.
Mixing the Wet Ingredients
1. In a large bowl, combine the melted butter, granulated sugar, and brown sugar. Whisk them together until smooth.
2. Add four eggs, one at a time, mixing well after each addition. Then, stir in the vanilla extract and red food coloring. Mix until everything is bright and well blended.
Combining Dry Ingredients
1. In a separate bowl, sift together the all-purpose flour and cocoa powder. This helps to avoid lumps for a smooth batter.
2. Add baking powder, baking soda, and salt to this mix. These ingredients help the brownies rise and add flavor.
Creating the Brownie Batter
1. Gradually mix the dry ingredients into the wet ingredients. Stir gently until just combined. Do not over-mix, or the brownies will be tough.
2. Now, fold in the semi-sweet chocolate chips. These will melt slightly, giving your brownies a rich texture.
Baking the Brownies
1. Pour the brownie batter into the prepared pan. Spread it evenly using a spatula.
2. Bake in the preheated oven for 25-30 minutes. To check for doneness, insert a toothpick in the center. It should come out with a few moist crumbs.
Making the Frosting
1. While the brownies bake, prepare the cream cheese frosting. In a mixing bowl, beat the softened cream cheese until smooth.
2. Gradually mix in the powdered sugar and milk. Beat until the frosting is creamy and well combined.
Final Touches
1. Once the brownies cool for at least 10 minutes, spread the frosting evenly on top.
2. For an extra treat, sprinkle white chocolate chips on top. This adds sweetness and looks great.
For the complete recipe, check the Full Recipe page. Enjoy this delightful treat!
Tips & Tricks
Achieving the Perfect Fudgy Texture
To get that rich, fudgy texture, you must underbake the brownies slightly. Bake them for 25-30 minutes, but check at the 25-minute mark. Insert a toothpick, and if it comes out with a few moist crumbs, they are ready. Overbaking will lead to dry brownies.
Even mixing is also key. After adding the dry ingredients, mix gently until just combined. This helps keep the brownies dense and fudgy.
Flavor Enhancements
You can enhance the flavor by adding nuts or different types of chocolate. Chopped walnuts or pecans add a nice crunch. You can also use dark chocolate chips for a richer taste.
Adjusting sweetness is simple too. If you prefer sweeter brownies, increase the sugar slightly. For a more intense cocoa flavor, add an extra tablespoon of cocoa powder.
Frosting Techniques
When making the cream cheese frosting, aim for a smooth consistency. Start by beating the cream cheese until it’s fluffy. Gradually add powdered sugar and milk. This mix should be creamy and easy to spread.
You can get creative with frosting designs. Use a piping bag for swirls or simple patterns. Add white chocolate chips on top for a fun visual touch. Check the Full Recipe for more details on the frosting process.
Variations
Red Velvet Swirl Brownies
You can make red velvet swirl brownies by adding cream cheese to the batter. Swirl the cream cheese mixture into the brownie mix before baking. This adds flavor and a beautiful look. You can also adjust the colors by using more or less red food coloring. For decorations, consider adding sprinkles or a drizzle of white chocolate on top.
Gluten-Free Option
If you want a gluten-free version, simply swap the all-purpose flour for a gluten-free blend. There are many great mixes available that work well in brownies. Be sure to choose a blend that includes xanthan gum for the best texture. This way, you can still enjoy fudgy brownies without gluten.
Vegan Version
For a vegan version, replace the eggs with flaxseed or applesauce. To make flaxseed eggs, mix one tablespoon of ground flaxseed with three tablespoons of water. Let it sit for a few minutes to thicken. For the butter and cream cheese, use plant-based alternatives. This keeps the brownies moist and delicious while being completely vegan.
Storage Info
How to Store Brownies
Store your brownies in an airtight container. This keeps them fresh. You can also place them in the fridge. They will last up to one week this way. If you want them to stay soft, let them cool completely before storing. Avoid stacking them, as this can cause them to stick together.
Freezing Instructions
To freeze brownies, cut them into squares first. Wrap each square tightly in plastic wrap. Then place them in a freezer bag. They can last up to three months in the freezer. When you want to eat them, take out a square and let it thaw at room temperature. For best texture, don’t microwave them to thaw.
Reheating Suggestions
To enjoy your brownies warm, preheat your oven to 350°F (175°C). Place the brownies on a baking sheet and warm them for about 10 minutes. This helps keep them fudgy. You can also use a microwave. Heat for about 10-15 seconds. Check to ensure they do not dry out. Enjoy them with a scoop of ice cream for a tasty treat!
FAQs
What makes these brownies fudgy?
Fudgy brownies have a rich, soft texture. Key ingredients that create this texture include butter, sugar, and eggs. The melted butter adds moisture, while the sugars help with that chewy bite. The eggs bind everything together, making it dense. The recipe also calls for cocoa powder, which adds depth. To keep them fudgy, avoid overbaking. Just bake until a toothpick shows moist crumbs.
Can I make these brownies ahead of time?
Yes, you can make these brownies ahead. They stay fresh for about 3 to 4 days at room temperature. Store them in an airtight container to keep them soft. If you want to keep them longer, freeze them. Wrap the cooled brownies tightly in plastic wrap, then put them in a freezer bag. They can last up to three months this way.
What can I use instead of food coloring?
If you want a red velvet look without food coloring, you have options. Beet juice is a great natural choice. It gives a nice color and adds some sweetness. Another option is pomegranate juice, which also works well. Just remember, these alternatives may change the flavor a bit.
How do I know when the brownies are done?
To check for doneness, use a toothpick. Insert it into the center of the brownies. If it comes out with a few moist crumbs, they’re ready. If it’s wet with batter, they need more time. Always avoid a clean toothpick, as this means they are overbaked. The edges should look set, while the center remains slightly soft.
Can I add nuts or other mix-ins?
Absolutely! Adding nuts can give your brownies a nice crunch. Walnuts or pecans work well. You can also mix in chocolate chips for extra chocolatey goodness. If you want a fun twist, try adding peanut butter or caramel swirls. Just remember to keep the balance, so the brownies don’t become too heavy. For the full recipe, check out the detailed steps.
You learned how to make delicious brownies from scratch. We covered key ingredients, step-by-step instructions, and helpful tips. With variations for everyone, like gluten-free and vegan, everyone can enjoy these treats. Pay attention to baking times for that perfect fudgy texture. Store them properly for freshness, and don’t forget to try different frosting designs. Enjoy your baking journey, and impress friends and family with these yummy brownies!
![To make these fudgy red velvet brownies, gather these main ingredients: - 1 cup (2 sticks) unsalted butter, melted - 1 1/2 cups granulated sugar - 1/2 cup brown sugar, packed - 4 large eggs - 1 tablespoon vanilla extract - 1 tablespoon red food coloring - 1 1/4 cups all-purpose flour - 1/2 cup unsweetened cocoa powder - 1 teaspoon baking powder - 1/2 teaspoon baking soda - 1/2 teaspoon salt - 1 cup semi-sweet chocolate chips These ingredients work together to create a rich and moist brownie. The red food coloring adds that classic red velvet look. The melted butter makes the brownies soft and rich. You will also need these ingredients for the cream cheese frosting: - 1/2 cup cream cheese, softened - 1 cup powdered sugar - 1 tablespoon milk - Optional: white chocolate chips for garnish The cream cheese frosting is smooth and creamy. It adds a tangy sweetness to the brownies, making each bite delightful. You can sprinkle white chocolate chips on top for extra flair. For the full recipe, check out [Full Recipe]. 1. First, preheat your oven to 350°F (175°C). This step is key for even baking. 2. Next, grease and line a 9x13 inch baking pan with parchment paper. Leave some paper hanging over the edges for easy removal later. 1. In a large bowl, combine the melted butter, granulated sugar, and brown sugar. Whisk them together until smooth. 2. Add four eggs, one at a time, mixing well after each addition. Then, stir in the vanilla extract and red food coloring. Mix until everything is bright and well blended. 1. In a separate bowl, sift together the all-purpose flour and cocoa powder. This helps to avoid lumps for a smooth batter. 2. Add baking powder, baking soda, and salt to this mix. These ingredients help the brownies rise and add flavor. 1. Gradually mix the dry ingredients into the wet ingredients. Stir gently until just combined. Do not over-mix, or the brownies will be tough. 2. Now, fold in the semi-sweet chocolate chips. These will melt slightly, giving your brownies a rich texture. 1. Pour the brownie batter into the prepared pan. Spread it evenly using a spatula. 2. Bake in the preheated oven for 25-30 minutes. To check for doneness, insert a toothpick in the center. It should come out with a few moist crumbs. 1. While the brownies bake, prepare the cream cheese frosting. In a mixing bowl, beat the softened cream cheese until smooth. 2. Gradually mix in the powdered sugar and milk. Beat until the frosting is creamy and well combined. 1. Once the brownies cool for at least 10 minutes, spread the frosting evenly on top. 2. For an extra treat, sprinkle white chocolate chips on top. This adds sweetness and looks great. For the complete recipe, check the Full Recipe page. Enjoy this delightful treat! To get that rich, fudgy texture, you must underbake the brownies slightly. Bake them for 25-30 minutes, but check at the 25-minute mark. Insert a toothpick, and if it comes out with a few moist crumbs, they are ready. Overbaking will lead to dry brownies. Even mixing is also key. After adding the dry ingredients, mix gently until just combined. This helps keep the brownies dense and fudgy. You can enhance the flavor by adding nuts or different types of chocolate. Chopped walnuts or pecans add a nice crunch. You can also use dark chocolate chips for a richer taste. Adjusting sweetness is simple too. If you prefer sweeter brownies, increase the sugar slightly. For a more intense cocoa flavor, add an extra tablespoon of cocoa powder. When making the cream cheese frosting, aim for a smooth consistency. Start by beating the cream cheese until it’s fluffy. Gradually add powdered sugar and milk. This mix should be creamy and easy to spread. You can get creative with frosting designs. Use a piping bag for swirls or simple patterns. Add white chocolate chips on top for a fun visual touch. Check the Full Recipe for more details on the frosting process. {{image_2}} You can make red velvet swirl brownies by adding cream cheese to the batter. Swirl the cream cheese mixture into the brownie mix before baking. This adds flavor and a beautiful look. You can also adjust the colors by using more or less red food coloring. For decorations, consider adding sprinkles or a drizzle of white chocolate on top. If you want a gluten-free version, simply swap the all-purpose flour for a gluten-free blend. There are many great mixes available that work well in brownies. Be sure to choose a blend that includes xanthan gum for the best texture. This way, you can still enjoy fudgy brownies without gluten. For a vegan version, replace the eggs with flaxseed or applesauce. To make flaxseed eggs, mix one tablespoon of ground flaxseed with three tablespoons of water. Let it sit for a few minutes to thicken. For the butter and cream cheese, use plant-based alternatives. This keeps the brownies moist and delicious while being completely vegan. Store your brownies in an airtight container. This keeps them fresh. You can also place them in the fridge. They will last up to one week this way. If you want them to stay soft, let them cool completely before storing. Avoid stacking them, as this can cause them to stick together. To freeze brownies, cut them into squares first. Wrap each square tightly in plastic wrap. Then place them in a freezer bag. They can last up to three months in the freezer. When you want to eat them, take out a square and let it thaw at room temperature. For best texture, don’t microwave them to thaw. To enjoy your brownies warm, preheat your oven to 350°F (175°C). Place the brownies on a baking sheet and warm them for about 10 minutes. This helps keep them fudgy. You can also use a microwave. Heat for about 10-15 seconds. Check to ensure they do not dry out. Enjoy them with a scoop of ice cream for a tasty treat! Fudgy brownies have a rich, soft texture. Key ingredients that create this texture include butter, sugar, and eggs. The melted butter adds moisture, while the sugars help with that chewy bite. The eggs bind everything together, making it dense. The recipe also calls for cocoa powder, which adds depth. To keep them fudgy, avoid overbaking. Just bake until a toothpick shows moist crumbs. Yes, you can make these brownies ahead. They stay fresh for about 3 to 4 days at room temperature. Store them in an airtight container to keep them soft. If you want to keep them longer, freeze them. Wrap the cooled brownies tightly in plastic wrap, then put them in a freezer bag. They can last up to three months this way. If you want a red velvet look without food coloring, you have options. Beet juice is a great natural choice. It gives a nice color and adds some sweetness. Another option is pomegranate juice, which also works well. Just remember, these alternatives may change the flavor a bit. To check for doneness, use a toothpick. Insert it into the center of the brownies. If it comes out with a few moist crumbs, they’re ready. If it’s wet with batter, they need more time. Always avoid a clean toothpick, as this means they are overbaked. The edges should look set, while the center remains slightly soft. Absolutely! Adding nuts can give your brownies a nice crunch. Walnuts or pecans work well. You can also mix in chocolate chips for extra chocolatey goodness. If you want a fun twist, try adding peanut butter or caramel swirls. Just remember to keep the balance, so the brownies don’t become too heavy. For the full recipe, check out the detailed steps. You learned how to make delicious brownies from scratch. We covered key ingredients, step-by-step instructions, and helpful tips. With variations for everyone, like gluten-free and vegan, everyone can enjoy these treats. Pay attention to baking times for that perfect fudgy texture. Store them properly for freshness, and don’t forget to try different frosting designs. Enjoy your baking journey, and impress friends and family with these yummy brownies!](https://grilledflavors.com/wp-content/uploads/2025/08/45c2e69e-851a-4197-b798-76ac889c14f1-300x300.webp)