Air Fryer Onion Rings Crispy and Flavorful Snack

WANT TO SAVE THIS RECIPE?

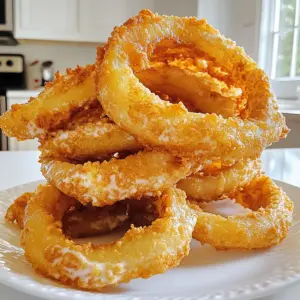
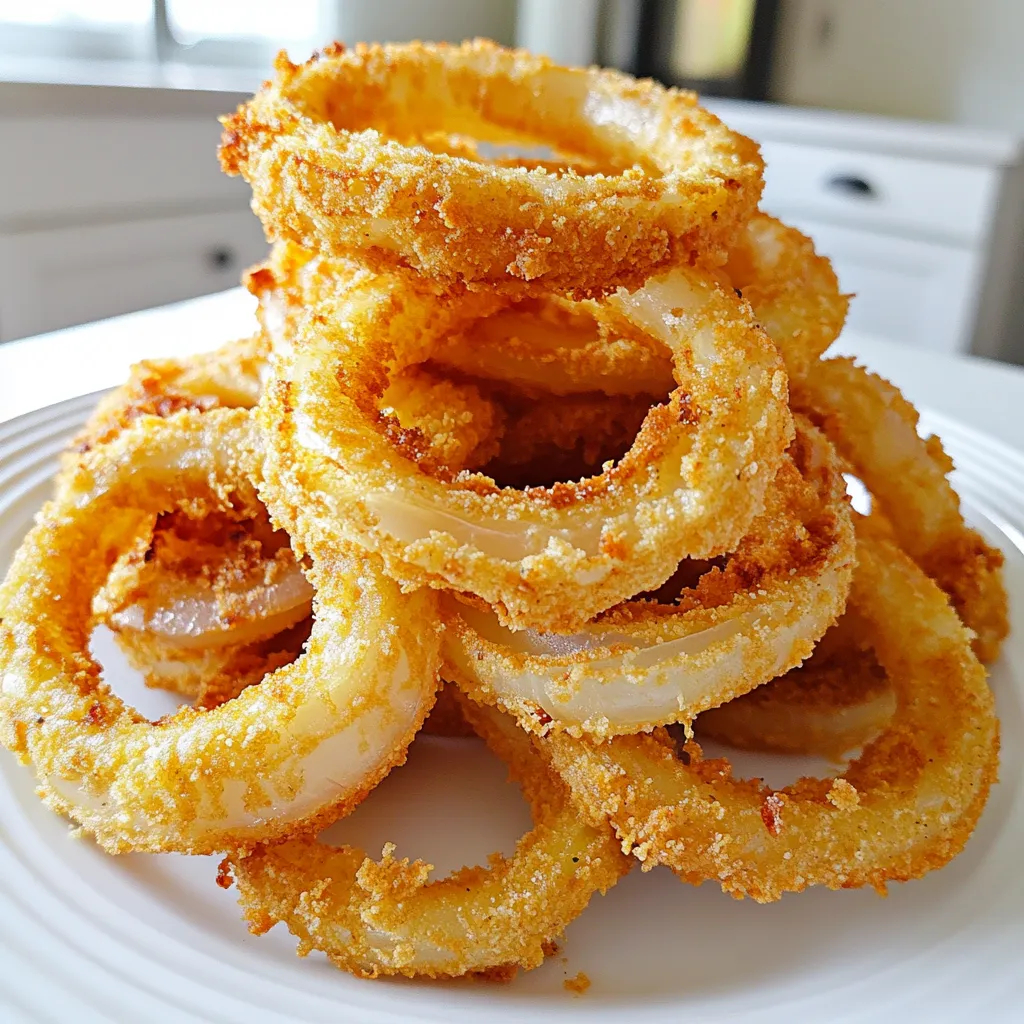
Looking for a crispy snack that’s easy to make? Air fryer onion rings are just what you need! With a golden crunch and tasty flavor, they’re perfect for any occasion. In this article, I’ll share a simple recipe, plus tips to make them extra crispy. Whether you’re a beginner or a seasoned cook, you’ll impress everyone with this delightful treat. Let’s get started!

Ingredients

Main Ingredients

– 2 large onions, sliced into thick rings

– 1 cup buttermilk (or milk with 1 tablespoon of lemon juice added)

Coating Ingredients

– 1 cup all-purpose flour

– 1 cup breadcrumbs (preferably panko for extra crunch)

– 1 teaspoon paprika

– 1 teaspoon garlic powder

– 1/2 teaspoon onion powder

– 1/2 teaspoon salt

– 1/4 teaspoon black pepper

Cooking Essentials

– Cooking spray

When making onion rings, the main ingredients are key. I like to use large onions. Slice them into thick rings for the best texture. Buttermilk makes the onions tender and adds flavor. You can also use milk with lemon juice if you don’t have buttermilk.

Next, let’s talk about the coating ingredients. I use all-purpose flour for a good base. Breadcrumbs add crunch, especially panko. The spices bring the flavor alive. Paprika gives a nice color. Garlic powder and onion powder add depth. Salt and pepper enhance the taste.

You also need cooking spray. It helps the onion rings crisp up in the air fryer. This simple list of ingredients makes delicious, crispy onion rings.

Step-by-Step Instructions

Soaking the Onion Rings

Soak the onion rings in buttermilk for at least 30 minutes. This step helps tenderize the onions and adds flavor. You can use regular milk with lemon juice if you don’t have buttermilk.

Preparing the Coating

In a separate bowl, mix flour, paprika, garlic powder, onion powder, salt, and black pepper. This blend gives the onion rings a tasty kick. Make sure to mix well for even flavor.

Coating the Onion Rings

Remove the soaked onion rings from the buttermilk. Let the excess drip off. Dredge each ring in the seasoned flour mixture. Make sure they are well-coated. Then dip them back into the buttermilk briefly. Finally, coat them in breadcrumbs, pressing gently to stick.

Air Frying the Onion Rings

Preheat your air fryer to 400°F (200°C). Arrange the coated onion rings in a single layer in the basket. Do not overcrowd them. Lightly spray the tops with cooking spray for extra crispiness. Air fry for 10-12 minutes, flipping halfway through. Check for a golden-brown color. Adjust the cooking time if needed, based on your air fryer. Enjoy the crunch right away!

Tips & Tricks

Achieving Extra Crispiness

To make your onion rings super crispy, lightly spray the tops with cooking spray before air frying. This small step adds a nice crunch and helps the coating stick. It also gives the onion rings a golden color.

Onions Selection Tips

Choosing the right onion matters. Use sweet onions if you want a milder taste. They are great for kids and those who prefer less bite. For a stronger flavor, go with yellow onions. They add more zing to your snack.

Cooking Time Adjustments

Every air fryer is different, so check your onion rings for doneness. If they need more time, adjust the cooking time as needed. Start with 10-12 minutes, but feel free to add a few more minutes if they’re not golden brown yet.

Variations

Spicy Version

Want a kick? Add cayenne pepper or hot sauce to the flour mix. This small change gives a big flavor boost. You can start with half a teaspoon of cayenne. Adjust to your taste. The heat pairs well with the sweet onion flavor. It’s a fun twist for spicy snack lovers!

Cheese-Stuffed Option

Love cheese? Try adding shredded cheese inside the onion rings before coating. This option makes the rings creamy and cheesy. Just stuff a small amount of cheese between the onion layers. When cooked, the cheese melts and adds a delightful surprise. Cheddar, mozzarella, or pepper jack work great!

Gluten-Free Alternative

Need a gluten-free snack? You can easily swap in gluten-free flour and breadcrumbs. This option still gives you that crispy crunch. Make sure to check the labels on your products. Many brands offer great gluten-free choices. You’ll enjoy all the flavor without the gluten!

Storage Information

Storing Leftovers

After enjoying your crispy onion rings, store any leftovers in an airtight container. Keep them in the refrigerator. This way, they stay fresh for up to three days. Make sure the rings are cool before sealing them to avoid moisture build-up.

Reheating Tips

To bring back their crunch, reheat the onion rings in the air fryer. Set the temperature to 350°F (175°C). Heat them for 3-5 minutes. Check often to avoid burning. This method keeps them crispy, just like when they were first made.

Freezing Instructions

If you want to save some for later, freeze uncooked breaded onion rings. Place them on a baking tray in a single layer. Freeze until solid, then transfer to a ziplock bag. This way, you can cook them right from frozen whenever you crave a tasty snack!

FAQs

Can I use yellow or sweet onions for this recipe?

Yes, both yellow and sweet onions work well for making onion rings. Yellow onions give a nice balance of flavor. Sweet onions add a touch of sweetness, making them a favorite for many. If you prefer one over the other, feel free to choose!

How do I ensure my onion rings are crispy?

To ensure crispy onion rings, coat them well in the flour and breadcrumbs. Make sure you do not overcrowd the air fryer basket. If you pack them too tightly, the air cannot circulate. A light spray of cooking oil on top helps, too. This gives them that golden-brown crunch we all love.

Can I make these onion rings in advance?

These onion rings taste best when fresh. However, you can prepare them in advance. Just store them in the fridge and reheat later. For reheating, use the air fryer for about 3-5 minutes. This will help restore their crispiness. Enjoy them hot for the best experience!

In this post, I covered how to make the best onion rings. You learned about the key ingredients, like onions and buttermilk. I shared step-by-step instructions, tips for extra crispiness, and fun variations.

Remember, the right onion choice can make a big difference. Try our storage tips for leftovers, too. Enjoy your tasty air-fried onion rings any day!

- 2 large onions, sliced into thick rings - 1 cup buttermilk (or milk with 1 tablespoon of lemon juice added) - 1 cup all-purpose flour - 1 cup breadcrumbs (preferably panko for extra crunch) - 1 teaspoon paprika - 1 teaspoon garlic powder - 1/2 teaspoon onion powder - 1/2 teaspoon salt - 1/4 teaspoon black pepper - Cooking spray When making onion rings, the main ingredients are key. I like to use large onions. Slice them into thick rings for the best texture. Buttermilk makes the onions tender and adds flavor. You can also use milk with lemon juice if you don’t have buttermilk. Next, let’s talk about the coating ingredients. I use all-purpose flour for a good base. Breadcrumbs add crunch, especially panko. The spices bring the flavor alive. Paprika gives a nice color. Garlic powder and onion powder add depth. Salt and pepper enhance the taste. You also need cooking spray. It helps the onion rings crisp up in the air fryer. This simple list of ingredients makes delicious, crispy onion rings. Soak the onion rings in buttermilk for at least 30 minutes. This step helps tenderize the onions and adds flavor. You can use regular milk with lemon juice if you don't have buttermilk. In a separate bowl, mix flour, paprika, garlic powder, onion powder, salt, and black pepper. This blend gives the onion rings a tasty kick. Make sure to mix well for even flavor. Remove the soaked onion rings from the buttermilk. Let the excess drip off. Dredge each ring in the seasoned flour mixture. Make sure they are well-coated. Then dip them back into the buttermilk briefly. Finally, coat them in breadcrumbs, pressing gently to stick. Preheat your air fryer to 400°F (200°C). Arrange the coated onion rings in a single layer in the basket. Do not overcrowd them. Lightly spray the tops with cooking spray for extra crispiness. Air fry for 10-12 minutes, flipping halfway through. Check for a golden-brown color. Adjust the cooking time if needed, based on your air fryer. Enjoy the crunch right away! To make your onion rings super crispy, lightly spray the tops with cooking spray before air frying. This small step adds a nice crunch and helps the coating stick. It also gives the onion rings a golden color. Choosing the right onion matters. Use sweet onions if you want a milder taste. They are great for kids and those who prefer less bite. For a stronger flavor, go with yellow onions. They add more zing to your snack. Every air fryer is different, so check your onion rings for doneness. If they need more time, adjust the cooking time as needed. Start with 10-12 minutes, but feel free to add a few more minutes if they're not golden brown yet. {{image_2}} Want a kick? Add cayenne pepper or hot sauce to the flour mix. This small change gives a big flavor boost. You can start with half a teaspoon of cayenne. Adjust to your taste. The heat pairs well with the sweet onion flavor. It’s a fun twist for spicy snack lovers! Love cheese? Try adding shredded cheese inside the onion rings before coating. This option makes the rings creamy and cheesy. Just stuff a small amount of cheese between the onion layers. When cooked, the cheese melts and adds a delightful surprise. Cheddar, mozzarella, or pepper jack work great! Need a gluten-free snack? You can easily swap in gluten-free flour and breadcrumbs. This option still gives you that crispy crunch. Make sure to check the labels on your products. Many brands offer great gluten-free choices. You’ll enjoy all the flavor without the gluten! After enjoying your crispy onion rings, store any leftovers in an airtight container. Keep them in the refrigerator. This way, they stay fresh for up to three days. Make sure the rings are cool before sealing them to avoid moisture build-up. To bring back their crunch, reheat the onion rings in the air fryer. Set the temperature to 350°F (175°C). Heat them for 3-5 minutes. Check often to avoid burning. This method keeps them crispy, just like when they were first made. If you want to save some for later, freeze uncooked breaded onion rings. Place them on a baking tray in a single layer. Freeze until solid, then transfer to a ziplock bag. This way, you can cook them right from frozen whenever you crave a tasty snack! Yes, both yellow and sweet onions work well for making onion rings. Yellow onions give a nice balance of flavor. Sweet onions add a touch of sweetness, making them a favorite for many. If you prefer one over the other, feel free to choose! To ensure crispy onion rings, coat them well in the flour and breadcrumbs. Make sure you do not overcrowd the air fryer basket. If you pack them too tightly, the air cannot circulate. A light spray of cooking oil on top helps, too. This gives them that golden-brown crunch we all love. These onion rings taste best when fresh. However, you can prepare them in advance. Just store them in the fridge and reheat later. For reheating, use the air fryer for about 3-5 minutes. This will help restore their crispiness. Enjoy them hot for the best experience! In this post, I covered how to make the best onion rings. You learned about the key ingredients, like onions and buttermilk. I shared step-by-step instructions, tips for extra crispiness, and fun variations. Remember, the right onion choice can make a big difference. Try our storage tips for leftovers, too. Enjoy your tasty air-fried onion rings any day!

Air Fryer Onion Rings

Get ready to make the ultimate snack with these Crispy Air Fryer Onion Rings! Perfectly golden and incredibly crunchy, these onion rings are soaked in buttermilk and coated in a flavorful blend of spices, then air-fried to perfection. They're a delicious treat for any occasion. Click through for the full recipe and tips on achieving that perfect crunch! #AirFryerRecipes #CrispyOnionRings #SnackIdeas #HealthyEating

Ingredients
  

2 large onions, sliced into thick rings

1 cup buttermilk (or milk with 1 tablespoon of lemon juice added)

1 cup all-purpose flour

1 cup breadcrumbs (preferably panko for extra crunch)

1 teaspoon paprika

1 teaspoon garlic powder

1/2 teaspoon onion powder

1/2 teaspoon salt

1/4 teaspoon black pepper

Cooking spray

Instructions
 

Start by soaking the onion rings in buttermilk in a large bowl. Allow them to soak for at least 30 minutes to tenderize and flavor the onions.

    In another bowl, mix together the flour, paprika, garlic powder, onion powder, salt, and black pepper.

      Remove the onion rings from the buttermilk and let the excess drip off. Dredge each ring in the seasoned flour mixture, ensuring it is well-coated.

        After flouring, dip the rings back into the buttermilk briefly and then coat them in the breadcrumbs, gently pressing to adhere.

          Preheat your air fryer to 400°F (200°C).

            Place the coated onion rings in the air fryer basket in a single layer, ensuring they are not overcrowded. Lightly spray the tops with cooking spray for extra crispiness.

              Air fry for 10-12 minutes, flipping halfway through, until the onion rings are golden brown and crispy. Depending on your air fryer, you may need to adjust the cooking time.

                Remove the cooked onion rings and serve immediately for the best crunch!

                  Prep Time: 30 minutes | Total Time: 45 minutes | Servings: 4

                    WANT TO SAVE THIS RECIPE?