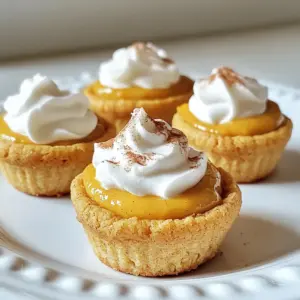
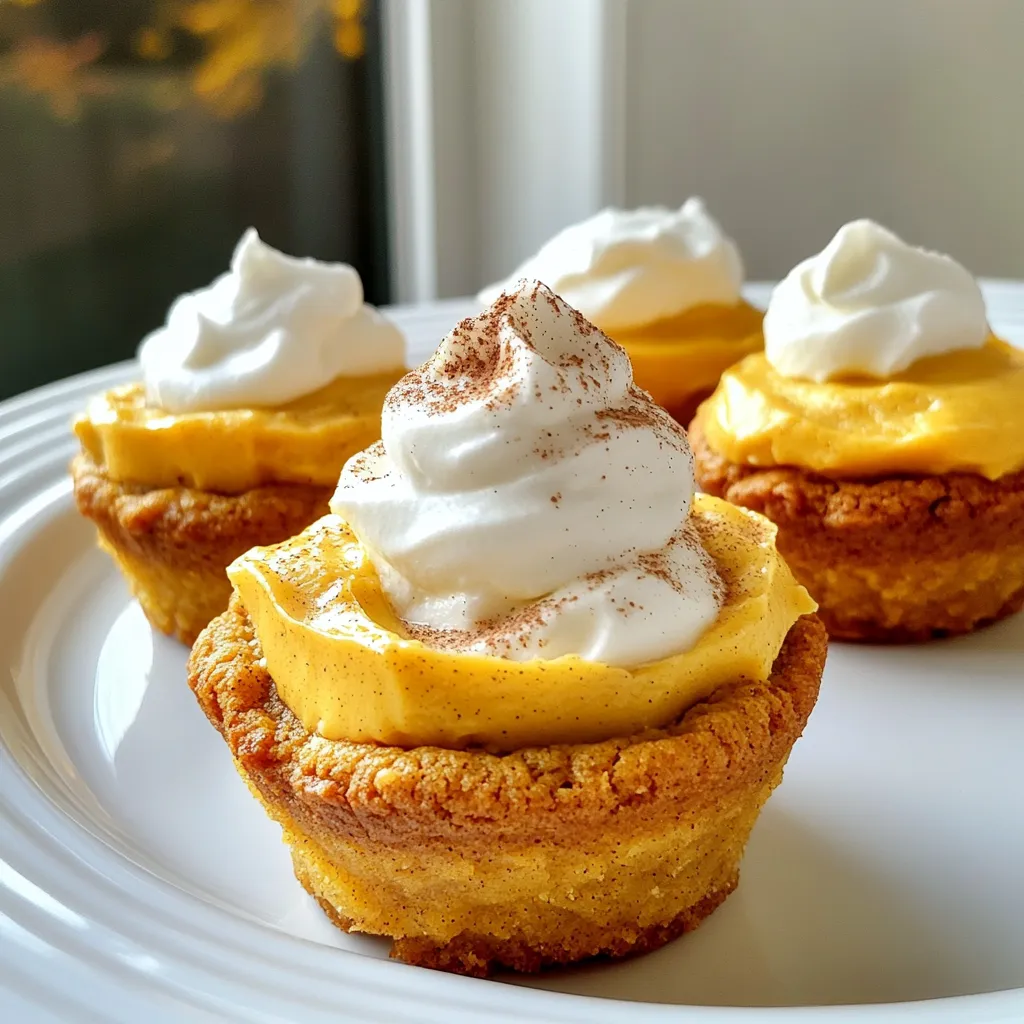
Get ready to fall in love with pumpkin! My Pumpkin Cheesecake Cookie Cups are a delightful treat that blends warm flavors with a creamy filling. Perfect for gatherings or cozy nights at home, these little bites will be the star of your dessert table. I’ll share easy steps for making them, helpful tips, and fun variations to suit your taste. Let’s dive into this festive dessert adventure together!
Ingredients
List of Ingredients
– 1 cup all-purpose flour
– 1/2 teaspoon baking soda
– 1/4 teaspoon salt
– 1/2 teaspoon ground cinnamon
– 1/4 teaspoon ground nutmeg
– 1/4 teaspoon ground ginger
– 1/2 cup unsalted butter, softened
– 1/2 cup brown sugar, packed
– 1/4 cup granulated sugar
– 1 large egg
– 1 teaspoon vanilla extract
– 3/4 cup pumpkin puree
– 8 oz cream cheese, softened
– 1/2 cup powdered sugar
– 1/4 teaspoon vanilla extract (for cheesecake filling)
– Whipped cream for topping (optional)
– Ground cinnamon for garnish (optional)
Using unsalted butter is best for this recipe. It lets you control the salt flavor. Fresh spices give these cookie cups a warm taste. Always use high-quality cream cheese for a smooth filling.
Substitutions
If you need a swap, try using Greek yogurt instead of cream cheese. It gives a tangy flavor but has less fat. For those needing gluten-free options, you can use a gluten-free flour blend. This will also work well in your cookie cups.
Step-by-Step Instructions
Preparation Steps
1. Prepping the oven and muffin tin
Start by preheating your oven to 350°F (175°C). This temperature helps the cookie cups bake evenly. While the oven warms, grab a muffin tin and lightly grease it. I like using cooking spray or butter. This step ensures the cookie cups come out easily.
2. Mixing dry and wet ingredients
In a medium bowl, whisk together the all-purpose flour, baking soda, salt, ground cinnamon, nutmeg, and ginger. Mixing these dry ingredients first helps blend the flavors. In a large bowl, cream together the softened butter, brown sugar, and granulated sugar until light and fluffy. This process adds air to the mix, which makes the cookie cups tender. Beat in the egg and one teaspoon of vanilla extract until fully combined. Gradually add in the dry mix, stirring gently until just combined.
Forming Cookie Cups
1. How to shape the cookie dough in the muffin tin
Divide the cookie dough into 12 equal portions. I find using a cookie scoop helps with this. Press each portion firmly into the bottom of the muffin tin cups, creating a shell. Make sure the dough goes up the sides a little. This step will hold the filling nicely.
2. Tips for even distribution
To ensure even distribution, use your fingers or the back of a spoon to smooth the dough. It’s important to have each cup as uniform as possible. This way, they cook evenly and look great.
Baking Process
1. Optimal baking time and temperature
Bake the cookie cups in your preheated oven for 15-18 minutes. Keep an eye on them as they bake. The goal is for the edges to turn a light golden brown.
2. Signs of doneness
You’ll know they’re done when they look slightly set and the tops are just beginning to crack. Let them cool in the muffin tin for about 10 minutes. This cooling time helps them firm up before you transfer them to a wire rack.
Tips & Tricks
Perfecting Texture
To get the right softness in your cookie cups, start with softened butter. Cream it well with sugars until fluffy. This helps create a tender base.
For a thicker cheesecake filling, use room-temperature cream cheese. It mixes better and prevents lumps. Also, beat the mixture until smooth and creamy. This ensures a rich texture.
Serving Suggestions
Garnishing your cookie cups is simple yet delightful. Top each cup with a dollop of whipped cream. A sprinkle of ground cinnamon adds a nice touch.
These treats pair well with coffee or tea. The warmth of these drinks complements the pumpkin flavor. Serve them at your next gathering for a cozy vibe.
Troubleshooting Common Issues
If your cookie cups collapse, check your baking time. Underbaking can cause them to lose shape. Let them cool in the muffin tin to firm up.
For overcooked cheesecake filling, keep an eye on the baking time. The filling should be set but not too firm. If it gets too hard, next time reduce the baking time slightly.
Variations
Flavor Variations
You can make pumpkin cheesecake cookie cups even more fun. Try adding chocolate chips or caramel sauce to the cookie dough. This adds a rich twist to the flavor. You can also mix in some mini chocolate chips for a sweet surprise.
Spices can change the taste too. While cinnamon, nutmeg, and ginger are great, consider adding cloves or allspice. Each spice brings a unique flavor that can surprise your taste buds. Experiment to find your favorite spice mix!
Dietary Variations
Want to make these cookie cups vegan? Swap out the egg for a flax egg. Just mix one tablespoon of flaxseed meal with two and a half tablespoons of water. Let it sit for five minutes to thicken. Use vegan cream cheese instead of regular cream cheese too.
If you want a low-sugar option, use a sugar substitute like stevia or monk fruit. You can also reduce the brown sugar in the cookie dough. Just keep the balance so the cookie cups stay yummy and soft.
Serving Variants
These cookie cups make a great mini dessert platter. You can serve them with other small treats like mini brownies or fruit tarts. It adds variety to your dessert table and makes it look fancy.
You can also turn the cookie cups into a layered dessert. First, make the cookie cups. Then, layer them with more pumpkin cheesecake filling and whipped cream. This gives a fun twist and makes them look even more inviting!
Storage Info
Storage Methods
To keep your pumpkin cheesecake cookie cups fresh, you need the right storage. If you plan to eat them soon, store them in the fridge. Place them in an airtight container. This helps keep them moist and tasty for a few days. If you want to keep them longer, freeze them! Use a freezer-safe container or wrap them tightly in plastic wrap and foil. This will keep them fresh for up to three months.
Shelf Life
These cookie cups taste best within five days if stored in the fridge. After that, they may lose their flavor and texture. Watch for signs of spoilage. If you see any mold or if they smell off, it’s time to toss them. You want to enjoy these treats at their best!
Reheating Instructions
When you want to enjoy your cookie cups again, reheating is easy. Preheat your oven to 300°F (150°C). Place the cookie cups on a baking sheet. Heat them for about 10 minutes. This warms them up and keeps the texture nice. Avoid using the microwave, as it can make them soggy. Enjoy your delightful treat warm!
FAQs
What can I substitute for pumpkin puree?
You can make your own pumpkin puree by cooking and mashing fresh pumpkin. Just cut the pumpkin, remove seeds, and roast it until soft. After it cools, mash it well. If you prefer store-bought options, look for canned pumpkin puree. Make sure it is pure pumpkin, not pumpkin pie filling. Other alternatives include butternut squash puree or sweet potato puree. Both have similar flavors and textures.
Can I make cookie cups ahead of time?
Yes, you can prepare cookie cups ahead of time. You can make the dough and shape it into cups. Store them in the fridge for up to 24 hours. When you are ready to bake, simply add the filling and pop them in the oven. You can also bake the cookie cups ahead. Let them cool completely, then store them in an airtight container. Just add the cheesecake filling and toppings when you are ready to serve.
How do I know when the cheesecake filling is done?
The cheesecake filling is done when the edges are set and the center is slightly jiggly. If it looks too wet, it needs more time. You can also check the texture; it should be creamy but firm. After baking, let them cool down completely. This will help the filling set more as it cools. A light golden color on top is also a good sign of doneness.
You now have a complete guide to making delicious Pumpkin Cheesecake Cookie Cups. From choosing the right ingredients to tips on baking and storage, you have all the tools you need. Remember, using quality ingredients makes a big difference. Don’t hesitate to experiment with flavors and variations. These cookie cups are fun to make and share. With the right care, they can stay fresh for days. Enjoy creating these tasty treats in your kitchen. You’ll impress everyone with your skills and flavors!