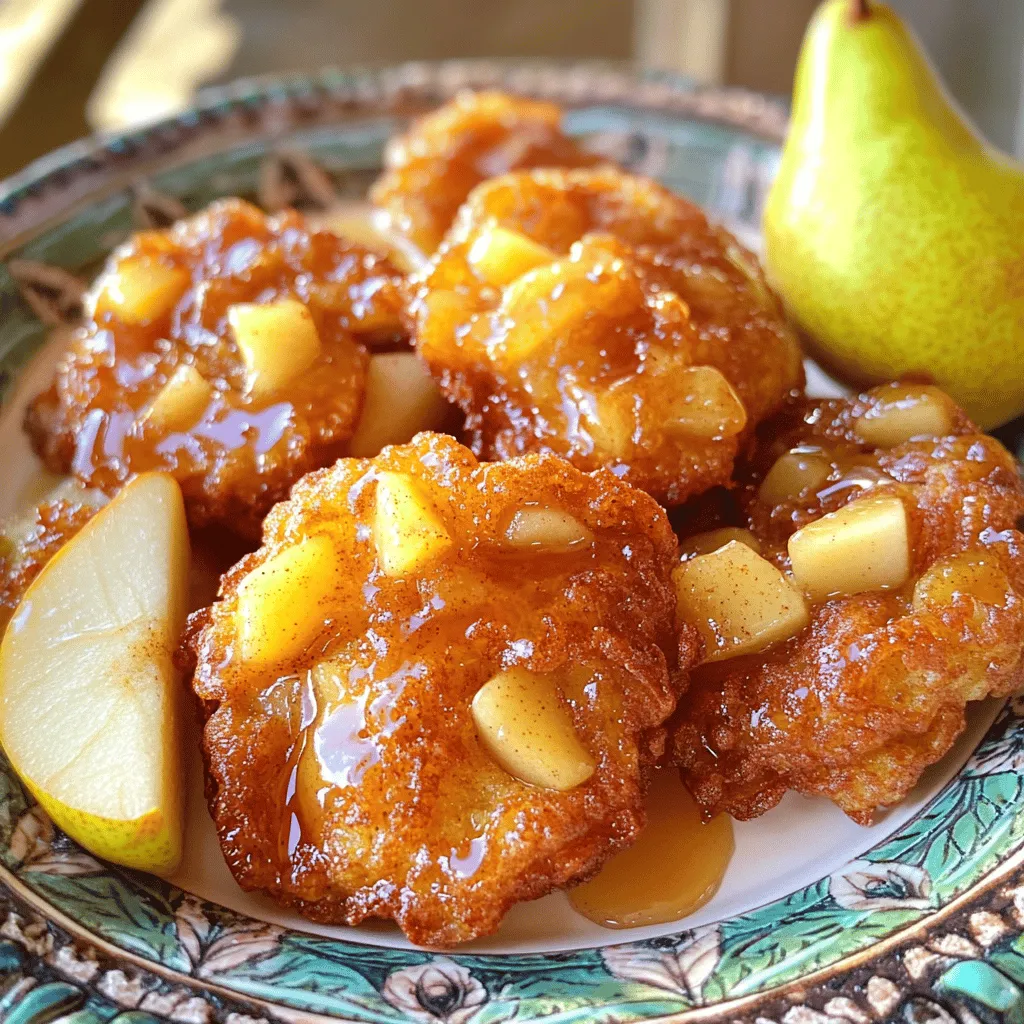
Skip to content
grilledflavors.com
  • Home
  • Appetizers
  • Desserts
  • Salads
  • Breakfast
  • Dinner
  • Privacy Policy
  • Contact
  • About

Chef Nate

Easy Homemade Peach Cobbler Deliciously Simple Delight

June 20, 2025 by Chef Nate
- 4 cups fresh peaches, peeled, pitted, and sliced - 1 cup granulated sugar, divided - 1 teaspoon ground cinnamon - 1 teaspoon lemon juice - 1 cup all-purpose flour - 1 teaspoon baking powder - 1/2 teaspoon salt - 1 cup whole milk - 1/2 cup unsalted butter, melted - 1 teaspoon vanilla extract For a peach cobbler, the ingredients are simple and fresh. You will need four cups of ripe peaches. Make sure they are peeled, pitted, and sliced. This adds sweetness and flavor to your dessert. You will also need one cup of granulated sugar. This sugar will sweeten the fruit and the batter. Ground cinnamon brings a warm spice to the mix. You need just one teaspoon. Lemon juice is key; it adds a bright note. You will need one teaspoon of it. Flour is the base of the batter. Use one cup of all-purpose flour to get a nice rise. Baking powder makes your cobbler fluffy. You need one teaspoon for this recipe. Salt enhances all the flavors, and you need half a teaspoon. Whole milk adds richness to the batter. You will need one cup of it. Melted unsalted butter gives the batter a lovely texture. You will need half a cup. Lastly, add one teaspoon of vanilla extract for a hint of sweetness. - Alternative fruits to use instead of peaches: You can swap peaches for berries, apples, or cherries. Each fruit gives a new taste. - Sugar substitutes for a healthier option: Use honey or maple syrup in place of sugar. They add great flavor. - Gluten-free flour alternatives: For gluten-free, try almond flour or a gluten-free flour mix. Both work well in cobblers. Using these substitutions allows you to customize your peach cobbler. It’s fun to try new flavors! For the full recipe, check out the complete instructions. 1. Preheat the oven and prepare the baking dish Start by preheating your oven to 350°F (175°C). This step is key to ensuring your peach cobbler bakes evenly. While the oven heats, grease a 9x13-inch baking dish to prevent sticking. 2. Combine peach ingredients and let them macerate In a bowl, mix the sliced peaches, 1/2 cup of sugar, ground cinnamon, and lemon juice. Stir everything together and let it sit for about 10 minutes. This process, called macerating, helps the peaches release their juices and enhances their flavor. 1. Whisk dry ingredients together In a separate mixing bowl, add the all-purpose flour, baking powder, salt, and the remaining 1/2 cup of sugar. Whisk these dry ingredients well to combine them evenly. 2. Incorporate wet ingredients carefully Pour in the milk, melted butter, and vanilla extract into the dry mix. Stir until just combined. The batter will look a bit lumpy, and that's perfectly fine. Avoid overmixing to keep the texture light and fluffy. 1. Pour batter, layer peaches, and navigate baking time Carefully pour the batter into the greased baking dish. Then, spoon the peach mixture over the batter. Spread the peaches evenly but do not stir. Bake in the preheated oven for 35-40 minutes. 2. Tips for checking doneness with a toothpick To check if your cobbler is done, insert a toothpick into the center. If it comes out clean, your cobbler is ready. If there’s batter on the toothpick, it needs more time. Keep an eye on it to avoid overbaking. Follow these steps for a delightful dessert that’s sure to impress! For the complete recipe, check out the Full Recipe section. To choose the best peaches, look for firm fruit with a slight give. The skin should be smooth and have a warm color. Smell them; ripe peaches have a sweet aroma. If you find hard peaches, you can ripen them at home. Just place them in a paper bag at room temperature. This method traps the ethylene gas, speeding up the ripening process. Check them daily until they soften. You can easily boost the flavor of your cobbler. Adding a pinch of nutmeg or ginger can create depth. You might also try a splash of almond extract for a unique twist. Serving your peach cobbler with vanilla ice cream is a must. The cold ice cream melts into the warm cobbler, creating a delightful mix. Whipped cream also adds a lovely touch. One common mistake is overmixing the batter. This can make your cobbler dense and tough. Mix until just combined; lumps are okay. Another mistake is moving the cobbler too soon. Let it set for at least 10 minutes after baking. This allows the juices to thicken and improves the overall texture. Enjoy your delicious cobbler with these helpful tips! For the full recipe, check out the [Full Recipe]. {{image_2}} You can easily change up the flavor of your peach cobbler. One fun way is to add berries or other fruits. Try mixing in blueberries, raspberries, or even cherries. This gives your cobbler a lovely burst of color and flavor. You can also spice it up with nutmeg or ginger. A pinch of these spices can add warmth and depth to your dish. If you want a vegan peach cobbler, swap out the milk and butter. Use almond milk and coconut oil instead. This keeps the rich flavor while making it plant-based. For those watching sugar intake, try using a low-sugar version. You can use a sugar substitute like stevia or monk fruit. This way, you still enjoy the sweet taste without the extra calories. When it comes to serving, think beyond the plate. A scoop of vanilla ice cream is a classic choice. It melts slightly on the warm cobbler, creating a creamy delight. Greek yogurt is another great option. It adds a tangy flavor that balances the sweetness. You might also drizzle some caramel sauce over the top for extra indulgence. At gatherings, consider serving the cobbler with fresh fruit on the side. It adds a nice touch and keeps things light. To keep your peach cobbler fresh, store it in the fridge. First, let it cool down. Then, cover it tightly with plastic wrap or foil. You can also use an airtight container. This method helps keep moisture in and prevents drying out. I recommend eating it within three days for the best taste. When you want to enjoy your cobbler again, reheating is key. The oven is best for keeping that crispy topping. Preheat the oven to 350°F (175°C). Place the cobbler in a baking dish and cover it with foil. Heat for about 15-20 minutes. If you’re short on time, the microwave works too. Just heat a slice for 30 seconds to 1 minute. But be careful, as the texture may change a bit. If you want to save some cobbler for later, freezing is a great option. First, let it cool completely. Cut it into squares for easy serving. Wrap each piece tightly in plastic wrap and then in aluminum foil. This helps prevent freezer burn. You can keep it in the freezer for up to three months. When you’re ready to eat, take it out and thaw it in the fridge overnight. Reheat it in the oven for the best results. Look for peaches that are golden. A ripe peach feels soft but not mushy. You can gently squeeze them. If they give just a little, they are ready to eat. Check the smell too; ripe peaches have a sweet scent. Yes, you can prepare the peach filling ahead of time. Just keep it in the fridge until you're ready to bake. Mix the batter just before baking to keep it fresh. This way, you will get the best texture. Peach cobbler is best when warm. The heat brings out the sweet flavors. Serving it warm with ice cream adds a nice contrast. Cold cobbler can be tasty too, but it lacks that cozy feel. Yes, you can use canned peaches. Drain them well to avoid a soggy cobbler. Adjust the sugar since canned peaches can be sweeter. This makes it easy to enjoy cobbler any time of the year. Serve peach cobbler warm with vanilla ice cream. A scoop on top melts into the cobbler. You can also add fresh mint leaves for color. Pair it with a cold drink like sweet tea for a perfect combo. This article covered key ingredients for a delicious peach cobbler, tips for making it better, and storage ideas. We explored alternatives if you lack fresh peaches and gave easy steps to bake it perfectly. Remember, selecting ripe fruit and avoiding overmixing are vital for success. This tasty dessert can be enjoyed warm or cold. With these insights, you can create your own perfect peach cobbler, impressing family and friends every time. Happy baking!

Looking for a dessert that’s easy to make and packed with flavor? My Easy Homemade Peach Cobbler is just what you need! With simple ingredients and quick steps, this recipe …

Read more

Categories Desserts

Hearty Creamy Basil Chicken Rich Flavorful Delight

June 20, 2025 by Chef Nate
- 4 boneless, skinless chicken breasts - 1 cup heavy cream - 1 cup fresh basil leaves, chopped - 2 tablespoons olive oil - 1 teaspoon salt - 1/2 teaspoon black pepper - 1 teaspoon Italian seasoning - 3 cloves garlic, minced - 1 cup cherry tomatoes, halved - Grated Parmesan cheese for serving When I make Hearty Creamy Basil Chicken, I love how simple the ingredients are. You only need a few items to create rich flavors. Start with the chicken. I prefer boneless, skinless breasts. They cook evenly and soak up the sauce well. Next, heavy cream is the star of this dish. It adds a rich, creamy texture. Fresh basil gives a bright, herbal note that lifts the dish. I always chop the basil finely to release its oils. For seasonings, I use olive oil for cooking. It adds flavor and helps brown the chicken. Salt and black pepper enhance the taste. Italian seasoning brings a warm, aromatic touch. Garlic is a must for me. I use fresh cloves, minced finely. They add depth to the sauce. Cherry tomatoes, halved, add a pop of color and sweetness. Finally, I finish the dish with grated Parmesan cheese. It adds a savory kick and ties everything together. You can find the full recipe in the article for more detailed steps. Enjoy cooking and savoring this delightful meal! - Seasoning the chicken breasts Start by seasoning the chicken breasts. Use salt, black pepper, and Italian seasoning. Coat both sides evenly. This adds flavor and enhances the dish. - Cooking on the skillet Heat two tablespoons of olive oil in a large skillet. Set the heat to medium-high. Once hot, add the seasoned chicken breasts. Cook for 6-7 minutes on each side. Look for a golden brown color. Make sure they are cooked through. Remove the chicken from the skillet and set aside. - Sautéing the garlic In the same skillet, add three minced garlic cloves. Sauté for about one minute. You want the garlic to become fragrant. This brings out its rich flavor. - Adding the heavy cream Pour in one cup of heavy cream after the garlic. Stir well to mix. Scrape any browned bits from the bottom of the skillet. These bits add great taste to the sauce. - Incorporating cherry tomatoes and basil Next, add one cup of halved cherry tomatoes and one cup of chopped fresh basil. Stir these into the cream sauce. Let it simmer for 3-4 minutes. This thickens the sauce and blends the flavors. - Blending flavors with cooked chicken Return the cooked chicken breasts to the skillet. Coat them with the creamy basil sauce. Let everything simmer together for another 2-3 minutes. This step is key to ensuring all the flavors meld beautifully. For the complete recipe, check out the full recipe section. Enjoy your cooking! To ensure chicken is cooked thoroughly, use a meat thermometer. The chicken should reach 165°F (75°C). This way, you avoid undercooking or drying it out. Also, cook the chicken in batches if your skillet is small. This helps it brown nicely. For a thicker sauce, let it simmer longer. The heavy cream will reduce and thicken. You can also add a bit of cornstarch mixed with water. This trick works great to achieve the perfect creamy texture. Experimenting with additional herbs can elevate the dish. Try adding thyme or oregano for a twist. Fresh herbs bring bright flavors. You can mix in a bit of parsley for a fresh pop. For suggested spices, consider adding a pinch of red pepper flakes. This adds warmth without overpowering the dish. You can also use smoked paprika for a subtle depth. Plating is key for an appealing dish. Use a large plate and place the chicken in the center. Pour the creamy sauce around it for a lovely look. Add the cherry tomatoes on top for color. Garnishing with Parmesan adds a nice touch. Grate fresh Parmesan over the dish just before serving. It enhances the flavor and makes it look gourmet. This simple step can impress your guests! {{image_2}} You can switch the chicken for turkey or tofu. Turkey is lean and has a mild taste. It cooks in a similar way. Just season it like chicken. For a plant-based option, use firm tofu. Press it to remove water, then cut it into cubes. Cook it until golden brown before adding to the sauce. You can also cook with shrimp. Shrimp cooks quickly and adds a nice touch. Just add them to the sauce after the garlic and let them simmer until pink. If you need gluten-free options, make sure to use gluten-free broth or cream. Check the labels to ensure no hidden gluten. For those looking to cut carbs, try zucchini noodles. Spiralize the zucchini and sauté it briefly. This will create a light and fresh base for the creamy sauce. It’s a great way to enjoy the dish without the added carbs. You can add sun-dried tomatoes for a burst of flavor. Just chop them and stir them into the sauce. They bring a sweet and tangy taste that pairs well with basil. Another option is to incorporate a splash of white wine. Add it after the garlic, letting it cook down a bit. This will deepen the flavor of the sauce. These simple tweaks can make your dish even more special. For the full recipe, visit the Hearty Creamy Basil Chicken page. To keep your Hearty Creamy Basil Chicken fresh, store it in an airtight container. This method helps lock in the flavors and keeps it safe from contamination. Make sure to let the dish cool before sealing it. Your leftovers will last about 3 to 4 days in the fridge. Always check for any signs of spoilage before eating. You can freeze Hearty Creamy Basil Chicken for later enjoyment. Portion the dish into freezer-safe containers. If you plan to freeze it, do so within a day or two of cooking. This dish can last up to 3 months in the freezer. When you’re ready to eat, thaw it in the fridge overnight. For quick thawing, you can use the microwave, but be careful not to cook it. For the best taste, reheat Hearty Creamy Basil Chicken on the stove over low heat. This method helps maintain the creamy texture. Stir the sauce gently to avoid sticking. You can also use the microwave, but heat it in short bursts to prevent overcooking. Stir in between to ensure even heating. Enjoy every bite of this rich dish! For the full recipe, check out the recipe card above. To make this dish gluten-free, you can use gluten-free flour or cornstarch to thicken the sauce. This keeps the creamy texture without any wheat. You can also ensure that all other ingredients, like chicken broth, are gluten-free. Check labels to be sure. If you want a lighter option, try using coconut milk or almond milk mixed with a bit of cornstarch. Another option is Greek yogurt, which adds creaminess and protein. You can also use half-and-half for a less rich taste while still keeping the dish creamy. Yes, you can prep Hearty Creamy Basil Chicken in advance. Cook the chicken and sauce, then store them separately in the fridge. When you’re ready to eat, just reheat the chicken and sauce together in a skillet. This way, the flavors blend nicely again. For best results, eat it within three days. For the full recipe, check the recipe section above! This recipe for Hearty Creamy Basil Chicken showcases simple ingredients. It combines chicken, fresh basil, and rich cream for a tasty meal. You learned how to cook the chicken and make the sauce. We shared tips to enhance flavor and presentation. You can try protein swaps and dietary changes for variety. In conclusion, this dish is both easy and flexible. Enjoy making it for family or friends. Your cooking will impress with its rich flavors and vibrant colors.

Welcome to a taste sensation! Hearty Creamy Basil Chicken is the dish you didn’t know you needed. With rich flavors and simple steps, you’ll impress any guest. This creamy delight …

Read more

Categories Dinner

Quick Pickled Vegetables Easy and Flavorful Recipe

June 20, 2025 by Chef Nate
- Sliced cucumbers - Shredded carrots - Thinly sliced red radishes To make quick pickled vegetables, you start with fresh, crunchy veggies. I love using sliced cucumbers for their crispness. Shredded carrots add a sweet touch and bright color. Thinly sliced red radishes bring a peppery bite that wakes up the taste buds. - Mustard seeds - Coriander seeds - Red pepper flakes Adding spices enhances the flavor of your pickles. Mustard seeds give a nice crunch and a tangy taste. Coriander seeds add a warm, earthy note. If you like heat, sprinkle in some red pepper flakes. Adjust the amount to match your spice level. - Apple cider vinegar - Sugar and salt - Garlic The pickling liquid is key to great flavor. I use apple cider vinegar for its fruity acidity. It balances well with sugar and salt, which help to bring out the flavors. Adding smashed garlic infuses a wonderful aroma and depth. This combo creates a bright and tangy liquid that transforms your veggies. For the full recipe, check out the Zesty Quick Pickled Veggies 🥒 section. To start, I combine water and apple cider vinegar in a medium saucepan. This mix forms the base of our pickling liquid. I add one tablespoon of sugar and one tablespoon of salt. I heat the mixture over medium heat. I stir it occasionally until the sugar and salt dissolve completely. This step is key for balance in flavor. Next, I turn up the flavor. I add one teaspoon of mustard seeds, one teaspoon of coriander seeds, two smashed garlic cloves, and one teaspoon of red pepper flakes. This blend brings warmth and depth to the pickles. I bring the mixture to a gentle simmer for about one to two minutes. This helps the spices release their aromas and flavors into the liquid. Now, I prepare my veggies. I slice cucumbers, shred carrots, and thinly slice red radishes and bell peppers. I place all these colorful veggies into a large, heatproof jar or container. Then, I carefully pour the warm pickling liquid over the veggies. I make sure they are fully submerged. If any float, I gently press them down with a spoon. Once done, I let the jar cool to room temperature. After that, I seal it with a lid. For the best taste, I recommend refrigerating the pickles for at least two hours, but overnight is even better. You can find the full recipe here. To make sure your quick pickles turn out great, keep these tips in mind: - Ensuring vegetables are submerged: This is key for even flavor. When you pour the pickling liquid over the veggies, they should be completely covered. If some float, use a spoon to push them down gently. This helps every piece soak up that tangy goodness. - Cooling time for optimal flavor: After you seal the jar, let it cool at room temperature. This step is crucial. It allows the flavors to meld together nicely. For the best taste, chill the pickles in the fridge for at least two hours or overnight. The longer they sit, the better they taste! When serving your quick pickled vegetables, think about how to make them shine: - Presentation ideas for serving: Use a clear glass jar to show off the colors of the pickles. You can sprinkle some fresh herbs on top for a pop of green. This not only looks nice but adds a fresh taste as well. - Pairing with different dishes: Quick pickled veggies are versatile! Serve them with grilled meats for a zesty side. They also brighten up salads, sandwiches, and tacos. You can even add them to charcuterie boards for a fun twist. Want to take your pickles to the next level? Here are some tasty ideas: - Adding herbs or citrus zest: Fresh herbs like dill or cilantro can bring a new layer of flavor. You can also add a bit of lemon or lime zest for a citrusy kick. This adds freshness and enhances the overall taste. - Adjusting spice levels to your preference: If you like heat, feel free to increase the red pepper flakes. You can also experiment with other spices like black pepper or chili powder. Adjust to your liking for the perfect balance! {{image_2}} You can change up the veggies in your quick pickles. Try using radishes for a spicy kick. Zucchini also works great for a mild taste. Green beans add a nice crunch. Asparagus brings a fresh, bright flavor to the mix. These options can change the whole vibe of your pickles. Feel free to use what you have on hand! Switching vinegars can alter the taste. Use rice vinegar instead of apple cider for a sweeter flavor. It also gives your pickles a nice tang. You can also play with spices. Adding dill seeds, black peppercorns, or even ginger can bring new flavors. Get creative and see what you like best! If you need low-sodium options, simply cut back on the salt. You can also leave out the sugar for a sugar-free version. This way, your pickles will still taste great. For vegan diets, all your veggies are plant-based! These pickles fit right into any meal plan. Enjoy them in salads or as a snack. To keep your quick pickled vegetables fresh, choose the right container. Glass jars work best. They let you see the colors and are easy to clean. Make sure your jars have tight lids. This keeps air out and flavors in. After you make your pickles, put them in the fridge. Cold temperatures help keep them crisp and tasty. Quick pickled vegetables last about 1 to 2 weeks in the refrigerator. After that, they may lose their crunch. Look for signs of spoilage. If the pickles become soft or the liquid turns cloudy, it’s time to throw them out. Always trust your senses. If something smells off, it’s better to be safe. You can freeze quick pickled vegetables, but it’s not the best idea. Freezing changes their texture. If you want to freeze them, use freezer-safe bags. Remove as much air as you can to prevent freezer burn. When you want to use them, just thaw in the fridge. They might not be as crunchy, but they will still taste good in cooked dishes. For a full recipe, check out the Zesty Quick Pickled Veggies. Quick pickled vegetables can last about 2 to 4 weeks in the fridge. Keep them in a clean, airtight jar. Make sure to always use clean utensils when serving. This helps avoid bad bacteria. If you see any signs of spoilage, like mold or off smells, it's best to throw them away. Yes, you can use many types of vinegar for pickling. Apple cider vinegar gives a sweet and tangy flavor. White vinegar is sharp and strong. Rice vinegar is mild and slightly sweet. Each type changes the taste of your pickles. Experiment to find your favorite! Quick pickled vegetables add flavor and crunch to many meals. Use them in tacos, sandwiches, or salads. They also pair well with grilled meats or fish. Serve them as a side dish or snack. Their bright colors make any plate more appealing. You can find more ideas in the Full Recipe. Yes, you can add more heat to your pickles. Increase the amount of red pepper flakes in your recipe. You can also add sliced fresh chili peppers. If you love garlic, try adding more smashed cloves. Adjust the spices to your taste for the perfect kick. Quick pickling is a simple way to make tasty vegetables at home. You learned about key ingredients, how to prepare the pickling liquid, and tips for picking various veggies. The right jar and storage can make them last longer. You can enjoy your pickles as a snack or alongside meals. Experimenting with flavors adds fun. Now, you have the tools to create your own quick pickles. Enjoy your cooking and all the crunchy goodness that follows!

Looking for a simple way to enhance your meals? Quick pickled vegetables are the answer! In this easy and flavorful recipe, I’ll show you how to create tangy, crunchy delights …

Read more

Categories Salads

Classic Salisbury Steak Recipe Savory and Simple Dish

June 20, 2025 by Chef Nate
When making classic Salisbury steak, you need to gather some simple ingredients. This recipe is not only tasty but also easy to follow. Here is what you will need: - 1 pound ground beef - 1/2 cup breadcrumbs - 1/4 cup grated Parmesan cheese - 1/4 cup finely chopped onion - 1 clove garlic, minced - 1 egg, beaten - 1 teaspoon Worcestershire sauce - Salt and pepper to taste - 2 tablespoons olive oil - 2 cups beef broth - 1 cup sliced mushrooms - 1 tablespoon cornstarch - 1 tablespoon water - Fresh parsley, for garnish Collecting these ingredients sets you up for success. Each one plays a key role in making the dish flavorful. The ground beef gives the steak its heartiness. Breadcrumbs and egg help bind everything together. Adding cheese and Worcestershire sauce brings in rich flavor notes. Remember, fresh ingredients make all the difference! For a full recipe, you can check out the detailed steps. This dish will surely impress your family and friends. Enjoy cooking! To start, grab a large mixing bowl. Combine the following ingredients: - 1 pound ground beef - 1/2 cup breadcrumbs - 1/4 cup grated Parmesan cheese - 1/4 cup finely chopped onion - 1 clove garlic, minced - 1 egg, beaten - 1 teaspoon Worcestershire sauce - Salt and pepper to taste Mix these well until everything blends smoothly. Next, form the mixture into four oval patties. Each patty should be about 1 inch thick. This shape helps them cook evenly. Now it's time to cook. Heat 2 tablespoons of olive oil in a large skillet over medium heat. When the oil is hot, add your patties. Cook them for about 4-5 minutes on each side until they turn golden brown. Make sure to check that they are cooked through. Once done, take the patties out of the skillet and set them aside. In the same skillet, add 1 cup of sliced mushrooms. Sauté them for 3-4 minutes until they are tender. After that, pour in 2 cups of beef broth and bring it to a simmer. Add the cooked Salisbury steak patties back into the skillet. Reduce the heat, cover it, and let it simmer for about 10 minutes. To thicken the gravy, mix 1 tablespoon of cornstarch with 1 tablespoon of water in a small bowl. Stir this slurry into the broth mixture. Cook for another 2-3 minutes. Your gravy should be thick and rich. Serve the Salisbury steaks hot, covered in the mushroom gravy, and don't forget to garnish with fresh parsley. For the full recipe, check the details above. Enjoy your savory and simple dish! To make the best Salisbury steak, start with the right beef. I suggest using ground beef with about 15-20% fat. This fat keeps the patties juicy and tender. If you choose lean beef, your patties may turn out dry. Next, when mixing the ingredients, use your hands. It’s the best way to blend everything without overworking the meat. Overmixing can lead to tough patties. Just mix until combined, then form them gently. To boost the flavor of your gravy, consider adding herbs and spices. Fresh thyme or rosemary works well. You can also add garlic powder or onion powder for depth. If you want a richer taste, simmer the gravy a bit longer. This helps develop the flavors. Just be careful not to burn it. A few extra minutes can elevate your dish. For side dishes, mashed potatoes are classic and perfect. They soak up the gravy and add creaminess. You could also serve it with steamed green beans or corn for a colorful plate. When it comes to presentation, slice the patties in half and fan them out on the plate. Spoon the gravy over the top and sprinkle fresh parsley for a pop of color. This makes your meal look as good as it tastes! {{image_2}} You can change the meat in Salisbury steak. Ground turkey or chicken works well. They make a lighter dish. These meats keep the flavor while cutting fat. You can also try vegetarian options. Use lentils or black beans as a base. Mix in grains like quinoa for extra texture. These swaps make the dish fit many diets. Want to jazz up your Salisbury steak? Try adding cheese. A bit of cheddar or blue cheese adds richness. You can also spice things up. Add some red pepper flakes for heat. A bit of hot sauce in the gravy gives a nice kick. These small changes make the dish unique. Gravy is key to a great Salisbury steak. Try a creamy mushroom sauce instead of the classic. Blend sautéed mushrooms with cream for a rich taste. You can also use different broths. Chicken or vegetable broth can give a new flavor. Each option changes the dish while keeping it familiar. Enjoy experimenting with these ideas! You can find the full recipe above for a base to start from. To store your leftover Salisbury steak, use an airtight container. This keeps moisture in and prevents odors from mixing. Always let the steak cool down to room temperature before sealing it. Place it in the fridge right away. Your Salisbury steak will last about 3 to 4 days in the fridge. If you want to freeze Salisbury steak, wrap each patty tightly in plastic wrap. Then, place them in a freezer bag. This helps prevent freezer burn. The steak can stay frozen for up to 3 months. When you’re ready to eat it, thaw overnight in the fridge. For reheating, I recommend using the oven. Preheat it to 350°F (175°C). Place the patties in a baking dish with a bit of broth to keep them moist. Cover the dish with foil to lock in the steam. Bake for about 15 to 20 minutes. You can also use the microwave if you’re in a hurry. Place the patties on a microwave-safe plate. Add a splash of broth and cover with a microwave-safe lid. Heat for about 2 to 3 minutes. Be careful to not overheat, as this can dry out the meat. Salisbury steak is a dish made from ground beef. It looks like a hamburger but is served with gravy. The dish dates back to the late 1800s. Dr. James Salisbury, an American physician, created it. He believed that beef was healthy and good for digestion. Over time, Salisbury steak became very popular in American homes. It pairs well with mashed potatoes or rice. This dish is a comfort food for many, bringing warmth and nostalgia. Yes, you can make Salisbury steak in advance. Prepare the patties and cook them. Allow them to cool, then place them in a container. Store them in the fridge for up to three days. When ready to eat, reheat in a skillet over medium heat. Add a splash of beef broth to keep them moist. You can also freeze the cooked patties. They last for up to three months in the freezer. Thaw them overnight in the fridge before reheating. To keep the patties from falling apart, use the right binding agents. Breadcrumbs and eggs work well together. They help hold the meat together during cooking. Mix the ingredients gently, as overmixing can make them tough. Form the patties evenly, about one inch thick. This ensures they cook evenly. Cook them on medium heat, and avoid flipping too often. This helps create a nice crust while keeping the inside juicy. This article covered how to make Salisbury steak from scratch. We discussed all the ingredients, preparation steps, and cooking techniques. You learned how to create a rich mushroom gravy and explored tips for perfect patties. We also covered variations, storage options, and FAQs for your convenience. In closing, making Salisbury steak is simple and rewarding. Enjoy experimenting with flavors and serving it to family. Your cooking will shine!

Savor the comfort of a classic dish that brings warmth to your kitchen: Salisbury steak. This savory and simple recipe combines ground beef, topped with rich mushroom gravy, making it …

Read more

Categories Dinner

Healthy Chocolate Zucchini Bread Irresistibly Delicious

June 19, 2025 by Chef Nate
- Grated zucchini - Whole wheat flour - Unsweetened cocoa powder - Natural sweeteners (honey or maple syrup) - Unsweetened applesauce - Eggs To make Healthy Chocolate Zucchini Bread, you need simple ingredients. Grated zucchini adds moisture and nutrition. Whole wheat flour gives the bread a hearty texture. Unsweetened cocoa powder brings rich chocolate flavor without added sugar. For sweetness, you can use honey or maple syrup. Unsweetened applesauce helps keep the bread moist and adds natural sweetness. Lastly, eggs bind everything together and provide structure. - Dark chocolate chips - Ground cinnamon You can enhance the flavor with optional dark chocolate chips. They give extra chocolatey goodness. Ground cinnamon adds warmth and depth to the taste. If you love chocolate, don’t skip the chips! This recipe is flexible. You can mix in your favorite add-ins. Enjoy making this tasty treat! For the complete recipe, check out the Full Recipe. 1. Preheating the oven: Start by preheating your oven to 350°F (175°C). This step is key to getting the right bake for your bread. 2. Mixing wet ingredients: In a large bowl, mix together 1 cup of grated zucchini, 1/2 cup of honey (or maple syrup), 1/2 cup of unsweetened applesauce, 2 beaten eggs, and 1 teaspoon of vanilla extract. Stir until everything is well combined and smooth. 3. Combining dry ingredients: In a separate bowl, whisk together 1 cup of whole wheat flour, 1/2 cup of unsweetened cocoa powder, 1 teaspoon of baking soda, 1/2 teaspoon of baking powder, 1/4 teaspoon of salt, and 1/4 teaspoon of ground cinnamon if you like a hint of spice. Make sure these ingredients are mixed well. 1. Pouring batter into the pan: Gradually add the dry mix to the wet mix. Stir gently until just combined. Do not overmix; this keeps the bread soft. If you want, fold in 1/2 cup of dark chocolate chips for extra flavor. 2. Baking time and temperature: Pour the batter into a greased 9x5 inch loaf pan. Smooth the top with a spatula. Bake in your preheated oven for 50-60 minutes. Check for doneness by inserting a toothpick in the middle. It should come out clean or with a few moist crumbs. 1. Cooling time in the pan: After baking, take the loaf pan out of the oven. Let it cool for about 10 minutes in the pan. This helps it set up and makes it easier to remove. 2. Transferring to a wire rack: Carefully turn the bread out of the pan onto a wire rack. Let it cool completely before slicing. This allows the flavors to meld and makes for a better texture. For the full recipe, refer to the earlier section. Enjoy your delicious Healthy Chocolate Zucchini Bread! - Avoiding overmixing: Mix your wet and dry ingredients just until combined. Overmixing makes the bread dense and chewy. You want it light and moist. - Testing for doneness: Insert a toothpick into the center. If it comes out clean or with a few moist crumbs, your bread is ready. If it has wet batter, bake for a few more minutes. - Alternative sweeteners: You can use maple syrup or honey in this recipe. Try using agave nectar for a different flavor. Each sweetener gives a unique taste. - Gluten-free options: Substitute whole wheat flour with almond flour or a gluten-free blend. This makes the bread safe for gluten-free diets without losing taste. - Using spices like cinnamon: Adding cinnamon boosts the flavor profile. It pairs well with chocolate and zucchini. Just a pinch can make a big difference. - Adding nuts or seeds: Chopped walnuts or sunflower seeds add crunch and nutrition. They also enhance the texture and make each bite interesting. {{image_2}} You can make this healthy chocolate zucchini bread even more fun. Try adding fruits like mashed bananas. They add sweetness and moisture. You can also mix in nuts for a crunchy bite. Walnuts or pecans work well here. Just chop them up before adding. Want to cut some calories? Use Greek yogurt instead of applesauce. It keeps the bread moist and adds protein. You can also switch to lower-calorie sweeteners. Stevia or monk fruit are great options. They keep the sweetness without extra sugar. Change it up with the seasons. For fall, try pumpkin spice zucchini bread. Just add pumpkin puree and your favorite spices. You can also add festive holiday flavors. Think cinnamon, nutmeg, or even cranberries for a special touch. These variations keep the recipe exciting all year round. To keep healthy chocolate zucchini bread fresh at room temperature, wrap it in plastic wrap. Store it in an airtight container. This helps it stay soft and moist. It is best enjoyed within three days. If you plan to keep it longer, consider freezing it. For long-term storage, you can freeze the zucchini bread. First, let it cool completely. Then, wrap it tightly in plastic wrap and aluminum foil. This prevents freezer burn. You can also slice the bread before freezing, making it easier to grab a piece later. To thaw, place the bread in the fridge overnight or at room temperature for a few hours. To reheat healthy chocolate zucchini bread, use the oven or microwave. If using the oven, preheat it to 350°F (175°C). Place the bread on a baking sheet and heat for about 10 minutes. This keeps the bread moist and warm. In the microwave, heat a slice for 15 to 20 seconds, checking often. Avoid overheating, as it can dry out your delicious treat. Enjoy it warm for the best flavor! Can I use frozen zucchini? Yes, you can use frozen zucchini. Just thaw it first and drain excess water. This helps keep the bread moist without making it soggy. Fresh zucchini is great, but frozen works well too. How do I make this recipe vegan? To make this recipe vegan, replace the eggs with flax eggs. Mix 1 tablespoon of ground flaxseed with 2.5 tablespoons of water. Let it sit for a few minutes until it thickens. You can also use a plant-based sweetener instead of honey. Caloric content per slice Each slice of this healthy chocolate zucchini bread has about 150 calories. This makes it a great option for a snack or dessert. The lower sugar content helps keep the calories in check. Nutritional benefits of ingredients - Zucchini: Provides fiber and vitamins A and C. - Whole wheat flour: Adds whole grains and more fiber. - Cocoa powder: Rich in antioxidants and can boost mood. - Applesauce: Acts as a natural sweetener and adds moisture. - Honey or maple syrup: Natural sweeteners with some vitamins and minerals. Best pairings with drinks I love serving this bread with a warm cup of tea or coffee. The rich chocolate flavor pairs well with the warmth of these drinks. It also tastes great with a glass of milk or almond milk. Ideas for breakfast or snacks This bread is perfect for breakfast or a quick snack. Enjoy it plain or spread with almond butter. You can also add slices of banana on top for extra flavor. Perfect for any time of day! For the full recipe, check out the instructions above. This blog post covers the delicious and healthy zucchini bread recipe. You learned about key ingredients, preparation steps, and baking tips for success. Remember to experiment with flavors, like adding fruits or nuts, to make it your own. Proper storage ensures your bread stays fresh longer, while reheating tips keep it tasty. Use the FAQs to clarify any questions about ingredients or servings. Now, you have all the tools to bake the perfect zucchini bread. Enjoy creating your own delicious version!

Are you ready to enjoy chocolate in a healthy way? My Healthy Chocolate Zucchini Bread is not only tasty but also packed with nutrients! This recipe uses fresh zucchini and …

Read more

Categories Desserts

Brown Butter Strawberry Peach Pie Deliciously Simple

June 19, 2025 by Chef Nate
To make a Brown Butter Strawberry Peach Pie, gather these simple ingredients: - 1 ½ cups all-purpose flour - ½ cup unsalted butter (1 stick), browned - ½ cup granulated sugar - 1 teaspoon salt - 1/4 cup ice water - 2 cups fresh strawberries, hulled and sliced - 2 cups fresh peaches, peeled and sliced - 1 tablespoon lemon juice - ½ cup brown sugar - 1 tablespoon cornstarch - 1 teaspoon vanilla extract - 1 egg (for egg wash) - 1 tablespoon coarse sugar (for topping) Choosing fresh fruit is key for a great pie. Look for strawberries that are bright red and firm. Avoid any that are mushy or have dark spots. For peaches, select ones that feel slightly soft. They should also have a sweet smell. Always wash your fruit before using it. This helps remove any dirt or chemicals. If you have dietary needs, you can modify this pie. For a gluten-free option, use a gluten-free flour blend instead of all-purpose flour. You can also swap the butter for a vegan butter substitute to make it dairy-free. This way, everyone can enjoy this delicious pie! Start by making your pie crust. In a bowl, mix 1 ½ cups of flour, ½ cup of sugar, and 1 teaspoon of salt. Next, add the browned butter. This butter gives the crust a nutty flavor. Stir until it looks like coarse crumbs. Gradually add 1/4 cup of ice water. Mix until the dough forms a ball. Shape it into a disc, wrap it in plastic, and put it in the fridge for at least 30 minutes. Chilling helps the dough stay flaky. While the dough chills, prepare the filling. In a separate bowl, combine 2 cups of sliced strawberries and 2 cups of sliced peaches. Add 1 tablespoon of lemon juice to brighten the flavors. Then, mix in ½ cup of brown sugar, 1 tablespoon of cornstarch, and 1 teaspoon of vanilla extract. This mixture will create a sweet and juicy filling. Let it sit for a bit. This allows the flavors to mix well. Once the dough is chilled, preheat your oven to 425°F (220°C). On a floured surface, roll out the dough to fit your 9-inch pie pan. Place the rolled dough in the pan and trim any extra. Pour the strawberry and peach filling into the crust, spreading it evenly. For a beautiful top, roll out more dough and cut it into strips. Weave these strips over the filling to make a lattice top. Crimp the edges with your fingers or a fork to seal. Brush the top with a beaten egg and sprinkle coarse sugar for a sweet crunch. Bake for 30-35 minutes until the crust is golden and the filling bubbles. Let it cool for an hour before slicing. This helps the filling set nicely. Enjoy your delicious pie! For the complete recipe, refer to the Full Recipe. To make brown butter, start by melting unsalted butter in a pan over medium heat. Keep stirring it. Soon, you'll see it change color. The butter will turn a golden brown and give off a nutty aroma. This step is key to adding depth and richness to your pie. Be careful not to burn it. Once it’s ready, let it cool slightly before using it in your dough. This enhances the taste of the crust and adds a lovely flavor to the filling. A flaky pie crust needs cold ingredients. Start with chilled butter and cold water. When you mix the butter into the flour, do it gently. You want small lumps of butter to remain. These lumps create steam when baking, which leads to flakiness. After mixing, wrap the dough and chill it for at least 30 minutes. This rest time allows the gluten to relax, making it easier to roll out. Preheat your oven to 425°F (220°C). This high heat helps the crust become golden and crisp. Bake the pie for 30-35 minutes. Watch for the crust to turn golden brown and the filling to bubble up. If the edges brown too quickly, cover them with foil. Let the pie cool for about an hour before slicing. This cooling period helps the filling set and makes serving easier. For the best taste, serve warm with vanilla ice cream or whipped cream. For the full recipe, check out the Brown Butter Strawberry Peach Pie. {{image_2}} You can mix up the filling in your Brown Butter Strawberry Peach Pie. While strawberries and peaches shine brightly, other fruits can add a twist. Try using blueberries or raspberries for a new flavor. These berries bring a tartness that balances the sweetness. You can even create a mix. Just keep the same amount of fruit to maintain the pie's structure. Sweetness is key in any pie. You can adjust the sugar based on your taste. If you like it less sweet, cut back on the brown sugar and granulated sugar. Adding a bit more lemon juice can also balance the flavors. Taste the filling before baking. This way, you can find the perfect sweetness for you and your guests. If you want a different texture, try a crumble topping. Instead of weaving a lattice crust, combine flour, brown sugar, oats, and butter to make a crumble. Sprinkle it over the filling before baking. This gives a crunchy contrast to the soft fruit. It also saves time if you’re in a hurry. Just remember, the baking time may vary, so keep an eye on it! For the full recipe, check out the link above! To keep your Brown Butter Strawberry Peach Pie fresh, store it in a cool place. Once the pie is fully cooled, cover it with plastic wrap or aluminum foil. This protects it from drying out and keeps the flavors intact. If you have a pie dish with a lid, that works great too. Always let the pie cool completely before covering it. This will prevent condensation that can make the crust soggy. In the fridge, your pie will last for about 3 to 4 days. Make sure it's well covered to maintain freshness. If you want to keep it longer, you can freeze it. When properly wrapped, the pie can last for up to 3 months in the freezer. Just remember to let it cool completely before freezing. If you plan to freeze it, I recommend slicing the pie first for easy serving later. To reheat your pie, preheat your oven to 350°F (175°C). Place the pie on a baking sheet to catch any drips. Heat it for about 15 to 20 minutes. This warms the filling and makes the crust crispy again. If you want to warm individual slices, you can use the microwave. Heat each slice for about 30 seconds or until warm. Enjoy it with ice cream for a delightful treat! To cut a pie cleanly, use a sharp knife. Dip the knife in hot water before each slice. This helps the knife glide through the crust and filling. Wipe the knife with a cloth after each cut. This keeps the slices neat and tidy. Always start from the center and work your way out. Yes, you can prepare the pie ahead of time! You can make the crust and filling a day before. Just store the crust wrapped in plastic in the fridge. Keep the filling in a sealed container. When you're ready, assemble the pie and bake it. This saves time and lets the flavors blend well. If your pie crust is soggy, try blind baking it. Blind baking means pre-baking the crust before adding the filling. This helps set the crust and keeps it crisp. If the crust is already baked, you can spoon off any excess liquid from the filling. This will help the crust stay crunchy when you serve it. This blog post covered everything you need for a perfect Brown Butter Strawberry Peach Pie. You learned how to choose fresh fruits, make a flavorful filling, and craft an ideal crust. My tips will help you achieve that rich brown butter flavor and flaky texture. You can even explore variations with different fruits or toppings. Remember to store leftovers properly to enjoy your pie later. With these steps, you’ll impress everyone with your pie-making skills. Happy baking, and enjoy every slice!

Get ready to indulge in the tasty goodness of Brown Butter Strawberry Peach Pie. This dessert is easy to make and packed with flavors that burst in every bite. I’ll …

Read more

Categories Desserts

Steak & Queso Rice Flavorful Comfort Food Recipe

June 19, 2025 by Chef Nate
- 1 lb flank steak - 1 cup long-grain white rice - 2 cups beef broth - 1 cup queso blanco cheese, shredded - 1 medium onion, diced - 2 cloves garlic, minced - 1 green bell pepper, diced - 1 teaspoon cumin - 1 teaspoon smoked paprika - 1 tablespoon olive oil - Salt and pepper to taste - Fresh cilantro, for garnish - Lime wedges, for serving Gather these ingredients before you start cooking. The flank steak adds rich flavor to the dish. Long-grain white rice gives a nice texture. Beef broth enhances the taste of the rice. Queso blanco cheese brings creaminess. Don't forget the veggies! Onion, garlic, and green bell pepper add color and taste. Cumin and smoked paprika give depth to your dish. Olive oil helps to sauté the vegetables. Use salt and pepper to adjust the flavor to your liking. Fresh cilantro makes a nice garnish. Lime wedges add a zesty touch when serving. For more details, check the Full Recipe. First, you need to marinate the flank steak. Mix cumin, smoked paprika, salt, and pepper in a bowl. Rub this mix all over the steak. Let it rest for at least 15 minutes. This step boosts the flavors. For cooking, you can use a skillet or grill. Heat olive oil in a large skillet over medium-high heat. Cook the steak for 4-5 minutes on each side for medium-rare. Adjust time for your desired doneness. After cooking, take the steak out and let it rest for 5 minutes. This helps keep it juicy. Slice it thinly against the grain for the best texture. In the same skillet, add diced onion and green bell pepper. Sauté these for 3-4 minutes until they soften. Then add minced garlic and cook for 1 more minute. This step builds a great base flavor. Next, stir in the long-grain white rice. Toast the rice for about 2 minutes to bring out its nutty flavor. Pour in the beef broth and bring it to a boil. Cover the skillet, lower the heat, and let it simmer for 18-20 minutes. The rice will soak up all the broth and become tender. Once the rice is cooked, it's time to add the queso. Stir in the shredded queso blanco cheese. This makes the dish creamy and rich. Mix well until the cheese melts completely. Taste the rice and add salt and pepper as needed. Now, spoon the cheesy rice onto plates. Top with the sliced steak. Garnish with fresh cilantro and serve with lime wedges. This dish is now ready to enjoy! For the full recipe, refer to the earlier section. - Best cooking temperatures: Cook flank steak at medium-high heat. Aim for 130°F for medium-rare. Use a meat thermometer for accuracy. - Resting tips for optimal juiciness: Let your steak rest for 5 minutes after cooking. This helps the juices stay inside the meat. - Optional spices or ingredients: Try adding chili powder or garlic powder for a kick. Fresh herbs like oregano can also add a nice touch. - Pairing suggestions with side dishes: Serve with a fresh salad or roasted vegetables. They balance the rich, cheesy flavors of the dish. - Ensuring the right texture: Add the queso blanco cheese to the warm rice. Stir until it melts smoothly, creating a creamy texture. - Alternatives for queso blanco: You can use cheddar or Monterey Jack cheese for a different flavor. These cheeses melt well and add a nice taste. {{image_2}} For a meatless take on this dish, you can substitute the flank steak with grilled portobello mushrooms or marinated tofu. Both options provide a hearty base and soak up flavors well. When it comes to cheese, you can use a creamy cashew cheese or a rich cheddar for a similar taste. These substitutes allow you to enjoy the cheesy goodness without the meat. If you like heat, consider adding jalapeños or a splash of hot sauce. This gives the dish a lively kick. For more depth, you can mix in chorizo or spicy sausage. Cook the sausage first to get that rich flavor, then add it when you mix in the rice. This makes the dish bold and exciting. You can switch out long-grain white rice for brown rice or quinoa. Each grain has its own cooking time. For brown rice, increase the liquid to 2 ½ cups and cook for about 40-45 minutes. For quinoa, use 1 ½ cups of broth and cook for around 15 minutes. Each option offers unique flavors and textures. To keep your Steak & Queso Rice fresh, use airtight containers. Glass or plastic containers work well. Store it in the fridge for up to three days. This way, you can enjoy it later without losing flavor. When you are ready to eat, the best way to reheat is on the stove. Place the rice in a skillet over low heat. Add a splash of beef broth to keep it moist. Stir gently until it warms through. This method keeps the dish tasty and creamy. If you want to save some for later, freezing is a great option. Place portions in freezer-safe bags. Remove as much air as possible before sealing. Your dish can stay good for up to three months in the freezer. When you are ready to eat, thaw it in the fridge overnight. Reheat it on the stove as mentioned above. This way, you retain all the yummy flavors from your Steak & Queso Rice. To cook flank steak tenderly, start by marinating it. A simple mix of oil, vinegar, and spices helps. Use cumin and smoked paprika for great flavor. Let it marinate for at least 15 minutes. This step adds moisture and taste. When cooking, use high heat. Heat oil in a skillet until hot. Cook the steak for about 4-5 minutes on each side. This keeps it juicy. After cooking, let it rest for 5 minutes. This helps the juices stay in the meat when you slice it. Yes, you can use other cheeses. Cheddar adds a sharp bite. Monterey Jack gives a smooth texture. Cream cheese can make the dish extra creamy. Just make sure to melt it well for a smooth mix in the rice. Several sides work well with Steak & Queso Rice. A fresh salad adds crunch. Guacamole brings a creamy element. You can also serve black beans for protein. Corn on the cob is a fun, sweet option. These sides make the meal feel complete. Yes, you can make this dish ahead. Cook the steak and rice, then store them separately. Keep them in airtight containers. They last for about 3-4 days in the fridge. When ready to eat, just reheat them in a skillet or microwave. Add fresh cheese before serving for that creamy touch. This recipe serves about four people. Each serving has around 500 calories. It includes protein from the steak and cheese. The rice provides carbs for energy. You also get vitamins from the vegetables. This meal is balanced and satisfying. For a more detailed breakdown, check the Full Recipe for exact nutrition facts. This blog post covered a tasty recipe for steak and queso rice. We discussed ingredients like flank steak, rice, and cheese. We walked through cooking the steak and rice, plus how to make it creamy. I shared tips for perfecting the steak and enhancing flavors. You learned about vegetarian and spicy twists, too. Finally, we covered storing and reheating leftovers. I hope you feel ready to cook this dish and enjoy it with your loved ones. Get started and share your delicious results!

Craving a dish that’s both hearty and packed with flavor? Try my Steak & Queso Rice! This recipe combines tender steak, cheesy goodness, and fluffy rice into a comfort food …

Read more

Categories Dinner

Crispy Air Fryer Okra Quick and Easy Recipe

June 19, 2025 by Chef Nate
To make crispy air fryer okra, gather these ingredients: - 1 pound fresh okra, trimmed and halved - 1 cup cornmeal - 1/2 cup all-purpose flour - 1 teaspoon garlic powder - 1 teaspoon onion powder - 1 teaspoon paprika - 1/2 teaspoon cayenne pepper (adjust to taste) - 1 teaspoon salt - 1/2 teaspoon black pepper - 2 large eggs - 2 tablespoons milk (or a dairy-free substitute) - Cooking spray These ingredients will help you create a tasty snack or side dish. You can customize your okra with different spices. Try these options: - Cajun seasoning for a kick - Italian herbs for a fresh twist - Lemon zest for brightness - Parmesan cheese for a cheesy flavor Feel free to mix and match to find your favorite blend! If you have dietary needs, here are some swaps: - Use gluten-free flour instead of all-purpose flour. - Replace eggs with a flaxseed mixture (1 tablespoon flaxseed meal + 2.5 tablespoons water). - Choose almond milk or oat milk for a dairy-free option. These substitutions keep the dish delicious while meeting your needs! First, set your air fryer to 400°F (200°C). Let it heat for about 5 minutes. Preheating helps the okra cook evenly. It also makes them crispier. A hot air fryer is key for great results. In a large bowl, mix the following ingredients: - 1 cup cornmeal - 1/2 cup all-purpose flour - 1 teaspoon garlic powder - 1 teaspoon onion powder - 1 teaspoon paprika - 1/2 teaspoon cayenne pepper - 1 teaspoon salt - 1/2 teaspoon black pepper Stir all the dry ingredients together until they blend well. This mix will give the okra a flavorful crust. In another bowl, whisk together: - 2 large eggs - 2 tablespoons milk Dip each okra piece into the egg mix. Let the extra drip off. Then, coat it in the breading mixture. Make sure each piece is fully covered. Now, lightly spray the air fryer basket with cooking spray. This step helps the okra not stick. Place the coated okra in a single layer. If your air fryer is small, you may need to work in batches. Finally, spray the tops of the okra with a bit more cooking spray. This helps them get extra crunchy. Follow these steps for tasty, crispy air fryer okra. You can find the detailed cooking process in the Full Recipe. To get that crunchy outside, use a solid breading mix. Combine cornmeal and flour for the best crunch. The eggs help the breading stick well to the okra. Ensure each piece is fully coated in the mix. This gives the okra a nice, crispy layer. Set your air fryer to 400°F (200°C). Cook the okra for 10 to 12 minutes. Shake the basket halfway through to ensure even cooking. If you see golden brown okra, it’s ready! Keep an eye on it, as every air fryer cooks a bit differently. Sogginess happens if the okra is wet. Make sure to dry the okra before breading. Another tip is to use cooking spray lightly. A thin layer helps to crisp the breading. Avoid overcrowding the basket. Cook in batches if needed for the best results. For the full recipe, check the Crispy Air Fryer Okra Delight section. {{image_2}} You can change the flavor of your crispy air fryer okra with fun seasoning blends. Try adding Italian herbs like oregano and basil. You can also use taco seasoning for a zesty twist. If you love a smoky flavor, add smoked paprika. Mix and match spices to find your favorite blend. Why stop at okra? You can add other veggies to the mix. Slice zucchini, bell peppers, or even carrots. They will cook well in the air fryer. Just make sure to adjust the cooking time. Cut your veggies into similar sizes for even cooking. This makes a colorful and tasty snack or side dish. Want more heat? Add chopped jalapeños or red pepper flakes to your breading mixture. You can also serve your okra with spicy dipping sauces. Hot sauce or a spicy ranch dip works great. These additions will give your dish a fiery kick. Enjoy experimenting to find the perfect level of spice! After you enjoy your crispy air fryer okra, store leftovers in an airtight container. This keeps them fresh and tasty. You can keep them in the fridge for about 3 days. Make sure to let them cool before sealing the container. To reheat your okra, use the air fryer again. Set the air fryer to 350°F (175°C). Heat the okra for about 5 minutes. This helps restore their crunch. Avoid using the microwave, as it makes them soggy. You can freeze okra for later use. First, let the cooked okra cool completely. Then, spread them on a baking sheet in a single layer. Freeze for 1-2 hours until firm. Transfer the okra to a freezer bag and remove as much air as possible. It stays good for up to 3 months. When ready to eat, reheat directly from frozen in your air fryer. Enjoy your crispy treat anytime! You can make Air Fryer Okra without oil by using a dry breading method. Coat the okra pieces in your breading mix, which consists of cornmeal and flour. Instead of using oil, ensure you shake off any extra moisture from the okra. This helps the breading stick well. You can still achieve a crispy texture by cooking at the right temperature and time. Yes, you can use frozen okra. Just remember to thaw it first. Pat it dry with a paper towel to remove excess moisture. This step is key to getting that crunch you want. The cooking time may vary slightly, so keep an eye on the okra as it cooks. Okra is packed with nutrients and offers many health benefits. It is low in calories and high in fiber, which aids digestion. Okra also contains vitamins like C and K, which support your immune system and bone health. Additionally, it has antioxidants that help fight inflammation. Enjoying okra can be a tasty way to boost your health! Air fryer okra is easy and fun to make. We covered the best ingredients, cooking steps, and tips for a crispy texture. You can even change up the recipe with different spices or veggies. Proper storage and reheating help keep your okra tasting fresh. Remember, this dish is not just good; it also gives health benefits. I hope you enjoy making and eating this delicious snack. Keep experimenting to find your perfect flavor!

Looking for a tasty, healthy snack? You’ve got to try crispy air fryer okra! This easy recipe transforms fresh okra into a delightful dish that’s both crunchy and full of …

Read more

Categories Appetizers

Cake Mix Peach Cobbler Easy and Delicious Dessert

June 19, 2025 by Chef Nate
To make a delicious cake mix peach cobbler, you'll need some simple ingredients. Here’s what to gather: - 2 cans (15 oz each) sliced peaches in syrup or 4 cups fresh peaches, sliced - 1 cup granulated sugar - 1 tsp ground cinnamon - 1 box (15.25 oz) yellow cake mix - 1/2 cup unsalted butter, melted - 1/2 cup water - 1 tsp vanilla extract - Ice cream or whipped cream (for serving, optional) These ingredients create a sweet and fruity base with a soft cake topping. If you use fresh peaches, adjust the sugar based on how sweet they are. The yellow cake mix gives the cobbler a light and fluffy texture. Next, let’s talk about why this combo works so well. The peaches bring a juicy sweetness. The sugar enhances that flavor, while cinnamon adds warmth. The cake mix and butter create that comforting, cake-like topping. This recipe is easy and quick. It requires just a few steps and about 15 minutes of prep time. You can find the full recipe later, but with these ingredients, you are on your way to a delightful dessert that everyone will love! - Preheat the oven to 350°F (175°C). - Prepare a 9x13-inch baking dish by greasing it lightly. - In a large bowl, combine two cans of sliced peaches, one cup of sugar, and one teaspoon of cinnamon. Mix well. Spread this peach mixture evenly in the prepared baking dish. - In another bowl, take one box of yellow cake mix. Add half a cup of melted butter, half a cup of water, and one teaspoon of vanilla extract. Stir until just combined. Avoid overmixing. - Pour the cake batter over the peaches. Spread it gently to cover the peaches well. - Bake in the preheated oven for 35-40 minutes. Check for doneness by inserting a toothpick into the center. It should come out clean when done. This cake mix peach cobbler is easy to make and tastes amazing. Enjoy the warm, sweet flavors! For the full recipe, check the earlier section. - Choosing the right peaches: Select ripe peaches that are firm but slightly soft. Look for a sweet aroma. Fresh peaches are ideal, but canned peaches work well too. If using canned, pick those in light syrup for better flavor. - Adjusting sweetness based on peach ripeness: Taste your peaches first. If they are very sweet, cut down on the sugar. If they are less sweet, you may need to add a bit more sugar to balance the flavors. - Overmixing the batter: Mix just until combined. Overmixing can make the cake tough. Remember, lumps are okay! This ensures a light and fluffy texture. - Not greasing the baking dish properly: Always grease your dish well. This helps prevent sticking. Use butter or cooking spray for best results. - Adding spices like nutmeg or cloves: A pinch of nutmeg or cloves can add warmth. Start with a small amount and adjust to taste. These spices complement the peaches nicely. - Experimenting with flavored extracts: Try adding almond or lemon extract. This can bring a new twist to your cobbler. Just a teaspoon can elevate the flavor profile. For the complete recipe, check out the Full Recipe. {{image_2}} You can switch out peaches for other fruits. Berries like blueberries or strawberries work well. Apples add a nice crunch and flavor. You can also mix different fruits for a fun twist. A combination of peaches and raspberries makes a vibrant cobbler. Just keep the sugar amount right based on the fruit’s sweetness. The yellow cake mix is great, but you have options. Angel food cake mix gives a light texture. Spice cake mix adds warm flavors like cinnamon and nutmeg. If you need gluten-free options, many brands offer gluten-free cake mixes. These will keep your cobbler delicious without gluten. Serving your cobbler can be fun. Try drizzling caramel sauce on top for a sweet finish. Whipped cream adds a creamy touch that many enjoy. You can even turn this dessert into breakfast. Serve it warm with yogurt or fresh fruit on the side. It makes a tasty morning treat! For the full recipe, check the link. To store your peach cobbler, let it cool completely first. Place it in an airtight container. This keeps it fresh and prevents it from drying out. If you don’t have a container, cover it tightly with plastic wrap. In the fridge, peach cobbler lasts about 3 to 4 days. You can enjoy it warm or cold, so it's easy to grab a slice anytime! For reheating peach cobbler, the best method is to use the oven. Preheat your oven to 350°F (175°C). Place the cobbler in a baking dish and cover it with foil. Heat it for about 15 to 20 minutes. This helps keep it moist. If you're in a hurry, you can use the microwave. Place a slice on a microwave-safe plate and cover it with a damp paper towel. Heat it for 30 seconds to 1 minute. This way, it warms up without getting too dry. Yes, you can freeze peach cobbler! First, let it cool completely. Cut it into slices, then wrap each piece in plastic wrap. Place the wrapped slices in a freezer-safe bag. To thaw, move it to the fridge overnight. For best results, reheat it in the oven after thawing. This ensures you keep that lovely texture from the Full Recipe. Yes, you can use frozen peaches! Just make sure to thaw them first. Drain any excess liquid before adding them to the dish. This helps keep the cobbler from getting too watery. You may want to add a bit more sugar if the peaches are not very sweet. Your peach cobbler is ready when the top is golden brown. A toothpick inserted into the center should come out clean. The edges should bubble slightly, and the peaches will be soft. This usually takes about 35-40 minutes in the oven. You can prepare the peach cobbler in advance! Mix the peaches and sugar, and store them in the fridge for up to a day. Keep the cake mix batter separate until you are ready to bake. Just combine it right before baking for the best results. Serve your peach cobbler warm for the best taste. Top it with vanilla ice cream or whipped cream for a sweet finish. You can also add a sprinkle of cinnamon or a drizzle of caramel for extra flavor. A soggy cobbler often comes from too much liquid. Ensure you drain canned peaches well. If using frozen peaches, thaw and drain them before adding. Overmixing the batter can also make it dense and heavy, so mix just until combined. Peach cobbler is a simple and delicious dessert. We covered the key ingredients, like peaches and cake mix. I shared step-by-step instructions for making it perfectly. You learned tips to avoid mistakes and ideas for variations. Remember, the right peaches make a big difference. With these insights, you can bake a tasty cobbler your loved ones will enjoy. Now grab your ingredients and start baking!

Looking for a sweet and simple dessert? This Cake Mix Peach Cobbler is your answer! It combines juicy peaches and fluffy cake mix for a treat everyone will love. Don’t …

Read more

Categories Desserts

Easy Peach Cobbler Tasty and Quick Dessert Recipe

June 19, 2025 by Chef Nate
- 4 cups fresh peaches, sliced (or 2 cans of peaches, drained) - 1 cup granulated sugar (divided) - 1 teaspoon vanilla extract - 1 tablespoon lemon juice - 2 teaspoons ground cinnamon - 1 cup all-purpose flour - 1 teaspoon baking powder - ½ teaspoon salt - 1 cup milk - ½ cup butter, melted To make a great peach cobbler, you need fresh or canned peaches. Using fresh peaches gives a lovely taste. If you choose canned, drain them well. You also need granulated sugar. This sweetens the fruit and the batter. Ground cinnamon adds warmth and flavor. You will also use all-purpose flour. This forms the base of your batter. Baking powder helps it rise. Salt is key for flavor balance. Milk and melted butter create a rich, moist texture. - Vanilla extract - Lemon juice - Serving suggestions (e.g., vanilla ice cream) While you can make the cobbler without them, a teaspoon of vanilla extract boosts the flavor. A tablespoon of lemon juice adds brightness to the peach filling. For serving, a scoop of vanilla ice cream works wonders. The cold creaminess pairs perfectly with the warm cobbler. For the full recipe, check out the details above. 1. Preheat your oven to 350°F (175°C). This helps the cobbler cook evenly. 2. If you use fresh peaches, peel and slice them. Place the slices into a bowl. 3. Add ½ cup of sugar, vanilla extract, lemon juice, and 1 teaspoon of cinnamon to the peaches. Toss them together. Let them sit for about 10 minutes to release their juices. 4. In another bowl, mix the flour, remaining sugar (½ cup), baking powder, salt, and the last teaspoon of cinnamon. This is your dry mix. 5. Gradually add the milk and melted butter into the dry mix. Stir it gently until just combined. The batter should be a bit lumpy. Do not over mix. 6. Pour the batter evenly into a greased 9x13 inch baking dish. 7. Spoon the peach mixture evenly over the batter. Let the juices spread but do not stir. 8. Bake in the preheated oven for 45-50 minutes. The top should look golden brown and a toothpick should come out clean from the batter. Now, you have a warm and tasty peach cobbler ready to enjoy! For a full recipe, check the earlier sections. To get that golden brown top, bake your cobbler until it looks like sunshine. This usually takes about 45 to 50 minutes. Keep an eye on it. Every oven is different. You want it to be firm and not too jiggly. If it’s browning too fast, cover it lightly with foil. This helps cook the inside without burning the top. Mixing the batter is simple, but there are a few tricks. Start with your dry ingredients in one bowl. Then whisk them well. This includes flour, sugar, baking powder, salt, and cinnamon. In another bowl, combine the milk and melted butter. Pour the wet mix into the dry mix. Stir gently until just combined. You want it to be a bit lumpy. Over-mixing makes it tough, and nobody likes a tough cobbler! Serve your Easy Peach Cobbler warm for the best taste. It feels cozy on a chilly night. It’s great to let it cool for about 10 minutes before digging in. This helps the juices set a little. Top it off with a scoop of vanilla ice cream. The cold cream melts slightly on the warm cobbler, creating a delightful mix. You can also use whipped cream for a lighter touch. Drizzle some of the peach juice on top for added sweetness. This gives your dessert that extra wow factor. For the full recipe, check out the [Full Recipe]. {{image_2}} You can easily adjust this recipe for different diets. For a gluten-free option, swap all-purpose flour with a gluten-free blend. Many brands create blends that work well in most baked goods. You can also use almond flour, but it may alter the texture a bit. If you want a low-sugar version, use a sugar substitute like stevia or monk fruit. These sweeteners can replace granulated sugar with little change in taste. Just follow the package instructions for the right amounts. To make your peach cobbler even more exciting, try adding other fruits. Berries, like blueberries or raspberries, can mix well with peaches. Apples also add a nice crunch and sweetness. For spice lovers, consider adding nutmeg or allspice to the filling. These spices add warmth and depth to the flavor. Try one or mix a few for a unique twist. Feel free to get creative with your ingredients! Check the Full Recipe for all the details. To keep your peach cobbler fresh, start by letting it cool completely. Once cooled, cover it tightly with plastic wrap or aluminum foil. You can store it in the fridge for up to four days. If you want to save it for longer, freezing is a great option. Just make sure to wrap it well. You can use a freezer-safe container or a heavy-duty freezer bag. It will last for about three months in the freezer. When you are ready to enjoy your leftover peach cobbler, the best way to reheat it is in the oven. Preheat your oven to 350°F (175°C). Place the cobbler in an oven-safe dish and cover it with foil. Heat it for about 20 minutes or until it’s warm throughout. This method helps keep the topping nice and crisp. You can also use the microwave for quick heating. Just heat it for 30 seconds at a time until warm. However, the topping may get soft in the microwave. Easy Peach Cobbler lasts about 2 days at room temperature. You can keep it in the fridge for up to 5 days. Storing it in the fridge helps it stay fresh longer. Just cover it well to avoid drying out. Yes, you can use frozen peaches! They work well in this recipe. Just thaw them first and drain any extra liquid. This helps keep your cobbler from getting too soggy. Fresh peaches are great, but frozen ones save time and are still tasty. To make a vegan peach cobbler, swap the milk with almond or oat milk. Use coconut oil instead of butter. For the egg, you can use a flaxseed meal mixed with water. This keeps the texture nice and moist. Enjoy your vegan peach cobbler just as much as the classic version! Check the Full Recipe for more details. You learned how to make an easy peach cobbler with fresh or canned peaches. I shared simple steps for preparation and baking. You also gained tips for the perfect golden top and serving ideas. Remember, you can customize it with different fruits or dietary swaps. With these insights, you can enjoy a delicious dessert anytime. Now, get baking and share this delightful treat with loved ones!

If you’re craving a sweet, simple dessert, this Easy Peach Cobbler is just for you! With fresh or canned peaches, a few pantry staples, and minimal effort, you can whip …

Read more

Categories Desserts
Older posts
Newer posts
← Previous Page1 … Page16 Page17 Page18 … Page57 Next →

GRILLED FLAVORS

where delicious ideas come to life, from stovetop to backyard. Warm, simple, and always satisfying. 🍽️✨

PAGES

Home About Contact Privacy Policy Terms & Conditions Cookie Policy GDPR Policy Copyright Policy Disclaimer

CATEGORIES

Appetizers Desserts Salads Breakfast Dinner

Contact

  • Pinterest
  • Mail
Copyright © 2025 Grilled Flavors. All rights reserved.