Healthy Bento Lunch Easy and Nutritious Guide
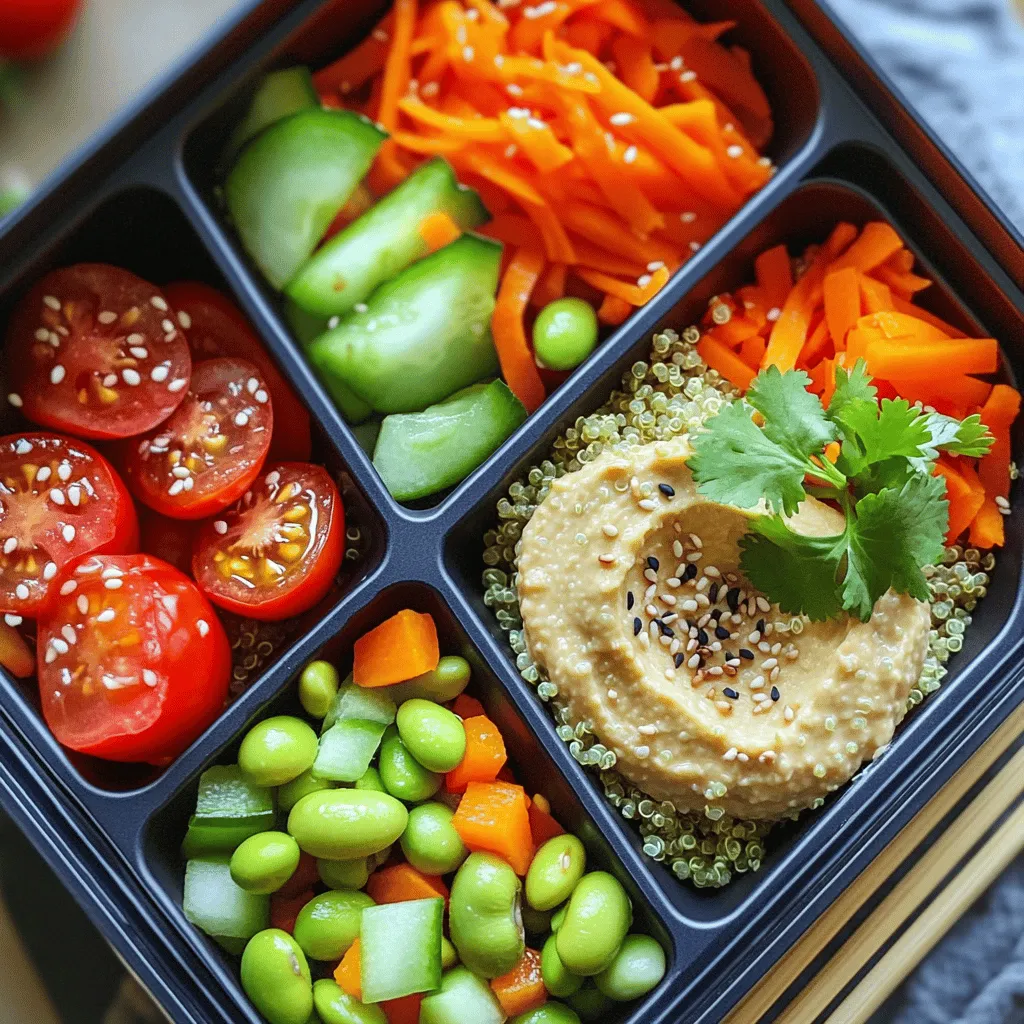
Are you tired of the same old lunch routine? It’s time to revolutionize your meals with a healthy bento lunch! This guide not only helps you create tasty and colorful …
Are you tired of the same old lunch routine? It’s time to revolutionize your meals with a healthy bento lunch! This guide not only helps you create tasty and colorful …
![To make soft blueberry cookies, you will need a few simple ingredients. Here’s the list you will need: - 1 cup fresh blueberries - 1 ½ cups all-purpose flour - ½ teaspoon baking soda - ½ teaspoon baking powder - ¼ teaspoon salt - ½ cup unsalted butter, softened - ½ cup granulated sugar - ½ cup packed brown sugar - 1 large egg - 1 teaspoon vanilla extract - ½ teaspoon almond extract (optional for an extra layer of flavor) - ½ cup powdered sugar (for dusting, optional) Each ingredient plays an important role. The fresh blueberries add sweetness and moisture. The flour gives structure to your cookies, while the baking soda and baking powder help them rise. Butter adds richness and flavor, helping to keep the cookies soft. Both sugars sweeten the cookies and create a lovely texture. The egg binds everything together. The vanilla extract gives a warm, classic flavor. If you want to try something different, almond extract can add a nice twist. Lastly, you can dust with powdered sugar for a sweet finish. For the full recipe, check out the detailed instructions to create these delightful cookies! 1. Preheat your oven to 350°F (175°C). This helps the cookies bake evenly. 2. Line two baking sheets with parchment paper. This keeps the cookies from sticking. 3. In a medium bowl, mix 1 ½ cups of all-purpose flour, ½ teaspoon baking soda, ½ teaspoon baking powder, and ¼ teaspoon salt. Set this bowl aside. 4. In a large mixing bowl, cream together ½ cup of softened unsalted butter, ½ cup of granulated sugar, and ½ cup of packed brown sugar. Mix until it looks light and fluffy, about 2-3 minutes. 1. Add 1 large egg, 1 teaspoon vanilla extract, and ½ teaspoon almond extract (if you want) to the butter mixture. Mix until everything is well blended. 2. Gradually stir in the dry mixture from the other bowl. Be gentle and don’t overmix; you want a soft dough. 3. Carefully fold in the 1 cup of fresh blueberries. Make sure they are spread out in the dough. 1. Use a cookie scoop or a tablespoon to drop rounded balls of dough onto the prepared baking sheets. Leave about 2 inches between each ball. 2. Bake in your preheated oven for 10-12 minutes. The edges should be lightly golden, and the tops will look set. 3. Once baked, take the sheets out and let the cookies cool for 5 minutes. Then, move them to wire racks to cool completely. 4. If you like, dust the cookies with powdered sugar before serving. This adds a nice touch to your delightful treat. For the full recipe, check out the recipe card! To get the best soft blueberry cookies, avoid overmixing. When you mix too much, the cookies can become tough. Mix just until you see no dry flour. Temperature matters too. Use room temperature butter and egg. This helps the butter cream smoothly and makes a nice dough. Cold ingredients can lead to uneven mixing. For a great taste, I suggest using vanilla extract. It pairs well with blueberries. You can also try almond extract for a unique twist. Just a little gives a nice touch! You can use different sugars for flavor. Brown sugar adds moisture and a hint of caramel. Granulated sugar keeps the cookies light and fluffy. Mixing them gives a nice balance. Presentation is key for soft blueberry cookies. Serve them on a bright platter. Adding extra blueberries on top makes a lovely touch. You can also drizzle blueberry sauce for a sweet finish. Dusting with powdered sugar adds a final elegant look. Enjoy your delightful treat! {{image_2}} You can make soft blueberry cookies even more fun! Try adding citrus flavors. A splash of lemon juice or zest can brighten the taste. The tartness of the citrus pairs nicely with the sweet blueberries. You can also mix in white chocolate chips or nuts. White chocolate adds creaminess, while nuts give a nice crunch. Choose your favorite type, like walnuts or pecans, for added texture. If you need gluten-free options, use a 1:1 gluten-free flour blend. This swap keeps the cookies soft and delicious. Check the label to ensure it contains xanthan gum for the best results. For vegan substitutes, replace the egg with a flax egg. Mix 1 tablespoon of ground flaxseed with 2.5 tablespoons of water. Let it sit for a few minutes until it thickens. Use a dairy-free butter for a vegan version of these cookies. You can switch up the fruits based on the season. In summer, add peaches or raspberries. In autumn, consider adding chopped apples or even pumpkin puree. Each fruit brings a unique flavor and texture. For holiday-themed cookies, add spices like cinnamon or nutmeg. You can even decorate them with festive icing. This makes your cookies perfect for any gathering. For the complete recipe, check the [Full Recipe]. You can store soft blueberry cookies at room temperature or in the fridge. If you keep them at room temperature, use an airtight container. This keeps them fresh and soft. If you prefer, you can put them in the fridge. This can help the cookies last longer. To freeze cookies, place them in a single layer on a baking sheet. Freeze them for about an hour. Once they are firm, move them to a freezer-safe bag. Make sure to squeeze out all the air. When it’s time to enjoy, just take them out. Let them thaw at room temperature. You can also reheat them in the oven at 350°F for a few minutes. Soft blueberry cookies stay fresh for about a week at room temperature. If you store them in the fridge, they can last up to two weeks. When frozen, they can keep their taste for up to three months. Enjoy your cookies while they are fresh for the best flavor! For the full recipe, refer to the previous section. How do you make soft blueberry cookies fluffy? To make your soft blueberry cookies fluffy, use room-temperature butter. Cream it well with the sugars until light and airy. This adds air to the dough. Also, avoid overmixing once you add the dry ingredients. Too much mixing can make the cookies dense. Can I use frozen blueberries instead of fresh? Yes, you can use frozen blueberries! Just add them directly to the dough without thawing. This keeps the cookies moist. However, be aware that frozen blueberries can bleed color into the dough, making it look different. What can I substitute for brown sugar in this recipe? If you need a substitute for brown sugar, try using granulated sugar with a little bit of molasses. Mix 1 cup of granulated sugar with 1 tablespoon of molasses to get a similar flavor and texture. Why are my cookies spreading too much? Cookies can spread too much if the butter is too warm. Ensure your butter is softened but not melted. Also, if you don’t chill the dough before baking, that can cause spreading. A quick chill for 30 minutes can help. How do I know when the cookies are done baking? You will know the cookies are done when the edges turn lightly golden. The tops should look set and not shiny. If you gently touch a cookie, it should feel soft but not doughy. This blog post detailed how to make soft blueberry cookies from scratch. We covered key ingredients and preparation steps. You now know tips to perfect texture, flavor, and presentation. Plus, I shared variations to suit different diets and seasons. In closing, these cookies are fun to make and delicious to eat. You can impress friends and family with your baking skills. Happy baking!](https://grilledflavors.com/wp-content/uploads/2025/07/12b0e2f7-c1be-499a-b5ab-bb0b9045e706.webp)
Are you ready to indulge in a sweet treat that’s simple and delicious? Let’s dive into making soft blueberry cookies! These cookies are not only easy to whip up, but …
![- Cream cheese and pumpkin balance: The base of this recipe is cream cheese and canned pumpkin puree. The cream cheese gives a rich, smooth texture. The pumpkin adds flavor and moisture. Together, they create a lovely balance. - Spices and their contributions: We use ground cinnamon, nutmeg, and ginger in this recipe. Cinnamon brings warmth and sweetness. Nutmeg adds a hint of earthiness. Ginger gives a spicy kick. These spices make the flavor pop. - Optional ingredients for texture and flavor: You can add chopped pecans for a nice crunch. These nuts also add a nutty flavor. If you want to coat the balls, you can use white or dark chocolate chips. This adds sweetness and a lovely finish to each bite. For the full recipe, check out the details above. Let's dive into how to make these no-bake pumpkin cheesecake balls. This recipe is simple and fun! Mixing the base ingredients Start by gathering your ingredients. You'll need cream cheese and canned pumpkin. In a large mixing bowl, add 1 cup of softened cream cheese and 1 cup of canned pumpkin puree. Use a hand mixer on medium speed to blend them. Mix until the mixture is smooth and creamy. Next, add 1/2 cup of powdered sugar, 1 teaspoon of vanilla extract, 1 teaspoon of ground cinnamon, 1/2 teaspoon of ground nutmeg, and 1/4 teaspoon of ground ginger. Continue mixing until everything is fluffy and well combined. Forming the pumpkin cheesecake balls Now, it’s time to make the balls! Gradually mix in 1 cup of graham cracker crumbs. Stir until the mixture is thick enough to form into balls. If you like, you can fold in 1/3 cup of chopped pecans for extra crunch. Use your hands to scoop out about a tablespoon of the mixture and roll it into a ball. Place each ball onto a baking sheet lined with parchment paper. Do this for all the mixture. Coating process with chocolate Once all your balls are formed, pop the baking sheet in the freezer for about 30 minutes. This helps them firm up nicely. Meanwhile, melt 1/2 cup of white or dark chocolate chips in a microwave-safe bowl. Heat in 30-second intervals, stirring in between until it’s smooth. After chilling, take the pumpkin cheesecake balls from the freezer. Dip each one into the melted chocolate, letting the excess drip off. Place them back on the baking sheet. If you want, sprinkle some extra graham cracker crumbs on top before the chocolate hardens. Finally, return the balls to the fridge for at least 15 minutes to let the chocolate set completely. For the complete recipe, check out the [Full Recipe]. Enjoy the delightful taste of fall in every bite! To make great no-bake pumpkin cheesecake balls, start with softened cream cheese. Softened cream cheese blends easier and gives a creamy texture. If it's cold, it will be lumpy and hard to mix. Next, chilling time is key for a good consistency. Once you form the balls, chill them in the freezer for 30 minutes. This helps them firm up, making them easier to coat in chocolate. The cold helps maintain their shape, so they won't fall apart when you dip them. For a fun presentation, arrange the cheesecake balls on a nice platter. Drizzle extra melted chocolate over the top. You can also sprinkle some cinnamon on them for a festive touch. Pair these delicious bites with a cup of warm cider or coffee. The spice flavors from the cheesecake balls and these drinks complement each other well. You can find the full recipe for more details on making these treats. {{image_2}} You can change the taste of your no-bake pumpkin cheesecake balls by adding different spices. Try cardamom for a warmer flavor. You can also use allspice for a more intense spice mix. If you love vanilla, a few drops of vanilla extract can enhance the sweetness. You might want to change the nuts as well. Chopped walnuts or almonds can add a nice crunch. If you prefer no nuts at all, just skip them. The base flavor still shines without them. For those who need gluten-free options, use gluten-free graham cracker crumbs. They work just as well and keep the taste intact. You can also make these balls vegan. Replace cream cheese with a vegan cream cheese. Use maple syrup instead of powdered sugar for a natural sweetener. These swaps let everyone enjoy this tasty treat. For the coating, use dairy-free chocolate chips instead of regular chocolate. This keeps the recipe friendly for all diets. You can find these options in most grocery stores now. To keep your no-bake pumpkin cheesecake balls fresh, store them in the fridge. Use an airtight container to prevent them from drying out. You can also freeze them for longer storage. Just place them in a single layer on a baking sheet. Once frozen, transfer them to a freezer bag. This method helps maintain their creamy texture and rich flavor. These delightful bites stay fresh for up to five days in the fridge. If frozen, they can last up to three months. Always check for signs of spoilage. If you notice any off smell or a change in texture, it’s best to toss them. Keeping an eye on their appearance ensures you enjoy your treats at their best! Can I make these ahead of time? Yes, you can make these pumpkin cheesecake balls ahead of time. They taste great after chilling in the fridge for a day. Just store them in an airtight container. How to adjust sweetness levels? To adjust sweetness, you can add more or less powdered sugar. Start with half a cup and taste as you mix. You can always add more if needed. What can I use instead of chocolate for coating? If you don’t want to use chocolate, try using yogurt or a glaze made from maple syrup. They both add a nice flavor without chocolate. Can I use fresh pumpkin instead of canned? Yes, you can use fresh pumpkin. Just cook and puree it until smooth. Make sure it is thick to avoid a watery mix. Are there any common mistakes to avoid when making these? One common mistake is not softening the cream cheese enough. Soft cream cheese mixes well. Also, avoid overmixing the batter, as it can make the balls too soft. For the full recipe, check the section above to gather all the details! This post covered how to make delicious pumpkin cheesecake balls. We detailed the key ingredients, mixing steps, and coating techniques. I shared tips on texture and serving, plus fun flavor variations and dietary swaps. Don’t forget best practices for storage and how to identify spoilage. Making these treats can be fun and rewarding. Enjoy sharing them with friends and family!](https://grilledflavors.com/wp-content/uploads/2025/07/c951cbdd-d9e8-4d3b-bc45-384edb7690cd.webp)
Looking for a tasty treat that’s simple to make? No-Bake Pumpkin Cheesecake Balls are here to save the day! These creamy bites blend the flavors of pumpkin, spices, and sweet …
In a rush? I get it! Busy days leave little time for meals. But you can enjoy a tasty lunch in just 10 minutes. In this post, I’ll share quick …
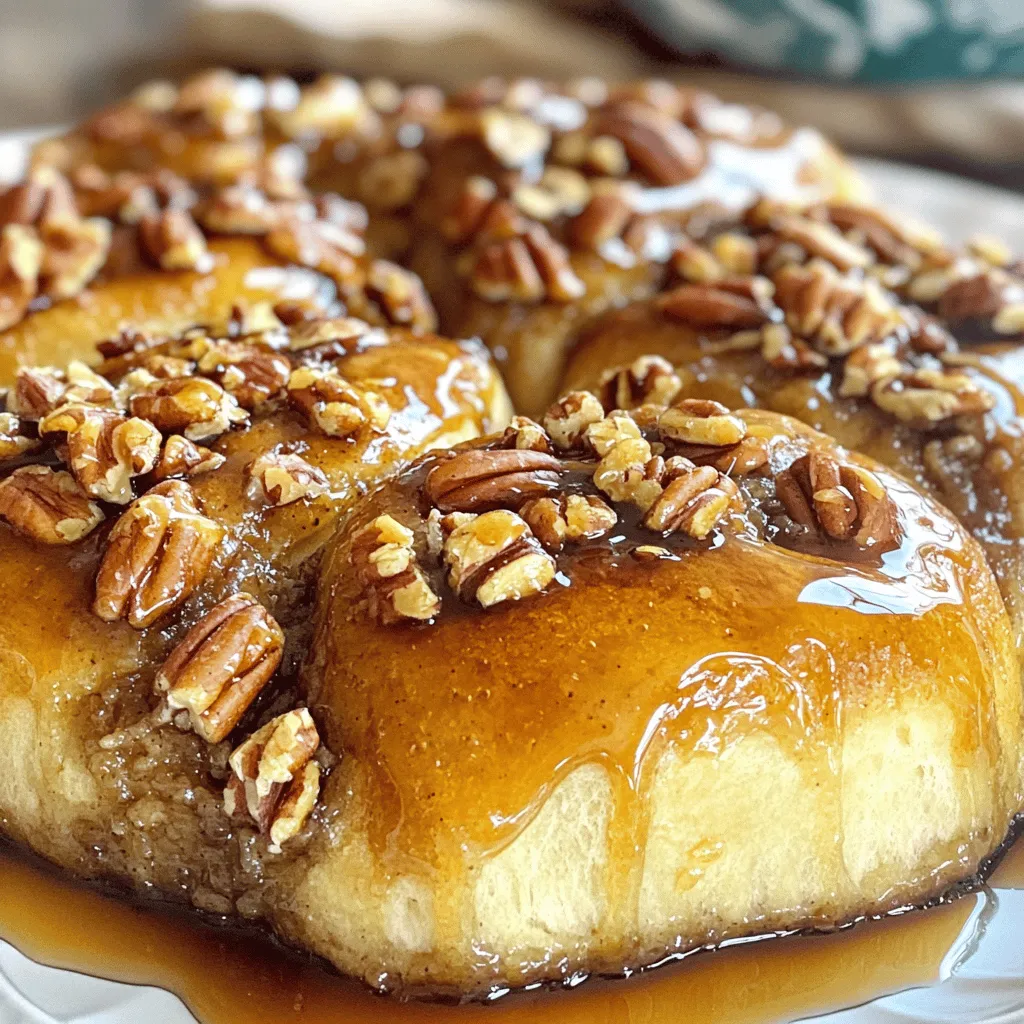
If you’re craving something warm, sweet, and nutty, you’ve found the right place! In this Irresistible Recipe Guide for Big Fat Pecan Sticky Buns, I’ll share my secrets for crafting …

Are you ready to boost your snack game with a tasty treat? Today, I’ll show you how to make Peanut Butter Chocolate Energy Bites. These little power-packed balls are easy …
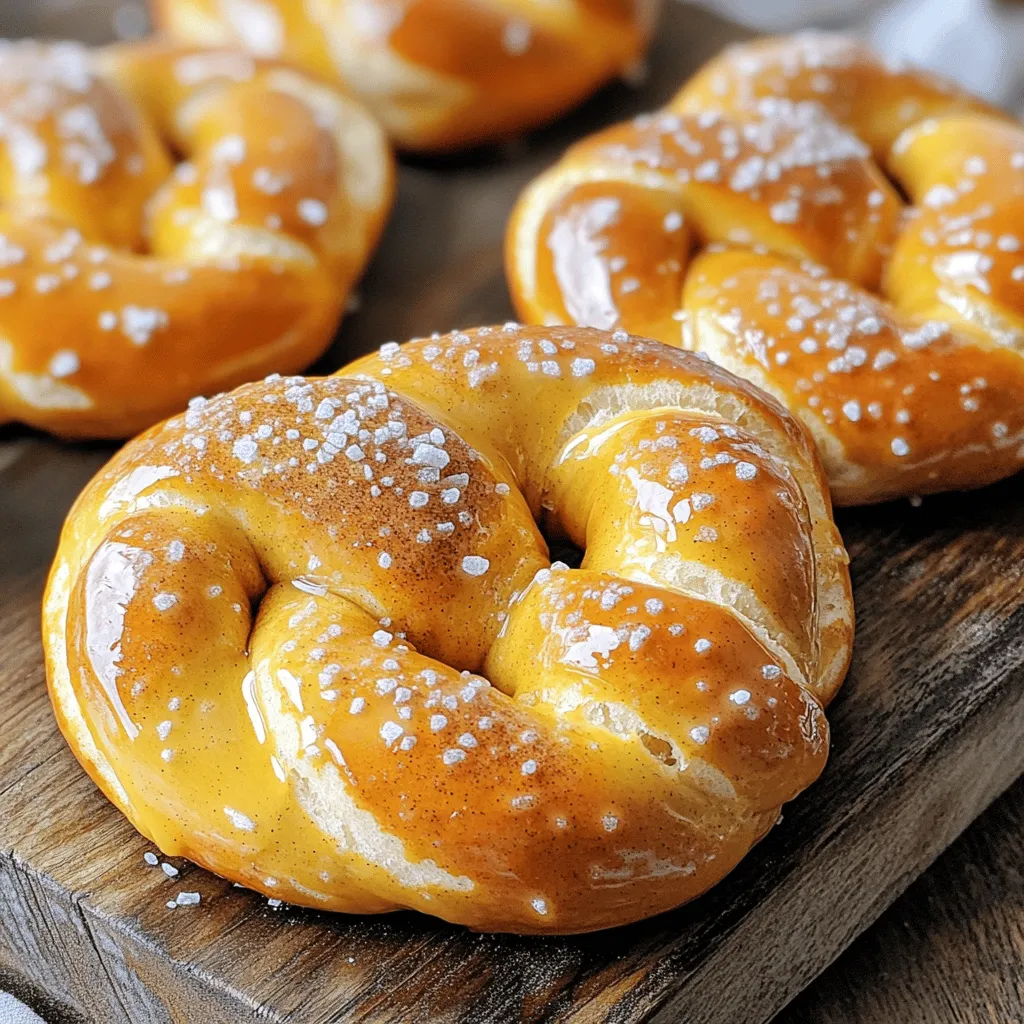
Looking for a snack that combines comfort and fun? Apple Pie Spiced Pretzels are your answer! These warm, fluffy treats blend the classic flavor of apple pie with the crispy …

Looking for a fun and easy lunch idea for your kids? DIY Pizza Lunchables are the answer! With simple ingredients like whole grain pita, marinara sauce, and mozzarella cheese, you’ll …

If you crave a burst of flavor in every bite, you need to try Hatch Green Chile Enchiladas! This simple recipe makes it easy to enjoy rich tastes and a …
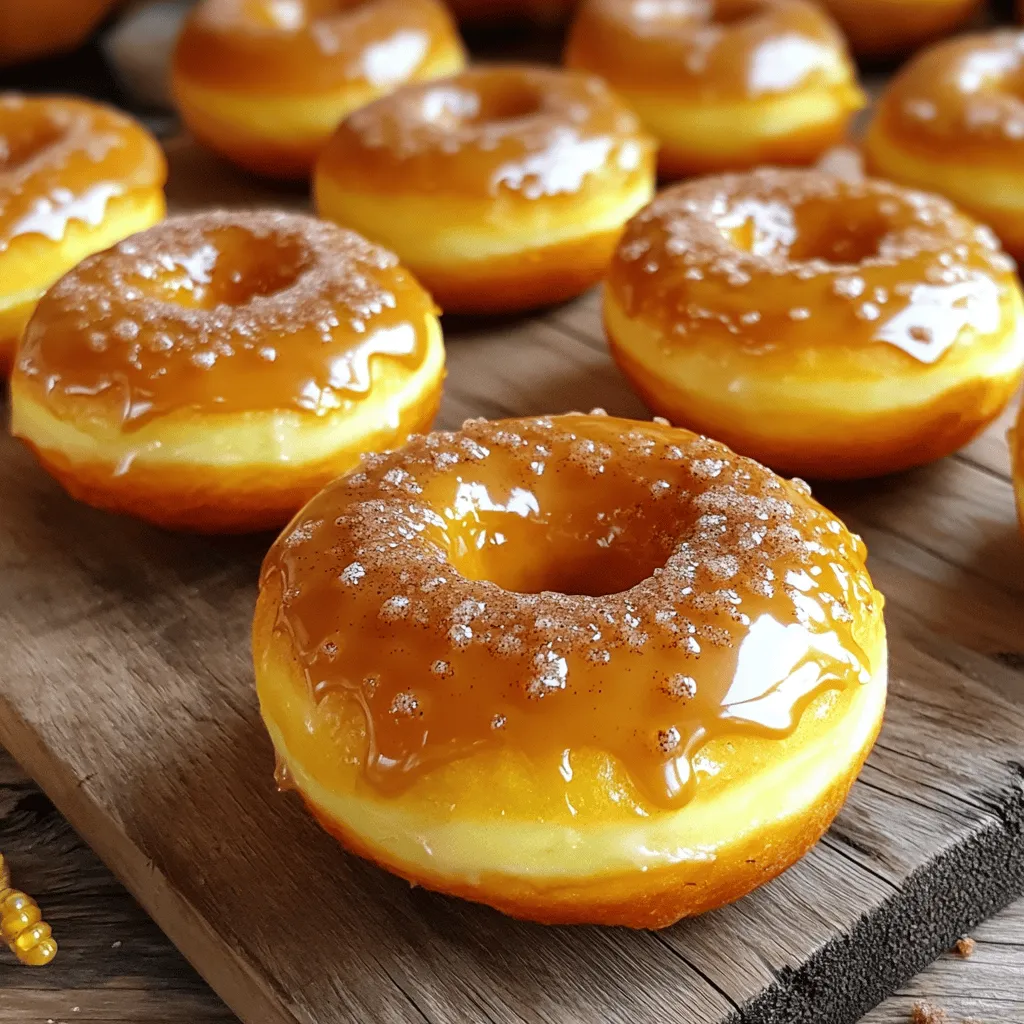
Fall is here, and that means one thing: pumpkin season! If you crave a warm, sweet treat, my Pumpkin Buttermilk Donuts are your answer. With rich pumpkin flavor and a …