Easy Baked Ziti Simple Comfort Food Recipe
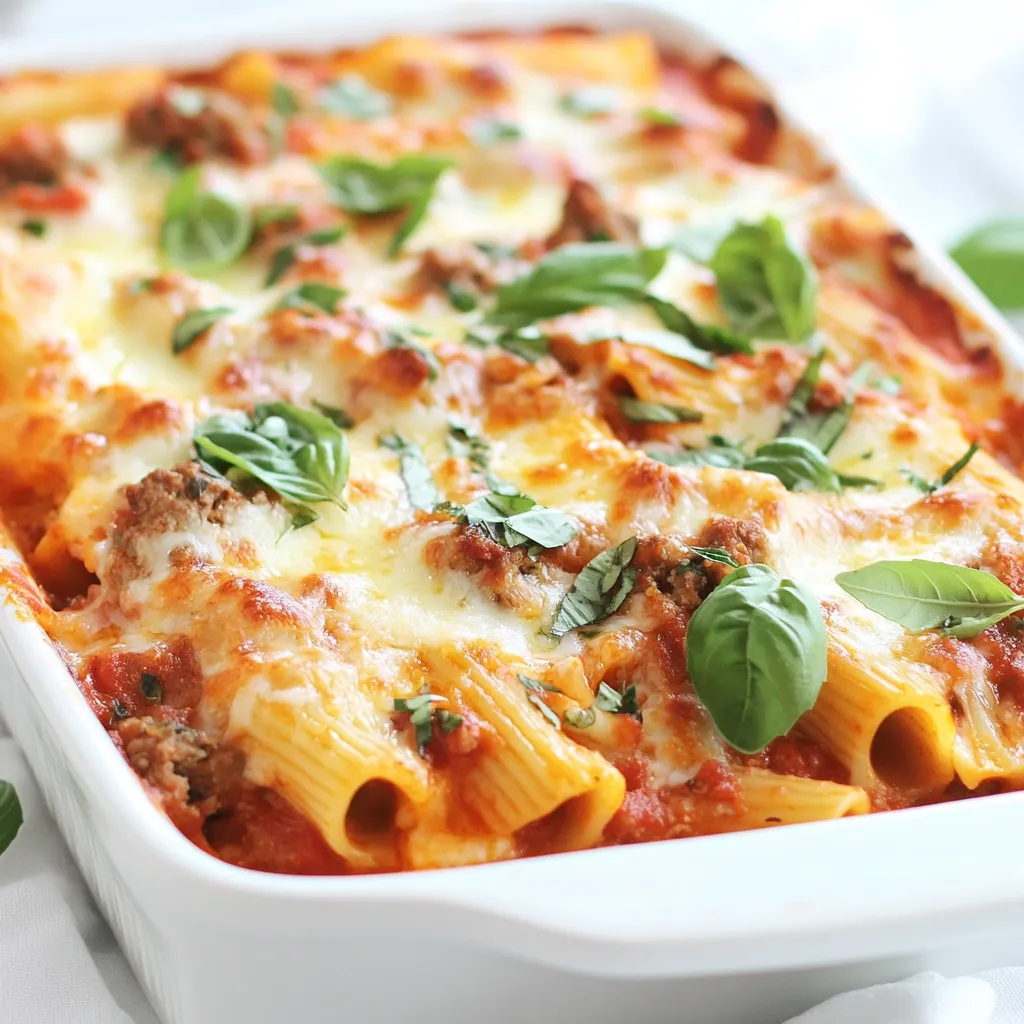
Craving a warm, comforting dish that’s easy to make? Let me show you how to whip up a delicious Easy Baked Ziti that will satisfy your hunger and bring smiles …
Craving a warm, comforting dish that’s easy to make? Let me show you how to whip up a delicious Easy Baked Ziti that will satisfy your hunger and bring smiles …

If you love the classic campfire treat, get ready for a twist! S’mores Cupcakes combine chocolate, marshmallows, and graham crackers in delightful little cakes. They’re perfect for parties, picnics, or …

Get ready for a Halloween treat that’s both spooky and fun! In this guide, I’ll show you how to make easy Halloween cookies that will wow your friends and family. …
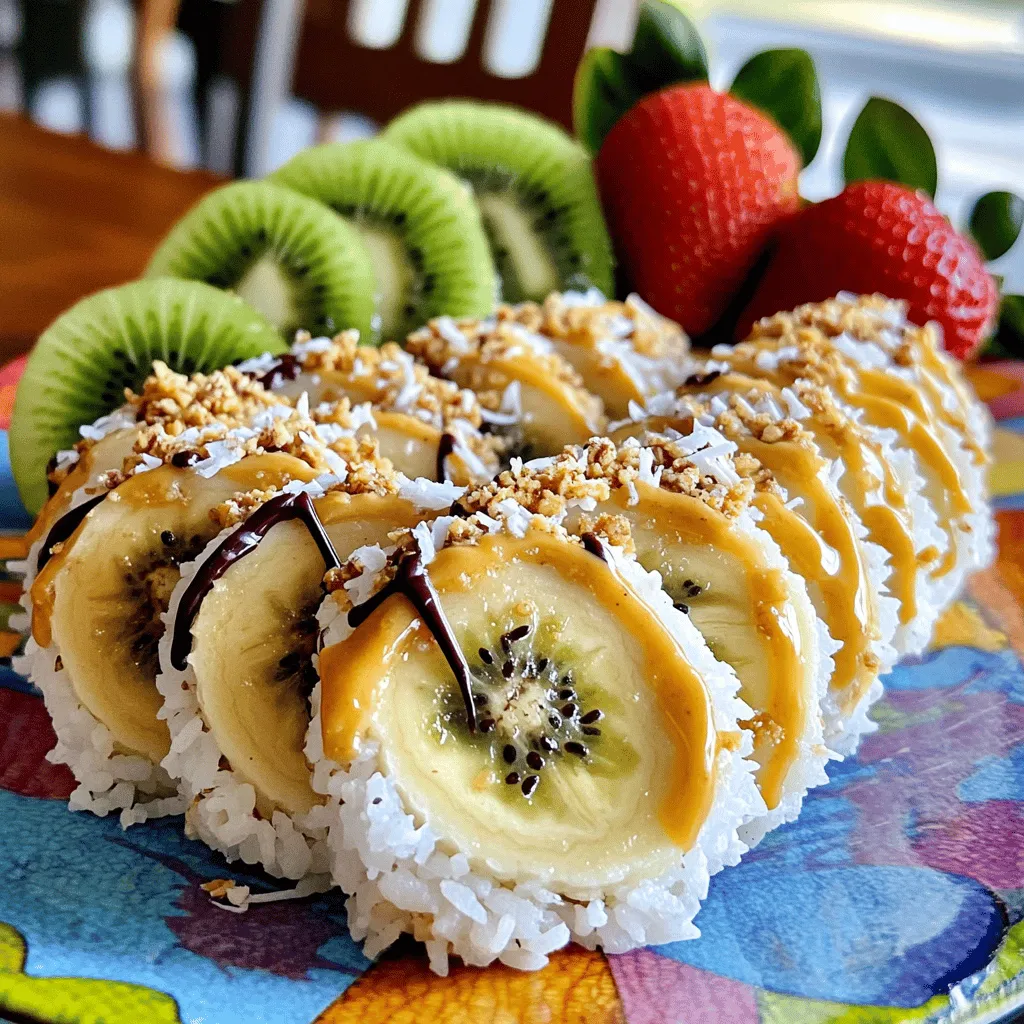
Want a fun and tasty treat that’s easy to make? Banana sushi is the perfect choice! This fun twist on sushi is great for kids and adults alike. In this …

Are you ready to enjoy a warm bowl of comfort? My Potsticker Soup Recipe combines savory flavors and simple steps to create a delightful meal you’ll love. Perfect for chilly …
. {{image_2}} You can change the taste of your sweet potato gnocchi by adding herbs and spices. Try mixing in fresh basil or rosemary into the dough. These herbs give a nice aroma and flavor. You can also add a pinch of cinnamon or cayenne for a warm kick. Another fun option is to toss in some vegetables. Spinach or kale can bring a fresh touch. Just make sure to chop them finely and mix them well into the dough. This not only adds color but also boosts the nutrition of your dish. The right sauce can make your sweet potato gnocchi shine. A light olive oil and garlic sauce is a classic choice. Simply heat olive oil and sauté minced garlic until fragrant. Toss the cooked gnocchi in this sauce for a simple yet tasty meal. You can also try creamy sauces to enhance the sweet potato flavor. A creamy cheese sauce or a vegan cashew cream works well. Both options add richness to the dish. They also balance the sweetness of the gnocchi perfectly. For more detailed instructions, check out the [Full Recipe]. To keep your cooked gnocchi fresh, follow these steps: - Refrigeration: Place cooked gnocchi in an airtight container. It can last up to three days in the fridge. Ensure it cools down before sealing. This keeps moisture away and prevents sogginess. - Freezing: For longer storage, gnocchi freezes well. Spread the cooked gnocchi on a baking sheet in a single layer. Freeze until solid, then transfer to a freezer bag. This method prevents them from sticking together. They can stay frozen for up to three months. When it's time to enjoy your gnocchi again, use these methods: - Boiling: Bring water to a boil. Drop in the gnocchi for about one minute. This quickly warms them without losing texture. - Sautéing: Heat a skillet with a little olive oil. Add the gnocchi and sauté until golden. This gives a nice crispy edge. - With Sauces: If you want to revive your gnocchi with sauce, add them directly to your favorite sauce in a pan. Heat gently until warmed through. This method adds flavor while keeping them moist. By following these storage and reheating tips, you can enjoy your healthy sweet potato gnocchi at its best! For a complete guide, check out the Full Recipe. What are the health benefits of sweet potato gnocchi? Sweet potato gnocchi is nutritious. Sweet potatoes are high in fiber and vitamins. They support good digestion and boost your immune system. This dish also offers a lower glycemic index than regular pasta, which helps control blood sugar. Can I make gnocchi in advance? Yes, you can! Prepare the gnocchi and store them in the fridge for a day. Alternatively, freeze them for longer storage. Just ensure you dust them with flour to prevent sticking. How do you know when gnocchi is cooked? Gnocchi is cooked when it floats. Once it rises to the top of the boiling water, it's ready. This usually takes about 2-3 minutes. Can I substitute sweet potatoes with other vegetables? Yes, you can! Other root vegetables like butternut squash or pumpkin work well. Just remember to adjust the flour and cooking time as needed. What is the difference between traditional and sweet potato gnocchi? Traditional gnocchi uses regular potatoes. Sweet potato gnocchi has a different flavor and a slightly sweeter taste. It also adds a vibrant color to your plate. Is this recipe suitable for a gluten-free diet? You can make this recipe gluten-free. Substitute the whole wheat flour with a gluten-free blend or almond flour. Just ensure that the other ingredients are also gluten-free. Can I make this recipe vegan-friendly? Absolutely! For a vegan option, use a flax egg instead of a regular egg. This simple swap keeps the recipe plant-based while still being delicious. For the cheese, skip it or use a vegan alternative. For the full recipe, please refer to the complete instructions above. In this blog post, we explored how to make delicious sweet potato gnocchi. You learned about the ingredients, preparation steps, and tips for perfecting your dish. We also covered storage methods and variations for added flavor. Sweet potato gnocchi is versatile, healthy, and fun to make. You can easily customize it to suit your taste and dietary needs. With these steps, you can create a meal that satisfies and impresses. Enjoy making this dish and share it with friends and family!](https://grilledflavors.com/wp-content/uploads/2025/07/cbba0466-8f0b-4c96-b2e2-5420e22b7330.webp)
Are you ready to elevate your dinner game with a healthier twist? This Healthy Sweet Potato Gnocchi is simple, delicious, and packed with flavor. Made from just a few wholesome …
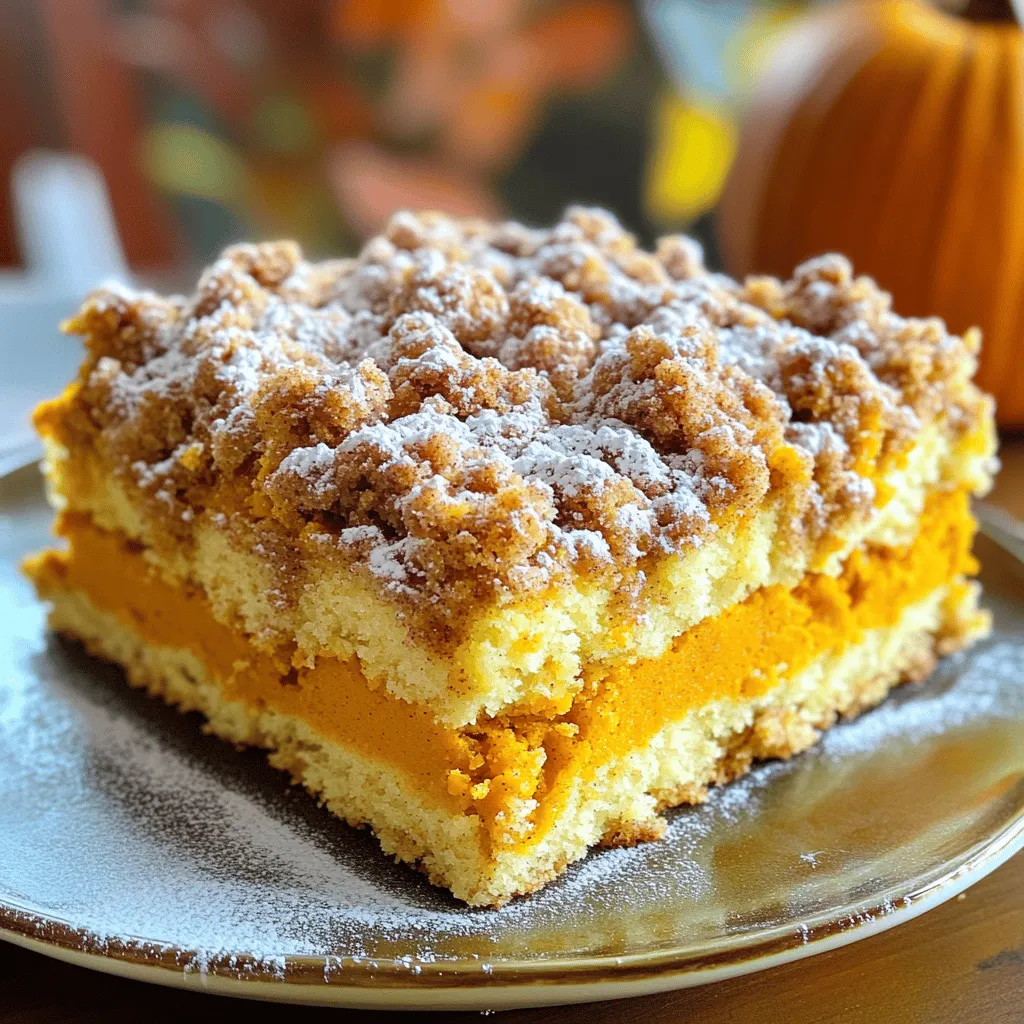
Are you ready for a delectable fall treat? This Cinnamon Streusel Pumpkin Coffee Cake combines warm spices and rich pumpkin for a delightful dessert experience. I’ll guide you through easy …

Craving a simple yet delightful dessert? Let me introduce you to Salted Honey Pie! This sweet treat combines rich honey, creamy goodness, and a hint of salt for the perfect …
![To make Apple Pumpkin Streusel Muffins, gather these simple ingredients. Each one plays a key role in creating a tasty treat. - Dry Ingredients - 1 cup all-purpose flour - 1 cup whole wheat flour - 1 teaspoon baking powder - 1 teaspoon baking soda - 1 teaspoon cinnamon - 1/2 teaspoon nutmeg - 1/2 teaspoon ginger - 1/2 teaspoon salt - Wet Ingredients - 1 cup pumpkin puree - 1/2 cup brown sugar - 1/4 cup granulated sugar - 1/3 cup vegetable oil - 2 large eggs - 1 teaspoon vanilla extract - 1 medium apple, peeled and diced - Streusel Topping Ingredients - 1/2 cup oats - 1/3 cup brown sugar - 1/4 cup all-purpose flour - 1/4 teaspoon cinnamon - 2 tablespoons cold butter, cubed These ingredients come together to create a muffin that’s moist and full of flavor. You can use the Full Recipe for step-by-step guidance to bake these delicious muffins. - Preheat the Oven: Start by preheating your oven to 350°F (175°C). Line a standard muffin tin with paper liners. This step ensures even baking and easy cleanup. - Combine Dry Ingredients: In a large mixing bowl, whisk together the all-purpose flour, whole wheat flour, baking powder, baking soda, cinnamon, nutmeg, ginger, and salt. Mix until combined. This blend adds flavor and structure to your muffins. - Mix Wet Ingredients: In another bowl, whisk together the pumpkin puree, brown sugar, granulated sugar, vegetable oil, eggs, and vanilla extract. Mix until smooth. This creates a rich base for your muffins. - Combine Mixtures: Pour the wet mixture into the bowl with the dry ingredients. Gently fold together until just combined. Be careful not to overmix. Overmixing can lead to dense muffins. - Add Apples and Nuts: Fold in the diced apple and chopped walnuts, if using. Distribute them evenly through the batter. This adds texture and flavor to each bite. - Prepare the Streusel: In a small bowl, mix together the oats, brown sugar, flour, and cinnamon. Cut in the cold butter using a fork until the mixture looks like coarse crumbs. This topping will give your muffins a delightful crunch. - Fill Muffin Tin: Divide the muffin batter evenly among the prepared muffin cups. Fill each cup about two-thirds full. Generously sprinkle the streusel topping over each muffin. - Bake: Place the muffin tin in the oven and bake for 20-25 minutes. Check for doneness by inserting a toothpick into the center of a muffin. It should come out clean. - Cool Down: Remove the muffins from the oven and let them cool in the pan for 5 minutes. Then, transfer them to a wire rack to cool completely. This helps maintain the muffins' texture. For the complete recipe, head over to [Full Recipe]. - Ensuring Proper Mixing: Mix your dry and wet ingredients separately. This helps keep the muffins light. When you combine them, fold gently. Overmixing can make them tough. - Oven Temperature Check: Always preheat your oven to 350°F (175°C). This ensures even baking. If your oven runs hot or cold, adjust the temperature as needed. An oven thermometer can help. - Muffin Texture Enhancements: For extra moisture, add a bit more pumpkin puree. You can also swap out some all-purpose flour for more whole wheat flour. This gives a heartier texture. - Gluten-Free Options: If you need gluten-free muffins, use a gluten-free flour blend. Look for one with xanthan gum added. This helps mimic the texture of wheat flour. - Sugar Alternatives: You can use coconut sugar or maple syrup instead of brown sugar. Just adjust the liquid in your mix if you use syrup. This adds a nice flavor twist. - Dairy-Free Alternatives: Replace eggs with flaxseed meal mixed with water. For oil, use melted coconut oil. This keeps the muffins moist and rich without dairy. For the full recipe, check out the full recipe section and enjoy baking these delightful treats! {{image_2}} You can boost flavor by adding spices. Try adding a pinch of cloves for warmth. A dash of allspice can add depth too. You can even mix in some cardamom if you like a twist. Each spice gives a unique taste, making the muffins exciting. Want more fruit? You can add dried cranberries or raisins. These will add a sweet burst in every bite. Chopped pears can work well, too, giving a lovely texture. Consider using different apple varieties for varied sweetness. Each fruit brings its charm to the muffins. For chocolate lovers, adding chocolate chips is a great idea. Dark chocolate pairs nicely with pumpkin and apple. You can also use white chocolate for a sweeter contrast. This adds a fun twist, making the muffins even more indulgent. These muffins shine with warm drinks. Serve them with hot apple cider or spiced tea. A scoop of vanilla ice cream on the side makes a tasty dessert. You can even pair them with yogurt for a filling breakfast. Serve the muffins warm for the best taste. Place them on a rustic wooden board to enhance their charm. You can drizzle honey on top for extra sweetness. A sprinkle of cinnamon or a few apple slices makes it look stunning. Each muffin should be a delight to the eyes and the palate. Once your Apple Pumpkin Streusel Muffins are baked, let them cool on a wire rack. This helps keep the muffins from getting soggy. After they cool completely, store them in an airtight container. You can use a plastic or glass container. Keep them at room temperature for up to three days. For longer storage, consider refrigerating them. They last about a week in the fridge. Just remember to wrap them tightly to avoid drying out. If you want to save some for later, freezing works great. Wrap each muffin in plastic wrap or foil. Then, place them in a freezer-safe bag. They stay fresh in the freezer for up to three months. When you crave one, just take it out and thaw it. To enjoy your muffins warm, reheating is key. The best way to keep them fresh is to use the oven. Preheat your oven to 350°F (175°C). Place the muffins on a baking sheet and heat for about 10 minutes. This method keeps them soft and tasty. You can also use the microwave if you're in a rush. Place a muffin on a microwave-safe plate. Heat for about 15-20 seconds. This method is quick, but it may make the muffins a bit rubbery. Enjoy your delicious Apple Pumpkin Streusel Muffins with these storage tips! For the full recipe, check out the recipe card. How do I ensure my muffins are moist? To keep your muffins moist, use pumpkin puree. It adds moisture and flavor. Also, mix wet and dry ingredients just until combined. Overmixing can lead to dry muffins. Can I make these muffins ahead of time? Yes, you can make these muffins ahead of time. They store well in an airtight container. Enjoy them within three days for the best taste. What types of apples work best for this recipe? I recommend using Honeycrisp or Granny Smith apples. Both add sweetness and a nice crunch to the muffins. They balance well with the pumpkin flavor. How long do Apple Pumpkin Streusel Muffins last? These muffins last about three days at room temperature. For longer storage, keep them in the fridge for up to a week. You can also freeze them for up to three months. Can I make a mini version of these muffins? Absolutely! Just use a mini muffin tin and reduce the baking time. Check them after 12-15 minutes. They will be perfect bite-sized treats! For the full recipe, check out the details above. You now know how to make delicious Apple Pumpkin Streusel Muffins. We covered the key ingredients, step-by-step instructions, and helpful tips. You learned about variations and how to store and reheat your muffins. Baking muffins can be fun and simple. Experiment with flavors and share them with friends. Enjoy your fresh, tasty treats!](https://grilledflavors.com/wp-content/uploads/2025/07/0ac0500a-fc2d-4a48-b925-e60665dfdce1.webp)
Fall is here, and what better way to embrace the season than with Apple Pumpkin Streusel Muffins? These tasty treats combine the warm flavors of pumpkin and apple, topped with …

Dive into the world of warm, flavorful treats with my Delectable Apple Crisp Baked Apples recipe! This dish brings together sweet apples, a crunchy topping, and cozy spices. Imagine the …