Easy Maple Pumpkin Butter Irresistible Fall Spread
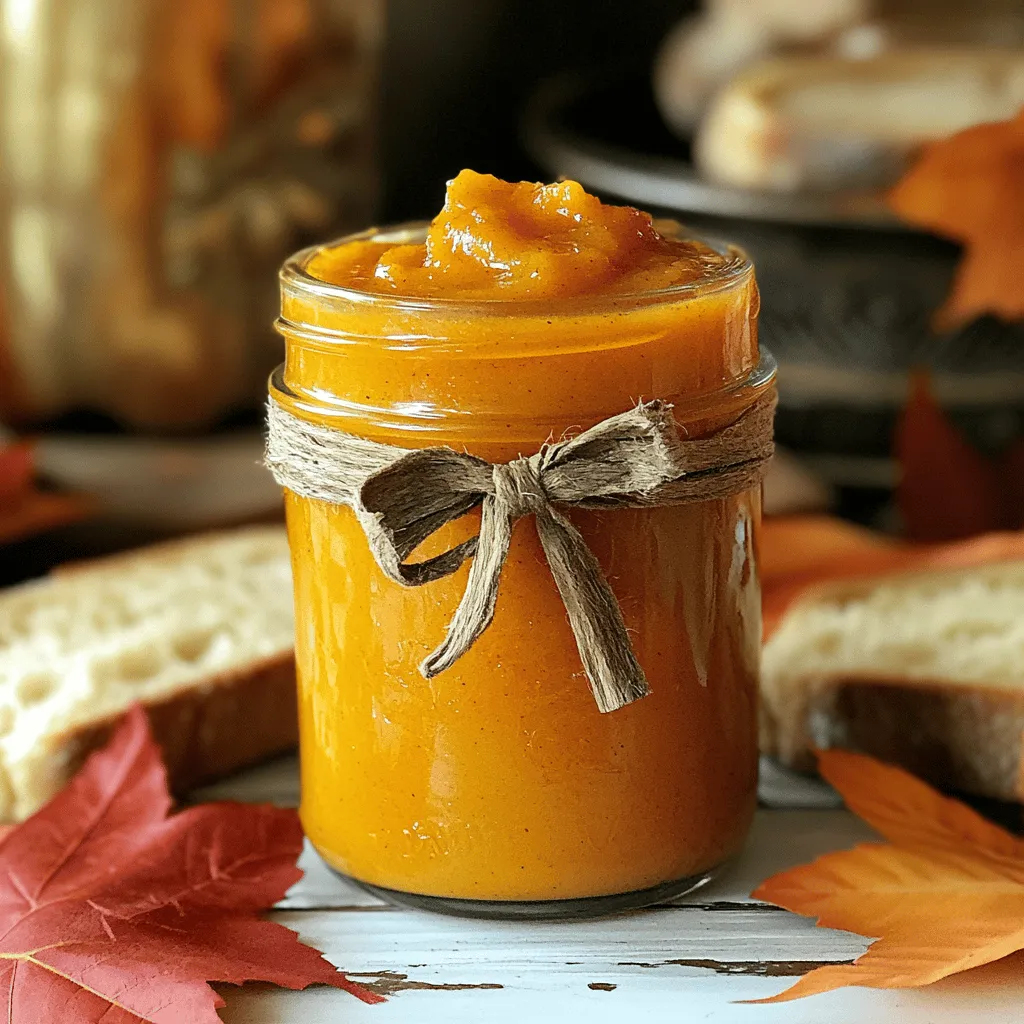
Get ready to enjoy fall with my easy maple pumpkin butter recipe! This sweet spread is perfect for your morning toast or as a delightful addition to your favorite dishes. …
Get ready to enjoy fall with my easy maple pumpkin butter recipe! This sweet spread is perfect for your morning toast or as a delightful addition to your favorite dishes. …
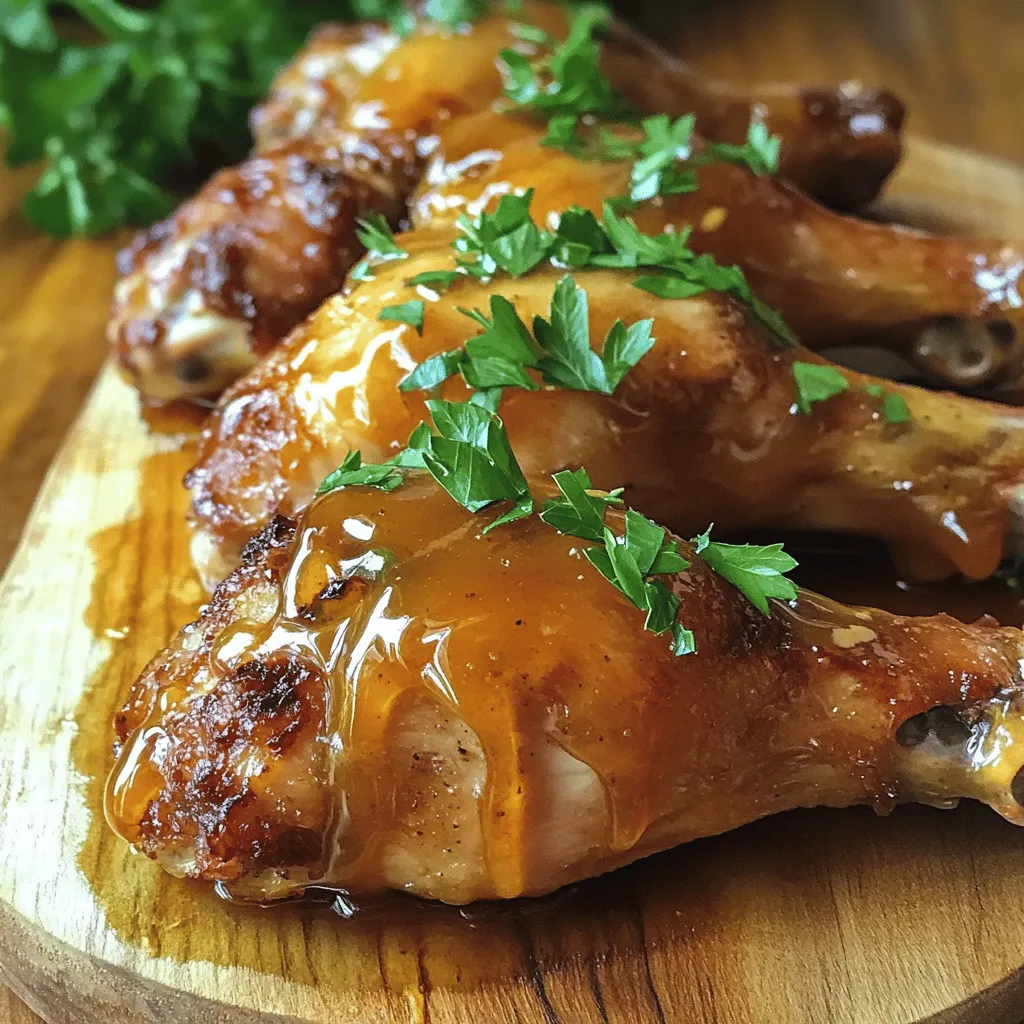
Looking for a delicious meal that’s easy to make? Try my Apple Cider Glazed Chicken! This simple recipe combines juicy chicken with a sweet and tangy glaze that will wow …
![To make pancake donuts, you will need these key ingredients: - 1 cup all-purpose flour - 1 tablespoon baking powder - 2 tablespoons granulated sugar - 1/2 teaspoon salt - 1 cup milk - 1 large egg - 2 tablespoons melted butter (or vegetable oil) - 1 teaspoon vanilla extract - Cooking spray or extra oil for the donut pan These ingredients come together to create a fluffy and soft donut base. The all-purpose flour provides structure, while the baking powder helps them rise. The sugar adds sweetness, and the egg binds everything. After baking, you can add fun toppings. Here are some tasty choices: - Maple syrup - Powdered sugar - Sprinkles - Chocolate glaze Toppings can elevate your pancake donuts. Drizzling maple syrup brings a warm sweetness. Sprinkles add color and fun, while chocolate glaze makes them extra special. You can mix and match your favorites! For the full recipe, check the details above. - Preheat your oven to 350°F (175°C). - Grease the donut pan with cooking spray or oil. This helps prevent sticking. - In a bowl, combine 1 cup of all-purpose flour, 1 tablespoon of baking powder, 2 tablespoons of sugar, and 1/2 teaspoon of salt. Mix well until everything is combined. This gives the donuts a nice rise. - Beat 1 large egg in a separate bowl. Add 1 cup of milk, 2 tablespoons of melted butter, and 1 teaspoon of vanilla extract. - Mix until everything is well blended. This step adds moisture and flavor to your donuts. - Pour the wet ingredients into the dry mixture. Stir gently until just combined. - Be careful not to overmix; it’s okay if some lumps remain. Overmixing can make the donuts tough. - Spoon the batter into the donut pan wells. Fill each well about 3/4 full. This way, they have room to rise without overflowing. - Bake in the preheated oven for 10-12 minutes until golden brown. Check doneness with a toothpick; it should come out clean. - Allow the donuts to cool in the pan for about 5 minutes, then transfer them to a wire rack to cool completely. Enjoy your delicious pancake donuts! For the full recipe, check the details above. To get the best pancake donuts, avoid overmixing the batter. When you mix the wet and dry ingredients, stop as soon as you see no dry flour. Some lumps are perfectly fine. This keeps your donuts light and fluffy. Next, use a toothpick to check for doneness. Insert the toothpick into the center of a donut. If it comes out clean, your donuts are ready. If it has wet batter, bake them a little longer. For a great display, arrange the donuts on a colorful plate. Dust them with powdered sugar for a fun touch. You can also serve with a small pitcher of maple syrup on the side. This adds a nice element for dipping. Pair your pancake donuts with drinks like coffee or milk. The rich flavors of coffee blend well with the sweetness. Milk offers a nice balance and is fun for kids. To store leftover donuts, place them in an airtight container. This keeps them fresh for a few days. You can also wrap them in plastic wrap for extra protection. When you want to enjoy them again, reheating is key. You can use the microwave for about 10 seconds. For an oven, set it to 350°F (175°C) and heat for 5 minutes. This way, they taste just as good as fresh! For the full recipe, check out the details above. {{image_2}} You can easily change the taste of your pancake donuts. Try adding fun flavors like cinnamon or nutmeg. Just add a teaspoon of either spice to the dry mix. This adds warmth and depth to each bite. If you love chocolate, mix in cocoa powder. A couple of tablespoons of cocoa will give you a rich, chocolatey donut. Don't be shy—experiment with different flavors! Each change can bring a new twist to your recipe. The fun doesn't stop at flavors! You can dress up your pancake donuts in many ways. Instead of just powdered sugar, try a drizzle of maple syrup or honey. You can also top with chocolate glaze for a sweet finish. Add sprinkles for color and crunch. If you want something more fruity, try fresh berries or a fruit compote. Get creative with your toppings to make each batch unique! Filling your pancake donuts can add a surprise inside. You can use jam, cream, or chocolate for a delicious filling. To fill the donuts, use a piping bag or a small spoon. Simply poke a hole in the donut and add your filling. A fruity jam can give a nice burst of flavor. Creamy filling adds a rich texture. Chocolate makes every bite feel like a treat. Don't be afraid to mix and match fillings to find your favorite! For the complete recipe, check out the [Full Recipe]. Finding pancake donuts can be fun. You have many choices, both nearby and online. Start by checking local bakeries. Many bakeries love to create fun treats. Ask about pancake donuts when you go in. Small cafes also may have them. Look for places that focus on breakfast or brunch. They often think outside the box with their menu items. Use apps or websites like Yelp to find reviews. This can help you spot the best spots in your area. If you cannot find them locally, try online. Many websites sell pancake donuts or kits. Check out Amazon, where you can find a variety of flavors. Some specialty food sites offer unique versions too. You can also find DIY kits if you want to make them at home. This way, you get all the fun without having to go out. Don’t forget specialty grocery stores. Stores that focus on organic or local foods may carry pancake donuts. Some larger grocery chains have unique items in their bakery sections. Look for mixes that let you make pancake donuts yourself. This can be a great option if you want to try out the Full Recipe at home. A pancake donut is a fun twist on classic pancakes. It combines the fluffy texture of pancakes with the shape of a donut. You bake them instead of frying, making them lighter and healthier. These treats are great for breakfast or a snack. Each bite is soft and sweet, perfect for dipping in syrup or topping with your favorite sprinkles. Yes, you can make pancake donuts without a donut pan! Use a muffin tin or a baking sheet instead. For a muffin tin, just fill each cup halfway with batter. If using a baking sheet, drop spoonfuls of batter in circles to form donut shapes. Keep the size small to mimic the look of donuts. You can still enjoy the same great taste! Customizing pancake donuts is easy and fun. Here are some tips: - Add spices: Mix in cinnamon or nutmeg for extra flavor. - Use different milks: Try almond or coconut milk for a new twist. - Incorporate fruits: Add mashed bananas or blueberries to the batter. - Experiment with toppings: Use chocolate glaze, whipped cream, or nuts. You can also check out the Full Recipe for more ideas! You now have all you need to make pancake donuts. We covered essential ingredients, mixing methods, baking tips, and creative variations. You can play with flavors and toppings to fit your taste. Remember, the key is to avoid overmixing and check the donuts for doneness. Enjoy these treats fresh or stored for later. Pancake donuts are easy to customize and fun to share. I hope you feel inspired to whip up a batch soon!](https://grilledflavors.com/wp-content/uploads/2025/07/63dce531-6e18-45c6-a7e1-49f402046f9b.webp)
Do you love pancakes and donuts? What if I told you that you can enjoy both in one bite? Pancake donuts are soft, fluffy, and taste amazing! In this easy …
![To create these delightful Apple Cider Cheesecake Cookies, gather the ingredients listed in the full recipe. You’ll need both common and special items to get that perfect fall flavor. Here’s what you must have: - 1 cup unsalted butter, softened - 1 cup cream cheese, softened - 1 ½ cups granulated sugar - 1 large egg - 1 teaspoon vanilla extract - 2 cups all-purpose flour - 1 teaspoon baking powder - 1 teaspoon ground cinnamon - ½ teaspoon ground nutmeg - ½ teaspoon salt - ½ cup apple cider - 1 cup caramel sauce (for drizzle) - ½ cup chopped nuts (walnuts or pecans) for topping These ingredients work together to create a rich, creamy cookie with a hint of apple and spice. If you want to boost the flavor, consider adding: - Extra cinnamon or nutmeg for warmth - A splash of maple syrup for sweetness - Diced apples for added texture These optional ingredients can take your cookies to the next level. Experiment and find what works best for your taste! Gather all your ingredients before you start. This makes cooking easier. You will need: - 1 cup unsalted butter, softened - 1 cup cream cheese, softened - 1 ½ cups granulated sugar - 1 large egg - 1 teaspoon vanilla extract - 2 cups all-purpose flour - 1 teaspoon baking powder - 1 teaspoon ground cinnamon - ½ teaspoon ground nutmeg - ½ teaspoon salt - ½ cup apple cider - 1 cup caramel sauce (for drizzle) - ½ cup chopped nuts (walnuts or pecans) for topping Make sure the butter and cream cheese are soft. This helps them blend better. Measure everything carefully for the best results. Let’s get started! Preheat your oven to 350°F (175°C). Line a baking sheet with parchment paper. This keeps your cookies from sticking. In a big bowl, cream the butter, cream cheese, and sugar together until it’s light and fluffy. This step is crucial; it adds air and makes your cookies soft. Then, beat in the egg and vanilla extract until mixed. In another bowl, whisk together the flour, baking powder, cinnamon, nutmeg, and salt. Gradually mix this dry mix into the wet mix. Alternate with the apple cider. Mix until just combined; don’t overmix or your cookies will be tough. Drop rounded balls of dough onto your baking sheet, leaving space between each cookie. Bake them for 12-15 minutes. You want the edges to be lightly golden. After baking, let them cool for about 5 minutes, then transfer to a wire rack. For soft cookies, watch the baking time closely. If you bake them too long, they become hard. Also, make sure not to overmix the dough. This keeps the cookies soft and chewy. Adding apple cider gives a nice flavor, but it can make the dough wet. So, if the dough feels too sticky, add a bit more flour. Lastly, drizzle caramel while the cookies are still warm. It helps the caramel stick better. Enjoy your perfect Apple Cider Cheesecake Cookies! For a full recipe, refer to the [Full Recipe]. When baking Apple Cider Cheesecake Cookies, it’s easy to make mistakes. Here are some common ones: - Overmixing the dough: This can lead to tough cookies. Mix until just combined. - Not measuring ingredients correctly: Use proper measuring cups for dry and wet ingredients. - Skipping the cooling time: Let cookies cool on the baking sheet. This helps them set. To make the best cookies, follow these tips: - Use room temperature ingredients: Softened butter and cream cheese mix better. - Chill the dough: If the dough feels too soft, chill it for 30 minutes. - Watch the baking time: Keep an eye on your cookies. They should be golden at the edges. Using the right tools makes a big difference. Here’s what you need: - Mixing bowls: A large bowl for mixing wet and dry ingredients. - Cookie scoop: This helps you portion the dough evenly. - Parchment paper: Line your baking sheet to prevent sticking. - Cooling rack: This allows air to circulate, helping cookies cool evenly. For the complete recipe, check out the Full Recipe. Enjoy baking these delightful treats! {{image_2}} You can make these cookies gluten-free easily. Use a gluten-free flour blend instead of all-purpose flour. Make sure your blend contains xanthan gum. This helps bind the cookies and keeps them soft. The taste remains delicious, and everyone can enjoy them. Adding spices can boost the flavor of your cookies. Consider adding ground ginger or allspice for a warm kick. You can also try extracts like almond or maple. These will give your cookies a unique twist. Mix these spices in when you add the dry ingredients for even distribution. Toppings make your cookies even more appealing. After cooling, drizzle caramel sauce over each cookie for sweetness. You can also sprinkle chopped nuts like walnuts or pecans for crunch. Try adding a dusting of powdered sugar for a pretty finish. For a fun touch, place apple slices on the platter with your cookies. Use the [Full Recipe] to create these delightful treats. To keep your Apple Cider Cheesecake Cookies fresh, store them in an airtight container. This helps prevent them from drying out. Place parchment paper between layers if you stack them. Keep your cookies at room temperature for a soft texture. If you want to save some cookies for later, freezing is a great option. First, let the cookies cool completely. Then, place them in a single layer on a baking sheet. Freeze them until firm, about an hour. Next, transfer the cookies to a freezer-safe bag or container. They can last up to three months in the freezer. These cookies are best eaten fresh but will last for about five days at room temperature. To reheat, pop them in the microwave for about 10-15 seconds. This will help bring back their soft and creamy texture. If you prefer, you can also enjoy them cold or at room temperature. For the full recipe, check the earlier section. Yes, you can! You might try using hard cider for a stronger flavor. Avoid ciders with added sugars. They may make your cookies too sweet. If you prefer, use unsweetened apple juice. It will give a nice apple taste without the alcohol. Just make sure to use the same amount as in the recipe. To stop your cookies from spreading, chill the dough before baking. Place it in the fridge for about 30 minutes. This helps the butter firm up. It’s also key to measure your flour properly. Too little flour can lead to flat cookies. Use a spoon to scoop and level your flour for best results. Drizzling caramel sauce is easy! Once your cookies cool, use a spoon for drizzling. You can also use a squeeze bottle for more control. Warm the caramel slightly to make it easier to drizzle. For a fun twist, you can mix some caramel into the dough. This adds flavor throughout the cookie. For the complete process, check the Full Recipe. You learned about making tasty apple cider cheesecake cookies. We covered essential ingredients, step-by-step instructions, and tips to avoid common mistakes. You can even explore different flavors and storage options. Remember, baking is fun and creative. Use these tips to perfect your cookies. Whether you share them or keep them for yourself, enjoy every delicious bite!](https://grilledflavors.com/wp-content/uploads/2025/07/8066f664-be9c-422d-b65c-82e6ad1cbb6c.webp)
Fall is here, and so is the craving for warm, cozy treats! Let’s talk about Apple Cider Cheesecake Cookies. These soft, spiced cookies blend the flavors of apple cider and …
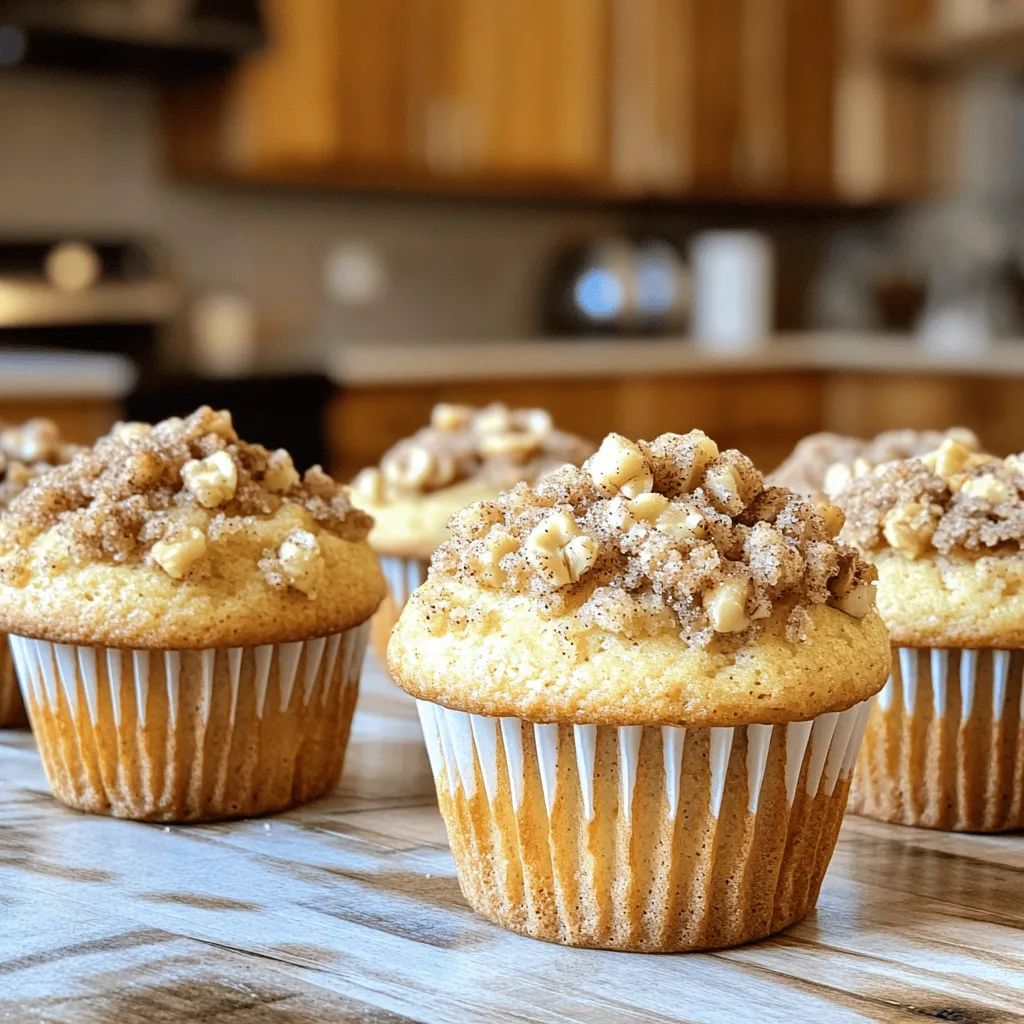
If you love coffee cake but want a quick treat, coffee cake muffins are the answer. This delightful and easy recipe is perfect for breakfast or snack time. You’ll enjoy …
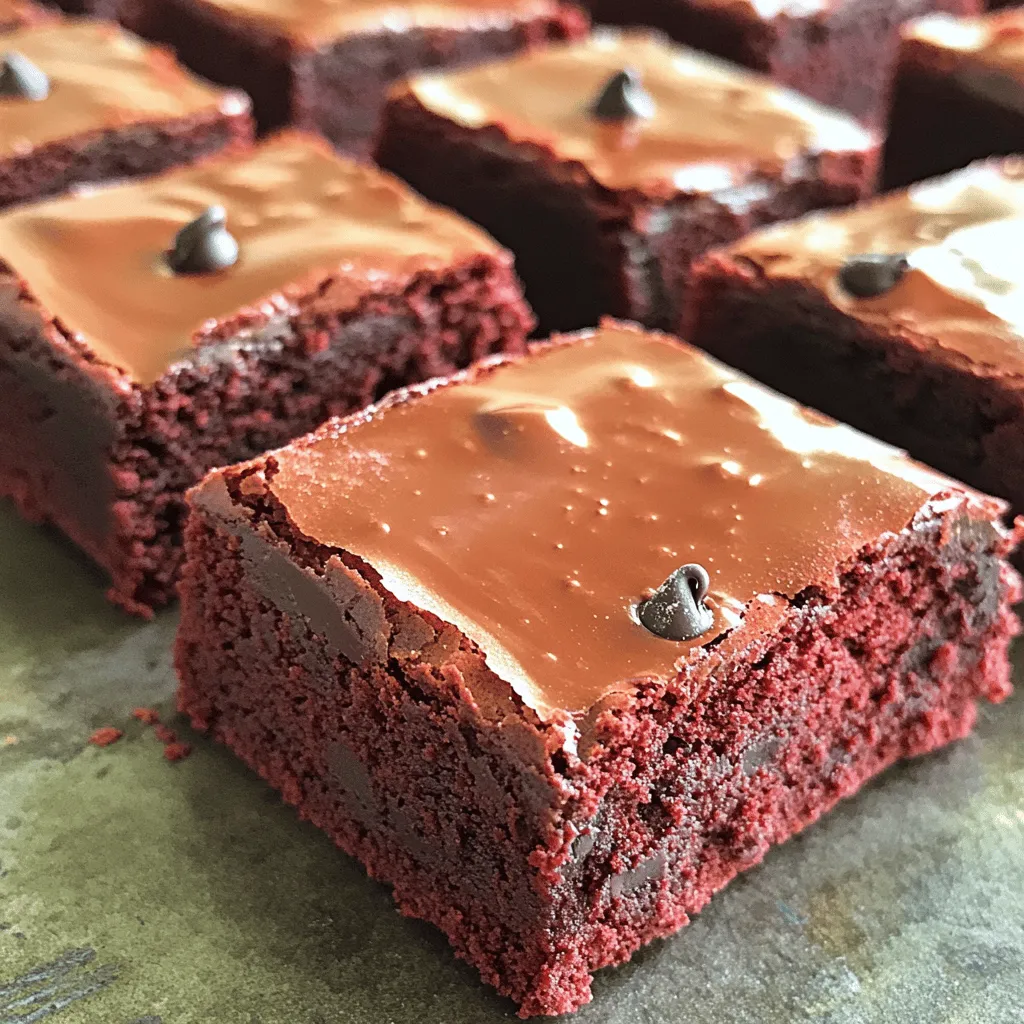
Get ready for a dessert treat that is rich, fudgy, and simply irresistible: Fudgy Red Velvet Brownies! With their deep red hue and velvety texture, these brownies bring a fun …
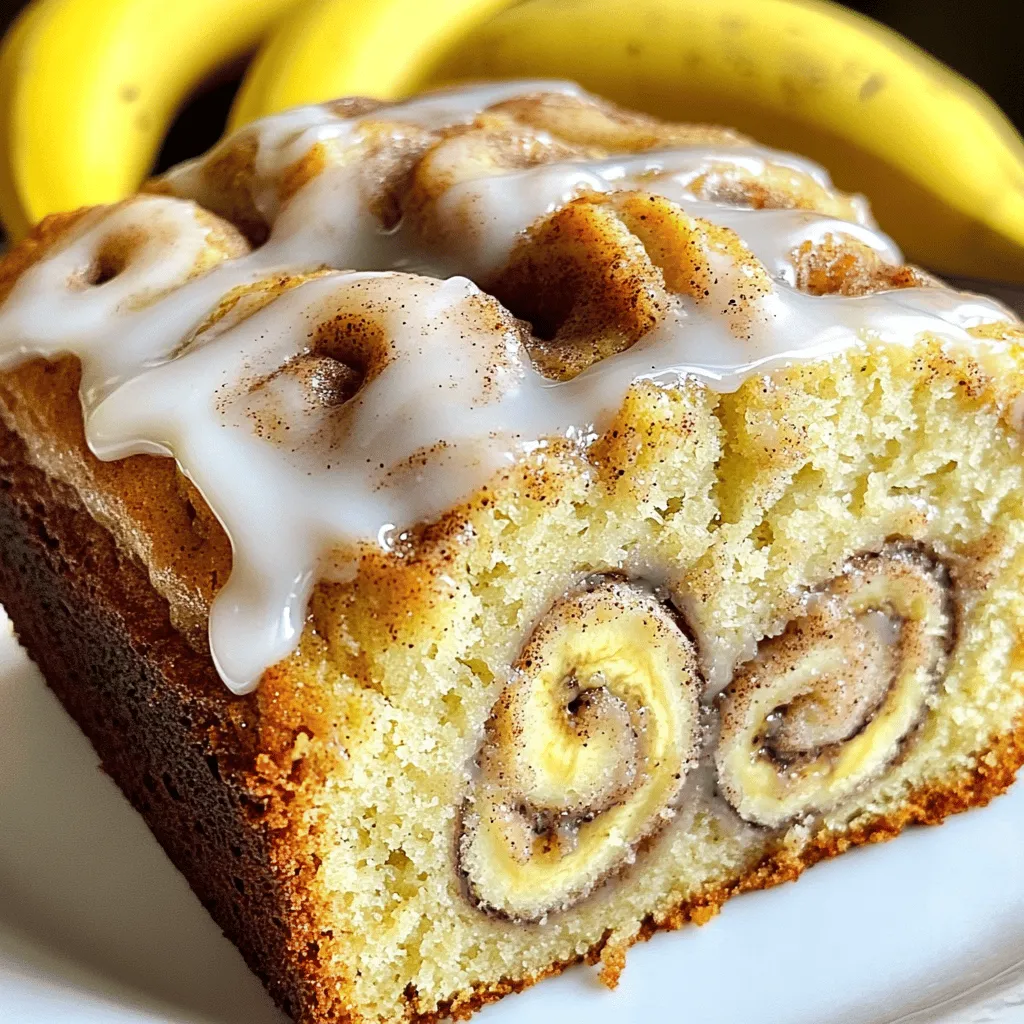
If you crave a sweet treat that’s both cozy and delicious, you’re in for a treat! This Cinnamon Roll Banana Bread combines the rich flavors of ripe bananas with a …
![To make Libby’s Pumpkin Bread, gather these simple ingredients. Each one adds to the rich flavor and texture. - 1 ¾ cups all-purpose flour - 1 teaspoon baking soda - ½ teaspoon baking powder - ½ teaspoon salt - 1 teaspoon ground cinnamon - ½ teaspoon ground nutmeg - ½ teaspoon ground ginger - 1 can (15 oz) Libby’s Pure Pumpkin - 1 cup granulated sugar - ½ cup brown sugar, packed - ½ cup vegetable oil - 4 large eggs - 1 teaspoon vanilla extract - 1 cup chopped nuts (optional) - 1 cup chocolate chips (optional) These ingredients blend to create a moist and flavorful bread. The spices add warmth, while Libby’s Pumpkin provides a lovely base. You can add nuts or chocolate chips for extra fun. This recipe is easy and perfect for sharing. 1. Start by preheating your oven to 350°F (175°C). This step is key for even baking. Next, take a 9x5 inch loaf pan. Grease it well or line it with parchment paper. This helps the bread come out easily after baking. 2. In a medium bowl, mix your dry ingredients. Combine 1 ¾ cups of all-purpose flour, 1 teaspoon of baking soda, ½ teaspoon of baking powder, and ½ teaspoon of salt. Add in 1 teaspoon of ground cinnamon, ½ teaspoon of ground nutmeg, and ½ teaspoon of ground ginger. Whisk these together until they are well mixed. Set this bowl aside for later. 3. In a large bowl, it’s time to mix your wet ingredients. Pour in 1 can (15 oz) of Libby’s Pure Pumpkin. Add 1 cup of granulated sugar and ½ cup of brown sugar. Then, add ½ cup of vegetable oil to this mix. Stir these until they blend well. 4. Crack 4 large eggs into the pumpkin mixture, adding them one by one. Mix well after each egg. Then, add 1 teaspoon of vanilla extract. Keep stirring until the mixture is smooth and creamy. 5. Now, it's time to bring the dry and wet mixtures together. Gradually add the dry ingredient bowl to the pumpkin bowl. Stir gently until just combined. Be careful not to overmix; a few lumps are okay. 6. If you want to add some crunch or sweetness, fold in 1 cup of chopped nuts or chocolate chips at this stage. This step is optional but adds great flavor. 7. Pour the batter into your prepared loaf pan. Use a spatula to smooth the top evenly. 8. Place the pan in your preheated oven. Bake for 60-70 minutes. You will know it’s done when a toothpick inserted in the center comes out clean. 9. Once baked, let the bread cool in the pan for about 10 minutes. Then, transfer it to a wire rack to cool completely. Take a moment to enjoy the aroma filling your kitchen. This bread is not just a treat; it's an experience. For more details, check the Full Recipe. - Ensuring the right oven temperature: Always preheat your oven to 350°F (175°C). This step is key to getting that perfect rise. If your oven runs hot or cold, use an oven thermometer to check. - Checking for doneness with a toothpick: Insert a toothpick into the center of the bread. If it comes out clean or with a few crumbs, your bread is ready. If it’s wet, bake for a few more minutes. - Folding in mix-ins for texture: If you want to add nuts or chocolate chips, do it gently. Overmixing can make your bread tough. Just fold them in until they are evenly distributed. - How to store leftover pumpkin bread: Let the bread cool completely first. Wrap it tightly in plastic wrap or aluminum foil. You can keep it at room temperature for about three days. - Best ways to freeze for later use: For longer storage, slice the bread and wrap each slice in plastic wrap. Place the slices in a freezer bag. This way, you can grab a slice anytime. It will last for up to three months in the freezer. {{image_2}} You can make Libby’s Pumpkin Bread even more special by adding flavors. Try mixing in spices like allspice or cloves. You can also use vanilla or almond extract for a new twist. These small changes can create a big taste difference. Want some crunch? Add nuts! Chopped walnuts or pecans work well. If you love chocolate, toss in some chocolate chips. They melt and blend beautifully with the pumpkin. You can even use white chocolate or dark chocolate for a unique flavor. If you need a gluten-free option, swap the all-purpose flour for a gluten-free blend. Make sure it has a good binding agent, like xanthan gum. This way, your bread will still hold together well. Looking to make a vegan version? Replace the eggs with flaxseed meal. Mix 1 tablespoon of flaxseed with 3 tablespoons of water for each egg. Also, use a plant-based oil instead of vegetable oil. These simple swaps keep the bread tasty and friendly for all diets. For the complete recipe, check out the [Full Recipe]. Bakers love Libby’s Pumpkin Bread for its rich taste and moist texture. Many say it is easy to make, which keeps them coming back for more. Some bakers enjoy the warm spices that fill their kitchens as the bread bakes. Others mention how well it slices and presents beautifully on a platter. Some bakers suggest adding a pinch more cinnamon or nutmeg for extra flavor. Others recommend using half brown sugar and half white sugar for a deeper taste. You can also try adding a splash of maple syrup for a sweet twist. Pumpkin bread fans share many helpful tips. One popular tip is to let the bread sit overnight. This makes the flavors even better! Many also recommend serving it with cream cheese or butter for a tasty spread. As for drinks, pumpkin bread pairs well with coffee or chai tea. You might even try it with a scoop of vanilla ice cream for a dessert twist. For those who love fruit, slices of apple or pear go great with this bread too. Yes, you can use fresh pumpkin. Just cook and puree the pumpkin first. It must be smooth and thick. However, Libby’s pumpkin is easy and reliable. It gives great taste and texture. Check the bread with a toothpick. Insert it into the center. If it comes out clean, the bread is done. If it has batter on it, bake longer. Keep an eye on it after 60 minutes. You can serve many things with pumpkin bread. Try cream cheese spread for a rich flavor. A sprinkle of cinnamon or powdered sugar adds a sweet touch. You might also enjoy it with a warm drink, like apple cider or coffee. For the full recipe, check out Libby's Delightful Pumpkin Bread. It’s a sure hit! In this article, we explored the key ingredients, steps for baking, and useful tips for making pumpkin bread. I shared ideas for variations, storage options, and what other bakers think about the recipe. Now you're ready to create your own tasty pumpkin bread. Whether you stick to the classic method or try a variation, have fun with it! Enjoy each bite and share your delicious results!](https://grilledflavors.com/wp-content/uploads/2025/07/6ef11244-c211-400c-b67d-e9b2257ea352.webp)
Fall is here, and there’s nothing better than the smell of Libby’s Pumpkin Bread baking in your oven. This recipe is easy to follow and perfect for cozy gatherings or …
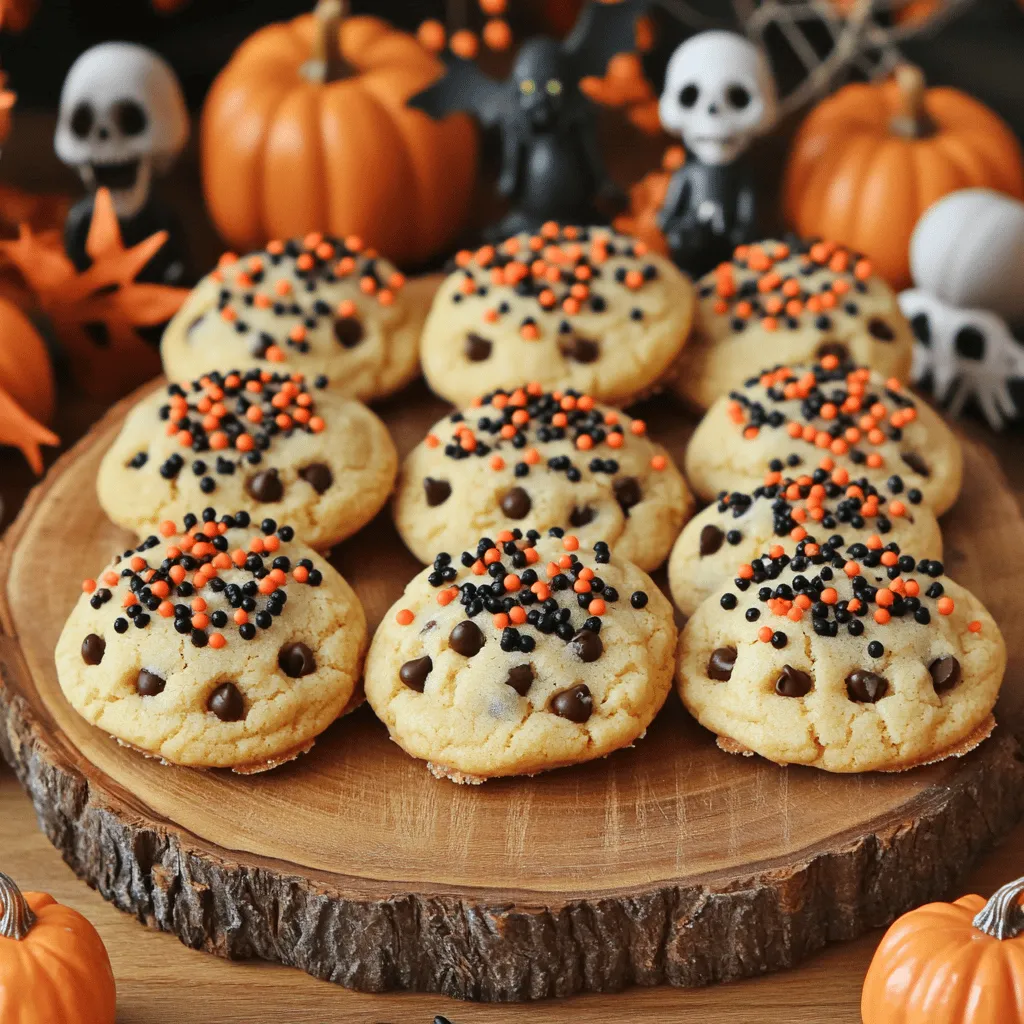
Get ready for a Halloween treat that’s fun to make and even more fun to eat! My Halloween Chocolate Chip Sugar Cookies are perfect for festive gatherings or cozy nights …
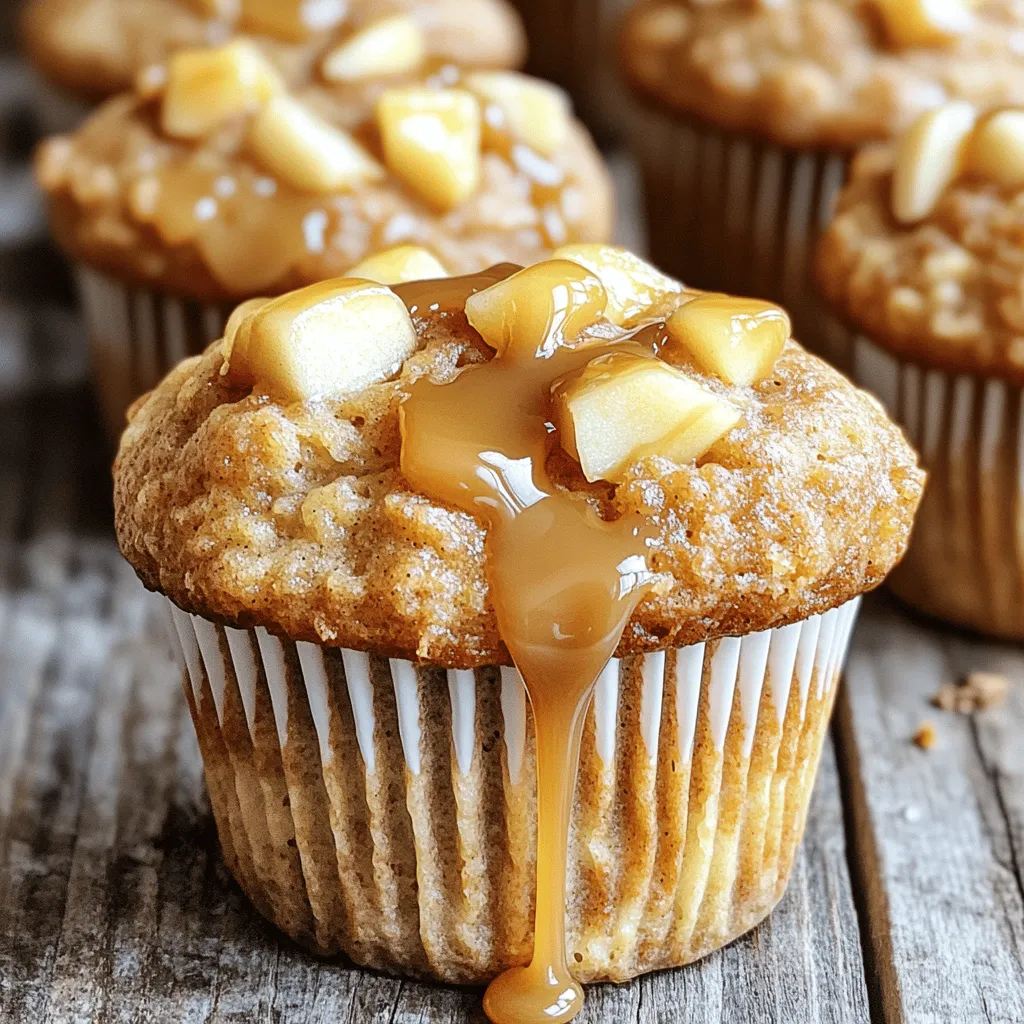
If you love warm, sweet treats, then you’ll adore Caramel Apple Buttermilk Muffins. These muffins are soft, moist, and packed with delicious flavors. In just a few easy steps, you …