Brown Butter Dirty Chai Cupcakes Flavorful Delight
If you’re craving a treat that’s full of flavor and warmth, Brown Butter Dirty Chai Cupcakes are your answer. These moist cupcakes blend rich brown butter with spicy chai notes, …
If you’re craving a treat that’s full of flavor and warmth, Brown Butter Dirty Chai Cupcakes are your answer. These moist cupcakes blend rich brown butter with spicy chai notes, …
![The core of these donut holes is simple yet flavorful. Here’s what you need: - 1 cup canned pumpkin puree - 1/4 cup unsweetened applesauce - 1/4 cup granulated sugar - 1/4 cup brown sugar, packed - 1 large egg - 2 cups all-purpose flour - 1 tsp baking powder - 1/2 tsp baking soda - 1 tsp ground cinnamon - 1/2 tsp ground nutmeg - 1/4 tsp ground ginger - 1/4 tsp salt - 1/2 cup vegetable oil (for frying) - 1/2 cup granulated sugar (for coating) - 2 tsp ground cinnamon (for coating) These ingredients create a warm, spiced flavor that makes each bite irresistible. While the key ingredients shine on their own, a few optional add-ins can take these donut holes to a new level. Consider adding: - A splash of vanilla extract for a sweet aroma. - Chopped nuts like walnuts or pecans for added crunch. - Mini chocolate chips for a fun twist. These enhancements can make your donut holes unique and tailored to your taste. If you’re missing some items, don’t worry! Here are easy swaps: - Use homemade pumpkin puree instead of canned if you prefer fresh flavors. - Replace applesauce with mashed bananas for a different sweetness. - Try coconut oil in place of vegetable oil for frying to add a hint of coconut flavor. These substitutions make the recipe flexible, so you can cook with what you have. For the full recipe, check out the details above. To make these donut holes, start by mixing wet ingredients. In a big bowl, combine 1 cup of canned pumpkin puree, 1/4 cup of applesauce, 1/4 cup of granulated sugar, 1/4 cup of brown sugar, and 1 large egg. Stir until it’s smooth. In another bowl, whisk together the dry stuff. You’ll need 2 cups of flour, 1 tsp of baking powder, 1/2 tsp of baking soda, 1 tsp of ground cinnamon, 1/2 tsp of nutmeg, 1/4 tsp of ginger, and 1/4 tsp of salt. Be sure to mix well. Gradually add the dry mix to the wet mix. Stir gently until everything is just combined. Don’t overmix! This step is key for soft donut holes. Chill the dough for 30 minutes in the fridge. It helps with shaping. Heat vegetable oil in a large pot or deep fryer to 350°F (175°C). This temperature is vital for crispy donut holes. Use a small cookie scoop or your hands to take about 1 tablespoon of dough. Roll it into a ball. Carefully drop the balls into the hot oil in small groups. Fry them for 3-4 minutes until they turn golden brown. Use a slotted spoon to turn them gently. This ensures even cooking. Avoid overcrowding the pot to keep the oil hot. Once fried, remove the donut holes and let them drain on paper towels. This step removes excess oil. In a shallow bowl, mix 1/2 cup of granulated sugar with 2 tsp of ground cinnamon for the coating. While the donut holes are still warm, roll them in this mixture. Make sure they are well coated. This adds a sweet touch that makes them irresistible. Enjoy these warm delights from the [Full Recipe]. When making cinnamon sugar pumpkin donut holes, avoid overmixing the dough. This can make them tough. Also, don’t skip chilling the dough. It helps the donut holes hold their shape. Fry in small batches to keep the oil temperature steady. If you crowd the pan, they may not cook evenly. Lastly, roll them in sugar while they are warm. This helps the coating stick better. To get a light and fluffy texture, measure your flour properly. Too much flour can lead to dense donut holes. Use the spoon and level method. Spoon flour into a measuring cup and level off with a knife. Mixing your wet and dry ingredients just until combined also helps. The dough should be slightly sticky but manageable. You will need a few handy tools for this recipe. A mixing bowl is vital for combining ingredients. A whisk makes blending dry ingredients easy. Use a cookie scoop to portion the dough evenly. This ensures uniform donut holes. A slotted spoon helps you turn and remove them from the hot oil. Finally, have paper towels ready to drain excess oil after frying. For the full recipe, check out the cooking instructions above. {{image_2}} You can add more warmth with pumpkin spice. Just mix in extra spices like clove or allspice. This gives a cozy fall flavor. Use about 1 teaspoon of each spice for the best taste. These donut holes become a true seasonal treat with that extra kick. If you love chocolate, try a chocolate glaze. Melt 1 cup of chocolate chips with a bit of cream. Dip the warm donut holes into this glaze. You can then sprinkle them with crushed nuts or sprinkles. This twist brings a rich taste to your pumpkin donuts. You can play with the coatings too! Instead of cinnamon sugar, roll your donut holes in powdered sugar. For a fun twist, coat them in coconut flakes or crushed graham crackers. You can also try a maple glaze for a sweet contrast. The options are endless, so get creative! For the full recipe, you can explore how to make these delicious donut holes. To keep your donut holes fresh, store them in an airtight container. Use parchment paper between layers to avoid sticking. This method helps maintain their fluffy texture. Place the container in a cool, dry place. Avoid storing them in the fridge, as this can make them dry. You can freeze these donut holes for a later treat. First, let them cool completely. Then, place them in a single layer on a baking sheet. Freeze for about an hour, then transfer to a heavy-duty freezer bag. When you're ready to enjoy them, reheat in a 350°F oven for 5-7 minutes. This will bring back their warmth and softness. Homemade donut holes stay fresh for about 2-3 days at room temperature. If stored properly in an airtight container, they can last up to a week in the fridge. However, the best taste comes when enjoyed fresh. With proper freezing, they can last for up to 2 months. Always check for any signs of spoilage before eating. For the full recipe, check out the detailed instructions to make these delightful treats. If you can't find canned pumpkin puree, use fresh pumpkin. Cook the pumpkin until soft. Then, mash it well to get a smooth texture. You can also use butternut squash puree as a tasty alternative. Both options give a similar flavor and texture. Yes, you can bake these donut holes for a healthier twist! Preheat your oven to 350°F (175°C). Place the rolled donut holes on a baking sheet lined with parchment paper. Bake for about 15-20 minutes or until they are golden. Keep an eye on them to avoid over-baking. To check if the oil is ready, use a thermometer. The ideal temperature is 350°F (175°C). If you don't have a thermometer, drop a small piece of dough into the oil. If it bubbles and rises, the oil is hot enough. Fry in small batches to keep the temperature steady. This article covered how to make cinnamon sugar pumpkin donut holes from start to finish. You learned about the key ingredients, the steps for perfect frying, and helpful tips along the way. I shared variations and best storage practices too. Now you have all the tools to create these tasty treats. Enjoy experimenting with flavors and impress your friends and family with your delicious donut holes!](https://grilledflavors.com/wp-content/uploads/2025/07/aa08d20b-f820-467a-89a6-5a734a9e29ca.webp)
Fall is the perfect time to whip up Cinnamon Sugar Pumpkin Donut Holes. These tasty treats combine warm spices and sweet pumpkin for a cozy snack any time of day. …
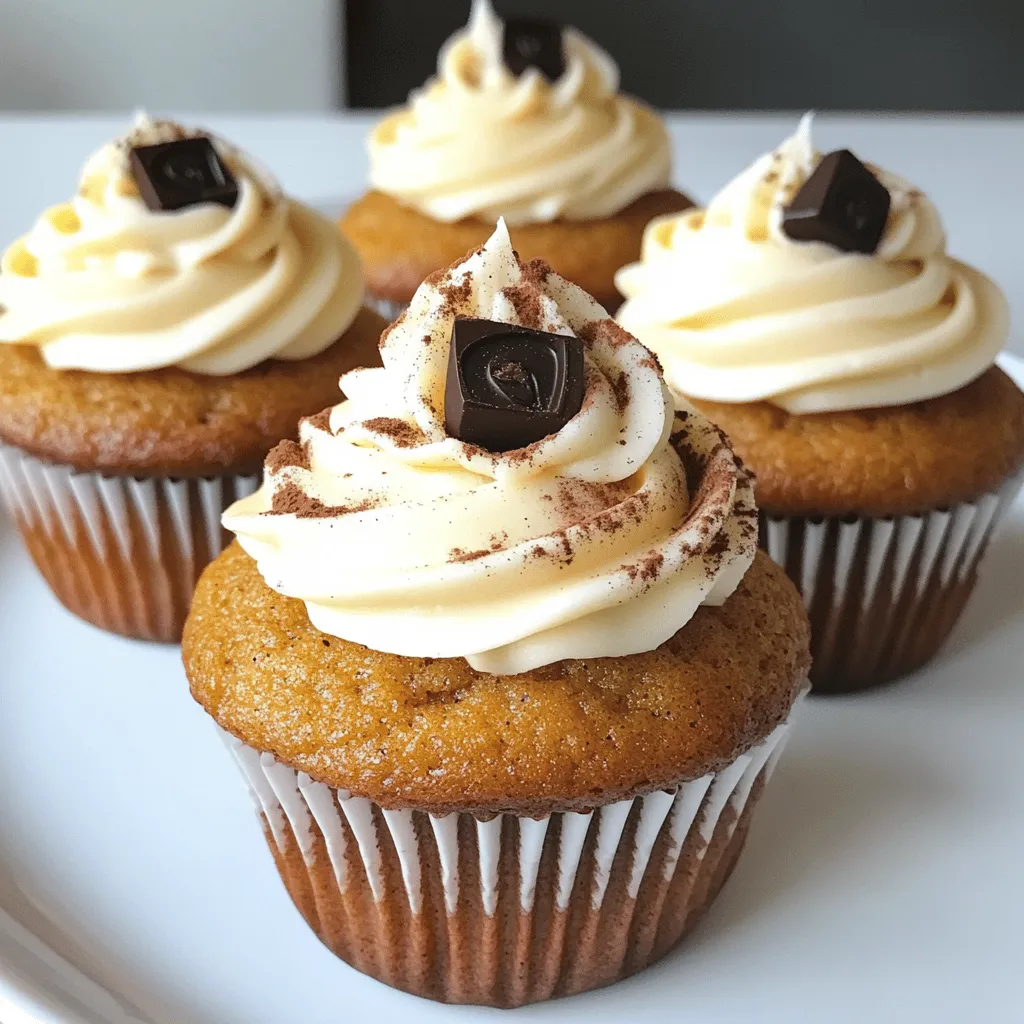
![- 1 ½ cups all-purpose flour - 1 teaspoon baking powder - 1 teaspoon baking soda - ½ teaspoon salt - 1 teaspoon ground cinnamon - ½ teaspoon ground nutmeg - ½ teaspoon ground ginger - ½ cup unsalted butter, softened - 1 cup granulated sugar - 2 large eggs - 1 cup canned pumpkin puree - ½ teaspoon vanilla extract - ½ cup brown sugar - 8 oz cream cheese, softened - ½ cup unsalted butter, softened - 1 teaspoon vanilla extract - 2 cups powdered sugar - ¼ cup caramel sauce (store-bought or homemade) Every ingredient plays a key role in making these cupcakes great. The dry ingredients create the base. Flour provides structure while baking powder and baking soda help them rise. The spices add warmth and flavor. For the wet ingredients, butter gives richness and moisture. Sugar adds sweetness. Eggs bind everything together. Pumpkin puree brings a lovely texture and flavor. It also keeps the cupcakes moist. The frosting ingredients are just as important. Cream cheese and butter create a smooth base. The vanilla adds a nice touch. Powdered sugar sweetens the frosting and gives it the right consistency. Finally, caramel sauce adds that extra layer of flavor we all love. Check out the Full Recipe to see how to combine these ingredients into delicious pumpkin cupcakes with caramel cream cheese frosting. - Preheat your oven to 350°F (175°C). - Line a cupcake tray with paper liners. - In a bowl, whisk together: - 1 ½ cups all-purpose flour - 1 teaspoon baking powder - 1 teaspoon baking soda - ½ teaspoon salt - 1 teaspoon ground cinnamon - ½ teaspoon ground nutmeg - ½ teaspoon ground ginger - Set this mix aside for later use. - In a large bowl, beat together: - ½ cup unsalted butter, softened - 1 cup granulated sugar - Mix until creamy and light. This takes about 3 to 4 minutes. - Add 2 large eggs, one at a time. Mix well after each egg. - Stir in: - 1 cup canned pumpkin puree - ½ teaspoon vanilla extract - Mix until smooth. - Gradually add the dry ingredients to the wet mix. Stir gently. Avoid overmixing. - Fill each cupcake liner about 2/3 full with batter. - Bake in the preheated oven for 18 to 20 minutes. - Check doneness with a toothpick. It should come out clean. - Let the cupcakes cool in the tray for 5 minutes. - Transfer them to a wire rack to cool completely. - In a mixing bowl, beat together: - 8 oz cream cheese, softened - ½ cup unsalted butter, softened - Mix until creamy and smooth. - Add 1 teaspoon vanilla extract. - Gradually mix in: - 2 cups powdered sugar - Keep mixing until you get your desired sweetness and consistency. - Fold in: - ¼ cup caramel sauce - Once the cupcakes are cool, generously frost each one with the caramel cream cheese frosting. - For an extra treat, drizzle some additional caramel sauce on top. For the complete recipe, check out the [Full Recipe]. To make moist pumpkin cupcakes, start with fresh ingredients. Fresh ingredients boost flavor and texture. Always check dates on baking items. Use the right measuring techniques. Spoon flour into your measuring cup, then level it off. This avoids too much flour in your mix, which can dry out cupcakes. For a creamy frosting, ensure your butter and cream cheese are at room temperature. This step is key for a smooth blend. If they’re too cold, the frosting can be lumpy. Adjust the sweetness to your taste by adding powdered sugar slowly. This helps you find the perfect balance for your caramel cream cheese frosting. Check your oven temperature for accuracy. An oven thermometer can help with this. If your oven runs hot, cupcakes may bake too fast and dry out. Avoid overmixing your batter. Mix until just combined to keep your cupcakes light and fluffy. Too much mixing can make them tough. These tips will guide you toward making the best pumpkin cupcakes with caramel cream cheese frosting. For the complete recipe, check [Full Recipe]. {{image_2}} If you want to switch up the frosting on your pumpkin cupcakes, try these options: - Whipped cream frosting: This light and airy frosting adds a fluffy touch. Just whip heavy cream with a bit of sugar and vanilla until soft peaks form, then pipe it onto the cupcakes. - Maple cream cheese frosting: For a twist, mix maple syrup into the cream cheese base. This adds a rich, sweet flavor that pairs well with pumpkin. You can adjust the recipe for different diets: - Gluten-free flour options: Use a gluten-free all-purpose flour blend. This way, you can enjoy these cupcakes without gluten. - Vegan substitutions: Replace eggs with applesauce or flaxseed meal mixed with water. Use vegan butter and dairy-free cream cheese for a completely plant-based treat. Add some extra fun to your cupcakes with these ideas: - Adding chocolate chips: Fold in a cup of chocolate chips into the batter for a sweet surprise with each bite. - Incorporating nuts: Chopped walnuts or pecans can add a nice crunch and nutty flavor. Sprinkle them in the batter or on top of the frosting for an extra touch. These variations let you personalize your pumpkin cupcakes. Feel free to mix and match to find your favorite combination! For the complete recipe, check out the Full Recipe section. To keep your pumpkin cupcakes fresh, store them properly. You can keep them at room temperature or refrigerate them. If you choose room temperature, place them in an airtight container. This helps keep them moist. For refrigeration, it’s best to use the same airtight container. This method prevents them from drying out. How long do these pumpkin cupcakes last? If stored correctly at room temperature, they can stay fresh for up to three days. In the fridge, they can last up to a week. Look for signs of spoilage. If you see mold or a strange smell, it’s time to toss them. Freezing is a great option if you want to save these treats for later. First, let the cupcakes cool completely. Then, wrap each one tightly in plastic wrap. Place them in a freezer-safe bag or container. To thaw, simply take them out and leave them at room temperature for a few hours. This helps keep their flavor intact. Enjoy them later along with the full recipe! Yes, you can make these cupcakes a day ahead. Bake and cool them fully. Then, place them in an airtight container. Keep them at room temperature. Frost them just before serving for the best taste. To frost pumpkin cupcakes, use a piping bag with a star tip. This gives a nice swirl. If you don't have a piping bag, a simple offset spatula works well. Start from the center and swirl outwards. Yes, homemade caramel sauce adds a special touch. To make it, melt sugar slowly until it turns golden. Then, add butter and cream carefully. Stir until smooth. Let it cool before using in the frosting. You can use applesauce or mashed bananas instead of pumpkin puree. Both give moisture and flavor. Sweet potato puree is another great option. Each of these adds a nice taste to your cupcakes. Check for doneness by inserting a toothpick into the center. If it comes out clean or with a few crumbs, they’re done. You can also gently press the tops; they should spring back. If they sink, they need more time. These pumpkin cupcakes combine simple ingredients and steps for great results. Start with a mix of dry and wet ingredients that creates a rich batter. Follow the easy instructions to bake and cool the cupcakes, then make a creamy frosting. Add your choice of flavors or modifications to make them unique. Remember to store them well to keep your treats fresh. Enjoy these tasty delights at any gathering. You’ll impress everyone with your baking skills!](https://grilledflavors.com/wp-content/uploads/2025/07/a806c365-c9bb-4231-9f6c-a094719cd902.webp)
Get ready to satisfy your sweet tooth with my Pumpkin Cupcakes with Caramel Cream Cheese Frosting! These cupcakes burst with flavor and warmth, perfect for fall or any time you’re …
![When making Vanilla Chai Pumpkin Latte Cupcakes, the right ingredients create magic. Here’s what you need: - 1 cup all-purpose flour - 1 teaspoon baking powder - 1/2 teaspoon baking soda - 1/4 teaspoon salt - 1 teaspoon ground cinnamon - 1/2 teaspoon ground ginger - 1/4 teaspoon ground cloves - 1/4 teaspoon ground nutmeg - 1/4 cup unsalted butter, softened - 1/2 cup granulated sugar - 1/4 cup brown sugar, packed - 1/2 cup canned pumpkin puree - 2 large eggs - 1 teaspoon vanilla extract - 1/2 cup brewed chai tea, cooled - 1/4 cup milk (or a non-dairy alternative) - Optional: Whipped cream and pumpkin spice for topping Using fresh spices makes a big difference. Ground spices lose flavor over time. Fresh pumpkin puree is also ideal for richness. You can use canned, but choose a quality brand. The chai tea is a star here. It gives a warm, spiced flavor. Brew it strong for the best taste. Use your favorite milk or a non-dairy option if needed. This recipe is flexible. Feel free to top your cupcakes with whipped cream and pumpkin spice. This adds a lovely finish. You can find the full recipe in the cooking section for more details. Now, let’s make some delicious treats! Error: Error code: 429 - {'error': {'message': 'Rate limit reached for gpt-4o-mini in organization org-zFeAnX8gJvsCtEtJubNX3NN3 on tokens per min (TPM): Limit 200000, Used 199345, Requested 2281. Please try again in 487ms. Visit https://platform.openai.com/account/rate-limits to learn more.', 'type': 'tokens', 'param': None, 'code': 'rate_limit_exceeded'}} - Always ensure your ingredients are at room temperature. This helps the batter mix evenly. - Avoid over-mixing the batter. This can make your cupcakes tough instead of soft. - Use an oven thermometer. It helps to check if your oven heats accurately. - Use stabilized whipped cream for a better texture. It holds shape longer and tastes great. - Chill your whipped cream before using it. This helps it whip up nicely and stay firm. - Adding spices to your frosting can boost flavor. A pinch of cinnamon or nutmeg works wonders. - Garnish with extra pumpkin spice and whipped cream. This makes your cupcakes look inviting. - Use decorative cupcake liners. They add a pop of color and charm to your treats. These tips will help you create the best Vanilla Chai Pumpkin Latte Cupcakes. Follow them, and watch your cupcakes shine! For the complete recipe, refer to the Full Recipe. {{image_2}} You can change the flavor of your Vanilla Chai Pumpkin Latte Cupcakes by using different spices. For instance, try adding cardamom for a unique twist. If you wish, swap pumpkin puree for sweet potato. This change gives a different taste while keeping the texture. Also, consider using different types of milk or milk alternatives. Almond or oat milk can add a nice flavor. Frosting can change the whole cupcake game. Instead of whipped cream, you can use cream cheese frosting. It adds a tangy flavor that pairs well with the spices. Another fun option is chocolate ganache. This rich topping can bring a decadent feel to your cupcakes. You might also try maple-flavored frosting. It brings a sweet, autumn vibe to the table. If you have dietary needs, there are great options. Use gluten-free flour alternatives for a gluten-free treat. You can also make vegan substitutions for eggs and butter. Try using flaxseed meal or applesauce in place of eggs. For butter, coconut oil works well. If you want a healthier option, look for low-sugar alternatives. These changes keep the flavor without all the sugar. You can find the full recipe to get started on these delicious variations! To keep your Vanilla Chai Pumpkin Latte Cupcakes fresh, store them in an airtight container. This method helps to lock in moisture and flavor. If you want to keep them longer, refrigerate the cupcakes. The fridge slows down spoilage and keeps them safe. For even longer storage, you can freeze the cupcakes. Wrap each cupcake tightly in plastic wrap, and then place them in a freezer-safe bag. They can stay fresh for up to three months in the freezer. At room temperature, these cupcakes last about 2 to 3 days. Keep them in a cool, dry place, away from direct sunlight. If you store them in the fridge, they can last up to a week. Just make sure to seal them well to maintain their taste and texture. To reheat your cupcakes, the best method is to use the microwave. Heat them for about 10 to 15 seconds. If they seem a bit dry, place a damp paper towel over the cupcake while warming. This trick adds moisture back into the cupcake. If you prefer using the oven, preheat it to 350°F (175°C). Place the cupcakes on a baking sheet and warm them for about 5 to 10 minutes. This method keeps the cupcakes soft and tasty. To make these delightful cupcakes, start by mixing your dry ingredients. Use flour, baking powder, baking soda, salt, and spices like cinnamon and ginger. In another bowl, cream softened butter with granulated and brown sugar. Add pumpkin puree, eggs, and vanilla extract. Then, blend in your dry mix and brewed chai tea with milk. Fill cupcake liners with the batter and bake at 350°F for about 18-20 minutes. Follow the [Full Recipe] for detailed steps. Yes, you can make these cupcakes in advance! Bake them a day or two before your event. Store the cupcakes in an airtight container at room temperature. They stay fresh and tasty for a couple of days. If you want to keep them longer, freeze them. Just thaw them before serving. These cupcakes pair well with warm drinks. Try serving them with a spiced chai latte or a rich hot cocoa. For snacks, consider salted caramel popcorn or a simple cheese platter. The sweet and spicy flavors complement each other. To boost the chai flavor, use strong brewed chai tea. You can also add a bit of chai spice mix directly into the batter. If you love a more intense flavor, steep the chai tea longer before adding it to the mix. Another option is to sprinkle a bit of chai spice on top of the whipped cream. This recipe includes common allergens like gluten from flour, dairy from butter and milk, and eggs. If you need alternatives, you can use gluten-free flour and non-dairy milk. For egg substitutes, try using flaxseed meal or applesauce. Always check labels when using substitutes to ensure they fit your needs. These cupcakes combine tasty spices, pumpkin, and chai for a unique treat. You start with simple ingredients and follow easy steps to bake them. I shared tips for perfect cupcakes and ideas for variation, plus storage info to keep them fresh. Enjoy these flavors in different ways to match your diet. Whether for a special event or just because, these cupcakes are sure to please. Try them out and make them your own!](https://grilledflavors.com/wp-content/uploads/2025/07/16e8200c-dbd9-429c-a6ae-c314189c52cb.webp)
Get ready to indulge in a sweet treat that perfectly blends autumn flavors! These Vanilla Chai Pumpkin Latte Cupcakes are simple to make and bursting with warmth. With each bite, …
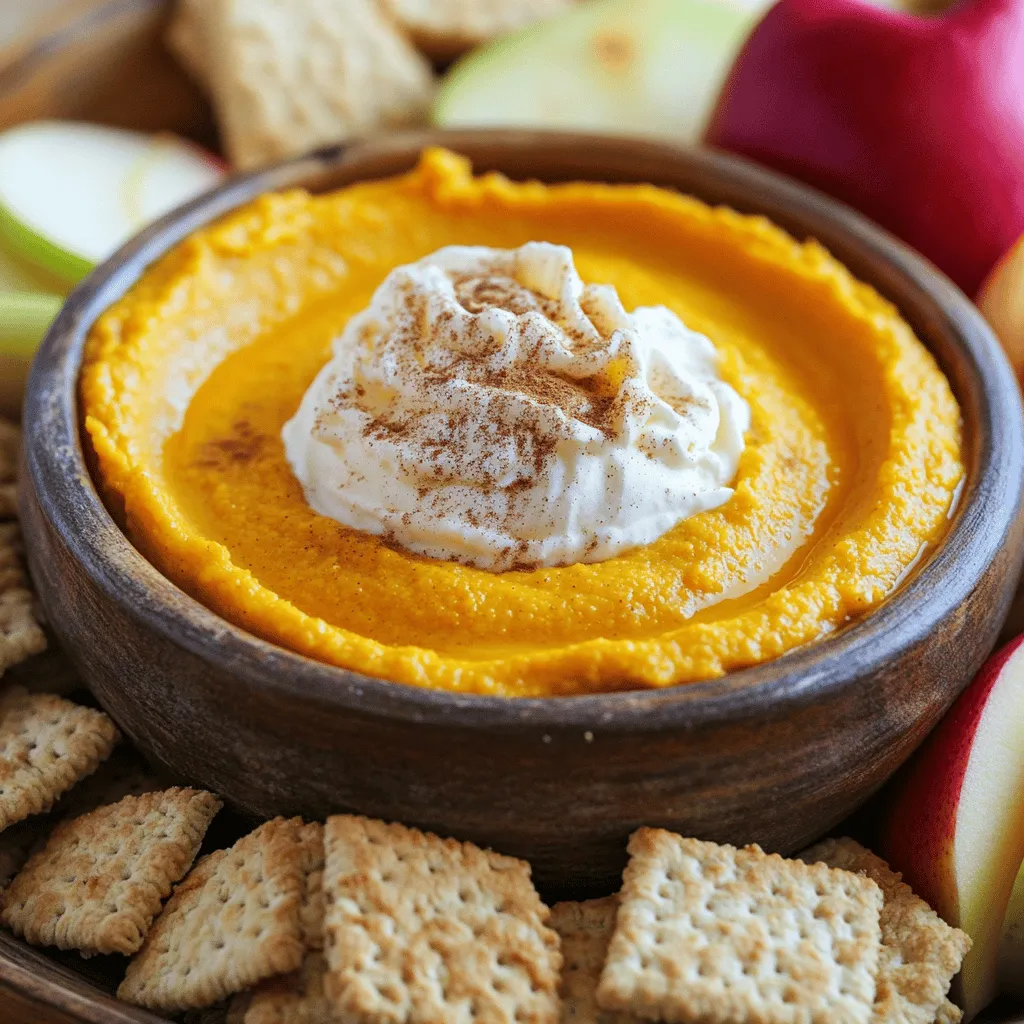
Fall is here, and what better way to celebrate than with a simple Pumpkin Pie Dip? This creamy treat combines the rich flavors of pumpkin, spice, and whipped topping for …
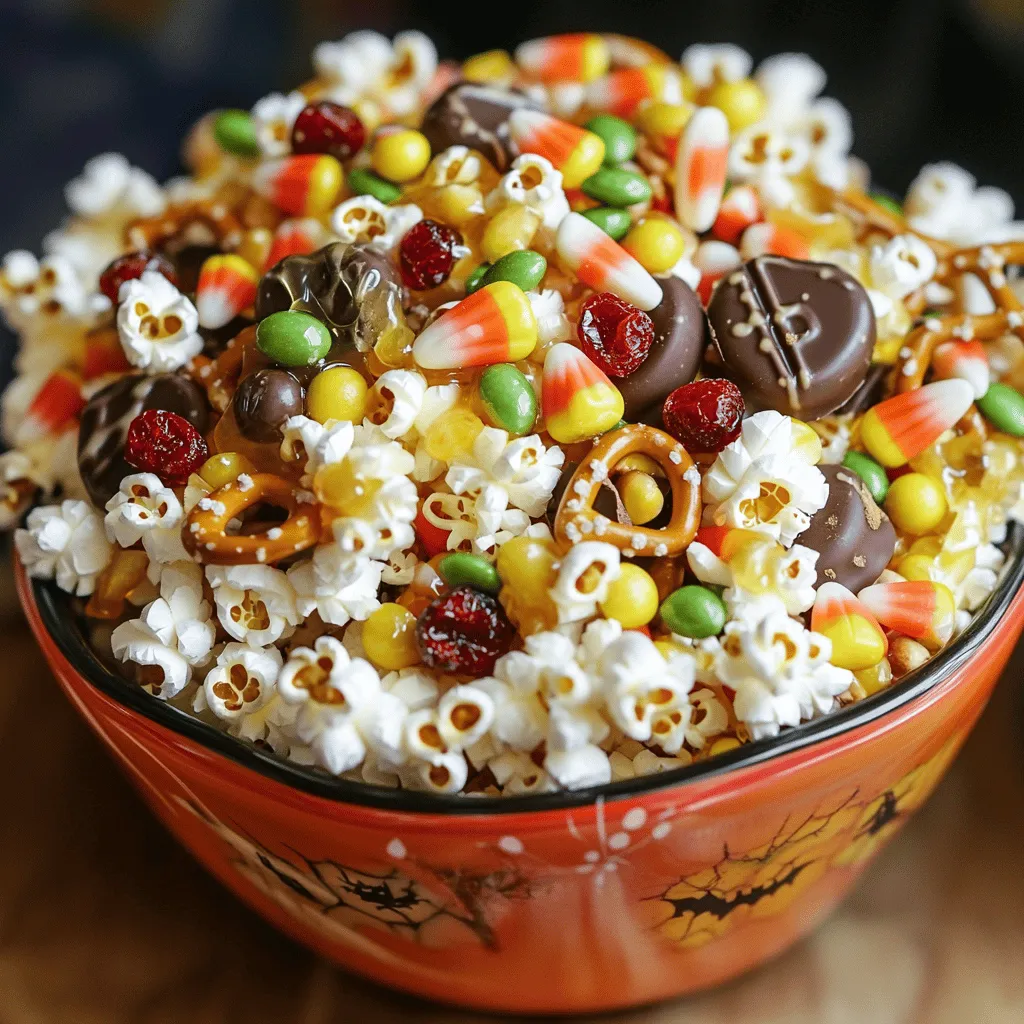
Get ready for Halloween fun with my Scarecrow Crunch Snack Mix! This tasty treat combines popcorn, pretzels, and candy corn for a sweet and salty crunch everyone will love. Perfect …
![- 1 cup pure pumpkin puree - 3/4 cup brown sugar, packed - 1/2 cup granulated sugar - 1 teaspoon vanilla extract - 1 teaspoon ground cinnamon - 1/2 teaspoon ground nutmeg - 1/2 teaspoon ground ginger - 2 large eggs - 1 cup milk (or plant-based milk) - 1/2 cup all-purpose flour - 1/4 cup unsalted butter, melted - 1 cup pecans, chopped - 1/2 teaspoon baking powder - Pinch of salt The base of my homemade pumpkin pecan cobbler is simple yet packed with flavor. I always use pure pumpkin puree. It gives the dish its rich, sweet taste. Brown sugar adds a nice depth, while granulated sugar helps balance the flavors. I love adding warm spices like cinnamon, nutmeg, and ginger to my cobbler. They bring a cozy warmth that feels like a hug on a cold day. The eggs help bind everything together. Milk, whether dairy or plant-based, keeps the cobbler moist. When baking, I always include flour for structure. A little melted butter adds richness. Chopped pecans give a delightful crunch and nutty flavor. Finally, a pinch of salt enhances all the sweet notes. You can find the full recipe above to get started on this delightful treat! - Preheat your oven to 350°F (175°C). - Grease a 9x13-inch baking dish. This step helps the cobbler come out easily. - In a large mixing bowl, combine pumpkin puree, brown sugar, granulated sugar, and vanilla. - Mix until smooth. The blend should be thick and creamy. - Next, add two large eggs and one cup of milk. - Whisk until fully mixed. This makes your batter rich and tasty. - In a separate bowl, mix flour, baking powder, cinnamon, nutmeg, ginger, and a pinch of salt. - Stir these dry ingredients well. - This mix adds flavor and texture to your cobbler. - Gradually add the dry mix to the wet mix. Stir gently until just combined. - Be careful not to over-mix; this keeps your cobbler light. - Fold in melted butter and chopped pecans. - Pour the batter into the greased baking dish. Smooth the top with a spatula. - Bake for 45-50 minutes. The cobbler should be set in the center and golden on top. - Let it cool for ten minutes before serving. Enjoy your delicious homemade pumpkin pecan cobbler! For the complete recipe, check the Full Recipe section. To make your pumpkin pecan cobbler great, use pure pumpkin puree. Avoid pumpkin pie filling. This ensures you get the true pumpkin flavor. Next, when mixing your batter, don’t over-mix. This keeps the texture tender and soft, which is what you want in a cobbler. Serve your cobbler warm for the best taste. It pairs well with whipped cream or ice cream. A scoop of vanilla ice cream brings out the flavors. For an eye-catching look, sprinkle cinnamon on top. Add a few whole pecans as a garnish. This makes your dish pretty and tasty. Before baking, taste your batter. If you want it sweeter, add more sugar. Each pumpkin can vary in sweetness, so this step is key. Adjusting now helps you get the flavor just right. Remember, you can always add more, but you can’t take it out. {{image_2}} You can make your pumpkin pecan cobbler even better! Try adding chocolate chips for a richer taste. The sweet chocolate pairs well with pumpkin. You can also mix in different spices. Cloves or allspice can add warmth and depth to the flavor. Just a pinch can change the whole dish! If you want a new twist, swap the pecans. Walnuts or almonds work great too. Walnuts add a softer crunch. Almonds give a unique flavor. Both nuts will change the texture and taste. This keeps the recipe fun and fresh! Need a gluten-free option? Use gluten-free flour instead of regular flour. This keeps the texture just right. You can also replace dairy milk with plant-based options. Almond or oat milk are great choices. They keep the cobbler creamy without the lactose. These simple swaps make it easy for everyone to enjoy! After you enjoy your cobbler, store any leftovers covered in the refrigerator. It will stay fresh for up to 4 days. Just make sure to keep it in an airtight container or wrap it tightly with plastic wrap. This will help keep the flavors and moisture intact. If you want to save some for later, freezing is a great option. Freeze individual portions in airtight containers. This method allows you to enjoy a slice whenever you want. Your cobbler will keep well in the freezer for up to 3 months. Just label your containers with the date so you remember when you made it. When you’re ready to enjoy your frozen cobbler, reheating is easy. You can use the oven or the microwave. If you choose the oven, preheat it to around 350°F. Place the cobbler in an oven-safe dish and heat until warmed through. For the microwave, heat in short intervals, checking often to avoid overheating. Enjoy your delicious treat again! For the full recipe, check [Full Recipe]. Yes, canned pumpkin puree works perfectly for this recipe. It saves time and is easy to use. Just make sure to pick pure pumpkin, not pie filling. This choice keeps the flavor rich and smooth. The center should be set and slightly golden on top; a toothpick should come out clean. If the toothpick has wet batter, bake it a bit longer. You want a nice, firm texture without being dry. Yes, you can prepare it a day in advance and bake it before serving. Just cover it well and store it in the fridge. When you're ready, bake it fresh for your guests. This makes it easy to enjoy without stress. It pairs well with ice cream, whipped cream, or a caramel sauce drizzle. The cold creaminess of ice cream balances the warm cobbler. A drizzle of caramel adds a sweet touch that everyone loves. For the full recipe, check out Homemade Pumpkin Pecan Cobbler! This blog post shared a simple way to make pumpkin pecan cobbler. We covered the key ingredients, detailed instructions, tips for best results, and tasty variations. With each step, you can create a warm, comforting dessert. Remember to store leftovers properly and explore different flavors. Enjoy the joy of baking and sharing this sweet treat with friends and family!](https://grilledflavors.com/wp-content/uploads/2025/07/29cfc71c-9e20-4464-a672-c390f5a5d160.webp)
Are you ready to impress your friends and family with a tasty dessert? Homemade pumpkin pecan cobbler is simple to make and bursting with flavor! This cozy treat combines the …

Get ready to fall in love with Pumpkin Spice Cheesecake Doughnuts! This easy recipe blends creamy cheesecake with warm pumpkin spice, creating a treat you’ll crave all season. I’ll guide …
![- 4 cups all-purpose flour - ¼ cup granulated sugar - 1 teaspoon salt - 2 teaspoons ground cardamom - 1 teaspoon ground cinnamon - ½ teaspoon ground ginger - ½ teaspoon ground cloves - ½ cup whole milk, warmed - ⅓ cup unsalted butter, melted - 2 large eggs - 1 tablespoon vanilla extract - ½ cup brown sugar, packed - 2 tablespoons ground cinnamon - ⅓ cup unsalted butter, softened - 1 teaspoon ground cardamom - 1 tablespoon chai blend - Glaze ingredients: 1 cup powdered sugar, 2-3 tablespoons milk, ½ teaspoon vanilla extract Gathering the right ingredients makes all the difference. The dry ingredients form the base of your dough. Flour gives it structure, while sugar adds sweetness. Salt brings out the flavors. The spices, like cardamom and cinnamon, add warmth and depth. For the wet ingredients, warm milk helps activate the yeast. Melted butter makes the rolls rich and tender. Eggs enrich the dough and help it rise. The vanilla extract adds a lovely aroma. The filling and glaze are where the magic happens. Brown sugar and cinnamon create a sweet, sticky mixture. The softened butter binds it all together. The chai blend adds an extra kick, making these rolls special. The glaze is simple but effective, adding a sweet finish. To make this delightful treat, follow the [Full Recipe]. It guides you through every step, ensuring your chai cinnamon rolls come out perfect. 1. Start by mixing the yeast, warm milk, and sugar in a bowl. Stir gently. Let this sit for 5 to 10 minutes until it gets frothy. 2. In a big bowl, combine the flour, salt, cardamom, cinnamon, ginger, and cloves. This mix gives our rolls great flavor. 3. Now, add the melted butter, eggs, and the yeast mixture to the dry mix. Stir until it comes together. Knead the dough on a floured surface for about 5 to 7 minutes. Aim for a smooth, elastic texture. 1. Place the kneaded dough in a greased bowl. Cover it with a kitchen towel. Let it rise in a warm spot for about 1 to 1.5 hours. It should double in size. 2. Once it has risen, punch the dough down gently. Roll it out into a rectangle that is about 15 by 10 inches. 3. To make the filling, mix brown sugar, cinnamon, softened butter, cardamom, and chai blend in a bowl. Spread this mixture evenly over the rolled-out dough. 1. From one long edge, tightly roll the dough into a log. 2. Cut the log into 12 equal pieces. This helps create nice, even rolls. Arrange them in a greased baking dish. 3. Cover the rolls with a towel again and let them rise for another 30 to 40 minutes. Preheat your oven to 375°F (190°C). 4. Bake the cinnamon rolls for 25 to 30 minutes. They should be golden brown when done. 5. While baking, mix powdered sugar, milk, and vanilla for the glaze. Adjust milk to reach your desired consistency. 6. Once baked, allow the rolls to cool slightly. Drizzle the glaze over them for a sweet finish. Follow these steps for a delightful chai cinnamon roll experience! For the detailed recipe, check the Full Recipe section. - Choosing the right chai blend Select a chai blend that includes spices like cinnamon, ginger, and cardamom. This will boost the flavor of your rolls. You can use loose-leaf tea or tea bags, depending on your taste. - Adjusting spices for personal taste Feel free to add more cardamom or cinnamon if you love those flavors. You can also try adding a pinch of nutmeg for extra warmth. Remember, it is all about what you enjoy! - Tips for making a more fragrant dough To enhance the aroma, let your dough rise in a warm, cozy spot. Try adding a splash of vanilla extract to the dough mix. The warmth will bring out the lovely scent of spices. - How to achieve perfect roll shape Roll the dough tightly when forming the log. This helps the rolls keep their shape while baking. Use a sharp knife to cut the dough into even pieces for uniform cooking. - Knowing when the rolls are perfectly baked Look for a golden-brown color on top. You can also tap the bottom of a roll; it should sound hollow when done. If you have a thermometer, the inside should be about 190°F (88°C). - Presentation tips: glazing and serving suggestions Drizzle the glaze generously over warm rolls for a glossy finish. Arrange them on a large platter. Sprinkle a little cinnamon on top for a beautiful touch. Serve with a cup of chai for the full experience. By following these tips, your chai cinnamon rolls will be even more delightful! You can find the full recipe above for step-by-step guidance. {{image_2}} To make vegan chai cinnamon rolls, swap key ingredients. Use plant milk like almond or oat. Replace eggs with flaxseed meal or applesauce. For butter, choose coconut oil or a vegan butter alternative. This keeps the rolls soft and tasty without dairy. For a gluten-free version, choose a gluten-free all-purpose flour blend. You may also add xanthan gum for better texture. Adjust the liquid slightly as gluten-free flours absorb moisture differently. Your rolls will still rise and taste wonderful! To make your filling even better, add nuts or dried fruits. Chopped walnuts or pecans add a nice crunch. Dried cranberries or raisins can add sweetness. Just mix them into the filling for a delightful twist. You can also create a different glaze flavor. Instead of vanilla, try almond extract or a splash of chai tea. This small change can make a big difference in taste. Adjust the sweetness by adding more or less sugar. Your glaze will complement the rolls perfectly! For the full recipe, check the section above. To keep your chai cinnamon rolls fresh, store them in an airtight container. Place a piece of parchment paper between layers to avoid sticking. You can also wrap them tightly in plastic wrap. This will help prevent them from drying out. If you want to freeze the rolls, let them cool completely first. Wrap each roll in plastic wrap, then place them in a freezer bag. They can stay frozen for up to three months. To reheat, take out a roll, unwrap it, and place it on a plate. Microwave it for about 20-30 seconds, or until warm. Chai cinnamon rolls last about two days at room temperature if stored correctly. Keep them in a cool, dry place. If you refrigerate them, they can last about a week. However, refrigeration may change their texture. When frozen, these rolls maintain their best taste for three months. After that, they may still be safe to eat but may lose flavor. Always check for any signs of spoilage before enjoying them. How do you know when the cinnamon rolls are done? The rolls are done when they turn golden brown. You can also check the center. If a toothpick comes out clean, they are ready. Can I make these rolls ahead of time? Yes, you can make the rolls ahead. Prepare the dough and filling, then shape the rolls. Cover them and refrigerate overnight. Bake them fresh in the morning. What are some best tea pairings with Chai Cinnamon Rolls? I recommend pairing these rolls with a strong black tea. Assam or Darjeeling tea works well. You can also try spiced chai for added warmth. Can I use instant yeast if I have active dry yeast? Yes, you can. Just use the same amount. However, you need to activate active dry yeast first. Mix it with warm milk and sugar before adding it to the dry mix. How do I fix dough that’s too sticky? If your dough is too sticky, add more flour. Do this slowly, a little at a time. Knead the dough until it feels smooth and not sticky anymore. What can I substitute for whole milk in the recipe? You can use almond milk or soy milk. Both will work well. If you want a creamier texture, try using oat milk. You now have everything you need to create delicious chai cinnamon rolls. We covered the right ingredients, step-by-step instructions, and helpful tips. With a simple recipe and a few twists, anyone can enjoy these rolls. Experiment with flavors and fillings to make this treat your own. Remember to store leftovers properly so you can enjoy them later. With practice, your rolls will impress everyone. Enjoy your baking journey and the delightful aromas that fill your kitchen!](https://grilledflavors.com/wp-content/uploads/2025/07/cac3a074-bc7c-44a1-8314-e3810aa66c71.webp)
Are you ready to indulge in a delicious treat that combines sweet and spicy flavors? These Chai Cinnamon Rolls are a game-changer, transforming your breakfast (or snack time) into a …
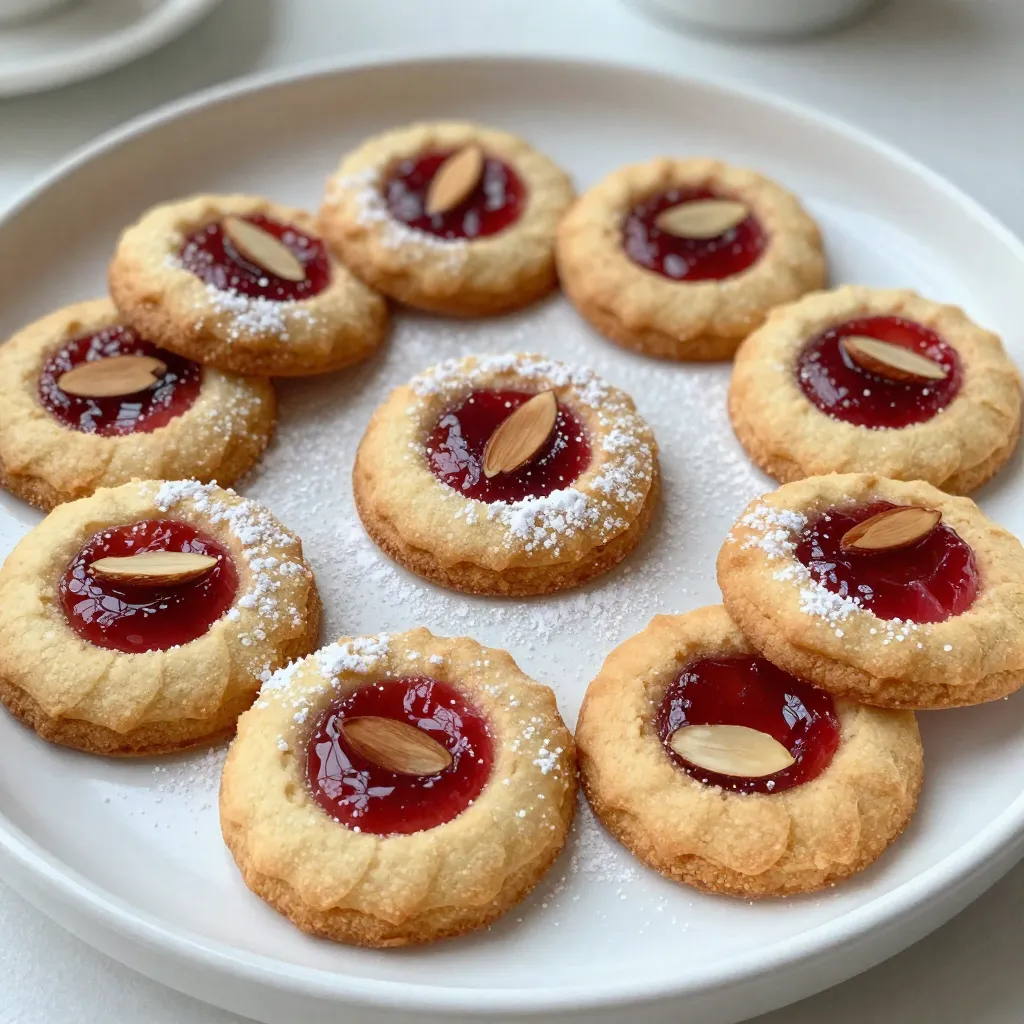
If you’re looking for a sweet treat that’s easy and delightful, you’ll love Raspberry Almond Thumbprint Cookies! These tasty bites combine the rich flavor of almond with bright raspberry jam, …