Skip to content
grilledflavors.com
  • Home
  • Appetizers
  • Desserts
  • Salads
  • Breakfast
  • Dinner
  • Privacy Policy
  • Contact
  • About

Chef Nate

Creamy Tortellini Soup Hearty and Comforting Dish

July 12, 2025 by Chef Nate
To make creamy tortellini soup, gather these items: - 2 cups cheese tortellini (fresh or frozen) - 1 tablespoon olive oil - 1 small onion, diced - 3 cloves garlic, minced - 2 carrots, diced - 2 celery stalks, diced - 4 cups vegetable broth - 1 cup heavy cream or coconut milk - 1 cup fresh spinach - 1 teaspoon dried oregano - 1 teaspoon dried basil - Salt and black pepper to taste - Grated parmesan cheese for serving - Fresh basil leaves for garnish Each ingredient adds to the soup's creaminess and flavor. The tortellini brings texture, while the broth and cream create a rich base. You can swap some ingredients if needed. Try these: - Use chicken broth instead of vegetable broth for a meatier taste. - Instead of heavy cream, use Greek yogurt for a lighter version. - Replace cheese tortellini with spinach or mushroom tortellini for extra flavor. These swaps keep the soup tasty while fitting your needs. For those who want to add more taste, consider these extras: - A splash of lemon juice brightens the soup. - Add red pepper flakes for heat if you like spice. - Toss in some diced tomatoes for a hint of sweetness. These optional ingredients make the soup even more special! For the full recipe, check the earlier section. To make creamy tortellini soup, gather all your ingredients first. This makes cooking easy and fun. You will need cheese tortellini, olive oil, onion, garlic, carrots, celery, vegetable broth, heavy cream or coconut milk, spinach, herbs, salt, and pepper. 1. Start by heating the olive oil in a large pot over medium heat. 2. Add the diced onion, carrots, and celery. Sauté these for 5 to 7 minutes. You want them soft but not mushy. 3. Then, add the minced garlic. Sauté for 1 to 2 minutes. This will make your kitchen smell amazing. 4. Pour in the vegetable broth and bring it to a boil. This step adds a rich base to your soup. 5. Now, add the cheese tortellini. Cook according to the package instructions. Fresh tortellini takes about 3 to 5 minutes. Frozen may take 7 to 10 minutes. 6. When the tortellini is cooked, reduce the heat to low. Stir in the heavy cream or coconut milk. This makes your soup creamy and rich. 7. Next, add fresh spinach, oregano, basil, salt, and black pepper. Stir well and let it simmer for another 2 to 3 minutes. The spinach will wilt and add color. 8. Taste your soup and adjust the seasonings if needed. You want it just right. 9. Finally, serve the soup hot. Top with grated parmesan cheese and fresh basil leaves for a nice touch. - Make sure to follow the cooking time on the package. Overcooking can make tortellini mushy. - If using frozen tortellini, do not thaw them first. Just add them directly to the pot. - For a firmer bite, cook tortellini just until al dente. This keeps them nice and chewy. This creamy tortellini soup is a great dish to share with family and friends. For the full recipe, you can refer to the earlier section. Enjoy your cooking! To make your creamy tortellini soup burst with flavor, use fresh ingredients. Fresh garlic and herbs add a bright taste. I also love using vegetable broth instead of water. The broth brings depth to the soup. Adding a splash of lemon juice can brighten the flavors. A pinch of red pepper flakes gives it a nice kick. One common mistake is overcooking the tortellini. Cook it just until tender to keep it from getting mushy. Another mistake is not sautéing the vegetables long enough. Sautéing them enhances their natural sweetness. Also, remember to taste the soup before serving. Adjust the seasoning as needed. This step makes a big difference. Serve your soup in warm bowls for a cozy touch. Top each bowl with grated parmesan cheese. Fresh basil leaves add a nice pop of color and flavor. Pair the soup with crusty bread for a hearty meal. You can also serve a side salad for a complete dinner. For the full recipe, check the detailed method outlined earlier. {{image_2}} You can easily make this soup vegetarian. Simply use vegetable broth and skip the cheese. For a vegan twist, swap heavy cream with coconut milk. It gives a nice creamy texture and flavor. You can also add nutritional yeast for a cheesy taste without dairy. This makes the soup rich while keeping it plant-based. Feel free to add more veggies to your soup. Try diced zucchini, bell peppers, or mushrooms. These add color and nutrients. If you want protein, consider adding cooked chicken or beans. Shredded rotisserie chicken works great. You can even toss in some cooked sausage for a heartier meal. These options let you customize the soup to your taste. While cheese tortellini is classic, try different types. You can use spinach or mushroom tortellini for a fun change. Each type brings a new flavor. Check your local store for fresh or frozen options. The choice of tortellini can change the whole dish, making it exciting every time you make it. Use the Full Recipe to guide your cooking adventure. After enjoying your creamy tortellini soup, store any leftovers in an airtight container. This keeps the soup fresh and tasty. Let the soup cool to room temperature before sealing it. If you store it while hot, condensation can form, making it watery. Leftovers will stay good for up to three days in the fridge. Mark the date on the container to track freshness. When you are ready to enjoy the soup again, reheat it gently. Pour the soup into a pot and heat it over low to medium heat. Stir often to avoid burning. If the soup looks thick, you can add a splash of broth or water. Heat until it reaches your desired temperature, then serve. Avoid microwaving if you can, as it may not heat evenly. You can freeze creamy tortellini soup for later use. It’s best to freeze the soup before adding the dairy. Place the cooled soup in a freezer-safe container, leaving some space at the top for expansion. Seal tightly and label with the date. It will stay good for about three months. When you’re ready to eat, thaw it in the fridge overnight. Reheat on the stove and add cream just before serving. This keeps the texture smooth. For the full recipe, check the earlier sections. Creamy tortellini soup lasts about 3 to 4 days in the fridge. To keep it fresh, store it in an airtight container. It’s best to eat it within this time for the best taste and safety. Yes, you can use frozen tortellini in this recipe. Just add the frozen tortellini straight to the soup. It takes a bit longer to cook, about 7 to 10 minutes. This makes it easy and quick for busy nights. Creamy tortellini soup can be healthy. It has veggies, broth, and tortellini for nutrients. You can use low-fat cream or coconut milk to cut fat. Adding more spinach or other veggies boosts health too. Enjoy this hearty dish without the guilt. For the complete recipe, check out the Full Recipe. To wrap up, this article covered how to make creamy tortellini soup. We listed key ingredients, shared step-by-step cooking instructions, and offered tips to enhance flavor. You learned about variations, storage methods, and answers to common questions too. Remember, this dish is flexible. You can adjust it to fit your taste. Whether you want it vegetarian or made with different tortellini, the options are endless. Enjoy making and sharing this warm, delicious soup!

Craving a hearty and comforting meal? This Creamy Tortellini Soup is your perfect answer! It’s rich, flavorful, and easy to make. With just a few simple ingredients, you can whip …

Read more

Categories Dinner

Quick Pickled Green Beans Crunchy and Flavorful Snack

July 12, 2025 by Chef Nate
To make quick pickled green beans, you'll need the following items: - 1 pound fresh green beans, trimmed - 1 cup white vinegar - 1 cup water - 1 tablespoon granulated sugar - 1 tablespoon sea salt - 2 cloves garlic, sliced - 1 teaspoon red pepper flakes - 1 teaspoon mustard seeds - ½ teaspoon black peppercorns These ingredients blend together to create a zesty brine that gives the green beans a bright flavor and crunch. You don’t need fancy gadgets for this recipe. Here’s what I recommend: - Medium saucepan - Measuring cups and spoons - Stirring spoon - Clean, sterilized jars with lids - Cutting board and knife Having the right tools makes the process smoother and more fun. Feel free to get creative! Here are some optional ingredients you might try: - Fresh dill for a herby taste - Sliced jalapeños for extra heat - Carrots or radishes for added crunch These options let you personalize your pickles to fit your taste. The full recipe gives you a great starting point. Enjoy making your own quick pickled green beans! To start, rinse your fresh green beans under cold water. This removes dirt and helps keep them crisp. Trim off the ends with a sharp knife. I like to set the trimmed beans aside in a bowl. This makes the next steps easier. In a medium saucepan, mix one cup of white vinegar with one cup of water. Then, add one tablespoon of granulated sugar and one tablespoon of sea salt. Slice two cloves of garlic and toss them in the pot. For some heat, add one teaspoon of red pepper flakes and one teaspoon of mustard seeds. Finally, include half a teaspoon of black peppercorns. Stir the mix well. Place the saucepan over medium heat. Bring it to a simmer while stirring until the sugar and salt dissolve. After this, let the brine cool for about ten minutes. While the brine cools, take clean jars and pack the green beans upright. This helps with style and makes them look nice. Once the brine is cool, pour it over the green beans. Make sure they are fully covered. Seal the jars with lids and place them in the fridge. Let the green beans pickle for at least four hours. For best flavor, wait a full day. For the full recipe, check out the earlier section. To get that perfect crunch in your pickled green beans, choose fresh, firm beans. Look for bright green color and no soft spots. Trim the ends, but keep the beans long. This helps them stay crisp when you pack them in jars. You can also blanch them for one minute in boiling water. This quick step helps to lock in the crunch. After blanching, plunge them into ice water to stop the cooking process. One common mistake is not cooling the brine enough before pouring it over the beans. Hot brine can make the beans soft. Also, do not skip the salt. It helps with flavor and crunch. Make sure to pack the beans tightly in the jars but not too tight. They need some room for the brine to flow around them. Lastly, avoid using old beans. Fresh ones make a big difference in taste and texture. You can boost the flavor of your pickled green beans by adding spices. Try adding a bay leaf or some dill for a fresh twist. If you like heat, toss in more red pepper flakes. For a sweet touch, add a slice of ginger or even some sliced shallots. Experiment with these extras to find your favorite mix. Using the full recipe will help you see how these changes can elevate your dish. {{image_2}} Want some heat? Add more red pepper flakes to the brine. You can also include sliced fresh jalapeños. This will give your green beans a spicy kick. Adjust the spice level to match your taste. I find that a little heat makes every bite exciting. For a sweet twist, add extra sugar. Use honey or maple syrup for a different flavor. You can also mix in some sliced onions to add depth. This blend balances the tartness of vinegar and gives a rich taste. Sweet and sour green beans are a fun snack or side dish. You can infuse your green beans with fresh herbs. Try dill, thyme, or basil for a fresh taste. Add these herbs to the brine before heating. They will bring a lovely aroma and flavor to your pickled beans. This variation is great for those who love herbal notes in their food. These variations let you explore new flavors while keeping that crunchy texture. You can find all the details in the full recipe. To keep your pickled green beans fresh, store them in the fridge. Make sure they stay in a clean, sealed jar. The beans should stay covered with the brine. This helps keep them crunchy. Always use a clean utensil to take beans out. This stops germs from getting in. Quick pickled green beans can last for about two weeks in the fridge. After that, their taste and texture may change. For the best flavor, try to eat them within a week. If you want to keep them longer, consider canning them. Canned beans can last for months when stored in a cool, dark place. Check for a few signs before eating your pickled green beans. If you see mold or the brine changes color, it's time to toss them. A bad smell can also be a sign of spoilage. If the beans are mushy or have an off taste, do not eat them. Always trust your senses. Quick pickled green beans last for about two weeks in the refrigerator. Store them in a tightly sealed jar. The brine helps keep them fresh. After a week, they taste even better as the flavors meld. If you notice any off smells, it’s best to toss them out. Yes, you can reuse the brine for other pickling. However, it’s best to use it only once. The flavor will change with each use, but it can work well for other vegetables. Just make sure to strain out any bits of garlic or spices before reusing. Quick pickled green beans add a nice crunch to many dishes. They work great in salads, tacos, or grain bowls. You can also serve them as a side or snack. Their tangy flavor complements grilled meats and fish. Try them on a charcuterie board for added color and zest! Quick pickled green beans are simple and fun to make. You learned the basics, from essential ingredients to helpful tips for crunch. We discussed variations to suit your taste, and storage tips to keep them fresh. Remember, avoid common mistakes to ensure great flavor and texture. Enjoy exploring new flavors and dishes that pair well with your pickled beans. You now have the know-how to create delicious snacks or sides anytime. Get started today, and happy pickling!

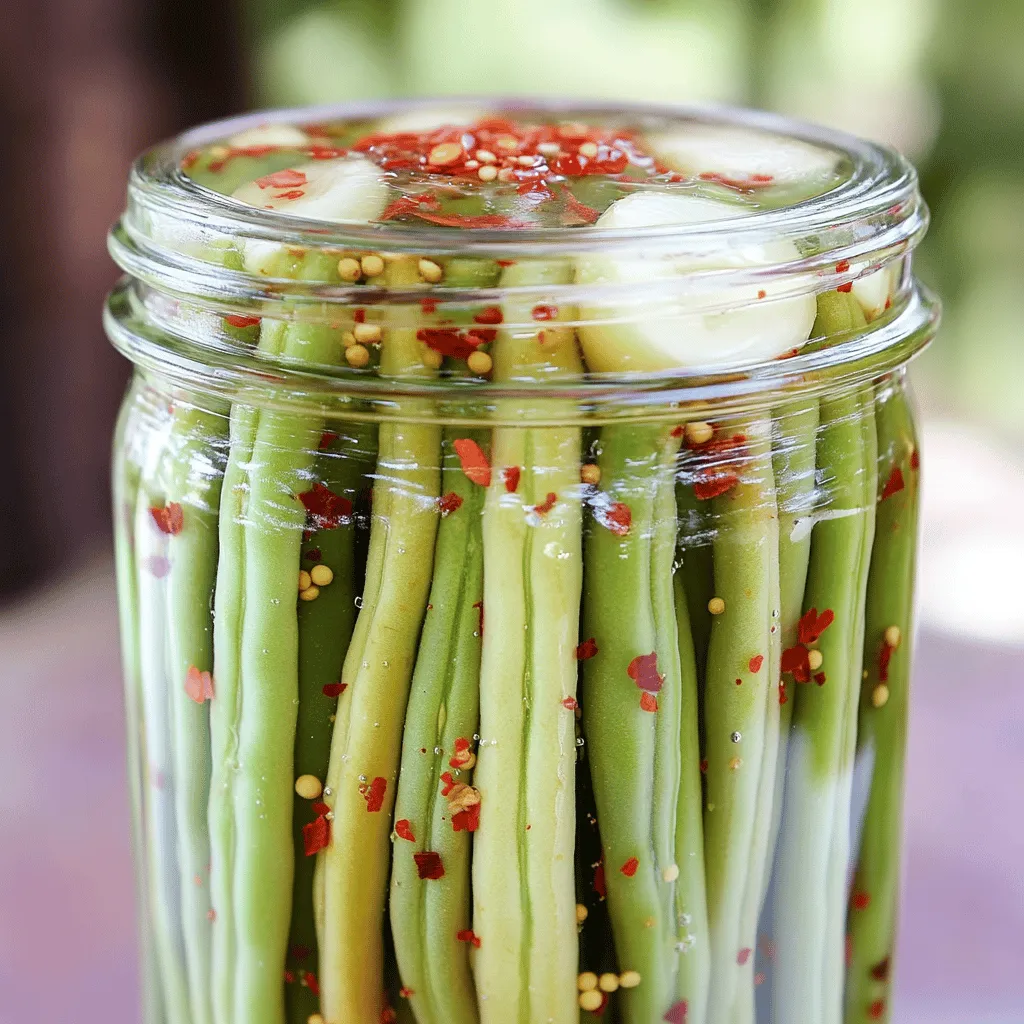
Looking for a crunchy and flavorful snack? Quick pickled green beans are the answer! They’re easy to make and packed with taste. In this blog post, I’ll guide you through …
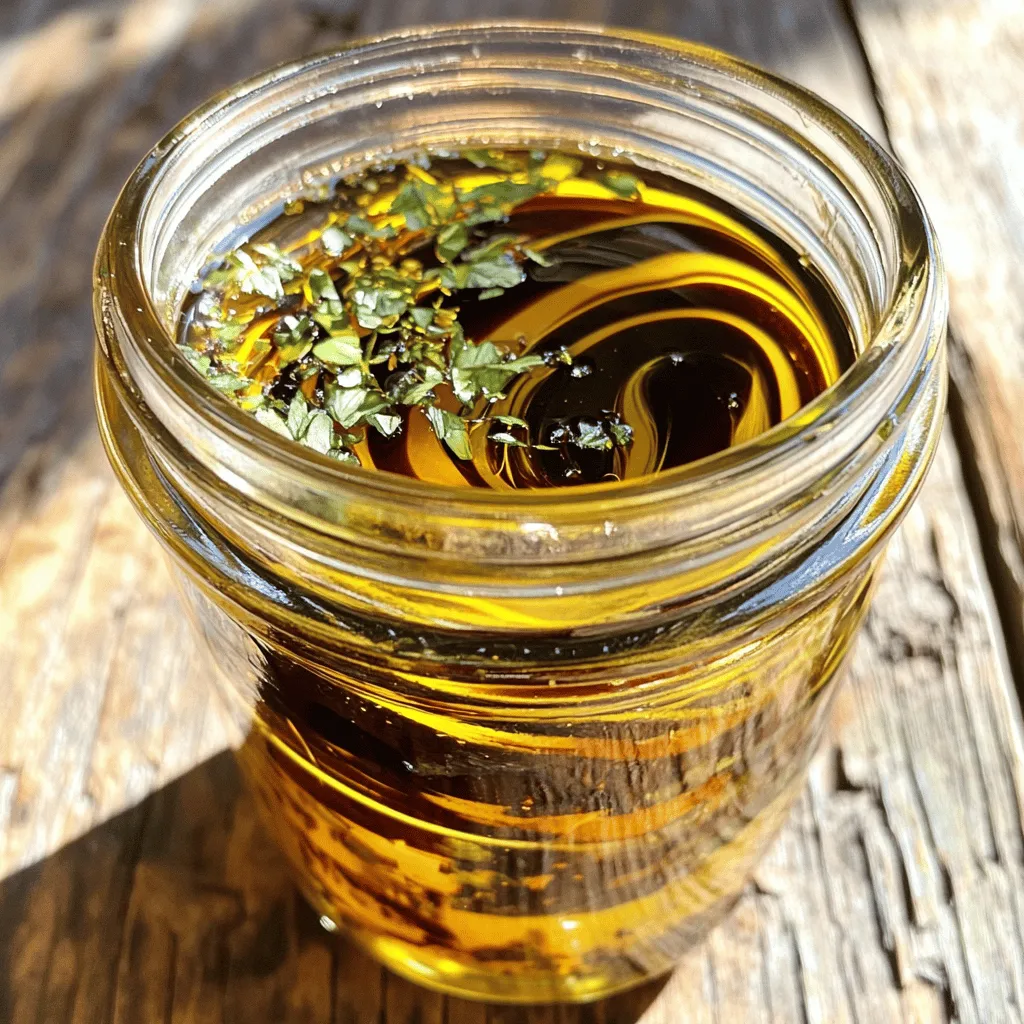
Read more

Categories Appetizers

Lemon Vinaigrette Dressing Simple and Delicious Recipe

July 12, 2025 by Chef Nate
To make a simple and delicious lemon vinaigrette, you need fresh and quality ingredients. Here’s what you will need: - Fresh lemon juice - Extra virgin olive oil - Dijon mustard - Honey or maple syrup - Garlic - Salt and pepper - Fresh herbs (parsley or basil) These ingredients come together to create a bright, zesty flavor. Fresh lemon juice gives that tartness we love. Extra virgin olive oil adds richness and depth. Dijon mustard brings a bit of spice and helps emulsify the dressing, making it smooth. Honey or maple syrup adds a touch of sweetness to balance the acidity. Garlic gives it a nice kick, while salt and pepper enhance all the flavors. Finally, fresh herbs add freshness and color to your vinaigrette. For the Full Recipe, follow the steps to whip up this tasty dressing. Experiment with the herbs you like best, or stick to classic parsley or basil. Enjoy bringing bright flavors to your meals! 1. Combining the base ingredients: Start by grabbing a small mixing bowl. Pour in 1/4 cup of fresh lemon juice. Add 1 tablespoon of Dijon mustard and 1 tablespoon of honey or maple syrup. Toss in one small minced garlic clove. Whisk these ingredients together until they blend well. 2. Emulsifying with olive oil: Slowly drizzle in 1/2 cup of extra virgin olive oil while you whisk. This step is key. It helps to emulsify the dressing, giving it a creamy texture. Keep whisking until the mixture is smooth and well combined. 3. Adjusting seasoning and flavor balance: Now, add salt and pepper to taste. I like to start with a pinch of each. Taste the dressing and see if you need to adjust it. If it’s too tart, add a bit more honey. If it’s too sweet, add a splash of lemon juice. Stir in 1 teaspoon of finely chopped fresh herbs for that extra pop of flavor. - Best ways to use lemon vinaigrette: This dressing shines on salads. Drizzle it over fresh greens or your favorite mixed salad. It also works great on grilled vegetables or as a marinade for chicken. - Drizzling technique over salads: When serving, use a light hand. Drizzle the vinaigrette in a circular motion across the salad. This technique ensures even coverage and makes your dish look pretty. - Keeping in refrigerator: Store the dressing in a jar with a tight lid. It will keep fresh in your refrigerator. - How long the dressing lasts: Homemade lemon vinaigrette lasts about one week in the fridge. Be sure to give it a good shake before each use, as it may separate over time. Enjoy your zesty creation! For the full recipe, check the ingredients and instructions above. To make your lemon vinaigrette shine, you can adjust the acidity and sweetness. If you like it tangy, add more lemon juice. For a sweeter taste, add a bit more honey or maple syrup. It’s all about finding the balance you enjoy. When mixing your vinaigrette, whisking well is key. Start by whisking the base ingredients in a bowl. Then, slowly drizzle in the olive oil while whisking. This process helps create a smooth texture. If you want an even creamier dressing, try using an immersion blender. Lemon vinaigrette packs a punch with its fresh ingredients. The main components have great nutritional value. Fresh lemon juice is high in vitamin C, which helps boost your immune system. Olive oil is filled with healthy fats that support heart health. Honey adds sweetness but also antioxidants. Using lemon vinaigrette can have several health benefits. It can aid digestion and promote hydration. The fresh herbs you add bring extra vitamins and minerals. This dressing not only tastes great, but it can also contribute to a healthy diet. {{image_2}} You can make your lemon vinaigrette even better. Adding fruits like berries or mango gives it a sweet twist. The burst of flavor pairs well with the tangy lemon. Try mixing in fresh herbs, too. Basil or mint can add a nice kick. You can also infuse the vinaigrette with spices. A pinch of cumin or paprika can change the taste. Experimenting with these flavors makes each batch unique. Lemon vinaigrette is not just for salads. You can pour it over pasta dishes for a zesty flair. Toss it with warm pasta and veggies for a delightful meal. It also works great as a marinade for proteins. Use it on chicken or fish before grilling. This adds flavor and helps keep the meat juicy. The options are endless, so get creative and enjoy! For the full recipe, check [Full Recipe]. To keep your lemon vinaigrette fresh, you need the right jars. A clean glass jar works best. Glass does not hold smells and keeps flavors intact. Always use an airtight container. This helps keep your dressing safe from air and light. For freshness, store your vinaigrette in the fridge. It will stay good for about a week. Before you use it, give it a good shake. The ingredients may separate, but that's normal. If you notice any off smells or colors, it is best to throw it away. Can you freeze lemon vinaigrette? Yes, you can! Freezing can help if you make too much. However, the texture may change a bit. Freezing can break the emulsion. This means it might look a bit different after thawing. To thaw, put it in the fridge overnight. If you need it quicker, run the jar under cool water. Once thawed, whisk it well to mix the ingredients again. If it looks clumpy, use a blender for a smooth finish. Enjoy it fresh on salads or as a dip! You can find the full recipe above to get started. Homemade lemon vinaigrette lasts about one week in the fridge. Store it in a sealed jar. Over time, the flavors may change a bit, but it should still taste good. Always check for signs of spoilage, like off-smells or changes in color. If you notice these, it’s best to toss it. You can use bottled lemon juice, but fresh is better. Fresh lemon juice tastes brighter and more vibrant. Bottled juice may have added preservatives, which can change the flavor. If you choose bottled juice, look for one without any additives for a closer taste to fresh. Lemon vinaigrette works well on many dishes. Drizzle it over mixed greens, spinach salads, or grilled vegetables. You can also use it on chicken, fish, or roasted potatoes. It adds a nice zing to pasta salads too. Feel free to get creative and try it on your favorite dishes! To make this recipe vegan, simply replace honey with maple syrup. Both sweeteners add flavor, but maple syrup is plant-based. Everything else in the recipe is already vegan-friendly, so you’re good to go! This way, everyone can enjoy this tasty lemon vinaigrette. For the full recipe, check the section above. This blog post covered everything you need to know about lemon vinaigrette. We explored key ingredients and how to make the dressing step by step. I shared ideas for serving, storage tips, and delightful variations. You learned about the health benefits and how to adapt the recipe. In summary, lemon vinaigrette is a versatile and healthy addition to your meals. Try it on salads, pasta, or as a marinade. Enjoy adding your own twist to this classic dressing!

Looking for a simple way to elevate your salads? This Lemon Vinaigrette Dressing brings fresh flavor with just a few ingredients. You’ll love how easy it is to whip up …

Read more

Categories Salads

Grilled Zucchini with Balsamic Glaze Tasty and Fresh

July 12, 2025 by Chef Nate
- 3 medium zucchinis, sliced into ½ inch thick rounds - 3 tablespoons olive oil - Salt and pepper to taste - ½ teaspoon garlic powder - ½ teaspoon Italian seasoning - ½ cup balsamic glaze (store-bought or homemade) - Fresh basil leaves for garnish - Other vegetables to grill - Different herbs for seasoning - Alternative glazes In this recipe, I love using fresh zucchini. The crunch and flavor shine through when grilled. You can add other veggies, like bell peppers or eggplants, for variety. Grilled corn also pairs well. For herbs, I recommend fresh thyme or rosemary. They add a nice twist. If you want to change the glaze, try honey or a spicy sauce. Each choice brings a new taste to the dish. Feel free to experiment. Cooking should be fun! Check out the Full Recipe to see how to make this dish and enjoy the tasty, fresh flavors. First, heat your grill to medium-high. This step is key for great flavor. While the grill heats, wash and slice the zucchinis into ½ inch thick rounds. In a large bowl, mix the sliced zucchini with olive oil, salt, pepper, garlic powder, and Italian seasoning. Toss well until every piece is coated. This will enhance the taste and make it tender. Now, it's time to grill! Place the zucchini slices on the grill. Cook them for about 4-5 minutes on one side. Flip them and grill for another 4-5 minutes. You want to see nice grill marks and feel that they are tender. For perfect grill marks, don’t move the zucchini too much. Let them sit still as they cook. During the last minute of grilling, drizzle the balsamic glaze over the zucchini. This adds a sweet flavor and a lovely shine. Once done, remove the zucchini from the grill. Place it on a serving platter. Garnish with fresh basil leaves for a bright pop of color. This makes your dish look stunning and fresh. For the full recipe, check out the details above! To avoid overcooking zucchini, keep an eye on the time. Grill slices for about 4-5 minutes on each side. Zucchini cooks fast, so watch for those grill marks. They tell you when it's done. If you cook too long, the zucchini can turn mushy. Maintaining the right grill temperature is key. Preheat your grill to medium-high heat. This helps the zucchini get tender while keeping its shape. A hot grill gives great marks and adds flavor. You can boost the balsamic glaze flavor in simple ways. Try adding a pinch of salt or a sprinkle of pepper. A dash of honey can add sweetness, too. For some heat, mix in a bit of red pepper flakes. When pairing grilled zucchini, think of other fresh dishes. It goes well with grilled chicken or fish. You can also serve it with a light salad. The flavors mix well and bring a fresh taste to your meal. For the full recipe, check the section above. {{image_2}} You can make grilled zucchini even better with a few simple changes. Adding cheese or nuts can give your dish a nice crunch. Try crumbled feta or goat cheese for creaminess. For a nutty flavor, sprinkle on some toasted pine nuts or walnuts. You can also play with different marinades. Instead of just olive oil, consider using lemon juice or a spicy sauce. This can change the taste and add a kick. Experiment with your favorite flavors. If you want a vegan option, you can make a balsamic glaze from scratch. Mix balsamic vinegar with a bit of maple syrup. This keeps the sweet taste and is plant-based. For those watching carbs or gluten, grilled zucchini is already a great choice! The dish is naturally low in carbs. Just ensure your glaze has no added sugars. Look for gluten-free options if you buy a store-bought glaze. These tasty variations can elevate your grilled zucchini with balsamic glaze. Check out the Full Recipe for more details! To keep your grilled zucchini fresh, let it cool first. Once cooled, place it in an airtight container. Make sure it is sealed tightly to lock in flavor. Store it in the fridge for up to three days. If you want to keep it longer, consider freezing it. Use a freezer-safe bag and remove as much air as possible. You can enjoy it later, but the texture may change. When reheating grilled zucchini, you want to keep it tender, not mushy. The best way to do this is in the oven. Preheat your oven to 350°F. Place the zucchini on a baking sheet and cover it with foil. Heat for about 10 minutes. This method helps keep the texture nice. If you need a quicker option, you can use the microwave. Place the zucchini on a microwave-safe plate. Heat it in short bursts, about 30 seconds at a time. Check after each burst. This method may not keep the texture as well, but it's fast. For more details, you can check the Full Recipe to see how to make this dish from scratch! How do I know when the zucchini is cooked? You can tell zucchini is cooked when it is tender and has grill marks. It should feel soft but not mushy. Check it after about 4-5 minutes on each side. The color will brighten too, making it look more appealing. Can I use a grill pan instead of an outdoor grill? Yes, a grill pan works great! It heats well and gives those nice grill marks. Just make sure to preheat the pan before adding the zucchini. This method also keeps the zucchini juicy and flavorful. What are the health benefits of zucchini? Zucchini is low in calories and high in vitamins. It contains vitamin C, which helps your immune system. Zucchini also has fiber, which aids digestion. Plus, it’s hydrating, as it has a lot of water content. How many calories are in grilled zucchini with balsamic glaze? One serving of grilled zucchini with balsamic glaze has about 100 calories. This is a tasty and healthy side dish. You can enjoy it without feeling guilty about your calorie intake. What to serve with grilled zucchini? Grilled zucchini pairs well with many dishes. Try it with grilled chicken or fish for a complete meal. It also goes well with pasta or a fresh salad. The flavors blend nicely with other summer foods. Can grilled zucchini be served cold as a salad? Absolutely! Grilled zucchini can be used in cold salads. Just let it cool after grilling. Combine it with fresh greens, tomatoes, and your favorite dressing. It makes a refreshing dish for a hot day. For the full recipe of grilled zucchini with balsamic glaze, check out the section above. Grilling zucchini is simple and tasty. You need just a few ingredients and steps. You can mix in add-ins for more flavor and variety. Try different herbs or glazes to make it yours. Remember to store leftovers properly and reheat them carefully. Grilled zucchini pairs well with many dishes, making it a versatile choice. Enjoy your delicious creation and impress your friends with your grilling skills. Try it out and have fun cooking!

Looking for a fresh and tasty side dish? Grilled Zucchini with Balsamic Glaze is simple and delicious! By mixing firm zucchini with garlic, Italian herbs, and a sweet balsamic glaze, …

Read more

Categories Appetizers

Roasted Strawberry Mousse Cake Divine and Simple Treat

July 12, 2025 by Chef Nate
For this delicious cake, you'll need: - 2 cups fresh strawberries, hulled and halved - 2 tablespoons sugar (for roasting) - 1 pre-baked sponge cake layer (store-bought or homemade) These strawberries bring a sweet, caramelized flavor to your cake. The sponge cake layer gives it structure and softness. The mousse mix needs a few special ingredients: - 1 cup heavy cream, chilled - 1/2 cup Greek yogurt - 1/2 cup powdered sugar - 1 teaspoon vanilla extract - 4 large eggs, separated - 1/4 teaspoon salt - 1/2 teaspoon unflavored gelatin - 1 tablespoon cold water The whipped cream and yogurt make the mousse light and creamy. The gelatin helps it hold its shape. Add some flair with these garnishes: - Fresh mint leaves for garnish - Remaining roasted strawberries for decoration These toppings not only look great but also add extra flavor. You can find the full recipe at the end of this section. Enjoy making your Roasted Strawberry Mousse Cake! To start, you need fresh strawberries. Use 2 cups of hulled and halved strawberries. Preheat your oven to 400°F (200°C). Place the strawberries on a baking sheet lined with parchment paper. Sprinkle 2 tablespoons of sugar over them. This helps bring out their sweet flavor. Roast the strawberries for 20 to 25 minutes until they are soft and caramelized. Once they cool, set them aside for later. In a small bowl, take 1/2 teaspoon of unflavored gelatin. Add 1 tablespoon of cold water and let it sit for 5 minutes. Heat it in the microwave for 10 seconds until melted. Now, in a large bowl, combine 1 cup of chilled heavy cream, 1/2 cup of Greek yogurt, 1/2 cup of powdered sugar, and 1 teaspoon of vanilla extract. Whip this mixture until soft peaks form. In another bowl, beat 4 egg whites with 1/4 teaspoon of salt until stiff peaks form. Gently fold the whipped cream into the egg whites in two additions. Be careful not to deflate the mixture. Take half of the roasted strawberries and mash them with a fork. Fold the mashed strawberries into the mousse mix. Add the melted gelatin and blend gently. Line a springform pan with plastic wrap. Place your pre-baked sponge cake layer at the bottom. Pour the strawberry mousse over the cake, smoothing the top with a spatula. Refrigerate for at least 4 hours, or overnight, to let it set. Once set, remove the cake from the pan and peel off the plastic wrap. Decorate the top with the remaining roasted strawberries and fresh mint leaves before serving. For the full recipe, check out the detailed instructions above. To roast strawberries well, start with ripe, fresh berries. Wash and hull the strawberries first. Cut them in half to help them cook evenly. Spread them on a baking sheet lined with parchment paper. Sprinkle sugar over the berries to enhance their natural sweetness. Roast them at 400°F for 20-25 minutes. Watch for a soft, caramelized look. Let the berries cool before using them in your mousse. For a light and airy mousse, focus on your cream. Use heavy cream, chilled well. Whip it until soft peaks form, but don’t overwhip. It should hold shape without being too stiff. When folding, do it gently. Start with a bit of the whipped cream and mix it into the egg whites. Then, fold in the rest in two parts. This helps keep the mousse light. Lastly, add the melted gelatin to stabilize your mousse. Store the mousse cake in the fridge until ready to serve. Cover it well to keep it fresh. This dessert tastes best chilled. When ready to serve, carefully remove it from the springform pan. Top with the remaining roasted strawberries. Add fresh mint leaves for a pop of color. Serve each slice on a dessert plate. Drizzle some strawberry juices over the cake for extra flavor. Enjoy this divine treat with friends and family! {{image_2}} You can use many fruits for your mousse. Try raspberries, blueberries, or peaches. Each fruit brings its unique taste. For raspberries, keep the sugar low for a tart flavor. Blueberries add a sweet touch, while peaches offer a juicy bite. Just roast them like the strawberries. This method enhances their flavors and sweetness. If you want a vegan mousse, there are simple swaps. Replace heavy cream with coconut cream. It whips up nicely and gives a rich taste. Use almond or soy yogurt instead of Greek yogurt. For the gelatin, choose agar-agar to keep it plant-based. These swaps let everyone enjoy the mousse cake. Want to spice up your mousse? Add a splash of lemon juice for a zesty kick. You can also mix in some chocolate or almond extract. Try adding crushed cookies or nuts for texture. A pinch of cinnamon or cardamom can give warmth. These additions make your mousse cake even more exciting. Check out the full recipe for more ideas! To keep your Roasted Strawberry Mousse Cake fresh, store it in the fridge. Cover it tightly with plastic wrap or place it in an airtight container. This keeps the cake moist and prevents it from absorbing other smells from the fridge. It is best to refrigerate it right after serving. You can freeze leftover Roasted Strawberry Mousse Cake for later. Wrap each slice in plastic wrap, then place it in a freezer bag. This helps avoid freezer burn. When you want to eat it, thaw the cake in the fridge overnight. This cake stays fresh in the fridge for about 3 to 4 days. After that, the texture and flavor may change. If you freeze it, the cake can last for about a month. Just remember, the sooner you eat it, the better it will taste! Enjoy your sweet treat! For the full recipe, check the earlier section. Yes, you can use frozen strawberries, but they may change the texture. Frozen berries release more water when they thaw. This extra moisture can make the mousse too runny. If using frozen strawberries, let them thaw, then drain any excess liquid. This will help maintain the mousse's texture. To keep the mousse fluffy, handle it gently. Fold the whipped cream and egg whites carefully. Use a large spatula and make a folding motion. This helps keep the air in the mixture. Avoid stirring too hard, as this can cause the mousse to lose volume. This dessert is great for making ahead. You can prepare it a day before. Just follow the recipe and refrigerate the cake. It needs at least four hours to set, but overnight is best. This lets the flavors blend and improves the taste. You can find the full recipe for the Roasted Strawberry Mousse Cake above. It includes all the ingredients and steps needed to make this delightful dessert. Enjoy making it! This blog post covered how to make a tasty roasted strawberry mousse cake. We looked at the main ingredients, steps, and helpful tips to perfect your cake. You learned about various fruit options and how long to store it. Remember, roasting strawberries brings out their flavor. You can enjoy this cake fresh or save it for later. Dive into your baking adventure, and have fun making this delicious dessert!

If you’re craving a sweet and easy dessert, look no further than my Roasted Strawberry Mousse Cake. This simple treat combines warm roasted strawberries with a creamy mousse, creating a …

Read more

Categories Desserts

Neapolitan Rose Cake Delightful and Easy Recipe

July 12, 2025 by Chef Nate
To make a Neapolitan Rose Cake, you need some key ingredients. Here’s what you will need: - 2 cups all-purpose flour - 1 ½ cups granulated sugar - ½ cup unsalted butter, softened - 1 cup milk - 3 large eggs - 2 teaspoons baking powder - 1 teaspoon vanilla extract - 1 cup strawberry puree (fresh or frozen) - 1 cup chocolate syrup - 1 cup whipped cream (for frosting) - Fresh strawberries and edible rose petals (for decoration) These ingredients create three delicious layers: vanilla, chocolate, and strawberry. Each layer brings its own flavor and charm. Using quality ingredients makes a big difference. Here are some tips: - Choose fresh strawberries for purees. They give a bright flavor. - Use real vanilla extract instead of imitation for a richer taste. - Select high-quality chocolate syrup. This enhances the chocolate layer. - For butter, choose unsalted. This lets you control the saltiness. - Use whole milk for a creamier texture in the cake. These small choices can elevate your cake from good to great! If you want to add some fun twists, try these optional add-ins: - Mix in lemon zest for a fresh, zesty flavor. - Add almond extract for a nutty touch. - Incorporate crushed nuts or chocolate chips for added texture. - Swirl in some raspberry puree for a tart punch. These options can help you personalize your cake and surprise your guests. Start by preheating your oven to 350°F (175°C). This step is key for a good bake. Grease and flour two 9-inch round cake pans. This will help the cake release easily later. In a large bowl, cream the softened butter and sugar. Mix them until light and fluffy, about 3 to 4 minutes. Next, add the eggs one by one. Mix well after adding each egg. Then, pour in the vanilla extract for flavor. In another bowl, whisk the flour and baking powder together. Gradually add this mixture to the butter mixture, alternating with the milk. Mix until just combined. Do not overmix. Now, divide the batter into three equal parts. In one part, stir in the strawberry puree. In the second part, mix in the chocolate syrup. Leave the last part plain. Pour each batter into the prepared pans. You will have layers of strawberry, chocolate, and vanilla. Bake for 25 to 30 minutes. Check with a toothpick; it should come out clean. Let the cakes cool for 10 minutes in the pans. Then transfer them to wire racks to cool completely. Once the cakes have cooled, it's time to stack them. Start with the vanilla layer on a cake plate. Spread a thick layer of whipped cream on top. Place the chocolate layer next. Again, add more whipped cream. Finally, add the strawberry layer on top. To keep the layers even, use a serrated knife to trim the tops of the cakes. This will help them sit flat. Make sure to press down gently to avoid breaking the layers. Now, you can frost the cake. Use a spatula to spread whipped cream on the top and sides. Don't worry if it’s not perfect; a little texture adds charm. To create a smoother look, dip your spatula in warm water before smoothing the frosting. For decoration, add fresh strawberries and edible rose petals on top. This gives the cake a lovely touch. For extra flair, place the cake on a nice stand. Add a drizzle of chocolate syrup on the plate for a beautiful presentation. Follow the Full Recipe for all the details. When making your Neapolitan Rose Cake, avoid overmixing the batter. This can make your cake dense and tough. Also, do not skip greasing and flouring the pans. It helps prevent sticking. Always check your oven temperature with an oven thermometer. An oven that is too hot can burn the edges while leaving the center raw. Lastly, let the cakes cool fully before frosting. This step is key for a clean finish. To keep your cake moist, use fresh ingredients. The butter should be softened but not melted. Use room-temperature eggs and milk for better mixing. Adding strawberry puree into the batter also adds moisture and flavor. After baking, you can brush simple syrup on the layers. Mix equal parts sugar and water, heat until the sugar dissolves, and let it cool. This enhances flavor and keeps the layers moist longer. To make your Neapolitan Rose Cake shine, use fresh strawberries and edible rose petals. Place the strawberries around the top edge. Arrange the petals in a circular pattern for a beautiful look. You can also drizzle chocolate syrup on the cake and the plate for extra flair. A simple cake stand can elevate the whole presentation. Get creative with colors and shapes, and make it your own! {{image_2}} You can change the flavors in your Neapolitan Rose Cake. Try using raspberry puree instead of strawberry for a fun twist. You can also mix in lemon zest to add a fresh zing. Consider using white chocolate instead of regular chocolate syrup. This adds a creamy taste to the cake. Each flavor will give your cake a unique touch! To make this cake gluten-free, swap the all-purpose flour for a gluten-free blend. Look for one that works well in baking. For dairy-free options, use coconut milk instead of regular milk. Use dairy-free butter and whipped cream too. These swaps keep the cake tasty while meeting dietary needs. Making mini cakes is a fun idea! Use muffin tins or small cake pans for these treats. Divide the batter into smaller portions. Bake them for a shorter time, about 15-20 minutes. Layer and frost them just like the big cake. Mini cakes are perfect for parties or special events. They are easy to serve and look adorable! For the full recipe, click [Full Recipe]. To keep your Neapolitan Rose Cake fresh, store it in an airtight container. This method helps prevent the cake from drying out. If you do not have a container, wrap the cake in plastic wrap. Place it in a cool, dry spot away from sunlight. Avoid storing it in the fridge unless it has whipped cream on top. The fridge can dry it out. To maintain the cake's flavor, you can add a layer of plastic wrap around the cake. This extra layer keeps the moisture locked in. If you plan to eat the cake within two days, keep it at room temperature. If you need to store it longer, the fridge is a better option. Just remember to bring it back to room temperature before serving. This way, the flavors will shine. To freeze Neapolitan Rose Cake, first, cool it completely. Wrap each slice in plastic wrap tightly. Then, place the slices in a freezer-safe bag or container. Label the bag with the date. You can freeze the cake for up to three months. When ready to eat, take it out and let it thaw in the fridge overnight. Enjoy the same great taste as when it was fresh. For the best results, frost the cake after thawing. For the full recipe, check out the complete guide! Neapolitan Rose Cake offers a lovely mix of flavors. You get sweet strawberry, rich chocolate, and light vanilla. Each bite is soft and creamy. The whipped cream adds a nice touch. The fresh strawberries and rose petals give it a fresh taste. Overall, it's a delightful cake that pleases many palates. Yes, you can use store-bought strawberry puree. It saves time and effort. Just make sure it's pure and has no added sugar. This will keep the cake sweet but not too sweet. If you want a fresher taste, try making your own. Blend fresh strawberries until smooth for the best flavor. You can keep the Neapolitan Rose Cake for about 3-4 days. Store it in the fridge to keep it fresh. Make sure to cover it well with plastic wrap. This will help keep it moist and tasty. If you want to keep it longer, you can freeze it. Just slice it first and wrap each slice tightly. The Neapolitan Rose Cake combines quality ingredients, a precise baking process, and smart tips. You learned how to create moist layers and stunning decorations. I shared fun variations and storage tips to keep your cake fresh. Now you can enjoy making this cake for any occasion. With these insights, you’ll impress friends and family with your baking skills. Remember, practice makes perfect, and every cake is a new chance to learn.

Welcome to my easy guide on making a Neapolitan Rose Cake! This cake is not just beautiful; it’s also delicious and fun to make. You’ll layer chocolate, vanilla, and strawberry …

Read more

Categories Desserts

Homemade Balsamic Vinaigrette Dressing Fresh and Easy

July 12, 2025 by Chef Nate
- Balsamic vinegar - Extra virgin olive oil - Dijon mustard - Honey or maple syrup - Garlic powder - Onion powder - Salt - Black pepper - Fresh herbs I love using fresh ingredients to make my balsamic vinaigrette. The balsamic vinegar gives it a sweet and tangy flavor. I use extra virgin olive oil for richness. Dijon mustard adds a nice kick. Honey or maple syrup brings sweetness, but feel free to skip it for a tangier taste. Garlic powder and onion powder round out the flavor. Lastly, I sprinkle in salt and black pepper to enhance everything. Fresh herbs really brighten the dressing and make it vibrant. If you want a vegan option, swap honey for maple syrup. It works perfectly! You can also replace extra virgin olive oil with other oils like avocado or sunflower oil. They will change the flavor, but they still taste great. When you need to convert measurements, remember: - 1 tablespoon equals 3 teaspoons. - 1 cup is about 240 milliliters. These simple conversions help when you want to adjust the recipe or make a smaller batch. To start, gather your ingredients. You will need balsamic vinegar, extra virgin olive oil, Dijon mustard, honey, garlic powder, onion powder, salt, black pepper, and fresh herbs. 1. In a medium bowl or jar, mix the balsamic vinegar, Dijon mustard, and honey. Stir or shake until it is smooth. 2. Now, slowly add the olive oil while whisking. If you have a jar, just add the oil and shake it well. This step helps blend the oil and vinegar together, creating a creamy texture. Next, it's time to add flavor. 1. Add garlic powder, onion powder, salt, black pepper, and your fresh herbs to the mix. 2. Whisk or shake again to make sure everything is well blended. 3. It’s important to taste your dressing. If you want it sweeter, add more honey. If you like it tangy, add more balsamic vinegar. Adjust until it’s just right for you. Now, let’s package it up for storage. 1. Pour your dressing into a clean jar with a lid. 2. Store it in the refrigerator. This dressing can last for about a week. 3. Before using, shake the jar well. The ingredients may separate, so shaking will mix them back together. For the complete recipe, refer to the Full Recipe section. Enjoy your homemade balsamic vinaigrette dressing! To make a great vinaigrette, oil plays a key role. It adds richness and aids in mixing flavors. Always choose good quality extra virgin olive oil for the best taste. When you're ready to mix, pour the oil slowly. This helps it blend well with the vinegar. Use a whisk to stir in small circles. This motion encourages the oil and vinegar to combine smoothly. If you prefer, you can also use a jar. Just shake it up until well blended. For a fun twist, add herbs and spices. Fresh herbs like basil or oregano can lift your vinaigrette. You can also try dried herbs if fresh ones are not handy. Consider adding a pinch of red pepper flakes for heat. If you like fruit, add diced peaches or strawberries. These will sweeten your dressing and add a burst of flavor. This vinaigrette pairs perfectly with many salads. Try it on mixed greens, spinach, or a hearty kale salad. It also works great as a marinade. Use it for chicken or veggies before grilling. You can even drizzle it over roasted vegetables for added flavor. The options are endless! For the full recipe, check the section above. {{image_2}} You can make your balsamic vinaigrette unique by changing the flavors. Adding citrus juices like lemon or orange brightens the taste. Just squeeze some fresh juice into the mix. This adds a zesty kick that pairs well with many salads. You can also try different types of vinegar. Apple cider vinegar or red wine vinegar can bring new notes to your dressing. Each vinegar will change the flavor profile slightly. Don't be afraid to experiment until you find your favorite combination. Sweetness can change the entire vibe of your vinaigrette. To adjust it, think about using natural sweeteners like agave or coconut sugar. These options can add sweetness without overpowering the other flavors. You can also use fruits to make the vinaigrette sweeter. Try blending in ripe strawberries or peaches. This gives a fresh taste and adds a fun twist to the dressing. If you crave a creamy texture, transforming the vinaigrette is easy. You can add ingredients like Greek yogurt or mayonnaise. These create a rich, smooth dressing that clings to your salad nicely. To make it creamy, simply mix in about 1/4 cup of yogurt or mayonnaise with your vinaigrette. This small change makes your dressing feel more luxurious. It is perfect for those days when you want something rich and satisfying. For the full recipe, check out my Zesty Balsamic Bliss Dressing. To keep your homemade balsamic vinaigrette fresh, use a clean glass jar with a lid. Mason jars are great for this. They seal tightly and make pouring easy. Always store the dressing in the refrigerator. This helps it stay fresh longer. Your balsamic vinaigrette can last about one week in the fridge. After that, it may start to lose flavor. Watch for signs that it has gone bad, like an off smell or color change. If it smells sour or looks cloudy, it’s best to toss it. You can freeze balsamic vinaigrette, but it may change texture. To freeze, pour the dressing into an ice cube tray. Once frozen, transfer the cubes to a freezer bag. When you want to use it, just thaw a few cubes overnight in the fridge. This method helps keep some of the flavor. Homemade balsamic vinaigrette lasts about one week in the fridge. Store it in a clean jar with a tight lid. Always check for changes in smell or color before using. Yes, you can make balsamic vinaigrette in advance. It saves time on busy days. Just remember to give it a good shake before using. The flavors may deepen if stored overnight. Balsamic vinaigrette is very versatile. You can use it on salads, grilled veggies, and meats. It also makes a great marinade for chicken or fish. Drizzle it over roasted vegetables for added flavor. Yes, balsamic vinaigrette can be healthy. It has healthy fats from olive oil and antioxidants from balsamic vinegar. Just watch the amount of honey or sugar you add. Balance is key. Absolutely! You can use oils like avocado or canola oil. Each oil brings its own flavor. Try different ones to see which you like best. The best way to whisk vinaigrette is by starting with the vinegar first. Slowly drizzle in the oil while whisking quickly. This helps emulsify the dressing, making it smooth and creamy. Making balsamic vinaigrette is simple and fun. We covered the essential ingredients and how to mix them. Using fresh herbs and adjusting flavors adds a personal touch. Storage tips help keep your dressing fresh longer. Experiment with variations to find your favorite flavor. Homemade balsamic vinaigrette is a tasty addition to salads and marinades. I hope you feel inspired to create this dressing in your kitchen. Enjoy the delicious rewards of your work!

Are you ready to elevate your salads with a simple homemade balsamic vinaigrette? This fresh and easy dressing combines basic ingredients to create a burst of flavor. From classic salads …

Read more

Categories Salads

Vegan Zucchini Muffins Easy Healthy Snack Idea

July 11, 2025 by Chef Nate
To make these vegan zucchini muffins, gather the following: - 2 medium zucchinis, grated - 1 cup whole wheat flour - 1 cup almond flour - 1/2 cup brown sugar or coconut sugar - 1/2 cup maple syrup - 1/4 cup unsweetened applesauce - 1/4 cup vegetable oil or melted coconut oil - 1 teaspoon baking soda - 1 teaspoon baking powder - 1 teaspoon cinnamon - 1/2 teaspoon nutmeg - 1/4 teaspoon salt - 1/2 cup chopped walnuts or pecans (optional) - 1/2 cup dark chocolate chips (dairy-free) or raisins (optional) You might not have all the ingredients on hand. Here are some easy swaps: - For whole wheat flour, use all-purpose flour. - Almond flour can be replaced with oat flour or more whole wheat flour. - Brown sugar works well, but coconut sugar is a great choice too. - Maple syrup can be swapped with agave syrup or honey if not vegan. - Applesauce can be replaced with mashed banana for added flavor. - Vegetable oil can be switched with melted coconut oil for a richer taste. These substitutions keep your muffins tasty and healthy! Each muffin packs a nutritious punch. Here’s what you get per muffin: - Calories: 150 - Protein: 3g - Fat: 7g - Carbohydrates: 20g - Fiber: 2g - Sugar: 5g These values make the muffins a wholesome snack. Enjoy them guilt-free! You can find the full recipe to guide you through making these delicious treats. Start by washing the zucchinis. Grate two medium zucchinis using a box grater. Squeeze the grated zucchini in a clean cloth or paper towel to remove extra moisture. This step helps keep your muffins from getting soggy. Set the prepared zucchini aside while you mix other ingredients. In a large bowl, add the following dry ingredients: - 1 cup whole wheat flour - 1 cup almond flour - 1/2 cup brown sugar or coconut sugar - 1 teaspoon baking soda - 1 teaspoon baking powder - 1 teaspoon cinnamon - 1/2 teaspoon nutmeg - 1/4 teaspoon salt Whisk these ingredients together until they blend well. A good mix ensures even flavor in each muffin. In another bowl, mix these wet ingredients: - 1/2 cup maple syrup - 1/4 cup unsweetened applesauce - 1/4 cup vegetable oil or melted coconut oil Stir these ingredients together until smooth. This mixture adds moisture and sweetness to your muffins. Now, pour the wet mixture into the dry mix. Stir gently with a spatula until just combined. Be careful not to over-mix, as this can make the muffins tough. If you want, fold in optional ingredients like: - 1/2 cup chopped walnuts or pecans - 1/2 cup dark chocolate chips or raisins Next, divide the batter among the muffin cups, filling each about 2/3 full. Bake in a preheated oven at 350°F (175°C) for 20-25 minutes. Check for doneness by inserting a toothpick in the center. If it comes out clean, your muffins are ready! Allow them to cool in the pan for five minutes before transferring them to a wire rack. Enjoy your delicious vegan zucchini muffins! For the full recipe, check the earlier section. To make sure your muffins stay moist, squeeze out excess water from the grated zucchini. This step keeps the batter from getting too wet. You can also add unsweetened applesauce. It brings extra moisture and a touch of sweetness. Use coconut oil instead of vegetable oil for an even richer taste. You can mix in nuts, chocolate chips, or dried fruit for added flavor. Walnuts add crunch, while dark chocolate chips provide sweetness. If you want a bolder taste, add a dash of vanilla extract. You can also try spices like ginger or cardamom for a unique twist. One common mistake is over-mixing the batter. Mix just until combined for light muffins. If you skip the step of removing water from the zucchini, your muffins may turn out soggy. Always taste your batter. If it feels too dry, add a splash of almond milk or extra applesauce. For the full recipe, refer to the previous section. {{image_2}} You can easily make these muffins gluten-free. Use a gluten-free flour blend instead of whole wheat and almond flour. Make sure it has xanthan gum for the right texture. This swap keeps the muffins soft and tasty. Feel free to get creative with mix-ins. You can add: - 1/2 cup chopped nuts like walnuts or pecans - 1/2 cup dairy-free chocolate chips - 1/2 cup dried fruit like raisins or cranberries - 1/2 cup shredded coconut for a sweet twist Each mix-in adds new flavors to your muffins. Choose your favorites! Want something savory? You can turn these into savory muffins. Simply leave out the sugar and spices. Add ingredients like: - 1/2 cup grated cheese, such as vegan cheese - 1/4 cup chopped sun-dried tomatoes - 1/4 cup fresh herbs like basil or parsley These savory muffins make a great snack or side dish. They pair well with soups or salads. Check out the Full Recipe for more ideas! To keep your vegan zucchini muffins fresh, store them in an airtight container. This helps lock in moisture and flavor. You can keep them at room temperature for about three days. If you want them to last longer, put them in the fridge. They should stay good for up to a week. Freezing is a great option if you want to save some muffins for later. Allow the muffins to cool completely first. Then, wrap each muffin tightly in plastic wrap or foil. Place the wrapped muffins in a freezer bag. They can stay frozen for up to three months. When you're ready to eat, just thaw them in the fridge overnight. To enjoy your muffins warm, you can reheat them easily. Preheat your oven to 350°F (175°C). Place the muffins on a baking sheet and heat for about 10 minutes. You can also use the microwave. Heat each muffin for about 20-30 seconds, but keep an eye on it to avoid getting it too hot. Enjoy your muffins warmed up for a delicious treat! For more details on making these tasty muffins, check out the Full Recipe. Yes, you can use different flours. Try oat flour or all-purpose flour instead. Each flour gives a unique texture. Oat flour adds a nuttier taste, while all-purpose flour keeps it light. Just remember, the amount may change slightly. Start with the same amount and adjust if needed. To check if your muffins are ready, insert a toothpick in the center. If it comes out clean, they are done. The tops should look golden brown. You can also lightly press the tops; they should spring back. If they sink, they need more time. Absolutely! You can make the batter the night before. Store it in the fridge to keep it fresh. Just remember to stir it again before baking. You can also bake the muffins and store them. They stay good for up to a week in an airtight container. Enjoy them as a quick snack or breakfast! For the full recipe, check out the detailed instructions above. We covered the key parts of making tasty zucchini muffins. You learned about ingredients, easy steps, and useful tips. You also discovered variations to suit your diet and how to store them fresh. Remember, good muffins are not just about taste but also about texture and storage. Keep these ideas in mind as you bake. Enjoy every bite and share your muffins with others! Happy baking!

If you’re looking for a tasty and healthy snack, you’ve found it! These Vegan Zucchini Muffins are simple to make and packed with flavor. With fresh zucchini and wholesome ingredients, …

Read more

Categories Desserts

Zucchini Cake with Cinnamon Cream Cheese Frosting Delight

July 11, 2025 by Chef Nate
For the zucchini cake, gather these items: - 2 cups grated zucchini (squeezed dry) - 1 ½ cups all-purpose flour - 1 cup granulated sugar - ½ cup brown sugar, packed - ½ cup vegetable oil - 3 large eggs - 1 teaspoon vanilla extract - 1 teaspoon baking soda - 1 teaspoon baking powder - 1 teaspoon ground cinnamon - ½ teaspoon salt - ½ cup chopped walnuts or pecans (optional) These ingredients come together to create a moist and flavorful cake. The zucchini adds moisture and a subtle sweetness that you won’t even notice. For the frosting, you will need: - 8 oz cream cheese, softened - ½ cup unsalted butter, softened - 3 cups powdered sugar - 1 teaspoon vanilla extract - 1 teaspoon ground cinnamon - 2 tablespoons milk (if needed for consistency) This frosting is rich and creamy. The cinnamon gives it a warm flavor that pairs perfectly with the cake. You can personalize your cake with optional add-ins: - ½ cup chopped walnuts or pecans - ½ cup raisins or chocolate chips These add-ins can add texture and extra flavor. You can mix and match based on what you like. They can make your cake unique and even more delightful. For the full recipe, check out the details provided earlier. Enjoy baking! Start by preheating your oven to 350°F (175°C). Grease and flour a 9x13 inch baking dish. This helps the cake not stick. Next, take 2 cups of grated zucchini and squeeze it dry. This step is key. If there's too much water, the cake may turn soggy. In a large bowl, mix the dry zucchini, 1 cup of granulated sugar, ½ cup of brown sugar, ½ cup of vegetable oil, 3 eggs, and 1 teaspoon of vanilla extract. Whisk until everything is well combined. In a separate bowl, sift together 1 ½ cups of flour, 1 teaspoon of baking soda, 1 teaspoon of baking powder, 1 teaspoon of ground cinnamon, and ½ teaspoon of salt. Now, gently fold the dry mix into the wet zucchini mix. Do this until just combined. It's okay to have a few lumps; don't overmix! If you want, fold in ½ cup of chopped walnuts or pecans for a nice crunch. Now, pour the batter into your prepared baking dish. Use a spatula to smooth the top. Bake it in the preheated oven for about 30-35 minutes. To check if it's done, insert a toothpick into the center. If it comes out clean, the cake is ready. Once baked, take it out and let it cool completely in the pan. This cooling time is important for the frosting later. While your cake cools, it's time to make the frosting. In a large bowl, beat 8 oz of softened cream cheese and ½ cup of softened unsalted butter together. Mix until creamy and fluffy. Gradually add 3 cups of powdered sugar. Keep beating until smooth. Then, add 1 teaspoon of vanilla extract and 1 teaspoon of ground cinnamon. If the frosting is too thick, you can add 1-2 tablespoons of milk for a better spread. Once the cake is completely cool, spread the frosting generously over the top with a spatula. You can create swirls for a nice look or sprinkle some extra cinnamon powder on top. Slice it into squares, and enjoy! Zucchini holds a lot of water. Too much moisture can make your cake soggy. To squeeze zucchini, first wash and grate it. Then, place the grated zucchini in a clean kitchen towel or cheesecloth. Twist the cloth to wring out the water. This method is simple and effective. Aim to remove as much liquid as you can for the best results. Baking is a science. Follow these practices for success: - Measure accurately: Use dry measuring cups for flour and sugar. Use liquid measuring cups for oil and eggs. - Oven temperature: Always preheat your oven. An accurate temperature helps the cake rise properly. - Use the right pan: A 9x13 inch pan works best for this recipe. Avoid glass pans, as they can bake unevenly. - Check for doneness: Insert a toothpick into the center. If it comes out clean, your cake is done. Getting the frosting just right is key. Follow these tips: - Softening: Make sure your cream cheese and butter are soft. This helps create a smooth texture. - Gradual mixing: Add powdered sugar slowly. This prevents clumps and helps achieve a creamy consistency. - Adjust thickness: If your frosting is too thick, add a little milk. Mix until you get the desired spreadable texture. - Decorate: Use a spatula to create swirls. A sprinkle of cinnamon on top adds a nice touch. For the full recipe, follow the steps outlined above and enjoy this delicious treat! {{image_2}} You can make this zucchini cake healthier with a few easy swaps. Instead of using all-purpose flour, try whole wheat flour. It adds more fiber and nutrients. You can also replace some or all of the sugar with a natural sweetener like honey or maple syrup. Applesauce is a great substitute for oil. It keeps the cake moist and cuts down on calories. These changes can help you enjoy a guilt-free treat. The cinnamon cream cheese frosting shines, but you can switch it up! Add a splash of orange zest for a bright twist. A touch of cocoa powder can turn it into a chocolatey delight. If you love nuts, mix in finely chopped pecans or walnuts for a crunchy texture. You can also try different spices like nutmeg or ginger for a unique flavor. These variations let you customize the frosting to match your taste. If you need a nut-free version, simply skip the walnuts or pecans. You can replace them with sunflower seeds. They add crunch without nuts. For those who want a different texture, try adding shredded coconut. It brings a fun chewiness to the cake. These options keep your zucchini cake safe for everyone while still being delicious. Enjoy experimenting with these alternatives! Store leftover zucchini cake in an airtight container. Keep it at room temperature for up to three days. If you want it to last longer, place it in the fridge. This will keep it fresh for about a week. Make sure to cover the frosting to prevent it from drying out. You can freeze zucchini cake for later enjoyment. First, let the cake cool completely. Then, wrap it tightly in plastic wrap. After that, place the wrapped cake in a freezer-safe bag or container. This helps protect it from freezer burn. It can stay in the freezer for up to three months. When you’re ready to eat it, thaw it in the fridge overnight. To reheat your zucchini cake, preheat your oven to 350°F (175°C). Remove the cake from the fridge and let it sit for about 15 minutes. This helps it come to room temperature. Place the cake in the oven for about 10-15 minutes. This warms it up without drying it out. If you prefer, you can microwave a slice for about 20-30 seconds. Just be careful not to overheat it, or the cake may become dry. For the best flavor, enjoy it warm with a dollop of fresh frosting. For the full recipe, check the earlier sections. Yes, you can use frozen zucchini. Just make sure to thaw it first. Squeeze out the extra water. This step helps keep the cake from becoming too wet. Frozen zucchini works well if fresh isn’t available. Check the cake with a toothpick. Insert it into the center of the cake. If it comes out clean, the cake is done. It should be golden brown on top. You can also lightly press the surface. If it springs back, it’s ready to come out. You can use unsweetened applesauce as an egg substitute. Use ¼ cup of applesauce for each egg. This keeps the cake moist and adds sweetness. Another option is to use a flax egg. Mix 1 tablespoon of ground flaxseed with 2.5 tablespoons of water. Let it sit for a few minutes before using it in the batter. These swaps work well for this cake. For the full recipe, check out the Zucchini Cake Delight with Creamy Cinnamon Swirl. This article covered how to make a delicious zucchini cake with cinnamon cream cheese frosting. You learned the key ingredients, step-by-step instructions, and helpful tips for success. Remember, you can adjust the recipe to fit your needs. Try different flavors or make it healthier. When stored properly, this cake can last and still taste great. Enjoy baking and sharing this tasty treat!

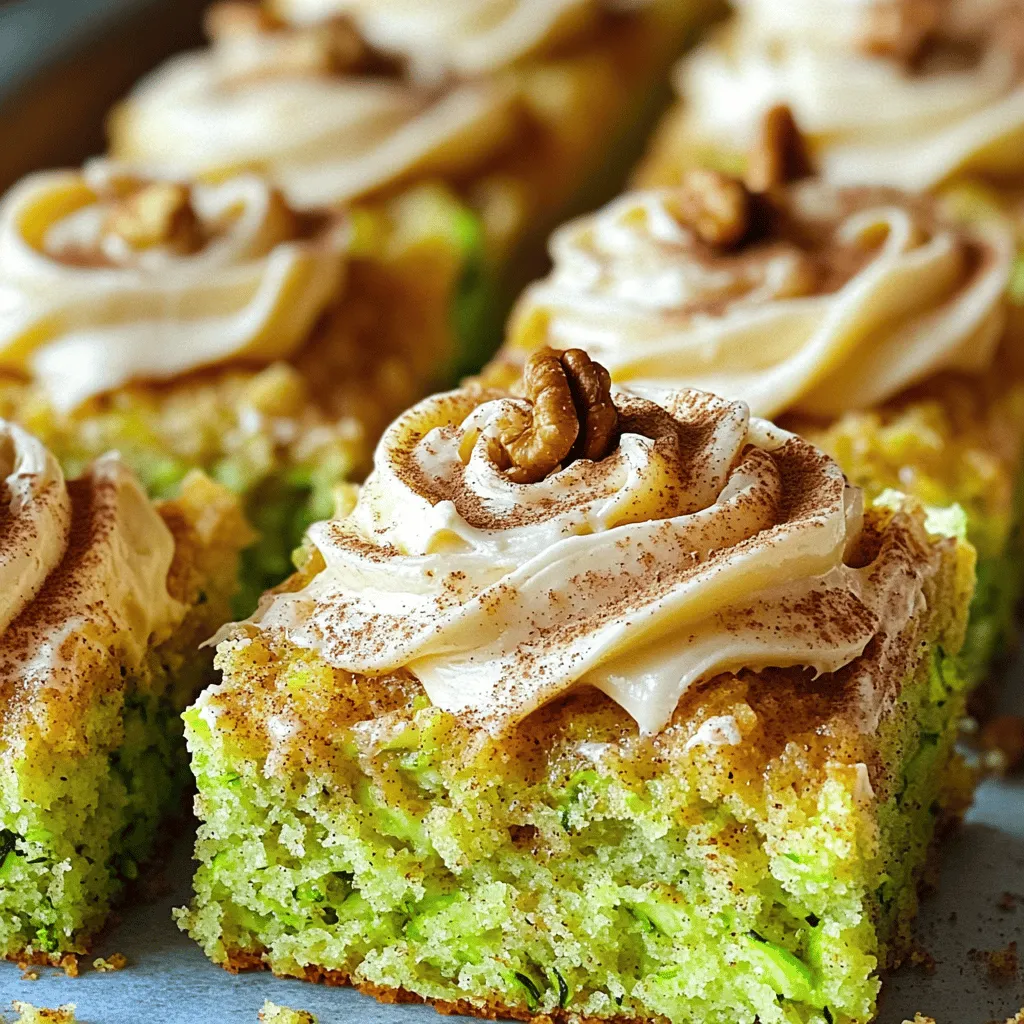
Are you ready to whip up a delicious treat that combines sweet and savory? My Zucchini Cake with Cinnamon Cream Cheese Frosting is here to excite your taste buds! This …

Read more

Categories Desserts

Fudgy KETO Zucchini Brownies Irresistibly Delicious Treat

July 11, 2025 by Chef Nate
To create these fudgy KETO zucchini brownies, you need a few simple ingredients. Each one plays a key role in making these treats both delicious and healthy. Here’s what you’ll need: - 1 medium zucchini, grated and excess moisture squeezed out - 1/2 cup almond flour - 1/2 cup unsweetened cocoa powder - 1/2 cup erythritol (or your preferred keto sweetener) - 1/4 cup unsweetened applesauce - 2 large eggs - 1/4 cup coconut oil, melted - 1 teaspoon vanilla extract - 1/2 teaspoon baking powder - 1/4 teaspoon salt - 1/2 cup sugar-free dark chocolate chips (optional) The zucchini adds moisture and a subtle texture. Almond flour keeps it low in carbs while offering a nice nutty flavor. Cocoa powder brings that rich chocolate taste we all love. Erythritol provides sweetness without the sugar, making it perfect for a keto diet. Unsweetened applesauce adds more moisture and a touch of natural sweetness. The eggs and melted coconut oil help bind everything together, while vanilla extract enhances the overall flavor. Baking powder gives the brownies a little lift, and salt balances the sweetness. If you like chocolate, the sugar-free dark chocolate chips are a great addition. For the full recipe, check out the detailed steps that follow. - Preheat the oven to 350°F (175°C) and prepare the baking dish. - Combine grated zucchini with dry ingredients in a mixing bowl. Start by preheating your oven. This step is key for even baking. You want that perfect fudgy texture! Line an 8-inch square baking dish with parchment paper. Let some hang over the edges. This helps you lift the brownies out later. In a mixing bowl, take your grated zucchini. Make sure to squeeze out as much moisture as you can. This helps keep the brownies from getting soggy. Next, add the almond flour, cocoa powder, erythritol, baking powder, and salt. Mix them well. You want everything to blend nicely. - Whisk together the wet ingredients until smooth. - Mix wet ingredients into dry until just combined. In a separate bowl, whisk the eggs, melted coconut oil, applesauce, and vanilla extract. Mix until the mixture is smooth. This is where you get that rich flavor. Now, pour this wet mix into the bowl with the dry ingredients. Stir until just combined. Be gentle here! Overmixing can make your brownies tough. - Pour batter into the prepared dish and bake for 25-30 minutes. - Cool the brownies and slice for serving. Now, pour the brownie batter into your prepared dish. Spread it evenly. Pop it in the preheated oven and set a timer for 25-30 minutes. You’ll know they are done when a toothpick comes out mostly clean, with a few moist crumbs clinging to it. Once baked, let the brownies cool for about 10 minutes in the pan. Use the parchment paper to lift them out carefully. Cool completely on a wire rack. Then, slice them up! Enjoy your fudgy keto zucchini brownies. For the full recipe, check below. To make these brownies extra fudgy, moisture control is key. Start by properly squeezing out the moisture from the grated zucchini. I use a clean kitchen towel for this. This step ensures that your brownies do not turn out soggy. Next, be careful not to overmix the batter. Stir the wet and dry ingredients together until just combined. Overmixing can lead to a more cake-like texture instead of the chewy, fudgy brownie you want. Erythritol is my go-to keto sweetener for these brownies. It adds sweetness without raising blood sugar. You can also try monk fruit or stevia. Each sweetener has a different taste, so feel free to experiment. Just keep in mind that some are sweeter than others, so adjust the amount accordingly. These brownies shine on their own, but you can enhance them with toppings. Consider serving warm brownies with whipped coconut cream on top. A sprinkle of extra cocoa powder or sugar-free chocolate chips adds visual appeal. You can even pair them with low-carb ice cream for a delicious contrast. If you’re feeling adventurous, add some fresh berries for a pop of flavor. For the full recipe, check out the detailed instructions above! {{image_2}} You can make these fudgy KETO zucchini brownies even more exciting. Adding nuts gives a nice crunch. Try walnuts or pecans for a great texture. You can also explore different types of sugar-free chocolate. Dark chocolate chips enhance the rich flavor. White chocolate or milk chocolate chips can change the taste, too. Each option offers a unique twist that keeps these brownies fresh and fun. If you have specific dietary needs, this recipe is adaptable. To make these brownies gluten-free, ensure you use certified gluten-free almond flour. For a vegan option, replace eggs with flax eggs. Mix one tablespoon of ground flaxseed with three tablespoons of water. Let it sit for a few minutes until it thickens. This swap retains the fudgy texture while catering to plant-based diets. Pairing these brownies with low-carb ice cream is a game changer. A scoop of vanilla or chocolate complements the rich taste. You can also add toppings like fresh berries or whipped coconut cream. A sprinkle of cocoa powder can elevate the look and flavor. Each pairing enhances your dessert experience, making it truly delightful. For the full recipe, check out the detailed instructions and enjoy your cooking! To keep your fudgy KETO zucchini brownies fresh, store them in an airtight container. Place a piece of parchment paper between layers to avoid sticking. This helps maintain their moist texture. Keep the container at room temperature for up to three days. For longer storage, consider refrigeration. You can freeze brownies for later enjoyment. First, let them cool completely. Then, wrap each brownie in plastic wrap tightly. Place them in a freezer bag or a container. They can stay frozen for about three months. To defrost, move them to the fridge overnight. You can also warm them in the microwave for a few seconds before serving. These brownies stay fresh for about three days at room temperature. In the fridge, they can last up to a week. The key is to check for any signs of spoilage. If they look or smell off, it’s best to discard them. Enjoy your delicious treats while they are fresh for the best taste! These brownies are keto-friendly because they use low-carb ingredients. Almond flour replaces regular flour, reducing carbs significantly. Erythritol is a sweetener that has zero calories and does not raise blood sugar levels. Zucchini adds moisture without many carbs, making these brownies delicious and guilt-free. Yes, you can use other vegetables if you want. Shredded carrots can work well, giving a sweet flavor. You can also try mashed avocado for a creamy texture. Each option will slightly change the taste but will still keep the brownies moist. To check if the brownies are done, use a toothpick. Insert it into the center of the brownies. If it comes out mostly clean with a few moist crumbs, they are ready. Also, look for a firm edge and a slight spring when you press the center. You can substitute almond flour with coconut flour, but use less. Coconut flour absorbs more moisture, so cut the amount to about one-third. You can also use sunflower seed flour for a nut-free option, but the texture may differ from the original recipe. This post covered a delicious keto brownie recipe made with simple ingredients. You learned how to mix dry and wet elements for a fudgy texture. We shared tips to enhance your brownies and explored variations for unique flavors. I also included storage info to keep your treats fresh. Enjoying these brownies can fit perfectly into your diet while satisfying your sweet tooth. Try them out and see how easy it is to indulge guilt-free!

Are you craving a rich, chocolatey treat that keeps your KETO diet on track? Look no further! These Fudgy KETO Zucchini Brownies are not just guilt-free but also incredibly delicious. …

Read more

Categories Desserts
Older posts
Newer posts
← Previous Page1 … Page34 Page35 Page36 … Page108 Next →

GRILLED FLAVORS

where delicious ideas come to life, from stovetop to backyard. Warm, simple, and always satisfying. 🍽️✨

PAGES

Home About Contact Privacy Policy Terms & Conditions Cookie Policy GDPR Policy Copyright Policy Disclaimer

CATEGORIES

Appetizers Desserts Salads Breakfast Dinner

Contact

  • Pinterest
  • Mail
Copyright © 2026 Grilled Flavors. All rights reserved.