Skip to content
grilledflavors.com
  • Home
  • Appetizers
  • Desserts
  • Salads
  • Breakfast
  • Dinner
  • Privacy Policy
  • Contact
  • About

Chef Nate

Pickled Vegetables for a Healthy Snack Delight

July 7, 2025 by Chef Nate
To create a tasty pickled veggie medley, gather these fresh ingredients: - 1 cup carrots, julienned - 1 cup cucumbers, sliced - 1 cup radishes, sliced - 1 cup bell peppers (any color), sliced - 1 cup red onions, thinly sliced - 2 cups water - 1 cup apple cider vinegar - 2 tablespoons sugar - 1 tablespoon salt - 1 teaspoon mustard seeds - 1 teaspoon coriander seeds - 1 teaspoon black peppercorns - 2 garlic cloves, smashed - Fresh dill sprigs (optional for extra flavor) When measuring ingredients, use dry measuring cups for solids. For liquids, use a liquid measuring cup. This helps ensure your pickled veggies turn out great. Make sure to level off dry ingredients with a knife. This way, you avoid using too much or too little. Remember, accurate measures lead to perfect flavors! Fresh ingredients are key for great pickles. They add crunch and vibrant taste. Old or wilted veggies can lead to mushy pickles. Always choose firm, colorful veggies. This guarantees that your pickled medley will have a bright look and a delightful crunch. Freshness also enhances the overall flavor, making your healthy snack even more enjoyable. To make a great pickling brine, start with a saucepan. Add 2 cups of water and 1 cup of apple cider vinegar. Then, add 2 tablespoons of sugar and 1 tablespoon of salt. Stir in 1 teaspoon of mustard seeds, 1 teaspoon of coriander seeds, and 1 teaspoon of black peppercorns. Finally, add 2 smashed garlic cloves. Heat this mixture over medium heat and stir until the sugar and salt dissolve. Once boiling, remove the saucepan from heat and let it cool for 10-15 minutes. Properly preparing your vegetables is key to great pickles. First, wash all your veggies thoroughly. For the carrots, julienne them into thin strips. Slice cucumbers, radishes, and bell peppers into bite-sized pieces. Thinly slice the red onion. This helps all the veggies soak in the brine well. If you want extra flavor, add fresh dill sprigs to your jar. This step adds a nice herbal touch. Once your brine is cool, place your prepared veggies into a large glass jar or an airtight container. Pour the brine over the veggies, making sure they stay submerged. You might need to press them down with a spoon. Seal the jar tightly and place it in the fridge. Let the vegetables pickle for at least 24 hours. For the best taste, let them sit for 3-5 days. Enjoy your pickled veggies as a healthy snack or topping for meals. Pickling vegetables is fun and simple. Choose fresh, crisp veggies for the best taste. Wash them well and cut them into even pieces. This helps them pickle evenly. Always use clean jars to avoid contamination. I like to sterilize my jars in boiling water before use. To add more flavor, use herbs and spices in the brine. Garlic and dill work great. You can also add red pepper flakes for heat. Experiment with flavors! Mustard seeds and coriander seeds give a nice crunch and extra taste. Just remember to keep it balanced. Too many spices can overpower the veggies. One common mistake is not letting the brine cool enough before pouring it over veggies. Hot brine can cook the vegetables and change their texture. Another mistake is not using enough salt. Salt helps preserve the veggies and adds flavor. Don’t skip the sugar, either! It balances the acidity of vinegar. Lastly, remember to seal the jars tightly to keep the flavors in. For a vibrant pickled snack, check out the Full Recipe for my Vibrant Pickled Veggie Medley. {{image_2}} Pickled vegetables are tasty and healthy. They are low in calories and high in nutrients. For example, cucumbers are rich in vitamins K and C. Carrots provide beta-carotene, good for your eyes. Radishes add fiber, which helps you feel full. These veggies also keep your meals colorful and fun. Eating pickled vegetables can help your tummy. They often contain probiotics. Probiotics are good bacteria that aid digestion. These bacteria can improve gut health. They help break down food, making it easier to digest. This can reduce bloating and discomfort. Plus, the vinegar in pickles may help your body absorb nutrients better. You can add pickled veggies to many meals. They make a great snack on their own. Try them in salads or on sandwiches for extra crunch. You can also mix them into grain bowls or tacos. Their tangy taste adds flavor without extra calories. For a fun treat, follow the full recipe to make your own vibrant pickled veggie medley. You can play with pickled vegetables in many fun ways. Try using different veggies to make your own mix. Instead of cucumbers, you can use zucchini or green beans. For a spicy kick, add sliced jalapeños or radishes. You can even mix in fruits like mango or peach for a sweet touch. Each veggie or fruit adds its own flavor, making your pickles unique. Pickled vegetables shine when paired with other foods. They make a great side dish for grilled meats or fish. Serve them on a cheese platter for a crunchy bite. You can also add them to sandwiches or wraps for extra flavor. Their tangy taste compliments rich dishes well. For a simple snack, enjoy them with hummus or dip. You can use pickled vegetables in many meals. Top your salads with them for a crunchy twist. Add them to tacos for a zesty layer. They also work great in grain bowls, adding texture and taste. You might want to mix them into pasta salads or rice dishes. They can even spice up a simple omelet. Be sure to try my Full Recipe for a vibrant pickled veggie medley! Pickled vegetables can last up to two months in the fridge. The brine helps preserve them. After that time, the taste may change. Always check for off smells or mold before eating. Yes, you can use many types of vegetables! Carrots, cucumbers, radishes, and bell peppers work well. You can also try green beans, cauliflower, and even asparagus. The key is to cut them into similar sizes for even pickling. Absolutely! Pickled vegetables are low in calories and high in fiber. They pack vitamins and minerals, too. They can aid digestion and add crunch to your meals. Just watch the sodium if you're keeping track of salt intake. Store your pickled vegetables in a glass jar with a tight lid. Keep them in the fridge. This keeps them fresh and crisp. Make sure they are fully submerged in brine to prevent spoilage. Pickled vegetables are usually ready after 24 hours in the fridge. For the best flavor, wait 3 to 5 days. Taste them to see if the flavors have melded well. They should have a tangy, crisp texture. For a tasty recipe, try the Vibrant Pickled Veggie Medley! In this article, we covered the essentials for making a vibrant pickled veggie medley. We explored ingredient choices, preparation steps, and tips for best results. I shared the health benefits of pickled vegetables and creative serving ideas. Remember, using fresh ingredients is key. By practicing the tips provided, you can avoid common mistakes. Enjoy your journey into pickling veggies. It's a fun way to add flavor and nutrition to your meals.

Are you looking for a tasty and healthy snack? Pickled vegetables offer a crunchy bite and bold flavors that pack a nutritious punch. In this guide, I’ll show you how …

Read more

Categories Appetizers

Tomato Zucchini Casserole Flavorful and Comforting Dish

July 7, 2025 by Chef Nate
To make a delicious Tomato Zucchini Casserole, you need fresh and simple ingredients. Here’s what you will need: - 2 medium zucchinis, sliced into thin rounds - 4 ripe tomatoes, sliced - 1 medium onion, thinly sliced - 3 cloves garlic, minced - 1 cup shredded mozzarella cheese - 1/2 cup grated Parmesan cheese - 1/4 cup fresh basil, chopped - 1 teaspoon dried oregano - 1/2 teaspoon red pepper flakes (optional) - 2 tablespoons olive oil - Salt and pepper to taste - 1 cup breadcrumbs (preferably whole wheat or gluten-free) You can swap the cheeses if you prefer. Try cheddar or a vegan cheese for a new flavor. For herbs, fresh thyme or oregano can be great substitutes. If you want a spicy kick, add more red pepper flakes. You can also mix in other vegetables like bell peppers or eggplants for variety. Using organic produce can enhance the taste and support sustainable farming. If you need a gluten-free option, choose gluten-free breadcrumbs. For the full recipe, check the complete instructions. - Preheating the oven Start by preheating your oven to 375°F (190°C). This step is key for even cooking. - Sautéing the onions and garlic In a large skillet, heat 2 tablespoons of olive oil over medium heat. Add 1 medium onion, thinly sliced, and 3 cloves of minced garlic. Cook until the onions are clear, which takes about 5 minutes. This brings out the flavor. - Layering the ingredients In a large mixing bowl, create your layers. Begin with half of the sliced zucchinis. Next, add half of the sliced tomatoes. Sprinkle them with salt, pepper, and half of the dried oregano and red pepper flakes. Spread half of the sautéed onion and garlic mix on top. Then, add a third of the shredded mozzarella and grated Parmesan cheeses. Repeat this layering with the remaining ingredients. Finish with breadcrumbs and the rest of the cheese. Top with fresh basil. - Covering and baking the casserole Cover the casserole dish with aluminum foil. Place it in the oven to bake for 30 minutes. This helps steam the veggies. - Finishing touches for the perfect bake After 30 minutes, remove the foil. Bake for an additional 15 to 20 minutes, until the top is golden and bubbly. This gives a nice texture. - Presentation tips Serve the casserole warm. For a nice look, garnish with extra fresh basil. You can also drizzle some balsamic reduction on each plate for a fancy touch. - Garnishing options If you want to add more flavor, try some chopped parsley or a sprinkle of Parmesan on top. Enjoy this comforting dish straight from the oven, or let it cool a bit for easier serving. For the full recipe, you can refer to the [Full Recipe]. - Tips for sautéing perfectly: Use medium heat to cook onions and garlic. This helps them soften without burning. Stir often for even cooking. You want them to be translucent and fragrant, not brown. - Best methods for layering: Start with zucchini, then tomatoes, and season in between. Layering like this lets the flavors mix well. Alternate with cheese and sautéed onions to add depth. Finish with breadcrumbs and cheese for a crispy top. - How to substitute fresh ingredients: Fresh herbs can be swapped for dried. Use one-third the amount if you use dried. You can also try frozen zucchini, but it may release more water. Drain it well before layering. - Adjusting for dietary preferences (vegan, gluten-free): For a vegan option, replace cheese with cashew cream or nutritional yeast. Use gluten-free breadcrumbs for a gluten-free dish. Check labels on all ingredients to ensure they meet your needs. - Suggested spice additions: Add a pinch of smoked paprika or cumin for a warm, earthy flavor. A dash of lemon juice brightens the dish, too. Fresh herbs like thyme or rosemary can enhance the taste. - Cheese alternatives: Use vegan cheese or a nut-based cheese for a dairy-free option. You can also try a mix of nutritional yeast and olive oil for a cheesy flavor without dairy. {{image_2}} You can change your Tomato Zucchini Casserole by using different veggies. In summer, fresh bell peppers or eggplant can add great flavor. In fall, you might try pumpkin or butternut squash for a sweet twist. Adjust your recipe based on what’s in season. This keeps the dish fresh and exciting. Want to change up the taste? Add proteins like grilled chicken or spicy sausage. These options make the dish heartier. You can also mix herbs and spices. Try thyme or rosemary for a different flavor. A dash of smoked paprika can add a warm, rich taste. Don’t be afraid to experiment with what you have on hand. You can easily scale the Tomato Zucchini Casserole recipe. For larger groups, double the ingredients. This way, everyone gets a serving. If you want smaller portions, make mini casseroles in ramekins. This is great for meal prep or personal servings. Each option lets you enjoy the dish your way. To store leftovers, let the casserole cool first. Then, cover it tightly with plastic wrap or foil. You can also use an airtight container. This keeps it fresh and avoids strong odors. When reheating, preheat your oven to 350°F (175°C). Place the casserole in the oven for 20-25 minutes. This method warms it evenly and keeps the top crispy. Yes, you can freeze Tomato Zucchini Casserole. To freeze, let it cool completely. Then, wrap it tightly in plastic wrap and aluminum foil. This helps prevent freezer burn. When ready to eat, move it to the fridge overnight to thaw. Reheat it in the oven at 350°F (175°C) for 30-40 minutes. Check that it's hot in the middle before serving. In the fridge, this casserole lasts for about 3-4 days. If you freeze it, it can last up to 2-3 months. Signs that the casserole has spoiled include a sour smell, mold, or a change in color. Always trust your nose and eyes! If it looks or smells off, it’s best to toss it out. Can I make Tomato Zucchini Casserole ahead of time? Yes, you can prepare this casserole the day before. Just layer your ingredients and cover it with foil. Store it in the fridge. When ready to bake, remove it from the fridge and let it sit for about 30 minutes. Then, bake it as directed in the recipe. What to serve with Tomato Zucchini Casserole? This casserole pairs well with a fresh salad or crusty bread. A light vinaigrette works nicely to balance the flavors. You can also serve it alongside grilled chicken or fish for a heartier meal. Is it possible to make this dish dairy-free? Absolutely! You can use dairy-free cheese options or omit the cheese completely. Nutritional yeast can add a cheesy flavor without dairy. Just be sure to check the labels for any hidden dairy ingredients. Why did my casserole turn mushy? Mushiness often comes from excess moisture. Make sure to drain any water from the zucchini. You can also bake it longer to help evaporate extra liquid. Tips if the casserole is too dry If your casserole turns out dry, try adding a splash of vegetable broth before baking. You can also drizzle some olive oil over the top before serving for extra moisture. Caloric breakdown This casserole has about 250-300 calories per serving, depending on the cheese used. The ingredients provide a good mix of carbs, proteins, and fats, making it a balanced dish. Health benefits of the main ingredients Zucchini is low in calories and high in vitamins A and C. Tomatoes are rich in antioxidants, helping to fight inflammation. Onions and garlic boost heart health and add flavor without extra calories. This dish is a great way to enjoy healthy, seasonal produce. This guide covered everything about making a delicious Tomato Zucchini Casserole. We looked at ingredients, preparation steps, cooking tips, and more. You can adjust this recipe to suit your taste and health needs. Remember to store it right and check for freshness. With these skills, you can impress at your next meal. Create a dish that delights everyone. Enjoy cooking and sharing your tasty casserole!

Are you ready to whip up a dish that screams comfort? My Tomato Zucchini Casserole combines fresh veggies and rich flavors, making it perfect for any meal. In this blog …

Read more

Categories Dinner

Moist Almond Flour Banana Bread Simple Recipe

July 7, 2025 by Chef Nate
- 2 ripe bananas, mashed - 3 cups almond flour - 1/2 teaspoon baking soda - 1 teaspoon baking powder - 1/4 teaspoon salt - 3 large eggs - 1/4 cup honey or maple syrup - 1 teaspoon vanilla extract - 1/2 cup chopped walnuts or pecans - 1/2 teaspoon cinnamon (optional) To make the best moist almond flour banana bread, you need a few key items. The bananas must be ripe. Their natural sugars give the bread sweetness and moisture. Almond flour is crucial. It brings a nutty flavor and a tender crumb. Baking soda and baking powder help the bread rise. The eggs add richness and bind everything together. Honey or maple syrup gives a touch of sweetness and moisture. Vanilla adds flavor, while nuts or cinnamon are fun extras. When you gather your ingredients, make sure they are fresh. Fresh ingredients make a big difference in taste. Using high-quality almond flour also enhances the flavor. This recipe is simple, yet it needs the right components to shine. For the full recipe, follow the steps carefully to ensure your banana bread turns out perfectly. 1. Preheat your oven to 350°F (175°C). Grease a 9x5-inch loaf pan. You can also line it with parchment paper for easy removal. 2. In a large mixing bowl, add the dry ingredients: almond flour, baking soda, baking powder, salt, and cinnamon if you like. Mix them well. This step ensures even flavor throughout. 3. In another bowl, mash the ripe bananas. Then, add the eggs, honey or maple syrup, and vanilla extract. Whisk until smooth. This mix adds sweetness and moisture. 1. Pour the wet ingredients into the bowl with dry ingredients. Stir gently. We want to mix until just combined. Don’t overmix; a few lumps are okay. 2. If you want a nutty crunch, fold in the chopped walnuts or pecans. This step adds texture and flavor to your bread. 1. Once mixed, pour the batter into the prepared loaf pan. Smooth the top with a spatula. 2. Bake for 50-60 minutes. To check for doneness, insert a toothpick in the center. It should come out clean. If it has wet batter, give it more time. For the full recipe, please refer to the main section. Enjoy your baking! Using ripe bananas is key to moist banana bread. They bring natural sweetness and moisture. Look for bananas with brown spots. The more spots, the sweeter and softer they are. This helps the bread stay moist. Mixing is also important. When combining wet and dry ingredients, mix just until they come together. Overmixing can make the bread tough. Lumps in the batter are fine. This technique keeps the texture light and fluffy. To present your banana bread beautifully, slice it neatly. Use a wooden board for a rustic feel. Drizzle honey on top for added sweetness. Garnish with banana slices and walnuts for color. Serve warm or toasted with a pat of butter. If your banana bread is dry, it may have baked too long. Check it with a toothpick a few minutes early. If it comes out clean, it’s done. You can also add a bit more banana or honey next time. This helps with moisture. For even baking, make sure your oven is preheated. Rotate the loaf pan halfway through baking. This ensures all sides bake evenly. If the top browns too fast, cover it with foil. This protects it while baking through. {{image_2}} If you want to skip nuts, you can still enjoy this bread. Use sunflower seed flour or oat flour as a base. These options keep the bread moist and tasty. You can also add seeds like pumpkin or sunflower for crunch. For flavor, try using vanilla or coconut extract instead of nuts. You can elevate your banana bread with fun add-ins. Chocolate chips are always a hit—use dark or dairy-free for a lighter touch. Dried fruits like raisins or cranberries add sweetness. You can sprinkle cinnamon or nutmeg for warmth. If you want it sweeter, add a bit more honey or maple syrup. Adjust it to your taste! This recipe is gluten-free, thanks to almond flour. For a vegan version, replace the eggs with flax eggs. Mix one tablespoon of ground flaxseed with three tablespoons of water. Let it sit for a few minutes until it thickens. Always check ingredients for allergens, especially if serving guests. You can safely enjoy this banana bread with these simple swaps! For the full recipe, check out the [Full Recipe]. To keep your banana bread fresh, store it at room temperature. Wrap it tightly in plastic wrap or place it in an airtight container. This helps it stay moist for up to three days. If you live in a hot area, it's best to refrigerate it. In the fridge, it can last up to a week. Just remember to let it come to room temperature before enjoying. For longer storage, you can freeze banana bread. First, slice it into pieces for easy thawing. Wrap each slice in plastic wrap and then place them in a freezer bag. This method keeps the bread fresh for up to three months. To enjoy, take a slice out and let it thaw at room temperature or warm it gently in the microwave. Reheating banana bread is simple. You can use a microwave or an oven. For the microwave, heat a slice for about 10-15 seconds. If using the oven, preheat it to 350°F (175°C) and warm the bread for 10-15 minutes. To keep it moist, cover it with foil while reheating. This helps the bread stay soft and delicious. What makes almond flour banana bread moist? Almond flour has a high oil content. This adds moisture to the bread. Ripe bananas also help. They bring natural sweetness and moisture. This combo creates a soft and rich texture. Can I use regular flour instead of almond flour? Yes, you can use regular flour. But it will change the texture. Almond flour gives a nutty flavor and moistness. Regular flour will make the bread lighter and less dense. Adjust the liquid if you switch flours. How long does it take to ripen bananas? It takes about 2 to 7 days. Place them in a warm spot. They ripen faster when in a paper bag. Check daily until they are soft and brown. Can I make this banana bread ahead of time? Yes, you can make it in advance. It tastes great stored in the fridge. Wrap it well to keep it fresh. You can also freeze it. This way, you can enjoy it later. Why isn’t my banana bread rising? If your banana bread isn’t rising, check your baking powder. It might be old or inactive. Ensure you mix the batter well but don’t overmix. Overmixing can lead to a dense loaf. Can I omit the eggs in this recipe? You can omit the eggs, but it will change the texture. Use a flaxseed or chia seed egg instead. Mix one tablespoon of seeds with three tablespoons of water. Let it sit for a few minutes to thicken. This acts as a good binder. For the perfect recipe, refer to the Full Recipe. This blog post shared how to create delicious almond flour banana bread. We covered essential ingredients, key preparation steps, and baking tips. I also shared ways to store your bread and answer common questions. Banana bread is fun to make and easy to tweak. You can mix in your favorite flavors or adjust for diets. Now, you have all the tools to bake a tasty loaf. Enjoy your baking adventure!

Looking for a delicious way to use up ripe bananas? I’ve got just the recipe for you! This Moist Almond Flour Banana Bread is easy to whip up with simple …

Read more

Categories Desserts

Best Zucchini Bread Recipe Simple and Tasty Delight

July 7, 2025 by Chef Nate
To make the best zucchini bread, gather these simple ingredients: - 2 cups grated zucchini (about 2 medium zucchinis) - ½ cup unsalted butter, melted - 1 cup brown sugar - ½ cup granulated sugar - 2 large eggs - 1 teaspoon vanilla extract - 1 teaspoon lemon juice - Zest of 1 lemon - 2 cups all-purpose flour - 1 teaspoon baking soda - ½ teaspoon baking powder - ½ teaspoon salt - 2 tablespoons poppy seeds - 1 teaspoon ground cinnamon - Optional: ½ cup chopped walnuts or pecans (for added texture) Use fresh, firm zucchinis for the best taste. Look for ones that feel heavy for their size. If you do not have unsalted butter, you can use salted butter. Just reduce the salt in the recipe. For a sweeter touch, you can swap brown sugar for coconut sugar. If you want a gluten-free option, choose a gluten-free flour blend. Add-ins can enhance the flavor of your zucchini bread. Consider mixing in: - ½ cup chocolate chips for a sweet twist - 1 teaspoon nutmeg for warmth - ½ cup dried cranberries or raisins for a chewy texture - 1 tablespoon chia seeds for extra nutrition These choices let you create a zucchini bread that fits your taste. Experiment to find your favorite mix! First, set your oven to 350°F (175°C). This is the perfect temperature for baking. Next, get a 9x5 inch loaf pan ready. You can grease it with butter or use parchment paper. Parchment helps the bread come out easily after baking. In a large bowl, melt your butter. Then, add both sugars: brown and granulated. Whisk these together till they blend well. Next, crack in two large eggs. Add one teaspoon of vanilla extract, lemon juice, and lemon zest. Stir until everything is mixed. Grab another bowl for the dry mix. In this bowl, combine the flour, baking soda, baking powder, salt, cinnamon, and poppy seeds. Whisk these together. Slowly add this dry mix to your wet mixture. Stir gently until combined. If you want, fold in chopped nuts for extra crunch. Pour your batter into the prepared loaf pan. Make sure it’s even on top. Bake for 50-60 minutes. To check if it’s done, insert a toothpick in the center. It should come out clean. Don’t bake it too long, or it will dry out! After baking, let it cool in the pan for about 10 minutes. Then, move it to a wire rack to cool completely. Enjoy your tasty bread! For the complete recipe, check the Full Recipe section. To keep your zucchini bread moist, check it often. Bake at 350°F for 50-60 minutes. Insert a toothpick in the center. If it comes out clean, it’s done! If the edges brown too fast, cover them with foil. This stops burning while the center cooks. Grate your zucchini using a box grater or a food processor. Make sure to squeeze out excess moisture. Wrap the grated zucchini in a clean towel and twist. This helps prevent a soggy bread. Use medium-sized zucchinis for the best flavor and texture. You can add many flavors to zucchini bread. Try adding chocolate chips for sweetness. A teaspoon of nutmeg can add warmth. For a fruity twist, mix in blueberries or cranberries. Nuts add crunch. Use walnuts or pecans for a delightful texture. Explore these options to make your bread unique. Check the Full Recipe for more ideas! {{image_2}} Many fun add-ins can enhance your zucchini bread. You can use chocolate chips for a sweet twist. Try adding dried fruits like raisins or cranberries. For a nutty flavor, walnuts or pecans work great. You can also mix in spices like nutmeg or ginger for a warm touch. Each of these options makes your bread unique and tasty. You can easily make gluten-free zucchini bread. Just swap regular flour for gluten-free flour blends. Look for blends that contain xanthan gum for the best texture. It helps the bread rise and hold together well. You might need to adjust the liquid a bit. Gluten-free flours can absorb more moisture. Always check the texture of your batter before baking. Making zucchini bread vegan is simple. Replace eggs with flaxseed meal or applesauce. For flaxseed, mix one tablespoon with three tablespoons of water and let it sit until it thickens. Use a plant-based butter or coconut oil instead of regular butter. This keeps the bread moist and delicious. You can also use non-dairy milk in place of standard milk if your recipe calls for it. Feel free to explore these variations and find what suits your taste best! You can create a delightful loaf with just a few changes. For the complete recipe, check out the Full Recipe section above. To keep your zucchini bread fresh, wrap it tightly in plastic wrap. You can also place it in an airtight container. Store it at room temperature for up to three days. If it's very warm or humid, I recommend refrigerating it. This helps prevent mold and keeps it tasty. Freezing zucchini bread is simple and effective. First, let the bread cool completely. Then, slice it into pieces for easy access later. Wrap each slice in plastic wrap, and place them in a freezer bag. You can freeze zucchini bread for up to three months. When ready to eat, just thaw a slice at room temperature. To reheat your zucchini bread, use the oven for the best results. Preheat your oven to 350°F (175°C). Place the bread on a baking sheet and cover it with foil. Heat for about 10-15 minutes, or until warm. You can also use the microwave. Just zap a slice for about 15-20 seconds. Enjoy the warm, soft texture! Yes, you can use yellow squash instead of zucchini. Both have similar textures and moisture. The taste will change slightly, but it will still be tasty. Just grate the yellow squash in the same way as zucchini. Use the same amount in your recipe. To make your zucchini bread moister, use freshly grated zucchini. Squeeze out some liquid, but keep some moisture in. You can also add an extra egg or use applesauce. Both will help keep the bread soft. Lastly, avoid overbaking. Check it a few minutes early to keep it fluffy. The best way to check if the bread is done is with a toothpick. Insert it into the center of the loaf. If it comes out clean or with a few crumbs, it is done. If it has wet batter, bake for a few more minutes. You can also gently press the top. If it springs back, it's ready! This blog post covered everything about making zucchini bread. We went over the best ingredients and how to prepare them. I shared tips to avoid overbaking and ways to add flavor. You also learned how to store your bread and keep it fresh. Zucchini bread is fun to make, and you can change it to suit your taste. Enjoy experimenting with flavors or variations. With the right steps, you'll whip up a delicious treat that everyone will love. Happy baking!

Are you ready to bake the moistest, most delicious zucchini bread ever? I’m excited to share my favorite recipe that’s simple, fast, and oh-so-tasty! You’ll discover the secret tips to …

Read more

Categories Desserts

Easy Lemon Poppy Seed Zucchini Bread Delightful Recipe

July 7, 2025 by Chef Nate
- Grated zucchini - Granulated sugar - Vegetable oil - Eggs - Vanilla extract - Lemon extract - Lemon zest - All-purpose flour - Baking powder - Baking soda - Salt - Poppy seeds You can switch granulated sugar for honey or maple syrup. These options will add a nice flavor. For oil, you can use melted coconut oil or applesauce. Both will keep the bread moist. If you don’t have zucchini, summer squash works well too. When choosing zucchini, look for firm ones without blemishes. Fresh zucchini gives the best taste. To zest a lemon, use a microplane. This tool makes it easy to get the bright, fragrant zest. For flour, all-purpose flour works best. It gives the bread a soft, tender crumb. To start, you need to prep the zucchini. Grate two medium zucchinis until you have about two cups. Place the grated zucchini in a bowl with one cup of granulated sugar. Let this mixture sit for about ten minutes. This step helps release moisture from the zucchini. Next, mix the wet ingredients. In the same bowl, add half a cup of vegetable oil, two large eggs, one teaspoon of vanilla extract, one teaspoon of lemon extract, and the zest of one lemon. Beat this mixture well until everything combines smoothly. Now it's time to prepare the dry ingredients. In another bowl, whisk together one and a half cups of all-purpose flour, one teaspoon of baking powder, half a teaspoon of baking soda, and a quarter teaspoon of salt. Make sure there are no lumps in the flour. Once your wet and dry ingredients are ready, combine them. Gradually add the dry ingredients to the wet mixture, stirring gently. Be careful not to overmix; you want a tender bread. Now, fold in the poppy seeds. Use about two tablespoons of poppy seeds for a nice crunch. After that, pour the batter into your greased and floured loaf pan. Smooth the top with a spatula to ensure even cooking. Set your oven to 350°F (175°C) and bake for 50 to 60 minutes. Check for doneness by inserting a toothpick in the center. If it comes out clean, your bread is ready. Let the bread cool in the pan for ten minutes. After that, transfer it to a wire rack to cool completely. This step is important to avoid sogginess. Enjoy your baking journey with this easy lemon poppy seed zucchini bread! For the complete recipe, check the [Full Recipe]. - Avoiding overmixing: Mix your batter until just combined. Overmixing makes the bread dense. Gently fold in dry ingredients with a spatula. This keeps it light and fluffy. - How to achieve the perfect texture: Use fresh, grated zucchini. It adds moisture without making the bread soggy. Let it sit with sugar first to release excess water. This step is key for the right texture. - Suggestions for additional spices: Add a pinch of cinnamon or nutmeg for warmth. These spices bring depth to the lemon flavor. Try cardamom for a unique twist. - Adding nuts or chocolate chips: Fold in walnuts or pecans for crunch. Dark chocolate chips pair well with lemon. They add sweetness and richness to each bite. - Decorative serving ideas: Slice the bread and arrange it on a colorful plate. Use lemon slices and fresh mint for a pop of color. This makes your dish look inviting and fresh. - Creating a lemon glaze: Mix icing sugar with lemon juice for a simple glaze. Drizzle it over the cooled bread for shine. It adds a sweet-tart finish that enhances flavor. {{image_2}} You can change the flavor of your lemon poppy seed zucchini bread by adding different extracts. For example, almond or orange extracts give a nice twist. You can also play with citrus flavors. Instead of lemon, try lime or grapefruit for a fresh taste. Each choice brings a new vibe to the bread. Texture is key to a great zucchini bread. You can add nuts like walnuts or pecans for a crunch. Seeds, such as sunflower or chia, work well too. If you want to include fruits, try blueberries or cranberries. For those who need gluten-free options, use almond or coconut flour. This way, everyone can enjoy your delicious creation. You can make this bread vegan by swapping eggs for flaxseed meal or applesauce. Each option helps bind the ingredients while keeping it plant-based. If you’re looking for low-sugar options, use natural sweeteners like honey or maple syrup. This will keep your bread tasty without the extra sugar. For a full guide on how to make this bread, check the Full Recipe. You can store your Easy Lemon Poppy Seed Zucchini Bread at room temperature. Wrap it in plastic wrap or place it in an airtight container. This keeps it fresh for about three days. If you prefer, you can refrigerate it. Just remember, refrigeration can change the texture. Use a glass or plastic container that seals tightly to prevent drying out. To freeze your zucchini bread, first cool it completely. Wrap it tightly in plastic wrap or aluminum foil. Place it in a freezer-safe bag. This bread can last up to three months in the freezer. Always write the date on the bag so you know when to use it. To reheat, preheat your oven to 350°F (175°C). Slice the bread and place it on a baking sheet. Cover it with foil to keep it moist. Heat for about 10-15 minutes. If you have frozen slices, you can reheat them directly from the freezer. Just add a few extra minutes to the time. Enjoy your warm, tasty bread! For the full recipe, check the [Full Recipe]. What can I substitute for zucchini? You can use grated carrots or apples. These options will add moisture and sweetness. How do I know when the bread is done? Insert a toothpick into the center. If it comes out clean, the bread is ready. Can I use yellow squash instead of zucchini? Yes, yellow squash works well too. It will give a similar taste and texture. Can I make this bread without eggs? You can use flaxseed meal mixed with water as an egg substitute. This helps bind the ingredients. How can I enhance the lemon flavor? Add more lemon zest or a splash of fresh lemon juice. You can also use lemon extract. Is it possible to add frosting or icing? Absolutely! A lemon glaze made from icing sugar and lemon juice works well. It adds sweetness and tang. Why did my zucchini bread sink? Your bread may have too much liquid or not enough flour. Be sure to measure accurately. What should I do if my bread is too moist? If it's too moist, try baking it a bit longer. Check it every 5 minutes after the initial time. How can I fix overcooked bread? If your bread is overcooked, keep it covered in a cloth to retain some moisture. In this blog post, we covered how to make a delicious zucchini bread. We discussed the key ingredients, their measurements, and how to prep and bake the bread. I provided tips to enhance flavor and texture, along with various options to customize your loaf. You can store, freeze, and reheat your bread for future enjoyment. My final thoughts? Experiment with flavors and adjust to your taste. Enjoy the process and have fun baking!

If you’re craving a tasty treat that’s both light and refreshing, you’ve found it! My Easy Lemon Poppy Seed Zucchini Bread is bursting with flavor and simple to make. Using …

Read more

Categories Desserts

Delicious Banana Zucchini Muffins Easy and Healthy Treat

July 7, 2025 by Chef Nate
To make these tasty muffins, you'll need: - 1 cup ripe bananas, mashed (about 2-3 medium bananas) - 1 cup grated zucchini (squeeze out excess moisture) - 1/2 cup Greek yogurt (or applesauce for vegan) - 1/3 cup honey or maple syrup - 1/4 cup vegetable oil (or melted coconut oil) - 2 large eggs (or flax eggs for vegan) - 1 teaspoon vanilla extract - 1 1/2 cups whole wheat flour (or gluten-free flour) - 1 teaspoon baking powder - 1/2 teaspoon baking soda - 1/2 teaspoon cinnamon - 1/4 teaspoon salt - Optional: 1/2 cup chopped walnuts or pecans, and/or 1/2 cup chocolate chips You can change some ingredients to suit diets or preferences. Instead of Greek yogurt, use applesauce for a vegan treat. For eggs, flax eggs work great. You can swap vegetable oil for melted coconut oil. If you want gluten-free muffins, just use gluten-free flour. Maple syrup can replace honey if needed, too. Each muffin has about 120 calories. It's packed with nutrients, thanks to bananas and zucchini. You get around 3 grams of protein and 2 grams of fiber. These muffins are a good source of vitamins and minerals. They’re a smart and tasty choice for a snack or breakfast. Enjoy these muffins without guilt, knowing they are both healthy and yummy! Start by gathering your ingredients. You need ripe bananas, grated zucchini, and Greek yogurt. Make sure to squeeze out excess moisture from the zucchini. Preheat your oven to 350°F (175°C). Line a muffin tin with paper liners or grease it. In a big bowl, mix the mashed bananas, zucchini, yogurt, honey, oil, eggs, and vanilla. Stir until well blended. In another bowl, whisk the whole wheat flour, baking powder, baking soda, cinnamon, and salt. Slowly add the dry mix to the wet mix. Fold gently until just combined. If you want, add nuts or chocolate chips. For the best muffins, don’t overmix the batter. A few lumps are fine. Fill each muffin cup about two-thirds full. This helps them rise nicely. Bake for 18-20 minutes. To check if they are done, stick a toothpick in the center. It should come out clean. Keep an eye on the muffins towards the end of baking. Ovens vary, and yours may bake faster or slower. Once baked, let the muffins cool in the pan for about five minutes. Then, transfer them to a wire rack. This helps them cool evenly. Serve them warm for the best taste. You can dust them with powdered sugar or add Greek yogurt on top. Enjoy these muffins for breakfast or as a snack. For the full recipe, check the earlier section. To keep your muffins soft, use ripe bananas. Their natural sugars add sweetness and moisture. Grate the zucchini finely and squeeze out excess water. This step helps avoid sogginess. Adding Greek yogurt or applesauce also helps. They bring moisture without making the muffins heavy. For best results, don't overmix the batter. A few lumps are okay. This keeps the muffins light and fluffy. One common mistake is overbaking. Check your muffins a few minutes early. Insert a toothpick; it should come out clean but not dry. Another mistake is not measuring flour correctly. Use the spoon-and-level method. Scoop flour into your measuring cup and level it off. This method prevents dense muffins. Finally, remember to preheat your oven. This ensures even baking and great rise. Let muffins cool completely before storing. Place them in an airtight container. This keeps them fresh for up to three days. If you want to store them longer, freeze them. Wrap each muffin in plastic wrap and place in a freezer bag. They’ll stay good for up to three months. To enjoy later, thaw at room temperature or microwave for a few seconds. {{image_2}} You can change the taste of your banana zucchini muffins by adding spices. Besides cinnamon, you can use nutmeg, ginger, or allspice. A dash of cardamom adds a nice twist too. Start with 1/4 teaspoon and adjust to your liking. These spices boost flavor without extra calories. They make your muffins warm and cozy, perfect for any time of year. Mix-ins allow you to personalize your muffins. You can add nuts, seeds, or dried fruits. Try walnuts, pecans, or even sunflower seeds for crunch. Dried cranberries or raisins add a sweet touch. For a fun twist, add chocolate chips. You can mix and match to find your perfect combo. Just remember to keep the total amount around 1 cup to ensure the batter remains balanced. If you need gluten-free muffins, swap the whole wheat flour for a gluten-free blend. Many blends work well without changing the taste. For a vegan option, replace eggs with flax eggs. To make a flax egg, mix 1 tablespoon of ground flaxseed with 2.5 tablespoons of water. Let it sit for a few minutes to thicken. You can also substitute Greek yogurt with applesauce for added moisture. These options keep your muffins tasty while meeting your dietary needs. For the complete recipe, check out the Full Recipe section. To keep your banana zucchini muffins fresh, store them in an airtight container. This helps keep moisture in and prevents them from drying out. You can store them at room temperature for up to three days. If you want to save them longer, refrigerate them for up to a week. Always let them cool completely before sealing them up. This step keeps the muffins fluffy and delicious. Freezing is a great option for longer storage. First, let the muffins cool completely. Then, wrap each muffin in plastic wrap. After that, place them in a freezer-safe bag or container. You can freeze them for up to three months. When you’re ready to enjoy them, just take out what you need. Let them thaw at room temperature or pop them in the microwave for a quick warm-up. To reheat your muffins, you have a few options. You can use a microwave for quick heating. Place a muffin on a microwave-safe plate and heat for about 15 to 20 seconds. If you prefer a crispier texture, use an oven. Preheat your oven to 350°F (175°C) and heat the muffins for about 10 minutes. This method brings back the fresh-baked taste. For more details on making these muffins, check the Full Recipe. Yes, you can use frozen bananas or zucchini. Just remember to thaw them first. Drain any extra water from the zucchini. This helps keep your muffins from getting too soggy. To make these muffins healthier, you can: - Use whole wheat flour for more fiber. - Swap honey for a natural sweetener like maple syrup. - Replace vegetable oil with applesauce to cut fat. - Add nuts or seeds for extra nutrients. These changes will boost the health factor while still keeping them tasty. You can use flax eggs as a great egg substitute. To make one flax egg, mix 1 tablespoon of ground flaxseed with 2.5 tablespoons of water. Let it sit for about 5 minutes until it thickens. This works well in the recipe, keeping the muffins moist and fluffy. For a vegan option, you can also use 1/2 cup of unsweetened applesauce. These substitutes work well and are easy to find. This blog post covered all you need for making great muffins. We talked about essential ingredients, helpful tips, and baking steps. You learned substitutions and ways to add flavors. I also shared how to store and reheat them properly. Remember, baking should be fun, so don’t stress if things go wrong. With the right info and a little practice, you will bake tasty muffins every time. Enjoy your baking journey!

Are you ready to bake some delicious Banana Zucchini Muffins that are both easy and healthy? You’ll love how these muffins blend sweet bananas with fresh zucchini, creating a treat …

Read more

Categories Breakfast

Rich Chocolate Zucchini Bread Delightfully Moist Recipe

July 7, 2025 by Chef Nate
To make rich chocolate zucchini bread, gather these key ingredients: - 1 ½ cups grated zucchini (about 1 medium zucchini) - 1 cup all-purpose flour - ½ cup unsweetened cocoa powder - 1 teaspoon baking soda - ½ teaspoon baking powder - ¼ teaspoon salt - ½ cup granulated sugar - ½ cup brown sugar, packed - ½ cup vegetable oil (or melted coconut oil) - 2 large eggs - 1 teaspoon vanilla extract - ½ cup semi-sweet chocolate chips - ¼ cup chopped walnuts (optional) Choosing the right ingredients can make a big difference. Here’s how to pick the best: - Zucchini: Use fresh, firm zucchini. Look for ones without spots or soft spots. - Flour: Use all-purpose flour for a balanced texture. Make sure it's fresh. - Cocoa powder: Opt for high-quality unsweetened cocoa. This will enhance the chocolate flavor. - Sugars: A mix of granulated and brown sugar adds depth. The brown sugar adds moisture. - Oil: Use vegetable or melted coconut oil. This keeps the bread moist. - Chocolate chips: Choose semi-sweet chips for the right sweetness. Dark chocolate works too! You can make this bread even better with fun add-ins: - Nuts: Add chopped walnuts for crunch. They give great texture. - Spices: A pinch of cinnamon or nutmeg can add warmth. - Fruits: Dried cherries or cranberries can bring a pleasant tartness. - Zest: A bit of orange or lemon zest gives a fresh twist. Feel free to mix and match these add-ins! They can elevate your rich chocolate zucchini bread to new heights. For the full recipe, including preparation methods, check out the complete guide. Start by preheating your oven to 350°F (175°C). This ensures even baking. Next, grab a 9x5-inch loaf pan. Grease and flour it, or line it with parchment paper. This helps with easy removal later. Now, take one medium zucchini and grate it until you have 1 ½ cups. Leave it aside; this will add moisture. In a medium bowl, mix the grated zucchini, granulated sugar, brown sugar, vegetable oil, eggs, and vanilla extract. Stir until it’s all combined. In a large bowl, whisk together the all-purpose flour, cocoa powder, baking soda, baking powder, and salt. Now, slowly add the wet mixture to the dry mixture. Stir gently until just combined. Be careful not to overmix! Finally, fold in semi-sweet chocolate chips and walnuts if you like. Pour the batter into your prepared pan and spread it out evenly. Place it in the oven and bake for 50-60 minutes. To check if it’s done, insert a toothpick into the center. It should come out clean. When baked, let it cool in the pan for about 10 minutes. After that, move it to a wire rack to cool completely. Enjoy your delicious treat! For the full recipe, refer back to the earlier section. To keep your chocolate zucchini bread moist, use fresh zucchini. Shred it just before mixing. The moisture from the zucchini is key. Don't squeeze it dry; you want that liquid. Adding vegetable oil or melted coconut oil also helps. These fats keep the bread tender. If you notice the batter feels thick, add a splash of milk. This small tweak can make a big difference. Bake your bread at 350°F (175°C). Use a toothpick to check for doneness. Insert it into the center; if it comes out clean, it’s done. If it’s wet, give it a few more minutes. Every oven is different, so watch closely. Consider rotating the pan halfway through baking for even cooking. This simple step can help you avoid undercooked spots. Want to boost flavor? Add a teaspoon of cinnamon for warmth. You can also use nutmeg for a hint of spice. Swap half the sugar for honey or maple syrup for a unique taste. For extra richness, try adding a splash of coffee or espresso. This deepens the chocolate flavor without being overpowering. You can also mix in nuts or dried fruit for added texture. Don't forget the semi-sweet chocolate chips; they add a lovely burst of sweetness. For the full recipe, make sure to check the details above. {{image_2}} You can swap some ingredients for healthier options. Use whole wheat flour instead of all-purpose flour. This change adds fiber to your bread. You can also replace sugar with applesauce. This keeps your bread sweet but cuts down on calories. If you want to lower the fat, use unsweetened applesauce instead of oil. This keeps the bread moist while making it lighter. Adding different flavors can make your zucchini bread even better. Try mixing in some spices like cinnamon or nutmeg for warmth. You can also add a bit of orange zest for a fresh taste. If you love nuts, try swapping walnuts for pecans. You can even add dried fruits like raisins or cranberries for a chewy bite. The key is to find what you like most! If you need to adjust for dietary needs, there are easy swaps. For a gluten-free option, use a gluten-free flour blend. This way, you can still enjoy the bread without gluten. If you want to make it vegan, replace eggs with flax eggs. Mix one tablespoon of ground flaxseed with three tablespoons of water. Let it sit for about five minutes until it thickens. This will help bind the bread just like eggs. Always remember, cooking is about finding what works for you! Check the Full Recipe for specific instructions and ideas. To keep your rich chocolate zucchini bread fresh, store it in an airtight container. You can place it on the counter for about three days. If you want to keep it longer, move it to the fridge. This helps maintain its moisture and flavor. If you use walnuts, the bread lasts a little less time. The nuts can go stale faster. Freezing is a great option if you want to save some for later. Wrap the cooled bread tightly in plastic wrap. Then, place it in a freezer bag. This method keeps it fresh for up to three months. When you want to enjoy it, just pull it out and let it thaw in the fridge overnight. To reheat, slice the bread and place it in a toaster or microwave. If using the microwave, heat for about 10-15 seconds. For a crispier texture, use an oven set at 350°F (175°C). Warm it for about 5-10 minutes. Enjoy it warm, perhaps with a bit of butter or whipped cream on top. Yes, you can use frozen zucchini for this recipe. Just make sure to thaw it first. After thawing, drain any excess water. This step keeps your bread from becoming too wet. Frozen zucchini works well and saves time if fresh zucchini is not available. To make this recipe vegan, you can replace the eggs. Use 1/4 cup of unsweetened applesauce for each egg. You can also swap the vegetable oil with melted coconut oil or a plant-based oil. Make sure to check your chocolate chips. Some brands offer vegan options. This way, you can enjoy rich chocolate zucchini bread without any animal products. Yes, you can substitute cocoa powder, but the taste will change. Carob powder is a good alternative. It has a sweeter flavor and is caffeine-free. You could also try using dark chocolate instead. Just melt it and mix it in. This will give your bread a rich chocolate flavor. For the best results, stick to unsweetened options to keep the balance of sweetness right. For the full recipe, check out the complete guide to creating this moist treat! In this blog post, we covered the key ingredients and steps for baking. I shared quality tips for selecting the best ingredients and highlighted optional add-ins for extra flavor. You learned effective mixing techniques and important baking times. I also gave you tips on moisture and how to enhance flavors. Variations for healthier options and dietary needs were discussed. Lastly, I outlined the best ways to store and reheat your baked goods. Remember, baking is both a science and an art, so enjoy the process!

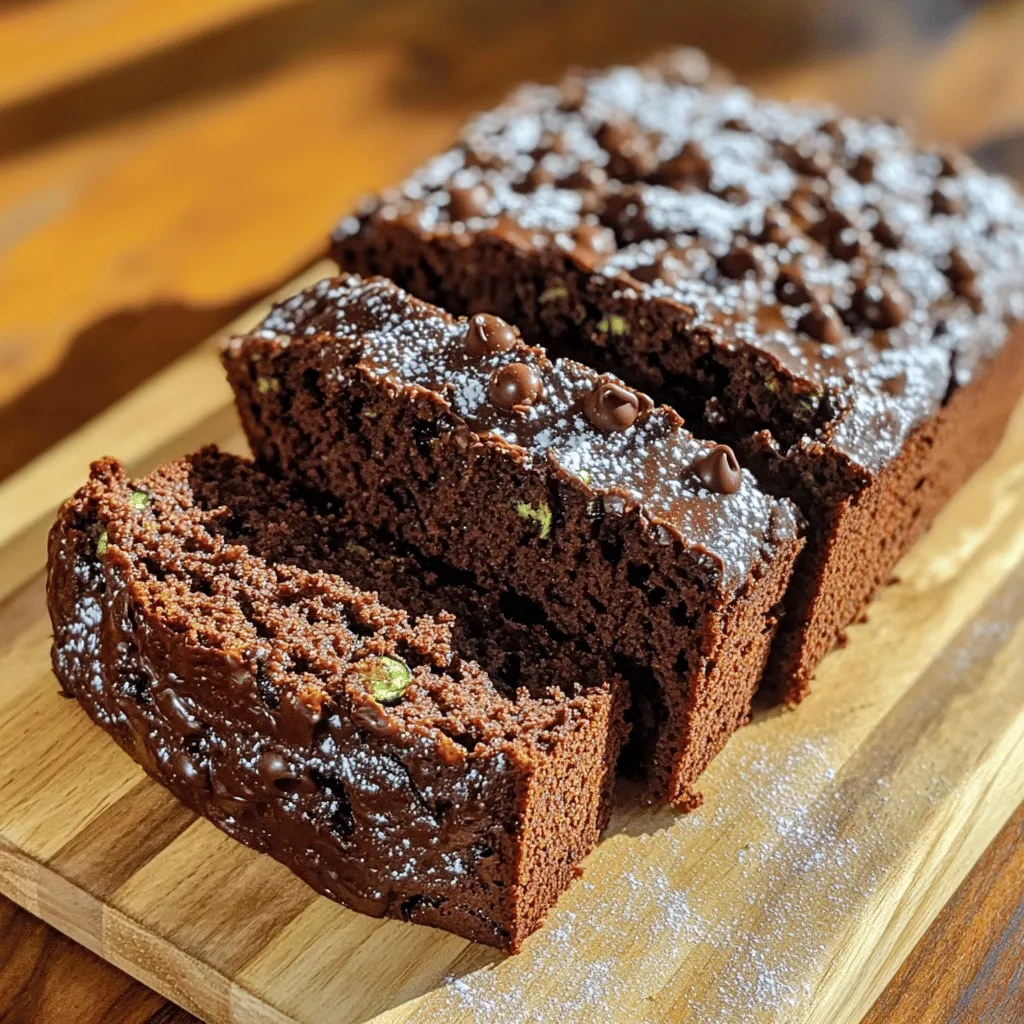
Are you ready to indulge in a rich and moist treat? My Rich Chocolate Zucchini Bread will surprise you! This delightful recipe blends the sweet taste of chocolate with the …

Read more

Categories Desserts

Fluffy Blueberry Zucchini Muffins Healthy Morning Treat

July 6, 2025 by Chef Nate
- 1 medium zucchini, grated - 1 cup fresh blueberries (or frozen) - 1 ½ cups all-purpose flour - ½ cup granulated sugar - ½ cup brown sugar, packed I love using zucchini in muffins. It adds moisture without changing the taste. Blueberries give a burst of flavor and color. You want the flour mix to hold everything together. The sugars sweeten without being too much. - 1 teaspoon baking powder - ½ teaspoon baking soda - ½ teaspoon salt - ½ teaspoon cinnamon - 2 large eggs - ½ cup vegetable oil - 1 teaspoon vanilla extract - ½ cup Greek yogurt Baking powder and soda help the muffins rise. Salt enhances the other flavors. Cinnamon adds warmth and depth. Eggs bind the ingredients and add richness. Oil keeps the muffins moist, while vanilla gives a lovely aroma. Greek yogurt adds creaminess and a slight tang. - Alternatives for Greek yogurt: You can use sour cream or applesauce instead. - Vegan options: Replace eggs with flax eggs and use a plant-based yogurt. These substitutions keep your muffins tasty and fun! Whether you need dairy-free or egg-free options, you can still enjoy these fluffy treats. For the full recipe, refer to the beginning of this article. Preparing the muffins starts with the zucchini and blueberries. First, wash the zucchini well. Then, grate it using a box grater. You want about one medium zucchini. For the blueberries, rinse them under cool water. If you use frozen blueberries, you can skip this step. Next, mix the wet and dry ingredients. In a large bowl, combine the grated zucchini, granulated sugar, brown sugar, eggs, vegetable oil, vanilla extract, and Greek yogurt. Stir these until they blend smoothly. In another bowl, whisk together the flour, baking powder, baking soda, salt, and cinnamon. Now, add the dry mix to the wet mix. Stir gently until just combined. It’s okay to have a few lumps in the batter. Finally, fold in the blueberries carefully so they don’t break. Time to fill the muffin tin! Line it with paper liners or grease it well. Use a scoop to divide the batter evenly among the muffin cups. Fill each cup about three-quarters full to allow room for rising. Now, bake in the preheated oven at 350°F (175°C) for 18-22 minutes. Check for doneness by inserting a toothpick in the center. If it comes out clean, they’re ready. If not, give them a few more minutes. After baking, let the muffins cool in the pan for about 5 minutes. This makes them easier to remove. Then, transfer them to a wire rack to cool completely. For serving, you can dust the muffins with powdered sugar. Another idea is to add a dollop of whipped cream. This adds a nice touch and makes them even more enjoyable. For the full recipe, check out the detailed instructions above. To make your muffins fluffy, avoid overmixing the batter. When you mix too much, you break down the flour. This can make your muffins dense instead of light and airy. Stir just until you combine the wet and dry ingredients. You want a few lumps in the batter. This helps keep the texture nice. Also, use eggs at room temperature. Cold eggs can slow down the mixing process. This leads to uneven batter and can affect how the muffins rise. Simply take your eggs out of the fridge an hour before you bake. You can boost flavor by adding nuts or spices. Chopped walnuts or pecans add crunch. A pinch of nutmeg or a dash of ginger can give warmth and depth to the muffins. Feel free to experiment with what you like! Adjusting sweetness is another way to personalize your muffins. If you want less sugar, reduce the granulated sugar. You can also swap in honey or maple syrup. Just remember to balance the wet and dry ingredients. If your muffins are dense, check your mixing technique. Did you overmix? If so, try again but mix gently. Another tip is to make sure your baking powder and baking soda are fresh. Old leaveners can lead to flat muffins. If you find your muffins are undercooked inside, it might be due to your oven's temperature. Every oven varies slightly. Use an oven thermometer to check if it’s accurate. If they need more time, bake for a few extra minutes. Just keep an eye on them to avoid burning. For the Full Recipe, refer to the section above. {{image_2}} You can swap in different fruits for a fresh twist. Try using chopped strawberries or raspberries. These fruits add a different taste and color. You can also mix fruits together. This makes each bite exciting and fun. For gluten-free options, use a gluten-free flour mix. Make sure it has a good blend of starches. This can help your muffins stay fluffy. You can also add a bit of xanthan gum. This helps bind the ingredients together. In fall, you can add pumpkin to your muffins. Use about half a cup of pure pumpkin puree. This will give your muffins a warm, cozy flavor. You can also sprinkle in some nutmeg to enhance the fall vibe. For winter, consider adding cranberries. They bring a tartness that pairs well with blueberries. Use about a cup of fresh or dried cranberries. This change gives your muffins a festive touch during the holidays. You can make sugar-free versions with natural sweeteners. Try using mashed bananas or applesauce instead of sugar. These options make the muffins healthier and keep them moist. For nut-free adjustments, simply skip any nuts. You can also use seeds like sunflower seeds or pumpkin seeds. This keeps your muffins safe for those with nut allergies while still adding a nice crunch. To keep your fluffy blueberry zucchini muffins fresh, store them in an airtight container. Use wax paper or a paper towel to line the container. This helps absorb any excess moisture and keeps the muffins soft. For short-term storage, they stay fresh at room temperature for up to three days. If you want to save them longer, freezing is a great option. Wrap each muffin tightly in plastic wrap, then place them in a freezer-safe bag. They can last up to three months in the freezer. When it's time to enjoy your muffins again, reheating them brings back that fresh-baked taste. The best methods are using a microwave or an oven. In the microwave, heat one muffin for about 15-20 seconds. For a crispier texture, use the oven. Preheat the oven to 350°F (175°C), then warm the muffins for about 5-10 minutes. To keep muffins moist, cover them with foil while reheating. At room temperature, muffins last about three days. If you store them in the fridge, they can last up to a week. Always check for signs of spoilage before eating. Look for mold, an off smell, or a dry texture. If any of these are present, it’s best to discard them. With proper care, your fluffy blueberry zucchini muffins will stay delicious! Yes, you can use frozen blueberries for these muffins. Just add them straight from the freezer. Do not thaw them first. This keeps the batter from turning blue. Frozen blueberries can make the muffins just as tasty! You should wash the zucchini and then grate it. No need to peel it! Grating makes it mix well into the batter. It adds moisture without changing the taste. After grating, gently squeeze out some water. This helps keep the muffins fluffy. Absolutely! You can bake the muffins a day in advance. Just store them in an airtight container. They stay fresh at room temperature. You can also freeze them for up to three months. This makes for a quick breakfast anytime. Serve the muffins warm for the best taste. You can dust them with powdered sugar or add whipped cream on top. They’re also great with a cup of coffee or tea. Enjoying them fresh makes every bite special! Yes, these muffins are perfect for kids! They are sweet and full of flavor. The zucchini adds nutrition without being too green. Kids will love the blueberries bursting in every bite. Plus, they are easy to hold and eat. You’ve learned how to make Fluffy Blueberry Zucchini Muffins with ease. With simple ingredients and straightforward steps, you can create a tasty treat. Remember, the key is to not overmix the batter for that perfect fluffy texture. Feel free to explore different flavors and make substitutions that suit your needs. Storing these muffins properly ensures they stay fresh and delicious longer. Now, it’s your turn to try this recipe and enjoy the joy of baking. Happy muffin-making!

Start your day on a delicious note with my Fluffy Blueberry Zucchini Muffins! These healthy treats pack a punch of flavor while sneaking in some veggies. You’ll love how easy …

Read more

Categories Breakfast

Spiced Zucchini Cake Delightfully Soft and Flavorful

July 6, 2025 by Chef Nate
The key to a great spiced zucchini cake lies in its ingredients. Here’s what you’ll need: - 2 cups grated zucchini (about 2 medium zucchini) - 1 ½ cups all-purpose flour - 1 cup granulated sugar - ½ cup brown sugar, packed - ½ cup vegetable oil - 3 large eggs - 1 teaspoon vanilla extract - 1 teaspoon baking soda - ½ teaspoon baking powder - 1 teaspoon ground cinnamon - ½ teaspoon ground nutmeg - ¼ teaspoon ground ginger - ½ teaspoon salt - 1 cup chopped walnuts (optional) - ½ cup raisins or chocolate chips (optional) These ingredients create a moist and flavorful cake. The zucchini adds moisture without a strong taste. The spices bring warmth and depth to every bite. When preparing your cake, make sure to gather your baking essentials. You will need a large mixing bowl, a whisk, and a 9x13-inch baking pan. Greasing the pan or lining it with parchment paper will help with easy removal later. This cake is versatile, so feel free to get creative with add-ins. Walnuts add a nice crunch, while chocolate chips can satisfy your sweet tooth. You can find the full recipe for a detailed guide on how to combine these ingredients perfectly. First, preheat your oven to 350°F (175°C). This helps the cake bake evenly. Next, take a 9x13-inch baking pan. Grease it with butter or oil. You can also line it with parchment paper. This makes it easy to remove the cake later. In a large bowl, add the grated zucchini, vegetable oil, granulated sugar, brown sugar, eggs, and vanilla extract. Mix these ingredients well. You want a smooth blend. In another bowl, whisk the all-purpose flour, baking soda, baking powder, ground cinnamon, nutmeg, ginger, and salt. This step is key for mixing flavors and ensuring a fluffy cake. Now, slowly add the dry mix to the wet zucchini mixture. Stir gently until just combined. Be careful not to overmix; this keeps your cake light. If you want to add some crunch, fold in the chopped walnuts and raisins or chocolate chips at this point. Pour the batter into your prepared baking pan. Spread it evenly. Now, it’s time to bake! Place the pan in the oven and set a timer for about 30-35 minutes. To check if it’s done, insert a toothpick into the center. If it comes out clean or with a few moist crumbs, the cake is ready. Once baked, remove the pan from the oven. Let the cake cool in the pan for about 10 minutes. After that, transfer it to a wire rack to cool completely. Now you have a lovely spiced zucchini cake ready to enjoy! For the full recipe, refer to the earlier sections. To make a fluffy spiced zucchini cake, avoid overmixing your batter. When you combine wet and dry ingredients, mix just until you see no dry flour. This keeps the cake light and airy. For flavor, spices are key. Ground cinnamon, nutmeg, and ginger add warmth. You can also try adding a pinch of cardamom or allspice for a unique twist. Remember, the more fresh your spices, the better your flavor will be. This cake pairs well with whipped cream or vanilla ice cream. A scoop on the side makes it extra special. You can also serve it with a dollop of cream cheese frosting for a richer taste. For presentation, dust the cooled cake with powdered sugar. This adds an elegant touch. You can also sprinkle extra walnuts or cinnamon on top for a beautiful finish. Each slice of spiced zucchini cake has about 220 calories. This recipe makes 12 servings. Zucchini adds moisture and fiber, making the cake healthier. Zucchini is low in calories but high in vitamins A and C. It also helps keep you full longer. So, you can enjoy this cake as a sweet treat without the guilt. {{image_2}} If you want to make a gluten-free spiced zucchini cake, use gluten-free flour. Almond flour or oat flour works well. These flours add a lovely nutty taste. You may need to adjust the liquid amount. Start with the same amount and add more if needed. To make this cake vegan, replace eggs with flax eggs. Mix one tablespoon of ground flaxseed with three tablespoons of water. Let it sit for five minutes to thicken. For oil, use coconut oil or applesauce. These options keep the cake moist and tasty. You can change the spices to create new flavors. Try adding cardamom for a floral note. Cloves give a warm, rich taste. You can also use allspice for a unique twist. Mix and match spices to find your favorite flavor profile. For the full recipe, check the earlier section. To keep your spiced zucchini cake fresh, store it in an airtight container. This protects it from air and moisture. Place the cake at room temperature if you plan to eat it within three days. If not, refrigerate it to extend its life. Make sure to cover the cake with plastic wrap or foil before placing it in the fridge. This helps prevent it from drying out. You can freeze spiced zucchini cake for longer storage. To do this, let the cake cool completely first. Wrap it tightly in plastic wrap, then in aluminum foil. This double wrap prevents freezer burn. Label it with the date before placing it in the freezer. When you're ready to enjoy it, thaw the cake in the fridge overnight. For quicker thawing, you can leave it at room temperature for a couple of hours. When stored correctly, spiced zucchini cake lasts about three days at room temperature. In the fridge, it stays good for up to a week. If frozen, it can last up to three months. Always check for signs of spoilage, such as mold or off smells, before eating. Enjoy your delicious cake knowing you stored it well! For the full recipe, refer to the section above. Yes, you can use frozen zucchini in this recipe. When using frozen zucchini, follow these tips: - Thaw the zucchini first and drain excess water. - Squeeze out moisture using a clean kitchen towel. - Frozen zucchini may be softer but still works well in the cake. Fresh zucchini gives a firmer texture, but frozen is a great alternative. To make this cake healthier, you can try these ideas: - Reduce sugar by using half the amount. - Substitute applesauce for some oil to lower fat content. - Add whole wheat flour for more fiber and nutrients. - Toss in some flaxseed or chia seeds for extra health benefits. These swaps can help you enjoy a lighter version of the cake. Yes, you can easily make cupcakes! Here’s how: - Use a standard cupcake pan and line it with paper liners. - Fill each liner about two-thirds full with batter. - Bake for 18-20 minutes, checking for doneness with a toothpick. Cupcakes are fun and quick to serve, making them a great choice! Pair your spiced zucchini cake with these tasty ideas: - A hot cup of coffee or tea enhances the flavors. - Serve with a scoop of vanilla ice cream for creaminess. - Fresh fruit, like berries or citrus, adds a refreshing touch. - A dollop of whipped cream on top makes it extra special. These pairings elevate your dessert experience! For the full recipe, check out the Spiced Zucchini Cake section above. You now have a complete guide to making a delicious spiced zucchini cake. We covered ingredients, baking steps, and helpful tips. I've shared options for diet variations and storage ideas. Remember, small changes can enhance flavor and texture. Don’t forget to explore ways to enjoy your cake. Whether you pair it with coffee or serve it as dessert, it will impress. Enjoy baking and sharing your tasty creation!

Do you love a dessert that’s both soft and bursting with flavor? Look no further! My Spiced Zucchini Cake is just what you need. This cake combines fresh zucchini and …

Read more

Categories Desserts

Protein-Packed Blueberry Muffins for Healthy Snacking

July 6, 2025 by Chef Nate
Here’s what you need to make these tasty muffins: - 1 cup whole wheat flour - 1 cup rolled oats - 2 tablespoons chia seeds - 1 teaspoon baking powder - 1/2 teaspoon baking soda - 1/2 teaspoon salt - 1/2 teaspoon cinnamon - 1/2 cup Greek yogurt - 1/2 cup almond milk (or any milk of choice) - 1/3 cup honey (or maple syrup) - 1 large egg - 1 teaspoon vanilla extract - 1 cup fresh blueberries (or frozen) - Optional: 1/2 cup chopped nuts (walnuts or pecans) for added crunch Each ingredient plays a role. Whole wheat flour gives fiber and nutrients. Rolled oats add heartiness and texture. Chia seeds boost protein and omega-3s. Baking powder and baking soda help the muffins rise. Greek yogurt adds moisture and protein. Almond milk keeps them light and fluffy. Honey or maple syrup sweetens naturally. The egg binds it all together, while vanilla extract adds warmth. Blueberries provide sweetness and a burst of flavor. And if you like crunch, chopped nuts are a great option. You can find the full recipe in the article for clear steps to follow. First, preheat your oven to 375°F (190°C). This step ensures the muffins bake evenly. Next, line a muffin tin with paper liners or lightly grease it. This makes it easy to remove the muffins later. In a large bowl, mix together the dry ingredients. Combine 1 cup of whole wheat flour, 1 cup of rolled oats, 2 tablespoons of chia seeds, 1 teaspoon of baking powder, 1/2 teaspoon of baking soda, 1/2 teaspoon of salt, and 1/2 teaspoon of cinnamon. Stir well to blend all the dry components. Take another bowl and whisk together the wet ingredients. Add 1/2 cup of Greek yogurt, 1/2 cup of almond milk, 1/3 cup of honey, 1 large egg, and 1 teaspoon of vanilla extract. Whisk until everything is smooth and combined. Now, pour the wet mixture into the dry ingredients. Stir gently until just combined, but do not overmix. This keeps your muffins light and fluffy. Next, fold in 1 cup of fresh blueberries and 1/2 cup of chopped nuts if you want extra crunch. Divide the muffin batter evenly among the muffin cups. Fill each cup about 2/3 full to allow for rising. Bake in your preheated oven for 18-22 minutes. Check if they are done by inserting a toothpick in the center. If it comes out clean, they are ready. After baking, let the muffins cool in the tin for 5 minutes before moving them to a wire rack. Enjoy your delicious protein-packed blueberry muffins! You can find the full recipe for more details. To keep your muffins moist, avoid overmixing the batter. When you mix too much, the muffins turn out dense and tough. Blend the ingredients just until they come together. Another great tip is to use Greek yogurt. It adds moisture and a nice tang to the muffins. Plus, it boosts the protein content! You can add spices to lift the flavor profile of your muffins. A pinch of nutmeg or a touch of vanilla can do wonders. For serving, try a dollop of Greek yogurt on the side. This not only adds creaminess but also pairs well with the sweetness of the blueberries. If your muffins turn out too dry, it may be due to overbaking or too much flour. To fix this, reduce your baking time or measure your flour correctly. If they are too dense, check your mixing technique. Gentle mixing helps keep them light and fluffy. {{image_2}} You can make a vegan version of these muffins. Swap the egg for flax eggs. To make one flax egg, mix 1 tablespoon of ground flaxseed with 2.5 tablespoons of water. Let it sit for five minutes until it thickens. This works well in the recipe. For a gluten-free option, use almond flour or gluten-free all-purpose flour. Make sure your oats are certified gluten-free. This keeps the muffins soft and tasty while being gluten-free. You can change the flavor by adding different fruits. Try raspberries, strawberries, or diced apples. Each fruit brings a new taste to the muffins. You can also add spices like nutmeg or ginger for warmth. Nut butter can add creaminess and flavor too. Consider adding almond butter or peanut butter to the batter. This not only boosts taste but also adds more protein. You can make mini muffins or larger portions. For mini muffins, fill each cup only halfway. This way, they bake quickly and are perfect for snacks. If you want larger muffins, just fill the cups more. Adjust the baking time by a few minutes for larger sizes. Looking for the full recipe? Check the section above. To keep your protein-packed blueberry muffins fresh, cool them first. Let them sit at room temperature for about 5 to 10 minutes after baking. This cooling step helps prevent sogginess. Once they are cool, place them in an airtight container. A glass or plastic container works well. This way, they stay moist and tasty. Freezing muffins is easy and smart. To freeze them, wrap each muffin in plastic wrap. After that, place the wrapped muffins in a freezer bag. This keeps them fresh for later. When you're ready to enjoy one, take it out and let it thaw. You can leave it at room temperature or microwave it for about 20 seconds. This warming makes it taste just baked. These muffins last for about a week in the fridge. If you freeze them, they stay good for about three months. Just remember to check for any freezer burn if they sit for a while. Enjoy your healthy snacks whenever you want! For the full recipe, check out the details I shared earlier. Yes, you can use frozen blueberries. They add great flavor and nutrition. However, frozen blueberries can change the texture. They might make the muffins slightly denser and moister. To avoid this, toss them in a bit of flour before adding them to the batter. This helps keep them from sinking to the bottom during baking. To boost the protein, consider these options: - Add protein powder to the dry mix. One scoop should do. - Use more Greek yogurt. Swap in 3/4 cup instead of 1/2 cup. - Mix in some nut butter. Almond or peanut butter adds flavor and protein. These options enhance both the taste and the protein content. Enjoy these muffins with tasty toppings. Here are a few ideas: - Greek yogurt: It adds creaminess and extra protein. - Honey: A drizzle on top gives sweetness. - Nut butter: Spread almond or peanut butter for added richness. These toppings make your muffins even more delicious and satisfying. These muffins are easy to make, tasty, and healthy. You learned the key ingredients, simple steps, and tips for moist muffins. I also shared fun variations for different diets and flavor preferences. Remember, you can store these muffins well and freeze them for later. Enjoy experimenting with your favorite add-ins and toppings. This recipe can fit any occasion, so bake and share your delightful creations!

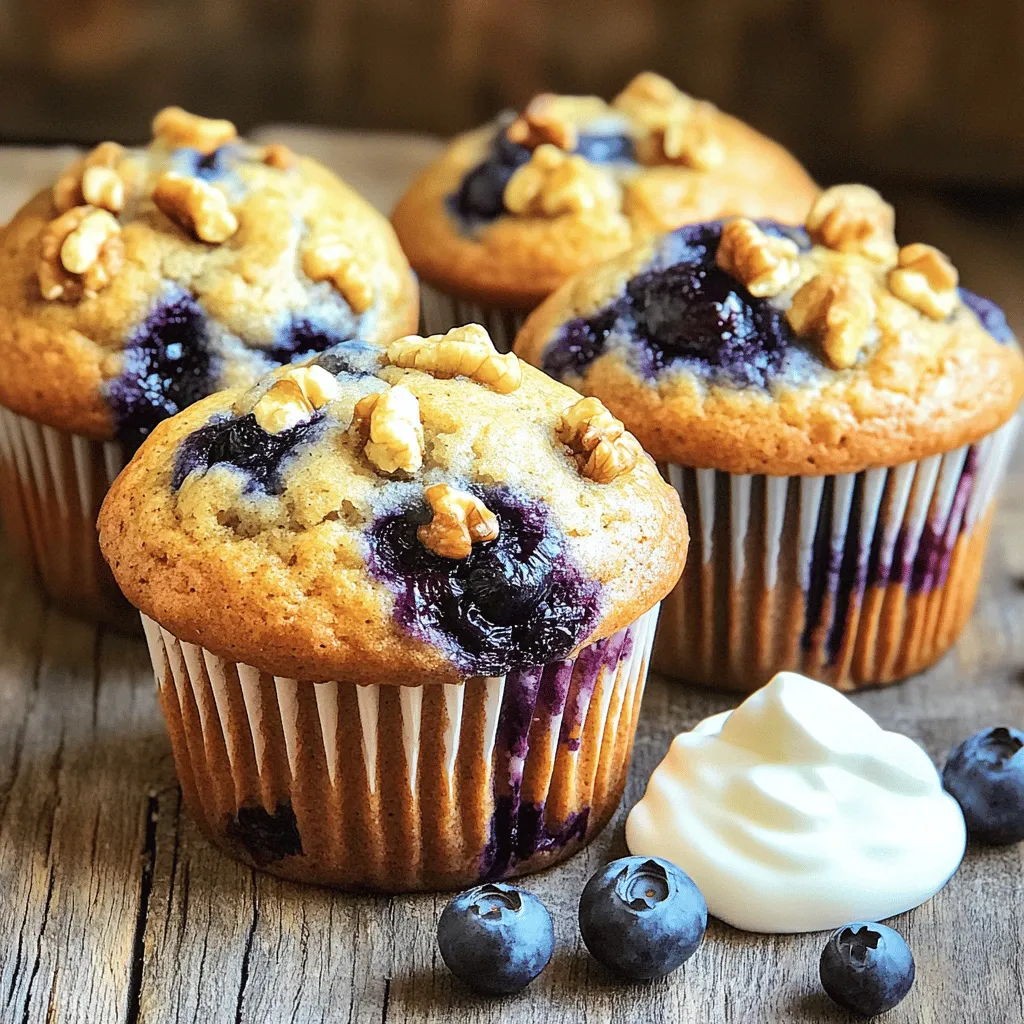
Looking for a tasty way to boost your protein intake? Try these Protein-Packed Blueberry Muffins! They offer a delightful blend of flavors and nutrients, making them perfect for a healthy …

Read more

Categories Breakfast
Older posts
Newer posts
← Previous Page1 … Page38 Page39 Page40 … Page108 Next →

GRILLED FLAVORS

where delicious ideas come to life, from stovetop to backyard. Warm, simple, and always satisfying. 🍽️✨

PAGES

Home About Contact Privacy Policy Terms & Conditions Cookie Policy GDPR Policy Copyright Policy Disclaimer

CATEGORIES

Appetizers Desserts Salads Breakfast Dinner

Contact

  • Pinterest
  • Mail
Copyright © 2026 Grilled Flavors. All rights reserved.