Best Peach Cobbler Recipe Easy and Irresistible Dish
Ready to treat yourself to a dessert that defines comfort? My Best Peach Cobbler Recipe is easy, fun, and utterly delicious. With ripe peaches and simple ingredients, you’ll whip up …

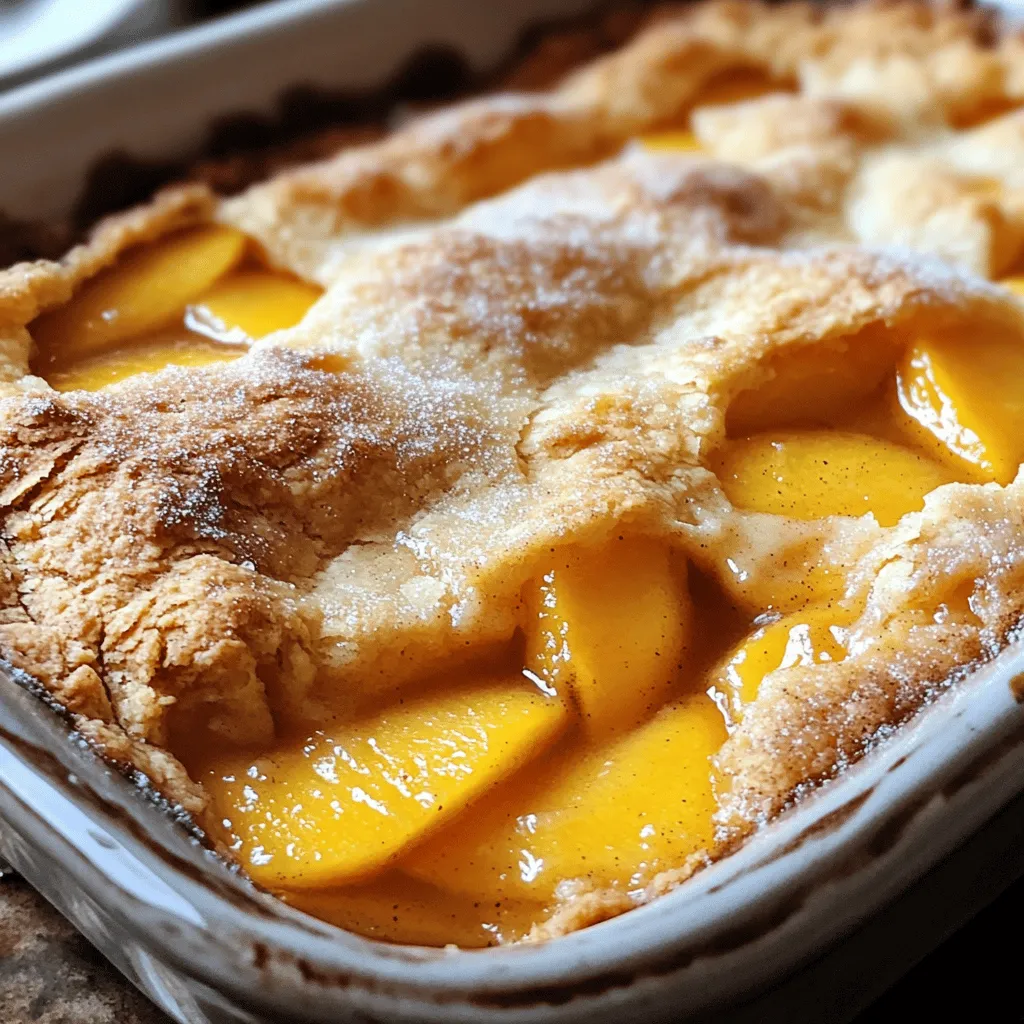
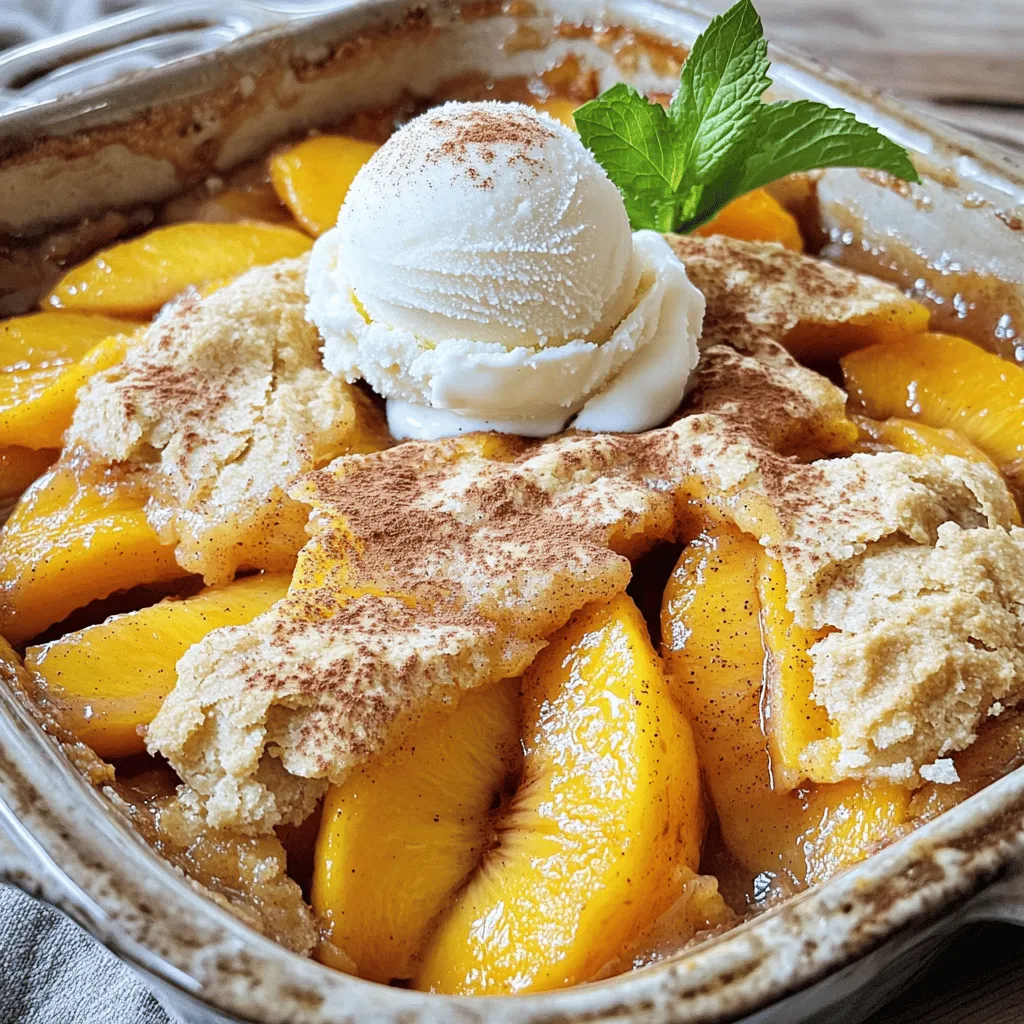
![- 2 cups fresh cherries, pitted and halved - 2 cups ripe peaches, peeled and sliced - 1 cup rolled oats - 1/2 cup all-purpose flour - 1/2 cup brown sugar - 1/4 cup granulated sugar - 1 teaspoon ground cinnamon - 1/2 teaspoon salt - 1/2 cup unsalted butter, melted - 1/4 cup sliced almonds (for a unique crunch) - 1 teaspoon vanilla extract - Prep Time: 15 minutes - Total Time: 50 minutes - Servings: 8 When it comes to making the perfect Cherry Peach Crisp, fresh fruit is critical. The bright flavor of cherries and peaches makes the dessert shine. You need ripe peaches for sweetness and juicy cherries for a hint of tartness. Next, the crisp topping is where the magic really happens. Rolled oats provide a hearty base, while flour and sugar create a delightful crumble. Cinnamon adds warmth, and sliced almonds give a nice crunch. The melted butter binds it together, making each bite irresistible. This recipe calls for basic ingredients that you probably already have at home. It’s quick and easy, making it a great choice for gatherings or a cozy night in. Check the [Full Recipe] for step-by-step guidance to bring this sweet treat to life! - Preheat the oven to 350°F (175°C). - In a large mixing bowl, combine 2 cups of fresh cherries and 2 cups of ripe peaches. Add 1/4 cup of granulated sugar and 1 teaspoon of vanilla extract. Toss the fruit to coat it well. - Pour the fruit mixture into a greased baking dish. Make sure it spreads evenly. - In a separate bowl, mix 1 cup of rolled oats, 1/2 cup of all-purpose flour, 1/2 cup of brown sugar, 1 teaspoon of ground cinnamon, and 1/2 teaspoon of salt. Stir until blended. - Pour 1/2 cup of melted butter over the dry ingredients. Stir until the mixture looks crumbly. - Fold in 1/4 cup of sliced almonds. This adds a nice crunch to the topping. - Spread the oat topping evenly over the fruit layer in the baking dish. - Bake in the preheated oven for 30-35 minutes. Look for a golden brown color and bubbling fruit. - Once baked, let the crisp cool for 10 minutes. This helps the juices settle before serving. For the full recipe, check out the Cherry Peach Crisp section. Enjoy making this sweet dish! Serve your cherry peach crisp warm to enjoy its best taste. Top it with a scoop of vanilla ice cream. This adds a creamy contrast to the warm fruit. For extra flavor, drizzle honey over the top. You can also sprinkle some cinnamon for a cozy touch. To create a great flavor mix, use both sweet and tart cherries. This gives your dish a nice balance. Make sure the fruit is well coated in sugar. This helps bring out the natural sweetness and ensures even flavor. For even cooking, opt for a 9x13-inch baking dish. This size fits all the ingredients perfectly. Use a fruit pitter for quick and easy cherry prep. It saves time and keeps your hands clean. With these tools, you will have a smooth cooking experience. Enjoy making your cherry peach crisp with these handy tips! {{image_2}} You can mix in other fruits for a fun twist. Combine cherries and peaches with blueberries or raspberries for a berry crisp. The berries add tartness and depth. You can also squeeze in a splash of lemon juice. This brightens the flavors and makes the fruit pop. If you want a vegan option, swap out the butter. Use coconut oil instead. It works great and adds a hint of sweetness. For gluten-free needs, just choose gluten-free oats and flour. This way, everyone can enjoy the dessert without worry. Want to spice things up? Add a pinch of nutmeg. This gives your crisp a warm, cozy flavor. You can also use fresh herbs like mint. Just a few leaves can add a refreshing touch to your dish. These small changes make a big difference in taste. Store leftover cherry peach crisp in an airtight container in the fridge. It can last for up to 3-4 days when properly stored. This way, you can enjoy the sweet taste of summer anytime you want. You can also freeze portions of your cherry peach crisp. Use resealable bags or containers for up to three months. When ready to eat, thaw it overnight in the fridge before reheating. This keeps the flavors fresh and tasty. To enjoy your cherry peach crisp again, reheat it in the oven. Set your oven to 350°F and heat for about 15-20 minutes. This method keeps the topping crisp. You can also use a microwave, but it may make the topping softer. Either way, it will still taste great! Yes, you can use frozen cherries and peaches. Just thaw them first. Make sure to drain any extra liquid. This way, your crisp won’t be too soggy. Using frozen fruit gives you the same sweet taste as fresh fruit. Cherry Peach Crisp offers both fruit and oats. While it has sugar and butter, it can be a balanced dessert. Enjoy it in moderation. The fruits provide vitamins, and oats add fiber. This makes the dessert a bit healthier than others. Absolutely! You can prepare it in advance. Just store it in the fridge until you are ready to bake. If it is chilled, it may take a few extra minutes to cook. This way, you can enjoy it fresh without much hassle. For the full recipe details, refer back to the earlier section. This blog post covered a tasty cherry peach crisp recipe, from ingredients to storage tips. You learned how fresh fruit, a delightful topping, and simple steps come together for a delicious dessert. Remember, adding nuts or berries can enhance flavor. Enjoy it warm with ice cream for a special touch. Whether you freeze it or make it ahead, this dish is sure to please. Try these ideas and make it your own. Enjoy creating this sweet treat!](https://grilledflavors.com/wp-content/uploads/2025/06/7e38bcbd-243b-470e-baf5-62f1128c6f92.webp)
![- 6 large eggs - 1/4 cup milk - 1/2 cup feta cheese, crumbled - 1/2 cup cherry tomatoes, halved - 1/2 cup bell peppers (mix of red and yellow), diced - 1/2 small red onion, finely chopped - 1/2 cup baby spinach - 2 tablespoons fresh basil, chopped - 1 tablespoon olive oil - Salt and pepper to taste When I make a Mediterranean frittata, I love to use fresh and colorful ingredients. The eggs give the dish a rich base. The milk makes it creamy and light. Feta cheese adds a tangy flavor that balances the eggs well. Next, I add my fresh vegetables. Cherry tomatoes bring a sweet burst. The bell peppers add crunch and color. Red onion gives a bit of sweetness, while baby spinach adds a lovely green touch. I finish with fresh herbs and seasoning. Basil gives a bright, herbal note. Olive oil helps to cook the veggies perfectly. A sprinkle of salt and pepper brings all the flavors together. This combination of ingredients makes a delicious and healthy meal. You can find the full recipe above to guide you through each step! - Preheat your oven to 400°F (200°C). - In a large bowl, whisk together the eggs and milk. Season with salt and pepper. - Heat olive oil in an oven-safe skillet over medium heat. - Add chopped red onion and bell peppers. Sauté until they soften, about 3-4 minutes. - Stir in halved cherry tomatoes and baby spinach. Cook for 2 more minutes until the spinach wilts. - Pour the egg mixture over the veggies. Gently stir to blend. - Sprinkle crumbled feta cheese and chopped basil on top. - Cook on the stovetop for about 5 minutes, until edges begin to set. - Transfer the skillet to the oven. Bake for 10-12 minutes until puffed and golden. - Remove from the oven and let it cool for a couple of minutes. - Slice the frittata and serve warm. Enjoy it with fresh basil if you like. For the full recipe, check the Mediterranean Frittata section above. - Use fresh ingredients for the best flavor. Fresh veggies and herbs make a big difference. - Don't overcook the eggs to maintain a creamy texture. This keeps your frittata soft and fluffy. - Pair with a fresh green salad. The crunch adds a nice balance to the frittata. - Add a wedge of lemon for brightness. A squeeze of lemon lifts the flavors. - Oven-safe skillet or cast-iron pan. This helps you cook and bake in one dish. - Whisk and mixing bowl. These are essential for mixing your ingredients well. For a detailed guide, check the Full Recipe for the Mediterranean Frittata. {{image_2}} You can swap out feta cheese for goat cheese or ricotta. Goat cheese gives a tangy twist. It melts nicely and adds creaminess. Ricotta is soft and rich, making the frittata fluffy. Both cheeses work well with the other flavors. For extra taste, try adding zucchini or mushrooms. Zucchini adds moisture and a mild taste. Sauté it until it softens before adding the eggs. Mushrooms bring a delicious earthy flavor. Just remember to cook them a bit to release their juices. Want more protein? Add cooked sausage or chicken. Sausage gives a savory kick. Use spicy or mild, depending on your taste. Chicken is a lighter option that blends well with the frittata. Just make sure it’s cooked and diced before mixing in. For the full recipe, check out Mediterranean Frittata. Store leftovers in an airtight container for up to 3 days. This helps keep the frittata fresh. You can enjoy it again for breakfast or lunch. Just make sure it cools before you store it. You can reheat the frittata in a microwave or heat it in a skillet. When using a skillet, add a little olive oil to maintain texture. This way, it stays moist and tasty. You can freeze the frittata for up to 2 months. Just slice it and wrap each piece in plastic wrap. When you want to eat it, reheat directly from frozen. It’s a great meal prep option to save time! A Mediterranean frittata is a tasty dish inspired by Mediterranean flavors. It features fresh vegetables and creamy cheese. You can use ingredients like bell peppers, tomatoes, and spinach. Feta cheese adds a rich, tangy flavor. This dish is not only colorful but also full of nutrients. It's perfect for breakfast or a light lunch. Yes, you can make a frittata ahead of time. It stores well in the refrigerator. Just let it cool completely before placing it in an airtight container. You can enjoy it cold or heat it up later. This makes it a great option for meal prep. To prevent sticking, use a well-seasoned skillet. You can also coat the pan with a little olive oil. This helps the frittata slide out easily after cooking. This way, you get perfect slices every time. Enjoy cooking your Mediterranean frittata with these easy tips! For the full recipe, check out the [Full Recipe]. This blog post details how to create a delicious Mediterranean frittata. You learned about the key ingredients, from eggs to fresh veggies and herbs. I shared step-by-step cooking instructions and tips to ensure your frittata turns out perfectly. With variations and storage info, this dish is easy to adapt for your tastes. Enjoy making this tasty and healthy meal. It’s a simple way to impress family or friends while enjoying great flavors. Happy cooking!](https://grilledflavors.com/wp-content/uploads/2025/06/a20ece44-c893-4106-a464-d4cb0eeba9d9.webp)


. Choosing ripe peaches is key to a great crisp. Look for peaches that are slightly soft when you press them gently. Their skin should have a rich color, with no bruises. If your peaches are hard, let them sit at room temperature for a few days. If you want to cut sugar, try using honey or maple syrup. These add sweetness and flavor without refined sugar. For butter, you can use coconut oil or a plant-based spread. They work well and keep your crisp tasty. Adjusting spice levels can make a big difference. For more warmth, add a bit more cinnamon or nutmeg. If you want a kick, consider adding a pinch of allspice or ginger. Just remember, a little goes a long way. Pair your warm bourbon peach crisp with a scoop of vanilla ice cream. The cold ice cream melts into the warm crisp, creating a wonderful mix. Whipped cream is another option that adds a light touch. For creative garnishes, try fresh mint leaves or a sprinkle of chopped nuts. A drizzle of caramel or chocolate sauce can also add flair. You can even add some crushed cookies on top for crunch. For the full recipe, check out the details above. Enjoy your cooking! {{image_2}} You can change up the warm bourbon peach crisp in fun ways. Adding nuts like walnuts or almonds gives it a nice crunch. You can also use seeds, such as pumpkin or sunflower seeds, for extra texture. These additions not only enhance the flavor but also add healthy fats and protein. If you want different flavors, try using other fruits. Apples and pears work well with the spices. You can also mix in berries, like blueberries or raspberries, for a sweet twist. Each fruit brings its own taste, making this dessert unique every time. Making this crisp fit your diet is easy. For a gluten-free version, swap the all-purpose flour with almond flour or a gluten-free blend. Just make sure to check the labels! You can also use gluten-free oats to keep it safe. If you follow a vegan diet, you can replace the butter with coconut oil or vegan butter. For the sweeteners, use maple syrup or agave instead of brown sugar. This way, you still get that warm, sweet flavor without animal products. For those watching their sugar intake, try using less sugar or a sugar substitute. Options like stevia or monk fruit sweetener can help keep the sweetness while cutting calories. With these adjustments, everyone can enjoy a delicious bowl of warm bourbon peach crisp. For the full recipe, check out the Warm Spiced Peach Crisp . To keep your warm bourbon peach crisp fresh, use an airtight container. Glass or plastic containers work well. Make sure the crisp is cool before sealing it. This helps prevent moisture build-up. You can store your crisp in the refrigerator for up to three days. If you want to keep it longer, freeze it. Wrap it tightly in plastic wrap or foil. Then place it in a freezer-safe bag. It can last for about three months in the freezer. To reheat your crisp and keep it crispy, try using an oven. Preheat the oven to 350°F (175°C). Place the crisp in a baking dish. Cover it with foil to avoid burning the top. Heat for about 15-20 minutes until warm. If you're in a hurry, a microwave works too. Heat in 30-second intervals. However, the topping may not stay crispy. For serving later, scoop out portions into bowls. Add a scoop of vanilla ice cream or whipped cream. This adds a nice touch to the warm, spiced peaches. For the full recipe, check the Warm Spiced Peach Crisp section above. Can I use frozen peaches instead of fresh? Yes, you can use frozen peaches. They work well in this recipe. Just thaw them first and drain excess liquid. This prevents the crisp from getting too soggy. Frozen peaches can be a great option when fresh ones are out of season. How can I make this recipe ahead of time? You can prepare the peach filling and topping separately. Store them in the fridge for up to a day. When ready to bake, layer them in a dish and bake as directed. This saves time and lets the flavors meld. What’s the best way to serve leftover crisp? Store leftover crisp in an airtight container. Keep it in the fridge for up to three days. To serve, simply reheat in the oven or microwave. Adding a scoop of ice cream on top makes it even better. Enjoy it warm for the best taste! For the full recipe, check out the Warm Spiced Peach Crisp details above. You learned how to make a Warm Bourbon Peach Crisp from fresh ingredients. We covered everything from choosing ripe peaches to adding fun toppings. Remember the tips for storage and reheating to keep it tasty. This dessert brings joy to any table. Enjoy experimenting with flavors and variations. Each bite can offer a new surprise. Stick to the steps, and you’ll have a dish that impresses everyone. Happy baking!](https://grilledflavors.com/wp-content/uploads/2025/06/96bea91f-bd89-47e2-bb9c-b0f08fea753b.webp)