Dave’s Tomato Pie Deliciously Crafted for You
Are you ready to savor a slice of something special? Dave’s Tomato Pie blends fresh ingredients with simple steps to create a dish that’s both tasty and fun to make. …
Are you ready to savor a slice of something special? Dave’s Tomato Pie blends fresh ingredients with simple steps to create a dish that’s both tasty and fun to make. …
. It includes all the steps and details you need to make this dish at home. You now have all the tools to make delicious fried chicken. We covered the essential ingredients, from chicken thighs to spices. You'll know how to marinate, fry, and get that crispy texture. Remember the tips for flavor and storage to keep your chicken tasty. If you're feeling adventurous, try different cuts or spice levels. Fried chicken can be your go-to meal, perfect for any occasion. Enjoy your cooking and the great meals ahead!](https://grilledflavors.com/wp-content/uploads/2025/06/81088206-5a10-4b82-9c68-52f415180940.webp)
Craving crispy KFC-style chicken that’s full of flavor? You’re in the right place! With just a few simple ingredients and easy steps, you can make juicy chicken that rivals your …
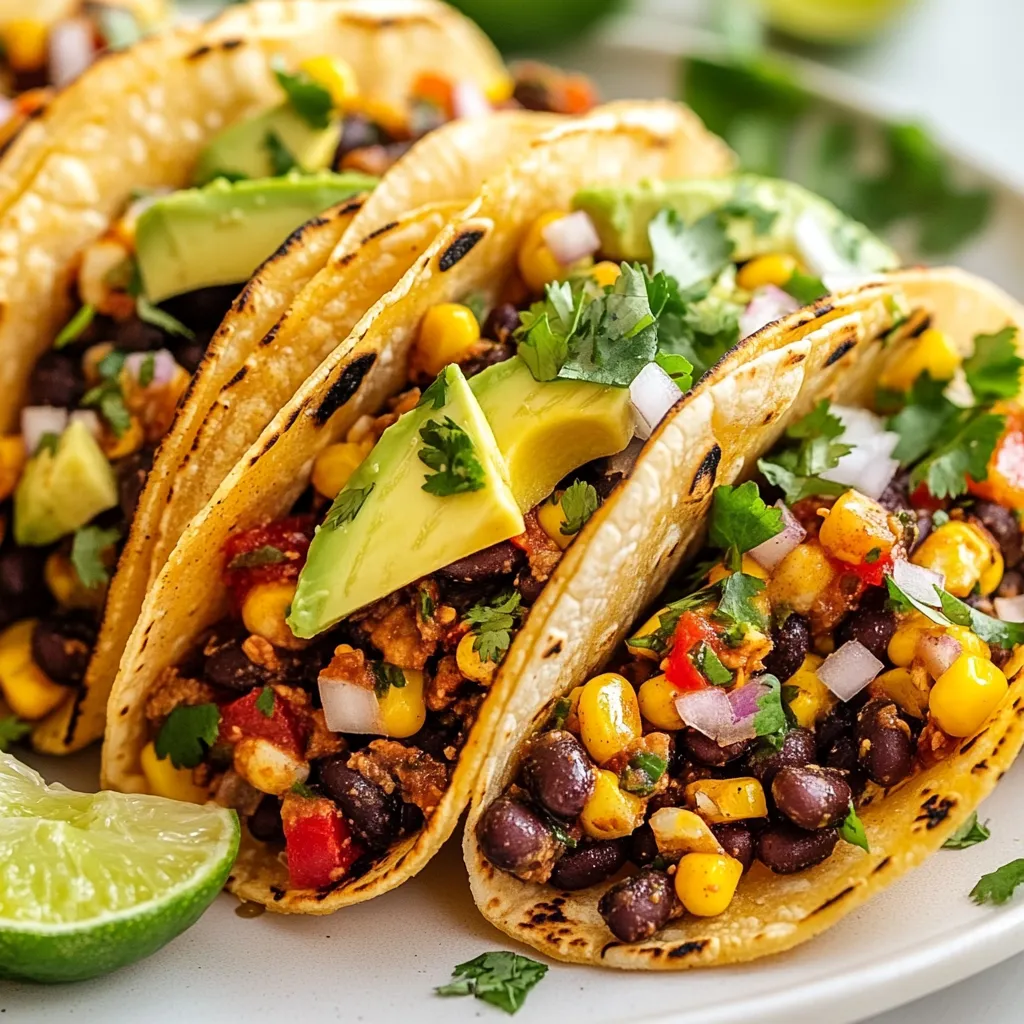
Are you ready to make mouth-watering spicy vegan street tacos? These tasty treats are packed with flavor and are simple to create. I’ll guide you through essential ingredients, step-by-step instructions, …
![- 4 ripe peaches, peeled, pitted, and sliced - 1 tablespoon lemon juice - 1/2 cup granulated sugar - 1 teaspoon cinnamon - 1 cup rolled oats - 1/2 cup all-purpose flour - 1/2 cup packed brown sugar - 1/2 cup unsalted butter, melted - 1/4 teaspoon salt - Vanilla ice cream (for serving, optional) Selecting ripe peaches is key. Ripe peaches are sweet and juicy. They give your crisp a great flavor. Look for peaches that yield slightly when pressed. Avoid hard or overly soft peaches. Measuring ingredients accurately helps your crisp turn out perfect. Use measuring cups for dry ingredients and a liquid measuring cup for liquids. This ensures you get the right balance for great taste and texture. For the best results, follow the Full Recipe closely. This way, you’ll create a delicious peach crisp that everyone will love! Start by preheating your oven to 350°F (175°C). This temperature helps cook the peach crisp evenly. While the oven warms up, grease a 9x9-inch baking dish with some butter or cooking spray. This step prevents the crisp from sticking. Next, grab four ripe peaches. Peel, pit, and slice them. In a big bowl, toss the peach slices with one tablespoon of lemon juice, half a cup of granulated sugar, and one teaspoon of cinnamon. Mixing these ingredients ensures every peach slice gets coated. This adds flavor and a bit of sweetness. In another bowl, combine one cup of rolled oats, half a cup of all-purpose flour, half a cup of packed brown sugar, and a quarter teaspoon of salt. Mix these dry ingredients well. Then, pour in half a cup of melted butter. Stir until the mixture looks crumbly. This crumbly texture gives the topping a nice bite. Now, pour the peach mixture into your greased baking dish. Spread it out evenly. Then, sprinkle the oat topping over the peaches. Bake your crisp in the preheated oven for 30 to 35 minutes. You know it’s done when the topping turns golden brown and the peaches bubble. Let it cool for a few minutes before serving. For a treat, serve it warm with vanilla ice cream. Enjoy your delicious peach crisp! For the complete recipe, check the [Full Recipe]. To make your peach crisp even better, you can add spices. Try a pinch of nutmeg or allspice. These spices add warmth and depth. You can also add lemon zest for a fresh kick. Mixing in nuts adds crunch. Chopped almonds or walnuts work well. You can also combine peaches with berries or apples for a twist. Getting the topping just right is key. You want it crumbly but not too dry. When mixing, ensure the butter coats the oats and flour well. If the mix feels too wet, add a bit more oats. For a crispy topping, bake until golden brown. Don't rush the baking time; allow the crisp to bubble and set. Serve your peach crisp warm, right out of the oven. It pairs perfectly with a scoop of vanilla ice cream. The cold ice cream melts into the warm crisp, creating a delightful treat. For a special touch, serve it in individual ramekins. Top with fresh mint leaves or a sprinkle of cinnamon for a pop of color. If you're feeling fancy, drizzle caramel sauce over the top. This adds sweetness and looks great! For the full recipe, check out the Peachy Delight Crisp. {{image_2}} You can switch up the fruit in this recipe. Instead of peaches, try using berries, like blueberries or raspberries. Apples are another great choice, especially in the fall. Mixing different fruits can create a unique taste. For example, combine peaches and blueberries for a burst of flavor. Each fruit adds its own sweetness and texture, making every crisp special. If you need gluten-free options, you can use almond flour or gluten-free oats. These swaps keep the crisp tasty and friendly for those with gluten sensitivities. For a vegan version, replace butter with coconut oil or a vegan butter substitute. You can also use coconut sugar or maple syrup instead of regular sugar. These changes let everyone enjoy this dessert without worry. You can adapt this recipe for different seasons. In winter, use fruits like pears or cranberries. They add warmth and a cozy feel. For fall flavors, add spices like nutmeg or allspice, and use apples or pumpkin. Each season brings fresh fruits and flavors. This way, you can enjoy peach crisp all year round! For the full recipe, check the details provided earlier. To keep your peach crisp fresh, store it in the fridge. Place it in an airtight container. This helps prevent it from drying out. You can also cover it with plastic wrap. Enjoy the leftover crisp within 3-4 days for the best taste. To reheat your peach crisp, use the oven for the best results. Preheat your oven to 350°F (175°C). Place the crisp in an oven-safe dish. Heat it for about 15-20 minutes. This will keep the topping crunchy and warm the peaches nicely. You can freeze peach crisp for later. If you want to freeze it before baking, prepare the dish as normal. Cover it tightly with plastic wrap and foil. If you freeze it after baking, let it cool first. Store it in a freezer-safe container. To thaw, place it in the fridge overnight. Reheat it in the oven, as mentioned above. Enjoy your peach crisp anytime! For the full recipe, check the earlier sections. Yes, you can use frozen peaches. Just thaw them first. Drain any extra liquid. Mix them with lemon juice, sugar, and cinnamon as you would fresh peaches. This helps keep the flavors bright. If you like, you can add a bit more sugar, as frozen peaches can taste less sweet. To make it gluten-free, use almond flour or oat flour instead of all-purpose flour. You can also use certified gluten-free oats. These swaps keep the crisp tasty, while making it safe for those with gluten issues. Just remember to check labels when buying these ingredients. Serve peach crisp warm with a scoop of vanilla ice cream. You can also try it with cinnamon ice cream or whipped cream. A drizzle of caramel sauce adds a nice touch. For extra crunch, sprinkle some chopped nuts on top. Peach crisp lasts about 3 to 4 days in the fridge. Keep it in an airtight container to maintain freshness. If you see any mold or an off smell, it’s best to toss it. Reheat it in the oven for the best texture. Yes, you can prepare it ahead. Assemble the peach mixture and topping separately. Store them in the fridge. When you’re ready, just layer and bake. This way, you keep the crisp topping nice and crunchy. This recipe for peach crisp is simple and fun. You learned to choose ripe peaches, mix the filling, and create a tasty topping. I shared tips for flavor and texture, plus ideas for serving. Remember, you can mix fruits, use gluten-free options, and store leftovers easily. Now, go ahead and enjoy making this delightful dessert! You’ll impress family and friends with your new skills. Happy baking!](https://grilledflavors.com/wp-content/uploads/2025/06/7644c091-c293-49e7-b5ed-1b62717d9bd4.webp)
Looking for a simple and tasty dessert? This Easy Peach Crisp Recipe is here to save the day! With just a handful of ingredients, you can create a warm and …
. Boil the corn until tender. Fill a large pot with water. Bring it to a boil. Once boiling, add the husked corn. Cook for about 5-7 minutes. The corn should be tender. Drain and let it cool slightly. In a small bowl, combine melted butter and minced garlic. Mix well. Set it aside to allow the flavors to infuse. This step is key for rich taste. Once the corn is cool enough to handle, brush or spoon the garlic butter mixture on the corn. Make sure to coat it well. Next, sprinkle with Parmesan cheese and spices. The cheese adds a great flavor and texture. To get the best flavor, grill the corn. Preheat your grill to medium-high heat. Place the butter-coated corn directly on the grill. Cook for about 6-8 minutes. Turn the corn occasionally. You can also bake it in the oven. Set your oven to 400°F (200°C). Bake for about 10 minutes until golden. Once cooked, remove the corn from the grill or oven. Garnish with chopped parsley before serving. This adds a fresh color and flavor. Enjoy your cheesy garlic butter corn on the cob hot! For the full recipe, check out the recipe section. - Use fresh ingredients for best taste. Fresh corn gives you sweetness and crunch. - Let garlic butter sit longer for enhanced flavor. This step makes the garlic taste brighter. - Avoid overcooking the corn to maintain texture. Cook it just until tender, around 5-7 minutes. - Grill with the husk on for a smoky flavor. The husk helps keep moisture in while cooking. - Pair with grilled meats or salads. The rich flavor of the corn complements many dishes. - Serve at summer barbecues or family gatherings. This dish is always a hit with everyone. {{image_2}} You can swap Parmesan with feta or cheddar. Each cheese brings a unique taste. Feta adds a tangy bite, while cheddar gives a rich flavor. Mixing different cheeses can create fun new flavors. Try mozzarella for a creamier texture or gouda for a smoky twist. Want a spicy kick? Add chopped jalapeños or a sprinkle of chili powder. Red pepper flakes come in many types. You can choose mild, medium, or hot. This allows you to control the heat level. Experiment to find your perfect spice balance. Herbs can change the dish's flavor profile. Try cilantro or chives for a fresh twist. You can also squeeze in lime juice for a zesty kick. Fresh herbs brighten the taste and add a pop of color. Feel free to mix and match herbs to your liking. After enjoying your cheesy garlic butter corn on the cob, store any leftovers in an airtight container. This keeps the corn fresh and tasty. It tastes best if you eat it within 2-3 days. Beyond that, you might lose some of the flavor and texture. When you want to enjoy your leftovers, use the microwave for a quick reheat. Just place the corn on a microwave-safe plate and heat for about 30 seconds. If you prefer to keep that nice crunch, reheat them in the oven. Preheat your oven to 350°F (175°C) and warm the corn for about 10 minutes. You can freeze the corn before or after cooking it. If you freeze it before cooking, just husk and clean the corn, then wrap it tightly. For cooked corn, let it cool down first. Then, flash freeze it on a tray. Once frozen, transfer the ears into freezer bags. This method helps with portion control and makes it easy to pull out just what you need later. To get tender corn, boil it for 5-7 minutes. Make sure the water is at a rolling boil before adding the corn. To test if it’s done, pierce a kernel with a fork. It should feel soft but still have a slight crunch. Yes, you can prep this dish in advance. Boil the corn and let it cool. Then, wrap it in foil and store it in the fridge. You can make the garlic butter ahead too. Just mix it and store it in a jar. This corn pairs well with grilled meats like chicken or steak. A fresh salad or coleslaw can add a nice crunch. You can also serve it with baked beans for a hearty side. Yes, you can swap the butter for a plant-based spread. Use a vegan cheese or nutritional yeast instead of Parmesan. This will keep the dish tasty and plant-based. Frozen corn works fine but changes the texture. If you use frozen corn, boil it for a few extra minutes. Fresh corn gives the best flavor, but frozen is a quick option. Grilling takes about 6-8 minutes. Preheat your grill to medium-high. Turn the corn every couple of minutes to get even grill marks. If you want a smoky flavor, grill it with the husk on. For the full recipe, check it out here: [Full Recipe]. This blog post covered how to make cheesy garlic butter corn on the cob. We discussed key ingredients like fresh corn, garlic, and butter. You learned step-by-step instructions, cooking methods, and even tips for storing leftovers. In closing, you can make this dish uniquely yours. Experiment with different cheeses, herbs, or spices. Enjoy this easy and tasty treat at your next gathering!](https://grilledflavors.com/wp-content/uploads/2025/06/ec9040e1-4fce-4c1a-adcb-de799d98668a.webp)
Get ready to elevate your summer barbecues with my cheesy garlic butter corn on the cob. This easy recipe turns fresh corn into a savory delight you’ll crave all season …
![Fresh tomatoes bring a bright flavor to your fritters. Choose ripe tomatoes for the best taste. They add moisture and natural sweetness, making each bite juicy. Flour and cornmeal are key for the right texture. Flour gives a soft base, while cornmeal adds crunch. Together, they create a perfect blend. Seasoning is crucial for flavor. Garlic powder gives a savory punch. Onion powder adds depth, and smoked paprika brings a hint of smokiness. These spices make the fritters truly tasty. Fresh basil is a great addition. It adds a nice herbal note to your fritters. Just chop it up and mix it in. If you like cheese, Parmesan is an excellent option. It adds a rich, nutty flavor that complements the tomatoes. For frying, choose a good vegetable oil. Canola or sunflower oil works well because they have high smoke points. You’ll need a deep skillet or frying pan to fry the fritters. A slotted spoon is handy for removing them from the oil. Make sure to have paper towels ready to drain excess oil. For the full recipe, you can check the section above. To start, gather your ingredients. In a large mixing bowl, combine the diced tomatoes with the dry ingredients. Use 1 cup of all-purpose flour, 1/2 cup of cornmeal, 1 teaspoon baking powder, 1 teaspoon garlic powder, 1/2 teaspoon onion powder, and 1/2 teaspoon smoked paprika. Don’t forget to add salt and pepper to taste! Next, add 1/4 cup of chopped fresh basil and, if you like, 1/2 cup of grated Parmesan cheese. Mix everything well. Then, slowly add in 1/2 cup of water, or adjust as needed. Your goal is to create a thick batter. It should be spoonable, not too runny. If it seems too thick, add a little more water. Now, it’s time to heat the oil. Use about 1 inch of vegetable oil in a deep skillet. Set your stove to medium heat. To check if the oil is ready, drop a small bit of the batter in. If it sizzles, you’re good to go! Safety is key while frying. Avoid splashing hot oil, and keep a lid nearby in case of flare-ups. Always stay near the stove and use long tongs or a slotted spoon to handle the fritters. When the oil is hot, drop spoonfuls of the batter into the oil. Make small fritters to ensure even cooking. Fry them in batches for about 3 to 4 minutes on each side. Look for a golden brown color and a crispy texture. To check for doneness, cut one fritter open. It should be cooked through with no raw batter inside. Once done, remove the fritters from the oil and place them on paper towels to drain excess oil. Enjoy them warm with your favorite dipping sauce or a dollop of sour cream. For the complete recipe, check the Full Recipe section. To make great tomato fritters, you need the right batter. If the batter is too thick, it won’t cook well. If it’s too thin, your fritters will fall apart. You should adjust the water until the mixture is thick but spoonable. Start with 1/2 cup of water, then add more as needed. Next, keep your fritters the same size. This helps them cook evenly. Use a spoon or small scoop for uniform portions. Aim for fritters about 2 inches wide. This size cooks well in hot oil. One common mistake is overcrowding the frying pan. If you add too many fritters at once, the temperature drops. This makes them greasy instead of crispy. Fry in small batches, giving each fritter space to cook. Another mistake is using oil that’s not hot enough. If the oil is too cool, the fritters absorb more oil. To check the oil, drop in a small bit of batter. If it sizzles, you’re ready to fry! When your fritters are ready, serve them warm. They taste great with dips. I recommend sour cream or a spicy aioli. You can also try a fresh salsa for a zesty touch. For a fun presentation, stack fritters on a plate. Add a sprinkle of fresh herbs on top. This not only looks great but also adds flavor. Your guests will love the visual and taste appeal! For the full recipe, check out the section above. {{image_2}} You can make tomato fritters gluten-free. Use almond flour or rice flour instead of regular flour. These flours give a nice texture. They also keep the fritters light and crispy. For a vegan option, replace the cheese with a dairy-free version. You can also use flax eggs instead of regular eggs. Just mix one tablespoon of flaxseed meal with three tablespoons of water. Let it sit for a few minutes to thicken. This will bind your fritters well. Spices can add a fun kick to your fritters. Try adding cayenne pepper or chili powder for heat. You can also mix in cumin for a warm flavor. Seasonal veggies or fresh herbs boost taste too. Try zucchini, bell peppers, or corn. Fresh herbs like cilantro or dill can brighten the dish. This makes the fritters more colorful and tasty. Tomato fritters shine as appetizers or snacks. Serve them warm with a dip like ranch or spicy mayo. You can also enjoy them as a main course. Pair them with a fresh salad for a light meal. For a complete meal, think about side dishes. Roasted veggies or a simple rice pilaf can balance the meal. You can also serve a tangy slaw on the side for crunch. Check out the [Full Recipe] for step-by-step instructions! After cooking, let the fritters cool. Place them in an airtight container. This keeps them fresh. Store in the fridge for up to three days. They lose crunch over time. So, enjoy them soon! To freeze fritters, first let them cool completely. Then, arrange them in a single layer on a baking sheet. Freeze for about an hour. Once firm, transfer them to a freezer bag. Squeeze out air and seal. To reheat, bake them at 375°F for 15-20 minutes. They will be crispy again! Use glass or plastic containers with tight lids. These materials keep moisture out. Label your containers with the date. This helps you track freshness. Proper storage keeps fritters tasty and safe to eat. Tomato fritters can stay fresh for about 2 to 3 days in the fridge. To keep them tasting good, store them in an airtight container. The main factors that affect shelf life include moisture and temperature. If fritters sit out too long, they can get soggy. Always check for any off smell or odd texture before eating. Yes, you can bake tomato fritters! Baking will make them lighter but may not be as crispy. Preheat your oven to 400°F (200°C). Place fritters on a baking sheet lined with parchment paper. Bake for about 20-25 minutes, flipping halfway through. They will be golden and firm, but expect a different texture compared to frying. For a complete meal, pair your fritters with a fresh salad. A mixed greens salad with a light vinaigrette works well. You can also serve them with grilled chicken or fish. For dipping, try sour cream or a spicy aioli. This adds flavor and makes the meal more filling. To add some heat, mix in diced jalapeños or crushed red pepper flakes. You can also use spicy paprika instead of smoked paprika. Another option is to add hot sauce into the batter. Start with a small amount, then taste and adjust as needed. This way, you can control the spice level to your liking. Tomato fritters are a delicious way to showcase fresh tomatoes. You learned about essential ingredients, from flour and cornmeal for texture to spices that add flavor. I shared step-by-step instructions for making perfect fritters, plus common mistakes to avoid. You can explore variations, from gluten-free options to exciting flavor combos. Store leftovers properly to enjoy them later. Use this guide to make tasty tomato fritters and impress your family and friends. Enjoy your cooking journey!](https://grilledflavors.com/wp-content/uploads/2025/06/6336ad0e-f529-472e-9e9c-3db0051fdce7.webp)
Are you ready to elevate your snack game? These Tomato Fritters are your new go-to treat! Bursting with fresh flavors and a crispy texture, they are simple to make and …
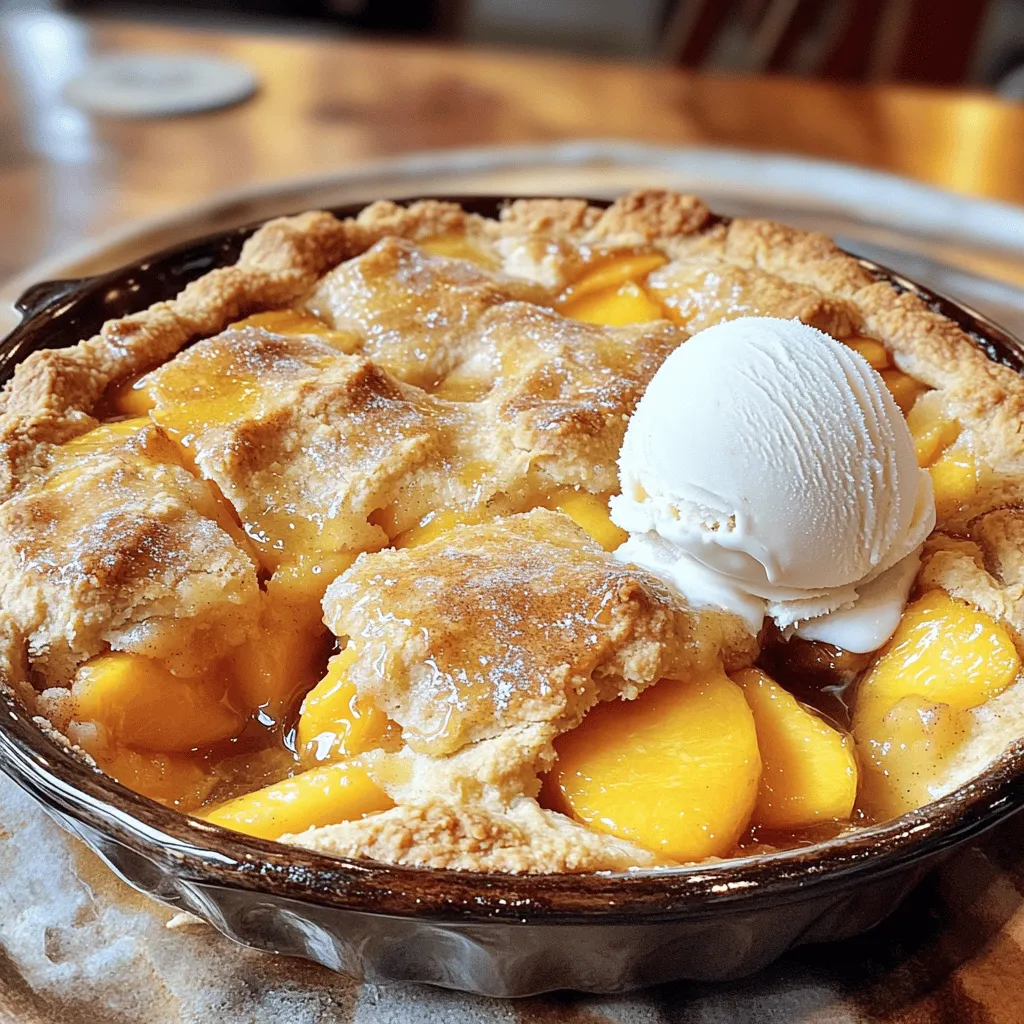
Get ready to savor the ultimate peach cobbler! My simple and tasty recipe brings out the best in fresh peaches. With easy steps and basic ingredients, you’ll impress your friends …
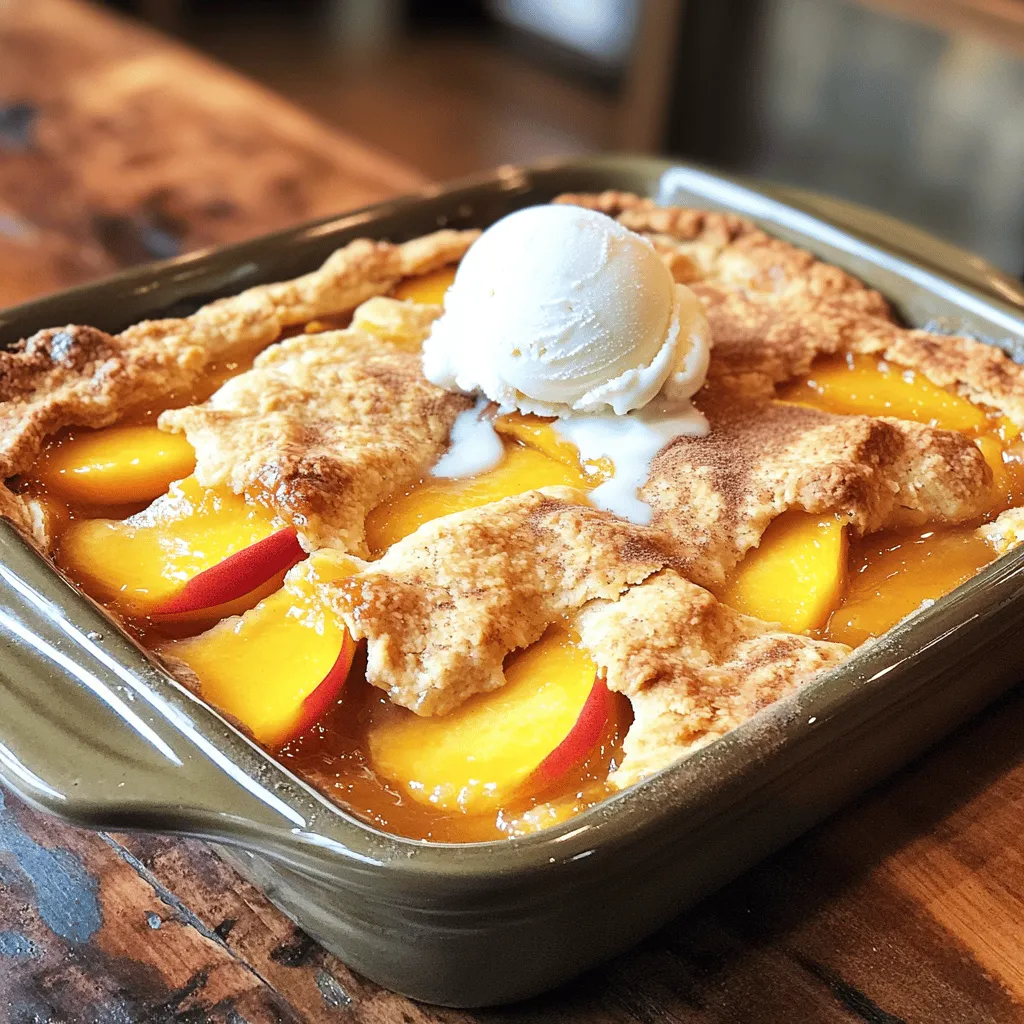
Looking for a dessert that makes your taste buds dance? Try this Frozen Peach Cobbler! It’s simple, quick, and oh-so-delicious. You might even have the ingredients at home. With just …
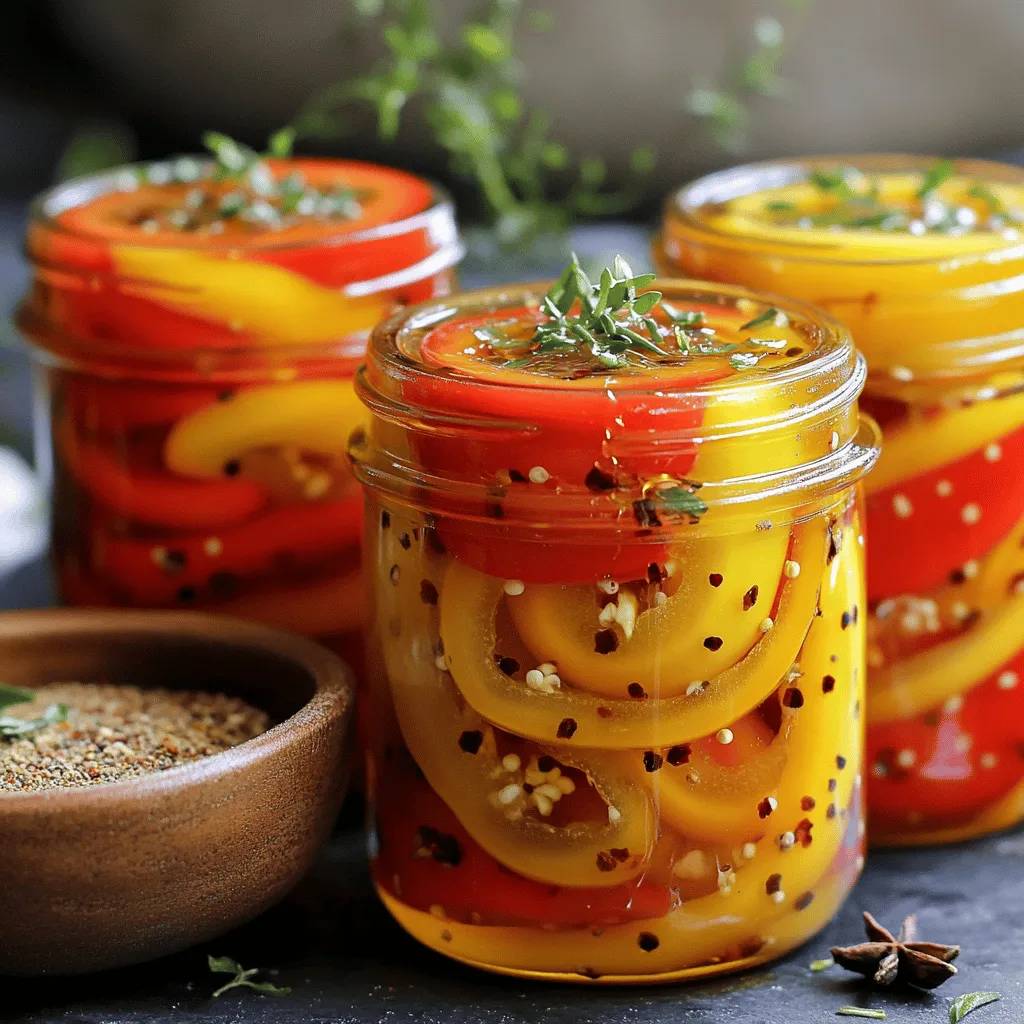
Are you ready to add a burst of flavor to your meals? Sweet and Spicy Pickled Peppers are a perfect way to achieve that! These delicious jarred treats combine the …
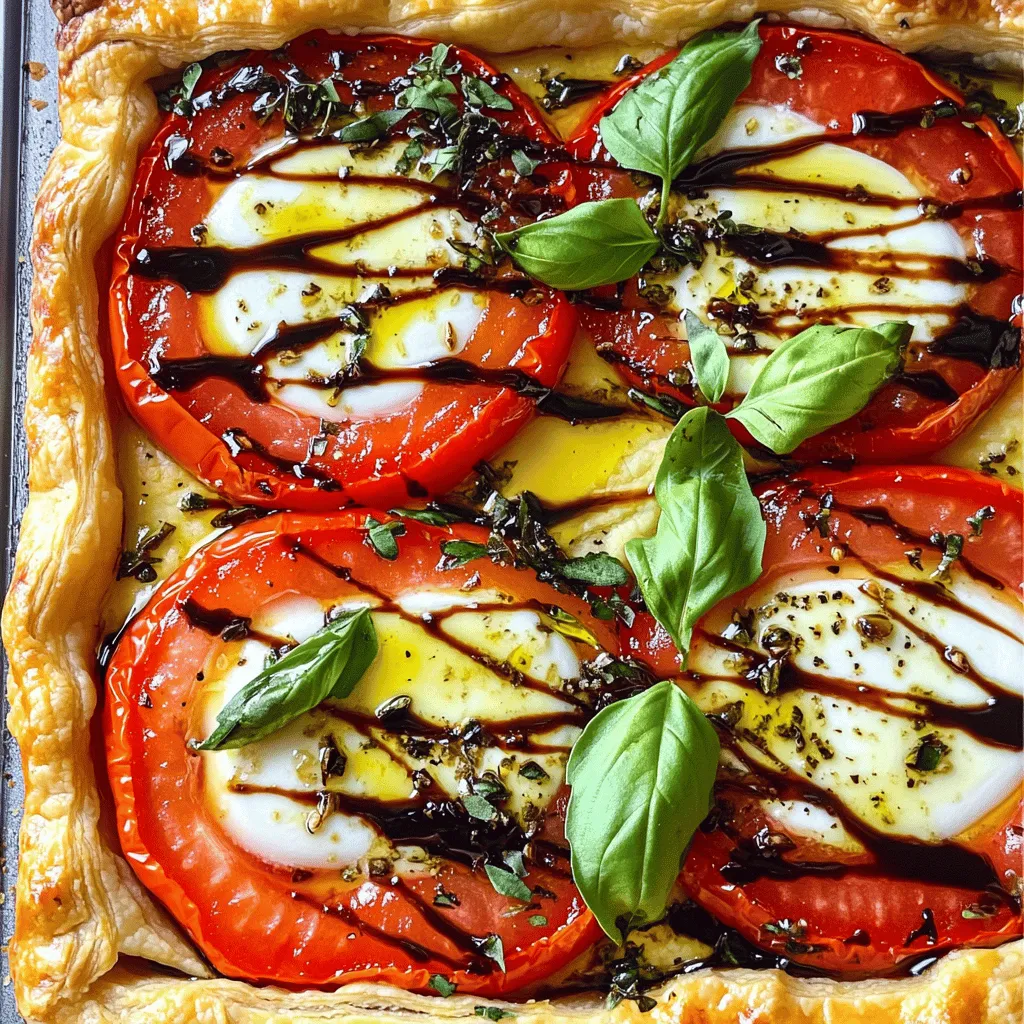
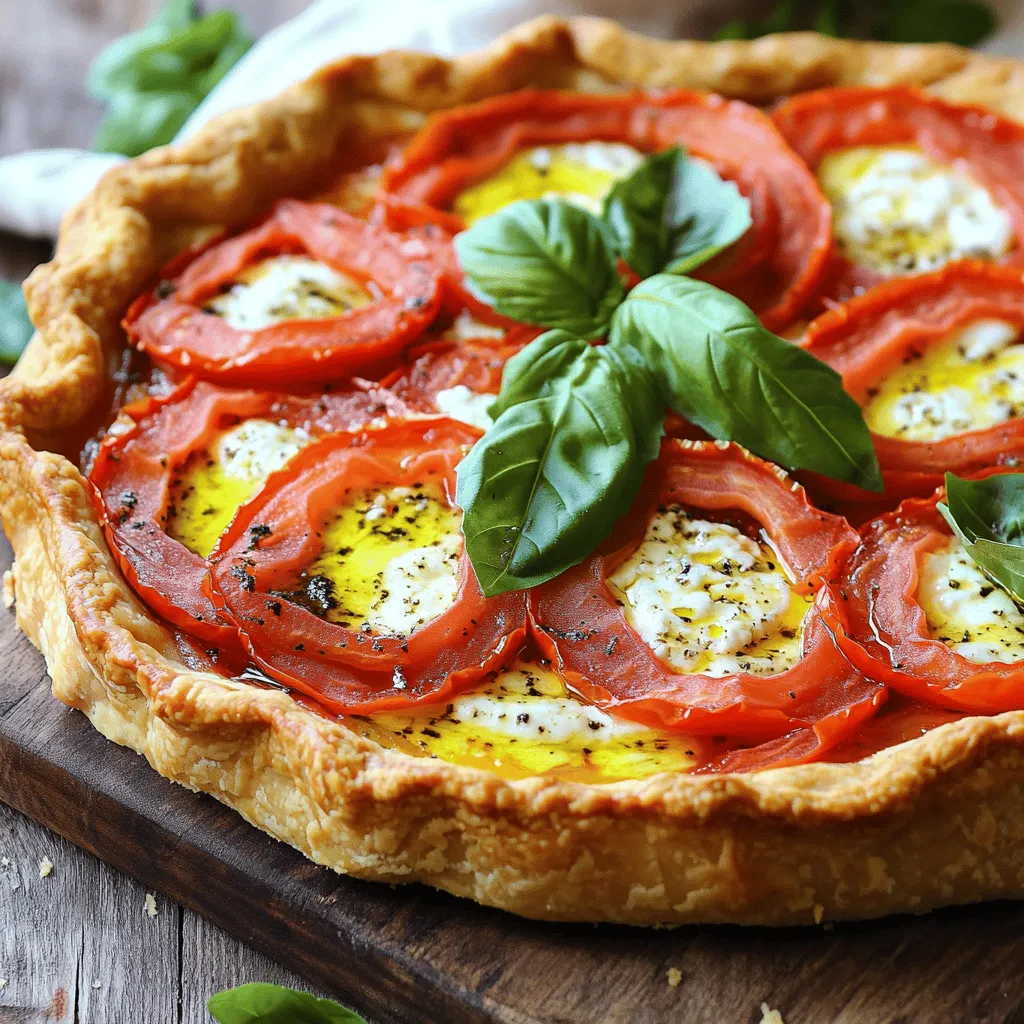
Looking for a delicious and simple dish that impresses? This Tomato Mozzarella Basil Tart is your answer! With fresh ingredients and a flaky crust, it captures summer flavors in every …