Skip to content
grilledflavors.com
  • Home
  • Appetizers
  • Desserts
  • Salads
  • Breakfast
  • Dinner
  • Privacy Policy
  • Contact
  • About

Chef Nate

Tuscan Garlic Salmon Flavorsome and Simple Recipe

June 13, 2025 by Chef Nate
- Salmon fillets - Olive oil - Garlic - Cherry tomatoes - Fresh spinach - Italian seasoning - Seasoning (salt and pepper) - Lemon juice - Garnishing (basil, Parmesan cheese) When I prepare Tuscan Garlic Salmon, I love the fresh and vibrant flavors. Each ingredient plays a key role in making the dish shine. Salmon fillets are the star. They provide a rich and buttery taste. I prefer using skin-on fillets for added flavor and texture. Next, olive oil adds a smooth base and enhances the natural taste of the salmon. Garlic is a must! I use minced garlic to give the dish a warm, aromatic flavor. Cherry tomatoes bring a burst of sweetness. They soften while cooking, adding juiciness to the meal. I always include fresh spinach. It adds color and a boost of nutrients. Italian seasoning ties everything together, giving a hint of herbaceous zest. Salt and pepper are simple but crucial. They help bring out the flavors of each ingredient. A squeeze of fresh lemon juice adds brightness, cutting through the richness of the salmon. For finishing touches, I like to garnish with fresh basil leaves. They add a lovely aroma. A sprinkle of Parmesan cheese gives a creamy element that many love. For the full recipe, check out the detailed instructions. This dish is easy and packed with flavor, making it a favorite in my kitchen! - Preheating the oven: Start by preheating your oven to 400°F (200°C). This ensures even cooking. - Preparing the skillet: Grab a large oven-safe skillet. Add 2 tablespoons of olive oil and heat it over medium heat. - Sautéing garlic and tomatoes: Add 4 minced garlic cloves to the skillet. Sauté for about 30 seconds until fragrant. Then, add 1 cup of halved cherry tomatoes. Cook for 3-4 minutes until they soften. - Adding spinach and seasonings: Stir in 1 cup of fresh spinach. Cook until it wilts, about 2 minutes. Season with 1 teaspoon of Italian seasoning, salt, and pepper to taste. - Arranging salmon in the skillet: Push the tomato and spinach mix to the sides. Add 4 salmon fillets skin-side down in the center. Season them with salt and pepper. Squeeze juice from 1 lemon over the salmon and spoon some of the mix on top. - Baking time and doneness indicators: Transfer the skillet to the oven. Bake for 12-15 minutes. The salmon is done when it flakes easily with a fork. - Optional cheese addition: If you like, sprinkle grated Parmesan cheese over the salmon right after baking. This adds a creamy touch. You can find the Full Recipe above to guide you through the cooking process. Enjoy your Tuscan Garlic Salmon! Using fresh herbs can bring your Tuscan garlic salmon to life. I love adding fresh basil or parsley. These herbs add bright notes that balance the richness of salmon. You can also try rosemary for a woodsy touch. If you want to change up the flavors, consider using lemon zest. It adds a fresh twist. You might also like to use paprika or chili flakes for a bit of heat. Just remember to use these in moderation. The best method for cooking salmon is baking. It keeps the fish moist and tender. Make sure you preheat your oven to the right temperature. That way, your salmon cooks evenly. Avoid overcooking by checking the salmon often. It should flake easily with a fork when done. If you have a meat thermometer, aim for 145°F (63°C). This will ensure your salmon is perfectly cooked. For serving, place the salmon on a white plate. This makes the colors pop. Add a generous scoop of the tomato-spinach mixture on top. It brings color and flavor to the dish. A lemon wedge on the side looks nice and gives extra flavor. You might sprinkle some grated Parmesan over the top, too. This adds a creamy touch that many enjoy. Use fresh basil leaves for garnish; they add a lovely finishing touch. For more detailed steps, check out the Full Recipe. {{image_2}} You can switch up the salmon for other fish. Try trout or halibut for a different taste. If you prefer plant-based options, use firm tofu or chickpeas for a tasty twist. For veggies, you can replace spinach with kale or arugula. Zucchini and bell peppers also add nice colors and flavors. Both grilling and baking work well for this dish. Grilling gives a smoky taste and beautiful char. Use medium heat and cook until the salmon flakes easily. Baking is simple and keeps the salmon moist. Just follow the oven instructions. You can also pan-sear salmon for a crispy skin. Heat oil in a pan, place skin-side down, and cook until golden. To bring in Mediterranean flavors, add olives and capers. These add a punchy taste that pairs well with garlic. You can also try a lemon-dill sauce for a fresh touch. Explore different sauces like pesto or a creamy yogurt sauce. These options can change the whole feel of the dish. Each twist keeps the meal fun and exciting. For the full recipe, check out the original guide! To keep your Tuscan garlic salmon fresh, store it right. Place leftovers in an airtight container. This helps keep moisture in and bacteria out. You can use glass or plastic containers. If you use plastic, make sure it is BPA-free. Label the container with the date to track how long it's been stored. When it comes to reheating salmon, the oven is best. Preheat your oven to 350°F (175°C). Place the salmon on a baking sheet and cover it with foil. Heat for about 10-15 minutes. This keeps the fish moist and tender. If you choose to use a microwave, do so with care. Place the salmon on a microwave-safe plate. Cover it with a damp paper towel. Heat in short bursts, checking often to avoid overcooking. You can freeze both salmon and spinach for later use. Wrap the salmon fillets tightly in plastic wrap, then place them in a freezer bag. Remove as much air as possible. For spinach, blanch it first to keep its color and flavor. Once cooled, pack it in a container or bag. When ready to eat, thaw salmon in the fridge overnight. For spinach, you can add it directly to your dish without thawing. How long does cooked salmon last? Cooked salmon can last up to three days in the fridge. Store it in an airtight container to keep it fresh. For best taste, eat it within two days. Can I use frozen salmon? Yes, you can use frozen salmon. Just thaw it in the fridge overnight. This will help keep the texture nice when cooking. What sides pair well with Tuscan Garlic Salmon? Great sides include roasted vegetables, rice, or a fresh salad. These options complement the flavors well and add color to your plate. What temperature should salmon be cooked to? Salmon should be cooked to an internal temperature of 145°F (63°C). This ensures it is safe to eat and still juicy. How do I know when salmon is done? You can tell salmon is done when it flakes easily with a fork. The color should be opaque, not translucent. Is Tuscan Garlic Salmon healthy? Yes, Tuscan Garlic Salmon is healthy. Salmon is rich in omega-3 fatty acids, which are great for your heart. The added veggies boost the dish's nutrients. What are the nutritional benefits of salmon? Salmon provides high-quality protein, vitamins, and minerals. It supports brain health and can improve mood. Plus, it’s low in saturated fat, making it a smart choice. For the full recipe, check the detailed section above. Enjoy your cooking adventure! You now have all the tools to make delicious Tuscan Garlic Salmon. We covered the ingredients, steps, and cooking tips to help you succeed. Remember, fresh herbs and careful cooking can enhance the flavor. Don’t hesitate to explore variations with different ingredients and cooking methods. Proper storage is key to enjoying leftovers. With practice, you will love making this dish. Enjoy your cooking and impress your family and friends with this tasty meal!

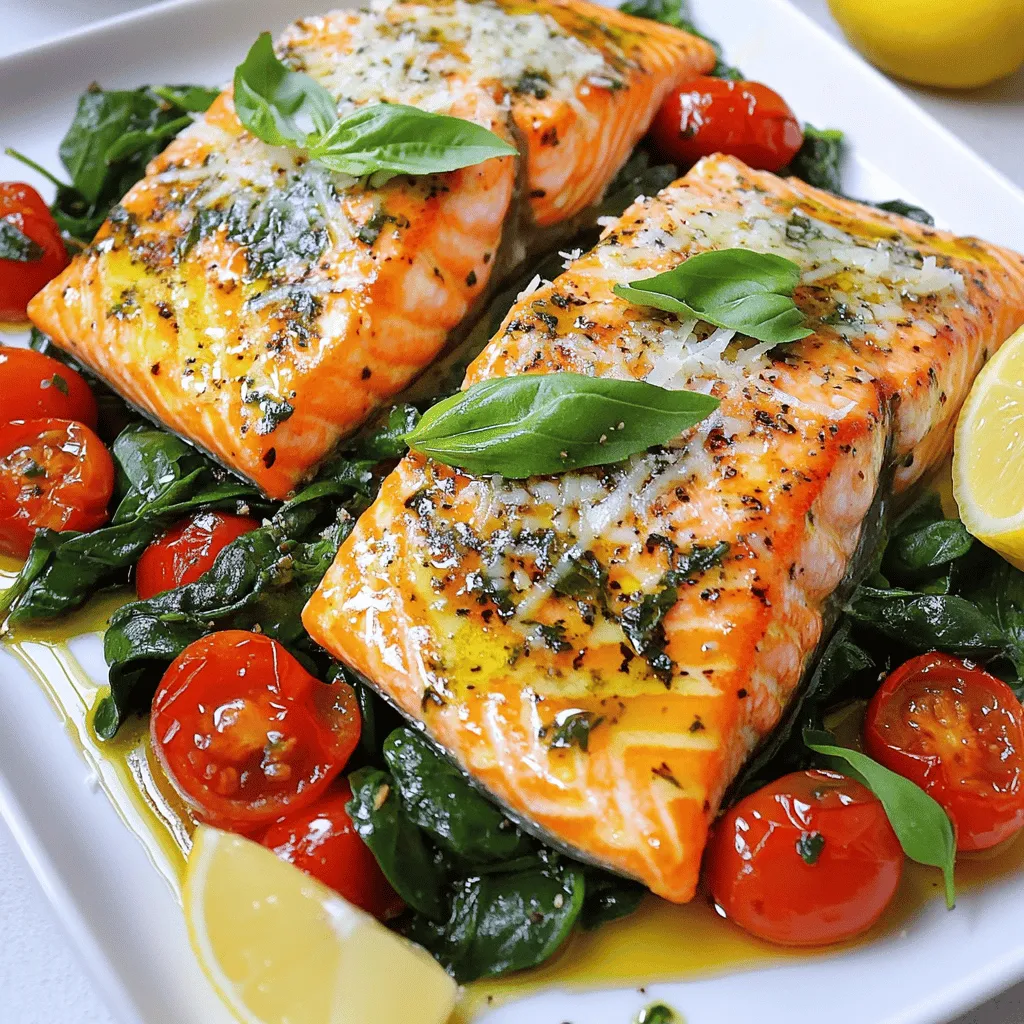
Are you ready to impress your taste buds with an easy, delicious dish? This Tuscan Garlic Salmon recipe is the perfect blend of fresh flavors and simple steps. With juicy …

Read more

Categories Dinner

Broccoli Bliss Salad Fresh and Flavorful Delight

June 13, 2025 by Chef Nate
- 3 cups fresh broccoli florets - 1 cup cherry tomatoes, halved - 1/2 cup red bell pepper, diced - 1/4 cup red onion, finely chopped - 1/2 cup shredded carrots - 1/3 cup sunflower seeds - 1/4 cup feta cheese, crumbled (optional) - 3 tablespoons olive oil - 2 tablespoons apple cider vinegar - 1 tablespoon honey - Salt and pepper to taste - 1 teaspoon Dijon mustard The ingredients in the Broccoli Bliss Salad create a vibrant and fresh dish. You’ll start with broccoli, a superfood packed with vitamins. The cherry tomatoes add sweetness and color. Red bell pepper gives a crunchy texture, while red onion adds a sharp flavor. Shredded carrots contribute a nice balance with their natural sweetness. You can enhance the salad with sunflower seeds for a delightful crunch. If you enjoy creamy flavors, crumbled feta cheese works well. The dressing ties everything together. It includes olive oil, apple cider vinegar, honey, salt, pepper, and Dijon mustard. This blend of flavors brings out the best in the salad. You can find the full recipe above. Gather these ingredients to create a fresh and tasty Broccoli Bliss Salad! 1. Prepare broccoli: Start with fresh broccoli florets. If you want a softer bite, blanch them. Boil water in a pot. Add the florets for just 1-2 minutes. Then, place them in ice water to stop cooking. Drain and set aside. This step helps keep the color bright and adds a tender crunch. 2. Combine other vegetables: In a large mixing bowl, add the blanched broccoli. Next, toss in halved cherry tomatoes, diced red bell pepper, finely chopped red onion, and shredded carrots. Mix everything gently to combine. Each veggie brings its unique flavor and adds color to the salad. 3. Whisk together dressing ingredients: In a small bowl, add olive oil, apple cider vinegar, honey, Dijon mustard, salt, and pepper. Whisk until well combined. The dressing will tie all the flavors together. The sweet honey balances the tangy vinegar and mustard, creating a delicious blend. 4. Toss salad ingredients with the dressing: Pour the dressing over the vegetable mix. Toss well until everything is coated. This is where the magic happens. The dressing enhances the flavors of each ingredient. 5. Add sunflower seeds and feta cheese just before serving: Right before you serve, sprinkle sunflower seeds and feta cheese on top. This adds crunch and creaminess. If you want a nut-free option, skip the seeds. 6. Allow flavors to meld for 10 minutes: Let the salad sit for about 10 minutes. This waiting time helps the flavors blend. You’ll notice how the dressing seeps into the veggies, making each bite even tastier. This simple process creates a fresh and vibrant Broccoli Bliss Salad that you will love. For the complete recipe, check out the Full Recipe section. Enjoy this delightful dish! For fresh broccoli, I recommend visiting local farmers' markets. You will find vibrant green florets that are crisp and full of flavor. Supermarkets may have broccoli, but it can lack freshness. Look for firm stems and tight florets. A rich green color shows it’s ripe! When choosing cherry tomatoes, feel for firmness. Ripe tomatoes should have a deep, rich color. Avoid any with wrinkles or blemishes. If you can, smell them; a sweet scent means they are ready to eat. To boost the taste of your Broccoli Bliss Salad, consider adding spices like garlic powder or smoked paprika. Fresh herbs like dill or cilantro can add a nice twist. They each bring a unique flavor that pairs well with the other ingredients. For the dressing, try adding a squeeze of lemon juice or a dash of hot sauce. These additions can brighten the flavors and add a bit of zing. When serving the salad, use a large, vibrant bowl to catch the eye. This makes it stand out at gatherings. Layer the ingredients to create a colorful display. For garnishing, sprinkle extra sunflower seeds on top for crunch. A light dusting of feta cheese adds both taste and beauty. Fresh herbs like parsley or basil can also offer a lovely pop of green. {{image_2}} You can boost the protein in your Broccoli Bliss Salad easily. Adding cooked chicken makes it heartier. Simply chop the chicken into bite-sized pieces and mix it in. If you prefer a plant-based option, chickpeas are great too. Rinse canned chickpeas and toss them in the salad. They add a nice texture and protein boost. Making this salad vegan is simple! Just skip the feta cheese and use maple syrup instead of honey. For a gluten-free version, ensure your mustard is gluten-free. If you want a nut-free option, feel free to leave out the sunflower seeds. This way, you can cater to various dietary needs without losing flavor. Seasonal vegetables can give your salad a fun twist. For example, try adding roasted butternut squash in the fall or fresh asparagus in the spring. You can also mix in fruits like apples or cranberries. Their sweetness pairs well with the savory elements of the salad, making it even more delightful. Store any leftover Broccoli Bliss Salad in an airtight container. This keeps the salad fresh and crisp. The salad lasts up to three days in the fridge. However, the longer it sits, the softer the veggies become. For the best taste, enjoy it within two days. You can freeze Broccoli Bliss Salad, but it's not ideal. Freezing can change the texture of fresh veggies. If you want to freeze it, separate the dressing from the salad components. Freeze the salad mix without the dressing for up to three months. When ready to eat, thaw it in the fridge overnight. To refresh the salad before serving, just give it a good toss. Adding a little extra dressing can help revive the flavors. Avoid heating the salad in the microwave. This will make it mushy. Instead, serve it cold for the best taste. Broccoli Bliss Salad is a vibrant, fresh mix of flavors and nutrients. This salad features crisp broccoli florets, juicy cherry tomatoes, and sweet red bell peppers. You also get finely chopped red onion and colorful shredded carrots. Together, these ingredients create a crunchy and colorful dish. The salad gets a delicious dressing made with olive oil, apple cider vinegar, and a hint of honey. You can add sunflower seeds for crunch and feta cheese for creaminess. It's a feast for the eyes and the taste buds! Yes, you can prepare Broccoli Bliss Salad ahead of time. To make it easy, chop the vegetables and keep them in the fridge. Mix the dressing in a separate bowl and store it in a jar. When you're ready to serve, combine everything and toss it with the dressing. This method keeps the salad fresh and crisp. Just remember to add the sunflower seeds and feta cheese right before serving. They add texture and flavor that you want to keep crunchy! If you need a substitute for sunflower seeds, there are many great options. Here are some ideas: - Pumpkin seeds add a nice crunch. - Chopped walnuts bring a rich flavor. - Sliced almonds offer a light, nutty taste. - Toasted sesame seeds give a unique twist. - Dried cranberries or raisins can add a hint of sweetness. These alternatives will still give your salad great texture and flavor. Enjoy experimenting with what you have on hand! The Broccoli Bliss Salad combines fresh veggies, seeds, and a zesty dressing. You learned how to prepare, mix, and enhance this dish. Don’t forget the tips for selecting ingredients and enhancing flavor! You can make this salad your own with easy variations for protein and diet needs. Follow the storage information to enjoy leftovers at their best. This salad is both delicious and nutritious, perfect for any meal. Make it for your next gathering, and impress your friends with your new cooking skills!

Looking for a fresh and vibrant salad that packs a punch? Meet the Broccoli Bliss Salad! This delightful dish combines crunchy broccoli, sweet cherry tomatoes, and zesty flavors for a …

Read more

Categories Salads

Japanese Katsu Bowls Tasty and Simple Recipe Guide

June 13, 2025 by Chef Nate
- 2 boneless chicken breasts - 1 cup panko breadcrumbs - 1/2 cup all-purpose flour To create a great katsu bowl, start with boneless chicken breasts. These cook evenly and stay juicy. Panko breadcrumbs add a nice crunch. They are lighter than regular breadcrumbs. All-purpose flour helps the coating stick well. - 1 teaspoon garlic powder - 1 teaspoon onion powder - 1/2 cup tonkatsu sauce - 2 cups cooked jasmine rice - 1/2 cup shredded cabbage - 1/4 cup sliced green onions Seasonings make the chicken flavorful. Garlic powder and onion powder give it a tasty kick. Tonkatsu sauce is a must-have for serving. It adds a sweet and savory touch. Serve the chicken over jasmine rice for a filling meal. Fresh vegetables like cabbage and green onions add crunch and color. - Sesame seeds for garnish - Variations of protein (pork, tofu) You can add sesame seeds for extra flavor and a nice look. If you want to try something different, use pork or tofu instead of chicken. This keeps the dish exciting and allows for more options. For the full recipe, check out the details above. To make great chicken katsu, start with the chicken. Place the chicken breasts between two sheets of plastic wrap. Use a meat mallet to pound them to about half an inch thick. This helps the chicken cook evenly. If the pieces are too thick, the outside may burn before the inside cooks. Pounding also helps tenderize the meat, making it juicier. Next, set up your breading station. You will need three shallow dishes. In the first dish, mix flour with salt, pepper, garlic powder, and onion powder. In the second dish, beat two eggs. Put panko breadcrumbs in the third dish. This is a three-step process: flour, egg, and breadcrumbs. Keep everything organized to avoid a mess. You can use one hand for wet ingredients and the other for dry ones. This helps keep your hands clean. Now it’s time to fry the chicken. Heat about half an inch of vegetable oil in a large skillet over medium-high heat. You want the oil to reach about 350°F, or 175°C. To check if it’s ready, drop a small piece of bread in. If it sizzles, the oil is hot enough. Carefully add the breaded chicken breasts. Fry each side for about four to five minutes. They should turn golden brown when done. To check if they are cooked through, slice into the thickest part. Juices should run clear, and the meat should be white. Remove the chicken and place it on a paper towel-lined plate to drain excess oil. Follow these steps for a tasty katsu that you can later use in your delicious katsu bowls. For the full recipe, check the details above. To get crispy katsu, follow these steps: - Use panko breadcrumbs for crunch. - Coat the chicken well with flour. - Dip it in beaten egg before the breadcrumbs. - Press the breadcrumbs on firmly. - Fry in hot oil, around 350°F (175°C). If your katsu turns out soggy, check the oil temperature. Too low oil makes katsu absorb oil. Fry in batches to avoid crowding. Let the fried katsu rest on paper towels to drain oil. Serve katsu over jasmine rice. The fluffy rice complements the crispy chicken. You can also add shredded cabbage for crunch. Don't forget the tonkatsu sauce; it adds rich flavor. Consider garnishing with sliced green onions or sesame seeds for a pop of taste. Prep can save time. Pound chicken breasts ahead and store in the fridge. You can also mix the flour and seasonings in advance. Cook rice early and keep it warm. When you’re ready, fry the chicken and assemble your bowls. Timing is key; fry the katsu last to keep it hot and crispy. For the full recipe, check out the link above. {{image_2}} You can switch up the protein in your katsu bowl. Pork katsu is a tasty choice. It has a rich flavor that pairs well with the toppings. If you want a vegetarian option, try tofu. Just use firm tofu and bread it like chicken. You can customize your meal based on your diet. Sauces can change the flavor of your katsu bowl. Besides tonkatsu sauce, try curry sauce for a twist. This adds warmth and spice. You can also explore regional toppings. Some people add pickles or eggs. These small changes can make your bowl unique and exciting. Jasmine rice is the classic base for katsu bowls. However, you can swap it out for quinoa. Quinoa adds protein and a nutty taste. Other grains like brown rice or barley are great too. This way, you can enjoy a healthy twist on the traditional dish. For the full recipe, please refer to the previous section. Store leftover katsu bowls in the fridge. Use an airtight container to keep them fresh. They stay good for about 2-3 days. Make sure the katsu is cool before sealing the container. This helps prevent sogginess. To reheat katsu, keep it crispy. The oven works best for this. Preheat the oven to 350°F (175°C). Place the katsu on a baking sheet and heat for about 10 minutes. This helps restore the crunch. If you use a microwave, the katsu may become soggy. If you must use the microwave, heat in short bursts. You can freeze katsu bowls for later use. First, let the katsu cool completely. Wrap each piece in foil or plastic wrap. Then, place them in a freezer-safe bag or container. When you're ready to eat, thaw them in the fridge overnight. Reheat in the oven to keep the crispiness. This method helps retain the flavor. For best results, eat frozen katsu within 2 months. Katsu has deep roots in Japanese cuisine. It started as a Western dish called "cutlet." In the late 19th century, Japanese chefs adapted it, creating the katsu we know today. This dish became popular for its crispy texture and rich flavor. Katsu holds cultural significance in Japan. It symbolizes comfort food and is often enjoyed during celebrations and special occasions. Yes, you can easily make katsu bowls gluten-free. For the flour, try using rice flour or chickpea flour. These options work well for the breading. For breadcrumbs, use gluten-free panko made from rice or corn. Check sauces too; many tonkatsu sauces contain gluten. Look for gluten-free versions or make your own using soy sauce alternatives. You can create tasty vegetarian katsu bowls with ease. Instead of chicken, use eggplant, zucchini, or tofu as your protein. For eggplant or zucchini, slice them thin and bread them just like you would with chicken. Firm tofu also works great; just press it to remove excess water before coating. This way, you can still enjoy a crunchy and satisfying meal. In this article, we explored the key ingredients for Japanese katsu bowls, including chicken, panko, and sauces. I shared tips for preparing, cooking, and serving the perfect katsu. You learned about variations, storage options, and how to adapt recipes for dietary needs. Katsu bowls are versatile and delicious. With the right techniques and ingredients, you can create a dish that fits any taste. Now it's time for you to try it and make it your own!

If you’ve ever craved a delicious, crispy Japanese Katsu Bowl, you’re in the right place! In this guide, I’ll share a tasty and simple recipe that anyone can make at …

Read more

Categories Dinner

Thai Chicken Salad Delightful and Flavorful Meal

June 13, 2025 by Chef Nate
For a tasty Thai Chicken Salad, you need these key items: - 2 cups cooked chicken breast, shredded - 1 cup red cabbage, thinly sliced - 1 cup carrots, grated - 1 cucumber, julienned - 1 red bell pepper, thinly sliced - 1/4 cup fresh cilantro, chopped - 1/4 cup chopped peanuts (for garnish) Nutritional aspects of each ingredient: - Chicken breast: High in protein, low in fat, great for muscle health. - Red cabbage: Rich in vitamins C and K, supports immune function. - Carrots: Full of beta-carotene, good for vision and skin health. - Cucumber: Hydrating and low in calories, helps with digestion. - Red bell pepper: Packed with antioxidants, boosts overall health. - Cilantro: Adds flavor and has anti-inflammatory properties. - Peanuts: Source of healthy fats and protein, adds crunch. For the dressing, gather these items: - 2 tablespoons lime juice - 2 tablespoons fish sauce - 1 tablespoon honey - 1 tablespoon sesame oil - 1 teaspoon grated ginger - 1 garlic clove, minced - Salt and pepper to taste Tips on sourcing fresh ingredients: - Buy herbs like cilantro from your local farmer's market. - Choose colorful vegetables for better taste and nutrition. - Look for fresh lime and garlic at the grocery store. - Always check the labels on sauces for quality. For the full recipe, click here: [Full Recipe]. To make Thai Chicken Salad, follow these easy steps. First, gather all your ingredients. You will need cooked chicken, red cabbage, carrots, cucumber, red bell pepper, cilantro, lime juice, fish sauce, honey, sesame oil, ginger, garlic, and peanuts. 1. In a large mixing bowl, add the shredded chicken, red cabbage, grated carrots, julienned cucumber, thinly sliced red bell pepper, and chopped cilantro. Toss them all together well. 2. In a small bowl, whisk together lime juice, fish sauce, honey, sesame oil, grated ginger, and minced garlic. This mixture will be your dressing. 3. Pour the dressing over the salad mixture. Gently toss to coat everything evenly. 4. Let the salad rest for about 10 minutes. This time is key. It allows the flavors to mix and become more vibrant. 5. Just before serving, sprinkle chopped peanuts on top for a crunchy finish. When serving the salad, think about how to make it look nice. Use a large bowl or individual plates. Garnish with fresh cilantro leaves and a lime wedge on the side. This adds color and freshness. You can pair the salad with spring rolls or jasmine rice. This combination makes for a complete meal. For drinks, consider serving iced tea or coconut water. It’s a refreshing way to enjoy your meal. For the full recipe, refer to the earlier section. Enjoy your delightful Thai Chicken Salad! You can easily change this Thai chicken salad to fit your taste. If you prefer a vegetarian option, swap chicken for tofu. Tofu absorbs flavors well and adds protein. You can also use shrimp for a seafood twist. For a crunchier salad, add sliced radishes or snap peas. If you want a spicy kick, toss in some sliced jalapeños. To enhance the flavor of your dressing, try adding more lime juice or a dash of chili sauce. Fresh herbs like mint or basil can brighten the taste too. Adjust the sweetness by adding more honey or using agave syrup for a vegan option. One common mistake is not shredding the chicken finely. Larger pieces can make the salad hard to eat. Make sure to slice the veggies thinly, too. This helps all the flavors blend well. Another error is not letting the salad sit. Allowing it to rest for ten minutes helps the flavors join together. For storage, keep the salad in a sealed container. This helps keep the veggies crisp. Try to eat the salad within two days to enjoy its freshness. If you add the dressing before storing, it can make the salad soggy. Keep the dressing separate until you are ready to eat. For the full recipe, check out the Full Recipe section above. {{image_2}} You can easily swap the chicken in your Thai Chicken Salad. Tofu is a great choice for a vegetarian option. Use firm tofu, and press it to remove excess water. Cut it into cubes and sauté until golden. This adds a nice texture. Shrimp is another tasty alternative. Cook medium shrimp in a pan with a little oil until pink and opaque. It takes only a few minutes. Both options work well with the salad's fresh flavors. Using seasonal vegetables makes your salad even better. In spring, add snap peas or radishes for a crisp bite. In summer, try ripe tomatoes or sweet corn for a juicy touch. For fall, consider using roasted butternut squash. It adds warmth and a sweet flavor. In winter, crunchy carrots and kale keep the salad vibrant. You can also adjust the dressing with seasonal ingredients. In summer, add a splash of orange juice to brighten it up. In winter, a bit of maple syrup can add a cozy sweetness. Enjoy exploring these options! To keep your Thai Chicken Salad fresh, store it in an airtight container. This helps maintain flavor and crunch. Place the salad in the fridge right after serving. It will stay good for about 3 days. If you notice any wilting or browning, it’s best to toss those bits out. If you want to save some salad for later, you can freeze it. Divide the salad into portions that you can use later. Use freezer-safe bags or containers. When you are ready to eat, thaw the salad overnight in the fridge. Once thawed, give it a good mix. The flavors will come back together nicely. Enjoy it with your favorite sides! For the full recipe, check out the details above. Thai Chicken Salad is a bright and tasty dish. It combines fresh veggies with shredded chicken. Key ingredients include red cabbage, carrots, and cucumbers. These add crunch and color. The salad also has a zesty dressing made from lime juice, fish sauce, honey, and sesame oil. Ginger and garlic add depth to the flavor. This meal is light yet satisfying, making it perfect for lunch or dinner. Yes, you can make Thai Chicken Salad ahead of time. However, I suggest keeping the dressing separate. This helps maintain the salad's crunch. Prepare the salad and store it in the fridge. Add the dressing just before serving. If you mix it too early, the veggies may become soggy. Letting it sit for 10 minutes before serving helps the flavors blend well. To make Thai Chicken Salad gluten-free, swap out certain ingredients. Use gluten-free fish sauce and soy sauce. Check labels to ensure no hidden gluten. You can also use tamari as a soy sauce substitute. Most other ingredients are naturally gluten-free. Fresh veggies and chicken are great choices. With these swaps, you can enjoy a tasty gluten-free salad. For the full recipe, check out the instructions provided above. In this article, we explored the delicious Thai Chicken Salad, starting with its key ingredients and dressing components. I shared easy steps for preparing and serving the salad, along with tips for customization and common mistakes to avoid. We discussed great alternatives for proteins and how to use seasonal veggies to enhance flavor. Finally, I provided storage tips to keep your salad fresh. By using these insights, you can create a tasty and colorful dish that fits your needs and impresses your guests. Enjoy making this vibrant salad!

Are you ready to spice up your meal routine? This Thai Chicken Salad is a delightful and flavorful dish that combines fresh herbs, crunchy veggies, and tender chicken. Not only …

Read more

Categories Salads

Lemon Raspberry Cookies Delightful and Easy Recipe

June 13, 2025 by Chef Nate
To make delicious lemon raspberry cookies, you need some key items. Here’s what you will need: - 1 cup unsalted butter, softened - 1 cup granulated sugar - 1 large egg - 2 teaspoons vanilla extract - Zest of 1 lemon - 2 cups all-purpose flour - 1 teaspoon baking powder - 1/2 teaspoon baking soda - 1/4 teaspoon salt - 1 cup fresh raspberries, gently mashed - 1 cup powdered sugar (for glaze) - 2 tablespoons lemon juice (for glaze) These ingredients blend to create a tasty treat with a zesty kick. The butter makes the cookies rich, while the raspberries add a burst of flavor. You might need to swap some items. Here are some easy ideas: - Butter: Use coconut oil or margarine. - Granulated sugar: Try brown sugar for a deeper flavor. - All-purpose flour: Use whole wheat flour for more fiber. - Egg: Replace it with a flax egg or a chia egg for a vegan option. - Raspberries: You can use blueberries or strawberries if you prefer. These swaps can change the flavor and texture, keeping your cookies fun and fresh. Measuring is key to baking. Here’s how to do it right: - Dry ingredients: Scoop the flour into a measuring cup and level it off with a knife. - Butter: If it’s in a stick, use the markings for easy measuring. - Sugar: Spoon it into the cup, then level it off. - Liquid ingredients: Use a clear measuring cup and check at eye level. Accurate measuring helps your cookies bake evenly. Follow the full recipe for precise instructions to ensure tasty results! Start by preheating your oven to 350°F (175°C). This helps the cookies bake evenly. While the oven heats, line two baking sheets with parchment paper. This prevents sticking and makes clean-up easy. Make sure the sheets are flat and ready for the dough. In a large bowl, cream together 1 cup of softened butter and 1 cup of granulated sugar. Mix until the blend is light and fluffy. Next, beat in 1 large egg, 2 teaspoons of vanilla extract, and the zest of 1 lemon. This mix adds flavor and moisture. In another bowl, whisk together 2 cups of all-purpose flour, 1 teaspoon of baking powder, 1/2 teaspoon of baking soda, and 1/4 teaspoon of salt. Gradually add this dry blend into your wet mixture. Stir until combined. Now, gently fold in 1 cup of fresh raspberries. Be careful not to mash them too much; you want some pieces to stay intact. Using a tablespoon, drop spoonfuls of your cookie dough onto the prepared baking sheets. Space them about 2 inches apart. Bake for 12-15 minutes. Look for lightly golden edges. The centers may seem soft, but they will firm up as they cool. While your cookies bake, prepare the glaze. In a small bowl, mix 1 cup of powdered sugar with 2 tablespoons of lemon juice. Stir until smooth. Once the cookies cool on a wire rack, drizzle the glaze over each cookie. Wait about 10 minutes for the glaze to set before serving. Enjoy your Lemon Raspberry Cookies! Check the Full Recipe for more details. To get the best cookie texture, start with softened butter. Cream it well with sugar. This makes your cookies light and fluffy. Mix until it is pale and airy. Don't overmix once you add the flour. This keeps the cookies tender. Bake them until the edges are golden. The centers should stay soft. They will firm up as they cool. When adding raspberries, be gentle. First, gently mash them in a bowl. Then, fold them into the dough carefully. Use a spatula to mix, but don’t crush them too much. You want to keep some chunks for great flavor and texture. This way, you’ll enjoy bites of fresh raspberry in every cookie. These cookies shine on their own, but you can dress them up! Serve them on a pretty plate. Add a sprinkle of lemon zest for color. Fresh raspberries around the cookies look nice too. A cup of tea or lemonade pairs well with them. For a fun twist, try serving with a scoop of vanilla ice cream. These ideas make your cookies feel special! For the full recipe, check the section above. {{image_2}} You can enhance your lemon raspberry cookies by adding nuts or chocolate. Walnuts or pecans add a nice crunch. Chopped chocolate or chocolate chips make the cookies rich and tasty. Mix in about 1/2 cup of your chosen nuts or chocolate during the last step of making the dough. This simple change adds flavor and texture, making each bite exciting. While the lemon glaze is great, you can try other flavors too. A raspberry glaze adds a fruity twist. To make it, use raspberry puree instead of lemon juice. You can also add spices like cinnamon or cardamom for warmth. Just a pinch can make a big difference. Experimenting with different glazes or add-ins can make your cookies unique. Don’t limit yourself to just raspberries. Blackberries, blueberries, or strawberries work well too. You can mix different berries for a colorful cookie. Each berry brings its own taste, making your cookies more fun. Just ensure the total amount of berries stays the same. Try these combinations for a new take on your favorite lemon raspberry cookie recipe. For the full recipe, check out my guide! To keep your Lemon Raspberry Cookies fresh, store them in an airtight container. This helps keep moisture in and makes the cookies soft. I like to place a piece of wax paper between layers of cookies. This way, they won’t stick together. If you add glaze, let it set first. Otherwise, the glaze can make the cookies soggy. You can freeze these cookies to enjoy later. First, let the cookies cool completely. Then, place them in a single layer on a baking sheet. Freeze for about an hour. Once frozen, transfer them to a freezer-safe bag. Be sure to remove as much air as you can. These cookies can last up to three months in the freezer. When you're ready to eat one, just thaw it at room temperature. These cookies stay fresh for about a week at room temperature. If you want them to last longer, freeze them. To keep them even fresher, avoid exposing them to heat or direct sunlight. If they start to lose their flavor, try adding a slice of bread to the container. The bread adds moisture and keeps the cookies soft. For the best taste, enjoy them within the first few days! Yes, you can use frozen raspberries. Just make sure to thaw and drain them first. This helps avoid excess liquid in your cookies. Frozen berries may be softer, so handle them gently. They still add great flavor and color. If your cookies spread too much, check your butter temperature. It should be soft, not melted. You can chill the dough for 30 minutes before baking. This helps the cookies keep their shape. Also, make sure to measure your flour correctly. To make gluten-free cookies, swap the all-purpose flour for a gluten-free blend. Look for a mix that includes xantham gum for better texture. You can also use almond flour or oat flour. Adjust the amount of liquid if needed. Yes, you can skip the lemon in the glaze. Instead, use milk or water to mix the powdered sugar. You can add vanilla extract for flavor. This will still give you a nice sweet topping for your cookies. For the full recipe, check the complete details above. You learned how to make delicious lemon raspberry cookies. We covered key ingredients, accurate measuring, and step-by-step baking. You also received tips for great texture and ways to add unique flavors. Storing and freezing ideas keep your cookies fresh. Now, get ready to bake and share these cookies with others! Enjoy the sweet and tangy blend; it brings joy to every bite. Your friends and family will love them. Happy baking!

Are you ready to bake something simple yet delicious? These Lemon Raspberry Cookies pack a bright punch of flavor, making them perfect for any occasion. You’ll love how easy they …

Read more

Categories Desserts

Healthy Chicken Pot Pie Soup Comforting and Nourishing

June 13, 2025 by Chef Nate
To make Healthy Chicken Pot Pie Soup, gather these simple and fresh ingredients: - 1 lb (450g) boneless, skinless chicken breasts, diced - 1 tablespoon olive oil - 1 medium onion, diced - 2 cloves garlic, minced - 3 medium carrots, diced - 2 celery stalks, diced - 1 cup frozen peas - 4 cups low-sodium chicken broth - 1 cup unsweetened almond milk - 1 teaspoon dried thyme - 1 teaspoon dried rosemary - ½ teaspoon salt - ¼ teaspoon black pepper - ½ cup whole wheat pastry flour - Fresh parsley for garnish Using fresh ingredients is key. The chicken adds protein, while the veggies bring color and texture. Olive oil helps with cooking and flavor. The herbs add depth, making each spoonful comforting. The almond milk keeps it creamy without being heavy. Make sure to use low-sodium chicken broth. It helps control salt levels. Whole wheat pastry flour thickens the soup while adding fiber. Garnish with parsley for freshness. This soup is not just a meal; it's a warm hug in a bowl. For the full recipe, check out the details above. 1. Cook chicken and set aside In a large pot, heat one tablespoon of olive oil over medium heat. Add one pound of diced chicken breasts. Cook until no longer pink, about five to seven minutes. Remove the chicken and set it aside. 2. Sauté onion and garlic In the same pot, add one medium diced onion and two minced garlic cloves. Sauté until the onion turns translucent, which takes about three to four minutes. 3. Add carrots and celery Next, add three diced carrots and two diced celery stalks. Stir frequently and cook for an additional five minutes until the veggies soften. 1. Incorporate whole wheat pastry flour Sprinkle half a cup of whole wheat pastry flour over the sautéed vegetables. Mix well to coat them. Cook for one more minute to remove the raw taste. 2. Gradually add chicken broth and almond milk Slowly pour in four cups of low-sodium chicken broth and one cup of unsweetened almond milk. Stir constantly to avoid lumps. 3. Return chicken and add herbs and spices Add the cooked chicken back into the pot. Also, include one teaspoon each of dried thyme and dried rosemary. Don’t forget half a teaspoon of salt and a quarter teaspoon of black pepper. Stir in one cup of frozen peas. 1. Bring to boil and simmer Bring the soup to a gentle boil. Then reduce the heat and let it simmer for 20 minutes, or until the veggies are tender and the soup thickens. 2. Adjust seasoning to taste Taste the soup and adjust the seasoning if needed. 3. Serve and garnish Serve hot, garnished with fresh parsley. Enjoy your warm, healthy chicken pot pie soup! You can find the full recipe for more details. - Use a rotisserie chicken for quicker preparation. This saves time and adds great flavor. - Adjust the thickness of the soup to your liking. Add more broth or milk for a thinner soup. Use less for a creamier texture. - Consider low-fat dairy alternatives like oat milk or skim milk. They can make the soup lighter. - Feel free to swap in different vegetables. Try green beans or corn for added crunch and color. - To achieve the perfect creamy texture, mix the flour well with the vegetables before adding liquids. This helps thicken the soup. - If your soup is too thick, add broth or milk to thin it out. For a thicker soup, let it simmer longer to reduce liquid. For the complete cooking guide, check out the Full Recipe. {{image_2}} You can easily make this soup even healthier. Adding leafy greens like spinach or kale boosts nutrition. These greens add vitamins and minerals without changing the taste much. You can stir them in during the last few minutes of cooking. Another option is to use gluten-free flour. This swap works well if you need to avoid gluten. You can use almond flour or a store-bought blend. Both will help thicken your soup while keeping it gluten-free. To make your soup more flavorful, try using different herbs and spices. Fresh thyme or oregano can give your dish a new twist. You might also add a pinch of paprika for some warmth. Experiment with flavors to find what you love best. Incorporating lemon juice is another great idea. Just a squeeze can brighten the dish. It adds a nice contrast to the creamy soup, making it even more tasty. If you want a vegetarian option, chickpeas or lentils are fantastic choices. They add protein and fiber while keeping the soup hearty. Just add them when you return the liquid to the pot. You can also swap the chicken for turkey. This change can give you a different flavor while keeping it lean. Use the same cooking steps as the original recipe. You will enjoy a new take on this comforting soup. For the full recipe, check out Healthy Chicken Pot Pie Soup. Store your Healthy Chicken Pot Pie Soup in the fridge for up to four days. Use airtight containers to keep the soup fresh. Glass or BPA-free plastic containers work well for this. Make sure to let the soup cool before sealing. This helps prevent condensation and keeps it tasty. To freeze the soup, let it cool completely. Then, pour it into freezer-safe bags or containers. Leave some space at the top to allow for expansion. Label each bag or container with the date. For reheating, thaw overnight in the fridge. Reheat on the stove over low heat. Stir often to keep the texture smooth. You can also use a microwave, but stir halfway through for even heating. Making a big batch of this soup is perfect for quick meals. Cook a double recipe and store it in your fridge or freezer. Portion it out for easy lunches. You can pack it in single servings to grab on busy days. This way, you can enjoy a warm, healthy meal without much fuss. You can use the stove or the microwave. The stove is my favorite choice. Just pour the soup into a pot. Heat it over low heat, stirring often. This helps keep the soup creamy. If using a microwave, place the soup in a safe bowl. Heat it in short bursts, stirring in between. This ensures even heating and prevents splatters. Yes, you can make this soup ahead of time. It tastes even better the next day! After cooking, let the soup cool down. Store it in an airtight container in the fridge. It lasts for about three days. You can also freeze it for longer storage. Just make sure to leave some space in the container for expansion. You can easily adjust this recipe for dietary needs. Here are some common swaps: - For dairy-free, use coconut milk instead of almond milk. - If you need gluten-free, swap whole wheat flour with a gluten-free blend. - For low-sodium diets, choose low-sodium chicken broth or make your own. - You can also add more veggies to increase fiber and nutrients. This blog post covered a delicious chicken soup recipe. I shared ingredients, steps, and tips to help you make it. Remember, you can swap ingredients for different tastes and textures. Store the soup easily in the fridge or freezer for quick meals. Explore variations for healthier options or different flavors. Cooking is about creativity and fun, so enjoy your time in the kitchen. Make this soup yours and share it with friends!

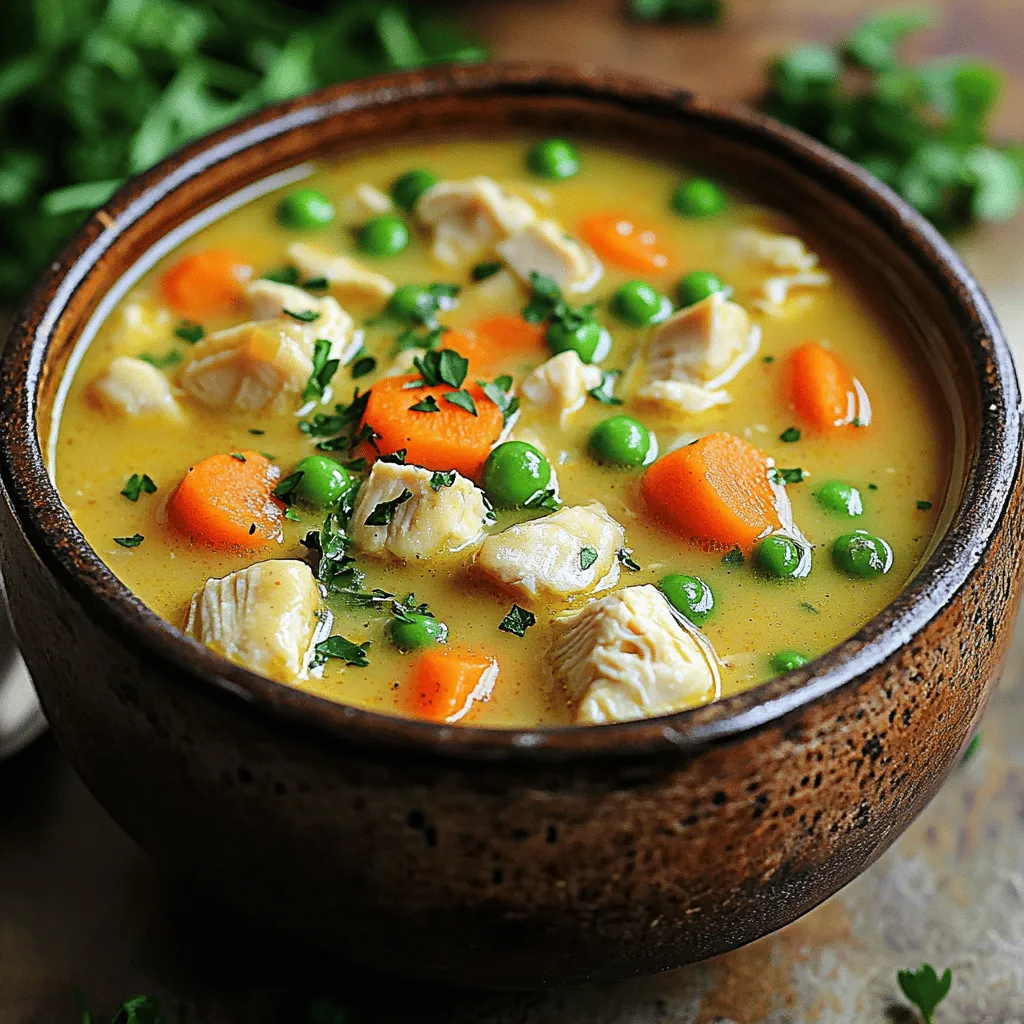
Are you ready to enjoy a warm bowl of comfort? This Healthy Chicken Pot Pie Soup is both nourishing and delicious. Packed with fresh veggies, tender chicken, and creamy goodness, …

Read more

Categories Dinner

Breakfast Chili and Eggs Flavorful Morning Boost

June 13, 2025 by Chef Nate
- 1 can (15 oz) black beans, drained and rinsed - 1 can (15 oz) diced tomatoes - 1 small onion, finely chopped - 2 cloves garlic, minced - 1 bell pepper (red or green), diced - 1 jalapeño, finely chopped (optional for heat) - 1 teaspoon ground cumin - 1 teaspoon chili powder - 4 large eggs - 2 tablespoons olive oil - Salt and pepper, to taste - Fresh cilantro, for garnish - Avocado slices, for serving The key to my Breakfast Chili and Eggs is using fresh, vibrant ingredients. Each one adds a layer of flavor. Black beans bring protein and heartiness. Diced tomatoes offer a juicy base. The onion and garlic give a sweet depth. Bell peppers add crunch, while the jalapeño gives an optional kick. Cumin and chili powder are the stars of the show. They create warmth and depth in your chili. Eggs create a rich, creamy texture when cooked. Olive oil helps everything sauté beautifully. Don't forget to season with salt and pepper. Fresh cilantro and avocado slices make the dish feel special. They add freshness and creaminess. You can enjoy this for breakfast or any meal. It’s a great way to start your day with energy! If you want to dive deeper into this recipe, check out the Full Recipe for more details. - Heat olive oil in the skillet. - Sauté onion and garlic until translucent. To start, grab a large skillet and pour in two tablespoons of olive oil. Place the skillet over medium heat. Olive oil adds a nice flavor and helps cook the veggies. Once the oil is hot, add one small chopped onion and two minced garlic cloves. Stir them around. You want the onion to turn soft and clear. This should take about 3-4 minutes. This step builds the base flavor for your chili. - Add bell pepper and jalapeño. - Incorporate black beans and diced tomatoes. Now, it's time to add some color and heat. Dice one bell pepper, either red or green, and add it to the skillet. If you like some spice, chop one jalapeño and toss it in too. Cook these for 2-3 minutes until they soften. Next, add one can of black beans and one can of diced tomatoes with their juices. Sprinkle in one teaspoon of ground cumin and one teaspoon of chili powder. Don’t forget to season with salt and pepper. Mix it all well. Bring this mixture to a gentle simmer. Let it cook for about 10 minutes. This allows all those great flavors to mingle. - Create wells in the mixture and crack eggs. - Cover and cook until whites are set. Once your chili is simmering, it’s egg time! Use the back of a spoon to make four small wells in the chili mixture. Crack one large egg into each well. Cover the skillet with a lid. Let the eggs cook for about 5-7 minutes. You want the whites to be set, but the yolks can be runny or firm, depending on your taste. This step makes the dish hearty and delicious. You can find the Full Recipe above to keep these steps handy. Enjoy making this fun breakfast! To get the perfect egg yolk doneness, you need to cover the skillet. This traps steam and helps the eggs cook evenly. If you want runny yolks, cook for about 5 minutes. For firmer yolks, wait a bit longer. You can also check them gently with a spoon. To ensure even cooking, stir the chili mixture before adding the eggs. This helps distribute the heat. Make sure your skillet is hot enough before adding the eggs. A well-heated skillet prevents sticking and helps the eggs cook properly. For sides, consider warm tortillas or crusty bread. Both add a nice touch to your meal. You could also serve it with fresh fruit or a light salad for balance. Presentation is key! Use a wide plate to showcase the colorful chili and eggs. Add a sprinkle of cilantro for a pop of green. Place avocado slices neatly on the side for a fresh look. To boost flavor, try adding smoked paprika or oregano. These spices add depth and warmth to your chili. You can also use fresh herbs like parsley or chives for a burst of freshness. For toppings, think beyond cilantro and avocado. Crumbled feta cheese adds creaminess. A squeeze of lime can brighten the dish. You could also try a dollop of sour cream for extra richness. {{image_2}} You can enjoy this dish even without eggs. For vegetarian options, use tofu instead. Simply scramble firm tofu in the skillet. For a vegan twist, replace eggs with chickpea flour. Whisk chickpea flour with water to create a batter. Cook it in wells like you would with eggs. This adds protein and keeps it plant-based. Want more heat? Add extra jalapeño or a pinch of cayenne. You can also use hot sauce for a kick. If you prefer less spice, remove the seeds from the jalapeño. You can even skip it altogether. For mild flavors, try sweet bell peppers or a pinch of paprika. Feel free to switch up the beans. Kidney beans or pinto beans work well too. You can add seasonal veggies like zucchini or spinach. This keeps the dish fresh and vibrant. Experiment with toppings like shredded cheese or diced bell peppers for added texture. Each variation brings a new twist to your breakfast chili. To keep your Breakfast Chili and Eggs fresh, follow these steps: - Refrigeration: Place leftovers in an airtight container. Store them in the fridge within two hours of cooking. They stay good for about 3 to 4 days. - Freezing: If you want to store them longer, freeze the chili. Use freezer-safe containers. It can last up to 2 months in the freezer. Just remember to leave some space in the container for expansion. To enjoy your leftovers, reheating is key. Here’s how: - Stovetop: Heat on medium in a skillet. Stir occasionally until warmed through. This keeps the flavor alive. - Microwave: Use a microwave-safe bowl. Cover it loosely with a lid or towel. Heat for 1-2 minutes, stirring halfway through. This method works well but may alter texture slightly. Knowing how long your dish lasts is crucial. Here are the details: - Refrigerated: Your chili can last for 3 to 4 days in the fridge. - Frozen: When properly frozen, it can last up to 2 months. - Signs of Spoilage: Look for off smells, changes in color, or any mold. If you see these, discard the dish. Always trust your senses! Yes, you can prepare Breakfast Chili and Eggs in advance. To do this, follow these tips: - Cook the chili part and let it cool. - Store the chili in an airtight container in the fridge. It lasts 3-4 days. - You can also freeze the chili for up to 3 months. - When ready to eat, reheat the chili on the stove. - Cook the eggs fresh when you serve it for the best texture. You can pair this dish with several tasty sides and drinks: - Toast or crusty bread for dipping. - Fresh fruit like sliced oranges or berries. - A light salad for added crunch. - Coffee or fresh juice to drink. Absolutely! You can modify the recipe for various diets: - For gluten-free, ensure all ingredients are certified gluten-free. - For dairy-free, skip the cheese or use a plant-based option. - Vegan? Use tofu or chickpeas instead of eggs. If you want more heat, here are some tips: - Add more jalapeños or use a spicier pepper. - Stir in hot sauce while cooking. - Sprinkle crushed red pepper flakes on top before serving. - Experiment with spices like cayenne pepper for extra kick. For the full recipe, check out Sunny Breakfast Chili ! In this post, we explored a tasty recipe for Breakfast Chili and Eggs. We covered ingredients, preparation steps, and cooking tips. I shared variations to suit different diets and spice levels. Remember, you can customize it to match your taste. This dish not only pleases the palate but also packs nutritional value. Enjoy experimenting with different ingredients and flavors. Your breakfast can be both fun and satisfying. Let's get cooking!

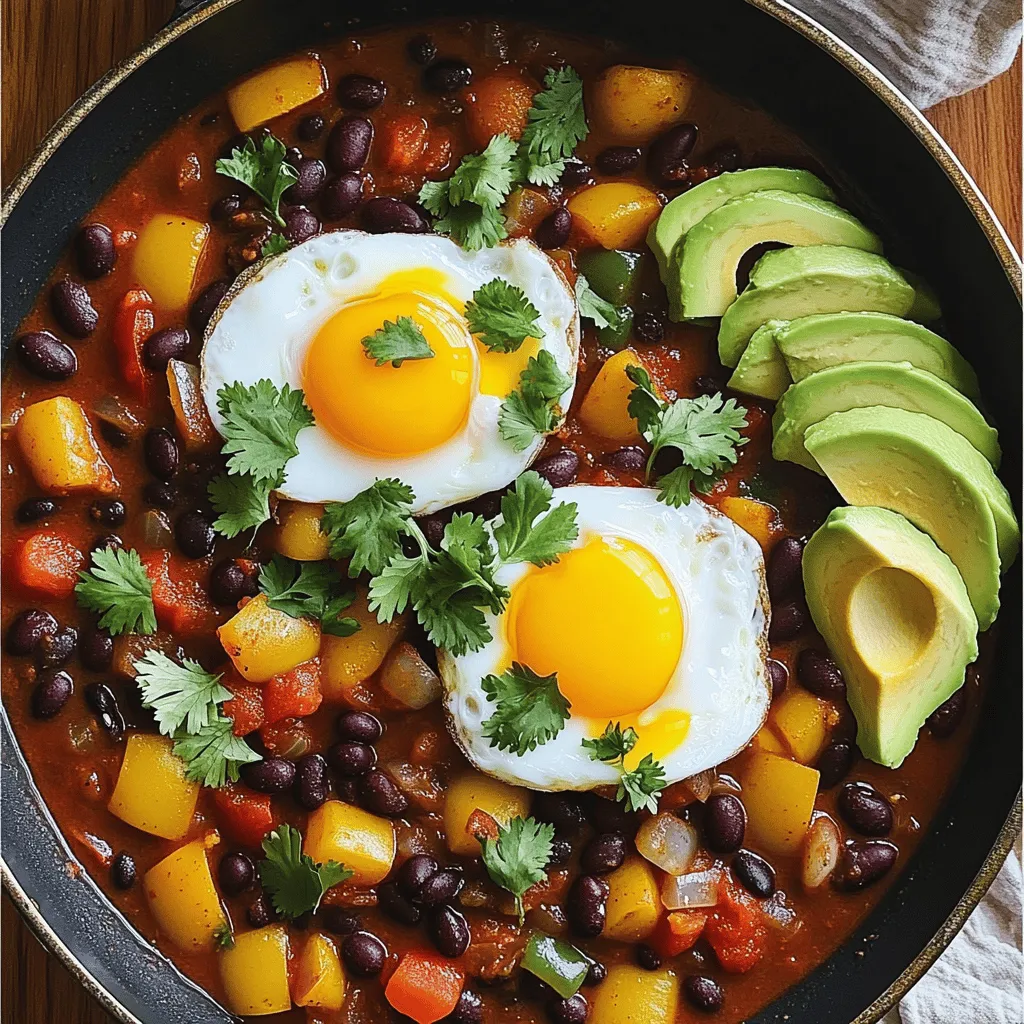
Looking for a breakfast that packs a punch? My Breakfast Chili and Eggs is just what you need! This vibrant dish combines hearty black beans, tomatoes, and spiced eggs for …

Read more

Categories Breakfast

Grilled Mozzarella Sandwich Delight in Every Bite

June 13, 2025 by Chef Nate
- 2 slices of sourdough bread - 1 cup fresh mozzarella cheese, sliced - 1/4 cup sun-dried tomatoes, chopped - 1/4 cup fresh basil leaves - 2 tablespoons pesto sauce - 2 tablespoons olive oil - Salt and pepper to taste - Optional: Red pepper flakes for added spice When making a grilled mozzarella sandwich, choosing the right bread is key. Sourdough is my favorite. It has a crusty outside and a soft inside. Look for a fresh loaf from a local bakery. For mozzarella, always go for fresh. Fresh mozzarella is soft, creamy, and melts beautifully. Regular mozzarella can dry out and lacks flavor. Sun-dried tomatoes add a sweet and tangy punch. They can vary in quality. Choose ones packed in oil; they are the best for flavor and texture. Using these quality ingredients will make your sandwich shine. For the full recipe, check the detailed cooking steps above. To start, heat a non-stick skillet over medium heat. This step is key for getting that perfect golden crust. While the skillet warms up, take your sourdough bread. Brush one side of each slice with olive oil. This oil side will turn crispy and delicious during cooking. Now, let’s build that tasty sandwich. Take one slice of bread, oiled side down. Spread the pesto sauce evenly on the un-oiled side. Next, layer the fresh mozzarella slices on top of the pesto. Add the chopped sun-dried tomatoes and fresh basil leaves. Sprinkle a pinch of salt and pepper. If you want some heat, add red pepper flakes here. Make sure to distribute the ingredients evenly. This helps every bite taste great. After layering, place the second slice of bread on top, with the oiled side facing out. It’s time to cook your sandwich! Place it carefully into the heated skillet. Let it grill for about 3-4 minutes. This gives the bread a lovely golden color. After that, gently flip the sandwich. Press it down slightly to ensure even cooking. Cook for another 3-4 minutes until the other side is golden and the mozzarella is nice and melty. Once done, remove it from the skillet. Let it sit for a minute before slicing. This helps the cheese set a bit. Enjoy your delicious grilled mozzarella sandwich! For the full recipe, check above. The right cheese temperature is key for a great melt. Cold cheese does not melt well. Let your mozzarella sit at room temp for about 15 minutes before cooking. This helps it get gooey and smooth. To achieve the perfect texture, slice the cheese thin. Thin slices melt more evenly and quickly. Spices can elevate your sandwich. Try adding a pinch of garlic powder for depth. A sprinkle of dried oregano also adds nice flavor. For extra kick, red pepper flakes are a great choice. They give that spicy zing while keeping it fun. Pair your sandwich with condiments like balsamic glaze or a zesty aioli. These add richness and a burst of flavor. Great sides make your meal even better. A simple side salad with fresh greens works well. Crispy potato chips add crunch and fun. For a nice touch, present your sandwich on a wooden board. Slice it diagonally for a neat look. Garnish with fresh basil and a small bowl of pesto for dipping. This makes it look gourmet and appetizing. {{image_2}} You can switch up your grilled mozzarella sandwich with different bread types. Ciabatta adds a chewy texture. You can also try whole grain or even focaccia for a unique taste. For cheese, fresh mozzarella is classic, but provolone offers a sharp twist. Fontina melts well too, giving a creamy finish. If you prefer plant-based meals, substitute cheese with vegan mozzarella. These options melt nicely and taste great. You can also add more veggies, like spinach or roasted peppers. They make your sandwich filling and add flavor without meat. Seasonal herbs and vegetables can elevate your sandwich. In spring, fresh arugula or asparagus adds a lovely crunch. In summer, try adding ripe tomatoes or zucchini. Mixing in these ingredients keeps your sandwich exciting all year long. Try this creativity to make your grilled mozzarella sandwich shine! For the full recipe, check out the Melty Mozzarella Delight Sandwich. To keep your grilled mozzarella sandwich fresh, wrap it tightly in foil or plastic wrap. This helps prevent the bread from drying out. Store it in the fridge for up to two days. When you’re ready to eat it, reheating is key. Use a skillet over low heat. This warms the sandwich evenly. Cook it for about 3-4 minutes on each side. This way, the bread stays crispy and the cheese melts perfectly. Yes, you can freeze grilled sandwiches! To do this, let the sandwich cool completely first. Then, wrap it tightly in plastic wrap and foil. This prevents freezer burn and keeps it fresh. You can freeze it for up to three months. When you want to enjoy it, take it out and thaw it in the fridge overnight. After that, reheat it in a skillet for the best results. This keeps the taste and texture intact. Enjoy your melty mozzarella delight anytime! For the full recipe, see the section above. You can serve many tasty sides with your grilled mozzarella sandwich. Here are a few ideas: - Tomato soup: A classic pairing that complements the flavors of the sandwich. - Salad: A fresh green salad adds a nice crunch. - Chips: Crispy potato chips offer a salty contrast. - Pickles: They add a zesty touch and cleanse the palate. - Beverages: Pair it with iced tea, lemonade, or a light white wine. To achieve that perfect crunch, follow these tips: - Use butter: Instead of olive oil, spread butter on the bread for a richer flavor. - Press down: While cooking, press the sandwich down with a spatula. - Cook on low heat: This allows the bread to brown evenly without burning. - Add more layers: A thicker layer of cheese can create a great contrast with the crispy bread. Yes, you can swap mozzarella for other cheeses. Here are my top picks: - Provolone: It melts well and adds a nice tang. - Cheddar: Sharp cheddar gives a bold flavor. - Fontina: This cheese melts beautifully and adds creaminess. - Goat cheese: For a different taste, try tangy goat cheese. Each cheese brings its own character to the sandwich, so feel free to experiment! For more details, check out the Full Recipe. This blog post explored how to make a delicious grilled mozzarella sandwich. We covered essential ingredients, step-by-step instructions, and helpful tips. Quality ingredients like fresh mozzarella and good sourdough bread make a big difference. Remember to adjust the heat for that perfect crust and gooey cheese. Whether you customize with spices or try a vegan option, enjoy this simple recipe. Now, go out and create your own version for a tasty meal.

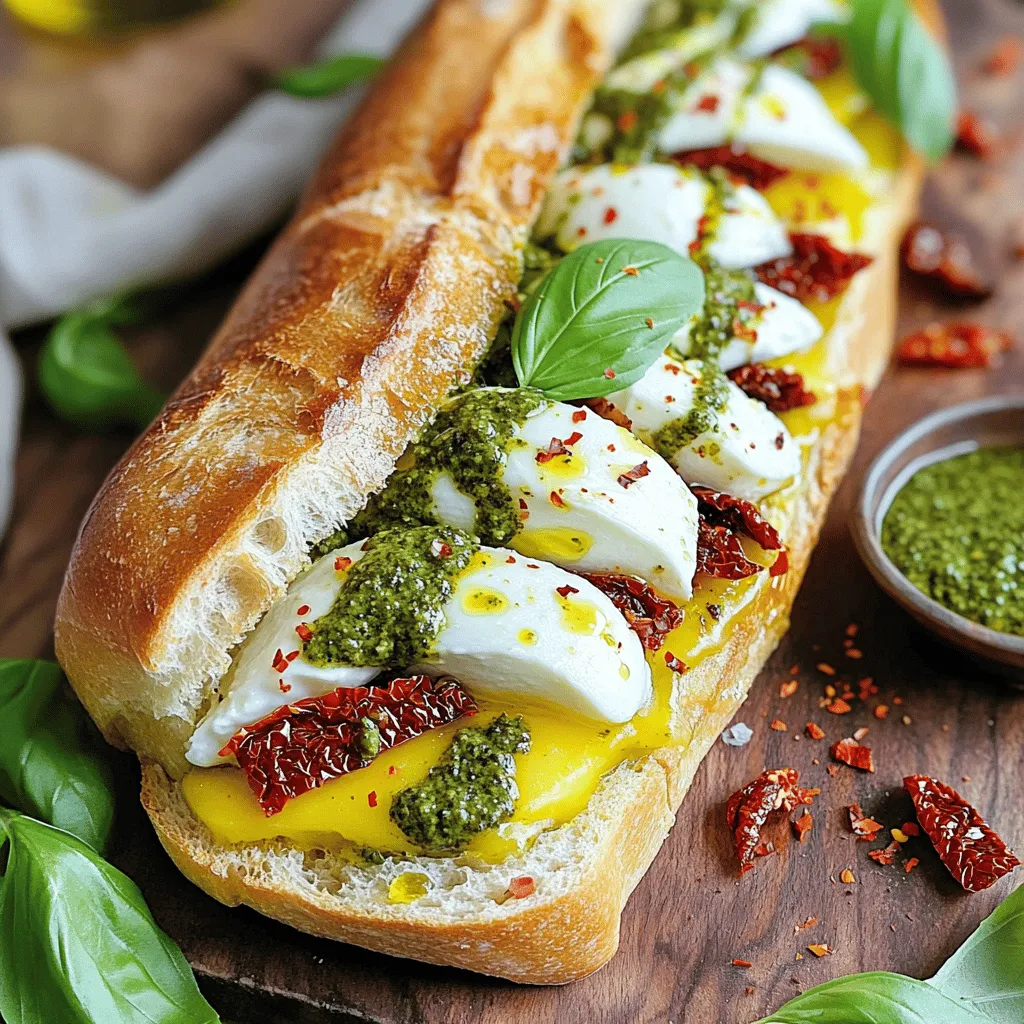
Are you ready to transform your lunch into a flavor-packed adventure? In this post, I will show you how to make a Grilled Mozzarella Sandwich that delights every taste bud. …

Read more

Categories Dinner

Creamy Marry Me Shrimp Pasta Irresistible Delight

June 13, 2025 by Chef Nate
To make Creamy Marry Me Shrimp Pasta, gather these items: - 8 oz fettuccine pasta - 1 lb large shrimp, peeled and deveined - 2 tablespoons olive oil - 4 cloves garlic, minced - 1 cup heavy cream - 1 cup sun-dried tomatoes, chopped - 1 cup spinach, fresh - 1 teaspoon red pepper flakes (adjust to taste) - ½ cup grated Parmesan cheese - Salt and pepper to taste - Fresh basil leaves for garnish This simple list provides all you need for a rich and creamy dish. You can swap some ingredients if needed. Here are a few ideas: - Pasta: Use any pasta shape you prefer, like penne or spaghetti. - Shrimp: Try chicken or tofu for a different protein. - Heavy Cream: Substitute with half-and-half or coconut milk for a lighter option. - Spinach: Use kale or arugula for a unique twist. - Parmesan Cheese: Nutritional yeast works as a great vegan alternative. These swaps still keep the dish delicious and satisfying. Using fresh ingredients often enhances flavor. Fresh shrimp tastes better than frozen. Fresh spinach brings a nice crunch. - Dried vs. Fresh Pasta: Fresh pasta cooks quickly but may be harder to find. Dried pasta is easy to store and works great. - Fresh Herbs: Always use fresh basil for the best taste. Dried basil lacks the same flavor punch. Incorporating fresh ingredients can elevate your meal and make it feel special. Check out the Full Recipe for more tips on making this dish shine! Start by boiling water in a large pot. Add a pinch of salt to it. Once it’s boiling, add 8 oz of fettuccine pasta. Cook it according to the package instructions until it is al dente. This usually takes about 8 to 10 minutes. Once done, drain the pasta and set it aside. Next, grab a large skillet and heat 2 tablespoons of olive oil over medium heat. When the oil is hot, add 4 cloves of minced garlic. Sauté it for about 1 minute. Then, add 1 lb of large shrimp, peeled and deveined. Cook the shrimp for 2 to 3 minutes on each side. They should turn pink and opaque. Once cooked, remove the shrimp from the skillet and set them aside. In the same skillet, pour in 1 cup of heavy cream. Bring it to a gentle simmer. After that, stir in 1 cup of chopped sun-dried tomatoes and 1 teaspoon of red pepper flakes. Let the sauce simmer for about 5 minutes. This thickens the sauce. Next, add 1 cup of fresh spinach. Stir until the spinach wilts. Then, mix in ½ cup of grated Parmesan cheese. Stir until the cheese melts and the sauce becomes creamy. Add a splash of reserved pasta water if the sauce is too thick. Now, return the cooked shrimp to the skillet. Toss them in the creamy sauce to coat. Add the cooked fettuccine and mix everything together until well combined. Season the dish with salt and pepper to taste. Serve it right away, garnished with fresh basil leaves on top. This adds a nice touch and enhances the flavor. Enjoy your Creamy Marry Me Shrimp Pasta! For the complete recipe, check the Full Recipe section. To get tender shrimp, follow these simple steps: - Choose large shrimp: They cook evenly and stay juicy. - Don’t overcook: Cook shrimp for 2-3 minutes on each side. They should turn pink and opaque. - Use medium heat: This helps cook shrimp evenly. High heat can make them tough. - Pat dry: Before cooking, pat shrimp dry with paper towels. This helps them sear nicely. You can easily make this creamy sauce your own. Here are some ideas: - Add herbs: Try fresh parsley or dill for extra flavor. - Add vegetables: Mix in mushrooms, bell peppers, or zucchini for more texture. - Adjust spice: Add more red pepper flakes for heat or omit them for mild taste. - Swap cheese: Use feta or goat cheese for a different twist. Make your meal stand out with these serving tips: - Use deep bowls: This adds elegance to your dish. - Garnish well: Top with extra grated Parmesan and fresh basil for color. - Pair with wine: A glass of white wine enhances the meal’s flavor. - Set the mood: Light candles and play gentle music for a romantic touch. For the complete recipe, check out the Full Recipe. Enjoy your cooking! {{image_2}} You can boost the health of your creamy marry me shrimp pasta by adding veggies. I love using fresh spinach, but you can mix in others too. Try bell peppers, zucchini, or broccoli. These add color and crunch. They also bring extra vitamins and minerals to your dish. Simply sauté the vegetables with garlic before adding the cream. This method keeps them crisp and tasty. While fettuccine is great, you can switch it up! Use penne, linguine, or even whole grain pasta. Each type changes the dish's texture. If you're looking for a gluten-free option, try chickpea or brown rice pasta. These alternatives work well with the creamy sauce and shrimp. Just cook them according to the package. They still taste fantastic! Adding wine to the sauce makes it even richer. I suggest using a dry white wine, like Sauvignon Blanc. This adds a nice depth of flavor. When you pour it into the pan, let it simmer for a few minutes before adding the cream. This helps the alcohol cook off and enhances the dish. The wine pairs well with the shrimp and cream, creating a lovely balance. You will love the taste! For more details on making this dish, check the Full Recipe. After you enjoy your Creamy Marry Me Shrimp Pasta, store leftovers in an airtight container. Place it in the fridge within two hours of cooking. It stays fresh for up to three days. Make sure to let it cool down before sealing it. When ready to eat, check for any off smells or changes in texture. You can freeze this pasta dish if you want to save it for later. Use a freezer-safe container and label it with the date. It can last up to three months in the freezer. Keep in mind, the texture may change when thawed. To freeze, separate the shrimp from the pasta and sauce. This helps keep everything tasting fresh. To reheat, thaw it in the fridge overnight. For best results, use a skillet over medium heat. Add a splash of cream or pasta water to help restore its creamy texture. Stir frequently until heated through. You can also use the microwave. Heat in short bursts, stirring in between. Make sure it’s hot all the way through before serving. Enjoy your meal from the Full Recipe! This shrimp pasta stands out for its rich and creamy sauce. The blend of sun-dried tomatoes and fresh spinach adds flavor and color. The shrimp cooks quickly, keeping it juicy and tender. Each bite bursts with taste, making it a true crowd-pleaser. It is perfect for a romantic dinner or a family meal. The dish looks gorgeous and tastes divine, which is why many adore it. Yes, you can prepare this dish ahead of time. Cook the pasta and shrimp, then store them separately in the fridge. Make the sauce and let it cool before storing it too. When ready to eat, reheat each part in a pan. Mix everything together just before serving. This way, you keep the flavors fresh and vibrant. You can serve this pasta with a simple salad. A fresh green salad pairs well and adds crunch. Garlic bread also complements the meal nicely, perfect for soaking up sauce. If you want something warm, consider a side of roasted veggies. These options balance the richness of the shrimp pasta beautifully. For gluten-free pasta, you can use rice or corn-based fettuccine. Many brands offer gluten-free pasta that tastes great. Just follow the cooking instructions on the package. You can enjoy the same creamy sauce and shrimp, keeping the dish delicious for everyone. Gluten-free alternatives make this recipe accessible to more people. This blog post covered everything about the Creamy Marry Me Shrimp Pasta. We discussed key ingredients and substitutions. You learned how to prepare the pasta and cook shrimp perfectly. The tips helped you customize your sauce. We explored delicious variations and shared storage methods. In closing, this dish is easy, tasty, and perfect for occasions. Enjoy your cooking and impress your loved ones!

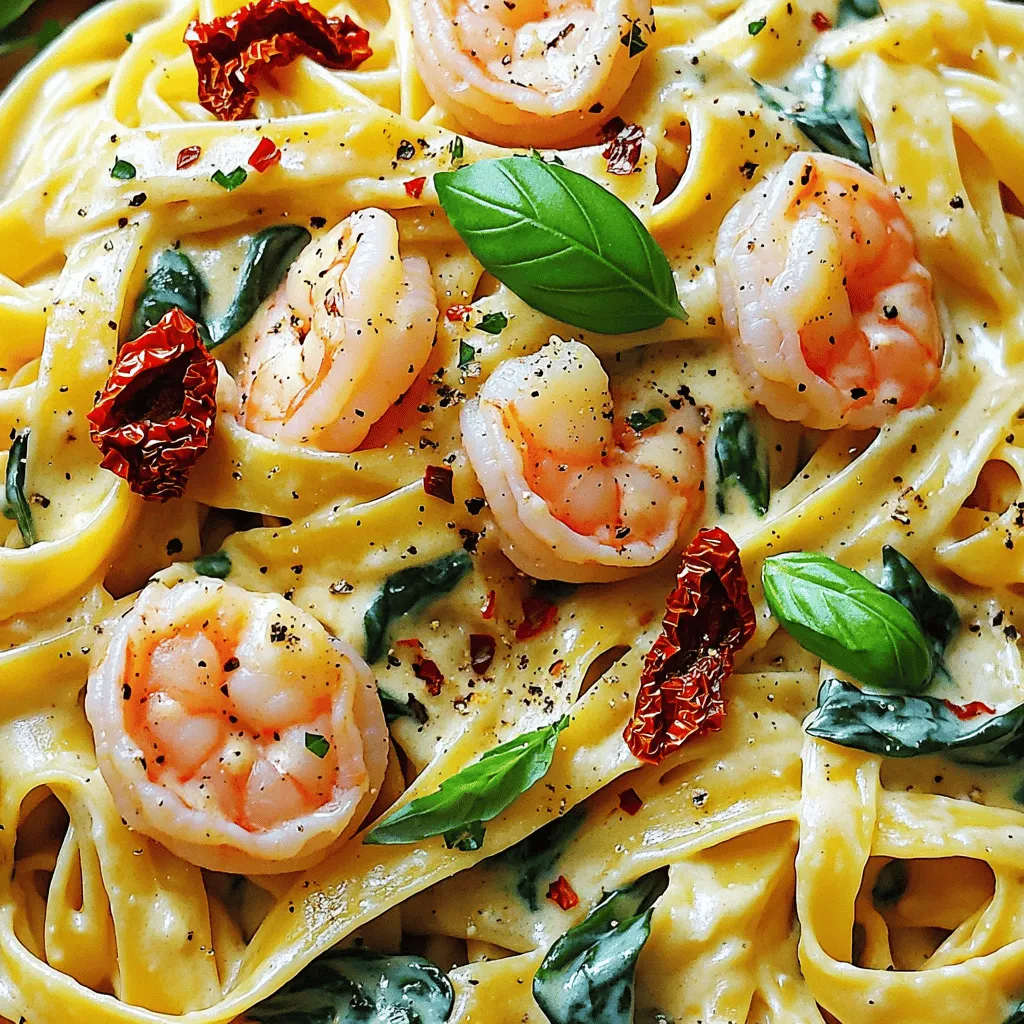
Looking to impress with a delicious meal? My Creamy Marry Me Shrimp Pasta is just the ticket! This dish brings rich flavors and creamy goodness together in a perfect harmony. …

Read more

Categories Dinner

Italian Basil Chicken Cutlets Flavorful and Simple Meal

June 13, 2025 by Chef Nate
- 4 boneless, skinless chicken breasts - 1 cup fresh basil leaves, chopped - 1/2 cup grated Parmesan cheese - 1 cup breadcrumbs (panko for extra crunch) - 2 large eggs - 1/4 cup all-purpose flour - 2 cloves garlic, minced - 1 teaspoon dried oregano - Salt and pepper to taste - Olive oil, for frying - Lemon wedges, for serving These ingredients create a simple and tasty dish. Fresh basil gives a bright flavor. The chicken stays juicy, while the Parmesan adds richness. Breadcrumbs give a nice crunch. For more detailed steps, be sure to check the Full Recipe. When you gather these items, the fun begins. Use fresh basil for the best taste. Grated cheese melts well and adds a savory touch. Garlic brings a warm aroma. Each ingredient plays a role in the final dish. Cooking with these fresh items makes your meal feel special. It’s easy to make, and you will love the flavors! First, prep the chicken. Place each chicken breast between two sheets of plastic wrap. This helps to keep the mess down. Using a meat mallet or a rolling pin, gently pound the chicken. Aim for an even thickness of about 1/2 inch. This step is key for even cooking. If the chicken is uneven, some parts may cook faster than others. Next, set up your breading stations. You will need three bowls. In the first bowl, mix flour with a pinch of salt and pepper. This adds flavor to the chicken. In the second bowl, crack the eggs and whisk them until smooth. This will help the breadcrumbs stick. In the third bowl, mix breadcrumbs with grated Parmesan cheese, chopped basil, minced garlic, and oregano. This blend gives the cutlets a tasty crust. Now it's time to coat the chicken. Take one cutlet and dip it into the flour, shaking off any extra. Then, dip it into the egg mixture. Make sure it is well-coated. Finally, press it into the breadcrumb mix, so it sticks nicely. Repeat this for all the cutlets. Heat about 1/4 inch deep of olive oil in a large skillet over medium heat. To check if the oil is hot, drop in a piece of breadcrumb. It should sizzle. Carefully add the breaded chicken cutlets to the pan. Cook them for about 4-5 minutes on each side. Look for a golden brown color and ensure they are cooked through. If the pan feels crowded, work in batches to avoid soggy cutlets. These steps will help you make Italian Basil Chicken Cutlets that are crispy and full of flavor. For the full recipe, check the details above. Using fresh herbs like basil makes a big difference. Fresh basil gives a bright taste. You can also add more herbs if you want. Adjust seasoning to your taste. Taste the mixture before breading the chicken. A little extra salt or pepper can really help. Panko breadcrumbs are key for a crunchy finish. They give a light and crispy texture. Be sure to coat the chicken well. The right oil temperature matters too. Heat the oil until it sizzles when you add a breadcrumb. This means it’s hot enough for frying. Garnish your cutlets with more chopped basil for color. A squeeze of lemon adds a nice zing. For side dishes, consider a fresh salad or roasted veggies. These pair well and add balance to the meal. Check the Full Recipe for more details on serving. {{image_2}} You can easily adjust this recipe for different diets. If you want a vegan option, use tofu or tempeh instead of chicken. Marinate it in a mix of soy sauce, lemon juice, and basil for great flavor. For a gluten-free meal, swap regular breadcrumbs for gluten-free panko. You can also use almond flour as a coating. Both options keep the dish tasty and enjoyable. You have choices when it comes to cooking these cutlets. Baking is a great way to make them healthier. Simply preheat your oven to 400°F. Place the breaded cutlets on a baking sheet lined with parchment paper. Bake for 20-25 minutes, flipping halfway through. If you prefer air frying, set your air fryer to 375°F. Cook the cutlets for about 12-15 minutes, flipping them halfway. This method gives you a nice crisp without much oil. Adding different herbs can change the whole dish. Try using parsley, thyme, or even rosemary for a fresh twist. You can also spice things up. Adding red pepper flakes gives your cutlets a kick. For a zesty touch, mix in some lemon zest with the breadcrumbs. These small changes can make a big difference in flavor. To keep your Italian Basil Chicken Cutlets fresh, place them in an airtight container. This helps prevent moisture loss. Store them in the fridge right after they cool down. You can keep them in the fridge for up to three days. The chicken may lose some crispiness over time, but it will still taste great. When reheating, you want to keep that crunch. I recommend using an oven or an air fryer. Preheat your oven to 375°F (190°C). Place the cutlets on a baking sheet and heat for about 10 minutes. Check them halfway through to ensure even heating. If using a microwave, cover the cutlets with a damp paper towel. This helps avoid dryness, but they may not stay crispy. Always check that the chicken is hot in the center before eating. If you want to save some for later, freezing is a good option. Let the cutlets cool completely before freezing. Wrap each cutlet tightly in plastic wrap, then place them in a freezer bag. This prevents freezer burn. You can freeze them for up to three months. When you're ready to eat, thaw them in the fridge overnight. Reheat them using the oven or air fryer for best results. Enjoy your flavorful cutlets anytime! For the full recipe, check out the [Full Recipe]. To boost flavor, use fresh herbs and spices. You can add thyme or rosemary for depth. A pinch of crushed red pepper gives a nice kick. Mix in lemon zest for brightness. You can also try a splash of balsamic vinegar for sweetness. These simple tweaks make a big difference. Yes, you can use chicken thighs. They are juicier and more flavorful. However, they take a bit longer to cook. Chicken breasts are leaner and cook faster. If you want a richer taste, go for thighs. For a lighter meal, stick with breasts. Great sides include roasted veggies or a fresh salad. Garlic mashed potatoes add creaminess. Pasta with olive oil and herbs is another tasty choice. You might also serve it with a slice of crusty bread to soak up juices. These sides balance the dish well. To make this gluten-free, swap out the all-purpose flour for a gluten-free blend. Use gluten-free breadcrumbs instead of regular ones. Many brands offer tasty options. Always check the label to ensure it's certified gluten-free. This way, you can enjoy the dish without worry. In this blog post, we covered how to make delicious Italian Basil Chicken Cutlets. We discussed the key ingredients, preparation steps, and effective frying methods. I shared tips for enhancing flavors and achieving a crispy texture. We also explored storage options and answered common questions. In conclusion, you can create a tasty meal with easy steps and options. Enjoy experimenting with this recipe to make it your own!

Looking for a quick and tasty meal? Try my Italian Basil Chicken Cutlets! This dish is packed with flavor, thanks to fresh basil and Parmesan cheese. Plus, it’s simple to …

Read more

Categories Dinner
Older posts
Newer posts
← Previous Page1 … Page56 Page57 Page58 … Page108 Next →

GRILLED FLAVORS

where delicious ideas come to life, from stovetop to backyard. Warm, simple, and always satisfying. 🍽️✨

PAGES

Home About Contact Privacy Policy Terms & Conditions Cookie Policy GDPR Policy Copyright Policy Disclaimer

CATEGORIES

Appetizers Desserts Salads Breakfast Dinner

Contact

  • Pinterest
  • Mail
Copyright © 2026 Grilled Flavors. All rights reserved.