Skip to content
grilledflavors.com
  • Home
  • Appetizers
  • Desserts
  • Salads
  • Breakfast
  • Dinner
  • Privacy Policy
  • Contact
  • About

Chef Nate

Pumpkin Spice Energy Bites Tasty and Healthy Snack

November 24, 2025June 13, 2025 by Chef Nate
To make pumpkin spice energy bites, you need a few key items. Here’s what to gather: - 1 cup rolled oats - 1/2 cup pumpkin puree - 1/4 cup almond butter (or another nut butter) - 1/4 cup honey or maple syrup - 1 teaspoon pumpkin spice blend - 1/2 teaspoon vanilla extract - Pinch of salt These ingredients create a soft, chewy texture. The oats and pumpkin give you fiber and nutrients. Almond butter adds healthy fats and protein. Honey or maple syrup sweetens the bites naturally. You can make these energy bites more fun with extra flavors. Here are some great options: - 1/4 cup mini chocolate chips - 1/4 cup chopped nuts or seeds (like pecans or sunflower seeds) Adding chocolate chips makes them sweeter. Chopped nuts or seeds add a nice crunch. Feel free to mix and match based on what you like! These energy bites are not just tasty; they are good for you too! Each bite packs: - Good carbs from oats and pumpkin - Healthy fats from nut butter - Natural sweetness from honey or maple syrup They are a great snack before or after a workout. Plus, they are easy to store and grab on the go. Enjoy a healthy treat that fuels your day! {{ingredient_image_1}} Start by gathering your ingredients. You will need rolled oats, pumpkin puree, almond butter, honey, and vanilla extract. In a large mixing bowl, combine 1 cup of rolled oats, 1/2 cup of pumpkin puree, 1/4 cup of almond butter, and 1/4 cup of honey or maple syrup. Stir until all ingredients mix well. Make sure everything is blended evenly. Next, add 1 teaspoon of pumpkin spice blend and a pinch of salt. If you want some sweetness, toss in 1/4 cup of mini chocolate chips. Stir again until well combined. Now, it's time to shape the mixture into bites. Add 1/4 cup of chopped nuts or seeds to the bowl. Fold them gently into the mix. To form the bites, take a small amount of the mixture in your hands. Roll it into a ball that's about 1 inch in diameter. If it sticks to your hands, wet them slightly with water. This will help you shape the bites without a mess. After forming the bites, place them on a parchment-lined baking sheet. Make sure they are spaced out well. Refrigerate the bites for at least 30 minutes. This helps them firm up and hold their shape. Once they are set, you can store them in an airtight container. Keep them in the fridge for up to one week, or freeze them for longer storage. Enjoy your tasty and healthy snack anytime! When you mix the ingredients for your pumpkin spice energy bites, do it in a large bowl. Start with the rolled oats, pumpkin puree, and almond butter. Make sure to add honey or maple syrup next. Mix these well. I like to use a sturdy spatula or my hands for this. You want a smooth blend where all flavors come together. If your mixture feels too sticky, wet your hands slightly before rolling. This small trick helps. You can also chill the mixture for 10 minutes before rolling. This makes it easier to handle. If you want, add a bit more oats to the mix. This can help reduce stickiness too. You can make these bites even better with some changes. Try adding a pinch of nutmeg or cinnamon for extra warmth. If you prefer, swap out almond butter for peanut butter or sunbutter. For sweetness, use agave syrup instead of honey. Mini chocolate chips are a fun option, but you can skip them if you want a healthier treat. Pro Tips Use Fresh Pumpkin Puree: For the best flavor, consider using fresh pumpkin puree instead of canned. You can easily roast and puree your own pumpkin for a more vibrant taste. Customize Your Sweetener: Feel free to adjust the amount of honey or maple syrup according to your taste preference. You can also substitute with agave syrup for a vegan option. Experiment with Add-ins: Get creative with your energy bites by adding different mix-ins such as dried fruits, seeds, or spices to suit your flavor preferences. Perfect Storage: To keep your energy bites fresh, store them in an airtight container in the fridge. For longer storage, freeze them and enjoy them anytime! {{image_2}} You can switch up the nut butter to fit your taste. Almond butter is my go-to, but peanut butter works well too. Cashew butter adds a creamy touch. Sunflower seed butter is great for nut-free options. Each type brings a unique flavor and texture. Feel free to experiment with the nut butter you love most. Honey and maple syrup add sweetness, but other options exist. Agave syrup offers a lighter flavor. You could also use brown rice syrup for a thicker texture. If you want to cut sugar, try mashed bananas or dates. These natural sweeteners make your energy bites tasty and healthy. You can make these bites festive by adding seasonal ingredients. Dried cranberries add tang and color. Chopped nuts like pecans boost crunch and flavor. You could even mix in pumpkin seeds for extra nutrition. These small changes keep your snacks fresh and fun all year. To keep your pumpkin spice energy bites fresh, store them in an airtight container. This helps prevent moisture from getting in. Place the container in the fridge right after making them. They stay fresh for up to one week. If you want to enjoy them longer, freezing is a great option. To freeze your energy bites, first let them chill in the fridge for 30 minutes. This helps them hold their shape. After they are firm, place them in a single layer on a baking sheet. Freeze them for about two hours. Once frozen, transfer them to a freezer bag or container. They can last for up to three months in the freezer. The shelf life of pumpkin spice energy bites is about one week in the fridge. Always look for signs of spoilage, like an off smell or change in texture. If they seem dry or hard, it’s best to toss them. If frozen, thaw them in the fridge overnight before eating. Enjoy your tasty and healthy snack with peace of mind! Yes, you can! Feel free to swap pumpkin spice for other blends. Cinnamon, nutmeg, and ginger all work well. You can even create your own mix. Just keep in mind that the flavor will change. Experiment to find what you like best! These energy bites stay fresh for one week in the fridge. Store them in an airtight container to keep them moist. If you want to keep them longer, freeze them. They can last up to three months in the freezer. Absolutely! These bites are packed with nutrients. They have oats, which provide fiber. The pumpkin puree adds vitamins and minerals. Almond butter gives you healthy fats and protein. They are a great snack choice for energy! Yes! To make these bites vegan, replace honey with maple syrup. This keeps the recipe plant-based. All other ingredients are already vegan. Enjoy these tasty bites while staying true to your dietary needs! You now know how to make tasty pumpkin spice energy bites. We covered the main ingredients, preparation steps, and storage tips. You can mix in extra flavors or swap ingredients to fit your taste. These bites are easy to make and fun to enjoy anytime. They stay fresh in the fridge or freezer, making them a perfect snack. Try different nut butters or sweeteners for variety. Happy snacking!

Fall is here, and that means it’s time to enjoy pumpkin spice! In this post, I’ll share a simple recipe for Pumpkin Spice Energy Bites. These bites are a tasty …

Read more

Categories Desserts

No Bake Peanut Butter Oat Cups Easy and Tasty Snack

June 13, 2025 by Chef Nate
The main ingredients in this recipe make it both tasty and healthy. Here’s what you need: - 1 cup rolled oats - 1/2 cup natural peanut butter - 1/4 cup honey or maple syrup - 1/4 cup mini chocolate chips - 1/4 cup chopped nuts (like almonds or walnuts) - 1 teaspoon vanilla extract - A pinch of salt Rolled oats form the base. They add fiber and good texture. The natural peanut butter gives protein and a rich taste. Honey or maple syrup adds sweetness. Mini chocolate chips and chopped nuts provide fun flavor and crunch. Vanilla extract rounds it all out with warmth. A pinch of salt balances the sweetness. You can tweak the recipe to fit your taste. Here are some fun ideas: - Dried fruit (like raisins or cranberries) - Seeds (such as chia or flaxseeds) - Different nut butters (like almond or cashew) - Coconut flakes for a tropical twist - A sprinkle of cinnamon for warmth Feel free to mix and match! This way, you can make your oat cups special. Let’s look at what each main ingredient offers. - Rolled oats: Great for digestion. They keep you full longer. - Natural peanut butter: Packed with protein. It helps build muscles. - Honey or maple syrup: Natural sugars that give you quick energy. - Mini chocolate chips: A little treat that can boost your mood. - Chopped nuts: Provide healthy fats and add crunch. - Vanilla extract: Adds flavor without extra calories. - Salt: Enhances all the flavors in the mix. These ingredients not only taste good but also give you energy and nutrients. Try this recipe for a quick snack or a sweet treat. For the full recipe, check out the details above. Making no bake peanut butter oat cups is quick and fun. You can whip them up in about 10 minutes. First, gather your ingredients. You’ll need rolled oats, peanut butter, honey or maple syrup, chocolate chips, nuts, vanilla, and salt. Make sure you have a mixing bowl and a muffin tin ready. 1. Start by adding 1 cup of rolled oats and a pinch of salt to a large mixing bowl. 2. In another bowl, warm 1/2 cup of peanut butter and 1/4 cup of honey in the microwave. Heat for about 30 seconds. Stir it until smooth. 3. Next, add 1 teaspoon of vanilla extract to the peanut butter mixture. Mix well. 4. Pour the warm peanut butter mixture over the oats. Stir until the oats are fully coated. 5. Now, fold in 1/4 cup of mini chocolate chips and 1/4 cup of chopped nuts. This adds great texture and taste. To shape the oat cups, line your muffin tin with paper or silicone liners. Use a spoon to scoop the mixture into each cup. Press down firmly to make sure they hold together. This step is key for a good shape. After filling the tin, chill it in the fridge for at least 30 minutes. This helps the oat cups firm up nicely. Once they are set, take them out and enjoy! You can also store them in an airtight container in the fridge for up to a week. For the full recipe, check the section above. To make the best no bake peanut butter oat cups, start with quality ingredients. Use natural peanut butter, as it has no added sugar or oils. This makes your cups healthier and tastier. Choose rolled oats, as they provide great texture. Warm the peanut butter and honey together, but don’t overheat them. About 30 seconds in the microwave is perfect. This helps the two mix well. When mixing, ensure every oat is coated. This step is key for flavor. Press the mixture firmly into the muffin tin. This helps the cups hold their shape. After chilling, they should be firm but still soft enough to enjoy. One common mistake is not measuring the ingredients correctly. Too much peanut butter can make the cups too sticky. Too little honey can make them dry. Another mistake is not chilling the oat cups long enough. If you don’t chill them for at least 30 minutes, they may fall apart. Avoid using non-stick spray on the muffin tin, as it can make removal tricky. Use paper or silicone liners instead. Serve these oat cups as a snack, breakfast, or dessert. They pair well with fresh fruit. Try serving them with sliced bananas or berries for added flavor. You can also enjoy them with yogurt for a protein boost. For a fun twist, drizzle melted chocolate on top before serving. Or, sprinkle some sea salt for a sweet and salty mix. Check out the full recipe for more ideas on how to enjoy your no bake peanut butter oat cups! {{image_2}} You can switch up the sweetener in this recipe. Honey is great, but maple syrup works too. Each sweetener gives a unique taste. Agave nectar is another option. It adds a mild sweetness. You can even use coconut sugar for a hint of caramel flavor. These changes keep your oat cups fresh and exciting! If you need a nut-free snack, try sun butter or soy nut butter. These spread alternatives taste amazing and are safe for nut allergies. You can still enjoy the creamy texture without any nuts. Just make sure to check for allergens in other ingredients too. You can still make delicious oat cups that everyone can enjoy! Want to make your oat cups even better? Add spices like cinnamon or nutmeg for warmth. These spices can enhance the flavor without adding extra calories. You might also try adding a scoop of protein powder for a boost. Dried fruits like cranberries or raisins add a sweet chewiness too. You can mix and match to find your favorite flavors! To keep your no bake peanut butter oat cups fresh, store them in an airtight container. This helps maintain their taste and texture. Place them in the fridge for the best results. If you use paper or silicone liners, make sure to keep them in the liners for easy access. These oat cups last about a week in the fridge. After a few days, check for any changes in smell or texture. If they seem off, it's best to toss them out. To keep them tasting great, avoid leaving them at room temperature for too long. If you want to save these tasty treats for later, freezing is a great option. Wrap each oat cup in plastic wrap. Then, place them in a freezer bag or container. They can last for up to three months in the freezer. To enjoy, simply take one out and let it thaw in the fridge overnight. For a quick snack, you can eat them straight from the freezer! Yes, No Bake Peanut Butter Oat Cups are quite healthy. They have oats, which offer fiber and energy. The peanut butter adds protein and healthy fats. Using honey or maple syrup gives natural sweetness. You can also add nuts and chocolate chips for extra nutrition. Overall, they make a great snack or quick breakfast. Absolutely! You can use crunchy peanut butter if you like some texture. It will add a nice crunch to the oat cups. The flavor remains the same, so feel free to switch it up. Just make sure the peanut butter is natural and smooth enough to mix well. To make these oat cups vegan, swap honey for maple syrup. Ensure you use vegan chocolate chips too. The rest of the ingredients remain the same. This way, you keep the taste and texture while making them suitable for a vegan diet. These oat cups are best not cut. Instead, use a muffin tin for easy serving. After they firm up in the fridge, just pop them out. If you do want to cut them, use a sharp knife and cut them into squares. This works better if you let them set longer for a firmer texture. For more details, check out the Full Recipe. In this post, we explored the key ingredients for no-bake peanut butter oat cups. We covered how to mix them well and shape them perfectly. I shared tips to avoid common mistakes and suggestions for serving. You can try different sweeteners and nut-free options to suit your taste. Proper storage is important for keeping them fresh. These oat cups are fun to make and easy to customize. Enjoy creating your own tasty treats!

Looking for a quick, tasty snack? Try my No Bake Peanut Butter Oat Cups! These delicious bites are easy to make and perfect for satisfying your hunger. With just a …

Read more

Categories Desserts

Grilled Chicken & Broccoli Bowls Flavorful Healthy Meal

June 13, 2025 by Chef Nate
- 2 boneless, skinless chicken breasts - 2 cups broccoli florets - 1 cup quinoa, rinsed - 2 cups chicken broth or vegetable broth - 2 tablespoons olive oil - 1 teaspoon garlic powder - 1 teaspoon onion powder - 1 teaspoon smoked paprika - Salt and pepper to taste - Zest of 1 lemon - Juice of 1 lemon - Sliced scallions - Sesame seeds - Red pepper flakes When I make my Grilled Chicken & Broccoli Bowls, I focus on freshness and flavor. Each ingredient plays a role in making this dish satisfying and healthy. First, I use two boneless, skinless chicken breasts. They grill beautifully and stay juicy. Next, I add two cups of broccoli florets. Broccoli adds color and crunch. I always rinse one cup of quinoa before cooking. It gives the base a nutty taste. For the broth, I choose either chicken or vegetable. It brings extra flavor to the quinoa. Next, I mix the seasonings. I use two tablespoons of olive oil to help the spices stick. Garlic powder and onion powder make the chicken taste great. Smoked paprika adds a subtle smokiness. I season with salt and pepper to my liking. The zest and juice of one lemon brighten the dish. I also think about optional toppings. Sliced scallions add a fresh kick. Sesame seeds bring a nice crunch. A sprinkle of red pepper flakes can spice things up if you like heat. This combination of ingredients creates a tasty, healthy meal. You can find the full recipe with all the steps to make this dish. Enjoy every bite! To start, I make a simple marinade. I mix 1 tablespoon of olive oil with garlic powder, onion powder, smoked paprika, salt, and pepper. This blend brings great flavor to the chicken. I then take the boneless, skinless chicken breasts and coat them well in this marinade. Once coated, I place the chicken in the fridge for at least 30 minutes. If I have time, I let it marinate for up to 2 hours. This step really enhances the taste. Next, I focus on the quinoa. I grab a medium saucepan and bring 2 cups of chicken or vegetable broth to a boil. Once boiling, I add 1 cup of rinsed quinoa. I reduce the heat to low, cover the pot, and let it simmer. After about 15 minutes, all the liquid should be absorbed. I remove the pot from heat and let it sit for another 5 minutes. This resting time helps the quinoa fluff up nicely. Now it’s time to grill the chicken. I preheat my grill to medium-high heat. Once it's hot, I place the marinated chicken on the grill. I cook each side for about 6-7 minutes. I use a meat thermometer to check that the internal temperature reaches 165°F (75°C). After grilling, I let the chicken rest for a few minutes before slicing. While the chicken is grilling, I prepare the broccoli. I bring a pot of water to a boil. Then, I add the broccoli florets and blanch them for 2-3 minutes. This keeps them bright green and tender-crisp. After blanching, I drain the broccoli and rinse it under cold water. This stops the cooking process and keeps the color vibrant. Now for the fun part: assembling the bowls! In a serving bowl, I start with a layer of quinoa as the base. On top of the quinoa, I add the sliced grilled chicken and the blanched broccoli. To finish, I drizzle some leftover olive oil, lemon zest, and lemon juice over everything. This adds a fresh, zesty flavor. For a pop of color and extra flavor, I like to garnish my bowls. I sprinkle some sliced scallions, sesame seeds, and a pinch of red pepper flakes. These toppings not only enhance taste but also make the dish look beautiful. Follow these steps, and you'll have a delicious meal ready in no time! You can find the complete instructions in the Full Recipe. To get the best flavor from your chicken, marinate it for at least 30 minutes. If you have more time, aim for 2 hours in the fridge. This lets the spices soak in well. Here are some tasty marinades you can try: - Lemon Herb Marinade: Use lemon juice, olive oil, and mixed herbs. - Teriyaki Marinade: Mix soy sauce, ginger, and brown sugar for a sweet twist. To avoid mushy quinoa, rinse it well before cooking. This removes excess starch. Cook it in chicken or vegetable broth for more flavor. Here’s how to enhance quinoa’s taste: - Add a bay leaf or garlic clove while it cooks. - Stir in a splash of lemon juice after it's done. To keep chicken from sticking to the grill, oil the grates before heating. Preheat the grill to medium-high. Follow these tips for perfect grill marks: - Place chicken at a 45-degree angle on the grill. - Don’t move it around; let it sear for 6-7 minutes per side. By using these tips, your Grilled Chicken & Broccoli Bowls will shine. Enjoy the flavors and the healthy boost! For the complete recipe, check the Full Recipe section. {{image_2}} You can boost your Grilled Chicken & Broccoli Bowls by adding more veggies. Seasonal vegetables work best. Think about using zucchini, carrots, or asparagus. These veggies add color and nutrients. To incorporate bell peppers, slice them thin. You can add them to the grill with the chicken. Snap peas are also great. Just toss them in during the last minute of blanching. This keeps them crisp and bright. If you want to change the protein, chicken is not your only option. You can use tofu for a vegetarian dish. Firm tofu holds up well during grilling. Just marinate it like chicken for great flavor. Shrimp is another tasty choice. It cooks quickly and absorbs flavors well. For those who want more plant-based options, chickpeas are a great alternative. They are packed with protein and add a nice texture. You can switch up the flavors to make this dish exciting. For a taste of Asia, try teriyaki sauce. Just brush it on the chicken before grilling. It adds a sweet and savory touch. If you want something spicier, use curry powder. Mix it into the marinade for a bold kick. You can also add coconut milk for a creamy texture. Each of these options gives you a new dish each time. For the complete recipe, check the Full Recipe. To keep your Grilled Chicken & Broccoli Bowls fresh, use airtight containers. Glass or BPA-free plastic containers work best. Make sure the food is cool before sealing. This helps prevent moisture buildup. For longer storage, you can freeze the bowls. Use freezer-safe containers and leave space for expansion. In the fridge, leftovers can last for 3 to 4 days. If you freeze them, they remain good for about 2 to 3 months. Always check for signs of spoilage. Look for off smells, changes in color, or mold. If you see any of these, it’s best to throw the dish away. When reheating, use the microwave or oven. For the microwave, heat in short bursts to avoid uneven cooking. Stir in between to help with even heat. If using the oven, preheat to 350°F (175°C) and cover with foil to keep moisture. Avoid soggy broccoli by reheating it separately for a few minutes. This way, your meal stays tasty and fresh! For the complete Grilled Chicken & Broccoli Bowls recipe, check out the Full Recipe. Yes, you can use frozen broccoli. Frozen broccoli is picked at its peak. It is then blanched and frozen, keeping its nutrients. However, it can be softer than fresh broccoli. If you want a crunch, cook it less. Just remember to thaw it first. Drain excess water for the best texture. You can swap quinoa with brown rice, farro, or couscous. These grains give a nice base. Brown rice is chewy and hearty. Farro has a nutty flavor. Couscous cooks quickly and soaks up flavors well. Each choice will change the taste a bit, so pick what you like! To make it dairy-free, skip cheese and cream. Instead, use creamy avocado or tahini. These options add richness. You can also blend soaked cashews with lemon juice. This creates a creamy sauce. It keeps the dish rich without using dairy. Yes, this recipe is great for meal prep! Cook a larger batch for the week. Store servings in airtight containers. Keep chicken, quinoa, and broccoli separate until you eat. This way, everything stays fresh. Reheat in the microwave or on the stove. Each serving has about 400 calories. It has 30 grams of protein and 15 grams of fat. You’ll get fiber from quinoa and broccoli. This dish is rich in vitamins A and C. It helps keep your immune system strong. For the complete recipe details and instructions, check out the [Full Recipe]. Grilled Chicken and Broccoli Bowls offer a healthy, tasty meal. We explored ingredients like chicken, quinoa, and fresh broccoli. I walked you through marinating, cooking, and grilling. A few simple tips helped ensure great flavor. You learned about storage and variations to keep meals exciting. Remember, feel free to customize flavors and ingredients. Enjoying healthy meals can be both easy and fun. Start making your own delicious bowls today!

Looking for a tasty and healthy meal that’s easy to make? Grilled Chicken & Broccoli Bowls are not only flavorful, but they’re also packed with nutrients! Imagine juicy chicken, crisp …

Read more

Categories Dinner

Blueberry Oatmeal Breakfast Bars Healthy and Tasty Snack

June 13, 2025 by Chef Nate
To make these tasty bars, you need a few key ingredients: - 2 cups rolled oats - 1 cup almond milk (or any milk of choice) - 1 cup fresh or frozen blueberries Rolled oats form the base of these bars. They're great for giving texture and nutrients. Almond milk adds moisture without strong flavors. You can also use any milk you prefer. Blueberries bring natural sweetness and color to the bars. For sweetness and flavor, gather: - 1/4 cup honey or maple syrup - 1/4 cup natural peanut butter (or almond butter) - Optional: 1/4 cup chopped nuts or seeds (e.g., walnuts, chia seeds) Honey or maple syrup adds a touch of sweetness. Natural nut butter gives richness and healthy fats. You can add nuts or seeds for crunch and extra nutrients. They make the bars more filling and fun to eat. To enhance the flavor, gather these spices: - 1/2 teaspoon ground cinnamon - 1 teaspoon baking powder - Pinch of salt - 1/2 teaspoon vanilla extract Ground cinnamon adds warmth and depth. Baking powder helps the bars rise. A pinch of salt balances the sweetness. Finally, vanilla extract gives a lovely aroma and taste. These ingredients make the bars healthy and delicious. For the full recipe, check the section below. Start by preheating your oven to 350°F (175°C). This step is key to getting those bars just right. Next, grab a 9x9 inch baking dish. Line it with parchment paper. This helps with easy removal later. Now, in a large mixing bowl, add your dry ingredients. Combine 2 cups of rolled oats, 1 teaspoon of baking powder, 1/2 teaspoon of cinnamon, and a pinch of salt. Mix them well. This blend sets the flavor for your bars. In a separate bowl, whisk together the wet ingredients. Pour in 1 cup of almond milk, add 1/4 cup of honey or maple syrup, and 1/4 cup of peanut butter. Don’t forget 1/2 teaspoon of vanilla extract. Stir until it is smooth and creamy. Now, pour the wet mix into the dry oats. Stir them together until fully combined. This is where magic happens! Gently fold in 1 cup of blueberries. If you want to, you can add 1/4 cup of chopped nuts or seeds for extra crunch. Pour the mixture into your prepared baking dish. Spread it evenly and press it down gently. This helps the bars hold together. Bake in the preheated oven for about 25 to 30 minutes. Check for doneness by looking for golden edges. After baking, let the bars cool in the pan for 10 minutes. Then lift them out using the parchment paper. Place them on a wire rack to cool completely. Once cool, slice them into bars. You can store them in an airtight container for up to a week. Enjoy your Blueberry Oatmeal Breakfast Bars! For the full recipe, click [Full Recipe]. To get the best Blueberry Oatmeal Breakfast Bars, start by ensuring even baking. This helps achieve a nice texture. Spread the mixture flat in the pan and press it down gently. This will give you a uniform bake. You can also adjust the sweetness to fit your taste. If you like it sweeter, add more honey or maple syrup. For a less sweet bar, use less. Taste the mixture before baking to find your perfect balance. One mistake is overmixing the batter. This can make the bars tough. Mix just until everything is combined. Another common error is not letting the bars cool completely. If you cut them too soon, they may fall apart. Let them cool in the pan for about 10 minutes, then cool fully on a wire rack. This helps them firm up. Serve these bars with yogurt for extra creaminess. You can also add fresh fruit on top for a burst of flavor. They are perfect for breakfast or as snacks on the go. You can pack them for school or work. Enjoy these bars anytime you need a quick, healthy bite. For the full recipe, check out the Blueberry Oatmeal Breakfast Bars recipe! {{image_2}} You can change fruits in these bars. Try raspberries or chopped apples. These fruits add new flavors and textures. You can also swap honey for agave syrup or stevia. These options work well if you want less sugar. Each change keeps the bars tasty and healthy. If you're gluten-free, use certified gluten-free oats. This keeps the bars safe for your diet. You can also make these bars vegan. Just skip the nut butter. Instead, use mashed bananas or applesauce. Both add moisture and flavor without any animal products. Want to make the bars even better? Add chocolate chips or coconut flakes. Both give a sweet, fun twist. Infusing the bars with citrus zest also brightens the flavor. A little lemon or orange zest makes a big difference. Each of these ideas helps you create a snack you'll love. For the full recipe, check out the detailed instructions above. To keep your Blueberry Oatmeal Breakfast Bars fresh, use an airtight container. This helps seal in moisture and flavor. These bars stay tasty for up to one week in the fridge. If you want to keep them longer, freezing works great. To freeze your breakfast bars, let them cool completely. Slice them into bars and wrap each one tightly in plastic wrap. Place the wrapped bars in a freezer-safe bag. They can last up to three months in the freezer. When you are ready to eat, just take one out and thaw it at room temperature. For the best texture, avoid using the microwave. To reheat your bars, place them in the oven at 350°F for about 10 minutes. This warms them up nicely without drying them out. You can also use a toaster oven for a quick warm-up. Serve the warmed bars with yogurt or fresh fruit for an extra tasty treat. For the full recipe, check out the detailed instructions above. Yes, you can make these bars ahead of time. I often prepare a batch on the weekend. Once they cool, store them in an airtight container. Keep them in the fridge for up to a week. This way, you always have a tasty snack ready to go. If you need a milk substitute, try regular cow's milk or soy milk. Coconut milk is also a great option. For a nut-free choice, oat milk works well. Each option gives a nice flavor and texture to the bars. Most oats are safe for gluten-free diets. However, ensure you use certified gluten-free oats. This helps avoid cross-contamination. Always check the label to be sure. With the right oats, these bars can be enjoyed by everyone. These breakfast bars last about a week when stored correctly. Look for signs like a dry or hard texture. If they smell off, it's best to toss them. Enjoy them fresh for the best taste! Yes, adding protein powder boosts the bars' nutrition. Start with one scoop and mix it into the dry ingredients. Adjust the liquid slightly if the mix feels too dry. This way, you keep the bars moist and tasty. For the full recipe, check out the section above. Blueberry oatmeal breakfast bars are a simple and tasty treat. We covered the key ingredients, like oats, almond milk, and blueberries. I gave you clear steps to mix and bake, along with essential tips to avoid mistakes. You can try different fruits and make it fit your diet too. Store them right to keep them fresh, and they’re perfect for breakfast or snacks. These bars can be made ahead, so you always have a healthy option. Enjoy your baking and get creative with your flavors!

Looking for a healthy and delicious snack? You’ll love these Blueberry Oatmeal Breakfast Bars! They mix refreshing blueberries, hearty oats, and natural sweeteners into a perfect on-the-go bite. Easy to …

Read more

Categories Breakfast

Baked Ziti Flavorful and Simple Dinner Delight

June 13, 2025 by Chef Nate
- 12 oz ziti pasta - 2 tablespoons olive oil - 1 medium onion, diced - 3 cloves garlic, minced - 1 bell pepper, diced (any color) - 1 zucchini, diced - 1 jar (24 oz) marinara sauce - 1 teaspoon dried oregano - 1 teaspoon dried basil - 1/2 teaspoon red pepper flakes (optional) - 1 cup ricotta cheese - 1 cup shredded mozzarella cheese - 1/2 cup grated Parmesan cheese - Fresh basil leaves for garnish - Salt and pepper to taste When I cook baked ziti, I love to gather all my ingredients first. This makes the process smooth and fun. You start with ziti pasta, which is perfect for holding sauces. I use olive oil to sauté my veggies and give them flavor. Onions and garlic are a must. They add a sweet taste and great aroma. I pick any color bell pepper, as they all work well. Zucchini adds a nice crunch and color to the dish. The marinara sauce is the heart of this meal. I always choose a good quality jar for rich flavor. Dried oregano and basil give it that classic Italian taste, while red pepper flakes can add a little heat. For that creamy texture, I use ricotta cheese. Then, I load it with mozzarella and Parmesan for cheesy goodness. Finally, I top it with fresh basil leaves for a pop of color. Don’t forget to season with salt and pepper to make every bite delicious. You can find the full recipe for these tasty ingredients and instructions in the [Full Recipe]. - Preheat the oven to 375°F (190°C). - Cook ziti pasta until al dente; drain and set aside. - In a large skillet, heat 2 tablespoons of olive oil. - Add 1 diced onion and sauté until soft, about 3-4 minutes. - Stir in 3 minced garlic cloves, 1 diced bell pepper, and 1 diced zucchini. - Cook for 5-7 minutes until the veggies are tender. - Pour in 1 jar of marinara sauce and mix in seasoning. - Add 1 teaspoon of dried oregano, 1 teaspoon of dried basil, and salt. - If you like heat, add 1/2 teaspoon of red pepper flakes. - Let it simmer for 5 minutes for the flavors to blend. - In a large bowl, mix the cooked ziti with the vegetable sauce and 1 cup of ricotta cheese. - Layer half of this mixture in a greased 9x13 inch baking dish. - Sprinkle half of 1 cup shredded mozzarella cheese over it. - Add the rest of the ziti mixture and top with more mozzarella cheese and 1/2 cup grated Parmesan cheese. - Cover the dish with foil and bake for 25 minutes. - Uncover and bake for an additional 15-20 minutes until the cheese is golden and bubbly. - Let it cool for a few minutes, then garnish with fresh basil leaves. - For the full recipe, check the ingredients section. For a tasty baked ziti, fresh herbs make a big difference. Use basil or oregano to elevate your dish. They add bright flavors that dry herbs can't match. Also, be careful not to overcook the pasta. Cook it just until al dente. It will finish cooking in the oven and stay firm. You can switch up the cheese for a fun twist. Fontina or Gouda can add a unique taste. Both melt well and offer different flavors. To make your baked ziti cheesier, mix different cheeses. Try adding more mozzarella or a sprinkle of cream cheese for a rich texture. You can prep your baked ziti in advance. Just assemble it and cover it tightly. Store it in the fridge for up to 24 hours. When ready to eat, bake it straight from the fridge. This helps keep the layers intact. To reheat, cover it with foil. This keeps the cheese from burning while warming. {{image_2}} For a meat-free meal, swap out meat for hearty mushrooms or lentils. These ingredients add a rich taste. You can also use eggplant or spinach to boost flavor and nutrition. To add more veggies, consider mixing in diced carrots, broccoli, or peas. These choices not only add color but also make your baked ziti healthier. If you love meat, consider adding ground beef, sausage, or turkey. Brown the meat before mixing it with the sauce. This step enhances the flavor. You can also add diced pepperoni or cooked chicken for extra zest. Mixing meats can give a rich, varied taste. Just ensure the meat is fully cooked before layering it in the dish. For a gluten-free option, use gluten-free ziti or another gluten-free pasta. Quinoa or rice noodles can work well too. Adjust the cooking time as needed to get the right texture. When baking, cover the dish tightly to keep moisture in. This helps the pasta cook evenly and stay tender. To keep your baked ziti fresh, store it in an airtight container. This helps avoid moisture loss and keeps flavors intact. Baked ziti lasts about 3 to 5 days in the fridge. Make sure to cool it completely before sealing. This way, you prevent condensation from making it soggy. Freezing baked ziti is easy and great for meal prep. First, let it cool down. Then, cut it into portions for easier thawing. Wrap each piece tightly in plastic wrap and then in foil. This helps protect it from freezer burn. When you’re ready to eat, thaw it in the fridge overnight. Reheat in the oven at 350°F (175°C) until hot. This keeps the cheese melty and the pasta tender. You can serve baked ziti as a main dish or at parties. It pairs well with a fresh salad or garlic bread. For a special touch, add a sprinkle of fresh parsley or basil on top. A side of roasted veggies can also make for a colorful plate. Baked ziti is great for family dinners or gatherings, making it a crowd-pleaser. Baked ziti is quick and easy. You spend about 15 minutes to prep. The cooking time is around 25 minutes covered and 15 to 20 minutes uncovered. This means you can serve a delicious meal in about 50 minutes. Yes, you can skip the ricotta. Cream cheese or cottage cheese works well instead. You can also mix in some sour cream for creaminess. These options keep your baked ziti tasty and rich without missing out. Ziti pasta is the classic choice. It has a smooth surface that holds sauce well. You can also use penne or rigatoni. These shapes add fun to your dish and also work great. Absolutely! You can add ground beef, sausage, or turkey. Just cook the meat before mixing it in. For a smokier flavor, try adding bacon or pancetta. Meat brings protein and heartiness to your baked ziti. If you want the full recipe, check it out for more tips! Baked ziti is a simple, tasty dish. You can make it with fresh veggies or meats. Use different cheeses for fun flavors. Remember to store leftovers properly for later. Cooking can be easy and enjoyable. With these steps, you can impress friends and family. So, grab your ingredients and start cooking! Enjoy the warm, cheesy goodness of baked ziti!

Are you ready for a cozy dinner that packs a punch of flavor? My Baked Ziti is not only simple to make, but it’s also a dish that everyone will …

Read more

Categories Dinner

Cottage Cheese and Veggie Bake Flavorful Comfort Dish

June 13, 2025 by Chef Nate
- 2 cups cottage cheese - 1 cup spinach, chopped - 1 zucchini, diced - 1 bell pepper, diced (any color) - 1 carrot, grated - 1 onion, finely chopped - 2 cloves garlic, minced - 1 teaspoon dried oregano - 1 teaspoon dried basil - 1/2 teaspoon salt - 1/4 teaspoon black pepper - 1 cup shredded mozzarella cheese - 1/2 cup breadcrumbs - 2 tablespoons olive oil When selecting ingredients, choose fresh produce when possible. Fresh veggies have better taste. Look for firm zucchini and bright bell peppers. Spinach should be dark green and crisp. If you can't find fresh, frozen options work well too. Just make sure to thaw and drain them before use. This helps avoid excess water in your bake. Using fresh or frozen ingredients affects flavor and texture. Frozen veggies can be softer, while fresh offers a nice crunch. Either way, this bake will be tasty. Remember to cut the vegetables into similar sizes. This way, they cook evenly. You can find the full recipe at the end of this article. 1. Start by preheating your oven to 375°F (190°C). This makes sure your bake cooks evenly. 2. Next, grease a 9x9-inch baking dish with a little olive oil. This keeps your bake from sticking. 3. In a skillet, heat 2 tablespoons of olive oil over medium heat. 4. Add 1 finely chopped onion and 2 minced garlic cloves. Sauté these until the onion turns clear, about 3-4 minutes. 1. Now, add 1 diced zucchini, 1 diced bell pepper, and 1 grated carrot to the skillet. Cook for 5-6 minutes until the veggies soften. 2. In a large mixing bowl, combine 2 cups of cottage cheese and 1 cup of chopped spinach with the sautéed veggies. 3. Sprinkle in 1 teaspoon of dried oregano, 1 teaspoon of dried basil, 1/2 teaspoon of salt, and 1/4 teaspoon of black pepper. Mix well until everything is evenly blended. 4. Transfer this mixture into your greased baking dish. 1. Sprinkle 1 cup of shredded mozzarella cheese over the top of the veggie mix. 2. In a small bowl, mix 1/2 cup of breadcrumbs with a drizzle of olive oil. This adds a nice crunch. 3. Evenly sprinkle the breadcrumb mixture over the cheese layer. 4. Bake in your preheated oven for 25-30 minutes. Look for a golden brown top that bubbles. 5. When done, take it out and let it cool for a few minutes before serving. Enjoy your dish! Check out the Full Recipe for detailed instructions! To get that perfect golden brown top, focus on the last few minutes of baking. When you see the cheese bubbling and turning golden, it's time to check. You want it golden, not burnt. If your oven heats unevenly, rotate the dish halfway through baking. This helps all sides cook evenly and brown nicely. If you have a convection oven, reduce the heat by about 25°F. This helps cook the dish faster and gives a nice texture. For gas ovens, you might need to adjust the time by checking a bit earlier. Every oven is different, so keep an eye on yours! This dish pairs well with a fresh side salad. A mix of greens, tomatoes, and a light vinaigrette works great. You can also serve it alongside some crusty bread for a heartier meal. For garnishing, fresh basil leaves add color and taste. You can also sprinkle some black pepper for a nice touch. Serve warm and cut into squares for a lovely presentation. Enjoy this comforting dish with friends and family! For more details on this recipe, check the Full Recipe. {{image_2}} Cottage cheese and veggie bake is a flexible dish. You can swap out vegetables based on what you have at home. Here are some tasty options: - Broccoli florets - Cauliflower, chopped - Mushrooms, sliced - Cherry tomatoes, halved - Asparagus, cut into pieces Feel free to mix and match any of these. Each choice brings a new flavor and texture. You can also change the cheese and breadcrumbs. If you want a creamier texture, try ricotta cheese instead of cottage cheese. For a sharp flavor, use feta cheese. If you need a crunch without bread, try crushed crackers or ground nuts. If you follow a gluten-free diet, use gluten-free breadcrumbs or omit them. You can still achieve a great bake without them. Just add more cheese on top for that crispy finish. To boost protein in your dish, try adding chicken or tofu. Cook the chicken first, then mix it into the veggie blend. For tofu, press it well, cube it, and sauté it before adding. This way, you add flavor and nutrition to your bake. These variations make the cottage cheese and veggie bake your own. Explore different ingredients to find what you love best. For the complete recipe, check out the Full Recipe section. To store leftovers of your cottage cheese and veggie bake, let it cool first. Once cool, cover it tightly with plastic wrap or transfer it to an airtight container. This helps keep it fresh for up to three days. When you’re ready to enjoy it again, preheat your oven to 350°F (175°C). Place the bake in an oven-safe dish and cover it with foil. Heat for about 15-20 minutes, or until warm. This method keeps the texture nice and creamy. To freeze your cottage cheese and veggie bake, first allow it to cool completely. Cut it into portions, and wrap each piece in plastic wrap. Then place the wrapped pieces in a freezer-safe bag. This way, you can grab a single serving whenever you like. For long-term storage, it can last up to three months in the freezer. When you're ready to eat, move a portion to the fridge to thaw overnight. Once thawed, reheat in the oven at 350°F (175°C) for about 20-25 minutes. This will give you a warm, tasty meal just like the day you made it. How long can you keep leftovers? You can keep leftovers in the fridge for about three to five days. Just make sure to store them in an airtight container. This keeps them fresh and tasty. If you want to enjoy them later, consider freezing them. They can last up to three months in the freezer. Just remember to thaw them in the fridge before reheating. Can I use low-fat cottage cheese? Yes, you can use low-fat cottage cheese if you prefer. It will still add creaminess to the dish. The flavor stays the same, but the texture might be a bit different. If you want a richer taste, use full-fat cottage cheese. It gives a creamier texture and more flavor. What’s the best way to ensure veggies are soft? Sautéing the veggies first is key to making them soft. Cook them in olive oil over medium heat. Stir often and keep an eye on them. Aim for about five to six minutes. You want them to be tender but not mushy. This method helps to bring out their natural flavors. Can I bake without breadcrumbs? Yes, you can bake without breadcrumbs. You might use crushed nuts or oats as a substitute. This adds a nice crunch and flavor. If you want a gluten-free option, try using almond flour. It gives a different taste but still works well in this dish. This blog post covered a tasty cottage cheese and veggie bake. We explored ingredients, preparation, baking steps, and tips for perfect results. You learned about options for swapping vegetables, making dietary adjustments, and how to store leftovers. Now, you can enjoy a delicious, healthy meal any time. Remember, this dish is flexible. Feel free to experiment with flavors and ingredients. Happy cooking!

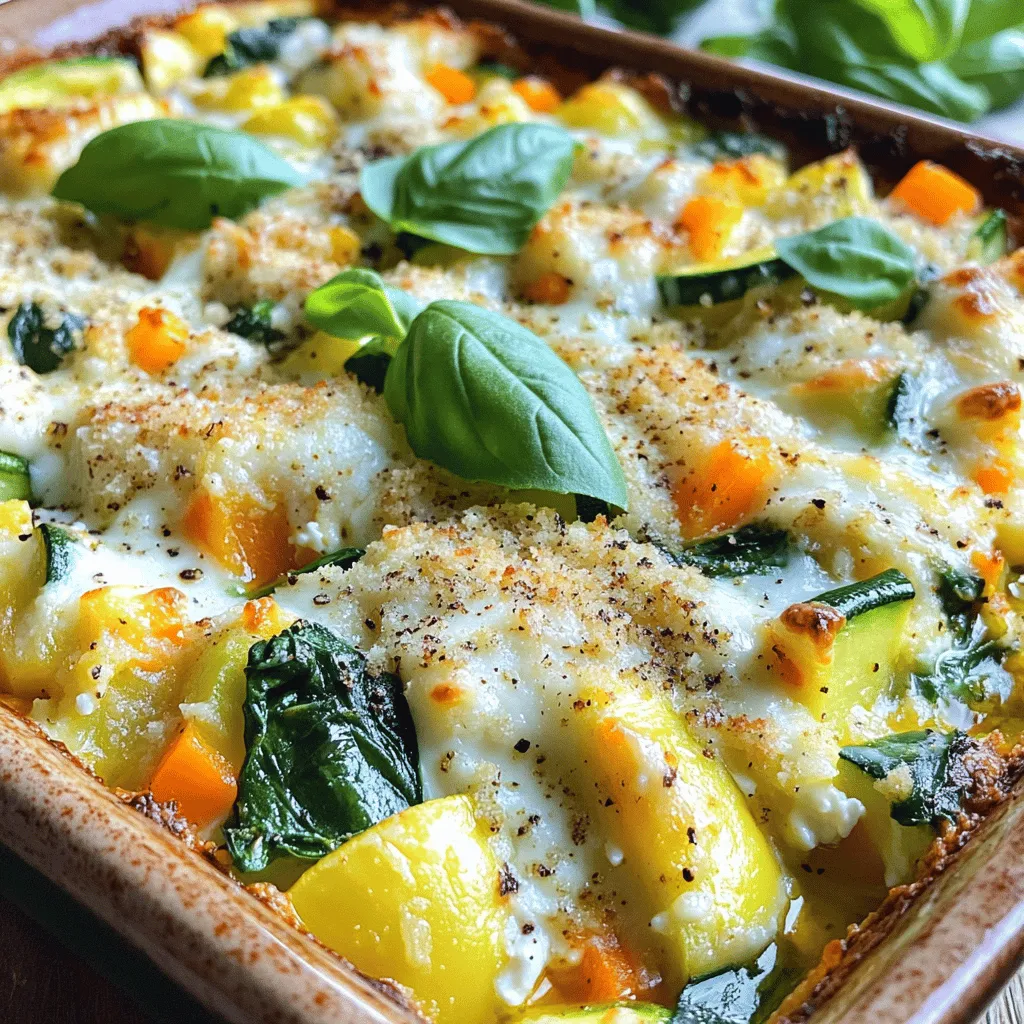
Looking for a comforting dish that’s both healthy and delicious? My Cottage Cheese and Veggie Bake hits the spot! It combines creamy cottage cheese with fresh veggies, creating a flavorful …

Read more

Categories Dinner

Healthy Greek Turkey Meatballs Simple and Tasty Recipe

June 13, 2025 by Chef Nate
- Ground turkey and its benefits Ground turkey is a lean meat. It has less fat than beef or pork. This makes it a great choice for health. It is rich in protein, which helps build muscles and keeps you full. You can find ground turkey in local stores. - Greek spices and herbs for flavor To give these meatballs a Greek twist, use spices like oregano and basil. These herbs add a lovely aroma and taste. They are also good for digestion. Fresh parsley brightens the dish and adds color. - Additional ingredients for texture and taste The recipe includes breadcrumbs for texture. Whole wheat or gluten-free breadcrumbs work well. Grated Parmesan cheese adds a nice salty flavor. Sun-dried tomatoes give a sweet touch and extra moisture. Onions and garlic add depth and richness to the meatballs. - Caloric content per serving Each serving has about 250 calories. This makes them a healthy option for any meal. - Macronutrient breakdown (protein, carbs, fats) You get about 25 grams of protein per serving. There are around 15 grams of carbs and 10 grams of fat. This balance helps fuel your day while keeping you satisfied. - Health benefits of included ingredients Ground turkey provides lean protein. Herbs like oregano and basil have antioxidants. Sun-dried tomatoes are rich in vitamins. These ingredients work together to make a tasty and healthy meal. For the full recipe, check out the Mediterranean Delight Turkey Meatballs. 1. Preheat your oven to 375°F (190°C). This step is key for even cooking. 2. Line a baking sheet with parchment paper. You can also grease it lightly with olive oil. This prevents the meatballs from sticking. 3. In a large bowl, combine the ground turkey, breadcrumbs, and grated Parmesan cheese. Mix until blended well. 4. Add the finely chopped onion, minced garlic, diced sun-dried tomatoes, and chopped parsley. Sprinkle in the dried oregano, dried basil, salt, and black pepper. 5. Crack the egg into the bowl. Use your hands or a spoon to mix everything. Be careful not to over-mix, as this can make the meatballs tough. 1. Now, form the mixture into small meatballs. Aim for 1 to 1.5 inches in diameter. Place them on the prepared baking sheet. 2. Drizzle the olive oil over the meatballs. This helps them brown nicely in the oven. 3. Bake in the preheated oven for 20-25 minutes. They should be cooked through and golden brown outside. Use a meat thermometer to check; they need to reach an internal temperature of 165°F (74°C). 4. Serve warm, garnished with extra chopped parsley. Enjoy them with tzatziki sauce or a fresh Greek salad. For the full details on this delicious dish, check the Full Recipe. To make your meatballs moist, avoid over-mixing the meat. When you mix too much, the meatballs can become tough. Just mix until everything combines. Using an egg helps bind the ingredients. It gives moisture and keeps the meatballs tender. The egg also adds protein, making your meal healthier. To achieve a golden crust, make sure to drizzle olive oil over the meatballs before baking. Olive oil adds flavor and helps with browning. The right amount of oil ensures the meatballs cook evenly. It also prevents them from sticking to the baking sheet. Aim for a nice golden color, which means they are ready to eat. For the full recipe, check out the Mediterranean Delight Turkey Meatballs! {{image_2}} You can adjust the recipe to fit your needs. If you want gluten-free meatballs, use gluten-free breadcrumbs. For a low-carb option, you can skip the breadcrumbs entirely. Instead, try using ground oats or crushed nuts. This change keeps the texture without the carbs. For cheese, you have choices too. If you want to skip the Parmesan, try nutritional yeast for a cheesy flavor. You can also use crumbled feta cheese to add a nice tang. Feta works great, especially in Greek dishes. To boost the flavor, think about adding more Greek ingredients. Feta cheese is a great addition. Just fold it into the meat mixture, and it gives a creamy texture and a salty kick. If you like some heat, add red pepper flakes or chopped jalapeños. These spices bring a nice zest to the meatballs. You can also add lemon zest for a fresh and bright flavor. This will make your meatballs pop with taste. For the full recipe, check out the Mediterranean Delight Turkey Meatballs. To keep your Greek turkey meatballs fresh, start by letting them cool completely. Once cooled, place them in an airtight container. This helps lock in moisture and flavor. Store them in the fridge for up to three days. If you want to save them for later, freezing is a great option. Place the meatballs in a single layer on a baking sheet. Freeze them for about an hour until firm. Then, transfer them to a freezer-safe bag. Make sure to label the bag with the date. You can freeze them for up to three months. When it’s time to enjoy your leftovers, reheating them properly is key. The best way to reheat is in the oven. Preheat your oven to 350°F (175°C). Place the meatballs on a baking sheet lined with foil. Cover them with another piece of foil to keep them moist. Heat for about 15-20 minutes until warmed through. You can also reheat them in the microwave. Place them in a microwave-safe dish with a splash of water. Cover the dish and heat in 30-second intervals until warm. After reheating, serve the meatballs with tzatziki sauce or fresh salad. This adds a nice touch of flavor and freshness. Enjoy your meal! For the full recipe, check out the Mediterranean Delight Turkey Meatballs. How do I know when the meatballs are cooked? You can tell the meatballs are cooked when they reach an internal temperature of 165°F (74°C). A meat thermometer works best for this. The outside should look golden brown. If you cut one open, the inside should be no longer pink. Can I make these meatballs ahead of time? Yes, you can make these meatballs ahead of time. Prepare them and store them in the fridge for up to a day. You can also freeze them for later. Just defrost before cooking. What can I serve with Greek meatballs? Greek meatballs pair well with tzatziki sauce, fresh Greek salad, or pita bread. You can also serve them on a bed of rice or quinoa for a complete meal. What if my meatballs fall apart? If your meatballs fall apart, they might need more binding. Try adding a bit more breadcrumbs or an extra egg. Make sure you mix them gently to keep them tender. Why are my meatballs too dry? Dry meatballs often result from overcooking or too many breadcrumbs. Monitor the cooking time closely. Also, ensure you use enough moisture, like the egg and olive oil in the recipe. The healthy Greek turkey meatballs are easy to make and full of flavor. We covered the best ingredients, from ground turkey to Greek herbs. Understanding their nutrition helps you stay healthy. I shared tips for perfect meatballs and ways to store them. You can even modify the recipe for your taste. Overall, making these meatballs is fun and rewarding. Enjoy a delicious dish that fits your healthy lifestyle. You’re now ready to impress your family and friends!

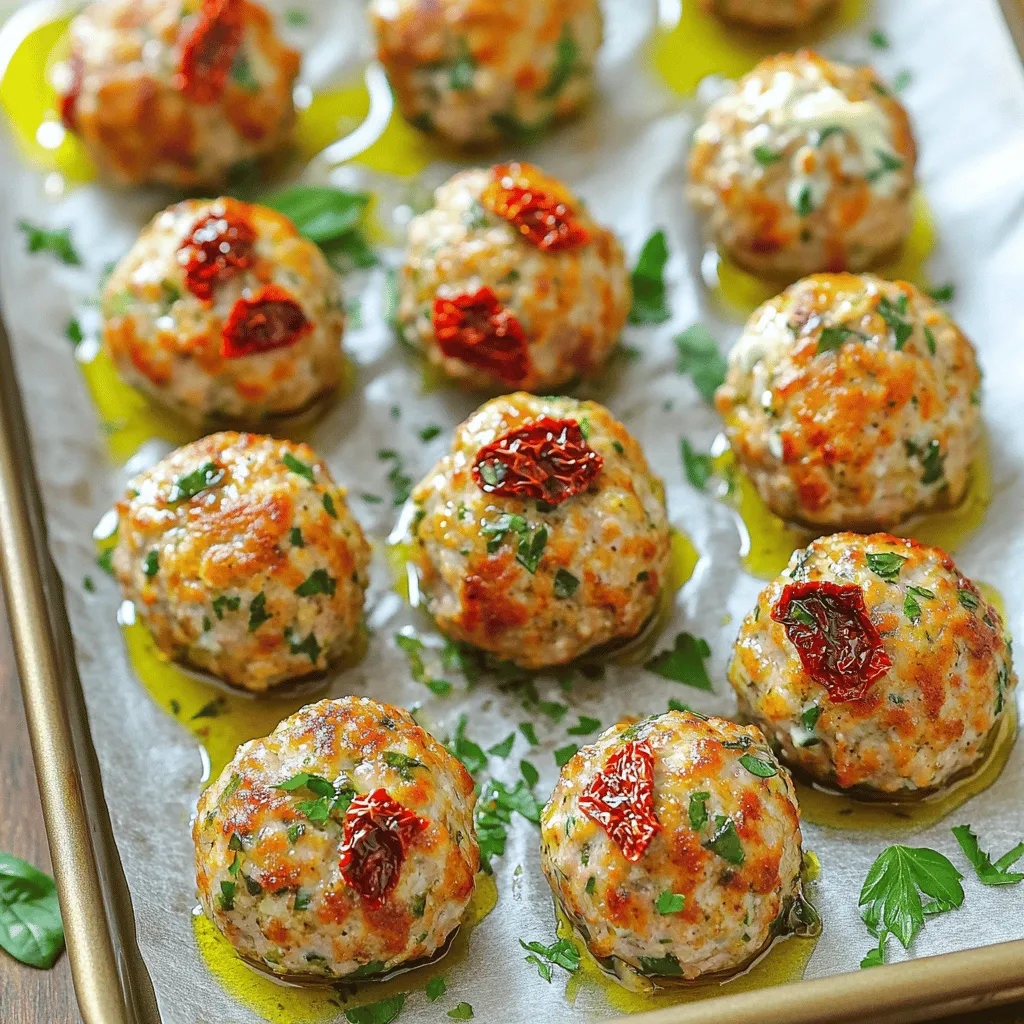
Looking for a delicious yet healthy meal option? You’ve found it! These Greek turkey meatballs are simple to make and packed with flavor. With ground turkey as the star ingredient, …

Read more

Categories Dinner

Chickpea Cucumber Salad Fresh and Flavorful Delight

June 13, 2025 by Chef Nate
- 1 can (15 oz) chickpeas, drained and rinsed - 1 large cucumber, diced - 1 cup cherry tomatoes, halved - 1/2 red onion, finely chopped - 1 red bell pepper, diced - 1/4 cup fresh parsley, chopped - 1/4 cup feta cheese, crumbled (optional) - 3 tablespoons olive oil - 2 tablespoons lemon juice - 1 teaspoon cumin - Salt and pepper to taste - Alternatives for chickpeas: You can swap chickpeas for black beans or kidney beans. Both add protein and flavor. - Recommended cucumber types: Use English cucumbers for less seeds and a crisper bite. Persian cucumbers are also great for salads. - Feta cheese variations: If you want a dairy-free option, try vegan feta. You can also use goat cheese for a tangy twist. This Chickpea Cucumber Salad is not just easy to make, but it also bursts with fresh flavors. You can find the full recipe in the previous sections. 1. Combining the ingredients: Start by taking a large bowl. Add the drained chickpeas, diced cucumber, halved cherry tomatoes, finely chopped red onion, and diced red bell pepper. These ingredients bring a nice crunch to the salad. 2. Mixing the dressing: In a small bowl, whisk together three tablespoons of olive oil, two tablespoons of lemon juice, one teaspoon of cumin, and salt and pepper to taste. This dressing adds a zesty flavor that ties everything together. 3. Tossing the salad: Pour the dressing over the salad mixture. Toss gently to coat all the ingredients evenly. Make sure everything is mixed well. Taste to see if it needs more salt or pepper. - Chilled vs. room temperature: You can serve this salad chilled or at room temperature. Chilling it for at least 15 minutes helps the flavors blend. I prefer it cold on hot days. - Ideal serving dishes: Use a large clear bowl for serving. This way, the bright colors of the salad shine through. It makes the dish more appealing. - Garnishing tips: Top the salad with extra fresh parsley and a sprinkle of feta cheese, if you like. This adds a nice touch and looks great on the table. - Prep time breakdown: You can make this salad in just 15 minutes. It’s quick and easy! - When to make the dressing: Make the dressing right before you toss the salad. This keeps it fresh and tasty. - Resting time for flavors: Let the salad sit for at least 15 minutes. This resting time allows the flavors to meld together beautifully. For the full recipe, check out the Chickpea Cucumber Fiesta Salad. To keep your chickpea cucumber salad fresh, use an airtight container. Glass or plastic containers work well. The salad stays good in the fridge for up to three days. If you have leftovers, keep them cold until you eat them. Reheating is not needed for this salad. It tastes best cold. If you like it fresh, serve it right after making it. You can add tasty spices to your salad. Try smoked paprika or chili powder for a kick. Fresh herbs like dill or mint boost flavor too. They add a nice touch and freshness. If you want extra protein, mix in grilled chicken or tuna. This makes your salad heartier and more filling. Meal prep is easy with this salad. Chop your veggies a day ahead. Keep them in the fridge to stay fresh. Don’t add dressing until you are ready to serve. Let the salad rest for a little while before serving. This helps the flavors blend together. Aim for at least 15 minutes. For the best taste, make it no more than a day in advance. For the full recipe, check the Chickpea Cucumber Fiesta Salad details. {{image_2}} If you want to mix things up, there are many easy swaps for this salad. - Vegan options: Omit the feta cheese. You can add avocado for creaminess. - Gluten-free modifications: This salad is naturally gluten-free! Just check your dressing for gluten. - Seasonal vegetables to include: Add bell peppers in summer, or roasted sweet potatoes in fall. The dressing can change the salad's taste. Here are some ideas. - Homemade dressing variations: Try mixing tahini, garlic, and lemon juice for a nutty flavor. - Use of store-bought dressings: A balsamic vinaigrette works well. Just pour it on and mix! - Flavor profiles to enhance: Add herbs like dill or mint for freshness. You can serve this salad in many ways. - As a side dish: It pairs great with grilled chicken or fish. - Main course salad ideas: Toss in quinoa or farro for a filling meal. - Pairing with other dishes: Serve it with hummus and pita for a delightful spread. For the full recipe, check out Chickpea Cucumber Fiesta Salad. To keep your salad fresh, use airtight containers. Glass or plastic containers work great. Store your salad in the fridge. The cold slows spoilage and keeps flavors bright. If you see wilting or a bad smell, it’s time to toss it. Can you freeze Chickpea Cucumber Salad? I don’t recommend it. The cucumber gets mushy when thawed. Instead, you can freeze the chickpeas and other veggies separately. To freeze, place them in freezer bags. Remove air and seal tightly. When ready to use, thaw them overnight in the fridge. This helps keep the texture nice. You can transform leftovers into a wrap. Just add some salad to a tortilla and roll it up. It makes a quick lunch. You can also add it to grain bowls. Mix it with rice or quinoa for a hearty meal. Lastly, try repurposing it in pasta. Toss it with cooked pasta for a fresh twist. These ideas help you enjoy every last bite! Chickpea Cucumber Salad lasts about 3 to 5 days in the fridge. Store it in an airtight container to keep it fresh. After this time, the veggies may become soggy. Yes, you can use canned chickpeas. They save time and are ready to use. Just drain and rinse them before adding to your salad. This step helps reduce sodium and improves taste. If you want a feta substitute, try goat cheese or a vegan cheese. You can also use cubes of avocado for creaminess. These options still keep the salad tasty and fresh. Yes, this salad is gluten-free. All the ingredients, like chickpeas and veggies, are safe for gluten-free diets. It’s a great option for anyone avoiding gluten. To boost protein, add grilled chicken or shrimp. You can also mix in some quinoa or nuts like almonds or walnuts. These options make your salad more filling and nutritious. Chickpeas are full of fiber, protein, and vitamins. They can help with digestion and keep you full longer. They also support heart health and may help lower cholesterol. Eating chickpeas is an easy way to add nutrients to your meals. Chickpea Cucumber Salad is simple to make and packed with flavor. We covered ingredients, prep, and tips for storage and variations. This salad is fresh and can meet many dietary needs. You can make it ahead, enjoy it chilled, or serve it at room temperature. Remember, it’s all about using what you love. Feel free to swap ingredients or dressings to fit your taste. Enjoy creating your own version of this tasty salad!

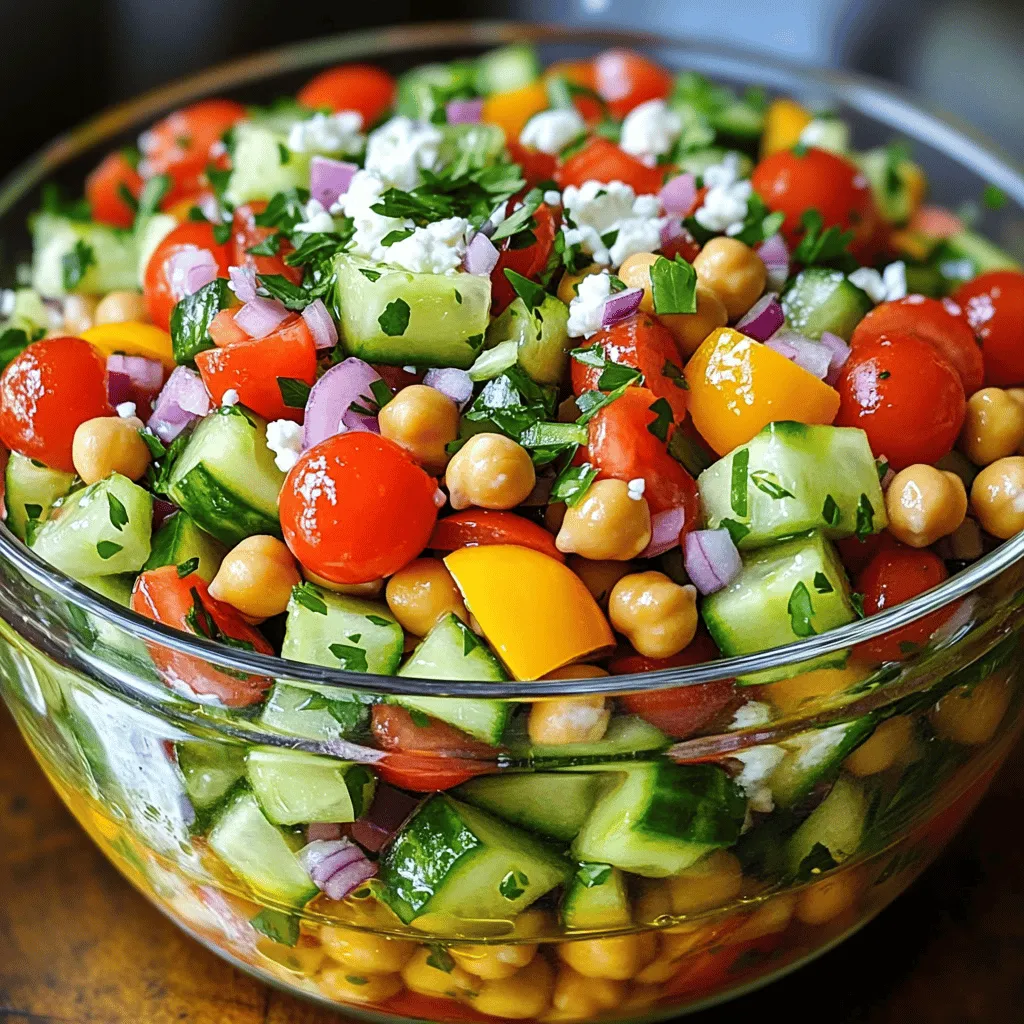
Do you crave a light, refreshing dish that packs a flavor punch? Look no further than this Chickpea Cucumber Salad! It’s simple to make and bursts with vibrant ingredients. Packed …

Read more

Categories Salads

Honey Garlic Chicken Flavorful Dinner Made Easy

June 13, 2025 by Chef Nate
To make delicious honey garlic chicken, you need these main ingredients: - 4 chicken thighs, bone-in and skin-on - 1/2 cup honey - 1/4 cup soy sauce (low sodium) - 4 garlic cloves, minced - 1 tablespoon fresh ginger, grated - 1 tablespoon rice vinegar - 1 teaspoon sesame oil - Salt and pepper to taste These ingredients create a sweet and savory flavor. The chicken thighs stay juicy and tender. Honey adds a nice glaze that makes it look great. You can also add some fun garnishes to your dish: - 2 tablespoons green onions, chopped - Sesame seeds These add color and a little crunch. The green onions give a fresh taste. Sesame seeds add a nice touch. If you want to change things up, consider these substitutions: - Use maple syrup or agave for a different sweetener. - Try apple cider vinegar instead of rice vinegar. These swaps can give your dish a unique twist. You can make it your own while keeping the flavor. Check out the Full Recipe for more details! To make the marinade, mix six easy ingredients. In a bowl, whisk together: - 1/2 cup honey - 1/4 cup low sodium soy sauce - 4 minced garlic cloves - 1 tablespoon grated fresh ginger - 1 tablespoon rice vinegar - 1 teaspoon sesame oil This blend creates a sweet and savory taste. For the best flavor, let the chicken marinate for at least 1 hour in the fridge. If you have time, overnight is even better. This allows the chicken to soak up all that delicious goodness. First, preheat your oven to 375°F (190°C). This step is key for even cooking. Heat a large oven-safe skillet on medium-high heat. Take the chicken out of the marinade and season it with salt and pepper. Place the chicken thighs skin-side down in the skillet. Sear the chicken for about 5-7 minutes until golden and crispy. Flip the chicken and sear the other side for an additional 5 minutes. This searing gives your chicken a nice crust. After searing, pour the reserved marinade over the chicken. Then, move the skillet to your preheated oven. Bake for 25-30 minutes. Check that the chicken reaches an internal temperature of 165°F (74°C). The sauce should be sticky and bubbly when done. Once you take the chicken out of the oven, let it rest for 5 minutes in the sauce. This helps the flavors mix well. For plating, place the chicken on a large platter. Drizzle the sticky glaze from the skillet over the chicken. Garnish with chopped green onions and sesame seeds for color and crunch. Pair your honey garlic chicken with steamed rice and seasonal veggies. This combination makes for a beautiful and tasty meal. You can find the full recipe [here]. To get that perfect sear, heat your skillet well. A hot pan helps the chicken skin crisp up. If the pan is not hot enough, the chicken will steam and become dry. Place the chicken skin-side down first. This allows the fat to render out, making the skin crispy. Sear for 5-7 minutes, then flip and sear the other side for about 5 minutes. You can enhance the flavor by adding fresh herbs and spices. Try adding thyme or rosemary for a nice twist. A pinch of red pepper flakes can add some heat. You can also use fresh cilantro or parsley for a fresh taste. These additions can brighten the dish and elevate the flavor profile. Avoid overcooking the chicken. Check the internal temperature with a meat thermometer. It should reach 165°F (74°C). If you cook it too long, the chicken will become tough. Also, don’t skip marinating for long enough. At least one hour is key, but overnight is best. This helps the flavors soak in deeply, making each bite delicious. {{image_2}} You can swap chicken thighs for other proteins. Chicken breasts work well too. If you prefer plant-based options, try tofu. Tofu absorbs the sauce nicely and offers a great texture. Shrimp adds a quick-cooking seafood twist. Just adjust cooking times to keep everything tender. Want some heat? Add chili flakes or sriracha to the sauce. This will spice up your dish. You can also use teriyaki sauce for a different flavor. Teriyaki gives a sweet and savory taste that pairs well with the honey. Mix and match these ideas to create your favorite version. You can cook honey garlic chicken in different ways. Use a slow cooker for an easy meal. Just set it up and let it cook while you do other things. Stovetop cooking is quick and keeps the chicken juicy. An Instant Pot is great for a fast dinner. It gives you the same rich flavor in less time. Each method yields tasty results, so pick what works for you. To keep your honey garlic chicken fresh, store leftovers in an airtight container. This keeps out air and moisture. If you want to freeze it, place the chicken in a freezer-safe bag. Remove as much air as you can before sealing. Label the bag with the date. This way, you know how long it’s been in the freezer. When it’s time to enjoy your leftovers, reheat gently. Using an oven works best to keep the chicken moist. Preheat your oven to 350°F (175°C). Place the chicken in a baking dish with a splash of water or broth. Cover it with foil to trap steam. Heat for about 15-20 minutes, until warm. You can also use a microwave, but be careful not to dry it out. Heat in short intervals, checking often. Honey garlic chicken lasts three to four days in the fridge. If frozen, it can last up to three months. Just remember to thaw it in the fridge overnight before reheating. This keeps the chicken safe and tasty. Yes, you can use boneless chicken. Boneless chicken cooks faster. Just adjust the cooking time. I suggest checking it at 20 minutes. This ensures you do not overcook it. Searing boneless chicken will also give it a nice crust. The sweet and sticky glaze will still stick well. I love serving honey garlic chicken with steamed rice. It soaks up the tasty sauce. You can also add seasonal vegetables. Broccoli or green beans work well. A fresh salad can add a nice crunch too. Feel free to get creative with your sides! The best way to check is with a meat thermometer. The chicken should reach 165°F (74°C) at the thickest part. If you don't have one, you can cut into the chicken. The juices should run clear, not pink. This way, you can ensure it is safe to eat. This blog post covered how to make honey garlic chicken. You learned about key ingredients, steps, and easy variations. I shared tips to improve your cooking. Remember to avoid common mistakes and use the right tools. With these details, you can enjoy a delicious meal. Try it out and adjust flavors to suit your taste. Cooking can be fun and rewarding! Enjoy your honey garlic chicken and impress your friends and family.

Looking to impress at dinner with minimal effort? Honey Garlic Chicken is your answer! This dish combines juicy chicken thighs with a sweet and savory glaze. It’s quick to make, …

Read more

Categories Dinner

Classic Spicy Moroccan Fish Savory and Flavorful Dish

June 13, 2025 by Chef Nate
To make Classic Spicy Moroccan Fish, you'll need: - 4 white fish fillets (cod or halibut) - 2 tablespoons olive oil - 1 teaspoon ground cumin - 1 teaspoon ground coriander - 1 teaspoon paprika - ½ teaspoon cayenne pepper (adjust to taste) - 1 teaspoon turmeric - 2 garlic cloves, minced - 1 can (14 oz) diced tomatoes, drained - 1 cup vegetable broth - 1 tablespoon lemon juice - Salt and pepper to taste - Fresh cilantro, chopped (for garnish) - Lemon wedges (for serving) These ingredients come together to create a bold and spicy dish. The fish fillets soak up the rich flavors from the spices and herbs. Cumin and coriander add warmth, while cayenne brings heat. Don't skip the garlic; it adds a lovely depth to the dish. For a well-rounded meal, consider these sides: - Couscous - Crusty bread - Steamed vegetables You can also add optional toppings: - Extra chopped cilantro - Sliced green onions - A drizzle of olive oil These sides and toppings enhance the dish's presentation and flavor. Couscous pairs perfectly, soaking up the spicy tomato sauce. Crusty bread is great for dipping. Enjoy the layers of taste and texture! For the full recipe, check out the detailed instructions provided. To start, we need to marinate the fish fillets. This step is key for flavor. In a bowl, mix together: - 2 tablespoons olive oil - 1 teaspoon ground cumin - 1 teaspoon ground coriander - 1 teaspoon paprika - ½ teaspoon cayenne pepper (adjust to taste) - 1 teaspoon turmeric - 2 garlic cloves, minced - Salt and pepper to taste Coat the fish fillets well with this spice mix. Let them sit for at least 30 minutes. This waiting time lets the spices soak in. For tools, you'll need a mixing bowl and a spatula. A large skillet is also essential for cooking. Next, we will prepare the sauce. Heat a large skillet over medium heat. Add: - 1 can (14 oz) diced tomatoes, drained - 1 cup vegetable broth Bring this mixture to a gentle simmer. Allow it to cook for about 5 minutes. This time helps the flavors blend well. Stir occasionally to prevent sticking. Now it’s time to cook the fish. Carefully place the marinated fillets into the skillet with the sauce. Align them evenly for even cooking. Cover the skillet with a lid. Cook for about 8-10 minutes. The fish is done when it flakes easily with a fork. If it’s still tough, it needs a bit more time. Once cooked, add 1 tablespoon of lemon juice to the sauce and stir gently. Taste your sauce and adjust the seasoning if needed. You can find the full recipe in the earlier section. Enjoy this dish hot and look forward to a burst of Moroccan flavors! To make the best Classic Spicy Moroccan Fish, start with marinating the fish properly. Mix the olive oil and spices in a bowl. Coat each fillet well. Let it sit for at least 30 minutes. This allows the flavors to soak in deep. Keep the fish moist during cooking. Use medium heat in your skillet. Cover it while it cooks. This keeps moisture inside. Check the fish after 8 to 10 minutes. It should flake easily with a fork. If it does, it's done! You can change the heat level by adjusting cayenne pepper. If you want it hotter, add more. For milder spice, cut back on the cayenne. Try different spices to create new flavors. Paprika adds a sweet taste. Ground ginger gives a warm, earthy note. You can also use cumin and coriander for extra depth. Mixing spices can make your dish unique. Feel free to experiment! {{image_2}} You can use many types of fish for this dish. Cod and halibut are great choices, but you can also try tilapia, snapper, or mahi-mahi. Each fish brings a unique taste and texture. If you have dietary needs, you can opt for firm tofu or plant-based fish. These swaps work well with the spice mix and sauce. Often, you may not have fresh tomatoes on hand. Canned tomatoes work just fine and save time. If you want a fresh taste, use diced tomatoes instead. You can also swap out spices based on what you have. Fresh herbs like parsley or mint can replace cilantro for a different flavor. This flexibility helps you enjoy the dish with what you have. For a twist, try adding olives or capers for extra richness. If you want the full recipe, you can find it [here](#). To keep your Classic Spicy Moroccan Fish fresh, store it in an airtight container. Place it in the fridge within two hours of cooking. It will stay good for up to three days. For longer storage, you can freeze the fish. Wrap each fillet tightly in plastic wrap, then place it in a freezer-safe bag. This method helps prevent freezer burn. Your fish can last up to three months in the freezer. When it's time to enjoy your leftovers, reheating is key. You want to keep the fish moist and flavorful. One method is to use the microwave. Place the fish on a microwave-safe plate and cover it with a damp paper towel. Heat it in short bursts, checking every 30 seconds until warm. Another option is to reheat on the stovetop. Place the fish in a skillet with a splash of vegetable broth. Cover and heat on low until warmed through, about 5 minutes. This method helps maintain the dish's rich flavors while keeping the fish tender. What can I serve with Classic Spicy Moroccan Fish? You can serve this dish with couscous, rice, or warm crusty bread. These sides soak up the sauce well and add texture. A fresh salad or roasted vegetables also complement the meal nicely. How can I tell when the fish is cooked through? The fish is done when it flakes easily with a fork. It should be opaque and no longer translucent. Using a food thermometer, the internal temperature should reach 145°F (63°C). Can I make this recipe ahead of time? Yes, you can prepare the fish and sauce a day in advance. Just store them in the fridge. Reheat gently before serving. This allows the flavors to meld well. Is it possible to make this dish spicier? Absolutely! You can add more cayenne pepper or include chili flakes. Adjust the heat to your liking during cooking. What to do if the fish is too spicy? If the dish is too spicy, add a bit of sugar or honey. This helps balance the heat. You can also serve it with a side of yogurt or sour cream to cool it down. How to fix a bland sauce? To enhance a bland sauce, add more spices, garlic, or lemon juice. A splash of vinegar can also brighten the flavors. Taste as you go to reach your desired flavor. This blog post covered the essentials for making Classic Spicy Moroccan Fish. You learned about key ingredients, preparation steps, and tips for perfect results. I shared variations to fit your taste and details on how to store leftovers. Cooking this dish can be fun and rewarding. With practice, you'll master the flavors and techniques. Enjoy making it your own, and don’t be afraid to experiment. Happy cooking!

Are you ready to spice up your dinner routine? My Classic Spicy Moroccan Fish recipe offers a burst of bold flavors and vibrant spices that will take your taste buds …

Read more

Categories Dinner
Older posts
Newer posts
← Previous Page1 … Page57 Page58 Page59 … Page108 Next →

GRILLED FLAVORS

where delicious ideas come to life, from stovetop to backyard. Warm, simple, and always satisfying. 🍽️✨

PAGES

Home About Contact Privacy Policy Terms & Conditions Cookie Policy GDPR Policy Copyright Policy Disclaimer

CATEGORIES

Appetizers Desserts Salads Breakfast Dinner

Contact

  • Pinterest
  • Mail
Copyright © 2026 Grilled Flavors. All rights reserved.