Creamy Tomato Pasta Delight in 30 Minutes or Less
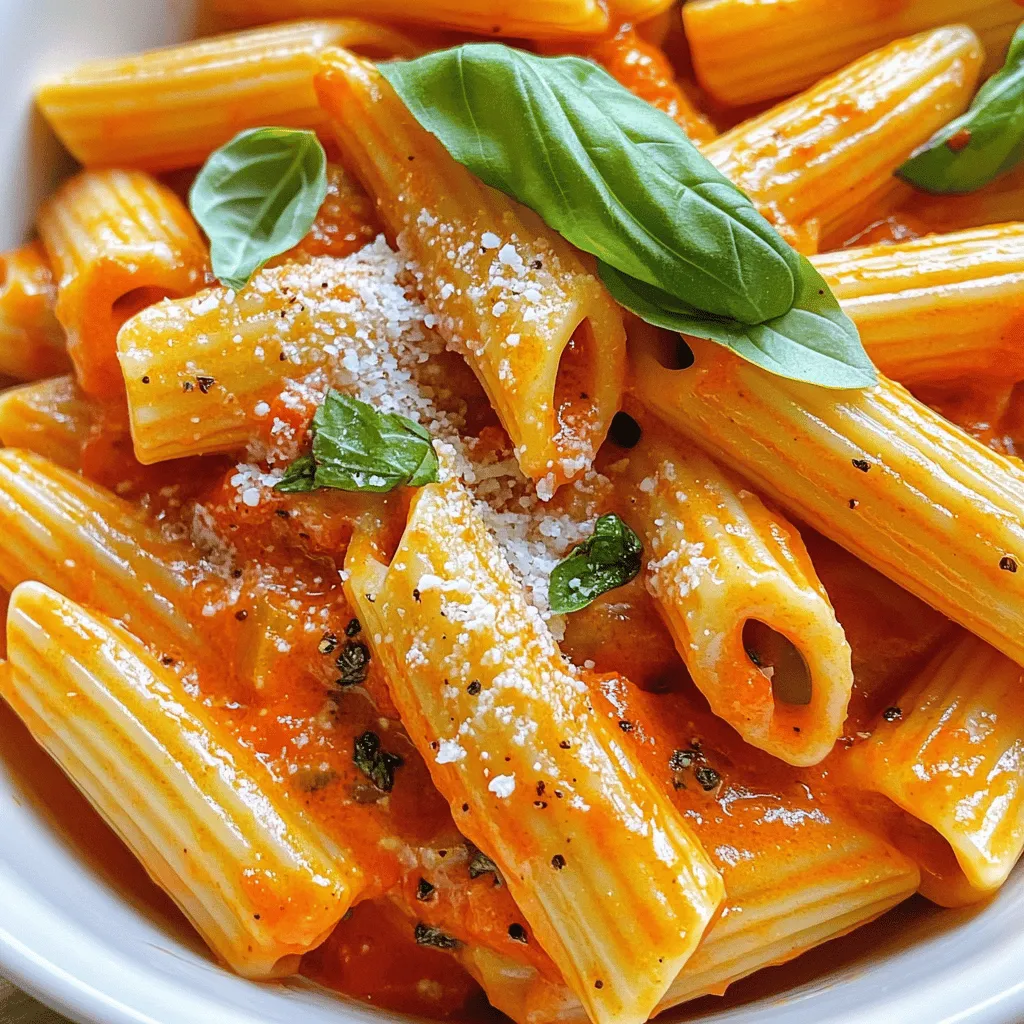
Are you ready to whip up a delicious meal in no time? In Creamy Tomato Pasta Delight in 30 Minutes or Less, I’ll show you how to create a rich, …
Are you ready to whip up a delicious meal in no time? In Creamy Tomato Pasta Delight in 30 Minutes or Less, I’ll show you how to create a rich, …

Craving a tasty meal that packs a protein punch? I’ve got you covered with my quick and easy recipe for High Protein Chicken Enchiladas! These delicious enchiladas are not only …
. - First, combine all salad components in a large bowl. Use your hands or a spoon to mix them well. The mix should include the shredded chicken, black beans, corn, red bell pepper, avocado, cherry tomatoes, red onion, and cilantro. This colorful mix makes the salad appealing and tasty. - Next, prepare the dressing in a separate bowl. Whisk together the lime juice, olive oil, ground cumin, chili powder, salt, and pepper. Keep whisking until the mixture blends well. This dressing adds flavor to the salad. - Now, it’s time to toss the salad. Pour the dressing over the salad mix. Use a gentle motion to toss everything together. Be careful not to mash the avocado. You want it to stay in chunks for great texture. - For presentation, serve the salad in a large, shallow bowl. This makes it easy to see all the vibrant colors. - Garnish with lime wedges and extra cilantro on the side. This adds a fresh look and extra flavor. Enjoy your Quick Southwest Chicken Salad! For the complete details, check the Full Recipe. To shred chicken fast, use two forks. Place the chicken on a cutting board. Hold one fork steady and pull with the other fork. This method works well for warm chicken. If you want a quicker option, buy pre-cooked chicken. Many stores sell rotisserie chicken that is ready to use. To boost flavor, add spices like smoked paprika or cayenne for heat. You can also mix in fresh herbs like parsley or basil. Different dressings can change the taste too. Try ranch or a spicy chipotle dressing to shake things up. Experiment and see what you love most! Prepare your ingredients ahead of time. Chop vegetables and store them in bags. This way, when you cook, you save time. If you have leftovers, store them in airtight containers. Keep the salad fresh for later meals. Remember, a little prep goes a long way! {{image_2}} You can swap chicken for other proteins. Try grilled shrimp, beef, or tofu. Each option gives you new flavors. For a plant-based version, use chickpeas or lentils. These swaps offer great protein and taste. You can try different dressings to mix it up. A ranch or vinaigrette can add a new twist. For a spicy kick, use chipotle ranch or sriracha dressing. These options will make your salad pop with flavor. Customizing your salad with seasonal fruits is fun. In summer, add juicy peaches or strawberries. In winter, try roasted sweet potatoes or pomegranate seeds. Each season brings fresh ingredients to enhance your salad. To keep your Quick Southwest Chicken Salad fresh, store it in an airtight container. This helps seal in flavors and keeps out air. Use a container that fits snugly to avoid excess space. If you have leftovers, try to eat them within three days. Always check for any signs of spoilage before you dig in. You can freeze the salad, but some ingredients don't freeze well. The avocado and tomatoes may turn mushy once thawed. If you want to freeze it, prepare the salad without these ingredients. You can add them fresh after thawing. Place the salad in a freezer-safe bag, removing as much air as possible. Label the bag with the date for easy tracking. In the fridge, your salad can last about three days. After that, it may start to lose freshness. Signs that your salad has gone bad include a sour smell or slimy texture. If you see any mold, toss it out immediately. Always trust your senses when it comes to food safety. Can I make this salad ahead of time? Yes, you can make this salad ahead of time. It stays fresh for a few hours. To keep the avocado from browning, add it just before serving. This way, it stays green and creamy. What can I use instead of lime juice? If you don’t have lime juice, use lemon juice. It gives a similar tangy flavor. You can also use vinegar, like apple cider or red wine vinegar, for a different twist. Is this salad gluten-free? Yes, this salad is gluten-free. All the ingredients used are safe for those with gluten issues. Just double-check any canned goods, like beans or corn, for hidden gluten. Can it be made dairy-free? Absolutely! This salad is naturally dairy-free. It does not contain cheese or any dairy ingredients. Enjoy it without worry if you are avoiding dairy. How many servings does this recipe provide? This recipe makes about four servings. It's perfect for a light lunch or dinner. You can double the recipe for larger groups or meal prep. What are good side dishes to serve with this salad? Good side dishes include tortilla chips, rice, or black bean soup. You can also serve it with fresh fruit for a sweet touch. These options pair well and enhance the meal. This blog post covered a vibrant and healthy chicken salad. We explored ingredients, health benefits, and preparation steps. Remember, you can swap proteins and dressings to suit your taste. Use fresh seasonal veggies to keep it exciting. Store leftovers properly to enjoy later. This salad is versatile and can fit many diets. With these tips, you can create a dish that looks great and tastes even better. Dive into your kitchen now and try this easy, fun recipe!](https://grilledflavors.com/wp-content/uploads/2025/06/736f7c77-a173-4f7f-b08f-107167efed94.webp)
Looking for a fresh and tasty meal? Try my Quick Southwest Chicken Salad! It’s loaded with healthy ingredients like chicken, black beans, and colorful veggies. In just a few minutes, …
![- 2 medium sweet potatoes, peeled and diced - 1 cup fresh spinach, chopped - 1/2 cup bell pepper, diced (any color) - 1/2 cup red onion, diced - 6 large eggs - 1/2 cup coconut milk (full-fat) - 1 teaspoon garlic powder - 1 teaspoon onion powder - Salt and pepper to taste - 1 tablespoon olive oil - Fresh herbs for garnish (like parsley or cilantro) This Whole30 breakfast casserole is a great way to start your day. It packs in a lot of flavor, and you can feel good about what you eat. The sweet potatoes provide a nice base, giving a little sweetness and great texture. Spinach adds nutrients and color, making it both pretty and healthy. The eggs and coconut milk create a creamy filling. Garlic and onion powder bring depth to the dish, while salt and pepper add essential seasoning. You can use any color bell pepper, which can change the look and taste a bit. Fresh herbs on top make this dish pop! They add a bright finish that ties the flavors together. You can serve this casserole hot or let it cool and enjoy it later. For the full recipe, check the steps that follow. First, preheat your oven to 375°F (190°C). Grease a 9x13 inch baking dish with olive oil. This will help the casserole not stick. In a skillet, heat a tablespoon of olive oil over medium heat. Add the diced sweet potatoes and sauté them for about 5 to 7 minutes. You want them to start softening. Next, add the diced bell pepper and red onion. Cook these for another 5 minutes. The onions should look translucent by now. Toss in the chopped spinach and stir until it wilts, which takes about 2 minutes. Remove the skillet from the heat and let the mixture cool slightly. This cooling step is key before mixing it with the eggs. In a large bowl, crack the 6 large eggs. Pour in 1/2 cup of full-fat coconut milk. Whisk these together until they blend well. Now, add 1 teaspoon of garlic powder, 1 teaspoon of onion powder, and a pinch of salt and pepper. Mix these seasonings in until everything is well combined. This mixture brings a rich flavor to the casserole. Take the cooled vegetable mixture and pour it into the egg mixture. Stir gently until everything is well combined. Pour this mixture into your prepared baking dish. Spread it out evenly to ensure even cooking. Now, it’s time to bake! Place the dish in the preheated oven and bake for 25 to 30 minutes. You will know it’s done when the top is golden and the casserole feels set. Once baked, remove it from the oven and let it cool for a few minutes. This cooling helps it slice nicely. For an extra touch, garnish with fresh herbs before serving. For the full details, check out the Full Recipe. To get even cooking, spread the mixture evenly in the dish. This helps it cook through nicely. Make sure your oven is fully preheated to 375°F (190°C). If it is not hot enough, the casserole can turn out soggy. For a fluffier casserole, whisk the eggs and coconut milk well. This adds air and makes the dish light. You can also add a bit of baking soda for extra lift, but be careful not to add too much. One common mistake is overcooking. If you leave it in the oven too long, the eggs can become rubbery. Check the casserole around 25 minutes. It’s done when the top is golden and the center is firm. Undercooking is another issue. If it’s too soft, it won’t set properly. Use a toothpick to test the center. It should come out clean when the casserole is ready. Choosing the right baking dish is key. A glass dish helps with even cooking. A metal dish can cook too fast on the outside, leaving the inside raw. To boost flavor, add fresh herbs like parsley or cilantro before baking. Dried herbs, such as thyme or oregano, also work well. Experiment with spices like paprika or cumin for a unique taste. You can use other Whole30-friendly ingredients too. Try adding diced tomatoes or mushrooms for extra depth. Ground turkey or chicken can also elevate the dish's protein content. Check the [Full Recipe] for more ideas! {{image_2}} You can boost the protein in your Whole30 breakfast casserole. Adding compliant meats makes it heartier and full of flavor. Here are some great options: - Bacon: Cook and crumble it before adding to the egg mix. It adds a smoky taste. - Sausage: Use ground turkey or pork sausage. Just make sure it's Whole30-approved. - Chicken: Shredded chicken works as a great lean protein option. These add-ins make your casserole even more satisfying and fun! Feel free to switch up the veggies in your casserole. Whole30 allows many great options. Here are some ideas: - Zucchini: Grate it for a mild taste and extra moisture. - Mushrooms: Sauté them for a rich, umami flavor. - Broccoli: Chop it finely for a crunchy texture and added nutrients. Experiment with different combinations and find your favorites! Changing the spices can turn your casserole into a whole new dish. Here are some fun flavor profiles to try: - Italian: Add dried oregano, basil, and a pinch of red pepper flakes. It gives a warm and cozy taste. - Mexican: Mix in cumin, chili powder, and fresh cilantro. This adds a zesty kick. - Mediterranean: Try adding sun-dried tomatoes and a sprinkle of feta cheese (if compliant). It brings a bright, fresh flavor. With these variations, your Whole30 breakfast casserole can be a new delight every time! For a complete guide on making this dish, check out the Full Recipe. To keep your Whole30 breakfast casserole fresh, store it in the fridge. Use airtight containers to prevent moisture loss. The casserole will stay good for up to four days. Make sure to let it cool completely before sealing it. This helps avoid sogginess. If you have a larger batch, consider dividing it into smaller portions for easy access. When you are ready to enjoy your casserole again, reheating it is simple. The best method is to use an oven. Preheat it to 350°F (175°C). Place your casserole in an oven-safe dish. Cover it with foil to keep it moist. Heat for about 15-20 minutes, or until warmed through. You can also use a microwave for quick reheating. Just make sure to cover it to keep the moisture in. If you want to save some for later, freezing is a great option. Cut the casserole into portions before freezing. Wrap each piece tightly in plastic wrap, then place it in a freezer bag. This helps prevent freezer burn. You can freeze it for up to three months. To thaw, move it to the fridge overnight. Reheat it as described above for the best texture. Whole30 is a strict 30-day diet plan. It focuses on whole foods. You eat meat, seafood, eggs, veggies, fruits, and healthy fats. You avoid sugar, grains, dairy, and legumes. The goal is to reset your body and discover food sensitivities. Many people find it helps with energy and mood. Yes, you can make the casserole ahead of time. Prepare it the night before. Store it in the fridge after assembling. Bake it in the morning for a warm breakfast. This saves time and makes mornings easier. Yes, this casserole is dairy-free. We use coconut milk instead of regular milk. Coconut milk gives it a creamy texture without dairy. It is a great choice for those on Whole30. You can use other compliant milk options. Almond milk or cashew milk are good choices. Just ensure they are unsweetened and free from additives. These options can also add a nice flavor to the dish. You can serve it with fresh fruit or a side salad. Avocado slices add healthy fats. You might also enjoy it with a dollop of salsa for extra flavor. Pairing these sides will make your meal even more satisfying. For the complete recipe, check out the Savory Sweet Potato & Spinach Breakfast Casserole [Full Recipe]. This blog post covered how to make a Whole30 breakfast casserole. We explored the simple ingredients, step-by-step instructions, and valuable tips. I shared ways to enhance flavor and suggested fun variations. Proper storage and reheating tips ensure leftovers stay tasty. Eating healthy can be easy and delicious. Try this casserole for a satisfying meal. Enjoy your cooking journey and feel good knowing you’re making Whole30-friendly choices!](https://grilledflavors.com/wp-content/uploads/2025/06/8bae297f-81d9-4045-b91a-fc7878287d9c.webp)
Looking for a tasty way to kick-start your mornings on Whole30? I’ve got just the recipe for you! My Whole30 Breakfast Casserole is packed with flavor and nutritious ingredients to …
![For this savory dump-and-bake chicken tzatziki casserole, you will need: - 2 cups cooked chicken, shredded - 1 cup Greek yogurt - 1 cup cucumber, diced - 1 cup cherry tomatoes, halved - 1 cup cooked quinoa or couscous - 1/2 cup red onion, finely chopped - 1/4 cup fresh dill, chopped - 2 tablespoons lemon juice - 1 tablespoon olive oil - 1 teaspoon garlic powder - Salt and pepper to taste - 1/2 cup feta cheese, crumbled - 1/2 cup grated mozzarella cheese If you need to swap ingredients, here are some options: - Use rotisserie chicken instead of cooked chicken for quick prep. - Substitute sour cream for Greek yogurt for a different texture. - Replace cucumber with zucchini for a similar crunch. - Cherry tomatoes can be swapped with diced bell peppers for sweetness. - If you don’t have quinoa, use rice or couscous instead. - You can omit feta cheese and use more mozzarella for a milder flavor. This casserole is not only tasty but also healthy. Here’s a rough idea of the nutritional value per serving (based on 6 servings): - Calories: 350 - Protein: 30g - Carbohydrates: 30g - Fat: 15g - Fiber: 3g - Sugar: 4g This dish packs protein and nutrients while being easy to make. For the full recipe, you can refer to the instructions above. First, gather your ingredients. You need cooked chicken, Greek yogurt, cucumber, cherry tomatoes, and quinoa or couscous. Also, have red onion, fresh dill, lemon juice, olive oil, garlic powder, salt, pepper, feta cheese, and mozzarella cheese. Preheat your oven to 375°F (190°C). In a large bowl, mix the shredded chicken and Greek yogurt. Add the diced cucumber, halved cherry tomatoes, and cooked quinoa or couscous. Then, stir in the chopped red onion, fresh dill, lemon juice, olive oil, garlic powder, salt, and pepper. Mix until it all blends well. Next, transfer your mixture to a greased 9x13-inch casserole dish. Spread it evenly across the dish. Now, sprinkle the crumbled feta cheese and grated mozzarella cheese on top. Cover the dish with aluminum foil and place it in the preheated oven. Bake for 25 minutes. After that, remove the foil. Bake for another 10 to 15 minutes, until the cheese is bubbly and golden brown. Once baked, take it out of the oven and let it cool for five minutes. Serve your Chicken Tzatziki Casserole warm. For a pop of color, garnish it with extra fresh dill. A wedge of lemon on the side adds a nice touch and brightens the dish. This recipe serves 4 to 6 people and works well for family dinners or gatherings. For more details, check the Full Recipe. To make the best Chicken Tzatziki Casserole, use cooked chicken. Shredded rotisserie chicken works great. It saves time and adds flavor. Mix the ingredients well to ensure even taste. Layer the cheese generously on top. This gives a rich crust. Bake until bubbly and golden brown. Let it cool for a few minutes before serving. This helps the flavors settle. Avoid using raw chicken in this casserole. The cooking time is not long enough. Don't skip the salt and pepper. They enhance the flavors of the dish. Watch the baking time. If overbaked, the cheese can burn. Also, do not rush the cooling time. It may crumble when you serve it hot. This dish pairs well with a fresh salad. A Greek salad adds a nice crunch. You could also serve it with pita bread. The bread helps scoop up the casserole. If you want more flavor, try tzatziki sauce on the side. It adds a cool, creamy touch. For a heartier meal, roasted vegetables work well too. They balance the dish nicely. For the full recipe, check out the [Full Recipe]. {{image_2}} You can easily adjust the recipe to fit your needs. If you're gluten-free, swap quinoa for rice or gluten-free couscous. For a dairy-free option, use a dairy-free yogurt for the tzatziki flavor. You could also skip the feta cheese or use a vegan alternative. If you want a lower-fat version, choose lean chicken breast and low-fat yogurt. These simple swaps keep the dish tasty while meeting different dietary needs. For extra flavor, consider adding spices to the mix. Try a teaspoon of smoked paprika for a warm, smoky taste. You could also add a pinch of cayenne pepper for some heat. Fresh herbs, like parsley or mint, can brighten up the dish. If you love garlic, increase the garlic powder to two teaspoons. These small changes can make your casserole even more exciting. Leftovers from this casserole are just as good. You can turn them into tasty wraps. Just take a tortilla and fill it with the casserole and some extra veggies. Another option is to add the leftovers to a salad for a quick lunch. You can even make a dip by mixing it with more yogurt and serving it with pita chips. These ideas keep your meals fresh and fun! After you enjoy the Dump-and-Bake Chicken Tzatziki Casserole, store leftovers in an airtight container. This keeps the flavors fresh. Let the casserole cool down to room temperature before packing it away. It will last in the fridge for up to three days. If you plan to eat it later, label your container with the date. This helps you keep track of how long it has been stored. To reheat, simply take the casserole out of the fridge. Preheat your oven to 350°F (175°C). Place the casserole in a baking dish. Cover it with aluminum foil to keep it moist. Heat for about 20 minutes or until warm. You can also microwave individual portions. Just cover them with a paper towel to avoid splatters. If you want to freeze the casserole, use a freezer-safe container. Wrap it well with plastic wrap and then foil. This helps prevent freezer burn. You can freeze the casserole for up to three months. When you’re ready to eat, thaw it in the fridge overnight. Then, reheat using the oven or microwave. This way, you can enjoy a taste of summer any time! For the full recipe, check out the Dump-and-Bake Chicken Tzatziki Casserole. It takes about 50 minutes to make this dish. You will spend 15 minutes prepping the ingredients. Then, the baking time is just 35 minutes in total. This makes it a quick meal for busy days. No, you should not use raw chicken. The chicken must be cooked before mixing it in. This keeps the dish safe to eat and ensures the chicken stays tender. Using cooked chicken also helps save time. This casserole pairs well with several sides. Here are some ideas: - A simple green salad - Pita bread or flatbreads - Roasted vegetables - Grilled zucchini or eggplant - Rice or couscous for extra carbs These options will add flavor and make your meal more filling. Enjoy your savory dump-and-bake chicken tzatziki casserole! For the full recipe, check out the provided link. This blog post guides you through making a delicious Dump-and-Bake Chicken Tzatziki Casserole. We covered ingredients, cooking steps, and tips for perfecting your dish. Remember to try ingredient swaps for any dietary needs and use our storage tips for leftovers. With these insights, you can enjoy a tasty meal that nourishes and delights. Happy cooking!](https://grilledflavors.com/wp-content/uploads/2025/06/345c3142-e350-4063-932e-f04f606c1956.webp)
Are you ready to dive into a simple yet delicious recipe? This Savory Dump-and-Bake Chicken Tzatziki Casserole is a game-changer for busy nights. With minimal prep and mouth-watering flavors, this …
![To make delicious funnel cake bites, you need a few simple ingredients. These items are easy to find and make the process fun. Here’s what you need: - 1 cup all-purpose flour - 2 tablespoons granulated sugar - 1/2 teaspoon baking powder - 1/4 teaspoon baking soda - 1/4 teaspoon salt - 1 large egg - 1 cup buttermilk - 1 teaspoon vanilla extract - Oil for frying - Powdered sugar for dusting - Optional toppings: chocolate sauce, strawberry jam, or whipped cream These ingredients come together to create a sweet treat. Each one plays an important role. The flour gives structure. The sugar adds sweetness. The baking powder and baking soda help them rise and become light. The egg and buttermilk keep the bites moist and tasty. You can choose your toppings based on what you like. Chocolate sauce is rich and sweet, while strawberry jam adds fruity flavor. Whipped cream is light and fluffy, making it a great choice too. You can mix and match for your own perfect bite! For the full recipe, check out the details above. Enjoy making these funnel cake bites! First, grab a mixing bowl. Sift together the flour, sugar, baking powder, baking soda, and salt. This step helps blend the dry ingredients well. Mixing them well keeps the bites light and fluffy. In another bowl, whisk the egg until it’s smooth. Add in the buttermilk and vanilla extract. Mix these ingredients until they blend nicely. The liquid mix brings moisture to the bites. Now, pour the wet mix into the dry bowl. Stir gently until just combined. You want a few lumps; don’t overmix. This keeps the bites tender and delicious. Heat about 2 inches of oil in a deep pot. Aim for 350°F (175°C). Use a piping bag or a squeeze bottle to drizzle the batter into the hot oil. Make small spirals about 2-3 inches wide. Fry for 1-2 minutes until golden brown, turning halfway for even cooking. After frying, use a slotted spoon to lift the bites from the oil. Place them on a plate lined with paper towels to drain. Dust with powdered sugar and add your favorite toppings. Try chocolate sauce, strawberry jam, or whipped cream for extra fun. Enjoy your funnel cake bites! For the complete recipe, check [Full Recipe]. - Temperature control for perfect bites: Heat the oil to 350°F (175°C). This keeps the bites crispy. If the oil is too hot, they will burn. If it’s too cold, they will soak up oil and become greasy. Use a thermometer for accuracy. - Using the right oil for frying: Choose oils with high smoke points, like vegetable or canola oil. These oils work best for frying because they can handle high heat without burning. To get that light and airy texture, mix your batter gently. Overmixing can make the bites tough. Letting the batter rest for a few minutes helps too. This allows the ingredients to meld. You want a thick but pourable batter. Serve your funnel cake bites warm. Dust them with powdered sugar for a sweet touch. You can also offer toppings like chocolate sauce, strawberry jam, or whipped cream. For a fun twist, try serving them in small paper cones for easy snacking. Add a side of fresh fruit for a burst of flavor. For the full experience, check out the Full Recipe. {{image_2}} Funnel cake bites are fun to make, and you can change them up in many ways. Here are some tasty variations you can try. You can make your funnel cake bites even better with fun toppings. Here are a few ideas: - Chocolate sauce - Strawberry jam - Whipped cream These toppings add sweetness. They also make your bites look pretty. Drizzle chocolate sauce on top for a rich taste. Use strawberry jam for a fruity twist. A dollop of whipped cream adds a creamy finish. You can add more flavor to the batter. Here are some options: - Cinnamon - Nutmeg - Fruit purees Cinnamon gives a warm spice. Nutmeg adds depth. Fruit purees like berry or banana can make your bites fruity and fresh. Mix these into the batter before frying for a new twist. Try serving your funnel cake bites in fun ways. Here are some ideas: - With a scoop of ice cream - With fresh fruit on the side Ice cream makes them a great dessert. Fresh fruit adds a healthy touch. You can even create a mini dessert platter for guests. These ideas make your bites more exciting and delicious. For the full recipe, check out the [Full Recipe]. Enjoy making your funnel cake bites! Store leftover funnel cake bites in an airtight container. Place a paper towel at the bottom to absorb moisture. This helps keep them crispy. You can keep them at room temperature for one day. If you want to keep them longer, move them to the fridge. They stay fresh for up to three days. To reheat your funnel cake bites, use an oven or an air fryer. Preheat the oven to 350°F (175°C). Place the bites in a single layer on a baking sheet. Heat for about five to seven minutes. If using an air fryer, set it to 350°F and heat for three to five minutes. This keeps them crunchy and warm. You can freeze funnel cake bites if you have leftovers. First, let them cool completely. Then, place them in a single layer on a baking sheet. Freeze them for about an hour. Once frozen, transfer them to a freezer bag. They can last for up to three months. When ready to eat, reheat them straight from the freezer. Enjoy your tasty treat anytime! Yes, you can make Funnel Cake Bites in an air fryer. First, prepare the batter as usual. Then, spoon small amounts of batter onto the air fryer basket. Make sure to space them out. Cook them at 350°F for about 8-10 minutes. Keep an eye on them. They will turn golden brown. This method uses less oil, making it a lighter option. To check if the oil is hot enough, use a thermometer. Heat the oil to 350°F (175°C). If you don’t have a thermometer, drop a small piece of batter into the oil. If it bubbles and rises, the oil is ready. If it sinks, let it heat longer. This step is crucial for crispy bites. Funnel cake is a larger, flat cake made by drizzling batter into hot oil. It often looks like a big web. In contrast, Funnel Cake Bites are smaller, bite-sized pieces. They are easier to eat and perfect for sharing. Both have a similar taste but offer different eating experiences. Yes, you can make Funnel Cake Bites gluten-free. Simply swap the all-purpose flour for a gluten-free flour blend. Make sure to check other ingredients too. Some baking powders may contain gluten. This way, everyone can enjoy them, regardless of dietary needs. You can find Funnel Cake Bites at fairs, carnivals, and some festivals. Many food trucks also sell them. If you prefer, you can make them at home with the Full Recipe. This way, you can enjoy them anytime! In this post, we covered how to make tasty funnel cake bites. We started with the ingredients, followed by step-by-step mixing and frying instructions. Then, I shared helpful tips for perfect frying and serving ideas. You can also try fun variations, such as adding different toppings and flavors. Making these bites is easy and fun. Enjoy sharing them with friends and family. Remember, you can always get creative with your toppings and flavors!](https://grilledflavors.com/wp-content/uploads/2025/06/4ff23fe8-20b9-41d6-9b79-efe9c67a30f0.webp)
Craving a sweet, crispy treat? Funnel cake bites are easy to make and oh-so-delicious. In this post, I’ll guide you through each simple step to whip up these tasty morsels. …
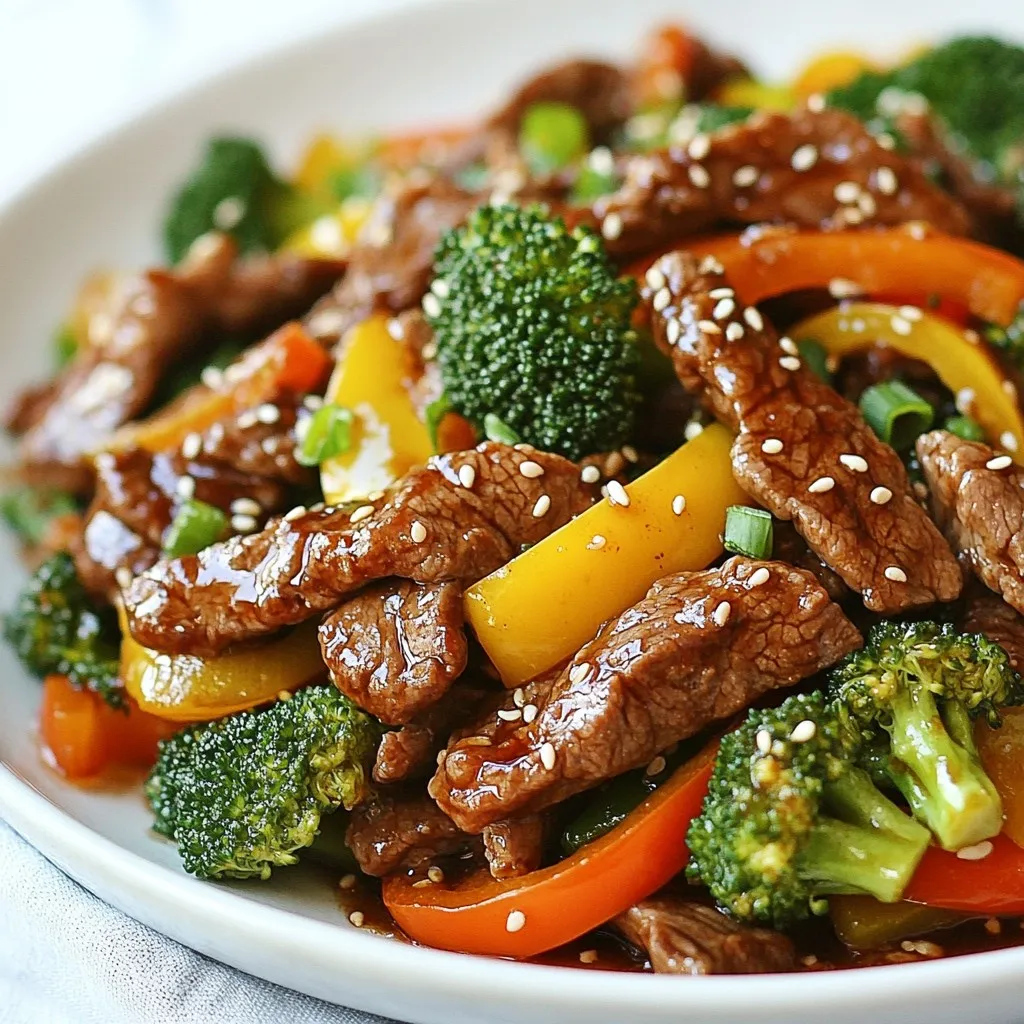
Craving a quick and tasty dinner? Try my Easy Teriyaki Beef Stir-Fry! This dish is packed with flavor and takes just minutes to prepare. With tender beef, crisp vegetables, and …

Start your day right with my Savory Breakfast Burritos Recipe! These tasty burritos are packed with eggs, veggies, and cheese, making them a perfect morning meal. With just a few …
![To make an Easy Low Carb Chicken Casserole, you'll need these key ingredients: - 2 cups cooked chicken, shredded - 1 cup broccoli florets, steamed - 1 cup cauliflower rice - 1 cup shredded cheddar cheese - 1/2 cup cream cheese, softened - 1/2 cup sour cream - 1 teaspoon garlic powder - 1 teaspoon onion powder - Salt and pepper to taste - 1/4 cup green onions, chopped (for garnish) These ingredients work well together to create a tasty and filling dish. I recommend using fresh broccoli for crunch and flavor. The cream cheese and sour cream add creaminess, making each bite enjoyable. Each serving of this casserole has about: - Calories: 350 - Fats: 20g - Proteins: 30g - Carbs: 10g This casserole is low in carbs, perfect for those on a keto or low-carb diet. The chicken provides lean protein, while the broccoli and cauliflower add fiber and vitamins. This meal is not just tasty; it also offers health benefits, making it a smart choice for a weeknight dinner. For the full recipe, check out the link provided. Start by preheating your oven to 350°F (175°C). This helps the casserole cook evenly. In a large bowl, mix the softened cream cheese and sour cream until smooth. It’s best to use a whisk or a fork for this. Next, add 2 cups of shredded chicken, 1 cup of steamed broccoli florets, and 1 cup of cauliflower rice to the bowl. Sprinkle in 1 teaspoon of garlic powder, 1 teaspoon of onion powder, and salt and pepper to your taste. Stir all the ingredients together until everything is well mixed. If you want to save time, you can prep the chicken and veggies in advance. This makes the cooking process faster. Once your mixture is ready, transfer it to a greased 9x13-inch baking dish. Spread it evenly across the dish. Now, sprinkle 1 cup of shredded cheddar cheese on top. Place the dish in the preheated oven. Bake for about 25-30 minutes. Look for the cheese to be melted and bubbly. You can also check the casserole by inserting a fork in the center. If it’s hot all the way through, it’s done. When it’s ready, remove it from the oven and let it cool slightly before serving. Garnish with chopped green onions for a fresh touch. Enjoy your easy low carb chicken casserole! For the full recipe, check out the [Full Recipe]. To cook chicken ahead of time, use a slow cooker. This method keeps the chicken moist and tasty. You can also bake or boil it. Just be sure to shred the chicken once it's cool. This makes it easy to mix into the casserole. For the best flavor and texture, season the chicken well. Use salt, pepper, and herbs like thyme or rosemary. Marinate the chicken for a few hours or overnight for more depth in flavor. When you mix all the ingredients, stir gently. This way, you keep the chicken pieces intact and juicy. This casserole pairs well with a side salad. A fresh green salad with a light dressing complements the dish nicely. You can also serve it with steamed green beans or a side of roasted vegetables. This dish is perfect for family dinners or casual gatherings. You can also serve it on busy weeknights when you need something quick. Just pop it in the oven and enjoy! For the full recipe, check below. {{image_2}} You can change the protein in this casserole. If you want a twist, try turkey. It works well, too. For a plant-based option, use tofu instead of chicken. Tofu absorbs flavors nicely and adds protein. You can also switch up the veggies. Instead of broccoli, try spinach or bell peppers. Both add color and taste. Zucchini is another great choice. It brings moisture and freshness to the dish. For those needing gluten-free options, this casserole fits the bill. Just check your cream cheese and sour cream labels. Most brands are gluten-free. If you want a dairy-free version, use coconut cream in place of cream cheese. For sour cream, try a cashew-based option. If you're following paleo or keto diets, this casserole works well. Just ensure your cheese is low-carb. You can also add more cauliflower rice to keep carbs low. This makes the dish filling and healthy. Thinking about these variations can help you enjoy this easy low carb chicken casserole in new ways. Feel free to explore! For the full recipe, check back to the recipe section. To keep your Easy Low Carb Chicken Casserole fresh, store it in the fridge. Use an airtight container. This helps keep the flavors locked in. It is best to eat leftovers within three days. For longer storage, freeze portions. Divide the casserole into smaller containers. This makes it easy to grab a serving later. When freezing, let the casserole cool completely. Cover it well with plastic wrap, then foil. This prevents freezer burn. You can freeze it for up to three months. Just remember to label the containers with the date. When it’s time to enjoy your casserole again, reheat it in the oven. Preheat the oven to 350°F (175°C). Place the casserole in an oven-safe dish. Cover it with foil to keep it moist. Heat for about 20-25 minutes or until warm. You can also use the microwave. Put a serving in a microwave-safe bowl. Heat for 1-2 minutes, stirring halfway. Check to see if it’s hot all the way through. Before eating, look for these signs: no strange smells, no mold, and a good texture. If it looks or smells off, it’s best to toss it. Enjoy your delicious casserole! For the complete recipe, refer to the [Full Recipe]. How can I make this casserole ahead of time? You can prepare this casserole the night before. Mix all the ingredients and place them in the baking dish. Cover it with plastic wrap and refrigerate. When you're ready to bake, remove the wrap and pop it in the oven. Just add a few extra minutes to the baking time. Can I use frozen vegetables in this recipe? Yes, you can use frozen vegetables. Just thaw them first and drain any excess water. This helps keep the casserole from becoming too watery. Frozen broccoli or cauliflower works well without losing flavor. What can I serve with low carb chicken casserole? You can serve a fresh salad or steamed veggies on the side. A simple green salad with a light dressing adds a nice crunch. You could also pair it with a low carb bread for a fuller meal. How do I know if my casserole is done baking? Your casserole is done when the cheese is melted and bubbly. You can use a fork to check if it’s hot throughout. The edges should be slightly golden. If you see this, it's ready to enjoy! This blog post covered everything you need for an Easy Low Carb Chicken Casserole. We discussed crucial ingredients and quantities that boost flavor. You learned about the nutrition of each ingredient and their health perks. The step-by-step guide helped with preparation and baking for the perfect dish. Tips for cooking, serving ideas, and ingredient swaps keep it fun and flexible. Proper storage methods ensure your leftovers stay tasty. Follow these steps for a delicious meal, any day of the week. Enjoy making this casserole for your next gathering!](https://grilledflavors.com/wp-content/uploads/2025/06/8bbeffce-4dff-4006-b7b1-9f5ad257598c.webp)
Are you looking for a quick, tasty meal that won’t derail your low-carb goals? This Easy Low Carb Chicken Casserole is your answer! Packed with flavor and simple to prepare, …
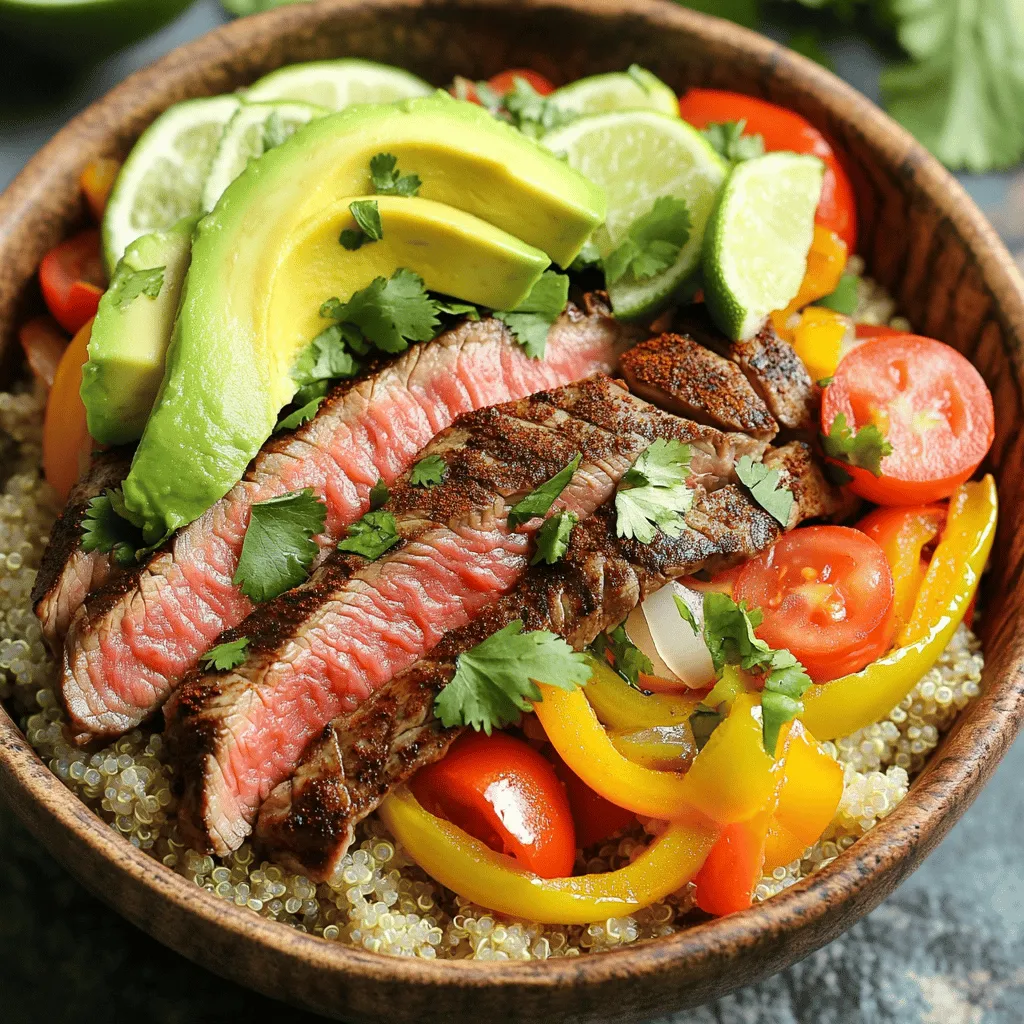
Looking for a tasty and healthy meal that’s packed with protein? My High Protein Steak Fajita Bowl combines juicy flank steak with fresh veggies, wholesome grains, and bold flavors. This …