Cheesecake Fruit Salad Easy and Creamy Delight
Ready for a treat that combines the best of dessert and fruit salad? This Cheesecake Fruit Salad is a simple, creamy delight you can whip up in no time. I’ll …
Ready for a treat that combines the best of dessert and fruit salad? This Cheesecake Fruit Salad is a simple, creamy delight you can whip up in no time. I’ll …
![To make tasty Air Fryer Taco Bombs, gather these key ingredients: - 1 lb ground beef or turkey - 1 taco seasoning packet - 1 can of refrigerated biscuit dough (8-count) - 1 cup shredded cheddar cheese - ½ cup chopped tomatoes - ½ cup diced onions - ¼ cup sliced black olives These ingredients create a delicious and hearty filling for your taco bombs. You can add extra flavor and fun with these garnishes and sauces: - ½ cup sour cream (for dipping) - Fresh cilantro (for garnish) - Hot sauce (for spice) - Salsa (for extra flavor) These options let you customize your dish to your taste. You will need a few essential tools to make your taco bombs: - Air fryer - Skillet - Mixing spoon - Baking sheet or plate (for assembling) - Measuring cups Having the right equipment makes the cooking process smooth and easy. For the complete recipe, check [Full Recipe]. First, start by cooking the meat. I like to use ground beef, but turkey works too. Heat a skillet over medium heat. Add the meat and cook until it is brown. This should take about 5 to 7 minutes. If there's extra fat, drain it. Next, stir in the taco seasoning. Follow the packet instructions for adding water. Let it simmer for a few minutes, then remove it from the heat. This mixture will give the taco bombs their bold flavor. Now, let’s assemble the taco bombs. Preheat your air fryer to 320°F (160°C). Take a can of refrigerated biscuit dough. For each biscuit, flatten it into a round shape, about 4 to 5 inches wide. Place a spoonful of the meat mixture in the center of each disc. Then, add some shredded cheddar cheese, chopped tomatoes, diced onions, and black olives on top. Next, gather the edges of the biscuit dough around the filling. Pinch the edges to seal them tightly. Roll the filled dough into a ball shape. This will help keep all the tasty fillings inside while they cook. It’s time to cook the taco bombs! Lightly spray the air fryer basket with olive oil. Place the taco bombs in the basket, making sure to leave space between each one. This helps them cook evenly. Spray the tops of the bombs with more olive oil for a nice, crispy finish. Set the air fryer to cook for about 10 to 12 minutes. Keep an eye on them until they turn golden brown and look delicious. Once they’re done, let them cool for a bit. Serve them warm with a side of sour cream for dipping. Don't forget to garnish with fresh cilantro for that extra pop! For the full recipe, check out the details above. Enjoy your tasty taco bombs! To get that perfect golden finish on your taco bombs, keep these tips in mind: - Use Olive Oil Spray: Lightly spray the tops with olive oil before cooking. - Adjust Air Fryer Temp: Set your air fryer to 320°F (160°C) for even cooking. - Don’t Overcrowd: Leave space between each taco bomb in the basket. This helps air circulate. These steps ensure even browning. You'll love the crunchy texture! Here are some common mistakes to watch out for: - Overfilling the Dough: If you add too much filling, the bombs won’t seal well. - Skipping the Simmer: Always let the meat mixture simmer to enhance the flavor. - Not Preheating the Air Fryer: Preheating helps cook the dough evenly. Avoiding these errors will lead to better results! To make your taco bombs even tastier, consider these ideas: - Add Spices: Mix in extra chili powder or cumin with the taco seasoning. - Fresh Herbs: Try adding chopped cilantro or green onions to the filling. - Cheese Variety: Use pepper jack or queso fresco for a different flavor. These tips will help you create a flavor explosion in every bite. For the complete recipe, check out the [Full Recipe]. {{image_2}} You can make tasty vegetarian taco bombs. Start with a meat substitute like lentils or black beans. Cook them with taco seasoning, just like you would with meat. You can also add veggies like bell peppers, corn, or zucchini. These ingredients add great flavor and texture. Cheese makes taco bombs extra yummy. While cheddar is classic, you can try other kinds. Monterey Jack adds a creamy touch. For a kick, use pepper jack cheese. If you want a tangy taste, try feta or goat cheese. Mix and match to find your favorite combo. Want it spicy? Add chopped jalapeños or a sprinkle of cayenne pepper to the meat mix. For a milder taste, skip the heat. You can also use diced bell peppers for sweetness. This way, everyone can enjoy taco bombs just the way they like. Explore these options to find your perfect flavor balance. For the full recipe, check out the above section. To store leftover taco bombs, let them cool completely. Place them in an airtight container. You can keep them in the fridge for up to three days. If you want to keep them longer, consider freezing. To reheat the taco bombs, preheat your air fryer to 350°F (175°C). Place the taco bombs in the basket. Heat them for about 5-7 minutes. This method keeps them crispy and tasty. To freeze taco bombs, arrange them on a baking sheet. Ensure they don't touch each other. Freeze for about one hour, then transfer to a freezer bag. They can stay frozen for up to three months. When ready to eat, cook from frozen for 12-15 minutes at 350°F (175°C). Check the Full Recipe for details on how to make these delicious treats! Yes, you can use pre-cooked meat. Just warm it up before adding it to the dough. This saves time. Make sure to mix in the taco seasoning for great flavor. You can use rotisserie chicken, leftover beef, or turkey. This way, you keep the taste and have fun making taco bombs! You have many options for fillings! Try using beans, corn, or peppers. You can add cooked vegetables for a healthy twist. Different cheeses like pepper jack or mozzarella can add a nice kick. Don't forget to mix in spices to match your taste. Get creative and make it your own! Check the color of the taco bombs. They should be golden brown and crispy on the outside. You can also use a meat thermometer. The inside should reach 165°F (74°C). If they look puffy and the dough is firm, they are ready to eat. Let them cool for a few minutes before serving! In this post, I covered how to make delightful air fryer taco bombs. We explored main ingredients, easy steps, and helpful tips. I shared options for vegetarian variants and ways to adjust the spice level. You learned how to store and reheat your taco bombs. Taco bombs are simple and fun to make. With these steps and tricks, you will impress everyone. Enjoy creating tasty bites that can fit many tastes!](https://grilledflavors.com/wp-content/uploads/2025/06/df4e66a1-6969-45b9-bbfe-b2e9f9cc8516.webp)
Are you ready to make a snack that wows everyone? Air Fryer Taco Bombs are not just tasty; they’re super easy to whip up! Packed with flavor and customizable for …

Looking for a tasty treat that brightens your day? Lemon Cream Cheese Muffins are the perfect blend of sweet and tangy. They are simple to make and bursting with flavor. …
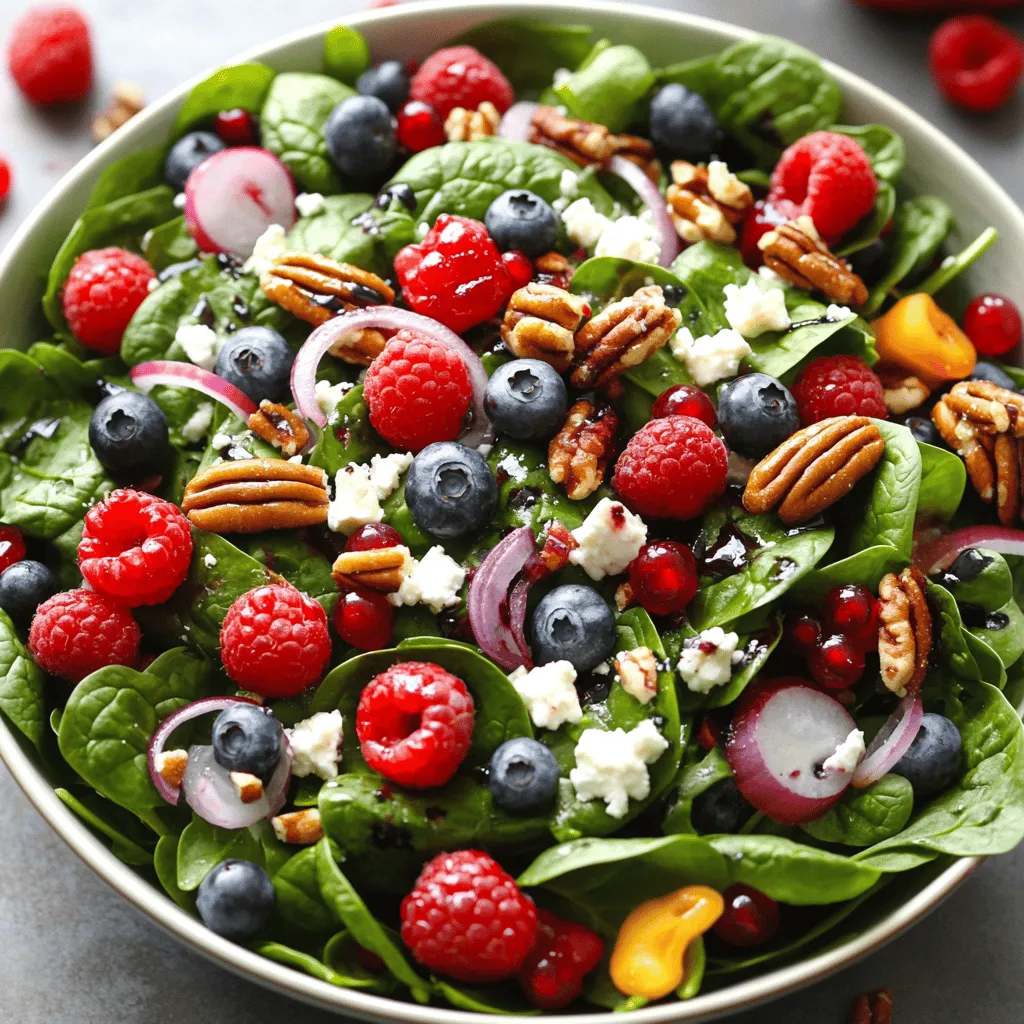
Looking for a fresh and flavorful dish that’s quick to make? Try my Berry Spinach Salad with Pecans! This vibrant salad combines sweet berries, crunchy nuts, and creamy feta, creating …
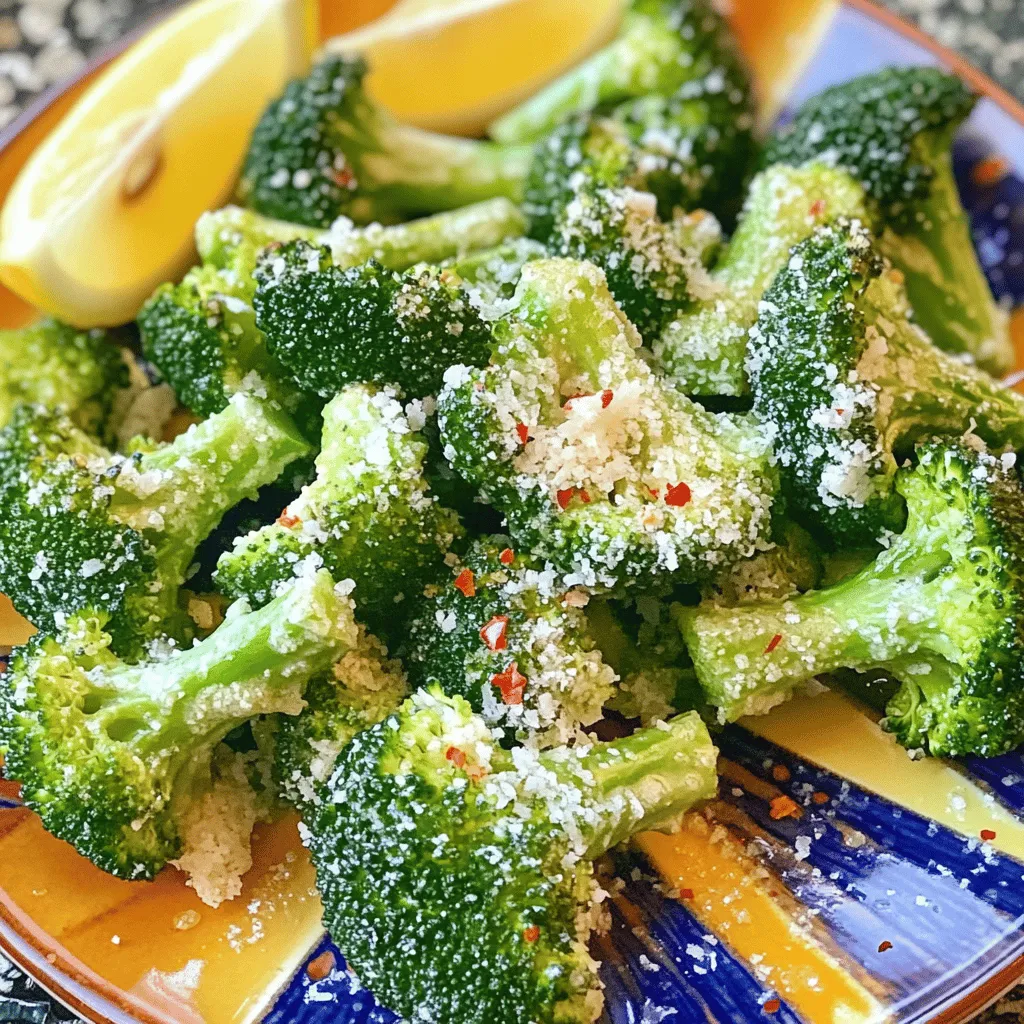
Get ready to elevate your snack game with my Crispy Garlic Air Fryer Broccoli! This quick and easy recipe turns ordinary broccoli into a crunchy delight, perfect for any meal …
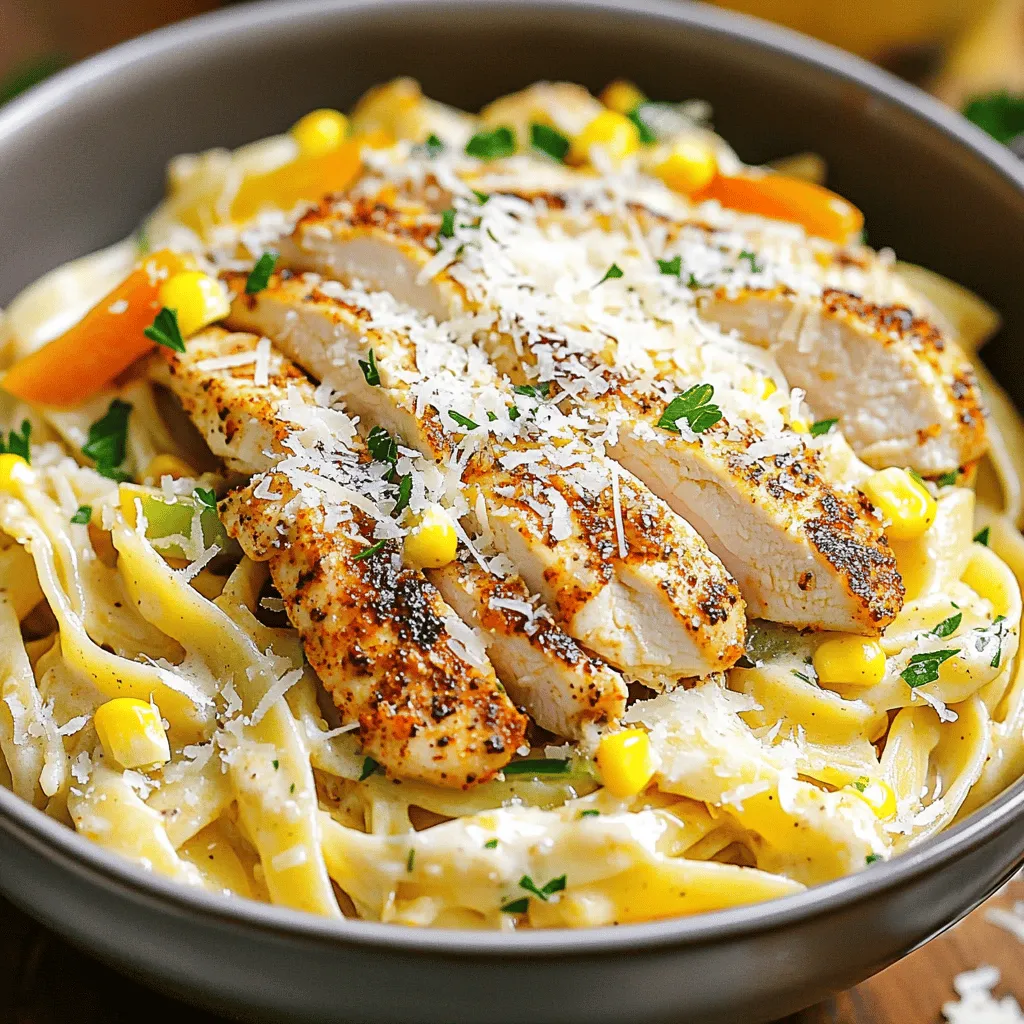
Looking for a quick and tasty dinner? Creamy Cajun Chicken Pasta is your solution! This dish combines smooth sauce with bold spices for mouth-watering flavor. You can make it in …
![- 2 boneless, skinless chicken breasts - 1 cup BBQ sauce - 2 medium sweet potatoes, peeled and diced - 2 tablespoons olive oil - 1 teaspoon paprika - 1 teaspoon garlic powder - Salt and pepper to taste - 1 cup corn - 1 avocado, sliced - 1 cup chopped fresh cilantro - Lime wedges for serving These ingredients come together to create a flavorful and satisfying dish. The chicken provides protein, while sweet potatoes add fiber and vitamins. Corn brings a touch of sweetness and texture. The avocado adds creaminess, and cilantro gives a fresh burst of flavor. Don't forget the lime; it brightens each bite! This recipe serves four and is packed with nutrients. Each serving contains about: - Calories: 450 - Protein: 30g - Carbs: 45g - Fats: 15g This meal is gluten-free and dairy-free, making it great for many diets. With a mix of protein, carbs, and healthy fats, it fuels your body well. Enjoy the balance of flavors while staying nourished! For the full recipe, check the section above. To start, preheat your oven to 425°F (220°C). This heat helps the sweet potatoes roast perfectly. Next, prepare your sweet potatoes. Peel and dice them into even pieces. In a mixing bowl, combine the diced sweet potatoes with olive oil, paprika, garlic powder, salt, and pepper. Toss them well to coat every piece evenly. Spread the seasoned sweet potatoes in a single layer on a baking sheet. Ensure they are not crowded, as this helps them roast well. Roast in the preheated oven for about 25-30 minutes. Halfway through, give them a toss. You want them to be tender and golden brown when done. While the sweet potatoes roast, heat a grill pan or skillet over medium heat. Season the chicken breasts with salt and pepper. Cook the chicken for 5-7 minutes on each side. Look for nice grill marks and ensure it cooks through. In the last few minutes, brush the chicken with BBQ sauce. This step adds a delicious glaze. Once everything is cooked, let the chicken rest for a few minutes. Then, shred the chicken into bite-sized pieces using two forks. Now, it’s time to assemble your bowls. Start with a layer of roasted sweet potatoes. Next, add the shredded BBQ chicken, followed by corn and sliced avocado. For the final touch, garnish with fresh cilantro and serve with lime wedges. Enjoy the burst of flavors in each bite! For the complete process, check the Full Recipe. For juicy chicken breasts, cook them over medium heat. This helps keep them tender. Season with salt and pepper before cooking for flavor. Use a meat thermometer to check doneness; the chicken should reach 165°F (75°C). To get sweet potatoes just right, cut them into even pieces. This helps them roast evenly. Toss them with olive oil and spices to add flavor. Roast them until they're golden and soft, about 25 to 30 minutes. You can speed up prep time by using pre-diced sweet potatoes. This cuts down on your chopping time. Also, gather all your ingredients before you start. This makes cooking smoother and more fun. For efficiency, use a sharp knife and a sturdy cutting board. A good peeler makes skinning sweet potatoes quick and easy. A timer helps you track cooking times, so nothing burns. For sides, I love mixing in a fresh salad or grilled veggies. They add color and crunch to your bowl. Consider serving with cornbread or a light coleslaw for extra flavor. To enhance the BBQ chicken bowls, try adding a drizzle of ranch or a squeeze of lime. A spicy sauce can also bring some heat. Fresh herbs like cilantro brighten the dish beautifully. For the full recipe, check out the detailed instructions above. Enjoy your BBQ Chicken & Roasted Sweet Potato Bowls! {{image_2}} You can change proteins in this dish. If you want a plant-based option, use tofu or tempeh instead of chicken. Both are great at soaking up flavor. You can also switch up the veggies. Bell peppers add crunch, while zucchini brings a mild taste. These swaps keep the dish fresh and exciting. BBQ sauce is key to this recipe. Try different kinds for a twist! A spicy sauce gives a kick, while a fruity sauce adds sweetness. You can also mix in herbs or spices. For example, adding cumin or rosemary can make a big difference. Experiment with flavors to find what you love. If you need gluten-free options, make sure your BBQ sauce is gluten-free. Many brands offer safe choices. For a vegan version, simply skip the chicken and use grilled veggies or beans. This keeps the dish hearty and delicious while catering to different diets. Check the [Full Recipe] for more details. To store leftovers correctly, place them in airtight containers. This keeps the flavors fresh. Let the food cool before sealing. You can store BBQ chicken and roasted sweet potatoes together. The shelf life in the refrigerator is about three to four days. After that, the flavors may fade. For freezing, you can pack cooked chicken and sweet potatoes in separate bags. This helps maintain texture. Make sure to remove as much air as possible from the bags. When you want to eat them, thaw in the fridge overnight. Reheat in the oven or microwave for best results. This keeps the chicken juicy and the sweet potatoes soft. You can prepare BBQ chicken and roasted sweet potato bowls in advance. Cook a larger batch and store in individual portions. This makes for quick meals during the week. Just grab a bowl, heat it, and enjoy! Add fresh toppings like avocado and cilantro before serving. It’s a great way to eat healthy without much hassle. BBQ chicken lasts about 3 to 4 days in the fridge. Always store it in an airtight container. Make sure to cool it first before putting it in the fridge. If you want to keep it longer, you can freeze it. When frozen, it can last up to 3 months. Just remember to label the date on the container. This way, you know when to use it. Yes, you can use skin-on chicken for this recipe. It adds extra flavor and keeps the meat moist. However, it may take a bit longer to cook. Skin-on chicken needs about 6 to 8 minutes on each side. Always check if it is cooked through before serving. The skin will also get crispy, adding a nice texture to your dish. If you want to substitute sweet potatoes, you can use regular potatoes or butternut squash. Both will work well, but cooking times might change. Regular potatoes may need more time to roast, about 30 to 35 minutes. If you choose butternut squash, it cooks faster, so check it at 20 minutes. Adjust the seasonings to match your choice for the best flavor. You know chicken is fully cooked when it reaches 165°F (74°C) internally. You can use a meat thermometer to check this. If you don’t have one, look for clear juices when you cut into it. The meat should not be pink. Always let it rest for a few minutes before shredding. This helps keep the juices inside. This blog post covered a delicious BBQ Chicken and Roasted Sweet Potato Bowl. We discussed the key ingredients, including chicken, sweet potatoes, and flavorful spices. I provided step-by-step instructions for preparation, cooking, and assembly. You also learned valuable tips for cooking and serving, plus variations to customize your bowl. Remember, you can adapt this recipe to fit your diet or taste. Enjoy making it your own!](https://grilledflavors.com/wp-content/uploads/2025/06/dffbd445-3609-49e0-9eb8-af37fd049f48.webp)
Looking for a delicious dinner idea? BBQ Chicken & Roasted Sweet Potato Bowls are packed with flavor and are easy to make. You’ll enjoy juicy chicken, tender sweet potatoes, and …
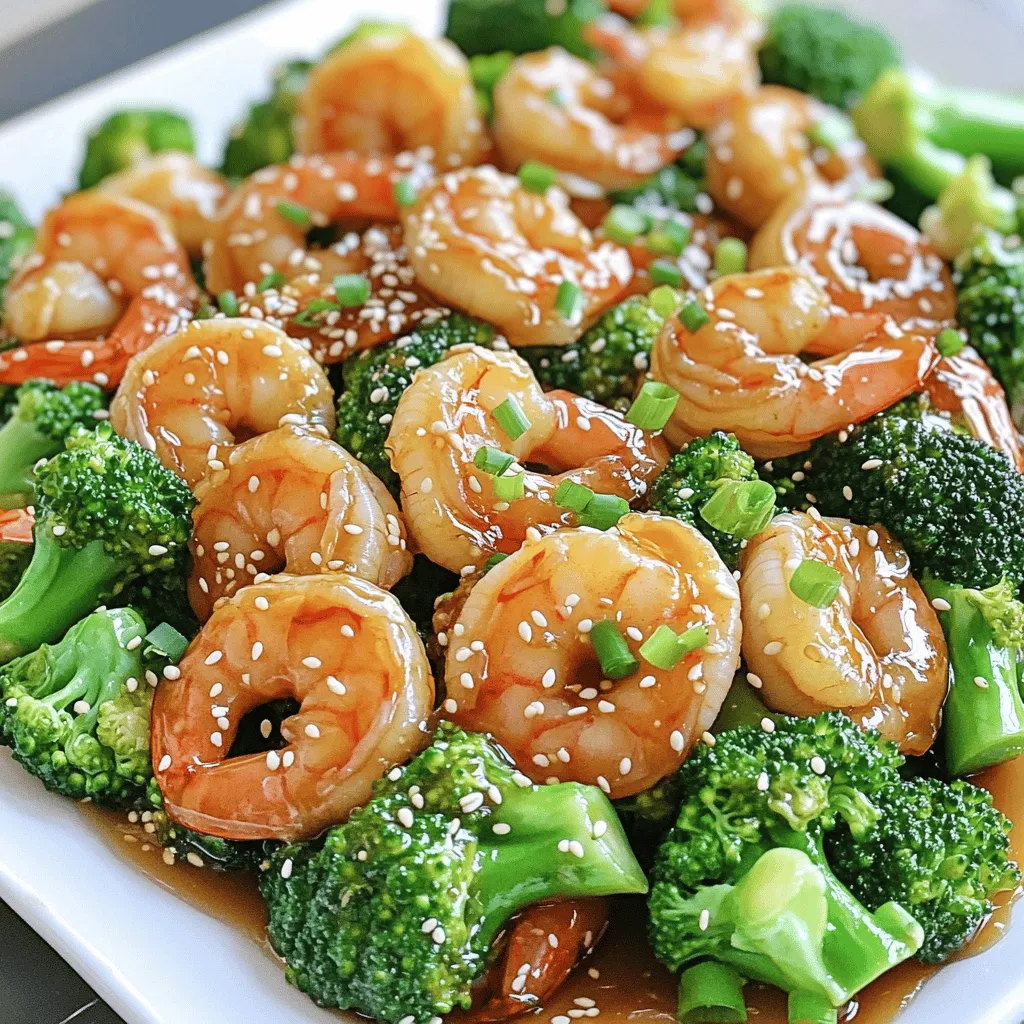
Looking for a quick and tasty dinner idea? Honey Garlic Shrimp & Broccoli is a perfect choice! This dish combines juicy shrimp, fresh broccoli, and a sweet garlic sauce in …
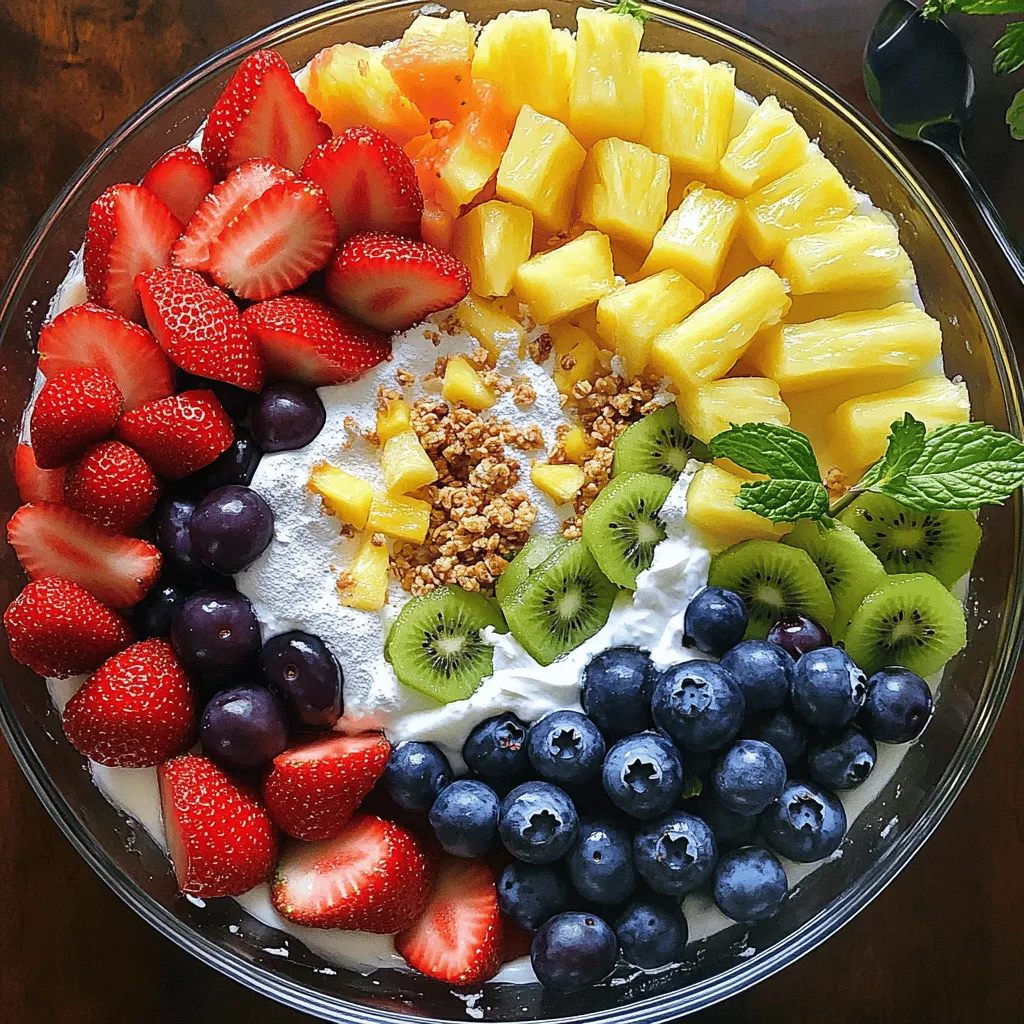
![- Fresh strawberries - Ripe pineapple - Blueberries - Kiwi - Banana - Honey - Fresh lime juice - Lime zest - Sea salt - Fresh mint leaves To make a great fruit salad, you need fresh and colorful fruits. Start with fresh strawberries. Look for bright red ones without any bruises. Next, use ripe pineapple, which adds sweetness. Blueberries bring a burst of flavor and color. Kiwi adds a unique taste and vibrant green. Finally, bananas provide creaminess. Choose bananas that are yellow with a few spots. For the honey lime dressing, you need just a few simple ingredients. Honey adds natural sweetness. Fresh lime juice gives it a zesty kick. Lime zest adds more flavor and aroma. A pinch of sea salt balances the sweetness. If you want to elevate your salad, consider adding fresh mint leaves. They add a nice touch and a refreshing taste. You can find the complete recipe with all the details [Full Recipe]. Start by washing all your fruits. For strawberries, hull them and slice them into thin pieces. For the pineapple, remove the skin and core, then dice it into small chunks. Next, rinse the blueberries and set them aside. Peel the kiwi and slice it into rounds. Lastly, slice the banana into coins. Once all your fruits are prepped, take a large mixing bowl. Gently combine the strawberries, pineapple, blueberries, kiwi, and banana in the bowl. Mix them carefully so they stay whole and look pretty. In a small bowl, add two tablespoons of honey. Then, squeeze in two tablespoons of fresh lime juice. Next, add the lime zest and a pinch of sea salt. Use a whisk to blend these ingredients together until smooth. If the dressing is too thick, add a tiny bit of water to loosen it up. Keep whisking until the dressing feels just right. A smooth, pourable consistency works best for drizzling. Now, drizzle the honey lime dressing over the mixed fruit. Use a large spoon to gently toss everything together. Be careful not to mash the fruit while mixing. You want those vibrant pieces to stay intact. After tossing, let the salad rest for about 10 minutes. This resting time allows the flavors to mix and makes each bite burst with taste. Enjoy your deliciously fresh fruit salad with honey lime dressing! For the full recipe, check the details above. To make a great fruit salad, choose ripe fruits. Look for bright colors and a pleasant smell. For strawberries, pick ones that are deep red. They should be firm, not mushy. When selecting pineapple, it should feel heavy for its size and have a sweet aroma. Blueberries should be plump and have a deep blue color. For kiwi, choose those that yield slightly to pressure. Bananas should be yellow with a few brown spots for the best flavor. Seasonal fruits can add unique flavors. In spring, use strawberries and cherries. Summer is perfect for peaches and melons. Fall brings apples and pears, while winter allows for citrus fruits like oranges and grapefruits. You can boost the flavor of your salad with extra ingredients. Consider adding a pinch of cinnamon or a splash of vanilla extract for depth. A touch of ginger can bring warmth and spice. Fresh herbs like basil or cilantro can add a surprising twist. To meld flavors, let the salad sit for a bit. Ten minutes is a good time to let the fruits soak in the honey lime dressing. This resting time helps all the tastes blend together nicely. Fruit salad is great for many occasions. Serve it at picnics, barbecues, or brunches. It’s a refreshing side dish for any meal. You can also use it as a healthy dessert. For presentation, use a clear bowl to show off the colorful fruits. Garnish with extra mint leaves on top. To keep it fresh, serve the salad cold. Refrigerate it for about 30 minutes before serving. This way, everyone enjoys it at its best! You can find the full recipe for this refreshing dish [here](#). {{image_2}} For a tropical twist, use fruits like mango, papaya, and coconut. These fruits add sweetness and a fun texture. You can also sprinkle some shredded coconut on top for extra flair. To adjust the dressing, keep the honey and lime juice but add a splash of orange juice. This change brightens the flavors and matches tropical fruits well. If you love berries, try adding raspberries or blackberries to your salad. These berries add a nice tang and color. You can replace some of the blueberries with these berries for a fresh take. For the dressing, you might want to use less honey since berries are sweet. This keeps the salad balanced. Want to make your fruit salad more filling? Add some yogurt or nuts. Greek yogurt gives a creamy texture and protein boost. If you prefer nuts, almonds or walnuts add crunch. They also enhance the nutritional value. You can mix in yogurt right before serving or sprinkle nuts on top for added flavor and fun. For the full recipe, check out the Fruit Fiesta Salad ! After you enjoy your fruit salad, store any leftovers in the fridge. Use an airtight container to keep the flavors fresh. The fruit salad can stay good for about 2-3 days. However, it tastes best within the first day. If you want to freeze the fruit, do so before mixing. Cut the fruits into small pieces. Lay them flat on a baking sheet to freeze individually. Once frozen, transfer them to a freezer bag. When you defrost, let the fruit sit in the fridge overnight. This keeps it nice and soft for serving. Some fruits brown quickly, like bananas and apples. To prevent this, use citrus juice on them before mixing. This keeps your salad looking bright and fresh. You can also add fresh mint leaves for a pop of color. Yes, you can make the honey lime dressing ahead of time. Mix the honey, lime juice, and zest in a small bowl. Store it in a jar in the fridge. This way, the flavors can blend well. Just give it a quick stir before you use it. Some fruits do not mix well in a salad. Avoid using bananas and apples with strong citrus fruits. Bananas can brown fast, and apples can turn soggy. Also, avoid fruits that release too much juice, like watermelon. This can make the salad watery. To add more color and texture, try using a mix of fruits. You can add pomegranate seeds or orange segments for bright colors. Consider using different textures too. For example, add crunchy nuts or creamy yogurt on top. This will make your salad more appealing and tasty. This fruit salad is a fresh and tasty choice that brightens any meal. You learned about selecting ripe fruits and making a sweet honey lime dressing. We discussed fun variations and served tips. Keep your salad colorful, and enjoy it at parties or quiet evenings. Remember to store leftovers properly to keep them fresh. You can make this dish in advance, ensuring a quick treat ready to serve. Try these ideas for a delightful fruit salad and impress family and friends. Enjoy making and sharing this refreshing dish!](https://grilledflavors.com/wp-content/uploads/2025/06/17ad068e-9dbe-411a-8bc0-aa254874417f.webp)
Looking for a fresh and tasty treat? This Fruit Salad with Honey Lime Dressing is your answer! It’s packed with colorful fruits like strawberries, pineapple, and kiwi, all drizzled with …
![- Ground turkey or beef - Black beans (1 can, rinsed and drained) - Corn kernels (1 cup, fresh or frozen) - Romaine lettuce (1 head, chopped) - Cherry tomatoes (1 cup, halved) - Cucumber (1 cup, diced) - Avocado (1, diced) - Shredded cheddar cheese (1/2 cup) - Sour cream (1/2 cup) - Mayonnaise (1/4 cup) - Chipotle sauce (1-2 tablespoons, adjust to taste) - Lime juice (1 tablespoon) - Salt and pepper (to taste) - Tortilla chips (for garnish) - Extra shredded cheese - Crushed tortilla chips - Fresh herbs or spices like cilantro or jalapeños - Large skillet - Salad bowl - Mixing bowls for dressing Using these fresh ingredients, you can create a taco salad that is both tasty and healthy. Each component brings its own flavor and texture. The ground meat adds protein, while beans and corn lend fiber. Fresh veggies like romaine, tomatoes, and avocado provide a refreshing crunch. The cheese and dressing tie it all together, making every bite a delight. For the full recipe, check out the detailed instructions on how to prepare this vibrant dish. Enjoy crafting your taco salad masterpiece! To start, heat a large skillet over medium heat. Add one tablespoon of olive oil. When the oil is hot, add 1 pound of ground turkey or beef. Cook it until it is browned. Use a spatula to break the meat into small pieces. This should take about 5 to 7 minutes. Next, drain any excess fat from the skillet. Now, add one packet of taco seasoning. Follow the package instructions and add water as needed. Stir in one can of black beans and one cup of corn kernels. Cook this mixture for an additional 5 minutes. Season it with salt and pepper to your taste. This savory meat mix is the heart of your taco salad. In a small bowl, combine half a cup of sour cream and a quarter cup of mayonnaise. Next, add 1 to 2 tablespoons of chipotle sauce. Adjust the amount based on how spicy you like it. Then, add one tablespoon of lime juice and a pinch of salt. Mix everything well until it's smooth. This dressing adds a creamy kick to your salad. Grab a large salad bowl and layer it with chopped romaine lettuce as the base. Next, add the cooked meat mixture on top. Then, layer in one cup of halved cherry tomatoes, one cup of diced cucumber, and one diced avocado. Finally, sprinkle half a cup of shredded cheddar cheese over the top. Drizzle the chipotle ranch dressing generously on the salad. For added crunch, crush some tortilla chips and sprinkle them on just before serving. This step makes your taco salad fun and crunchy. For the full recipe and more, check out the [Full Recipe]. To achieve the best taco salad, focus on your meat. Browning the meat well adds flavor. Use medium heat and let it sit for a minute before stirring. This gives it a nice sear. Adjusting the spice levels in the dressing is key. Start with one tablespoon of chipotle sauce. Taste it, then add more if you want heat. Lime juice balances the spice, so don’t skip it. Presentation matters. Serve the salad in clear bowls to show off colorful layers. This makes it look more appealing. Add extra tortilla chips on the side for crunch. Pair your taco salad with a refreshing drink. I recommend iced tea or a light beer. Both complement the flavors well. To boost flavor, consider adding fresh herbs. Chopped cilantro adds a bright taste. You can also try diced jalapeños for extra heat. For more crunch, add radishes or bell peppers. They add a fresh bite. You can also use toasted nuts for a unique twist. For the full recipe, check the section above. Enjoy making your taco salad! {{image_2}} You can easily make a vegetarian taco salad. Instead of meat, use more beans or lentils. Black beans and pinto beans add protein and texture. You can even mix in some quinoa for extra bite. For cheese, use plant-based options like cashew or almond cheese. They melt well and taste great. Plant-based dressings also work well here. Try avocado dressing or a creamy tahini sauce. If you want a low-carb version, swap tortilla chips for lettuce wraps. Use large leaves of romaine or butter lettuce. They hold the toppings well and are crunchy too. You can also skip high-carb items like corn and beans. Instead, focus on more veggies like bell peppers and cucumbers. This keeps the salad light and fresh. You can switch up the dressings for different flavors. Try a classic ranch or a zesty vinaigrette. You might also enjoy a creamy avocado dressing. It adds richness without overpowering the salad. Customize your flavors to match your taste. Add herbs like cilantro or a squeeze of lime for brightness. Feel free to experiment and find your favorite combination. For the full recipe, check the link provided above. To keep your taco salad fresh, store it in an airtight container. Layer the ingredients wisely. Place the meat mixture on the bottom and veggies on top. This method prevents sogginess. Use leftovers within 3 days for the best taste. When reheating the meat mixture, use a skillet over medium heat. Stir often to warm it evenly. Avoid overheating to keep the meat juicy. For the veggies, heat them separately, or add them fresh after reheating. This keeps them crisp and tasty. You can freeze the meat and dressing separately. It helps maintain the quality. Use freezer-safe containers for the meat. For the dressing, pour it into a zip-top bag. When ready to use, thaw overnight in the fridge. Enjoy the salad fresh when you’re ready! Yes, you can make taco salad in advance. I suggest preparing the meat mixture and dressing the day before. Store these in airtight containers in the fridge. Chop your veggies a bit earlier, but keep them separate until serving. Add the tortilla chips just before serving to keep them crunchy. If you need a substitute for chipotle, try smoked paprika or cayenne pepper. Both give a nice heat. You can also use regular ranch dressing and add a bit of hot sauce for kick. Yogurt mixed with lime and garlic can work for a creamier option. To spice things up, add more chipotle sauce to the dressing. You can also use spicy taco seasoning. For a milder flavor, reduce the chipotle sauce or use less spicy seasoning. Always taste as you go to find what works for you. In this blog post, we explored how to make a tasty taco salad. We covered key ingredients like ground turkey or beef, black beans, and fresh vegetables. You'll also find tips for perfecting your salad, plus ideas for variations and storing leftovers. Taco salad allows for easy customization and is great for gatherings. With these steps, you can create a dish that fits your taste perfectly. Enjoy your cooking!](https://grilledflavors.com/wp-content/uploads/2025/06/2d4426f6-0090-4b0b-96fb-6c01869cf93e.webp)
Are you ready to enjoy a vibrant and tasty meal? This Taco Salad with Chipotle Ranch Dressing brings fresh flavors to your table. Packed with ground turkey or beef, black …