Pan Seared Chimichurri Shrimp Flavorful and Simple Meal
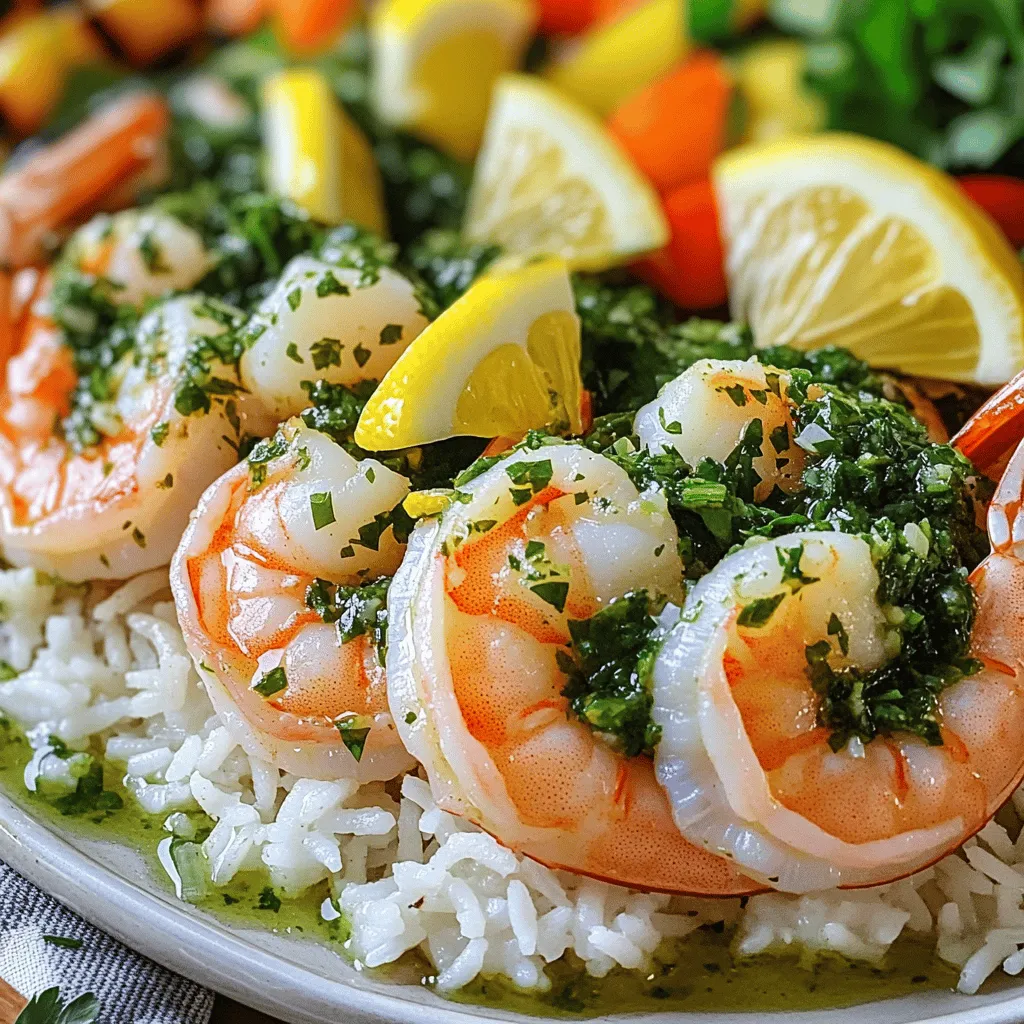
Looking for a quick and tasty dinner idea? My Pan Seared Chimichurri Shrimp is a perfect choice! This dish packs bold flavors in just a few simple steps. You’ll love …
Looking for a quick and tasty dinner idea? My Pan Seared Chimichurri Shrimp is a perfect choice! This dish packs bold flavors in just a few simple steps. You’ll love …
![For this dish, you need some basic items. Here’s what to gather: - 2 cups cooked sushi rice - 1 tablespoon rice vinegar - 1 teaspoon sugar - Salt to taste - 1 pound fresh salmon, skinless - 2 tablespoons sriracha - 1 tablespoon mayonnaise (preferably Kewpie) - 1 avocado, thinly sliced - 1/4 cup green onions, finely chopped - 1 teaspoon sesame oil - 1 tablespoon panko breadcrumbs - Seaweed sheets for garnish (optional) These ingredients form the base of our crispy rice and spicy salmon. The sushi rice provides a nice sticky texture. The salmon, mixed with sriracha and mayo, gives a creamy and spicy kick. You can add some seasonings to boost the flavor. Here are a few ideas: - Soy sauce for dipping - Lime juice for freshness - Toasted sesame seeds for crunch - Chili flakes for extra heat These seasonings help enhance the dish’s flavor. Use them as you like, based on your taste. Garnishes make your dish look great. They also add more flavor. Here are some you can use: - Fresh cilantro leaves - Thinly sliced radishes - Microgreens - Extra green onions These garnishes add color and freshness. They can make your presentation pop, making your meal even more special. For the full recipe, check the earlier section. To start, you need cooked sushi rice. Place it in a medium bowl. Add the rice vinegar, sugar, and a pinch of salt. Mix it gently so you do not break the rice. Allow it to cool slightly. Once cool, shape the rice into rectangular patties. Aim for about 1-inch thick. This will help them fry well. Heat a non-stick skillet over medium heat. Drizzle in some sesame oil. When the oil is hot, add your rice patties. Cook each side for about 3-4 minutes. You want them to turn golden brown and crispy. Once done, remove them from the skillet and set aside. Take fresh salmon and chop it into small cubes. In a bowl, mix sriracha and mayonnaise. I like to use Kewpie mayo for extra flavor. Toss the salmon cubes in the spicy mayo. Make sure all pieces are well coated. This mixture is what makes the dish pop with flavor. Now it’s time to put everything together. Place the crispy rice patties on a serving plate. Top each patty with a scoop of the spicy salmon mix. For a fresh touch, add a slice of avocado on each piece. Then, sprinkle with chopped green onions. For extra crunch, add panko breadcrumbs on top. Lastly, if you like, serve with strips of seaweed on the side. This adds a nice touch and flavor. Follow the [Full Recipe] to explore more about these steps! To make the best crispy rice, start with good sushi rice. Use short-grain rice for the best stickiness. After cooking, let it cool slightly before shaping. The rice should be warm but not hot. Form rectangular patties about one inch thick. When pan-frying, use a non-stick skillet and enough sesame oil. Heat the skillet over medium heat. Cook the patties for three to four minutes on each side. They should turn golden brown and crispy. If they stick, add a bit more oil. You want each bite to be crunchy. You can change up the spice level in the salmon mix. If you like it mild, use less sriracha. For a kick, add more sriracha or some chili flakes. You can also mix in lime juice for a zesty touch. Feel free to add chopped herbs, like cilantro or chives, for more flavor. The mayonnaise gives creaminess, but you can swap it for Greek yogurt if you want. Just make sure to mix the salmon well, so every piece gets that tasty sauce. When it comes to serving, lay the crispy rice on a nice plate. Top each patty with the spicy salmon mix. A slice of avocado adds color and creaminess. Use chopped green onions to give it a fresh look. For extra crunch, sprinkle panko breadcrumbs on top. If you want a fun twist, add strips of seaweed on the side. It adds a nice touch and flavor. Color and texture are key to making this dish pop. Try to arrange everything neatly for a great presentation. {{image_2}} If you want to switch things up, try other fish. Tuna is a great choice. It has a meaty texture and pairs well with spicy sauces. You can also use yellowtail or even shrimp. Each fish brings its own flavor. Just make sure it’s fresh. The key is to keep the spicy mayo mix, so you still have that bold taste. For a vegetarian twist, you can use tofu. Firm tofu works best. Just press it to remove extra water, then cube it. Toss it in the spicy mayo just like the salmon. You can also use roasted vegetables. Zucchini or bell peppers add nice flavor and texture. This way, you get a delicious meal without any fish. Want to get creative? Try adding Asian flavors like kimchi. Layer some on top of the spicy salmon. This gives it a tangy kick. Or, go for a Mexican twist with guacamole. This adds creaminess and a different taste. You can even use a Thai chili sauce for a unique spin. The options are endless, and each twist makes the dish fun! To store leftover crispy rice, place it in an airtight container. Let it cool to room temperature first. This helps prevent condensation and keeps the rice fresh. Store it in the fridge for up to three days. If you want to keep it longer, consider freezing. When you reheat crispy rice, use a skillet for the best results. Heat the skillet over medium heat and add a tiny bit of oil. Place the rice patties in the pan and heat each side for about two to three minutes. This keeps them crispy. You can also use an oven. Preheat it to 350°F (175°C) and bake the rice for about 10 minutes. If you freeze your crispy rice, wrap each patty in plastic wrap and place them in a freezer bag. They can last for up to two months. To thaw, move them to the fridge for a few hours or overnight. After thawing, reheat as mentioned above. This way, you maintain that delicious crunch. No, I don’t recommend using instant rice. Sushi rice has the right stickiness. This helps form the crispy patties. Instant rice does not have the same texture. It won’t hold together well when cooked. You can use any hot sauce for a different taste. Try chili garlic sauce or sambal oelek. If you want less heat, use a mild hot sauce. You can also mix ketchup with a bit of hot sauce for a sweet twist. While mayonnaise adds creaminess, you can skip it if you wish. You can use plain yogurt or even avocado instead. This keeps it light and healthy. Just make sure to mix it well with the salmon for flavor. This recipe makes four servings. It’s perfect for a small group or family meal. You can easily double the recipe for more guests. Each person can enjoy their own crispy rice with spicy salmon. Yes, you can prepare some parts ahead of time. Make the rice patties and spicy salmon mix earlier. Store them in the fridge. Just fry the patties and assemble when you are ready to eat. This keeps everything fresh and crispy. For the Full Recipe, check the details above. This blog post covered all you need for crispy rice with spicy salmon. We discussed key ingredients, cooking steps, and great tips. I shared fun variations and how to store leftovers too. You can make this dish your own by trying different fish or sauces. Enjoy experimenting and finding your perfect flavor. Cooking can be fun and tasty with this guide. Start making your own crispy rice today!](https://grilledflavors.com/wp-content/uploads/2025/05/ce5b9f05-38e8-44e2-b94c-5850d918ee5c.webp)
Are you craving a delicious meal that bursts with flavor? Look no further than crispy rice with spicy salmon! This dish is simple to make and packs a punch. Whether …

Looking for a quick, crispy treat that packs a punch? You’ll love these Easy Bang Bang Salmon Bites! Made with tender, flaky salmon and a crunchy panko coating, they’re perfect …
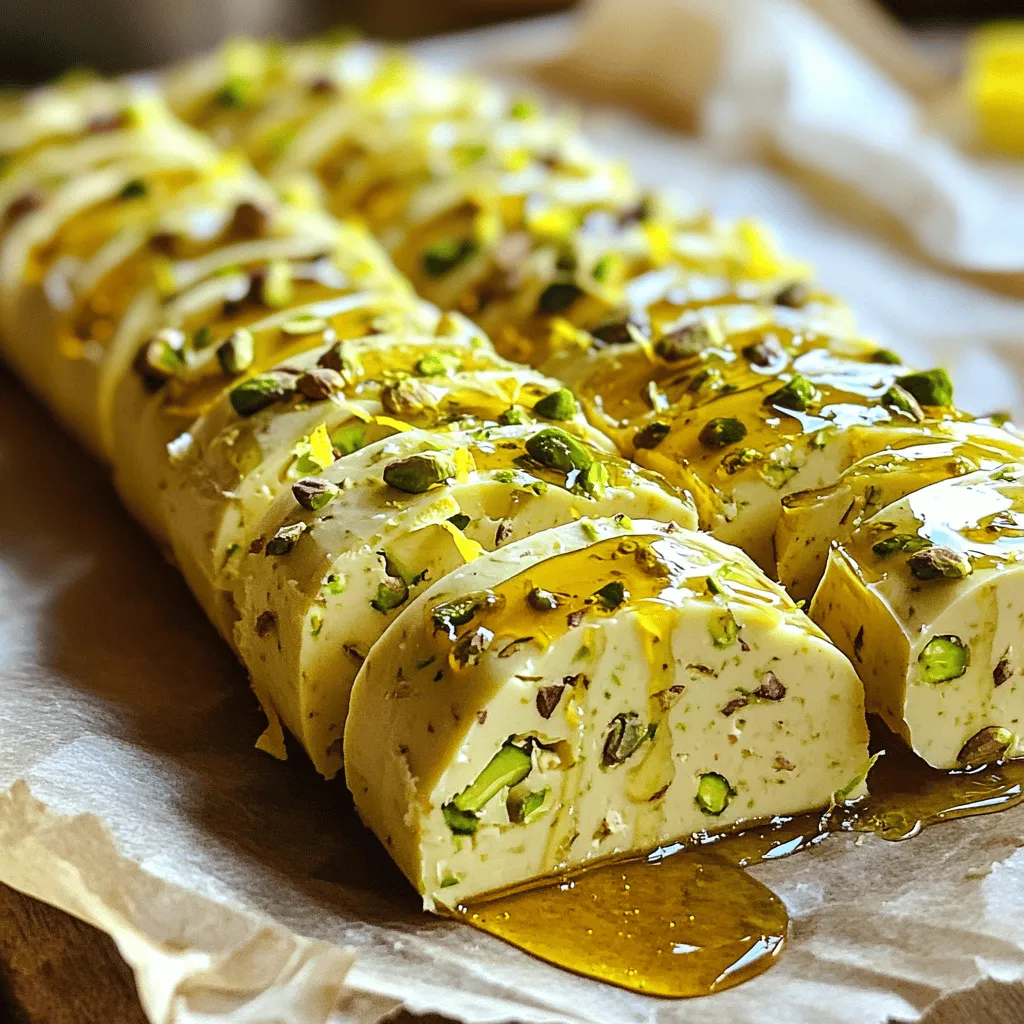
Are you ready to elevate your meals? Making pistachio compound butter is rich, easy, and fun. With just a few simple ingredients, you can create a creamy spread that transforms …
![To create a delicious Traeger shrimp boil, you need a simple list of ingredients. Here’s what you’ll need: - 2 lbs large shrimp, peeled and deveined - 1 lb baby red potatoes, halved - 2 ears of corn, cut into thirds - 1 lb smoked sausage, sliced - 1/4 cup Old Bay seasoning - 2 tablespoons olive oil - 6 cloves garlic, minced - 1 lemon, cut into wedges - 1 tablespoon smoked paprika - Fresh parsley, chopped for garnish - Salt and pepper to taste - Water Gathering these ingredients sets the stage for an effortless and flavorful feast. Each item plays a key role in building layers of taste. The shrimp brings a sweet, briny flavor, while the sausage adds a smoky depth. Potatoes and corn provide texture and heartiness. Old Bay seasoning ties everything together with its classic blend of spices. With the right ingredients, you can enjoy a meal that feels special yet easy to make. For the full recipe, check out the details provided earlier. 1. Preheating the Traeger grill: Start by turning on your Traeger grill. Set it to 350°F (175°C). This temperature gives a nice smoky flavor to your dish. 2. Boiling the potatoes: In a pot, fill it with water and bring it to a boil. Add the halved baby red potatoes, a pinch of salt, and half of the Old Bay seasoning. Boil them for about 10-15 minutes until they feel tender when pierced with a fork. 3. Adding corn and sausage: Once your potatoes are ready, add the cut corn and sliced smoked sausage. Boil this for another 5-7 minutes. The corn should be bright yellow, and the sausage will heat through. 4. Incorporating shrimp and other seasonings: Next, reduce the heat and carefully add the shrimp and the rest of the Old Bay seasoning. Stir gently for about 3-5 minutes. The shrimp will turn pink and opaque, showing they are cooked. 5. Transferring to a grill-safe pan: After boiling, take the mixture and drizzle olive oil over it. Add minced garlic and smoked paprika, then mix it well. Transfer this to a grill-safe pan or foil tray. 6. Grilling technique and timing: Place the pan on the preheated Traeger grill. Grill for about 10-15 minutes. Stir halfway through to ensure everything gets that great smoky flavor. Enjoy the process and your tasty Traeger shrimp boil! For more details, check the Full Recipe. Set your Traeger grill to 350°F (175°C). This is the sweet spot for cooking shrimp boil. The even heat cooks everything just right. Make sure to preheat the grill before adding your dish. It helps lock in flavors and gives your food a nice smoky taste. Use Old Bay seasoning generously. It brings out great flavors in shrimp and sausage. For added zing, marinate shrimp in olive oil and garlic before cooking. Let it sit for at least 30 minutes. This step boosts taste and makes your shrimp tender. Squeeze fresh lemon juice on top before serving for a bright finish. Stir the mixture halfway through grilling. This keeps everything cooking evenly and helps the shrimp soak up the smoky flavor. Keep an eye on your dish to avoid overcooking. Shrimp cooks quickly, turning pink and opaque in just a few minutes. Don't let it go too long! Follow the Full Recipe for more details. {{image_2}} You can switch up the shrimp and sausage in your boil. For shrimp, try scallops or crab. They add a nice twist. If you want more sausage options, consider chicken sausage or even tofu for a lighter choice. For a meatless version, load up on veggies! Use mushrooms for a hearty bite. Add bell peppers and zucchini for fresh crunch. You can also toss in chickpeas for protein. To spice things up, play with different seasonings. Besides Old Bay, try Cajun or lemon herb blends. These add depth and heat to your dish. Don’t stop at the basics. Add more vegetables for rich flavors. Broccoli, asparagus, or even artichokes can work well. They bring new textures and bright colors to your boil. Using a Traeger grill gives your shrimp boil a lovely smoky flavor. It’s easier than boiling on the stove. Plus, the grill keeps the shrimp juicy and tender. If you want to try other grilling methods, consider using a stovetop grill pan. It can give a nice sear too. You can even make packets with foil and grill them. Each method brings its own unique taste. For the full recipe details, check the [Full Recipe]. To keep your Traeger shrimp boil fresh, store leftovers in an airtight container. Place the shrimp, potatoes, corn, and sausage together. Do not mix in the lemon or parsley. Store them in the fridge for up to three days. This keeps the flavors bright and tasty. When you want to enjoy leftovers, heat them gently. You can use the microwave or a skillet on low heat. If using the microwave, place them in a bowl and cover it with a damp paper towel. This helps keep the shrimp moist. Stir every minute until heated through. If using a skillet, add a splash of water to keep it juicy. If you want to save some shrimp boil for later, freezing works well. First, let the dish cool completely. Then, portion it into freezer-safe bags. Squeeze out the air before sealing. You can freeze it for up to three months. When you're ready to eat, thaw it overnight in the fridge. Reheat it gently to enjoy that smoky flavor again. It takes about 50 minutes to cook a shrimp boil on a Traeger. This includes prep and grilling time. You want to start by boiling the potatoes for about 10-15 minutes. Then, the corn and sausage need about 5-7 minutes. Finally, the shrimp only takes 3-5 minutes until they are pink and opaque. After that, you grill the mixture for another 10-15 minutes. This gives you a perfect smoky flavor. Yes, you can use frozen shrimp for this recipe. Just make sure to thaw them first. You can do this by placing them in the fridge overnight or running cold water over them for about 10 minutes. Once thawed, you can follow the recipe as usual. The cooking time may be slightly longer, but watch for the shrimp to turn pink and opaque. You can add many proteins to a shrimp boil. Here are some tasty options: - Crab legs - Lobster tails - Clams - Mussels - Chicken wings These proteins can enhance the flavor and make your boil even more exciting. Just adjust the cooking times to ensure everything is cooked through. This shrimp boil is a fun dish that combines great flavors and textures. We covered the ingredients, from shrimp to smoked sausage, and the step-by-step process for grilling. I shared tips to enhance your meal and even some tasty variations. Remember, you can store leftovers or freeze them for later. Enjoy experimenting with your shrimp boil! Try different ingredients and cooking methods to make it your own. Your next gathering will surely be a hit with this recipe.](https://grilledflavors.com/wp-content/uploads/2025/05/9a694c29-21d5-4116-adfb-0d56c5a8c4ba.webp)
Get ready for a feast that marries ease with amazing flavor! In this blog post, I’ll guide you through a mouth-watering Traeger Shrimp Boil that’s perfect for any gathering. We’ll …
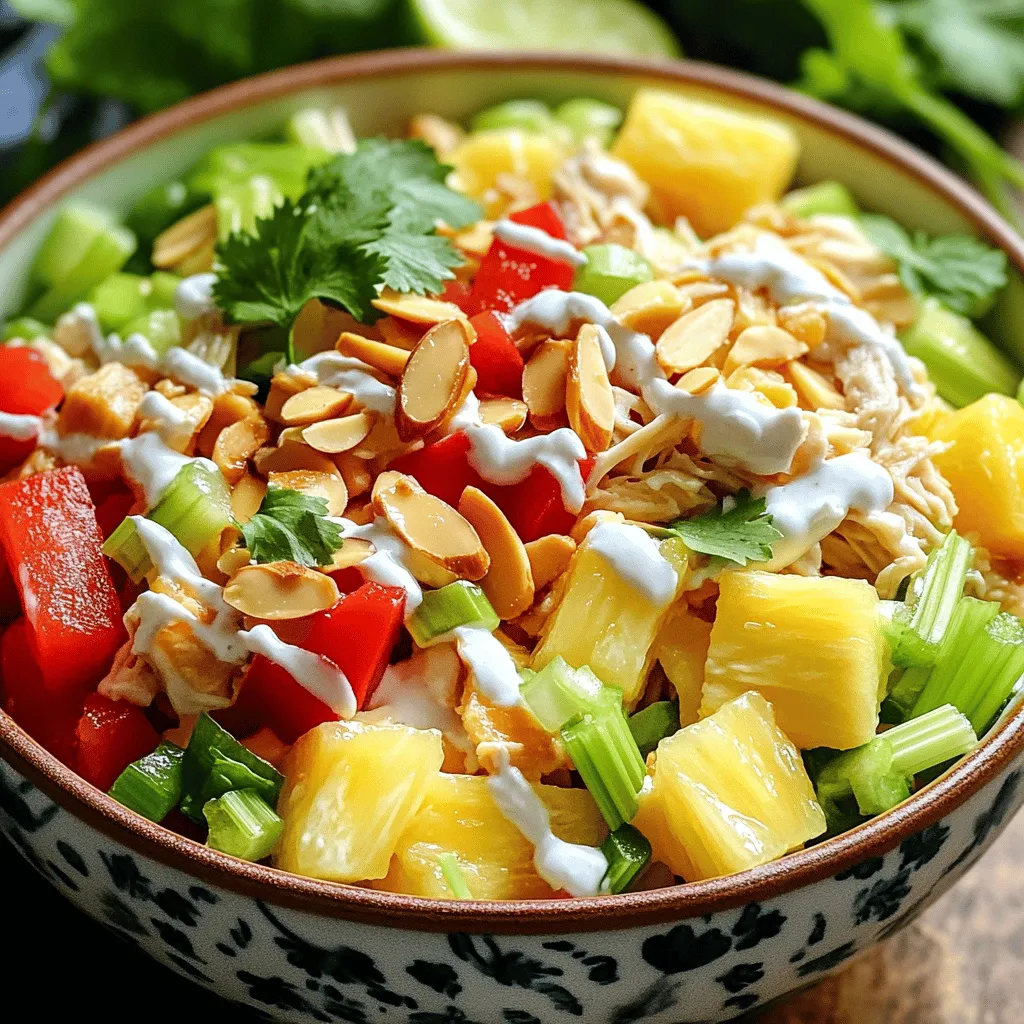
Looking for a fresh and tasty meal? My Savory Hawaiian Chicken Salad is simple and delicious! This dish brings a taste of the islands to your table. I’ll share key …

Looking for a quick and tasty snack? Let me introduce you to the delightful Peanut Butter Quesadilla! This unique treat combines creamy peanut butter, sweet bananas, and a touch of …
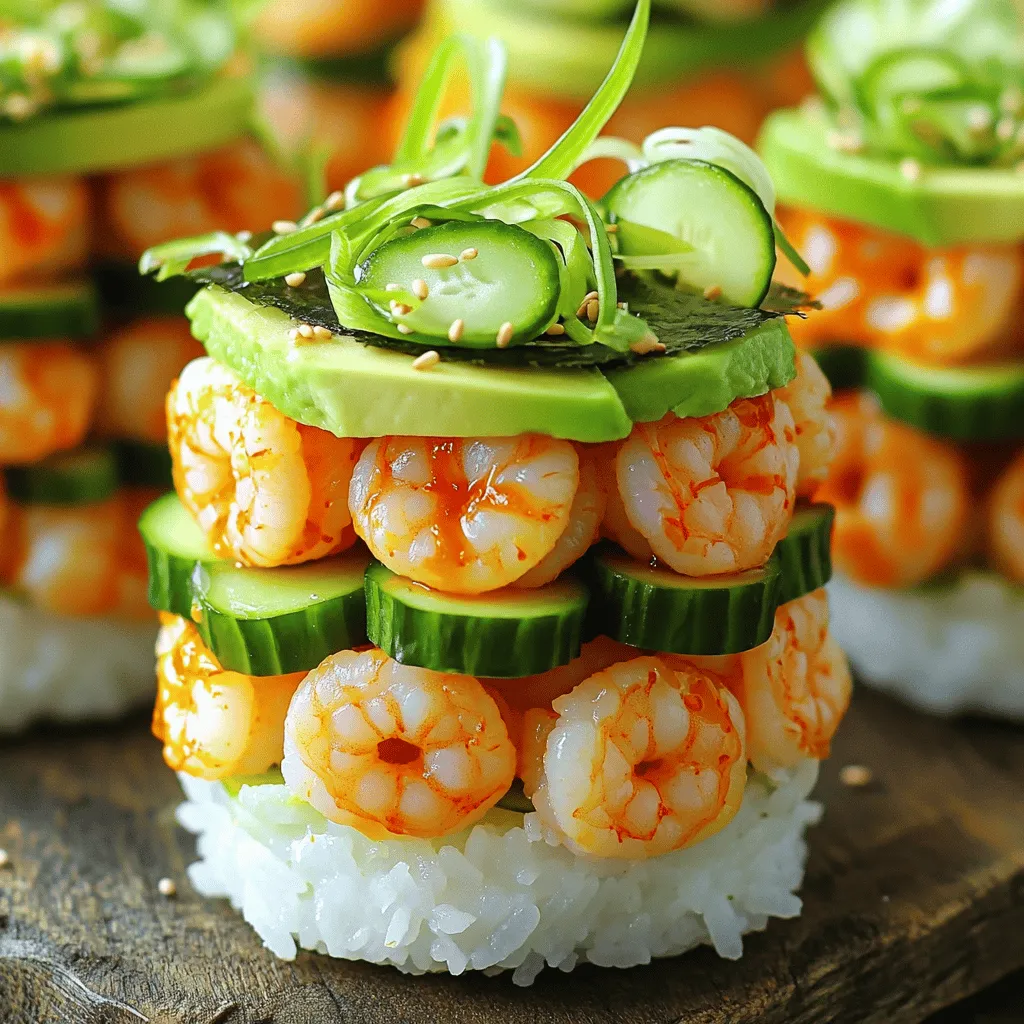
Are you ready to impress your friends with a fun, tasty twist on sushi? In this post, I’ll show you how to make spicy shrimp sushi stacks. This dish is …
![- 2 oranges, segmented - 1 grapefruit, segmented - 1 blood orange, segmented - 1 cup baby spinach - ½ cup feta cheese, crumbled - ¼ cup red onion, thinly sliced - ½ cup walnuts, toasted - 3 tablespoons olive oil - 2 tablespoons honey - 1 tablespoon apple cider vinegar - Salt and pepper, to taste Gather these fresh ingredients to make a vibrant citrus salad. I love using a mix of sweet and tangy citrus fruits. The oranges add sweetness, while the grapefruit brings a zesty kick. A blood orange adds a beautiful color and taste. Baby spinach gives the salad a nice green base. For the extra flavor, I like to add crumbled feta cheese. It pairs well with the citrus. Thinly sliced red onion gives a nice crunch and a bit of sharpness. Toasted walnuts add a lovely nutty flavor and crunch. The dressing is simple but effective. Olive oil makes it rich, while honey adds sweetness. Apple cider vinegar gives the salad a bright tang. Finally, a pinch of salt and pepper rounds out the flavors. You can find the full recipe with detailed steps to help you make this delightful salad. Enjoy the fresh, colorful taste! To segment citrus fruits, start by cutting off the tops and bottoms. This helps the fruit stand up. Next, slice the peel away, following the curve of the fruit. Segment each fruit over a bowl to catch the juice. This juice adds flavor to your salad. Always use fresh ingredients for the best taste. Fresh citrus gives a burst of flavor and zest. In a large bowl, combine baby spinach with the citrus segments. The mix of colors and textures looks great. Add crumbled feta cheese for creaminess. Thinly sliced red onion gives a nice bite. Toss these ingredients gently to keep the spinach from wilting. For the dressing, whisk together olive oil, honey, and apple cider vinegar in a small bowl. This mix should be smooth and well-combined. Add a pinch of salt and pepper for taste. If the dressing is too thick, add a little more olive oil. This will help it coat the salad evenly. Pour the dressing over the salad and toss gently. Enjoy the fresh flavors of your Citrus Salad! Try the full recipe for a delightful experience. To make a great citrus salad, start with fresh fruits. Look for seasonal options like oranges and grapefruits in winter. They taste best and are juicy then. When picking fruits, check for firmness and vibrant color. Ripe citrus should feel heavy for its size. Give it a slight squeeze; it should feel slightly soft but not too mushy. You can prepare this salad in advance to save time. Cut the fruits and make the dressing a day before serving. Store the citrus segments in an airtight container. Keep the dressing in a separate jar. This way, the salad stays fresh and crisp. Combine everything right before you serve. It ensures the salad tastes its best. To boost flavor, consider adding fresh herbs like mint or basil. They add a nice touch. For the dressing, adjust sweetness with more honey or acidity with extra vinegar. Taste as you go to find the right balance. You want a nice zing without it being too sweet or sour. Each bite should burst with flavor. [Full Recipe] for Zesty Citrus Bliss Salad is a great way to enjoy these tips! {{image_2}} You can switch up the nuts and cheeses in this salad. Instead of walnuts, try pecans or almonds. They add a nice crunch and a different flavor. For cheese, goat cheese works well too. It gives a creamy texture that pairs nicely with the citrus. You can also use mixed greens, like arugula or kale, instead of baby spinach. These greens add a peppery taste and extra nutrients to your dish. Berries can add a fun twist to your citrus salad. Blueberries or strawberries mix well with the sweet and tart flavors. Their juicy bites enhance the overall taste. You might also want to try different vinegars. Balsamic vinegar can add depth, while rice vinegar gives a lighter touch. Experimenting with flavors can lead to a new favorite salad. Using a yogurt-based dressing is a great idea. It adds creaminess without being too heavy. You can mix plain yogurt with lemon juice and herbs for a fresh taste. Another option is to infuse your oils. Try adding herbs like basil or rosemary to your olive oil. This adds a unique flavor to your dressing. These variations keep the salad exciting and new. For the full recipe, check out the Zesty Citrus Bliss Salad. To keep your citrus salad fresh, store components separately. This helps maintain crispness and flavor. Use airtight containers for storage. Glass or plastic containers with tight lids work best. Citrus fruits can last about a week in the fridge. Oranges and grapefruits stay fresh longer. For prepared salads, consume them within two days. This helps ensure you enjoy vibrant flavors. You should not freeze citrus salad. Freezing changes the texture of the fruits. If you want to freeze citrus, segment the fruits first. Thaw them slowly in the fridge to retain some flavor. To cut citrus, start by trimming the tops and bottoms off the fruit. This allows it to stand steady. Next, use a sharp knife to slice the peel off. Follow the curve of the fruit to reduce waste. Once peeled, hold the fruit over a bowl to catch juices. Cut between the membranes to create segments. This method ensures you get all the sweet juice without much mess. Citrus fruits are packed with vitamin C. They boost your immune system and help your skin. They also contain fiber, which aids digestion. Spinach adds iron and vitamins A and K. Together, they create a nutrient-rich salad that promotes good health. Eating citrus salads can improve your overall well-being and keep you feeling great. Yes, you can easily turn citrus salad into a meal. Add proteins like grilled chicken, shrimp, or chickpeas. This makes the dish filling and satisfying. For a complete meal, serve it with whole grain bread or quinoa on the side. These pairings complement the flavors and add nutrition. For the complete Zesty Citrus Bliss Salad recipe, check out the recipe section above. This blog post detailed how to create a fresh and tasty citrus salad. You learned about essential ingredients, from oranges to feta cheese. I shared steps to prepare citrus fruits and mix them with spinach. Plus, I provided tips for selecting fruits and making ahead. You can switch ingredients for fun variations and store your salad well. Enjoy the burst of flavors in your salad. It boosts your meals and health!](https://grilledflavors.com/wp-content/uploads/2025/05/21be201a-228b-430b-adda-2f1ab55e2ef6.webp)
If you’re looking for a bright burst of flavor, this Citrus Salad is your answer. With fresh oranges, grapefruit, and blood oranges, this salad is a delightful mix of sweet …
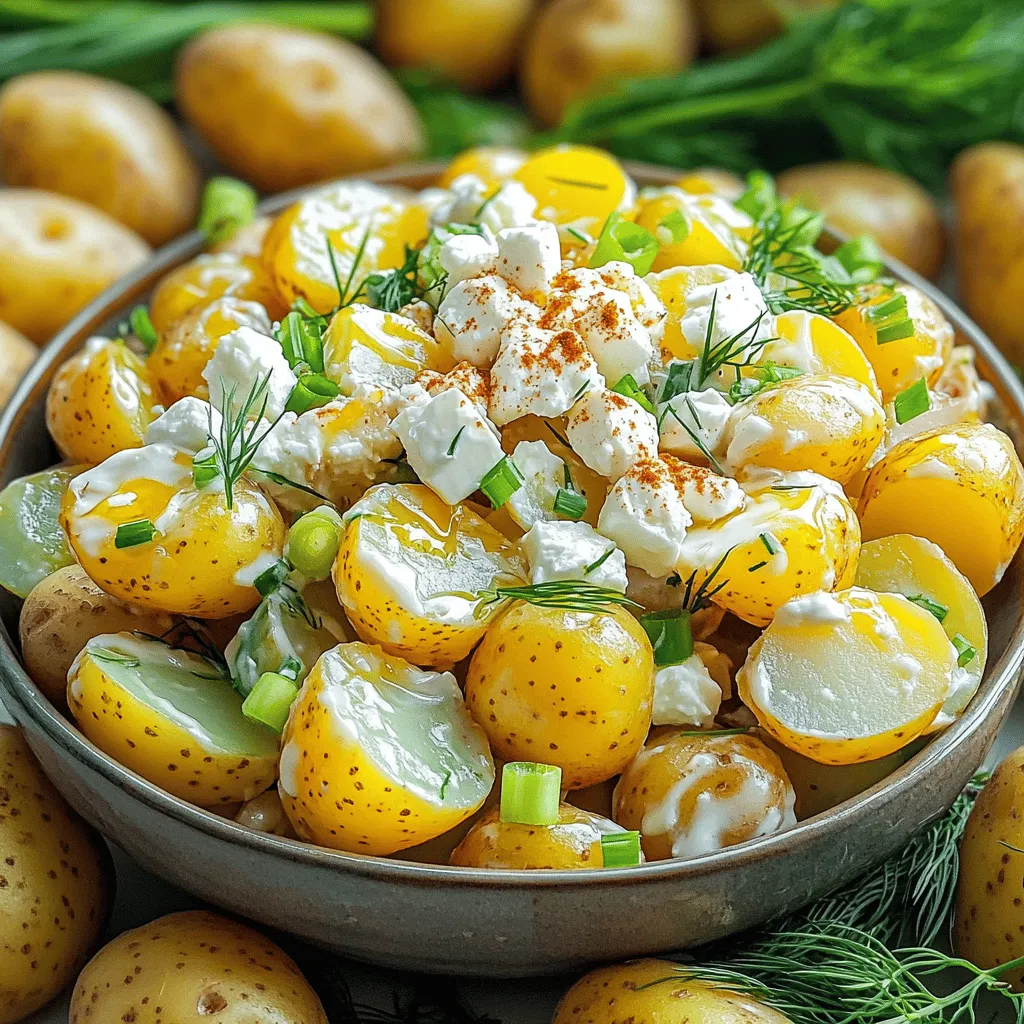
Are you tired of the same old potato salad? I’ve got a fresh twist that will change your mind! My “Not Your Grandma’s Potato Salad” recipe adds zing with Greek …