Spinach Strawberry Salad Fresh and Flavorful Dish
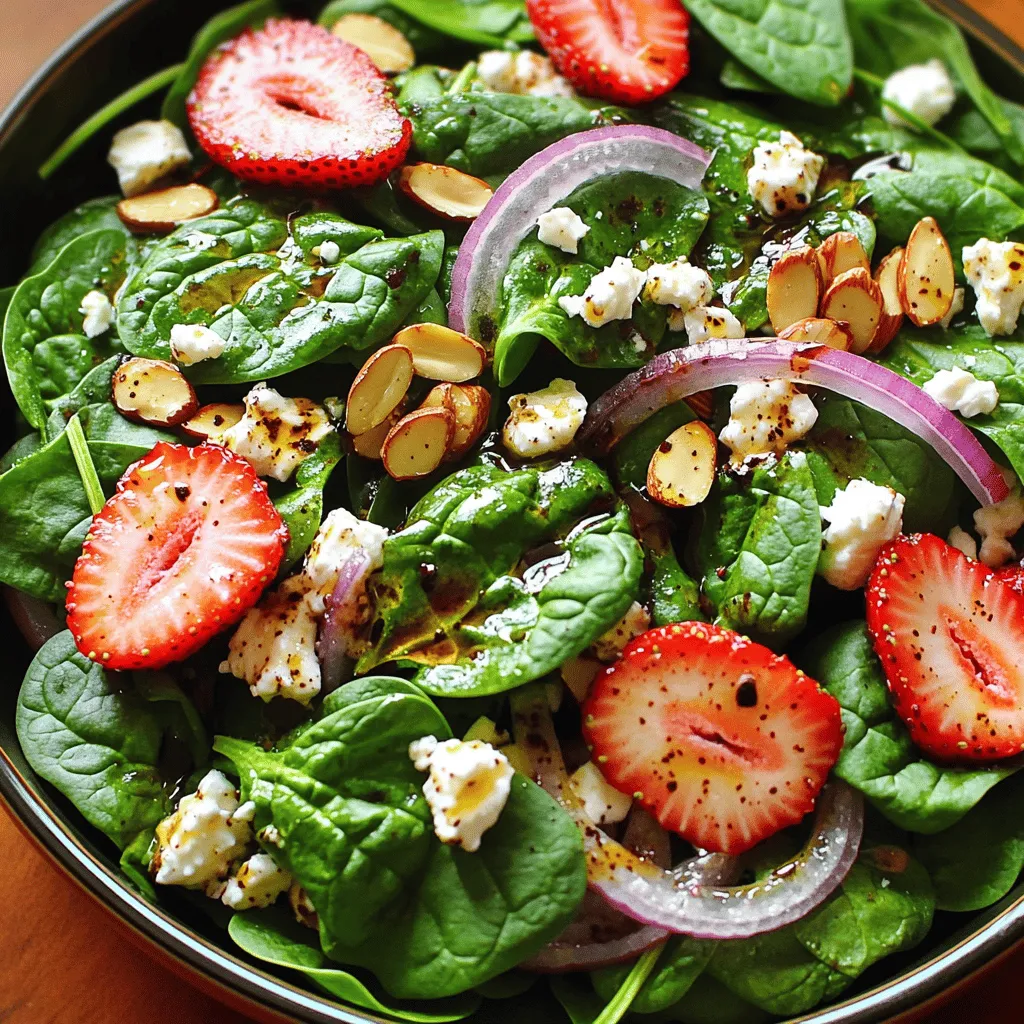
Looking for a fresh and tasty salad that’s easy to make? The Spinach Strawberry Salad is just what you need! With vibrant strawberries, crunchy almonds, and creamy feta, each bite …
Looking for a fresh and tasty salad that’s easy to make? The Spinach Strawberry Salad is just what you need! With vibrant strawberries, crunchy almonds, and creamy feta, each bite …
![To make these tasty stuffed shells, gather the following main ingredients: - 20 large pasta shells - 2 cups fresh spinach, chopped - 1 cup ricotta cheese - 1 cup shredded mozzarella cheese - 1/2 cup grated Parmesan cheese - 1 large egg - 2 cloves garlic, minced - 1 teaspoon dried oregano - Salt and pepper to taste - 3 cups marinara sauce These ingredients create a rich and creamy filling that pairs perfectly with marinara sauce. You can add a few optional ingredients for extra flavor: - A pinch of red pepper flakes for heat - Fresh herbs like parsley or thyme - A squeeze of lemon juice for brightness - Chopped sun-dried tomatoes for sweetness These options let you customize the dish to your taste. You’ll need some basic cooking tools to prepare the dish: - A large pot for boiling pasta - A skillet for sautéing spinach and garlic - A mixing bowl for combining ingredients - A 9x13 inch baking dish for assembling and baking - Aluminum foil to cover the dish while baking Having the right equipment makes the cooking process smooth and enjoyable. You can find the full recipe on my site for more details on preparation. To start, cook your pasta shells. Boil water in a large pot. Add salt to it. Follow the package instructions for cooking time. You want them al dente, which means firm but tender. Once cooked, drain the shells gently. Rinse them with cold water to stop the cooking. Set them aside on a clean towel. This way, they won’t stick together. Next, let’s make the filling. Heat a tablespoon of olive oil in a large skillet. Add minced garlic and cook for one minute. You want it fragrant but not burnt. Then, add chopped spinach. Stir and cook until it wilts, which takes about two to three minutes. Remove it from heat and let it cool a bit. In a mixing bowl, combine ricotta cheese, half of the mozzarella, and grated Parmesan. Add the cooked spinach, egg, dried oregano, salt, and pepper. Mix everything well until it’s blended. Now, let’s put it all together. First, spread a cup of marinara sauce evenly in a 9x13 inch baking dish. Take each pasta shell and stuff it with the ricotta mixture. Place the shells open side up in the dish. Pour the remaining marinara sauce over the stuffed shells. Ensure each shell is covered well. Sprinkle the rest of the mozzarella on top. Cover it with aluminum foil and bake for 25 minutes at 375°F (190°C). Then, remove the foil and bake for another 10 to 15 minutes. You want the cheese to be bubbly and golden. Let it cool for a few minutes before serving. Garnish with fresh basil for a nice touch. For the full recipe, visit [Full Recipe]. To cook pasta shells, start with a large pot of water. Add salt to the water; this helps flavor the shells. Bring the water to a boil before adding the shells. Cook them until they are al dente, which means they still have a bit of firmness. This usually takes about 8-10 minutes, but check your package for exact times. Once done, drain the shells and rinse them with cold water to stop the cooking. This step keeps them from getting too soft while you stuff them. When it comes to stuffing, make sure your filling is cool. If it's hot, it will soften the shells and make them hard to handle. Use a spoon or a small spatula to fill each shell, packing it well but not too tight. A pastry bag can also work well for this. Place the stuffed shells open side up in the baking dish. This helps them stay filled and makes for a nice presentation. To get that golden, bubbly cheese topping, use a mix of mozzarella and Parmesan. The mozzarella melts nicely, while the Parmesan adds flavor. After you pour the marinara over the shells, sprinkle the remaining mozzarella on top. Cover the dish with foil for the first part of baking. This keeps the moisture in. Remove the foil for the last 10-15 minutes to allow the cheese to brown. This gives you that perfect cheesy crust that everyone loves. For the complete recipe, check out the Full Recipe. {{image_2}} You can change the cheeses for unique flavors. Instead of ricotta, try cottage cheese. It gives a similar taste with less fat. For a creamier texture, use mascarpone. You can also mix in goat cheese. This will add a tangy taste. Experiment with different cheeses to find your favorite blend! Feel free to add more veggies to your stuffing. Chopped mushrooms or bell peppers work well. You can also add cooked chicken or sausage for extra protein. Just make sure to cook them first. These additions enhance the dish and boost its nutrition. The more colorful your filling, the more appealing it looks! If you need a gluten-free option, use gluten-free pasta shells. Many brands offer tasty alternatives. You can also make your own shells using chickpea or rice flour. Just follow the package instructions for cooking times. This way, everyone can enjoy this dish without worry. After enjoying your Easy Spinach and Ricotta Stuffed Shells, store leftovers in an airtight container. Make sure to let the dish cool completely first. This helps keep the shells fresh. You can keep them in the fridge for up to three days. If you want to enjoy them later, consider freezing. For the best taste, reheat your stuffed shells in the oven. Set your oven to 350°F (175°C). Place the shells in a baking dish and cover with foil. Bake for about 20 minutes. This keeps the shells moist. You can also reheat them in the microwave. Just cover the dish with a microwave-safe lid and heat for 2-3 minutes. Check that they are hot throughout before serving. To freeze your stuffed shells, place them in a single layer on a baking sheet. Freeze them for about 1-2 hours until solid. Then, transfer them to a freezer-safe container or bag. This way, they won’t stick together. Your frozen stuffed shells can last for up to three months. When you’re ready to eat, cook from frozen, adding extra baking time as needed. You’ll still have that delicious flavor! For the full recipe, check out the Easy Spinach and Ricotta Stuffed Shells. Yes, you can prepare stuffed shells in advance. Cooked shells can be filled and covered with sauce. Store them in the fridge for up to 24 hours. This makes dinner easy. Just bake when you are ready. If you freeze them, thaw overnight before baking. Stuffed shells pair well with many sides. Here are a few ideas: - Garlic bread - Green salad with vinaigrette - Roasted vegetables - Steamed broccoli - A simple tomato salad These sides add color and flavor to your meal. Your stuffed shells are done when the cheese is bubbly and golden. Bake them covered for 25 minutes, then uncovered for 10-15 more minutes. You can also use a food thermometer. The center should reach 165°F (74°C). If the shells look a bit crisp, they are ready. Dried spinach can work, but it needs some prep. Rehydrate it in hot water for 10-15 minutes. Squeeze out excess water before mixing it into the filling. Fresh spinach gives a better flavor and texture, making it the best choice for this recipe. For more details, check the Full Recipe. You learned how to make delicious spinach and ricotta stuffed shells. We explored key ingredients and cooking tips. Each step guides you to perfect your dish. Remember, you can tweak flavors with different cheeses or veggies. Storing leftovers is easy, and reheating keeps them tasty. Enjoy your stuffed shells with confidence, knowing your meal is both tasty and simple. Now, get in the kitchen and create this comforting dish!](https://grilledflavors.com/wp-content/uploads/2025/05/ac48cf02-61e8-4cde-ae74-1da7f5f66cbe.webp)
Welcome to a delicious journey! Today, I’m excited to share my recipe for Easy Spinach and Ricotta Stuffed Shells. This tasty meal is packed with flavor and will impress your …

Looking for a quick way to make juicy, flavorful hamburgers? Look no further! In this guide, I’ll show you how to use your air fryer to cook perfect burgers. With …
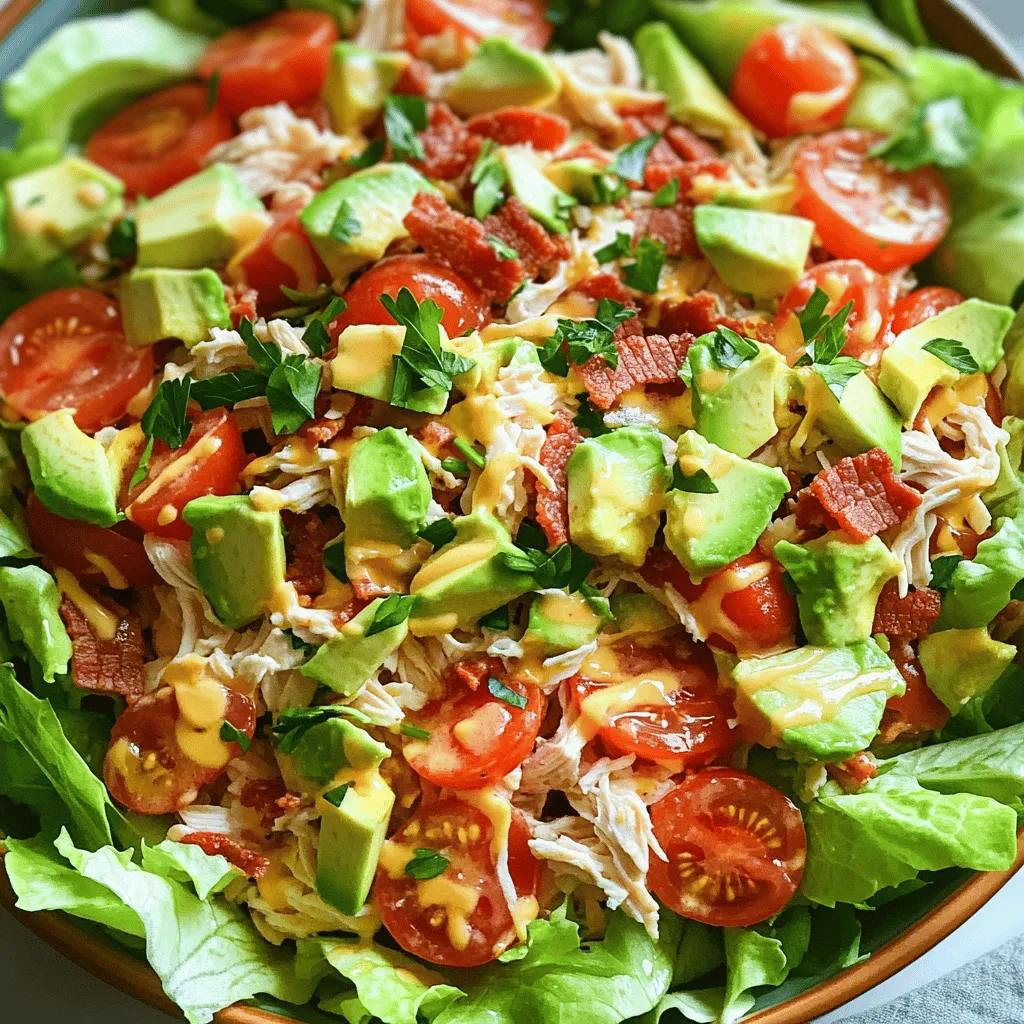
Looking for a quick and tasty meal? This Savory BLT Chicken Salad is the answer! Packed with flavor, it combines classic BLT ingredients with tender chicken for a satisfying dish. …
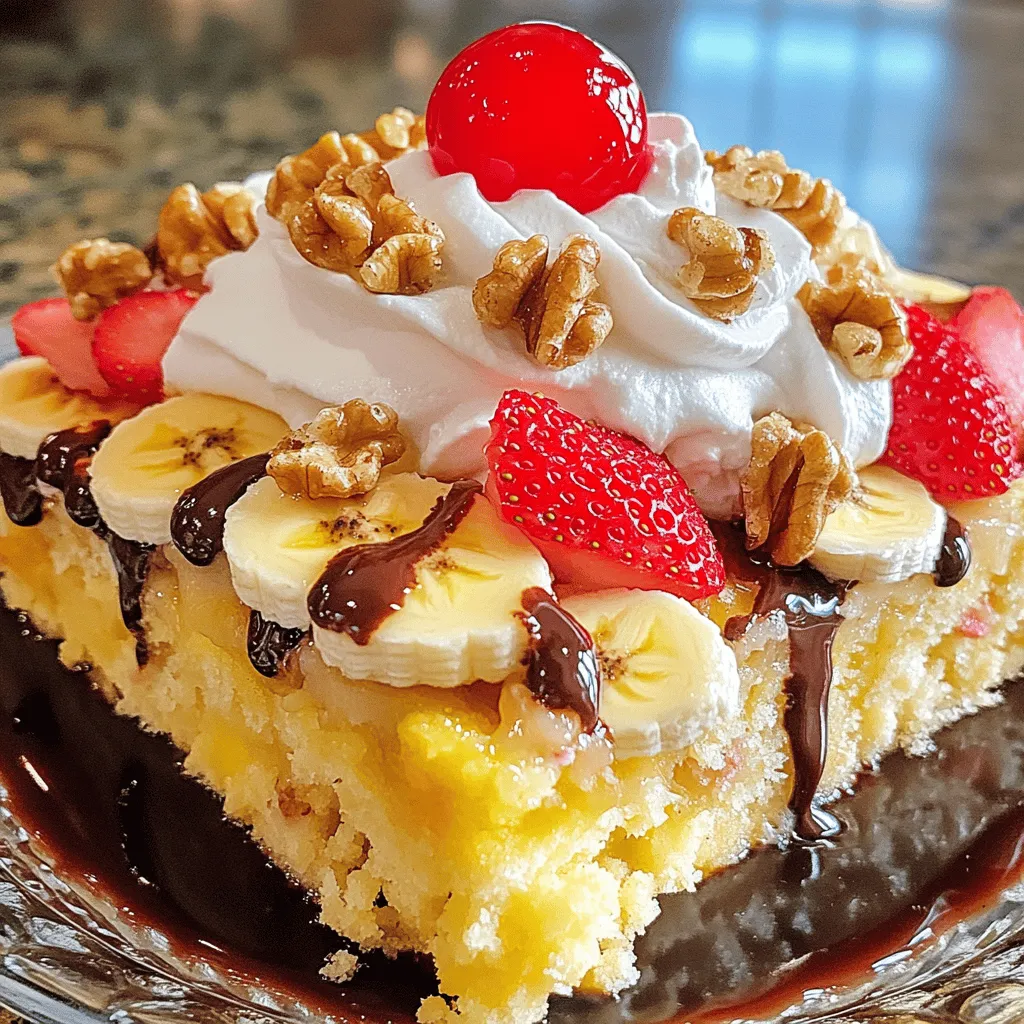
Are you ready to treat yourself to a sweet delight? The Banana Split Dump Cake is not just tasty; it’s also super easy to make! In this article, I’ll share …

Are you looking for a healthy snack that packs energy and flavor? I’ve got the perfect solution: Chia Banana Bread Energy Bites! These tasty treats are not just easy to …

Are you ready to take your steak game to the next level? In this article, I’m sharing my easy Air Fryer Cheesy Garlic Steaks recipe that’s bursting with flavor. With …
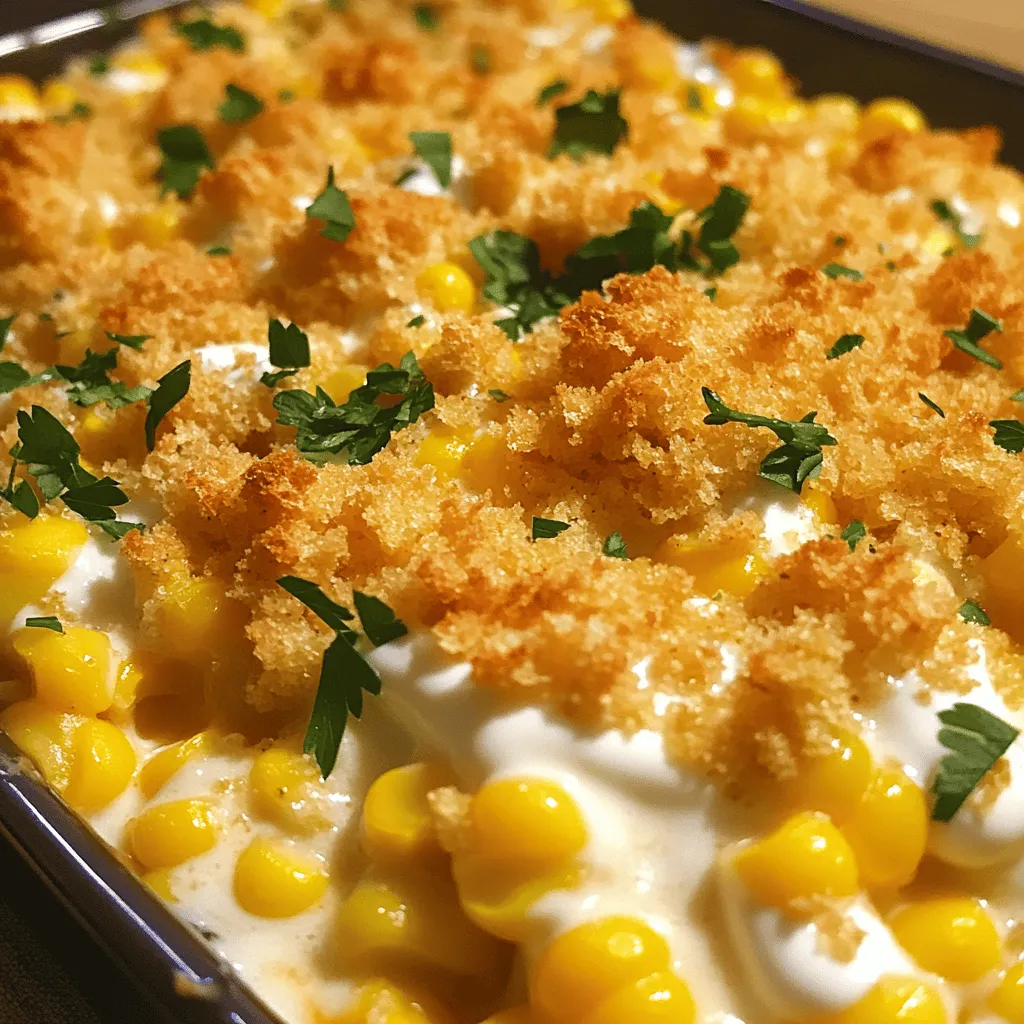
Are you ready to upgrade your comfort food game? White Cheddar Baked Corn is not only simple to make, but it’s also bursting with flavor. This dish combines sweet corn …
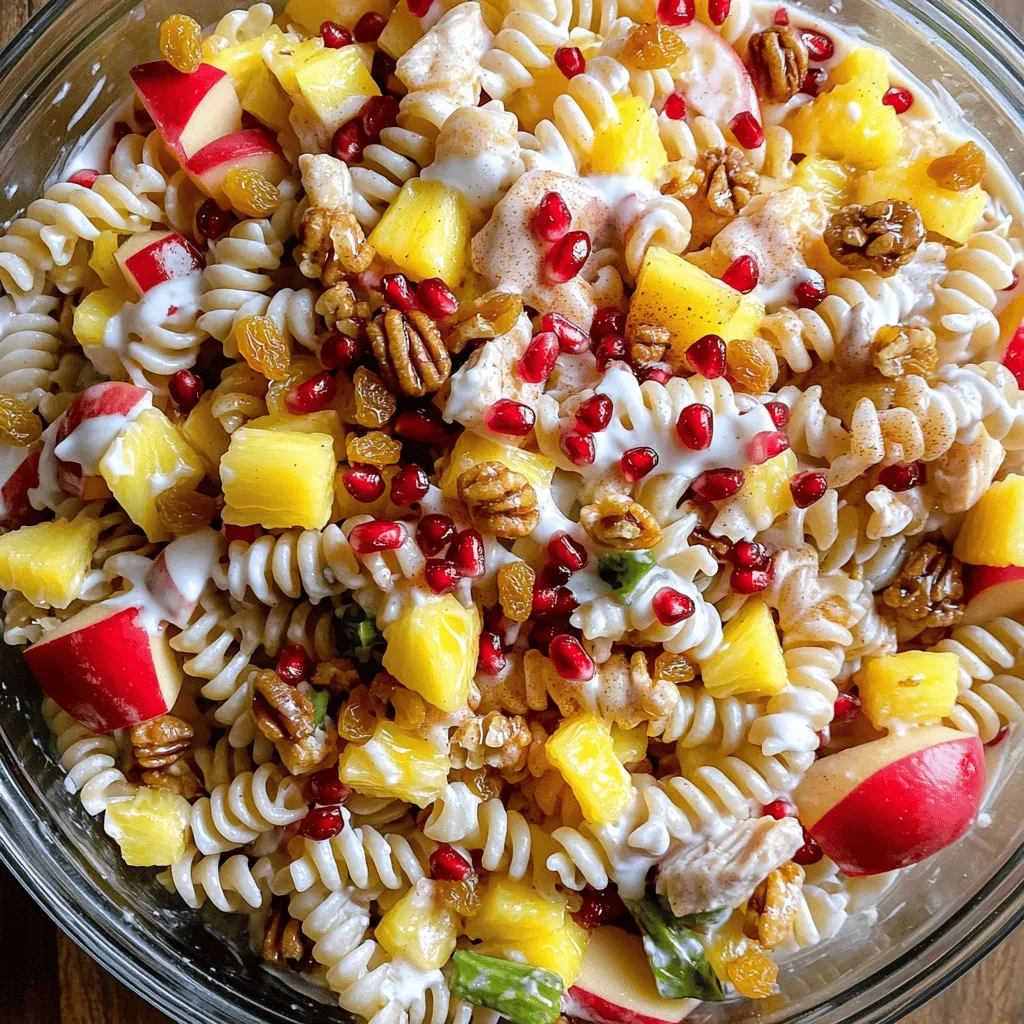
Are you ready to add a burst of flavor to your holiday table? Ensalada Navideña is a vibrant, festive salad that brings the spirit of the season straight to your …
![- 2 medium zucchini, grated - 1 cup all-purpose flour - 1/2 cup grated Parmesan cheese - 2 large eggs - 1/4 cup chopped fresh parsley - 2 green onions, finely sliced - Additional seasonings (garlic powder, black pepper) - Vegetable oil for frying To get the best results, grate your zucchini using a box grater or food processor. This will save you time and effort. Aim for even grating so your fritters cook evenly. Measuring ingredients accurately is key. Use dry measuring cups for flour and a liquid measuring cup for eggs. This helps ensure the right texture in your fritters. Too much flour can make them dry. Too little can make them too wet. Balance is essential for crispy zucchini fritters. For the best flavor, don’t skip the salt on the zucchini. Salting helps draw out moisture. Use a clean kitchen towel to squeeze out the excess moisture before mixing. This step is crucial for getting that perfect crunch. For the full recipe, check out the detailed instructions. Happy cooking! Start by grating your zucchini. Use a box grater or a food processor. Place the grated zucchini in a large bowl. Sprinkle one teaspoon of salt over it. Mix well and let it sit for about 10 minutes. This helps to draw out excess moisture. After 10 minutes, take a clean kitchen towel. Place the zucchini in the center of the towel. Twist the towel and squeeze out the moisture. This step is key for crispy fritters. If you skip this, the fritters may turn out soggy. In the same bowl with the zucchini, add the dry and wet ingredients. Combine one cup of flour, half a cup of grated Parmesan, two large eggs, a quarter cup of chopped parsley, two sliced green onions, one teaspoon of garlic powder, and half a teaspoon of black pepper. Mix until everything is well combined. You want a thick batter that holds together. If it feels too wet, add a little more flour. If it seems dry, you can add a splash of water. Next, heat a few tablespoons of vegetable oil in a large skillet over medium heat. You can test if the oil is ready by dropping in a small bit of batter. If it sizzles, you are good to go. Scoop about a quarter cup of the batter and drop it into the skillet. Use the back of a spatula to flatten it slightly. Don’t overcrowd the skillet; this helps them cook evenly. Fry for about 3-4 minutes on each side. You want them golden brown and crispy. Once cooked, transfer the fritters to a plate lined with paper towels to absorb excess oil. Repeat the process until you cook all the batter. You can add more oil to the skillet as needed. For the full recipe, refer to the detailed instructions above. To make your zucchini fritters really crispy, you must remove moisture. After grating the zucchini, add salt and let it sit for 10 minutes. This process pulls out excess water. Then, use a clean towel to squeeze out the moisture. The drier the zucchini, the crispier the fritters will be. For frying, use medium heat. If the oil is too cool, the fritters will absorb oil and become soggy. If it’s too hot, they’ll burn. The right temperature makes a golden, crispy outside. Pair your fritters with tasty dips like sour cream or Greek yogurt. These creamy dips enhance flavor and balance the crispiness. You can also sprinkle fresh parsley on top for color. A pinch of black pepper adds a nice touch too. One big mistake is overcrowding the skillet. If you add too many fritters at once, they won’t fry evenly. Stick to a few at a time. Another error is skipping the moisture extraction step. If you don’t remove the water from the zucchini, your fritters might turn out mushy. Following these steps will help you make perfect crispy zucchini fritters. For the full recipe, see the instructions above. {{image_2}} You can easily change some ingredients in crispy zucchini fritters. For cheese, try feta or cheddar instead of Parmesan. This swap gives a new flavor twist. You can also add spices like cumin or cayenne to heat things up. These little changes can make your fritters exciting and unique. If you want a lighter version, bake the fritters instead of frying them. Preheat your oven to 400°F (200°C). Spread the fritters on a baking sheet lined with parchment paper. Bake for about 20-25 minutes. Flip them halfway through to get both sides crispy. This method cuts down on oil while still giving you a tasty snack. You can mix in other veggies for a fun twist. Try adding grated carrots or diced bell peppers to the batter. These not only add color but also extra nutrients. Fresh herbs like basil or dill can enhance the flavor too. Experimenting with these additions can make each batch of fritters special. For the complete recipe, check out the [Full Recipe]. To keep leftover fritters fresh, place them in an airtight container. This helps seal in moisture and flavor. Store them in the fridge for up to three days. If you want to stack them, place parchment paper between layers. This prevents sticking and keeps them intact. For crispy fritters, I recommend using the oven. Preheat it to 350°F (175°C). Place the fritters on a baking sheet for about 10-15 minutes. This method maintains their crunch. If you use a microwave, heat them for about 30-60 seconds. However, this may make them soft. To freeze fritters, let them cool completely first. Then place them in a single layer on a baking sheet. Freeze for about an hour until solid. After that, transfer them to a freezer-safe bag or container. This way, they won't stick together. To thaw, leave them in the fridge overnight. Reheat them in the oven for the best results. To make your zucchini fritters crispier, remove as much moisture as possible from the zucchini. After grating the zucchini, sprinkle it with salt and let it sit for 10 minutes. This helps draw out excess liquid. Then, squeeze the zucchini with a clean towel to remove more moisture. Use a hot skillet with enough oil to fry the fritters. Fry them in batches, avoiding overcrowding. This allows even cooking and crispiness. Yes, you can prepare the batter ahead of time. Store it in an airtight container in the fridge for up to 2 hours. However, it’s best to cook the fritters soon after mixing to ensure the best texture. If you wait too long, the batter may become too watery as the zucchini releases more moisture. You can make zucchini fritters gluten-free by swapping the all-purpose flour for a gluten-free flour blend. Almond flour or chickpea flour are great alternatives. These options will give a nice texture and flavor. Always check ingredient labels to ensure they are gluten-free. Zucchini fritters pair well with several sides. Consider serving them with a dollop of sour cream or Greek yogurt. You can also add a side salad for freshness. For a heartier meal, serve them with a light pasta dish or grilled chicken. These combinations create a balanced and tasty meal. For the full recipe, check out the complete guide. Zucchini fritters are simple and fun to make. You learned the key ingredients, such as zucchini, flour, and Parmesan. I shared tips for making the batter and cooking methods to achieve crispy fritters. Remember to remove moisture for the best texture and avoid common mistakes like overcrowding your skillet. These fritters are versatile. You can change ingredients or try baking them for a different twist. Enjoy these delicious bites with your favorite dips or sides. You now have the know-how to impress your friends and family. Happy cooking!](https://grilledflavors.com/wp-content/uploads/2025/05/5f43e5fa-f245-458c-81a9-a808bfdb9156.webp)
If you’re craving a tasty snack that’s simple to make, try these crispy zucchini fritters! Packed with flavor and easy to put together, they make the perfect appetizer or side …