Skip to content
grilledflavors.com
  • Home
  • Appetizers
  • Desserts
  • Salads
  • Breakfast
  • Dinner
  • Privacy Policy
  • Contact
  • About

Chef Nate

Crispy Chicken Katsu Delightful and Easy Recipe

May 28, 2025 by Chef Nate
- 2 boneless, skinless chicken breasts - Salt and pepper to taste - 1 cup all-purpose flour - 2 large eggs, beaten - 1 cup panko breadcrumbs - Vegetable oil for frying - 1 tablespoon sesame oil - 1 tablespoon soy sauce - 1 tablespoon mirin (optional, can substitute with a bit more soy sauce) - 1 cup tonkatsu sauce (store-bought or homemade) - Chopped green onions and toasted sesame seeds for garnish For a great Chicken Katsu, you need fresh and simple ingredients. Start with two boneless chicken breasts. These give you that juicy center. Don’t forget salt and pepper to bring out the flavor. Next, you need flour for coating. It makes the chicken crisp. Beat two large eggs in a bowl. This helps the breadcrumbs stick. Panko breadcrumbs are key for that perfect crunch. They are light and airy. You will fry in vegetable oil. A mix of sesame oil adds a nice flavor. For dipping, soy sauce and mirin blend well. If you like, tonkatsu sauce adds a sweet touch. To finish, chopped green onions and toasted sesame seeds make great garnishes. They add color and crunch. These ingredients work together to make your Chicken Katsu tasty and fun. For the full recipe, check the section above. To start, you need to pound and season the chicken breasts. Place each chicken breast between two sheets of plastic wrap. Use a meat mallet or a rolling pin to pound them. Aim for about 1/2 inch thick. This helps them cook evenly. After that, season both sides with salt and pepper. Next, set up the breading station. You’ll need three shallow dishes. In the first dish, add flour. In the second, beat the eggs. In the third dish, place panko breadcrumbs. This setup makes the breading process easy. Now, let’s move on to dredging the chicken. Take one chicken breast and coat it in flour. Make sure to cover it completely and shake off any extra flour. Then, dip it into the beaten eggs. Let any excess drip off. Finally, coat it with panko breadcrumbs. Press gently to help them stick. Repeat this process with the second chicken breast. Make sure both breasts are well-coated and ready for frying. Heat about 1/2 inch of vegetable oil in a large skillet. Add a tablespoon of sesame oil for flavor. Set the heat to medium. You’ll know it’s ready when it sizzles after dropping in a breadcrumb. Carefully place the breaded chicken breasts in the hot oil. Fry each side for about 4-5 minutes until they turn golden brown and crispy. If your pan is small, cook in batches. Overcrowding can lead to soggy chicken. Once cooked, transfer the chicken katsu to a paper towel-lined plate. This helps drain any excess oil. Let them rest for a couple of minutes before slicing. For a tangy touch, mix soy sauce and mirin in a small bowl. This sauce pairs well with the katsu. Drizzle tonkatsu sauce over the sliced chicken and garnish with green onions and toasted sesame seeds. Enjoy your crispy chicken katsu! You can find the full recipe above. To get that perfect crispy texture, you need the right oil temperature. Aim for about 350°F (175°C). You can check this by dropping a breadcrumb in the oil; it should sizzle right away. Avoid frying at too low a heat, as this will make the chicken soggy. To prevent sogginess, make sure you drain the chicken well after frying. Use paper towels to soak up any excess oil. This helps keep your katsu crispy. One big mistake is overcrowding the frying pan. When you add too much chicken, the oil cools down. This leads to less crispy katsu. Fry in batches if needed. Another mistake is using the wrong breading technique. Make sure to coat the chicken fully in flour first. Then, dip it in egg, and finally press the panko breadcrumbs on firmly. This helps the coating stick well while cooking. Before you bread the chicken, try adding some spices to the flour. Garlic powder, paprika, or even a pinch of cayenne can boost the flavor. Feel free to experiment with these seasoning variations. For dipping sauce, you can mix soy sauce with a bit of mirin. This adds a nice touch. You can also serve it with tonkatsu sauce for a classic taste. Don't forget to garnish your katsu with green onions and sesame seeds for extra flavor. For the full recipe, check out the earlier section. {{image_2}} You can switch out chicken for pork. Use boneless pork chops for a tasty change. It has a similar texture and flavor. For a vegetarian version, try eggplant or tofu. Slice the eggplant into thick pieces and bread it just like the chicken. Tofu provides a nice, soft center. Press it to firm it up before breading for the best results. Want to spice things up? Add some paprika or garlic powder to the breading. This gives the katsu a nice kick. For dipping sauces, think outside the box. Spicy mayo or ponzu sauce pairs well with the crispy texture. These sauces add a burst of flavor that makes every bite special. Chicken katsu shines with a few tasty side dishes. Try serving it with steamed rice and a simple salad. A fresh cabbage slaw adds crunch and balances the meal. For a special touch, arrange the katsu on a colorful plate with a drizzle of sauce. Garnish with green onions and sesame seeds for a beautiful look. This way, you impress your guests before they even take a bite! For the full recipe, check out the [Full Recipe]. To keep your Chicken Katsu fresh, store it in the fridge. Place it in an airtight container. This will prevent moisture loss and keep it crispy. You can keep Chicken Katsu in the fridge for about 3 days. After that, the texture may change and it may not taste as good. When you reheat Chicken Katsu, you want to keep it crispy. The best way is to use an oven. Preheat your oven to 375°F (190°C). Place the chicken on a baking sheet and heat for about 10-15 minutes. This method helps restore the crispiness. If you use a microwave, the chicken may become soggy. You can freeze Chicken Katsu before or after cooking. If freezing before cooking, wrap each piece in plastic wrap. Then, place them in a freezer bag. For cooked Chicken Katsu, let it cool first. Then, wrap and store it in a freezer bag. When you are ready to eat, thaw it overnight in the fridge. Cook it in the oven to keep it crispy. This method works well for maintaining great flavor and texture. Chicken Katsu is a popular Japanese dish. It features breaded and deep-fried chicken. The origins trace back to the late 19th century. It became popular during the Meiji era. Chicken Katsu has cultural significance as comfort food. Many enjoy it for its crispy texture and savory flavor. Yes, you can make Chicken Katsu ahead of time. Prepare the chicken and bread it. Store the breaded chicken in the fridge for up to 24 hours. For longer storage, freeze it for up to three months. When ready, fry it straight from the fridge or freezer. Just add a few extra minutes to the cooking time. Chicken Katsu pairs well with many sides. Here are some popular options: - Steamed rice - Cabbage salad - Miso soup - Pickled vegetables - Japanese curry These sides enhance the meal and add flavor. Chicken Katsu has both pros and cons. It contains protein from chicken, which is good for muscle. However, frying adds extra fat and calories. A serving can have around 400-500 calories. For a healthier version, bake instead of fry. You can also use whole grain breadcrumbs. Tonkatsu sauce is easy to make at home. Mix these ingredients: - 1/4 cup ketchup - 2 tablespoons soy sauce - 1 tablespoon Worcestershire sauce - 1 tablespoon sugar - 1 teaspoon Dijon mustard Stir well until blended. You can also use store-bought tonkatsu sauce for convenience. This sauce adds a sweet and tangy flavor to your Chicken Katsu. For the full recipe, check the detailed instructions above. In this blog post, I covered how to make crispy Chicken Katsu. We explored essential ingredients, step-by-step instructions, and tips for perfect texture. You learned about variations like using different proteins and flavor profiles. I also shared storage and reheating tips to keep your dish fresh. Chicken Katsu is more than a meal; it's an experience. With practice, you will impress everyone at your table. Enjoy your cooking journey!

Are you ready to impress your family and friends with a crispy Chicken Katsu that’s simple yet delightful? This dish is a crowd-pleaser, boasting juicy chicken wrapped in a golden, …

Read more

Categories Dinner

Savory Slow Cooker Spaghetti Casserole Delight

May 28, 2025 by Chef Nate
The Savory Slow Cooker Spaghetti Casserole is a hearty dish. It mixes pasta, meat, sauce, and cheese. You can enjoy it any night of the week. This dish is simple to make and even easier to love. Here’s what you need for this recipe: - 12 ounces spaghetti, uncooked - 1 pound ground beef or turkey - 1 onion, finely diced - 2 cloves garlic, minced - 1 bell pepper (any color), diced - 24 ounces marinara sauce - 1 can (15 ounces) diced tomatoes (with juices) - 2 cups shredded mozzarella cheese - 1 cup ricotta cheese - 1 teaspoon dried Italian herbs (oregano, basil, thyme) - Salt and pepper to taste - Fresh basil for garnish (optional) Feel free to customize your casserole. You can add: - Sliced mushrooms for extra flavor - Spinach for a healthy boost - Zucchini for added texture - Red pepper flakes for some heat Experiment and find what you love! Start by heating a skillet over medium heat. Add the ground beef or turkey to the pan. Cook it until it turns brown. This should take about 5 to 7 minutes. As the meat cooks, add in the finely diced onion, minced garlic, and diced bell pepper. Stir these together, letting the flavors mix. Once the meat is no longer pink and the veggies are soft, drain any extra fat from the pan. In a large bowl, combine the cooked meat mixture with the marinara sauce. Next, add the canned diced tomatoes along with their juices. Toss in the dried Italian herbs, salt, and pepper. Use a spoon to mix everything well. This step is key. It helps blend all the tastes together, making the dish more flavorful. Now it’s time to build the layers in your slow cooker. Start with a layer of uncooked spaghetti at the bottom. Pour half of the meat sauce mixture over the spaghetti. Then, dollop half of the ricotta cheese on top. Repeat these layers with the remaining spaghetti and meat sauce. Finish by adding the leftover ricotta cheese on top. This layering keeps the flavors moving throughout the dish. Cover the slow cooker and set it to low. Cook for 4 to 5 hours. Check the spaghetti around the 4-hour mark. It should be tender and full of flavor. About 30 minutes before it is done, sprinkle shredded mozzarella cheese on top. Cover the slow cooker again to let the cheese melt and bubble. After it’s ready, carefully scoop servings from the slow cooker and enjoy! To get the best texture for your casserole, cook it on low heat. This method gives the spaghetti time to soak up the sauce. Keep an eye on the cooking time. If you cook it too long, the pasta might become mushy. To avoid this, check the spaghetti for doneness around the 4-hour mark. It should be tender but still hold its shape. Adding cheese is one of my favorite parts! About 30 minutes before serving, sprinkle mozzarella cheese on top. Cover the slow cooker to trap the heat. This action helps the cheese melt evenly. If you want a crispy top, you can briefly broil it in your oven. Just watch it closely to prevent burning. Serve the casserole hot in deep bowls. This makes it easy to scoop and enjoy. For a pop of color, garnish each bowl with fresh basil leaves. The bright green makes the dish look stunning. You can also add a sprinkle of grated Parmesan cheese on top. This extra touch adds flavor and makes it even more inviting. For a complete meal, pair it with a simple salad or garlic bread. You can find the full recipe above to guide you through each step. {{image_2}} If you want a vegetarian dish, swap the meat for veggies. Use mushrooms, zucchini, or spinach. These veggies add great flavor and nutrition. You can also add beans for protein. Black beans or chickpeas work well. This makes the dish hearty without meat. You’ll still get a rich taste with marinara sauce. You can switch the protein in this casserole for variety. Ground turkey or chicken are great substitutes. If you prefer a richer flavor, try Italian sausage. Just make sure to cook it first. For a fun twist, use shredded rotisserie chicken. Each option gives a unique taste. Experiment with what you enjoy most! Adjust the flavor to suit your taste. Add a pinch of red pepper flakes for heat. If you like it tangy, mix in some balsamic vinegar. Fresh herbs can brighten the dish. Try adding parsley or thyme to enhance the flavor. You can also play with cheese. Parmesan or feta can add a nice touch. My favorite way to do this is by using a mix of cheeses. It makes every bite a new delight. For the detailed recipe and ingredient list, check the Full Recipe. After you finish your Savory Slow Cooker Spaghetti Casserole, let it cool. Store it in an airtight container. It stays fresh in the fridge for up to three days. Make sure to label the container with the date. This helps you keep track of how long it has been there. If you want to save some for later, freezing is a great option. Place the cooled casserole in a freezer-safe container. You can also use a heavy-duty freezer bag. It will last for up to three months in the freezer. Remember to remove as much air as possible before sealing. This prevents freezer burn and keeps the flavor intact. To reheat, you can use the oven or microwave. If using the oven, set it to 350°F (175°C). Cover the casserole with foil to keep it moist. Heat for about 30 minutes, or until warmed through. If you're in a hurry, the microwave works well too. Just heat in short bursts, stirring in between. Enjoy your casserole just like it was fresh! For the full recipe, check out the details above. You should cook spaghetti in a slow cooker for about 4 to 5 hours on low. This allows the pasta to soak up the sauce and flavors. If you prefer a firmer texture, check it at 4 hours. If you want it softer, let it cook longer. Yes, you can use whole wheat spaghetti. It adds a nutty flavor and more fiber. Keep in mind that whole wheat pasta may cook a bit faster than regular pasta. Check it a little earlier to avoid mushiness. To prevent mushy spaghetti, avoid overcooking it. Layer uncooked spaghetti at the bottom, and don’t stir it too much. The slow cooker will cook it gently in the sauce. You can also add more sauce if needed, as this keeps the texture just right. Yes, you can make this casserole ahead of time. Prepare it the night before and store it in the fridge. When ready to cook, just pop it in the slow cooker. This makes dinner easy and stress-free! For the full recipe, check out the main article. This blog post covered how to make an easy slow cooker casserole. We explored each ingredient, from meat to optional add-ins. Then, I shared step-by-step cooking methods and tips for perfect results. We also looked at variations for different diets and how to store leftovers. Think of this casserole as a canvas. You can customize it however you like. Enjoy trying new flavors and textures. Happy cooking!

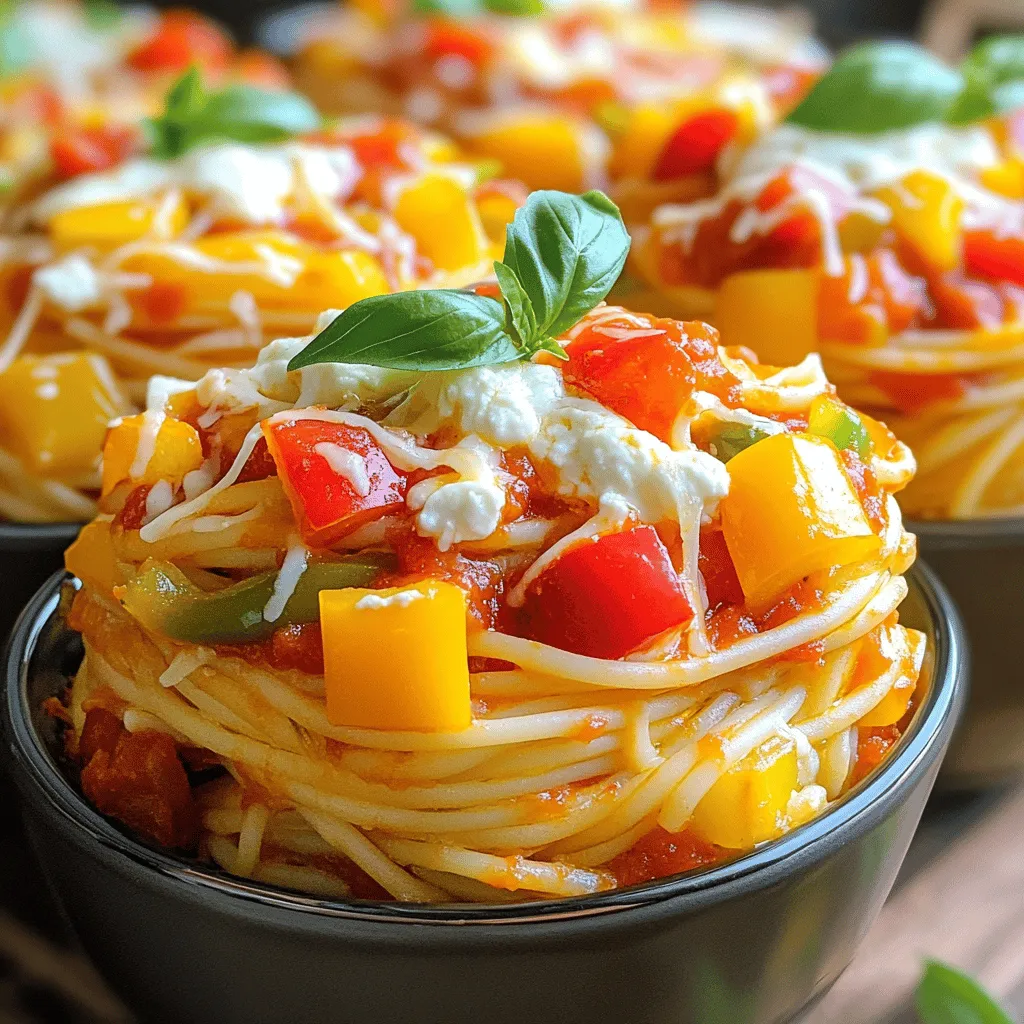
Are you looking for a cozy meal that cooks itself? The Savory Slow Cooker Spaghetti Casserole Delight is your answer! This easy recipe will make your taste buds dance while …

Read more

Categories Dinner

Cranberry Orange Scones Perfect for Any Occasion

December 11, 2025May 28, 2025 by Chef Nate
- 2 cups all-purpose flour - 1/4 cup granulated sugar - 1 tablespoon baking powder - 1/2 teaspoon salt - 6 tablespoons cold unsalted butter, cubed - 1/2 cup dried cranberries - Zest of 1 large orange - 1/2 cup heavy cream - 1 large egg - 1 teaspoon vanilla extract - 1/2 cup powdered sugar (for glaze) - 1-2 tablespoons fresh orange juice (for glaze) When baking, precise measurements matter. Use a kitchen scale if you can. For flour, spoon it into your measuring cup and level it off. If you need to swap ingredients, you can use whole wheat flour instead of all-purpose flour. The texture may change but it adds flavor. You can also swap heavy cream with milk, but the scones won’t be as rich. For the egg, a flaxseed or chia seed mixture works as an egg substitute. Just mix one tablespoon of seeds with three tablespoons of water and let it sit for a few minutes. Using fresh ingredients is key to great scones. Fresh cranberries give a burst of flavor. Their tartness balances the sweetness of sugar. The orange zest adds a bright note to each bite. Fresh butter creates a flaky texture. Always check for the expiration dates. Quality ingredients enhance the taste, making every scone a delight. {{ingredient_image_1}} Start by preheating your oven to 400°F (200°C). Line a baking sheet with parchment paper. This step keeps the scones from sticking. In a large bowl, whisk together 2 cups of flour, 1/4 cup of sugar, 1 tablespoon of baking powder, and 1/2 teaspoon of salt. Mix until everything blends well. Next, add 6 tablespoons of cold, cubed butter. Use a pastry cutter or your fingers to mix it into the flour. You want it to look like coarse crumbs. Then, stir in 1/2 cup of dried cranberries and the zest of 1 large orange. This gives the scones a nice flavor. In a separate bowl, combine 1/2 cup of heavy cream, 1 large egg, and 1 teaspoon of vanilla extract. Whisk these ingredients together until smooth. Gradually add the wet mix to the dry mix. Stir gently until a dough forms. Be careful not to overmix. This helps keep the scones light and fluffy. Turn the dough onto a lightly floured surface. Knead it gently a few times until it comes together. Pat the dough into a circle about 1 inch thick. This is key for even cooking. Use a sharp knife to cut the circle into 8 wedges. Place the wedges on your prepared baking sheet, leaving about 1 inch between each scone. This allows them to expand while baking. Bake your scones in the preheated oven for 15 to 18 minutes. Keep an eye on them; they should look lightly golden on top. While they bake, prepare the glaze. Mix 1/2 cup of powdered sugar with enough fresh orange juice to make a drizzle-able consistency. Once the scones are out of the oven, let them cool for a few minutes on the baking sheet. Then, transfer them to a wire rack. Just before serving, drizzle the glaze over the warm scones. Enjoy the sweet aroma! To get the best scones, focus on cold ingredients. Use cold butter and cream. This keeps the scones flaky. Mix the butter into the flour until it looks like crumbs. Don’t overwork the dough. This can make the scones tough. Just mix until everything is combined. Zest is key for flavor. Use the zest of one large orange in your dough. This adds a bright taste. The orange zest wakes up the scone’s flavor. You can also add a bit of fresh juice to the glaze. This makes the scones even more tasty. Serve your scones warm for the best experience. They go great with tea or coffee. You might add a dollop of cream or a smear of butter. For a fun twist, pair them with a fruit jam. Fresh cranberries and orange slices make a lovely garnish. Pro Tips Chill Your Ingredients: For the flakiest scones, ensure your butter and cream are very cold before mixing them into the dough. Don’t Overmix: Mix the dough just until combined to prevent tough scones. A little bit of crumbly texture is okay! Use Fresh Orange Zest: For the best flavor, use fresh orange zest rather than bottled. It enhances the citrus aroma of your scones. Experiment with Add-ins: Feel free to add nuts or chocolate chips to the dough for extra texture and flavor variation. {{image_2}} You can switch some ingredients to suit your taste. For a dairy-free version, use coconut cream instead of heavy cream. Replace butter with coconut oil for a plant-based option. If you want a gluten-free scone, use a gluten-free flour blend. You can also try using maple syrup in place of granulated sugar for a unique flavor twist. To make these scones even tastier, consider adding spices. A pinch of cinnamon or nutmeg can add warmth and depth. You might also try mixing in nuts like walnuts or pecans for crunch. For more citrus flavor, add lemon zest along with the orange zest. You can even fold in chocolate chips for a sweet treat! These scones are great for any time of year. In winter, try adding warm spices like ginger or cardamom. For a spring twist, you can mix in fresh berries like blueberries or raspberries. In the fall, consider adding pumpkin puree and spices for a seasonal delight. Each variation gives you a chance to explore new flavors and textures! To keep your leftover scones fresh, store them in an airtight container. Make sure the container is cool and dry. This helps the scones stay soft for about two days. If you want them to last longer, consider refrigerating them. Just be aware that refrigeration may change the texture slightly. If you want to save scones for later, freezing is a great option. First, let the scones cool completely. Then, wrap each scone in plastic wrap. After that, place them in a freezer bag or container. Label it with the date. Scones can stay fresh in the freezer for up to three months. When you are ready to enjoy them, simply thaw them in the fridge or at room temperature. To reheat the scones, preheat your oven to 350°F (175°C). Place the scones on a baking sheet. Heat them for about 5-10 minutes. This brings back their warmth and crispiness. You can also microwave them for 20-30 seconds. However, this might make them a bit softer. For the best result, stick to the oven method. Enjoy your scones warm with a drizzle of glaze! Yes, you can use fresh cranberries. However, fresh cranberries are tart. You may want to add more sugar to balance the flavor. Fresh cranberries also release more moisture during baking. This can change the texture of your scones. If you use fresh cranberries, chop them roughly. This makes them easier to mix into the dough. To make scones less crumbly, you need to handle the dough gently. Overworking the dough can lead to dryness. Use cold butter and cream. This helps keep the scones moist. Make sure not to add too much flour when kneading. Just pat the dough into shape and cut it. This keeps the scones light and fluffy. Yes, you can make the dough ahead of time. After mixing, wrap it in plastic wrap. Store it in the fridge for up to 24 hours. When you are ready to bake, just roll it out and cut your scones. This saves time on busy mornings or special occasions. To make great scones, you need fresh, quality ingredients and careful steps. Start by measuring and preparing your dough. Pay attention to how you shape and bake them for the best results. Use tips to perfect texture and enhance flavors. Try different ingredients and seasonal options for variety. Store leftovers properly to enjoy later. Remember, you can always prepare the dough ahead. Follow these steps to create delicious, delightful scones every time!

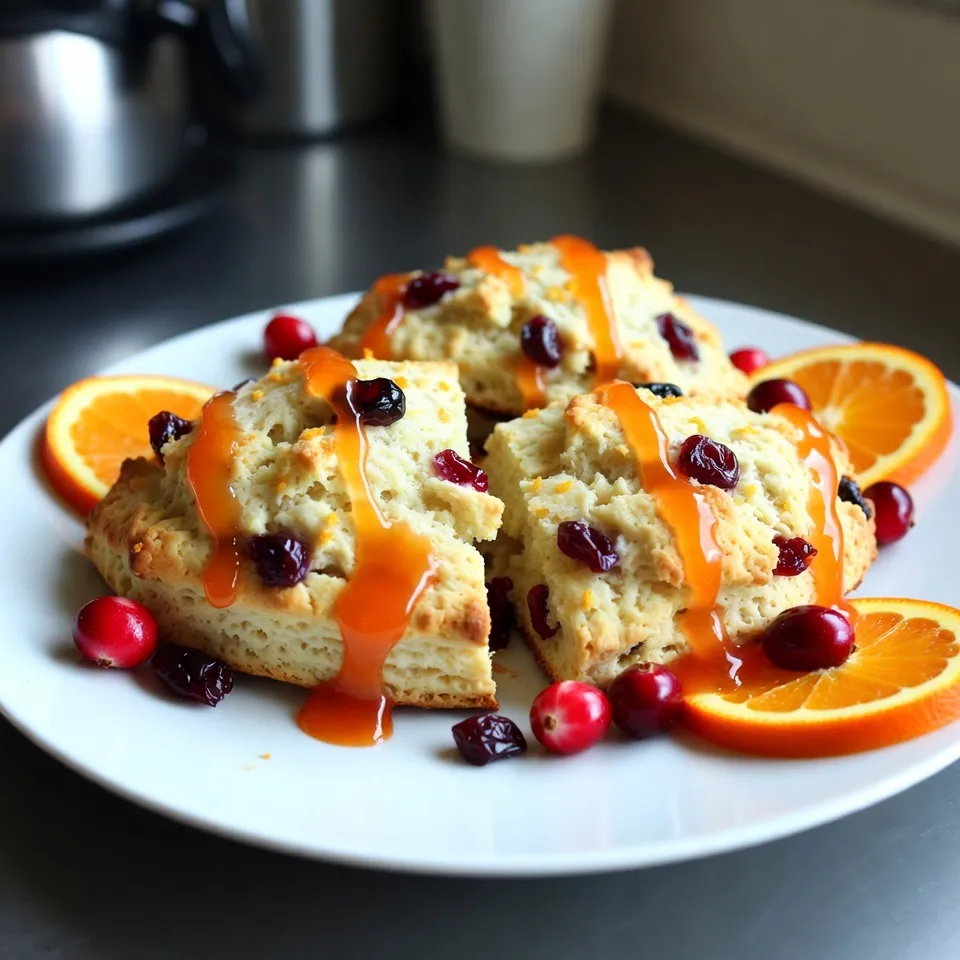
Are you ready to bake something delicious? These Cranberry Orange Scones are perfect for any occasion. They’re easy to make and bursting with flavor. I’ll guide you through every step, …

Read more

Categories Desserts

Meaty Texas Trash Dip Packed With Flavorful Goodness

May 27, 2025 by Chef Nate
- Ground beef - Spicy sausage - Cream cheese - Sour cream - Black beans - Diced tomatoes with green chilies - Shredded cheddar cheese - Shredded Monterey Jack cheese - Taco seasoning - Jalapeño (optional) - Tortilla chips for serving This Meaty Texas Trash Dip bursts with savory goodness. Each ingredient plays a key role. The ground beef and spicy sausage provide a hearty base. Cream cheese and sour cream add smoothness and richness. Black beans and diced tomatoes bring texture and flavor. I love using a mix of shredded cheddar and Monterey Jack cheese. It creates a melty, gooey topping that makes everyone want more. Taco seasoning ties it all together with zesty notes. If you want extra heat, add diced jalapeños. They give the dip a spicy kick. When serving, don’t forget the tortilla chips. They are perfect for scooping up the dip. Arrange them around the dish for a colorful and inviting presentation. You can find the full recipe in the article to guide you through each step. Enjoy this dip at your next gathering! Cooking the meat Start by heating a large skillet over medium heat. Add 1 pound of ground beef and 1 pound of spicy sausage. Cook the meat until it turns brown and is fully cooked. Use a spoon to break the meat into smaller pieces as it cooks. Once done, drain any extra fat from the skillet. Incorporating creamy ingredients Next, reduce the heat to low. Add an 8-ounce package of softened cream cheese and 1 cup of sour cream to the skillet. Stir the mixture until the cream cheese melts and blends well with the meat. This creamy base makes the dip rich and smooth. Adding mix-ins and seasoning Now, it's time to add more flavor. Mix in 1 can of black beans, drained and rinsed, and 1 can of diced tomatoes with green chilies. Sprinkle in 2 tablespoons of taco seasoning for that zesty kick. If you like heat, add a diced jalapeño. Stir everything until it's well combined and heated through. Melting the cheese Add half of the shredded cheddar cheese and half of the Monterey Jack cheese to the dip mixture. Stir until the cheese melts and spreads evenly throughout the dip. This step adds a gooey texture that everyone loves. Baking to perfection Transfer the dip mixture to a baking dish. Smooth the top with a spatula. Sprinkle the rest of the cheddar and Monterey Jack cheese over the dip. Bake it in a preheated oven at 350°F for about 15 to 20 minutes. You want the cheese to be bubbly and golden. Once finished, let it cool slightly before serving. For the full recipe, check out the detailed instructions. Enjoy your delicious Meaty Texas Trash Dip! To make the best Meaty Texas Trash Dip, focus on a few key points. - Achieving the right consistency: Aim for a creamy texture. If it’s too thick, add a splash of milk. If it’s too runny, cook it a bit longer. Stir often to help it blend well. - Balancing flavors with spices: Use taco seasoning wisely. Start with two tablespoons, then adjust to your taste. Adding a pinch of garlic powder or onion powder can enhance the flavor. - Importance of using fresh ingredients: Freshness matters! Use fresh jalapeños for heat and fresh herbs for a burst of color. This makes each bite pop with flavor. Make your dip even more fun with these ideas. - Recommended garnishes: Add chopped cilantro or sliced green onions on top. This adds a fresh touch and makes the dip look great. - Best tortilla chips to use: Choose sturdy tortilla chips. They need to hold up to the thick dip. Look for thick-cut or restaurant-style chips for the best experience. By keeping these tips in mind, your Meaty Texas Trash Dip will impress everyone. Enjoy every cheesy, meaty bite! {{image_2}} You can change the meats in this dip. Use ground turkey or chicken for a leaner option. You might also try chopped steak or pulled pork for a fun twist. If you're going meatless, use plant-based crumbles or lentils. Both work great and keep the dip hearty. Cheese choices can also vary. Instead of cheddar and Monterey Jack, you can use pepper jack for extra spice. A mix of cream cheese and goat cheese gives a tangy flavor. Experiment with your favorites to find what you love. Want some heat? Add more jalapeños or use hot sauce. You can even mix in diced habaneros for a fiery kick. If you prefer milder flavors, bell peppers or sweet corn work well too. They add sweetness and crunch. Adding vegetables boosts flavor and nutrition. Try mixing in diced onions, green peppers, or mushrooms. Spinach or kale can also sneak in some greens. These changes can make your dip even better. Enjoy your own unique version of Meaty Texas Trash Dip! To store leftover Meaty Texas Trash Dip, first let it cool. Place the dip in an airtight container. Make sure to seal it well to keep it fresh. Store the container in the fridge. It will last for about 3 to 4 days. Use glass or plastic containers that are safe for the fridge. This helps keep the flavors intact. When you want to reheat the dip, do it slowly. Use a microwave or oven. In the microwave, heat it in short bursts. Stir after each interval to keep it even. If using an oven, preheat it to 350°F (175°C). Place the dip in a baking dish and cover it with foil. Heat for about 15 minutes or until warm. This way, you keep the creamy texture. You can also serve this dip cold. It works great as a layered dip. Just layer it in a dish and enjoy with tortilla chips. This gives you a different taste that is just as fun! Can I make this dip ahead of time? Yes, you can make this dip ahead of time. Just prepare it, and let it cool. Store it in the fridge until you are ready to bake it. This way, you save time on party day. How can I make it spicier? To add spice, use more jalapeños or hot sauce. You can also add diced green chilies for extra heat. Adjust spice levels to your taste. What can I serve with it besides tortilla chips? You can serve this dip with veggies like carrots and celery. Pita chips or crackers also work well. Get creative with your dippers! Can I use canned beans instead of dried? Yes, canned beans are a great option. They are quick and easy to use. Just make sure to drain and rinse them well before adding to the dip. How long does it last in the fridge? It can last about 3 to 4 days in the fridge. Store it in an airtight container to keep it fresh. Reheat it before serving for the best taste. Can it be frozen for later use? Yes, this dip can be frozen. Just let it cool completely, then store it in a freezer-safe container. When ready to eat, thaw it in the fridge and reheat. Is it gluten-free? Yes, this dip can be gluten-free. Just check the labels on your ingredients, like taco seasoning and chips. Most are gluten-free, but it's best to confirm. How to make it dairy-free? To make it dairy-free, swap cream cheese and sour cream for dairy-free alternatives. Use plant-based cheese for the topping. This way, you keep the flavor without the dairy. This dip combines savory meats and creamy ingredients to create a delightful dish. We explored essential ingredients like ground beef, spicy sausage, and cheeses that boost flavor. You learned step-by-step how to cook and bake for the best texture. We also covered tips for achieving balance and suggested garnishes for serving. Remember, storage and reheating are key to enjoying leftovers. Whether you want variations or dietary adjustments, this dip balances taste and convenience. Dive into your kitchen and savor this meaty dish any way you like!

Are you ready to dive into a cheesy, meaty delight? My Meaty Texas Trash Dip is packed with flavor and perfect for any gathering. With ground beef, spicy sausage, and …

Read more

Categories Appetizers

Fresh Asparagus Salad Healthy and Simple Delight

May 27, 2025 by Chef Nate
- Fresh asparagus - Cherry tomatoes - Radishes - Red onions - Avocado - Feta cheese - Olive oil - Balsamic vinegar - Honey - Salt and pepper - Fresh basil leaves Fresh asparagus salad shines with vibrant colors and fresh flavors. You can start with fresh asparagus, which adds a lovely crunch and a bright green hue. When selecting asparagus, look for firm, straight stalks. Avoid any that appear limp or wrinkled. Next, add cherry tomatoes. Their sweetness balances the earthy taste of asparagus. Slice them in half to release their juices. Radishes add a nice peppery kick, while red onions bring a sharpness that enhances the salad. Dicing an avocado makes it creamy and rich, creating a great contrast in texture. Feta cheese crumbles give a salty touch, making the salad even tastier. Use the best feta you can find for the best flavor. For the dressing, combine olive oil and balsamic vinegar for a tangy yet smooth mix. Honey adds sweetness, while salt and pepper enhance the overall taste. This simple dressing ties all the ingredients together beautifully. If you want to add a hint of freshness, consider garnishing with fresh basil leaves. They elevate the dish with their aromatic scent. You can find the full recipe [here](#). Enjoy making this healthy and simple delight! First, let’s prepare the asparagus for blanching. Start by trimming the tough ends of the asparagus. This helps make it tender and tasty. Cut the asparagus into bite-sized pieces. Next, bring a pot of salted water to a boil. Once the water is boiling, add the asparagus pieces. Blanch them for about 2-3 minutes. This time cooks them just right, keeping them bright green and crunchy. After blanching, quickly move them to a bowl of ice water. This stops the cooking process and helps keep their color. After a few minutes, drain the asparagus and pat it dry with a clean towel. Now, let’s make the dressing. In a small bowl, whisk together 2 tablespoons of olive oil, 1 tablespoon of balsamic vinegar, and 1 teaspoon of honey. Add salt and pepper to taste. This dressing adds a sweet and tangy touch to the salad. Now it’s time to mix the salad. In a large mixing bowl, combine the blanched asparagus, 1 cup of halved cherry tomatoes, 1/2 cup of thinly sliced radishes, and 1/4 cup of thinly sliced red onions. Also, add 1 diced avocado for creaminess. Gently toss these ingredients together. Next, dress the salad. Drizzle the dressing over the salad mixture. Toss everything gently to coat. Be careful not to mash the avocado, as we want its texture to shine. For serving suggestions, use a large, shallow bowl. This lets the vibrant colors pop. Arrange the salad artfully. Sprinkle 1/4 cup of crumbled feta cheese on top. Finish with fresh basil leaves for a touch of green and flavor. Serve this salad fresh for a healthy and simple delight. You can find the complete instructions in the Full Recipe for Crunchy Spring Asparagus Salad. Enjoy every bite! How to choose the best asparagus Select bright green asparagus with firm stalks. Avoid ones that seem limp or yellow. Fresh asparagus should snap easily when bent. The thinner stalks are often more tender, but thicker ones have great flavor, too. Tips for cutting and preparing ingredients Trim the tough ends of the asparagus. Cut them into bite-sized pieces, about 2 inches long. For cherry tomatoes, slice them in half. Thinly slice radishes and red onions for a nice crunch. Dice the avocado just before serving to keep it fresh. Suggested spices and herbs to add Fresh herbs like basil or parsley boost flavor. You can also add a pinch of garlic powder for a nice touch. A sprinkle of chili flakes can add a little heat. Balancing acidity in the dressing Use olive oil and balsamic vinegar for a great mix. The honey adds sweetness, balancing the vinegar's acidity. Taste your dressing and adjust. Add a bit more honey if it feels too sharp. Best side dishes to pair with This salad pairs well with grilled chicken or fish. You can also serve it alongside a simple pasta dish. It complements a light soup nicely, too. Ideal occasions for serving this salad Serve this salad at picnics or barbecues. It’s perfect for spring gatherings. You can also enjoy it as a refreshing lunch during hot days. For more detailed steps, see the Full Recipe above. {{image_2}} You can make this salad heartier by adding protein. Here are some great options: - Grilled chicken: Dice up some grilled chicken breast. It adds flavor and makes the salad filling. - Shrimp or salmon: Cooked shrimp or grilled salmon work well too. They add a nice touch and pair perfectly with asparagus. If you want to change the cheese or go dairy-free, consider these ideas: - Different cheese options: Try goat cheese or blue cheese for a unique taste. - Non-dairy alternatives: Use vegan cheese or nutritional yeast for a dairy-free salad. They add a nice flavor without the dairy. You can switch ingredients based on the season. Here’s how: - Summer: Add sweet corn or bell peppers for a bright, fresh taste. - Winter: Include roasted nuts, like walnuts or pecans, for extra crunch and warmth. These variations keep your fresh asparagus salad exciting and delicious! For the full recipe, check out the Crunchy Spring Asparagus Salad. To store leftover salad, place it in an airtight container. This keeps the salad fresh. If you have dressing left, store it separately. This helps prevent sogginess. For proper storage of ingredients, keep the asparagus in a damp paper towel. Place it in a plastic bag. Store the cherry tomatoes at room temperature. They taste better when fresh. Other veggies, like radishes and onions, can go in the fridge in a sealed bag. How long does the salad last in the fridge? It lasts about 2-3 days. After that, the ingredients may lose their crunch. To maintain freshness, eat the salad within this time frame. If you notice any wilting, discard it. To keep the salad fresh longer, do not toss it with dressing until you are ready to eat. This simple step helps keep the veggies crisp. Can you reheat asparagus salad? Generally, I recommend eating it cold. Reheating can make the veggies mushy. If you want to warm it, heat only the asparagus. Best practices for reheating components include steaming or sautéing the asparagus. This way, it stays tender and bright. Avoid using the microwave, as it can ruin the texture. For the best taste, enjoy your salad fresh! How do you prepare asparagus for a salad? To prepare asparagus, start by trimming the tough ends. Next, cut the spears into bite-sized pieces. Blanch them in boiling water for 2-3 minutes. This keeps them bright green and crunchy. After blanching, place the asparagus in ice water. Let it cool before draining. Can I make this salad ahead of time? Yes, you can make this salad ahead of time. Just keep the dressing separate until serving. This prevents the salad from becoming soggy. Store the salad in the fridge for up to a day. What other ingredients can I add to asparagus salad? You can add many ingredients to enhance the salad. Consider adding nuts for crunch or fruits for sweetness. Grilled chicken or shrimp can make it heartier. Feta cheese adds creaminess, but you can also try goat cheese. What are the health benefits of asparagus? Asparagus is low in calories and rich in vitamins. It has vitamin K for bone health and folate for cell growth. It also contains antioxidants that help fight disease. Plus, it's a good source of fiber, aiding digestion. Is asparagus salad low in calories? Yes, asparagus salad is low in calories. One serving has around 100-150 calories. The fresh veggies keep it light. This salad is great for a healthy meal or snack. What are some alternative dressings I can use? You can mix things up with different dressings. Lemon vinaigrette adds a bright flavor. Honey mustard dressing gives a sweet kick. You could also use a yogurt-based dressing for creaminess. How do I make a creamy dressing for asparagus salad? To make a creamy dressing, mix 1/4 cup of Greek yogurt with 1 tablespoon of lemon juice. Add salt and pepper to taste. You can also whisk in olive oil to thin it out. This dressing pairs well with the fresh veggies in your salad. This blog post covers how to make a fresh and tasty asparagus salad. You learned about the key ingredients, like asparagus and feta cheese, and how to prepare them. We discussed dressing options and tips for serving. Don't forget the variations, like adding protein or changing up the cheese. Proper storage and shelf life are essential too. Enjoy experimenting with your own twists on this salad. Fresh salads can brighten up any meal!

Ready to elevate your salad game? This Fresh Asparagus Salad is a healthy and simple delight! Loaded with fresh ingredients like crisp asparagus, juicy cherry tomatoes, and creamy feta, it’s …

Read more

Categories Salads

Copycat Chipotle Grilled Chicken Burrito Recipe

May 27, 2025 by Chef Nate
To make a tasty burrito, gather these main items: - 1 lb boneless, skinless chicken thighs - 2 cups cooked rice (white or brown) - 1 can black beans, drained and rinsed - 1 cup corn (fresh, frozen, or canned) - 1 cup shredded cheddar cheese - 1 cup fresh salsa (store-bought or homemade) - 1 cup sour cream or Greek yogurt - 4 large flour tortillas - Fresh cilantro, chopped (for garnish) These ingredients form the heart of your burrito. The chicken thighs give a juicy base. The rice and beans add bulk and flavor. The salsa and cheese bring zest to each bite. For that Chipotle flair, use this marinade: - 2 tablespoons olive oil - 2 tablespoons lime juice - 1 tablespoon smoked paprika - 1 teaspoon ground cumin - 1 teaspoon garlic powder - 1 teaspoon onion powder - ½ teaspoon cayenne pepper (adjust for spice preference) - Salt and pepper to taste This marinade is key. It helps the chicken soak up all the great flavors. The lime juice gives it a fresh kick, while the spices add depth. Feel free to add these extras for more flavor: - Extra salsa - Sliced jalapeños - Avocado or guacamole - Extra cheese These optional items can elevate your burrito. They add more taste and texture. You can mix and match based on your preference. Enjoy customizing your meal! For the complete recipe, check out the Full Recipe. To start, gather your ingredients. You will need olive oil, lime juice, smoked paprika, ground cumin, garlic powder, onion powder, cayenne pepper, salt, and pepper. In a large bowl, mix the olive oil and lime juice first. Then, add the smoked paprika, cumin, garlic powder, onion powder, cayenne pepper, salt, and pepper. Stir everything together until it forms a smooth marinade. Now, add the chicken thighs. Make sure each piece is well coated in the marinade. Cover the bowl and place it in the fridge for at least 30 minutes. If you have time, letting it sit for up to 2 hours will give better flavor. Next, preheat your grill or grill pan to medium-high heat. While it heats up, take the chicken out of the marinade. Place the chicken on the grill and cook for about 6-7 minutes on each side. The chicken should reach an internal temperature of 165°F to be fully cooked. Once done, remove the chicken from the grill and let it rest for 5 minutes. This helps keep the chicken juicy. After resting, slice the grilled chicken into strips. Now it’s time to put your burrito together. Warm your flour tortillas in a dry skillet for about 30 seconds on each side. This step makes them easier to roll. Lay a warm tortilla flat on a clean surface. Start by adding a scoop of cooked rice. Next, layer on some black beans, corn, and a few slices of grilled chicken. Then, sprinkle on shredded cheese, add salsa, and finish with a dollop of sour cream. Carefully fold in the sides of the tortilla. Roll it tightly from the bottom up to form a burrito. Repeat this process for the remaining tortillas. If you want a crispy finish, grill the assembled burritos for an extra 2-3 minutes on each side. Serve them warm, and enjoy every bite! To get great flavor, you need a solid marinade. Start with good olive oil and fresh lime juice. The oil keeps the chicken moist while the lime juice adds zing. Use smoked paprika for that smoky taste. Adjust the cayenne pepper based on your spice level. Marinate the chicken for at least 30 minutes. If you can wait, two hours brings better flavor. Grilling chicken can be tricky. Preheat your grill to medium-high heat. This helps sear the chicken and lock in juices. Grill the chicken thighs for about 6-7 minutes on each side. Check that the inside reaches 165°F to ensure it’s safe to eat. After grilling, let the chicken rest for 5 minutes. This keeps it juicy when you slice it. Burritos are fun because you can make them your way! Start with rice and beans, then add your grilled chicken. You can mix in corn, cheese, and salsa. For extra flavor, try adding guacamole or jalapeños. Don’t forget fresh cilantro for garnish! Each bite can be different, making your meal exciting. You can find the full recipe in the earlier section. {{image_2}} You can easily make a vegetarian burrito. Start by swapping the chicken for grilled veggies. Use zucchini, bell peppers, and onions. These add a nice crunch and flavor. You can also replace the meat with beans. Black beans or pinto beans work great. For added protein, try lentils or chickpeas. You have many protein choices for your burrito. If you want something different, try steak or shrimp. Season them like you would the chicken. For a lighter option, use turkey or tofu. Just marinate the tofu in the same spices. It absorbs all the great flavors. This way, you can enjoy a tasty burrito no matter your protein preference. The rice and beans can change the taste of your burrito. For a zesty twist, add lime juice and cilantro to the rice. You can also mix in some corn for sweetness. For the beans, try adding spices like chili powder or cumin. This gives them a nice kick. Use different types of rice, too. Brown rice adds more fiber, while cilantro-lime rice brings fresh flavor. Ready to spice up your burrito? Check out the Full Recipe for more ideas! To store leftover burritos, wrap them tightly in plastic wrap or foil. This keeps them fresh and prevents drying out. You can also place them in an airtight container. Store them in the fridge for up to three days. If you want to save them longer, consider freezing. When ready to eat, unwrap the burrito. Place it on a plate and cover it with a damp paper towel. Microwave it on high for about 1-2 minutes. This method helps keep the tortilla soft. If you prefer the crispy texture, heat it in a skillet over medium heat for about 3-5 minutes, flipping once. To freeze your burritos, let them cool completely first. Wrap each burrito in plastic wrap, then place them in a freezer bag. Squeeze out any air before sealing. You can freeze them for up to three months. When you’re ready to eat, thaw them in the fridge overnight and reheat using the guidelines above. Enjoy your tasty burritos anytime! For the complete recipe, check out the Full Recipe. This burrito is a "Copycat" recipe because it mimics the famous Chipotle flavors. I use similar spices and cooking methods to recreate that beloved taste. By marinating the chicken in lime juice and spices, I bring out the fresh flavors you love. The ingredients match closely with what Chipotle uses, giving you a taste of the restaurant at home. Yes, you can make this burrito gluten-free! Simply swap the flour tortillas for gluten-free tortillas. Many brands offer great options that taste good and hold well. Check the labels to ensure they are certified gluten-free. You can enjoy all the flavors without the gluten. You can easily adjust the spice level to fit your taste. If you prefer less heat, reduce the cayenne pepper or leave it out. For more spice, add extra cayenne or include sliced jalapeños in the burrito. You can also use a spicy salsa to kick things up a notch. Taste as you go and find your perfect balance! In this article, I shared how to make a great burrito. We covered key ingredients, marinade, grilling tips, and assembling. You also learned about tasty variations, storage tips, and answers to common questions. Burritos are flexible and fun. You can make them your way. Enjoy creating, sharing, and tasting your own version of this dish!

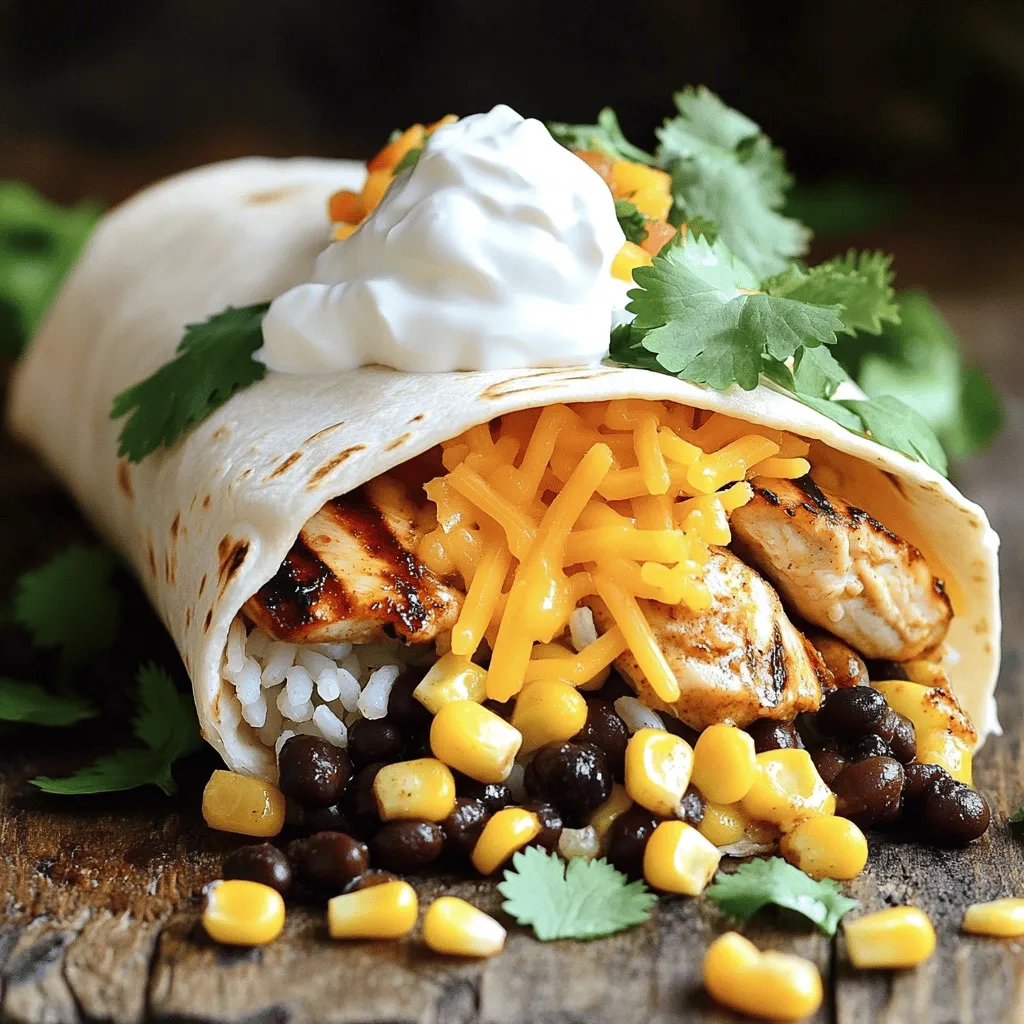
Are you craving a Chipotle grilled chicken burrito but want to make it at home? You’re in luck! This Copycat Chipotle Grilled Chicken Burrito recipe will guide you through each …

Read more

Categories Dinner

High Protein BBQ Chicken Salad Fresh and Easy Meal

May 27, 2025 by Chef Nate
- 2 cups cooked chicken breast, shredded - 1 cup cherry tomatoes, halved - 1 cup corn (fresh or canned) - 1/2 cup black beans, rinsed and drained - 1 red bell pepper, diced - 1/4 cup red onion, finely chopped - 1 cup mixed greens (spinach, arugula, etc.) - 1/2 cup Greek yogurt - 1/4 cup barbecue sauce (low-sugar if desired) - 1 tablespoon lime juice - Salt and pepper to taste - Optional: 1/4 cup sliced avocado for garnish Gather these ingredients before cooking. Each item adds unique flavor and nutrition. The cooked chicken breast is the star. It offers high protein and keeps you full. Cherry tomatoes add sweetness and color. Corn brings a nice crunch and fiber. Black beans boost protein and fiber too. Red bell pepper adds a zesty crunch. Red onion gives a sharp bite. Mixed greens provide freshness and nutrition. Greek yogurt makes a creamy dressing that's healthier than mayonnaise. Barbecue sauce adds a smoky sweetness. Lime juice brightens the flavors. Lastly, salt and pepper enhance everything. You can also add avocado for creaminess if you like. For the full recipe, check the details above. First, you need to shred your cooked chicken. Use two forks to pull it apart into small pieces. This part is easy and fun! Next, chop your veggies. - Cut the cherry tomatoes in half. - Dice the red bell pepper into small chunks. - Finely chop the red onion. Add the corn and black beans, rinsed and drained, to the mix. Your prep work is almost done! In a small bowl, combine the Greek yogurt, barbecue sauce, and lime juice. Mix them well until you have a smooth dressing. This blend gives your salad a tasty kick! Don't forget to add salt and pepper to enhance the flavor. In a large mixing bowl, toss together the shredded chicken and all the veggies. Pour the dressing over this mixture and gently toss until everything is well coated. For serving, lay a bed of mixed greens on a platter or in bowls. Spoon the BBQ chicken mixture on top of the greens. If you want, add sliced avocado for a creamy touch. Enjoy your fresh and high-protein BBQ chicken salad! For the full recipe, check the detailed steps provided earlier. Pick a low-sugar BBQ sauce for a healthier option. Look for sauces that use natural sweeteners. These sauces keep the flavor without too many added sugars. You can also try homemade sauces. Mix tomato paste, vinegar, and spices for a fun twist. This gives you full control over the taste and ingredients. Want more protein? Add chickpeas or nuts to your salad. Chickpeas boost fiber and protein. Nuts like almonds or walnuts add crunch. They also provide healthy fats. This makes your salad more filling and nutritious. You can even mix in some cottage cheese for a creamy texture and more protein. Balancing textures and flavors is key. Use crisp veggies like bell peppers and fresh greens. These add crunch and color. Pair them with the tender chicken for a great mix. Add a squeeze of lime for brightness. This enhances the taste and freshness of the salad. For a creamy touch, add sliced avocado on top. It makes the dish even more satisfying. For more details, check out the Full Recipe. {{image_2}} You can switch up the protein in your BBQ chicken salad. Turkey works well. It has a similar taste but is leaner. You can also try tofu if you want a plant-based option. Tofu absorbs flavors nicely and adds protein. Shrimp is another great choice. It cooks quickly and adds a fun twist to your salad. Feel free to add fun ingredients to your salad. Fruits like mango or pineapple bring sweetness. These can balance the BBQ flavor. You might also add cheese, like feta or cheddar. Cheese adds creaminess and flavor. Don’t forget about nuts! Chopped walnuts or almonds add crunch and healthy fats. If you want a meatless salad, it’s easy to make swaps. Use chickpeas or black beans for protein. They are filling and tasty. You can also add more veggies, like cucumbers or carrots. For a creamy texture, try avocado in place of chicken. This way, you still get a delicious, satisfying meal. For the full recipe, click here: [Full Recipe]. To keep your High Protein BBQ Chicken Salad fresh, use airtight containers. Glass or BPA-free plastic containers work best. Store the salad in the fridge for up to three days. If you have dressing left, store it separately. This keeps the greens crisp. You can enjoy this salad cold or warm. If you prefer warm, gently reheat the chicken in a microwave. Use a microwave-safe dish and cover it to keep moisture in. Heat for 30 seconds, then stir. Repeat until warm, but don’t overheat. Prep your ingredients in advance for quick meals. Cook and shred the chicken a day before. Chop the veggies and store them in separate containers. Mix the dressing and keep it in a jar. This way, you can assemble your salad in minutes. For freshness, add the greens just before serving. You can make this salad healthier by using low-calorie dressings. Try balsamic vinaigrette or lemon juice. Adding extra greens is also a great idea. You can include kale, romaine, or even arugula. These greens boost nutrients and fiber. They also add crunch and flavor. Yes, you can use frozen chicken! First, thaw it safely in the fridge overnight. You can also use the microwave for quick thawing. Just make sure to cook it right after. Cooked chicken should reach 165°F for safety. Once cooked, shred it for the salad. If you want a dairy-free option, try using avocado instead. You can also use silken tofu for a creamy texture. Sour cream or mayo can work too, but they are less healthy. Choose a substitute that fits your diet best. You learned how to make a tasty high-protein BBQ chicken salad. We covered essential ingredients, easy steps, and useful tips. You can customize this salad with proteins, veggies, or dressings. Remember to store leftovers properly for later enjoyment. By following these tips, you can build a delicious and healthy meal. Enjoy your cooking and get creative with your flavors!

Looking for a fast, fresh meal packed with protein? Look no further! My High Protein BBQ Chicken Salad is simple, tasty, and easy to make. With grilled chicken, colorful veggies, …

Read more

Categories Salads

Creamy Smothered Chicken and Rice Flavorful Comfort Dish

May 27, 2025 by Chef Nate
- 4 boneless, skinless chicken thighs - 1 cup long-grain white rice - 2 cups low-sodium chicken broth - 1 cup heavy cream - 1 medium onion, diced - 3 cloves garlic, minced - 1 cup mushrooms, sliced - 1 teaspoon thyme - 1 teaspoon paprika - 2 tablespoons olive oil - Salt and pepper to taste - Fresh parsley, chopped (for garnish) When you gather your ingredients, focus on quality. Fresh chicken and good broth make a big difference. The chicken thighs add rich flavor and stay juicy during cooking. Long-grain white rice cooks up fluffy and absorbs the sauce well. For the optional items, heavy cream adds a luscious texture. Onions and mushrooms bring umami and sweetness. Garlic adds depth and aroma. You can mix and match these ingredients based on your taste. Seasonings help tie all the flavors together. Thyme gives a warm, earthy touch, while paprika adds a slight smokiness. Olive oil is perfect for searing the chicken. Don't forget salt and pepper to enhance the dish's taste. Garnishing with fresh parsley makes your meal look bright and inviting. It adds a pop of color and a hint of freshness to each bite. Want to explore the full recipe? Check out the [Full Recipe]. - Heat olive oil over medium-high heat. - Season the chicken thighs with salt, pepper, thyme, and paprika. - Place the seasoned chicken in the skillet and sear for about 5-7 minutes on each side, until golden brown. - Remove the chicken from the skillet and set aside. - In the same skillet, add the diced onion and sliced mushrooms. - Sauté the onion and mushrooms for about 5 minutes, until the onion turns translucent. - Add the minced garlic and cook for an additional minute. - Pour in the chicken broth and scrape the bottom of the skillet to release any browned bits. - Stir in the heavy cream and mix until combined. - Bring the mixture to a gentle simmer. - Stir in the long-grain rice, ensuring it is well distributed. - Return the seared chicken to the skillet, nestling it into the rice mixture. - Cover the skillet and reduce the heat to low. - Let it simmer for 20-25 minutes, or until the rice is tender and has absorbed most of the liquid. - Stir occasionally to prevent sticking. - Taste the dish and adjust seasoning as needed with more salt and pepper. - Remove from heat and let it sit covered for an additional 5 minutes. - Fluff the rice with a fork, garnish with fresh parsley, and serve hot. For the full recipe, check out the detailed instructions above! To make your dish rich and smooth, use heavy cream. It gives a velvety feel. Be mindful of the rice. Avoid overcooking it; this helps keep the dish light and fluffy. To add depth, consider extra spices like garlic powder or cayenne. You can also add vegetables. Carrots, peas, or bell peppers boost nutrition and flavor. A large skillet is best for even cooking. It allows all ingredients to mix well. Using a lid helps keep moisture in. This ensures everything cooks perfectly without drying out. {{image_2}} You can easily change ingredients in this dish. For a lighter meal, use chicken breasts instead of thighs. Chicken breasts cook faster and still taste great. You can also swap long-grain white rice for brown rice. Brown rice adds fiber and nutrients. If you want a dairy-free version, use coconut milk. It gives a nice creamy texture and a hint of sweetness. For those needing gluten-free options, try rice noodles. They cook quickly and soak up the flavors well. You can make this dish in a slow cooker. Just brown the chicken first, then add all ingredients. Cook on low for about 6 hours. If you prefer the oven, place everything in a baking dish. Cover and bake at 350°F for about 1 hour. Both methods create a hearty, comforting meal. For the full recipe, check out the earlier sections! After you enjoy creamy smothered chicken and rice, store leftovers in an airtight container. This keeps the dish fresh and prevents unwanted odors from other foods. The recommended shelf life in the fridge is about three to four days. Always make sure to let the dish cool before sealing it up. To freeze your delicious dish, let it cool completely first. Then, use a freezer-safe container or heavy-duty freezer bags. This helps to avoid freezer burn. You can store it in the freezer for up to three months. When ready to eat, thaw it in the fridge overnight before reheating. When reheating, add a splash of chicken broth or cream for the best texture. This helps keep the dish creamy and moist. Heat it on the stovetop over low heat, stirring often. If using a microwave, cover the dish and heat in short bursts. This avoids dryness during reheating. Enjoy your creamy smothered chicken and rice just like it was freshly made! To make this dish, follow these steps: 1. Sear the chicken thighs in olive oil until golden. 2. Cook diced onion and mushrooms in the same skillet. 3. Add minced garlic, then pour in chicken broth and heavy cream. 4. Stir in long-grain rice and return chicken to the skillet. 5. Cover and simmer until the rice is tender. 6. Adjust seasonings, garnish with parsley, and serve hot. For the full recipe, check the previous section. Yes, you can use brown rice. Brown rice takes longer to cook. You will need about 30-35 minutes more for it to soften. Make sure to add extra chicken broth or water as needed. The cooking time will depend on the brand and type of brown rice. Yes, this recipe can be gluten-free. However, check your chicken broth. Some broths may contain gluten. Always read labels carefully. Opt for a brand that specifically states it is gluten-free. To add heat, try these suggestions: - Mix in some crushed red pepper flakes. - Add diced jalapeños or serrano peppers. - Use a spicy seasoning blend for extra flavor. Adjust the amount based on your spice preference. This dish pairs well with several sides: - Steamed green beans or broccoli for a fresh touch. - A simple salad with vinaigrette for crunch. - Crusty bread to soak up the creamy sauce. These options will balance the meal nicely. This blog post shared a simple, tasty recipe for creamy smothered chicken and rice. We covered key ingredients, cooking steps, and helpful tips to make it perfect. You can customize this dish to fit your taste by swapping ingredients or using different cooking methods. Remember, storing leftovers properly helps maintain flavor. Cooking should be fun and easy, and this recipe fits that bill perfectly. Enjoy your meal and feel free to experiment with flavors!

Craving a warm, comforting dish? This Creamy Smothered Chicken and Rice recipe hits the spot! With tender chicken thighs, rich flavors, and hearty rice, each bite offers pure satisfaction. Whether …

Read more

Categories Dinner

Death by Chocolate Cheesecake Decadent Dessert Delight

May 27, 2025 by Chef Nate
- 1 ½ cups chocolate graham cracker crumbs - ½ cup unsalted butter, melted - 2 tablespoons granulated sugar - 3 (8-ounce) packages cream cheese, softened - 1 cup granulated sugar - 1 cup sour cream - 1 teaspoon vanilla extract - 4 large eggs - 8 ounces dark chocolate, melted (cooled) - 1 cup heavy cream - 8 ounces semi-sweet chocolate chips - Whipped cream - Optional garnishes (dark chocolate shavings, fresh raspberries or strawberries) In this recipe, we need key ingredients to build the layers of flavor. The crust combines chocolate graham cracker crumbs, butter, and sugar. This mix gives a sweet and crunchy base. For the cheesecake filling, the cream cheese is the star. It brings creaminess and richness. The eggs help set the filling, while the sugar sweetens it. Sour cream adds a little tang. Dark chocolate makes it rich and deep in flavor. The ganache is a simple mix of heavy cream and semi-sweet chocolate chips. This will add a glossy finish. For serving, I like to add whipped cream and some fresh fruit. They make the dessert look fancy and taste fresh. This Death by Chocolate Cheesecake is a dream for chocolate lovers. You can find the full recipe to create this heavenly delight. - Preheat the oven to 350°F (175°C). - In a mixing bowl, combine: - 1 ½ cups chocolate graham cracker crumbs - ½ cup unsalted butter, melted - 2 tablespoons granulated sugar - Mix until you have a crumbly texture. - Press this mixture evenly into the bottom of a 9-inch springform pan. - Bake for 10 minutes, then set aside to cool. - In a large bowl, beat together: - 3 (8-ounce) packages cream cheese, softened - 1 cup granulated sugar - Mix until you get a smooth texture. - Add: - 1 cup sour cream - 1 teaspoon vanilla extract - Mix until smooth again. - Add 4 large eggs, one at a time, mixing well after each. - Finally, stir in 8 ounces of melted dark chocolate until fully combined. - Pour the cheesecake filling over the cooled crust in the springform pan. - Smooth the top with a spatula. - Bake in the preheated oven for 55-60 minutes. - The edges should be set, but the center will still wobble. - Turn off the oven, crack the door open, and let the cheesecake cool inside for 1 hour. This helps prevent cracks. - In a small saucepan over medium heat, bring 1 cup of heavy cream to a simmer. - Remove from heat and pour over 8 ounces of semi-sweet chocolate chips in a bowl. - Let sit for 5 minutes, then stir until smooth. - Once the cheesecake is cool, pour the chocolate ganache over the top. - Smooth it out, then refrigerate for at least 4 hours, or overnight for the best results. - To serve, run a knife around the edge of the springform pan before removing the sides. - Slice the cheesecake and add garnishes like whipped cream, dark chocolate shavings, and fresh raspberries or strawberries. For the complete recipe, check out the Full Recipe. To make the best cheesecake, use room temperature ingredients. This step helps all the items blend well. Cold ingredients can cause lumps. Make sure to soften the cream cheese before mixing. Avoid over-mixing the filling. Mix just until smooth. Over-mixing adds too much air, which makes the cheesecake rise and crack while baking. Use smart cooling techniques in the oven. After baking, turn off the oven and crack the door open. Let the cheesecake cool inside for an hour. This helps prevent sudden temperature changes, which can cause cracks. You can also use a water bath. Place your springform pan in a larger pan filled with water. This keeps the heat gentle and even during baking. It helps the cheesecake cook without cracking. Pair your cheesecake with rich sauces or sides. A drizzle of chocolate or raspberry sauce adds great flavor. You can also serve it with fresh fruit for a nice contrast. For special occasions, focus on presentation. Use whipped cream around the edges and sprinkle chocolate shavings on top. Fresh raspberries or strawberries add a pop of color. This makes the dessert look as good as it tastes. For the Full Recipe, check the main article. {{image_2}} You can add fun flavors to your Death by Chocolate Cheesecake. - Mint chocolate cheesecake variation: Add 1 teaspoon of peppermint extract to your cheesecake filling. This makes a cool and fresh taste. Pair it with chocolate mint candies on top for a special touch. - Espresso chocolate cheesecake variation: Mix in 1 tablespoon of instant espresso powder with your cream cheese. This gives a rich coffee flavor. It pairs perfectly with dark chocolate for a bold taste. You can easily make this cheesecake gluten-free. - Substituting crust ingredients: Use gluten-free chocolate graham cracker crumbs or crushed nuts. Mix them with melted butter and sugar, just like the original recipe. This keeps the crust tasty and solid. - Alternative cheesecake fillings: Instead of regular cream cheese, try using a dairy-free cream cheese. This keeps the rich flavor while making it suitable for those with dietary needs. How you present your cheesecake matters. A pretty cake looks even better on the table. - Layering with additional chocolate elements: Add layers of chocolate chips, fudge, or brownie pieces between the cheesecake layers. This makes each slice a surprise. - Decorative garnishing options: Top your cheesecake with whipped cream, dark chocolate shavings, and fresh fruit. Use mint leaves for a pop of color. These simple touches make it look gourmet and fancy. For the full recipe, check out the Death by Chocolate Cheesecake. To keep your Death by Chocolate Cheesecake fresh, chill it well. After it cools, cover it tightly with plastic wrap. This keeps it moist and prevents it from absorbing odors. Store it in the fridge for up to five days. The longer it sits, the more the flavors blend. This makes each bite even richer. If you want to save some for later, freezing works great. First, let the cheesecake cool completely. Then, wrap it tightly in plastic wrap and aluminum foil. This helps avoid freezer burn. You can freeze it for up to three months. When you're ready to enjoy it, take it out. Place it in the fridge overnight to thaw. For the best texture, avoid thawing at room temperature. This keeps the cheesecake creamy and smooth. Enjoy it with a fresh garnish for that perfect touch. You can find the Full Recipe for more details. Making Death by Chocolate Cheesecake takes about 5 hours in total. Here’s the breakdown: - Prep time: 30 minutes - Baking time: 55-60 minutes - Cooling time: 1 hour in the oven - Chilling time: At least 4 hours in the fridge This dessert requires patience, but the taste is worth it! You can use low-fat cream cheese, but it may change the flavor and texture. The cheesecake might not be as rich or creamy. Full-fat cream cheese gives a smooth texture and deep flavor. For the best results, I recommend sticking with regular cream cheese. If you can't find chocolate graham crackers, don't worry! You can use regular graham crackers mixed with cocoa powder. Another option is to use crushed Oreos or chocolate wafer cookies. Each of these substitutions will still give you a delicious crust. To check if the cheesecake is done, look for these signs: - The edges should be set. - The center should still be slightly wobbly. - It will puff up a bit when baking. Remember, it will firm up as it cools, so don’t overbake! Yes, you can make this cheesecake ahead of time! It keeps well in the fridge for up to 5 days. You can also freeze it for up to 3 months. Just make sure to wrap it tightly in plastic wrap and foil. When ready to serve, thaw it in the fridge overnight. Enjoy this delightful treat at your convenience with the full recipe! This blog post explored making a decadent Death by Chocolate Cheesecake. We covered crust ingredients, filling creation, and the chocolate ganache. I shared tips to achieve the perfect texture and prevent cracks. Variations included mint and espresso flavors, as well as gluten-free options. Embrace this dessert adventure, and remember to enjoy each rich bite. With practice, you will create a cheesecake that wows everyone. Happy baking!

Are you ready to indulge in the ultimate dessert experience? In this guide to Death by Chocolate Cheesecake, I’ll show you how to create a rich, mouthwatering dessert that will …

Read more

Categories Desserts

Breakfast Sausage Crescent Rolls Simple and Tasty Dish

May 27, 2025 by Chef Nate
- 1 package (8 oz) crescent roll dough - 1 lb breakfast sausage (bulk or patties) - 1 cup shredded cheddar cheese - 1/4 cup cream cheese, softened - 1 tablespoon fresh chives, chopped - Salt and pepper to taste - 1 egg, beaten (for egg wash) - Baking sheet - Parchment paper - Skillet - Mixing bowl - Measuring spoons Gathering the right ingredients is key for Breakfast Sausage Crescent Rolls. You will need crescent roll dough, breakfast sausage, cheese, cream cheese, and chives. Each of these items adds to the flavor and texture of the rolls. The crescent roll dough brings a flaky layer that is perfect for wrapping around the filling. The sausage provides a savory taste. I prefer using bulk sausage because it mixes well with the other ingredients. The cheddar cheese adds a sharp flavor, while the cream cheese gives a creamy texture. Fresh chives bring a hint of freshness to the dish. You want to ensure you have salt and pepper on hand. These simple seasonings enhance the flavors of your filling. Finally, a beaten egg is essential for that golden color on the rolls after baking. For tools, you will need a baking sheet lined with parchment paper. This setup makes cleanup easy. A skillet helps you cook the sausage evenly. A mixing bowl is necessary for combining the ingredients. Measuring spoons ensure you add the right amounts. Having everything ready makes the cooking process smooth. You can find the full recipe with detailed steps in the main article. - Preheat oven to 375°F (190°C). - Chop chives finely and set aside. - If using bulk sausage, remove it from the package. - Heat a skillet over medium heat. - Add the breakfast sausage to the skillet. - Cook until browned, breaking it into small pieces as it cooks. - Drain any extra fat from the skillet. - In a large bowl, mix the cooked sausage, cheddar cheese, cream cheese, and chives. - Stir until everything is well combined. - Open the crescent roll dough package. - Unroll it and separate the dough into triangles. - Take a spoonful of the sausage mixture and place it on the wide end of each triangle. - Starting from the wide end, roll the dough toward the pointed end, forming a crescent. - Place the rolls on a baking sheet lined with parchment paper. - Brush the tops of the rolls with the beaten egg for a shiny finish. - Bake in the preheated oven for 12-15 minutes. - Watch for a golden color and puffed shape. - Remove the rolls from the oven and allow them to cool slightly. Now you're ready to enjoy your tasty Breakfast Sausage Crescent Rolls! For a full experience, check out the Full Recipe. To get crispy rolls, I always preheat my oven to 375°F (190°C) before baking. This step helps the rolls puff up nicely. I also use parchment paper on the baking sheet. It makes for easy removal and cleanup later. Want to spice things up? You can add different cheeses or herbs to the filling. I love using mozzarella or pepper jack for a kick. You can also try spices like garlic powder or onion powder. They add great flavor to the sausage mix. These rolls pair well with eggs or fresh fruit for a full breakfast. You can also serve them with dipping sauces like ketchup or mustard. This adds a fun twist to your meal. If you're feeling adventurous, try adding a bit of hot sauce for extra heat! For the full recipe, check out the detailed steps I shared earlier. {{image_2}} You can make these crescent rolls healthier. Try using turkey sausage or a vegetarian option instead of regular sausage. Both choices cut down on fat but keep the flavor. You can also swap in low-fat cream cheese. This change keeps the rolls creamy without adding too many calories. Feel free to get creative with your fillings. Adding veggies can boost nutrition and taste. Bell peppers or spinach work great in this recipe. You can also try different cheese types. Gouda, pepper jack, or mozzarella can change the flavor profile. Mixing and matching will keep your breakfast exciting! For a heartier meal, add scrambled eggs to the sausage mix. This makes the rolls more filling and satisfying. You can also make mini versions. They are perfect for brunch events or gatherings. Everyone loves bite-sized treats! To keep your rolls fresh, refrigerate them in an airtight container. This keeps moisture in and helps maintain their flavor. Leftovers can stay tasty for up to three days. For the best texture, reheat your rolls in the oven. Set your oven to 350°F (175°C) and warm them for about 10 minutes. This will help them regain their crispiness. If you're short on time, you can microwave them for quick reheating. Just heat for about 30 seconds, but this may make them a bit softer. You can freeze uncooked rolls for easy future meals. Simply prepare the rolls as directed, then place them on a baking sheet. Freeze them until solid, then transfer to a freezer bag. Cook them from frozen, adding a few extra minutes to the bake time. Cooked leftover rolls can also be frozen. Wrap them tightly in foil or plastic wrap, then place them in a freezer bag. You can reheat them directly from the freezer when you’re ready to enjoy. Breakfast sausage crescent rolls last about 3 to 4 days in the fridge. Store them in an airtight container to keep them fresh. If you notice any changes in smell or texture, it's best to toss them out. Yes, you can make these rolls ahead of time. Prepare the rolls and place them on a baking sheet. Cover with plastic wrap and store in the fridge for up to 24 hours. When you're ready to bake, simply remove the wrap and follow the baking instructions. You can also freeze uncooked rolls for up to a month. Just bake them straight from the freezer, adding a few extra minutes to the baking time. You can serve these rolls with many tasty sides. Some good options include: - Scrambled eggs - Fresh fruit, like berries or sliced oranges - Hash browns or home fries - A light salad with vinaigrette These sides balance the richness of the rolls and add color to your plate. Definitely! You can use different types of sausage based on your taste. Here are some ideas: - Turkey sausage for a leaner choice - Pork sausage for a classic flavor - Chicken sausage for a lighter option - Vegetarian sausage for a meat-free meal Each type will bring a unique flavor to your rolls. This recipe yields a total of 8 rolls. It’s perfect for a family breakfast or brunch with friends. If you need more, simply double the recipe for a larger crowd. For the full recipe, check out the ingredients and instructions listed above. In this post, we covered how to make delicious breakfast sausage crescent rolls. You learned about the key ingredients, kitchen tools, and step-by-step instructions. I shared tips for crispiness and flavor, along with healthy alternatives and creative fillings. Proper storage and reheating methods ensure these tasty rolls stay fresh. Experiment with different ingredients and enjoy a hearty breakfast! With these techniques, you can impress anyone with your cooking skills. Dive in and make this dish your own!

Looking for a quick and tasty breakfast idea? Try my Breakfast Sausage Crescent Rolls! With just a few simple ingredients and easy steps, you’ll have a warm, cheesy dish that’s …

Read more

Categories Breakfast
Older posts
Newer posts
← Previous Page1 … Page75 Page76 Page77 … Page108 Next →

GRILLED FLAVORS

where delicious ideas come to life, from stovetop to backyard. Warm, simple, and always satisfying. 🍽️✨

PAGES

Home About Contact Privacy Policy Terms & Conditions Cookie Policy GDPR Policy Copyright Policy Disclaimer

CATEGORIES

Appetizers Desserts Salads Breakfast Dinner

Contact

  • Pinterest
  • Mail
Copyright © 2026 Grilled Flavors. All rights reserved.