Mini Tiramisu Cups Delightful and Easy to Make
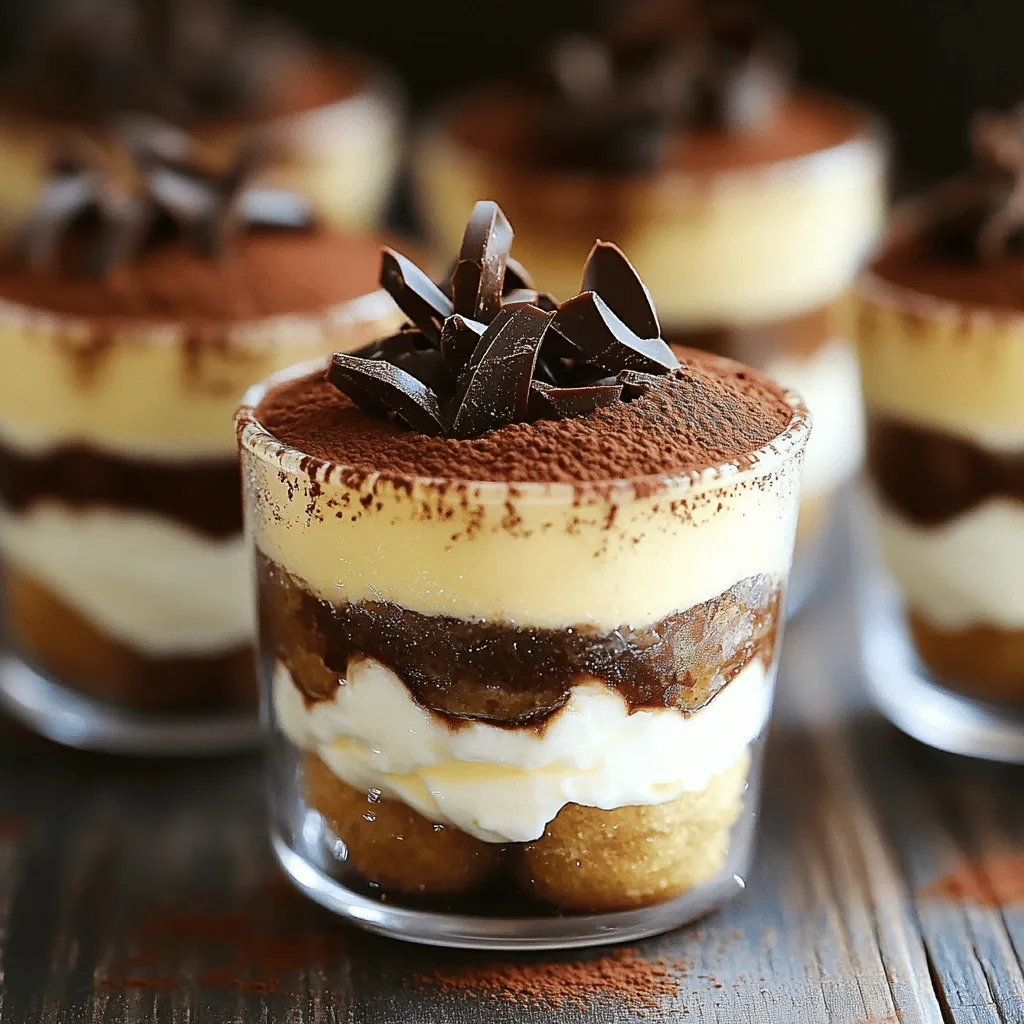
If you love coffee and dessert, you’ll adore these Mini Tiramisu Cups! They’re simple to make and packed with flavor. With just a few ingredients, you can create a delightful …
If you love coffee and dessert, you’ll adore these Mini Tiramisu Cups! They’re simple to make and packed with flavor. With just a few ingredients, you can create a delightful …
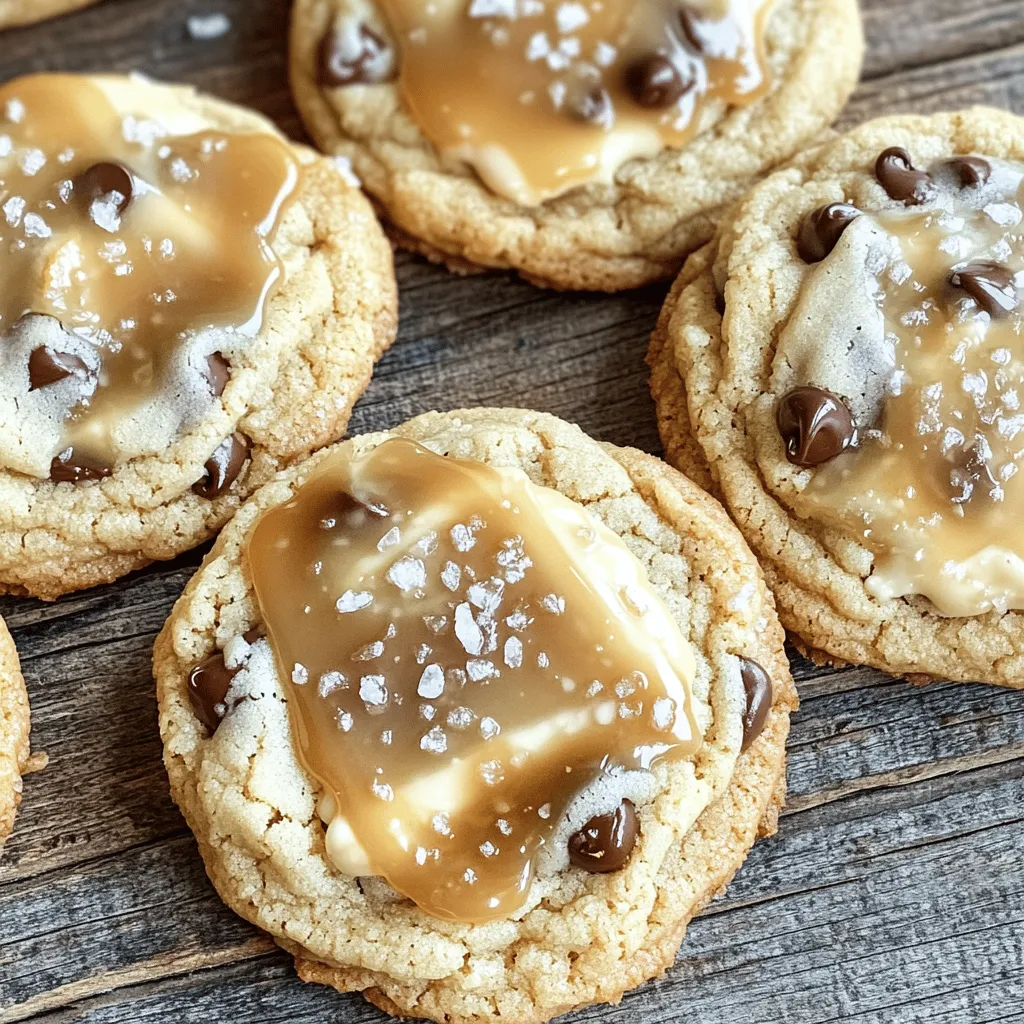
If you crave a sweet treat that combines creamy cheesecake and buttery caramel, you’re in luck! These Salted Caramel Cheesecake Cookies will make your taste buds dance. Soft, chewy, and …
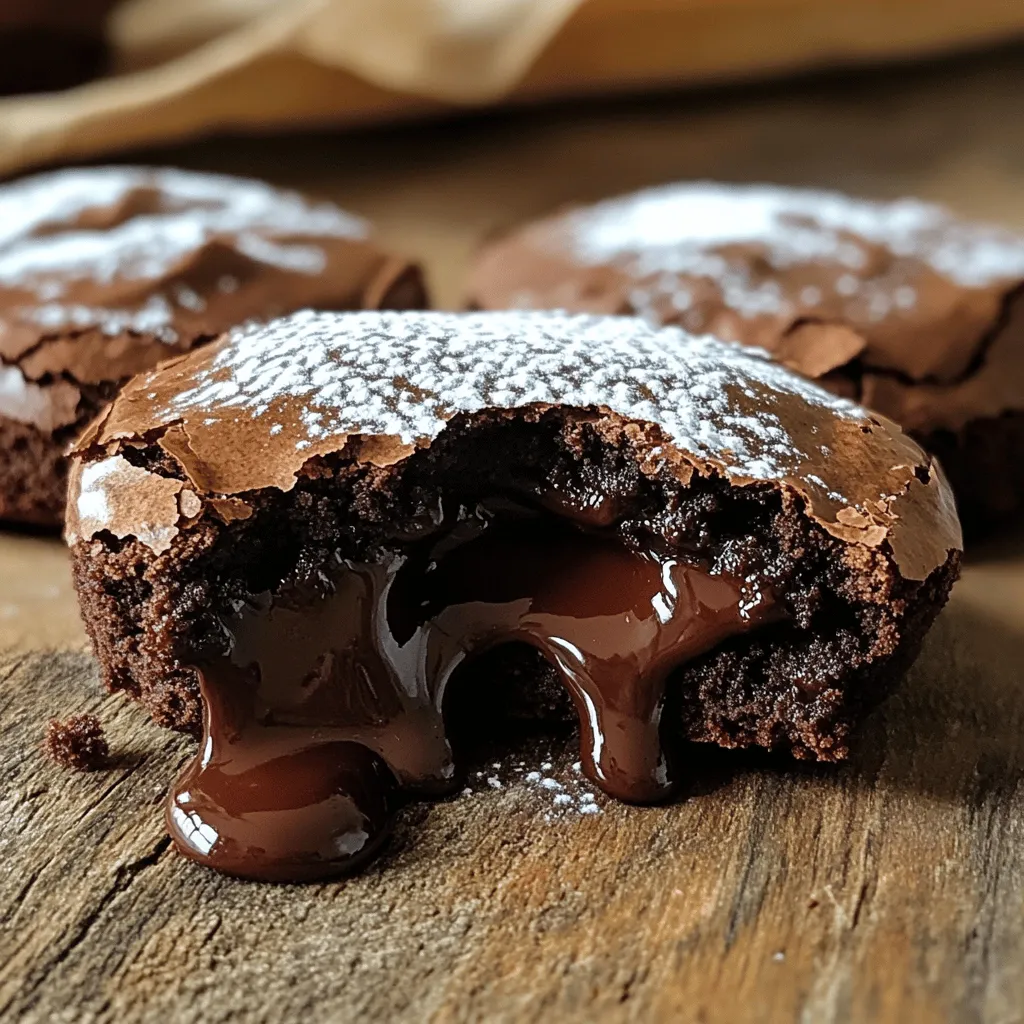
If you love warm, gooey desserts, you will adore Chocolate Lava Brownie Cookies. These treats combine the rich taste of a brownie with the fun of a cookie, creating a …
 for detailed steps to create this delightful dessert. - Preheat the oven to 350°F (175°C). - Grease and flour an 8-inch round cake pan. - In a large bowl, combine flour, sugar, cocoa powder, baking powder, baking soda, and salt. - Mix in melted butter, eggs, milk, and vanilla extract until just blended. - Pour the batter into the prepared pan. - Bake for 25-30 minutes. Check with a toothpick; it should come out clean. - Let the cake cool completely in the pan. Transfer to a wire rack afterward. - For dark chocolate mousse, melt dark chocolate in a double boiler or microwave. Stir until smooth. - In a bowl, whip 1 cup of heavy cream until soft peaks form. Add 1 tablespoon of sugar and 1/2 teaspoon of vanilla extract. Continue whipping to stiff peaks. - Fold the melted chocolate into the whipped cream until mixed well. Set aside. - For milk chocolate mousse, melt milk chocolate and repeat the same steps. - For white chocolate mousse, melt white chocolate and follow the same steps again. - Slice the cooled chocolate cake in half horizontally. - Place the bottom layer on a plate. Spread the dark chocolate mousse evenly over it. - Add the top layer of the cake. Spread the milk chocolate mousse over this layer. - Finally, spread the white chocolate mousse on top. Smooth the sides for a neat finish. - Chill the cake in the fridge for at least 4 hours or overnight to set the mousses well. Enjoy the rich flavors of this Triple Chocolate Mousse Cake with your family or friends. For the full recipe, check out the detailed instructions in the earlier sections. To ensure even baking, make sure your oven is preheated. Grease and flour the cake pan well. This stops the cake from sticking. When baking, always check for doneness using a toothpick. Insert it in the center of the cake. If it comes out clean, the cake is ready. For the perfect mousse, you need to whip the cream until it forms soft peaks. This helps give the mousse a light texture. When folding chocolate into the whipped cream, be gentle. Start by mixing a small amount of whipped cream into the chocolate. Then, fold the chocolate mixture back into the whipped cream. This keeps the mousse airy and smooth. Garnishing with chocolate shavings adds a nice touch to your cake. You can use a vegetable peeler to create curls from a chocolate bar. For serving, slice the cake cleanly, and add a dollop of whipped cream on each slice. This makes it look elegant and inviting. For the complete process, check out the Full Recipe. {{image_2}} You can add fun flavors to the mousse cake. Try using flavor extracts like mint or orange. A little mint extract in the dark mousse gives a fresh taste. Orange extract adds a bright twist to the milk mousse. You can also layer in fruit. Fresh raspberries or strawberries work well. Fruit purees add a burst of flavor and color. If you need a gluten-free cake, use a gluten-free flour mix. This keeps the cake moist and tasty. For a dairy-free option, swap the heavy cream with coconut cream. Use dairy-free chocolate for all the mousse layers. These swaps help everyone enjoy the cake. You can serve the cake in different ways. Individual servings look nice for a party. Just cut the cake into slices. Place each slice on a small plate. You can also serve it as a whole cake. For garnishing, try chocolate shavings or curls. A sprinkle of fresh berries can make it pop for special events. For the full recipe, check out the details above. To store your Triple Chocolate Mousse Cake, wrap it tightly in plastic wrap. This keeps the cake moist and the mousse fresh. You can also place it in an airtight container. This method prevents drying out and keeps the cake from absorbing any fridge odors. Keep the cake in the fridge until you're ready to serve. This dessert is best eaten cold, as it enhances the rich flavors and creamy texture. Freezing the cake is a great option if you want to save some for later. To freeze, slice the cake into portions. Wrap each piece in plastic wrap, then place them in a freezer bag. This helps prevent freezer burn. For the mousse layers, freeze them in small containers or ice cube trays. To thaw, move the cake to the fridge overnight. Avoid thawing at room temperature, as it may affect the mousse's texture. The cake can stay fresh in the fridge for up to five days. After that, the chocolate flavor may fade. Look for signs like a change in color or texture. If the mousse feels grainy or watery, it’s best to toss it. Trust your senses; if it smells off, don’t eat it. Always check before serving to ensure a delightful experience. You can tell if your chocolate cake is done by checking a toothpick. Insert a toothpick in the center of the cake. If it comes out clean or with a few crumbs, the cake is ready. If it has wet batter, bake it a little longer. The top should also look firm and slightly spring back when touched. Yes, you can make the mousse ahead of time. Prepare the mousse layers a day before serving. Just cover them tightly and keep them in the fridge. When you are ready, assemble the cake. This way, the flavors meld nicely and make a richer taste. If you need a substitute for heavy cream, use coconut cream or silken tofu. Both can create a nice texture. For coconut cream, chill a can overnight, then scoop out the cream. Blend it until smooth. For silken tofu, blend until creamy. These options work well and are great for different diets. Chill the mousse cake for at least 4 hours, but overnight is best. This time allows the mousse layers to set properly. It also helps the flavors mix well. If you are in a hurry, aim for 4 hours to ensure it holds its shape when cut. Absolutely! You can use various chocolates to change the flavor. For a bolder taste, try dark chocolate with higher cocoa content. White chocolate can be swapped for a sweet touch. Feel free to experiment with flavors like mint or orange chocolate. Just make sure to keep the total amount the same as in the Full Recipe. You've learned how to craft a rich chocolate cake with light mousse layers. Each ingredient plays a key role, and following the steps carefully makes a big difference. Remember to use tips for even baking and perfect mousse. Variations let you get creative, while proper storage keeps your dessert fresh. Your chocolate delight awaits! Enjoy every slice and share it with friends for extra joy.](https://grilledflavors.com/wp-content/uploads/2025/05/98916e23-c6c8-4be9-8ca7-70a6426f9f1e.webp)
Indulge in a slice of heaven with my Triple Chocolate Mousse Cake! This rich and decadent dessert combines three types of chocolate in a dreamy mousse. You’ll learn how to …
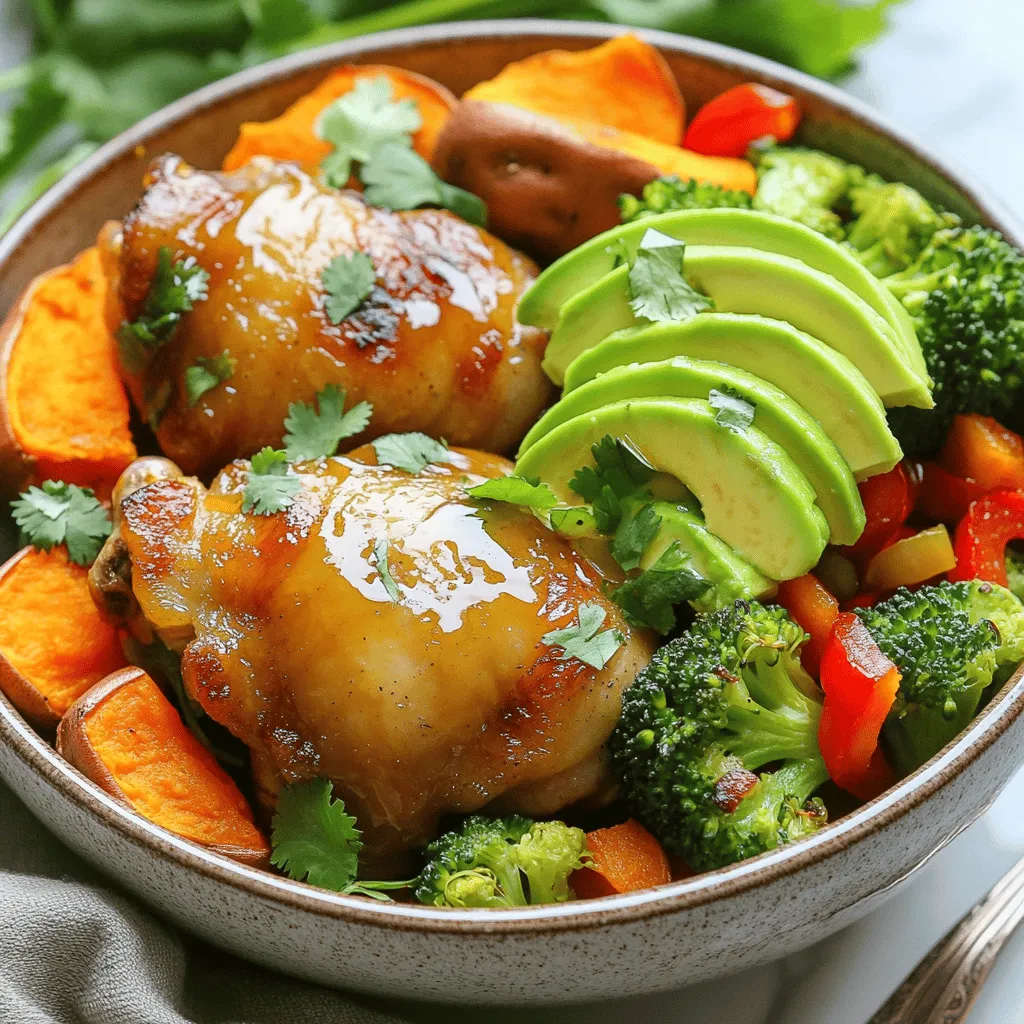
Looking for a tasty and healthy meal that’s quick to make? Chicken and sweet potato bowls are perfect for you! Packed with protein and fiber, these bowls help you feel …

Craving a sweet twist on a classic dish? Try my Peanut Butter Quesadilla! This fun recipe is quick and easy, perfect for any time of day. With creamy peanut butter, …
![To make soft cinnamon roll cookies, you will need these key ingredients: - 2 ½ cups all-purpose flour - 1 cup unsalted butter, softened - 1 teaspoon ground cinnamon Each of these ingredients plays a crucial role in creating the perfect texture and flavor. - All-purpose flour gives structure to the cookies and balances the moisture. - Unsalted butter adds richness and a creamy texture. Using unsalted lets you control the salt level. - Ground cinnamon is the star spice. It provides that warm, cozy flavor we love in cinnamon rolls. You can customize your cookies with some fun add-ins: - Chocolate chips: They add a sweet touch and a gooey texture. - Nuts (e.g., pecans or walnuts): They bring crunch and a nutty flavor. Feel free to mix and match these options to create your dream cookie. The full recipe will guide you through the steps to make these delicious treats! First, you need to prepare your baking sheet. I like to line it with parchment paper. This helps the cookies not stick. Next, preheat your oven to 350°F (175°C). Now, let’s measure and mix the dry ingredients. Grab a medium bowl. In it, whisk together: - 2 ½ cups all-purpose flour - 1 teaspoon baking powder - ½ teaspoon baking soda - ½ teaspoon salt - 1 teaspoon ground cinnamon Set this bowl aside for later. In a large mixing bowl, cream together the softened butter and granulated sugar. Use an electric mixer on medium speed for about 2-3 minutes. You want it to be light and fluffy. Now, it’s time to add the egg and vanilla. Add in: - 1 large egg - 2 teaspoons vanilla extract Mix until everything is fully combined. Gradually, add the dry ingredients from the first bowl into the wet mixture. Mix just until combined. Be careful not to overmix; this helps keep the cookies soft. Now, let’s roll out the cookie dough. Dust your surface with a little flour. Roll the dough into a rectangle, about 1/4 inch thick. Next, make the filling. In a small bowl, mix together: - 1 cup brown sugar, packed - 2 tablespoons ground cinnamon Sprinkle this mixture evenly over the rolled-out dough. Starting from one end, carefully roll the dough tightly into a log. Slice this log into 1-inch thick pieces. Place the slices on your prepared baking sheet. Bake the cookies for 10-12 minutes. They should be lightly golden around the edges. After baking, let them cool on the sheet for 5 minutes. Then, transfer them to a wire rack to cool completely. Finally, make the glaze by mixing: - ½ cup powdered sugar - 2 tablespoons milk Drizzle the glaze over the cooled cookies. Enjoy your soft cinnamon roll cookies! For the full recipe, check out [Full Recipe]. To make soft and chewy cookies, use room temperature butter. This helps create a light and fluffy base. Cream the butter and sugar well, but stop when they look mixed. Adding the egg and vanilla helps keep the dough moist. Avoid overmixing the dough. When you combine the wet and dry ingredients, mix just until you see no flour. Overmixing can make the cookies tough. You want them to be soft and tender. For even baking, make sure your oven is preheated to 350°F (175°C). Using parchment paper on your baking sheet helps prevent sticking. Place the cookies a few inches apart to allow room for spreading. Understanding your oven's temperature is key. Use an oven thermometer to check if your oven runs hot or cold. Adjust your baking time based on your oven's true temperature. This can make a big difference in how your cookies turn out. For the full recipe, check the detailed instructions above. Enjoy your baking! {{image_2}} You can easily switch up the flavors of your soft cinnamon roll cookies. Here are two fun ideas: - Pumpkin spice cinnamon roll cookies: Add 1 cup of pure pumpkin puree to the dough. Replace some cinnamon with pumpkin spice. This gives your cookies a warm, fall flavor. - White chocolate raspberry version: Mix in 1 cup of white chocolate chips and 1 cup of fresh raspberries. This adds a sweet and tangy twist that pairs beautifully with the cinnamon. Pair your soft cinnamon roll cookies with the right drinks for a great treat. Here are some ideas: - Pairing cookies with beverages: Serve these cookies with coffee, tea, or warm milk. The flavors blend nicely. - Ideas for cookie platters or gifts: Arrange your cookies on a pretty platter. You can also package them in cute boxes for gifts. Adding a little note makes it personal and special. For the full recipe and more tips, check out the [Full Recipe]. To keep your soft cinnamon roll cookies fresh, you need the right storage method. Here’s how: - At Room Temperature: Place the cookies in an airtight container. This will help lock in moisture and keep them soft. Line the bottom with parchment paper to avoid sticking. You can stack them, but separate layers with more parchment paper to keep them from squishing. - In the Freezer: For long-term storage, freeze the cookies. Wrap each cookie in plastic wrap, then place them in a freezer bag. This way, they won’t get freezer burn. They can last up to three months. When you want to enjoy them, just let them thaw at room temperature. Understanding how long your cookies stay fresh is key to enjoying them at their best. - Freshness: When stored properly at room temperature, these cookies can last about one week. You might notice them getting a bit drier after a few days. - Signs of Staleness: If your cookies feel hard or crumbly, they have likely gone stale. Another sign is if they lose their aroma. Trust your senses! If they don’t smell good, it's best to toss them out. For the full recipe, check out the instructions above. Enjoy your cookies! Can I use whole wheat flour instead of all-purpose? Yes, you can use whole wheat flour. However, the cookies may be denser. If you want a lighter texture, mix half whole wheat and half all-purpose flour. This way, you keep some chewiness while adding fiber. How can I make these cookies vegan? To make them vegan, replace the egg with a flax egg. Mix one tablespoon of ground flaxseed with three tablespoons of water. Let it sit until it thickens. Use vegan butter instead of unsalted butter. This will keep the flavor rich and delicious. Why are my cookies not soft? If your cookies are not soft, it may be due to overbaking. Always check them a minute or two before the time is up. Another reason could be using cold butter. Make sure your butter is softened for the best texture. What to do if cookies spread too much while baking? If your cookies spread too much, try chilling the dough before baking. Place the rolled dough in the fridge for 30 minutes. This will help the cookies keep their shape better while baking. Also, ensure you measure your flour correctly. Too little flour can cause spreading. You can make soft cinnamon roll cookies that delight everyone. I covered the key ingredients, from flour to cinnamon. I shared easy instructions to help you bake them perfectly. Remember, mixing gently leads to soft cookies. Experiment with flavors, like pumpkin spice or white chocolate. Store cookies properly to keep them fresh. Lastly, check FAQs to solve common baking issues. Enjoy each bite and share these tasty treats!](https://grilledflavors.com/wp-content/uploads/2025/05/d2dc009e-2956-485a-be81-f514b13cc114.webp)
Craving a dessert that’s warm, soft, and full of flavor? You’ll love these Soft Cinnamon Roll Cookies! Picture a classic cinnamon roll wrapped in a cookie—sweet, gooey, and perfect for …

Are you ready to explore the rich, flavorful world of Jamaican vegetable patties? These golden pastry delights burst with vibrant veggies and spices, making them a crowd-pleaser. Whether you’re a …

If you’re craving a warm, cheesy treat that’s easy to make, you’ve found the right recipe! My Pull-Apart Meatball Sliders are a perfect crowd-pleaser for game days or family dinners. …
![Here’s what you need to make these tasty salted caramel chocolate cookies. - 1 cup all-purpose flour - 1/2 cup unsweetened cocoa powder - 1/2 teaspoon baking soda - 1/4 teaspoon salt - 1/2 cup unsalted butter, softened - 1 cup brown sugar, packed - 1/4 cup granulated sugar - 1 large egg - 1 teaspoon vanilla extract - 1 cup chocolate chips (semi-sweet or dark) - 1/2 cup salted caramel sauce (store-bought or homemade) - Sea salt for sprinkling These ingredients create a rich, chocolatey dough that pairs perfectly with the sweet and salty caramel. Each bite bursts with flavor. The combination of chocolate chips and salted caramel makes these cookies a unique treat. You can use store-bought caramel or make your own for an extra touch. When measuring your flour and cocoa powder, spoon them into your measuring cup. This helps avoid packing, which can lead to dry cookies. Remember to let your butter soften at room temperature for the best texture. This step also helps the sugars cream well with the butter. Lastly, sprinkle a little sea salt on top before the cookies cool. This adds a lovely contrast to the sweetness. For the full recipe, check out the Salted Caramel Chocolate Heaven section. Enjoy crafting these delicious cookies! 1. Preheat your oven to 350°F (175°C). Line a baking sheet with parchment paper. 2. In a medium bowl, mix together: - 1 cup all-purpose flour - 1/2 cup unsweetened cocoa powder - 1/2 teaspoon baking soda - 1/4 teaspoon salt Set this dry mix aside. 3. In a large bowl, cream together: - 1/2 cup unsalted butter, softened - 1 cup brown sugar, packed - 1/4 cup granulated sugar Beat until light and fluffy, about 2-3 minutes. 4. Add 1 large egg and 1 teaspoon vanilla extract to the butter mix. Stir until well combined. 5. Gradually add the dry ingredients to the wet mix. Stir until just combined. Don’t overmix! 6. Fold in 1 cup chocolate chips, making a thick, chocolatey dough. 7. Scoop tablespoon-sized amounts of dough. Roll them into balls and place them on the baking sheet. Leave space between each ball. 8. Press a small indentation in the center of each ball. Fill this with about 1 teaspoon of salted caramel sauce. 9. Bake in the oven for 10-12 minutes. The edges should be set, but the centers remain soft. 10. When done, remove cookies and sprinkle a small pinch of sea salt on top while they are warm. 11. Allow the cookies to cool on the baking sheet for 5 minutes. Then transfer them to a wire rack to cool completely. For the full recipe, check out the detailed instructions above. Enjoy your baking! To avoid overmixing, mix until just combined. This helps keep your cookies soft. When you add the dry mix to wet, stop once you don't see flour. This ensures a tender cookie. For the right dough consistency, it should be thick and slightly sticky. If your dough is too dry, add a bit of milk. If it's too wet, add a bit of flour. The perfect dough helps your cookies bake evenly and taste great. For serving, use tiered stands or decorative plates. This makes your cookies look fancy. Place them in a way that shows off their shape. You can drizzle extra salted caramel on top for added appeal. This not only looks stunning but adds more flavor. Your guests will love the extra touch! Store cookies in an airtight container to keep them fresh. This helps them stay soft and tasty. If you want to keep them longer, use the freezer. Just make sure to wrap them well. For reheating, place cookies in the oven for a few minutes. This helps restore their soft texture. You can also use the microwave for a quick warm-up. Just be careful not to overheat them! {{image_2}} You can add nuts or caramel bits to your cookies. Chopped pecans or walnuts give a nice crunch. You can also mix in caramel bits for a sweeter taste. Try using different types of chocolate. Dark chocolate adds richness, while milk chocolate offers a creamy touch. Experiment with flavors to find your favorite blend! For a gluten-free option, use almond flour or coconut flour. These flours can give a nice texture without gluten. If you want a vegan version, swap the egg with a flax egg. Just mix one tablespoon of ground flaxseed with three tablespoons of water. Let it sit until it thickens. You can also use dairy-free butter and chocolate chips. Add spices for a hint of seasonal flavor. A pinch of cinnamon or nutmeg works well in fall. For winter holidays, try ginger or peppermint extracts. You can also create themed cookies for special occasions. Use cookie cutters to shape the dough for holidays like Halloween or Christmas. These small changes make your cookies stand out and taste great! For the complete recipe, check out the [Full Recipe]. To keep your salted caramel chocolate cookies fresh, use an airtight container. This method helps prevent moisture loss. You can also freeze them if you want to save some for later. To freeze, place cookies in a single layer in a freezer bag. They can last up to three months in the freezer. For best taste, eat them within one month. To reheat cookies, use an oven or a microwave. For the oven, preheat it to 350°F (175°C). Place cookies on a baking sheet and warm them for about 5 minutes. This keeps the texture soft. If using a microwave, heat a cookie for about 10-15 seconds. Serve them warm for a gooey treat. Check for changes in smell or texture. If the cookies feel hard or dry, they may be stale. Look for any visible mold or discoloration. If you notice these signs, it’s best to throw them away. Always trust your senses to ensure freshness. How can I make cookies chewier? To make cookies chewier, use more brown sugar than white sugar. Brown sugar has more moisture. You can also slightly underbake the cookies. This keeps the centers soft. Can I use homemade salted caramel? Yes, you can use homemade salted caramel. It adds a personal touch to your cookies. Just make sure it’s thick enough to hold its shape when baked. What substitutions can I make for allergens? For allergens, you can use gluten-free flour instead of regular flour. For dairy, try coconut oil or a vegan butter. Use flax eggs as an egg substitute. Can I adjust the sweetness levels? Yes, you can adjust sweetness by lowering the sugar. Start with a small amount and taste the dough. Keep in mind that cookies may not be as sweet. How do I know when to take cookies out of the oven? Take cookies out when the edges are set but the centers look soft. They will continue to cook on the baking sheet after you remove them. Why are my cookies flat? Flat cookies often happen due to too much butter or not enough flour. Make sure you measure your ingredients correctly. Chilling the dough can also help. How to fix dry cookie dough? If your dough is dry, add a tablespoon of milk or water. Mix it in slowly. You can also add an extra egg yolk for moisture. You learned how to make delicious salted caramel cookies, from ingredients to baking. Remember the key steps: mix, form, fill, and bake. Use my tips for perfect texture and storage. Feel free to switch things up with flavors or dietary needs. Keep your cookies fresh and enjoy them longer with proper storage methods. With a bit of practice, you’ll impress everyone with your baking skills. Now it’s time to bake and savor the yummy results!](https://grilledflavors.com/wp-content/uploads/2025/05/35e01217-11f5-4c30-ad08-8efb0510c9a8.webp)
Are you ready to bite into the ultimate treat? My Salted Caramel Chocolate Cookie Recipe combines rich chocolate with a sweet and salty twist. This easy recipe uses basic ingredients …