Pumpkin Cheesecake Bars with Caramel Delightfully Easy
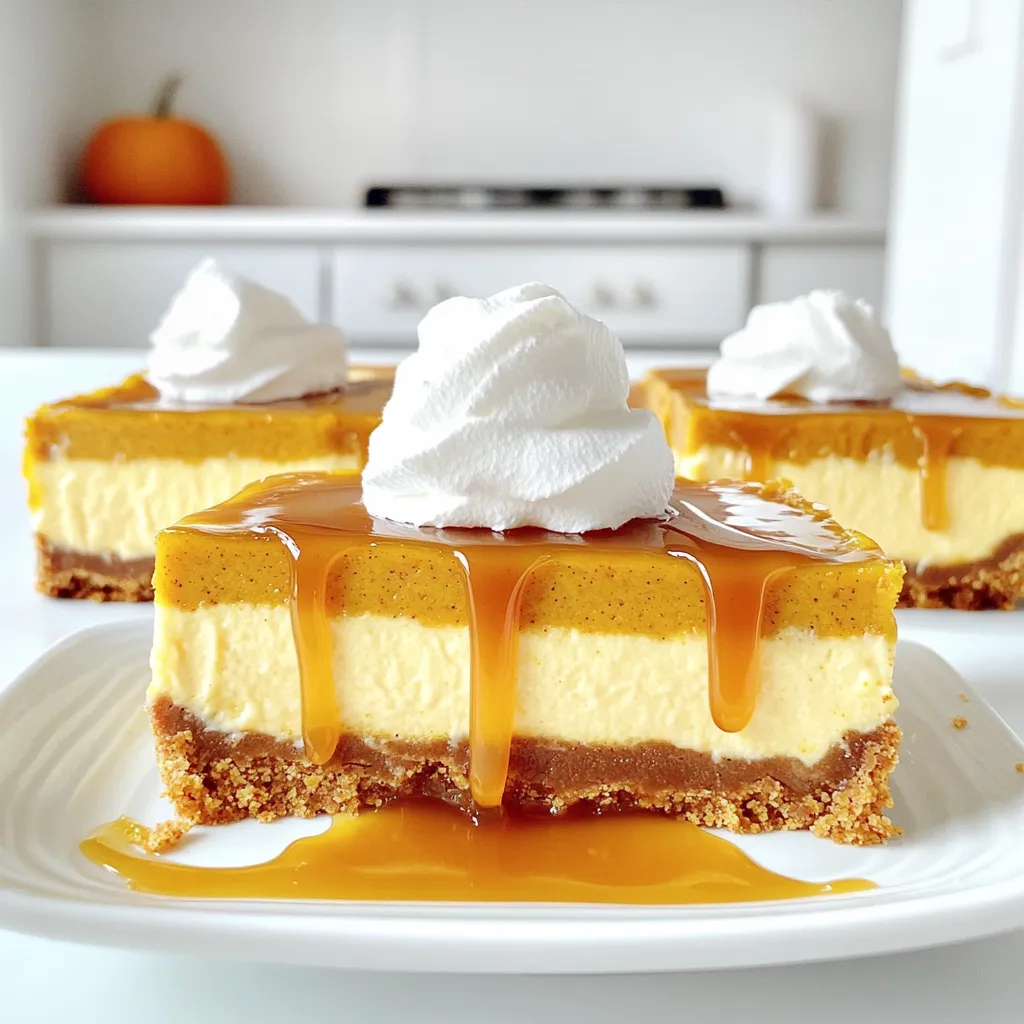
Are you ready to delight your taste buds with Pumpkin Cheesecake Bars topped with caramel? These treats are a perfect blend of creamy and sweet, making them a fantastic addition …
Are you ready to delight your taste buds with Pumpkin Cheesecake Bars topped with caramel? These treats are a perfect blend of creamy and sweet, making them a fantastic addition …

Looking for a quick, tasty snack that packs a punch? Try these Peanut Butter Oat Bites! I’ll show you how to whip up these easy no-bake treats in just minutes. …

Who doesn’t love a warm, sweet treat that fills the kitchen with delightful scents? In this post, I’ll guide you through making Cinnamon Sugar Donuts Bakery Style, perfect for breakfast …
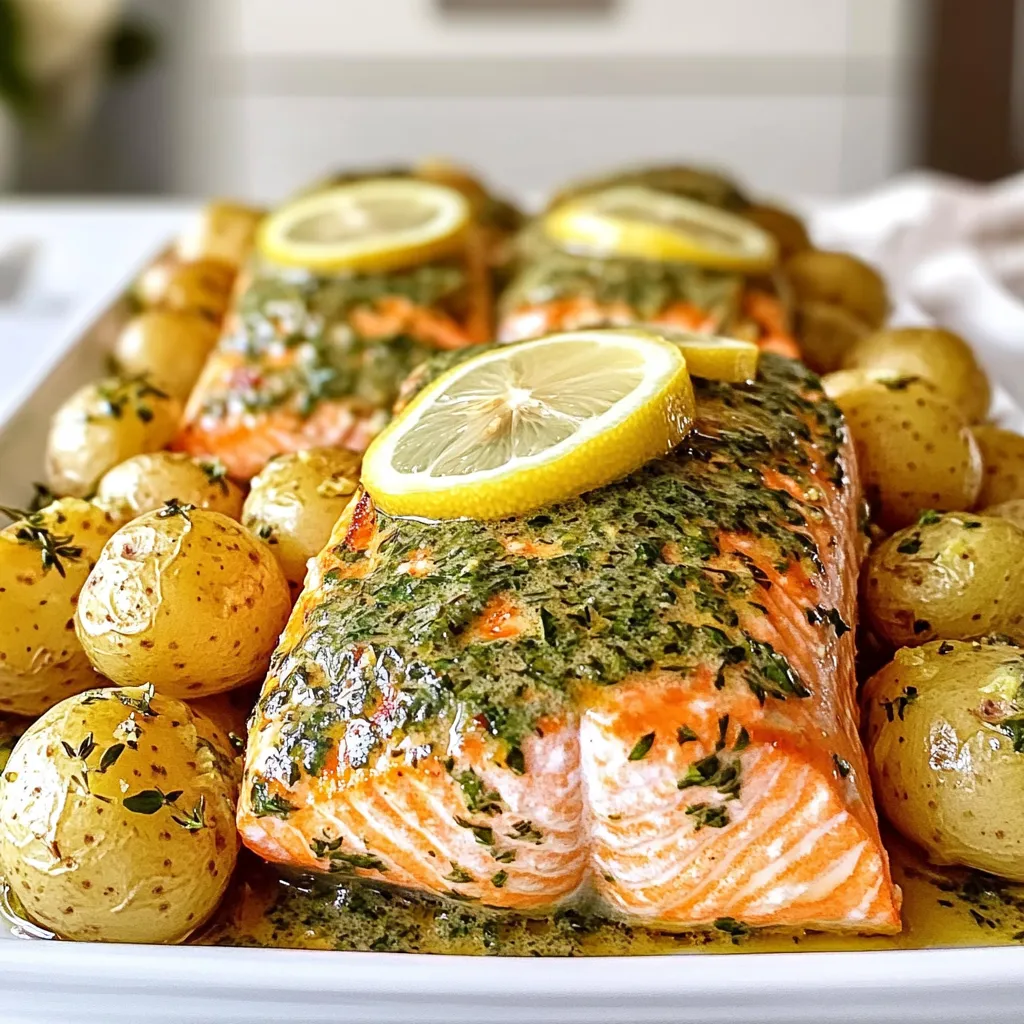
Are you ready to impress your family with an easy and tasty meal? This Sheet-Pan Herb Butter Salmon & Potatoes Delight combines flaky salmon and crispy potatoes. It’s quick to …
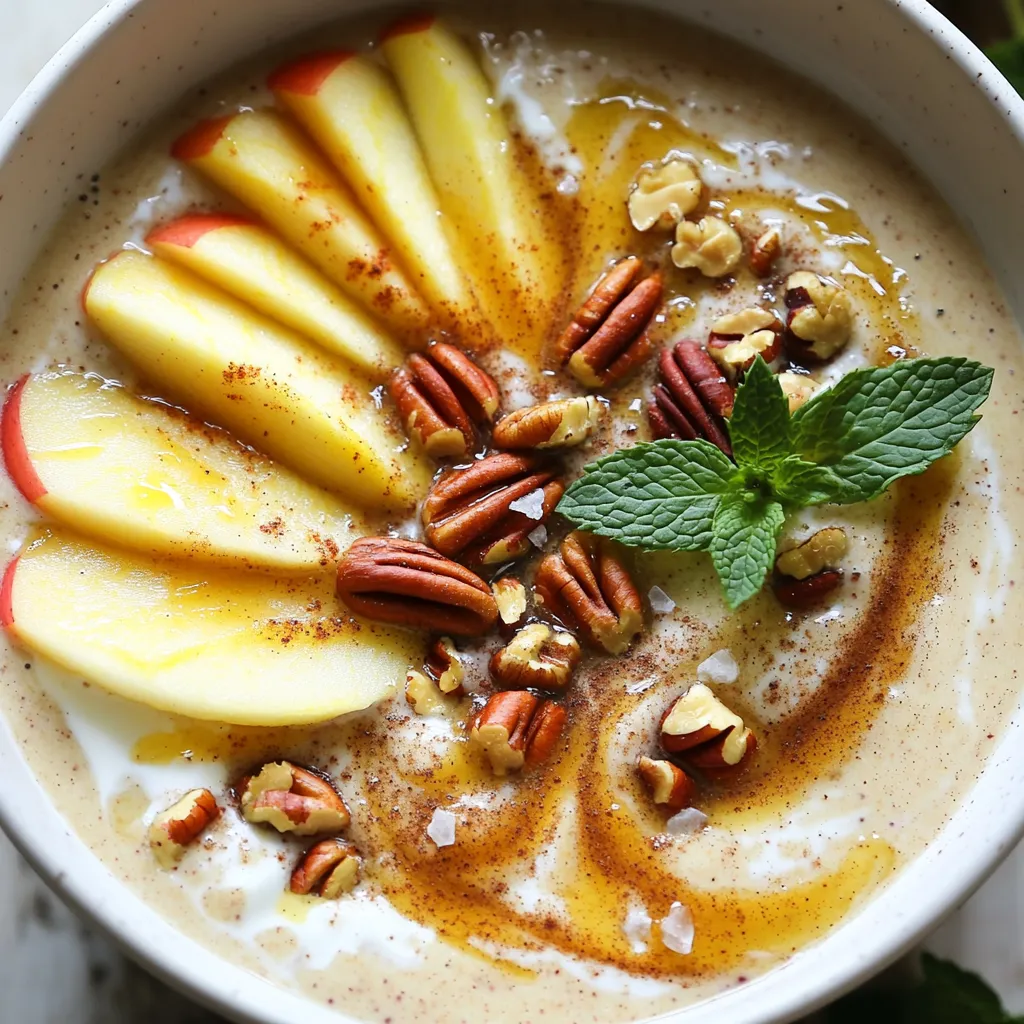
Looking for a cozy and delicious way to enjoy fall’s favorite flavor? This Spiced Apple Cider Smoothie Bowl is your answer! Packed with warm spices and smooth sweetness, it’s a …
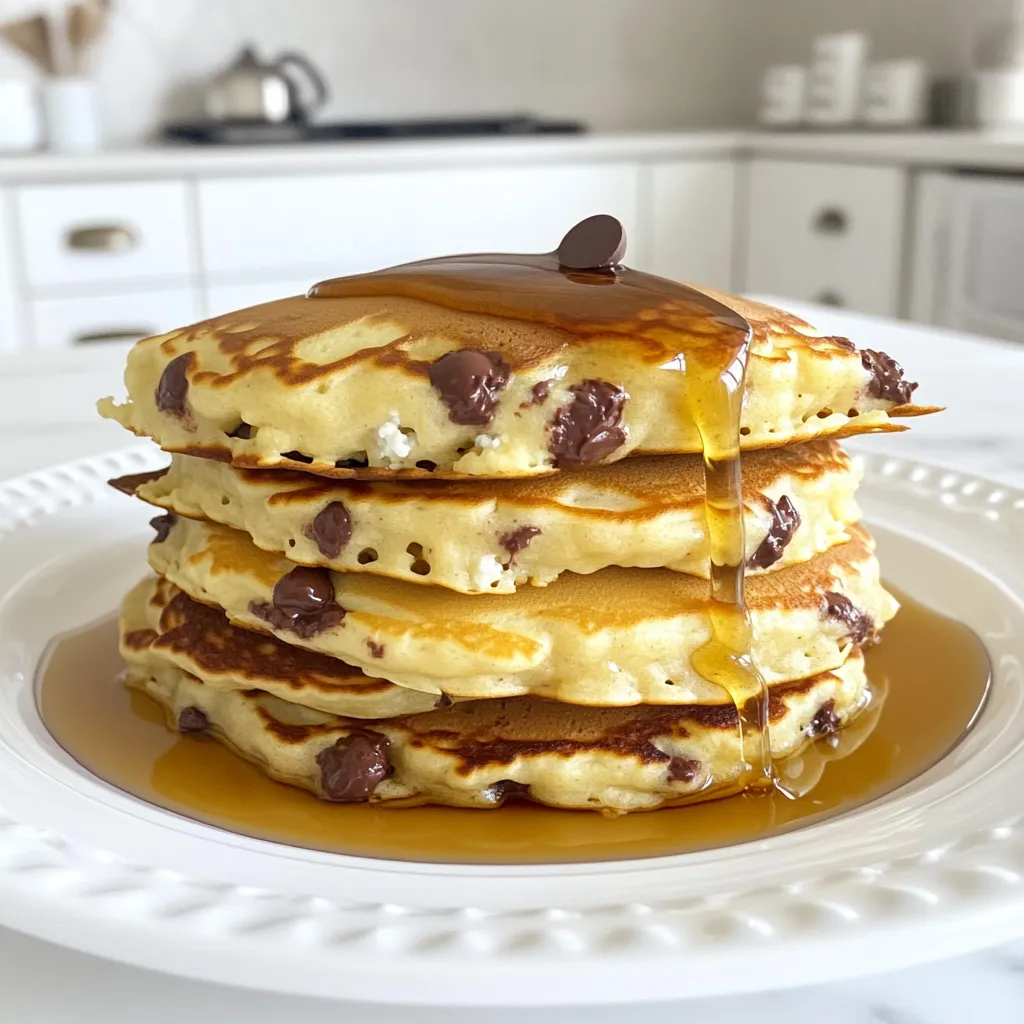
Get ready for a breakfast treat with my Cottage Cheese Chocolate Chip Pancakes! They are soft, tasty, and super easy to make. Packed with protein from cottage cheese, these pancakes …

Craving a tasty snack? Garlic Parmesan Knotted Pretzels are the perfect choice! These soft, cheesy bites offer a burst of savory flavor that’s hard to resist. In this post, I’ll …

Get ready to spice up your taco night with my *Spicy Shrimp Tacos with Lime Crema*! These zesty delights combine fresh shrimp, bold flavors, and a creamy lime topping that …
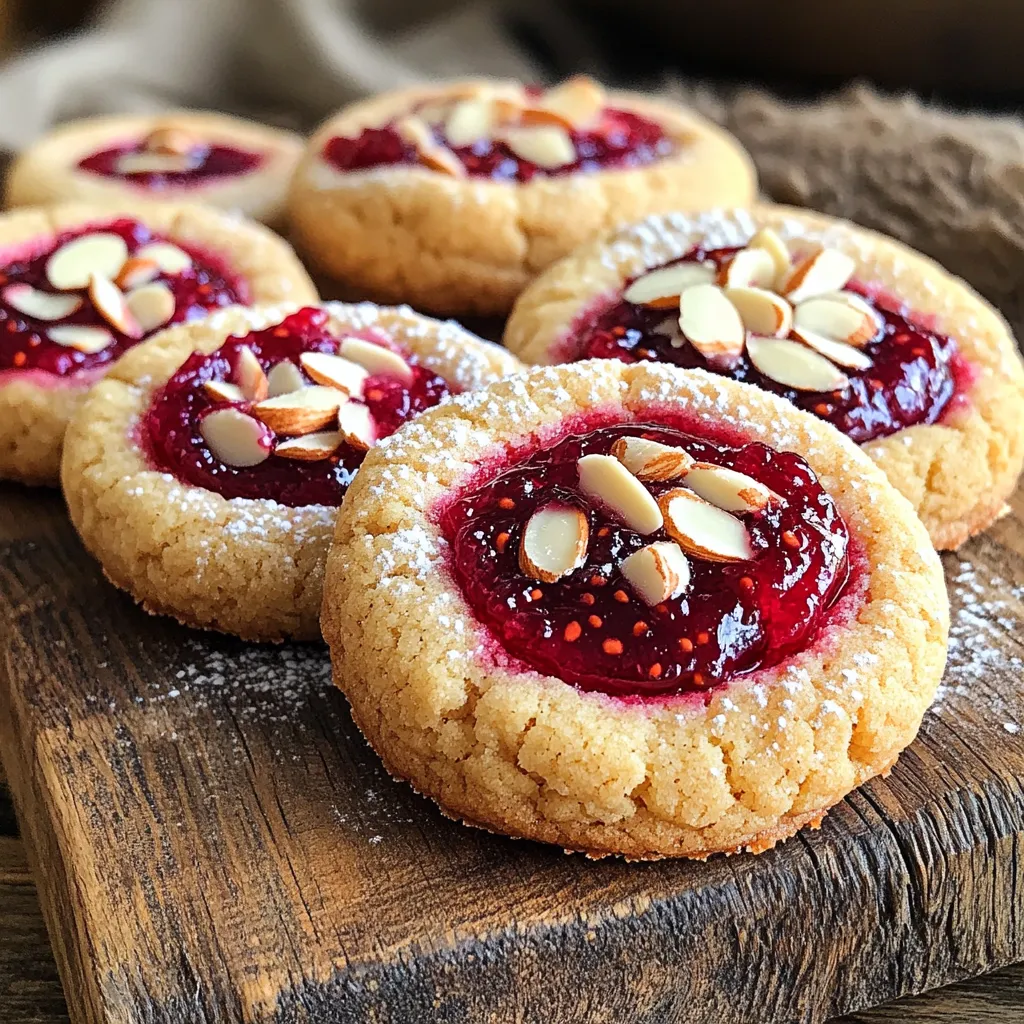
Do you love cookies that burst with flavor? Raspberry Almond Thumbprint Cookies are the perfect treat! These delightful cookies combine rich almond flavor with sweet raspberry jam, making them a …

Get ready to savor the deliciousness of Sheet Pan Teriyaki Meatballs with Pineapple! In this recipe, you’ll create juicy meatballs packed with flavor while keeping cleanup easy and quick. With …