Skip to content
grilledflavors.com
  • Home
  • Appetizers
  • Desserts
  • Salads
  • Breakfast
  • Dinner
  • Privacy Policy
  • Contact
  • About

Chef Nate

Korean BBQ Meatballs with Spicy Mayo Delight

May 22, 2025 by Chef Nate
- 1 lb ground beef or ground chicken - 1/4 cup breadcrumbs - 1/4 cup green onions, finely chopped - 2 tablespoons soy sauce - 1 tablespoon sesame oil - 2 teaspoons grated ginger - 2 cloves garlic, minced - 1 tablespoon brown sugar - 1/2 teaspoon black pepper - 1/4 teaspoon red pepper flakes (adjust to taste) - 1/4 cup mayonnaise - 1 tablespoon sriracha (or to taste) - 1 teaspoon lime juice - Sesame seeds and additional sliced green onions for garnish I love using fresh ingredients in my Korean BBQ meatballs. Ground beef or chicken gives you a great base. Green onions add a nice crunch and flavor. The soy sauce and sesame oil give an umami kick. Ginger and garlic offer warmth and depth. Brown sugar balances out the flavors. The black pepper and red pepper flakes add just the right amount of spice. For the spicy mayo, mix mayonnaise with sriracha and lime juice. This dip is creamy and spicy, perfect for drizzling on the meatballs. You can adjust the sriracha to control the heat. You will need a mixing bowl, a baking sheet, parchment paper, and a whisk to prepare these delicious meatballs. This recipe is quick, taking about 30 minutes, and serves 4 to 6 people. For the full recipe, check out the detailed instructions. - Preheat the Oven: First, set your oven to 400°F (200°C). This step helps cook the meatballs evenly. - Mixing Meatball Ingredients: In a large bowl, combine the ground beef or chicken, breadcrumbs, chopped green onions, soy sauce, sesame oil, grated ginger, minced garlic, brown sugar, black pepper, and red pepper flakes. Mix the ingredients gently. You want them combined but not overworked. - Forming Meatballs: Take a small amount of the mixture. Shape it into a ball about the size of a golf ball. Place each meatball on a baking sheet lined with parchment paper. This keeps them from sticking and makes cleanup easy. - Arranging on Baking Sheet: Spread the meatballs out on the baking sheet. Make sure they are not touching. This allows them to cook evenly and get a nice crust. - Baking Time and Temperature: Bake the meatballs in the preheated oven for about 15 to 20 minutes. Check for a golden-brown color and make sure they are cooked through. - Ingredients for Spicy Mayo: For the spicy mayo, you will need 1/4 cup of mayonnaise, 1 tablespoon of sriracha, and 1 teaspoon of lime juice. - Mixing Instructions: In a small bowl, whisk together the mayonnaise, sriracha, and lime juice. Mix until smooth. You can add more sriracha if you want it spicier. These steps will guide you toward making Korean BBQ meatballs with spicy mayo. For the full recipe, refer to the earlier section. Enjoy the process and the delicious results! - Don’t Overmix: When you mix your meatball ingredients, do it gently. Overmixing makes them tough. Just blend until everything is evenly combined. - Tips for Uniform Sizing: Use a small ice cream scoop or your hands to form meatballs. This gives you a uniform size and better cooking. Aim for golf ball-sized portions for even cooking. - Ways to Control Heat Level: To lower the heat in your spicy mayo, add more mayonnaise. You can also reduce the sriracha or add a bit of honey for sweetness. - Alternative Ingredients for Mayo: If you want a twist, try Greek yogurt instead of mayo. It adds creaminess and a tangy flavor that works well. - Garnishing Ideas: Sprinkle sesame seeds and sliced green onions on top for a pop of color. Fresh herbs like cilantro can also add a nice touch. - Serving Suggestions: Serve your meatballs on a platter with the spicy mayo in a small bowl. This allows guests to dip as they please, making it fun and interactive. For the full recipe, check out the detailed instructions above! {{image_2}} You can swap the ground beef or chicken for other options. - Using Ground Turkey: Ground turkey works well and is leaner. It still holds flavor from the spices. Try the same seasonings for a tasty twist. - Vegetarian Options: For a meat-free choice, use lentils or chickpeas. Mash them up and mix with breadcrumbs and spices. They will still give you great flavor. You can boost the taste of your meatballs with a few tweaks. - Adding Different Herbs: Fresh herbs like cilantro or basil can elevate the flavor. Just chop them finely and mix them in. They add freshness and brightness. - Alternative Sauces: Instead of sriracha, try gochujang for heat. You can also use a sweet chili sauce for a milder flavor. Each option brings a unique taste. You can serve these meatballs in fun ways that surprise your guests. - Appetizer Ideas: Skewer the meatballs on toothpicks. Serve with spicy mayo for dipping. This makes a great party snack. - Meal Prep Suggestions: These meatballs store well. Make a big batch and freeze them for later. Just reheat and serve over rice or noodles for a quick meal. For the full recipe, check out the Korean BBQ Meatballs with Spicy Mayo. Enjoy experimenting with these variations! To store leftover meatballs, place them in an airtight container. You can also wrap them tightly in plastic wrap. This keeps them fresh and tasty. For freshness, eat leftover meatballs within three days. After that, they may lose flavor and texture. For freezing, let the meatballs cool completely first. Then, arrange them on a baking sheet in a single layer. This helps keep them from sticking together. Freeze for a few hours until solid, then transfer to a freezer bag. When you want to enjoy them, thaw the meatballs in the fridge overnight. To reheat, place them in the oven at 350°F (175°C) until warm. You can also microwave them for a quick option. To reheat, the oven is your best choice. It will keep the meatballs crispy. You can also use the microwave, but they may get soft. If you find the meatballs dry after reheating, drizzle some water over them before heating. This helps restore moisture and flavor. Enjoy your Korean BBQ meatballs with spicy mayo even after storage! For the full recipe, check out the main article. Yes, you can make these meatballs ahead of time. Prepare them and store them in the fridge. They stay fresh for up to two days. You can also freeze them for up to three months. Just make sure to cook them before serving. If you don’t have sriracha, try using gochujang, a Korean chili paste. It adds a nice kick and flavor. You can also use sweet chili sauce for a milder taste. Adjust the amount to suit your heat preference. Yes! You can use gluten-free breadcrumbs or crushed rice crackers. Both work well and keep the meatballs tasty. You can also use ground oats as a binder instead of traditional breadcrumbs. To check if the meatballs are done, use a meat thermometer. The internal temperature should reach 165°F (75°C). You can also cut one open; the meat should be fully cooked and no longer pink. Yes, you can bake the meatballs without parchment paper. Just lightly grease the baking sheet. This helps prevent sticking and makes cleanup easier. However, parchment paper helps with even cooking and browning. This blog post explored how to make delicious Korean BBQ meatballs. We covered the right ingredients, tools, and step-by-step instructions to create tasty meatballs. I shared tips for texture, spicy mayo adjustments, and presentation ideas. Don't forget the variations and storage info for those leftovers! Whether you choose ground beef or chicken, these meatballs are sure to please. Get ready to impress your friends and family with this simple, fun recipe. Happy cooking!

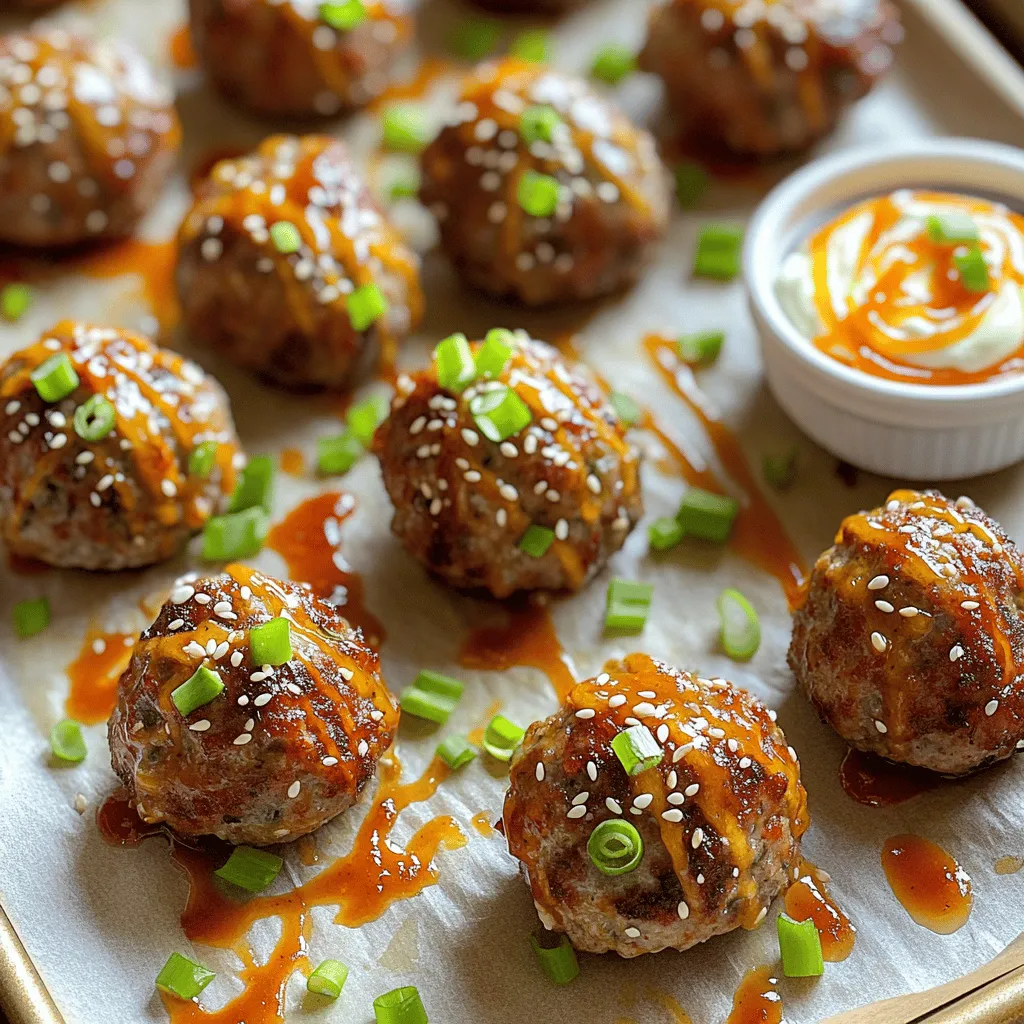
If you crave a bold flavor adventure, you’re in for a treat! My Korean BBQ Meatballs with Spicy Mayo are not only easy to make but incredibly delicious. In just …

Read more

Categories Appetizers

Hawaiian Chicken Sheet Pan Recipe for Easy Dinner

May 22, 2025 by Chef Nate
The Hawaiian Chicken Sheet Pan recipe is colorful and full of flavor. Here’s what you need: - 4 boneless, skinless chicken thighs - 1 cup fresh pineapple, diced - 1 red bell pepper, sliced - 1 yellow bell pepper, sliced - 1 red onion, cut into wedges - 3 cloves garlic, minced - 3 tablespoons soy sauce (or tamari for gluten-free) - 2 tablespoons honey - 1 tablespoon fresh ginger, grated - 1 tablespoon sesame oil - Salt and pepper to taste - Fresh cilantro for garnish These ingredients come together to create a dish that feels like a tropical escape. You can find the full recipe linked above. Each item plays a key role in building the flavors. The chicken thighs stay juicy, while the fresh pineapple adds sweetness. The bell peppers and onion bring crunch and color. The garlic, ginger, and soy sauce create a savory marinade that ties it all together. Enjoy making this dish! - Preheat the oven to 400°F (200°C). - Line a large sheet pan with parchment paper. - In a bowl, combine soy sauce, honey, garlic, ginger, sesame oil, salt, and pepper. - Whisk it together until smooth. - Take the chicken thighs and coat them in the marinade. - Let them rest for about 15 minutes. - In another bowl, toss the fresh pineapple, bell peppers, and onion. - Add olive oil, salt, and pepper. Mix well to coat. - Place the marinated chicken on one side of the sheet pan. - Add the vegetable mix to the other side. - Bake for 25-30 minutes. - Check to make sure the chicken is cooked through. Marinating the chicken is key. It helps the flavors soak in. I recommend marinating for at least 15 minutes. This short time makes a big taste difference. You can enhance the marinade by adding fresh herbs like basil or thyme. A splash of lime juice adds a nice zing. For a touch of heat, consider adding a pinch of red pepper flakes. For Hawaiian flavors, use vegetables like bell peppers and onions. Pineapple adds a sweet twist. Cut all veggies into even pieces to ensure they cook evenly. This way, everything roasts perfectly. Toss them in oil and season well. It helps them caramelize and brings out their best flavor. Pair your Hawaiian Chicken Sheet Pan with rice or quinoa. These sides soak up the tasty juices. A light salad with cucumbers and avocado adds a fresh touch. For a fun presentation, serve the dish on a colorful platter. Garnish with fresh cilantro for a pop of green. This makes it look and taste even better. {{image_2}} You can switch the chicken thighs for chicken breasts. Chicken breasts are leaner, so they cook faster. Just keep an eye on them to avoid drying out. Another tasty option is tofu. It soaks up flavors well. Use firm or extra-firm tofu for best results. Just marinate it like the chicken. Add seasonal veggies for extra color and nutrition. Think about zucchini, asparagus, or snap peas. You can also use local Hawaiian ingredients. Try adding taro or sweet potato chunks. These will give your dish a unique twist. Want some heat? Add red pepper flakes for a kick. You can also use sriracha in the marinade. For a sweet and spicy combo, mix honey with chili paste. This variation adds depth to the dish. Adjust to your taste for a fun twist. To keep your Hawaiian Chicken fresh, store leftovers in an airtight container. Let the chicken cool to room temperature first. If you have more than one serving, divide it into smaller portions. This helps with quick meals later. You can refrigerate leftovers for up to four days. For long-term storage, freeze the chicken and veggies in a freezer-safe bag. When ready to eat, reheating is simple. Place the chicken and veggies on a baking sheet. Preheat your oven to 350°F (175°C). Bake for about 15 minutes or until heated through. You can also use a microwave. Just cover the dish to keep moisture in. Heat it in short bursts, checking often, to avoid overcooking. In the fridge, your Hawaiian Chicken lasts about four days. If you freeze it, it can last up to three months. Always label your containers with the date. This helps you keep track of how long it’s been stored. Enjoy your easy dinners without worry! To cook chicken safely, check its internal temperature. The chicken should reach 165°F (75°C). Use a meat thermometer for the best results. Bake the chicken for 25-30 minutes at 400°F (200°C). This time works well for boneless, skinless thighs. If you see juices running clear, that’s a good sign it’s done. Always let the chicken rest before serving. This helps keep it juicy. Yes, you can prep this dish ahead of time. Marinate the chicken the night before. Keep it in the fridge until you’re ready to cook. You can also chop the veggies and store them in an airtight container. This way, you save time on busy days. Just remember to bake everything fresh for the best taste. It stays juicy and flavorful that way. This dish pairs well with many sides. Try serving it with steamed rice or quinoa. Both will soak up the tasty juices. You can also add a fresh salad or coleslaw for crunch. A fruity drink, like a tropical smoothie, matches the Hawaiian theme. Your guests will love the colorful and tasty spread. Yes, you can skip the soy sauce. Use coconut aminos instead for a similar flavor. Another option is to create a mix of vinegar and a bit of honey. This will give a sweet and tangy taste. Just make sure to adjust salt as needed. This way, you keep the dish tasty without soy sauce. To make this recipe gluten-free, use tamari instead of soy sauce. Tamari is a gluten-free soy sauce alternative. Always read labels to ensure all ingredients are safe. For the sesame oil, check that it’s gluten-free too. With these swaps, you can enjoy this Hawaiian chicken without worry. Enjoy the flavors without the gluten! For the full recipe, check the earlier section. This blog post covers a delicious Hawaiian chicken sheet pan recipe. You learned about the key ingredients, how to prep and bake, and tips for the best results. I shared variations to suit your taste and guidance on storage and reheating. Overall, this dish is easy, flavorful, and perfect for weeknight meals. Enjoy experimenting with the ingredients and flavors to make it your own. Happy cooking!

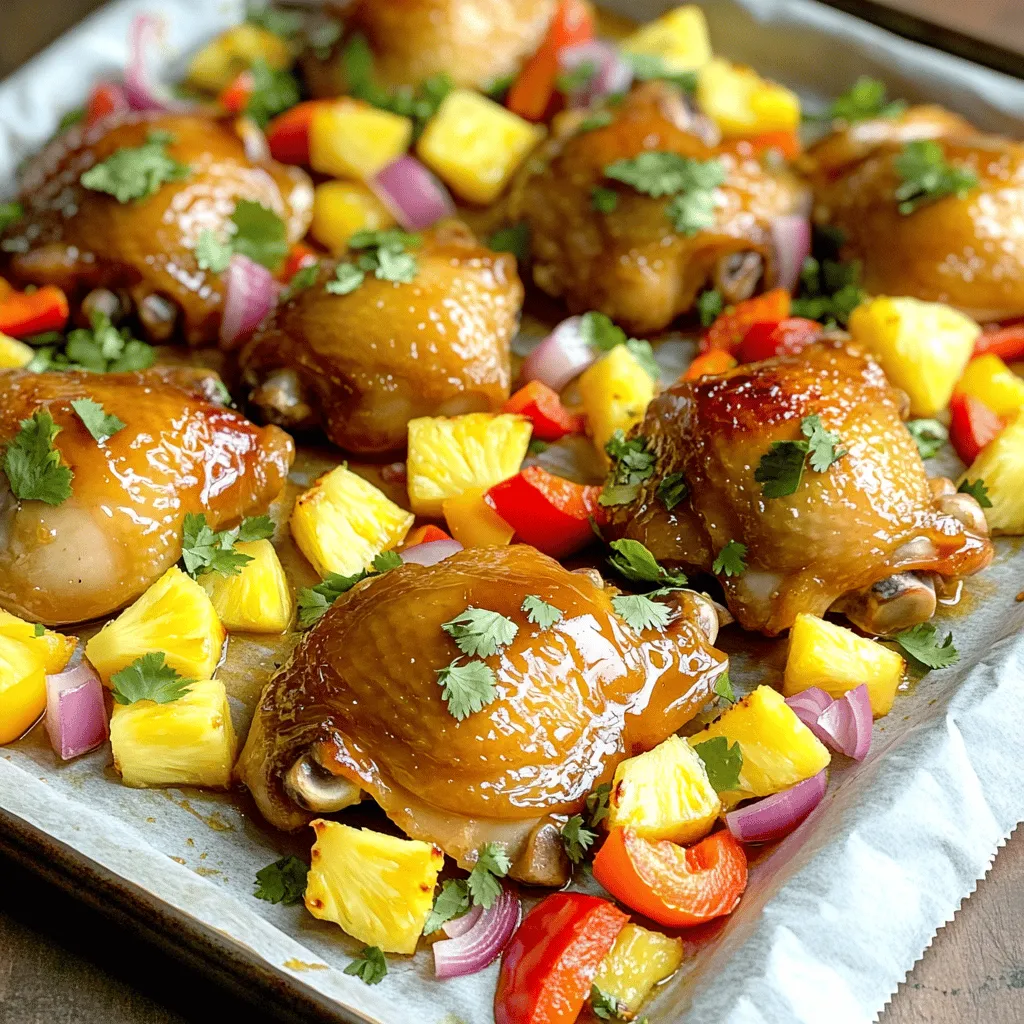
Looking for a simple yet delicious dinner? This Hawaiian Chicken Sheet Pan recipe is your answer! With juicy chicken, fresh vegetables, and a sweet-salty glaze, it’s a meal that pleases …

Read more

Categories Dinner

Garlic Butter Chicken Bites with Pasta Delightfully Easy

May 22, 2025 by Chef Nate
- Chicken and Pasta - 1 lb boneless, skinless chicken breasts, cut into bite-sized pieces - 8 oz pasta (preferably fettuccine or linguine) - Garlic and Seasonings - 4 cloves garlic, minced - 3 tablespoons unsalted butter - 1 teaspoon smoked paprika - 1 teaspoon Italian seasoning - Salt and pepper to taste - Garnishes and Optional Add-Ons - 1 cup cherry tomatoes, halved - 1/2 cup grated Parmesan cheese - Fresh parsley, chopped, for garnish - Zest of 1 lemon - Common Kitchen Staples for the Recipe - You will need olive oil, salt, and black pepper. These add great flavor. - Substitutions for Dietary Needs - For a gluten-free option, use gluten-free pasta. - For a dairy-free version, use a dairy-free butter and cheese. This dish is simple and fun to make. You can always adjust the ingredients to suit your taste. For the full recipe, check out the details above. Boiling and Draining To start, fill a large pot with water. Add a generous pinch of salt. Bring the water to a rolling boil. Once boiling, add your pasta. Cook it according to the package instructions. This usually takes about 8-10 minutes. Stir occasionally to prevent sticking. When it’s done, drain the pasta using a colander, but save 1/2 cup of that pasta water. This water is gold for our sauce! Importance of Al Dente Texture Cooking pasta al dente means it’s firm to the bite. This texture adds a nice contrast to the tender chicken. It also helps the pasta hold onto the garlic butter sauce better. If you overcook it, your pasta may become mushy. Keep an eye on the clock and taste it as it cooks! Tips for Perfectly Cooked Chicken For perfect chicken, start with small, bite-sized pieces. This helps them cook evenly. Heat a large skillet over medium heat and melt 1 tablespoon of butter. Add the chicken pieces in a single layer. Avoid overcrowding the pan. Cook for 5-7 minutes, turning them halfway through. You want them golden and cooked through. How to Season for Flavor Seasoning is key! Use smoked paprika and Italian seasoning for a lovely flavor. Sprinkle salt and pepper over the chicken as it cooks. This builds a great taste right into the meat. Don’t rush this step; good seasoning makes a dish shine! Achieving the Right Flavor Balance After you remove the chicken, keep that tasty skillet. Add 2 more tablespoons of butter and turn the heat down to low. This lets the butter melt gently. We want to keep its flavor intact. Cooking the Garlic to Perfection Next, add minced garlic to the butter. Sauté it for just 1-2 minutes. Keep stirring to prevent burning. Once it’s fragrant, you know it’s ready. Garlic brings a warm, rich flavor to our dish. Mixing with Pasta and Adjusting Consistency Now, it’s time to bring everything together. Add the cooked chicken back into the skillet, along with the halved cherry tomatoes. Toss gently to mix. Then, add the drained pasta. If it looks too dry, pour in some reserved pasta water. This helps create a nice sauce. Final Touches Before Serving Remove the skillet from heat and stir in the grated Parmesan cheese and lemon zest. This adds a creamy texture and a fresh kick. Taste, and adjust seasoning if needed. Serve it hot, garnished with fresh parsley for a pop of color! For the full recipe, check out the complete cooking instructions. To make great chicken bites, cook them at medium heat. This helps them brown nicely. Use a meat thermometer to check if they reach 165°F (75°C). This ensures they are safe to eat. If you cook them too fast, they might dry out. To avoid dry chicken, don't overcook it. After cooking, let the chicken rest for a few minutes. This helps keep the juices inside. If you cut it too soon, the juices will run out, making it dry. To boost flavor, you can add fresh herbs like basil or thyme. These herbs bring a nice taste to the dish. You can also try adding crushed red pepper for a little heat. Using fresh ingredients is key. Fresh garlic has a stronger flavor than dried. Always taste your dish as you cook. This helps you adjust flavors to your liking. For a beautiful finish, plate your pasta first, then add the chicken bites on top. This way, you can see the lovely colors. Arrange the cherry tomatoes around the dish for extra flair. Garnish with fresh parsley right before serving. A sprinkle of lemon zest adds a nice pop of color. These little touches make your dish look as good as it tastes. For the full recipe, check the details above. {{image_2}} You can switch up the protein in this dish to suit your taste. Shrimp or tofu works great. - Using Shrimp or Tofu: Shrimp cooks fast. Use medium shrimp, and add them in the last few minutes of cooking. For tofu, use firm tofu and sauté it until golden. - Adjusting Cook Times for Different Proteins: Chicken takes about 5-7 minutes. Shrimp only needs about 3-4 minutes. Tofu may take around 5-6 minutes, depending on the size of the cubes. If you want to change your pasta, you have options. Gluten-free or whole wheat pasta can be used. - Gluten-Free and Whole Wheat Options: Look for gluten-free pasta made from rice or quinoa. Whole wheat pasta adds more fiber and a nutty flavor. - Substituting with Vegetable Noodles: Zucchini or spaghetti squash can replace regular pasta. They add freshness and cut carbs. Just sauté them briefly to avoid sogginess. You can play with the flavors in this dish. Adding different veggies or sauces gives it a new twist. - Incorporating Different Vegetables: Feel free to add bell peppers, spinach, or broccoli. These veggies add color and nutrients. - Crafting Unique Sauces: Try adding a splash of soy sauce or a hint of lemon juice for a fresh kick. You can also mix in some cream for a richer sauce. For a full recipe, check out the [Full Recipe]. To store leftovers, let the dish cool first. Place the chicken and pasta in an airtight container. This keeps flavors fresh and prevents drying out. You can refrigerate it for up to three days. After that, the taste and texture may suffer. Freezing is a great option for long-term storage. First, let the dish cool completely. Then, divide it into portions and place in freezer-safe bags. Remove as much air as possible. This helps prevent freezer burn. To thaw, place it in the fridge overnight. When reheating, use a skillet over low heat. Add a splash of water or broth to keep it moist. Stir often to heat evenly. If the sauce is too thick, add more pasta water. This helps the dish return to its delicious state after freezing. Use a pasta that holds sauce well. My top picks are: - Fettuccine - Linguine - Penne These types catch the garlic butter sauce nicely. Fettuccine and linguine offer a great surface for the sauce. Penne adds a fun twist with its shape. Yes, you can prepare this dish ahead. Here are some tips for meal prep: - Cook the chicken and pasta separately. - Store them in airtight containers. - Combine them before serving. This method keeps everything fresh. Reheat gently on the stove with a splash of water. Absolutely! To make it more appealing for kids, try these tips: - Use mild seasonings. - Add extra cheese for flavor. - Include their favorite veggies. These changes can make the dish more fun for younger eaters. If you want some heat, consider these ideas: - Add red pepper flakes to the garlic butter. - Use a spicy seasoning blend. - Mix in sliced jalapeños or fresh chili. These options will give your garlic butter chicken bites a nice kick. Enjoy the extra flavor! In this post, I covered how to make delicious garlic butter chicken bites. We explored essential ingredients, pantry staples, and cooking steps. I shared tips for perfect chicken and flavorful sauce. You learned about variations, storage options, and helpful FAQs. Remember, cooking is fun. Experiment with flavors and enjoy the process. The more you practice, the better you’ll become. Enjoy your meal and impress everyone with your skills!

If you’re looking for an easy yet delicious meal, you’re in for a treat! My Garlic Butter Chicken Bites with Pasta is the perfect dish for busy weeknights. Tender chicken …

Read more

Categories Dinner

Grilled Shrimp Bowl with Avocado Fresh and Flavorful

May 22, 2025 by Chef Nate
For the Grilled Shrimp Bowl, you will need: - 1 pound large shrimp, peeled and deveined - 2 ripe avocados, diced - 1 cup cooked quinoa - 1 cup cherry tomatoes, halved - 1/2 red onion, finely chopped - 1 cup baby spinach - 2 tablespoons olive oil - 1 tablespoon lime juice - 1 teaspoon smoked paprika - 1 teaspoon garlic powder - Salt and pepper to taste - Fresh cilantro for garnish You can also use optional garnishes and seasonings like sliced jalapeños or a dash of hot sauce if you prefer a kick. Each serving of this bowl contains approximately: - Calories: 450 - Protein: 25 grams - Fats: 20 grams - Carbohydrates: 45 grams This meal is filling and packed with nutrients. The shrimp adds lean protein, while avocados provide healthy fats. To make this dish, you'll need some basic tools: - Mixing bowl for marinating shrimp - Grill or grill pan for cooking - Large serving bowl for assembling the dish - Knife and cutting board for chopping ingredients For grilling, a gas or charcoal grill works best. If you prefer indoors, a grill pan is a great alternative. Make sure it’s preheated to get perfect grill marks on your shrimp. For the complete recipe, check out the [Full Recipe]. Start by marinating the shrimp. In a bowl, mix the shrimp with olive oil, lime juice, smoked paprika, garlic powder, salt, and pepper. Make sure the shrimp is well-coated. This mix adds great flavor. For the best shrimp texture, choose fresh or thawed shrimp. If shrimp is frozen, let it thaw in the fridge overnight. Next, preheat your grill or grill pan over medium-high heat. A hot grill helps create a nice sear. Once hot, grill the shrimp for about 2-3 minutes per side. Look for the shrimp to turn pink and opaque. Don't overcrowd the grill; give each shrimp space to cook evenly. Now it's time to put everything together. Start by layering cooked quinoa in a large bowl as the base. Add fresh baby spinach on top, followed by the grilled shrimp. Then, layer diced avocado, halved cherry tomatoes, and finely chopped red onion. To finish, drizzle with a bit more lime juice and sprinkle salt and pepper. When you toss the ingredients, do it gently. You want to mix them without crushing the avocados. This keeps your bowl fresh and colorful. Enjoy your Grilled Shrimp Bowl with Avocado! For more details, check the Full Recipe. When you choose avocados, look for a few key signs. They should feel firm but give slightly when you press them. If they are hard, they are not ripe yet. If they feel mushy, they are overripe. To keep avocados fresh, store them in a cool place or the fridge once ripe. If you cut an avocado, sprinkle lime juice on the flesh. This helps prevent browning. Wrap it tightly in plastic wrap or store it in an airtight container. Grilling shrimp takes just a few minutes. Cook them over medium-high heat for about 2-3 minutes per side. They are ready when they turn pink and opaque. Adjust the seasoning to match your taste. You can add more spices or herbs. If you prefer a milder flavor, reduce the seasoning. To boost the taste, try different herbs and spices. Fresh cilantro and parsley add brightness. You can also use cumin or chili powder for a warm, savory note. If you like heat, add a few drops of hot sauce or a pinch of cayenne pepper. This will give your bowl an extra kick that pairs well with the shrimp and avocado. For the full recipe, check the earlier section. Enjoy your cooking! {{image_2}} You can swap shrimp with chicken or tofu. Both work well in this bowl. If you choose chicken, cut it into small pieces. Cook it until it’s no longer pink, about 6-8 minutes on the grill. For tofu, press it first to remove excess water. Then, grill it for about 4-5 minutes on each side. Adjust the cooking times to ensure your proteins are safe and tasty. To make this dish vegan, skip the shrimp. Use chickpeas or tempeh instead. Both add great texture and flavor. You can also add more toppings like diced bell peppers or shredded carrots. These will enhance the bowl and keep it colorful and fun. Try adding a drizzle of tahini or a sprinkle of nutritional yeast for an extra boost. Focus on fresh, seasonal veggies and fruits. In spring, add asparagus or snap peas. In summer, use zucchini or corn. In fall, try roasted sweet potatoes or apples. Adjust the recipe based on what’s available at your local market. This keeps your dish fresh and exciting. Whenever you can, use what’s in season for the best taste. For the full recipe, check out the steps to create this delightful grilled shrimp bowl with avocado. To keep your grilled shrimp bowl fresh, store it in an airtight container. Place it in the fridge right after serving. This helps prevent bacteria growth. The shrimp and veggies stay good for about two days. If you want to keep it longer, you can freeze it. Just ensure the shrimp are cool before freezing. You can freeze it for up to three months. When you want to enjoy your leftovers, reheat them gently. The best way is to use a microwave. Heat it on medium power for about one to two minutes. Stir halfway through to ensure even heating. You can also use a skillet on low heat. This helps maintain the shrimp's texture. Avoid high heat, as it can make the shrimp tough. You can make this bowl ahead of time for busy weeknights. Cook a large batch of quinoa and shrimp. Store them separately in the fridge. When you need a meal, combine them with fresh veggies. Portion them into grab-and-go containers for easy lunches or dinners. This way, you have a delicious meal ready in minutes. For the freshest taste, add avocado just before eating. You can find the full recipe above to guide your prep. Yes, you can make this recipe ahead of time. Here are some tips for meal prepping: - Cook the shrimp and store it in an airtight container. It stays good for up to three days. - Prepare the quinoa and keep it in the fridge. It will last for about five days. - Chop the veggies and avocados just before serving. This helps keep them fresh. - You can mix everything in a bowl when you are ready to eat. This keeps flavors bright and tasty. If you need a substitute for quinoa, try these options: - Rice: Brown or white rice works well. - Farro: This grain has a nice chewy texture. - Couscous: This is quick to cook and very light. - Cauliflower rice: A great low-carb option for gluten-free diets. Make sure to adjust cooking times based on the grain you choose. You can tell when shrimp is cooked by these signs: - The shrimp turns pink when cooked. - It becomes opaque and firm to the touch. - Cook shrimp for 2-3 minutes on each side. To avoid overcooking, watch carefully. Overcooked shrimp can become rubbery and tough. Enjoy your perfectly grilled shrimp! For the full recipe, check out the Grilled Shrimp Bowl with Avocado. In this post, we explored how to create a delicious Grilled Shrimp Bowl, covering ingredients, cooking techniques, and tips for preparation. You learned about essential tools, nutritional details, and variations to suit your taste. Whether you stick to the classic recipe or try something new, the right ingredients and techniques make all the difference. Enjoy this meal with friends or as a quick weeknight treat. Keep experimenting, and make it your own!

Dive into the vibrant world of flavor with my Grilled Shrimp Bowl with Avocado! This fresh and colorful dish combines juicy grilled shrimp and creamy avocado for a meal that’s …

Read more

Categories Dinner

Oreo Dessert Cups Simple and Tasty Treat Recipe

May 22, 2025 by Chef Nate
- 16 Oreos, crushed - 1 cup cream cheese, softened - 1/2 cup powdered sugar - 1 teaspoon vanilla extract - 1 cup whipped cream (homemade or store-bought) - 1/2 cup mini chocolate chips (for garnish) - Extra Oreos for crumbling on top - Mixing bowls - Electric mixer (or whisk) - Zip-top bag or food processor - Serving cups To create Oreo dessert cups, you need simple and tasty ingredients. First, gather 16 Oreos. I love using these for a crunchy base. You also need one cup of softened cream cheese. This adds a rich, creamy layer to your dessert. Next, grab half a cup of powdered sugar. This sweetens the mix perfectly. Add one teaspoon of vanilla extract for flavor. It makes everything taste even better! Whipped cream is key too. Use one cup, either homemade or store-bought. It lightens the dessert and makes it fluffy. Don’t forget the mini chocolate chips! You’ll need half a cup for a cute garnish. Lastly, keep some extra Oreos for crumbling on top. This will give your cups a nice finish. For tools, have mixing bowls ready. You will need an electric mixer or a whisk to mix your ingredients. A zip-top bag or food processor is great for crushing the Oreos. Finally, get some nice serving cups to layer your dessert. You can find the full recipe to create these delicious Oreo dessert cups in the next section. - Crushing the Oreos Start by crushing the Oreos. You can use a zip-top bag or a food processor. Aim for fine crumbs. This creates a great base for your dessert cups. Reserve about 2 tablespoons of the crushed Oreos for later. - Mixing the cream cheese and sugar In a large bowl, add the crushed Oreos, softened cream cheese, powdered sugar, and vanilla extract. Mix these together until they are smooth. This mixture should be creamy and well combined. - Layering the Oreo mixture Grab your serving cups. Begin by adding a layer of the Oreo mixture. Fill each cup halfway. This will be the first layer of deliciousness. - Adding whipped cream layers Now, add a layer of whipped cream on top of the Oreo mixture. Spread it out evenly. Repeat the layers until the cups are nearly full. Leave some space at the top for the finishing touches. - Topping with Oreo crumbs and chocolate chips Sprinkle the reserved Oreo crumbs and mini chocolate chips on top of each dessert cup. This adds a nice crunch and looks great. - Chilling time for optimal flavor Place the dessert cups in the refrigerator. Chill them for at least 30 minutes. This helps the flavors blend together. The result is a tasty and refreshing treat. For the full recipe, follow the steps above and enjoy making your Oreo Dessert Cups! To get the best cream cheese mixture, make sure your cream cheese is softened. Cold cream cheese does not mix well. Leave it out for about 30 minutes before you start. This makes blending easier and smoother. When mixing, use a hand mixer or a whisk. Start on low speed to blend the cream cheese with the powdered sugar. Then, increase to medium speed until fluffy. This step is key for a light texture in the dessert cups. Presentation matters! For a fun party look, use clear cups. This way, everyone can see those delicious layers. Top each cup with a small dollop of whipped cream and a half Oreo for a cute touch. You can even add a few mini chocolate chips on top for some extra flair. Try adding fresh berries for color. Strawberries or raspberries work well. They add brightness and a burst of flavor. One big mistake is overmixing the whipped cream. If you mix it too long, it can turn grainy. Mix gently just until it’s blended in. This keeps the fluffiness you want. Another mistake is not chilling long enough. Let the dessert cups chill for at least 30 minutes. This helps the flavors blend and sets the layers. If you skip this step, the cups may not hold their shape when served. {{image_2}} You can change up the Oreo dessert cups in fun ways. Adding peanut butter or Nutella gives a rich twist. Just mix a few spoonfuls into the cream cheese layer. You can also layer in fresh fruit like strawberries or bananas. This adds a bright flavor and color. Try adding a layer of raspberries for a sweet and tart kick. If you need gluten-free options, look for gluten-free Oreos. They taste great and work well in this recipe. For a vegan version, swap cream cheese with a plant-based cream cheese. Use coconut whipped cream instead of regular whipped cream. These swaps keep the dessert tasty while fitting different diets. Switch up how you serve these dessert cups. Mini jars work great for a fun look. They are perfect for parties or picnics. You can also use different types of cookies. Try chocolate cookies or vanilla wafers for a new taste. Each cookie will give your dessert a unique spin. For more ideas, check the Full Recipe. To keep your Oreo dessert cups fresh, store them in the fridge. Use an airtight container. This helps keep the layers from getting soggy. Make sure to cover them well. If you use plastic wrap, place it gently on top. Avoid pressing down on the layers. This way, they stay fluffy and tasty. Oreo dessert cups last about three days in the fridge. After this, they may lose their fresh taste and texture. You can freeze them if you want to keep them longer. However, the texture may change once thawed. If you freeze them, allow them to sit in the fridge overnight before eating. This helps keep the layers intact. You usually don’t need to reheat these dessert cups. They are best served cold. If you want to warm them, do it gently. Use a microwave for just a few seconds. This lets you enjoy the soft cream without ruining the layers. Avoid overheating, or the texture will get mushy. Enjoy your treat! You can make your Oreo Dessert Cups look even tastier with fun toppings. Here are some ideas: - Mini chocolate chips for extra crunch - Crumbled Oreos for a classic touch - Whipped cream dollops for creaminess - Shaved chocolate for a fancy look - Sprinkles for a pop of color These toppings add flavor and texture, making your dessert more exciting. Yes, you can prepare Oreo Dessert Cups in advance. Making them ahead saves time and stress. Here’s how: - Assemble the cups and cover them with plastic wrap. - Store them in the fridge for up to 2 days. This way, the flavors meld together nicely. Just remember to add toppings just before serving for best results. If you want a quick treat, look for pre-made Oreo Dessert Cups in stores. Check these places: - Grocery stores often have them in the dessert aisle. - Some bakeries sell their own versions. - Online retailers like Amazon may offer them too. Always read the labels to ensure they meet your taste needs. For the full recipe, refer to the provided link. In this article, we explored how to make Oreo Dessert Cups with simple steps. We looked at the main ingredients, tools needed, and the step-by-step process. I shared tips to avoid common mistakes and offered fun variations for flavors and dietary needs. Remember, chilling the dessert is key to great taste. Get creative with toppings and enjoy these cups at any event. Now it's time to make your own delicious Oreo Dessert Cups!

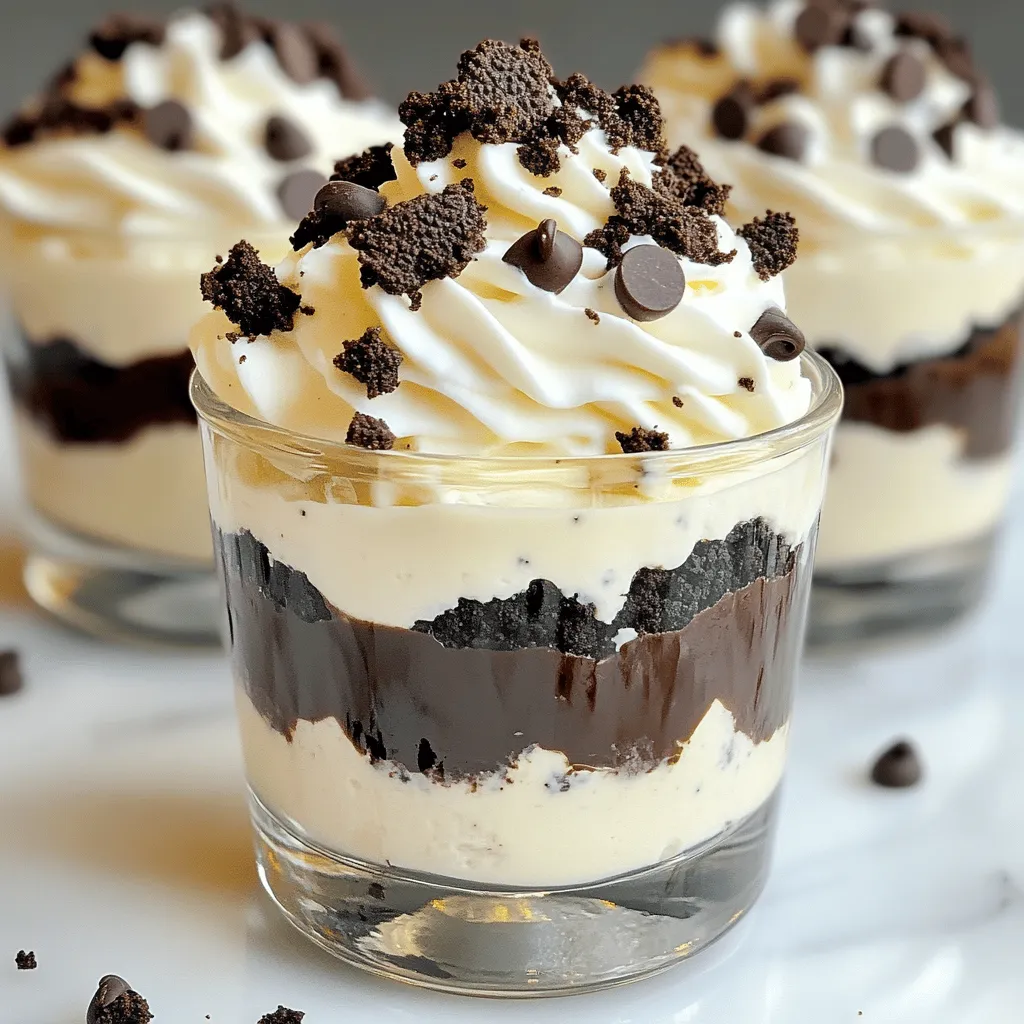
Indulge your sweet tooth with my easy Oreo Dessert Cups recipe! This treat combines the classic Oreo flavor with creamy layers that will make your taste buds dance. Perfect for …

Read more

Categories Desserts

Spring Mix Salad with Balsamic Honey Dressing Delight

May 21, 2025 by Chef Nate
- Spring mix greens: 6 cups - Cherry tomatoes: 1 cup, halved - Cucumber: 1, diced - Red bell pepper: 1/2, sliced - Red onion: 1/4, thinly sliced - Feta cheese: 1/4 cup, crumbled - Walnuts: 1/4 cup, roughly chopped - Balsamic vinegar: 1/4 cup - Honey: 2 tablespoons - Olive oil: 1/4 cup - Salt and pepper to taste When I create a Spring Mix Salad, I focus on fresh, colorful ingredients. The spring mix greens serve as a crunchy base. They bring a pleasant mix of flavors and textures. Cherry tomatoes add sweetness and a pop of color. Diced cucumber keeps things cool and refreshing. I always use red bell pepper for its crispness and vibrant hue. Thinly sliced red onion gives a nice bite without being too strong. Feta cheese is my go-to for creaminess. It adds a tangy flavor that pairs well with the other ingredients. I love adding walnuts for a nutty crunch. They also bring healthy fats to the dish. For the dressing, I mix balsamic vinegar and honey for a sweet and tangy blend. Olive oil rounds out the flavors, making the salad rich and satisfying. I finish with salt and pepper to enhance all the taste. This salad is not just easy to make; it's also a feast for the eyes and palate. For the full recipe, check out the detailed steps in the Spring Fling Salad. 1. First, wash the spring mix greens. Use cold water to rinse them well. 2. After washing, dry the greens. You can spin them in a salad spinner or pat them dry with a clean towel. 3. In a large bowl, combine the spring mix with cherry tomatoes, cucumber, red bell pepper, and red onion. Toss them gently so they mix well. 1. In a small bowl, whisk together the balsamic vinegar and honey. Mix them until they blend together smoothly. 2. While whisking, slowly add the olive oil. Keep whisking to create a smooth dressing. 3. Taste the dressing and add salt and pepper as needed. Make sure it has the right balance of sweet and tangy. 1. Pour the balsamic honey dressing over the salad. Toss gently to coat all the fresh ingredients. 2. Top the salad with crumbled feta cheese and roughly chopped walnuts. These add flavor and texture. 3. Serve the salad immediately for the best freshness. You can also chill it for up to 30 minutes for a cooler taste. For the full recipe, check out the detailed instructions above. Enjoy your vibrant and tasty Spring Mix Salad with Balsamic Honey Dressing! - Use fresh ingredients for the best taste. Fresh greens taste brighter and crisper. - Chill the salad for 30 minutes before serving. Cooling helps the flavors blend well. - Serve in large individual bowls or a platter. This makes the salad look inviting and fun. - Garnish with extra walnuts and whole cherry tomatoes. This adds color and texture on top. - Adjust olive oil for desired thickness. Add more for creaminess or less for a lighter dressing. - Make dressing ahead of time for convenience. This way, you save time when you’re ready to eat. For the full recipe, check out the Spring Fling Salad. {{image_2}} You can make this salad more filling by adding proteins. Grilled chicken or shrimp works great. Just cook them simply with salt and pepper. Slice them up and toss them right into your salad. If you want a different flavor, swap feta cheese for goat cheese. Goat cheese adds a creamy tang that pairs well with the greens. You can switch up the greens for new tastes. Substitute arugula or spinach for the spring mix. Arugula adds a peppery kick, while spinach brings a soft texture. If you want a heartier salad, try kale. Just massage it with a bit of olive oil to soften it before adding other ingredients. Experimenting with dressings can change the whole salad vibe. A lemon vinaigrette adds a bright, zesty flavor. Just mix lemon juice, olive oil, salt, and pepper. For a creamier option, use a yogurt-based dressing. This will give your salad a rich, smooth taste that complements the fresh veggies. For the full recipe, check the details above. To keep your lovely salad fresh, store the salad and dressing separately in the fridge. This helps keep the greens crisp. Use an airtight container for the salad to lock in freshness. Aim to eat your salad within 1-2 days for the best taste. Check all ingredients for spoilage before serving. This way, you can enjoy the salad at its peak flavor. Do not freeze the dressed salad. Freezing changes the texture of the greens. If you make a lot of dressing, store it separately. This keeps it tasty for your next meal. For the full recipe, check out the steps to create this delightful dish! Yes, you can prepare the salad ingredients in advance. Just wait to add the dressing until you are ready to serve. This keeps everything fresh and crisp. If you need a substitute for honey, maple syrup or agave nectar works well. Both will add sweetness and flavor to the dressing. To make this salad vegan, simply omit the feta cheese. You can also choose a plant-based cheese if you like. For extra crunch, add toasted seeds or nuts. Walnuts are great, but you can also use sunflower seeds or almonds. Yes, using store-bought balsamic dressing is a quick option. It can save you time while still tasting good. This blog post shows how to create a fresh, tasty salad. You need bright greens, crisp veggies, and a zesty balsamic honey dressing. Remember to chill it for the best flavor. Experiment with proteins or different greens for variety. Store leftovers properly to keep them fresh. Enjoy making this salad your own, as it can be a delicious, healthy option for any meal.

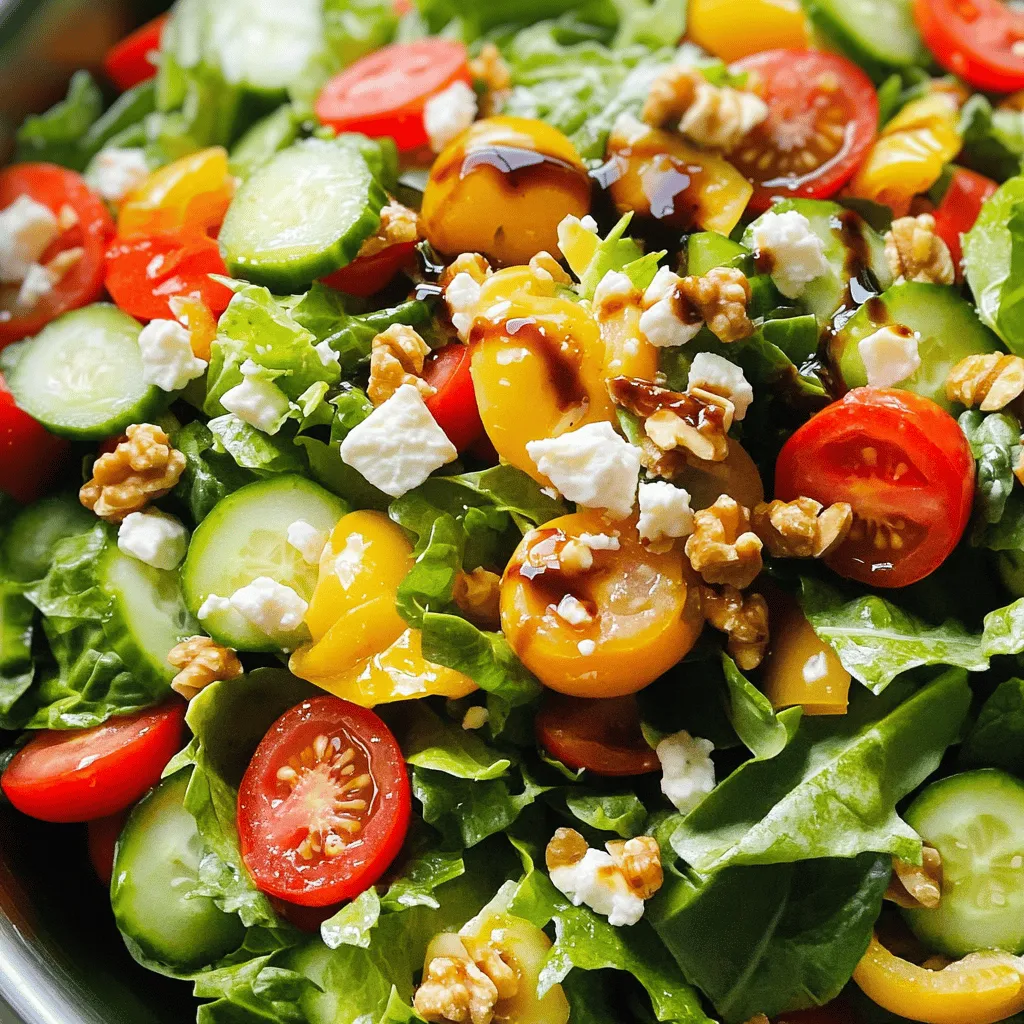
Ready to bring fresh flavors to your table? This Spring Mix Salad with Balsamic Honey Dressing is a vibrant and healthy choice. Packed with crisp greens, juicy tomatoes, and crunchy …

Read more

Categories Salads

Chicken Marsala Pasta Flavorful and Simple Delight

May 21, 2025 by Chef Nate
- Chicken (boneless, skinless breasts) - Pasta (fettuccine) - Vegetables (cremini mushrooms, onion, garlic) You need fresh chicken for this dish. I prefer boneless, skinless breasts. They cook quickly and stay tender. Slice the chicken into thin strips for even cooking. Next is the pasta. Fettuccine works best because it holds the sauce well. Cook it until it's al dente. This means it has a slight bite to it. For the vegetables, I use cremini mushrooms, a small onion, and garlic. Slice the mushrooms and dice the onion. Mince the garlic for a strong flavor. - Chicken broth - Balsamic vinegar - Olive oil and butter The sauce is simple yet rich. Use chicken broth to add depth. Balsamic vinegar gives a tangy kick. For cooking, I blend olive oil and butter. This combo adds richness to your dish. - Fresh parsley - Grated Parmesan cheese Garnishes can elevate the meal. Fresh parsley adds color and a fresh taste. Grated Parmesan cheese adds a salty, creamy finish. For more details on how to combine these ingredients into a delicious meal, refer to the Full Recipe. To boil pasta perfectly, start with a large pot. Fill it with water and add salt. I recommend using kosher salt; it gives the best flavor. Bring the water to a rolling boil. Once boiling, add the fettuccine. Stir gently to prevent sticking. Cook it for around 8-10 minutes until it’s al dente. Drain the pasta and set it aside. To sauté the chicken, heat a large skillet over medium-high heat. Add a tablespoon of olive oil. Season your chicken strips with salt and pepper. Place them in the hot pan. Cook the chicken for about 5-6 minutes. You want it golden brown and fully cooked. This step is key for flavor and texture. For the sauce, start by sautéing the onion and garlic. Heat the same skillet and add olive oil and butter. Cook the diced onion for about 2 minutes until soft. Then add the minced garlic and stir. This mix creates a nice base for your dish. Next, cut the mushrooms into even slices. This helps them cook evenly. Add the sliced mushrooms to the skillet. Cook them until they are browned and tender, about 5-7 minutes. Now, pour in the chicken broth and balsamic vinegar. Stir to combine. Add dried thyme and season with salt and pepper. Let the sauce simmer for about 3-4 minutes. This will reduce the sauce slightly, making it richer. You can find the full recipe in the preceding sections. Enjoy cooking! To ensure the chicken is tender and juicy, start with quality meat. Use boneless, skinless breasts for the best texture. Season the chicken well with salt and pepper before cooking. Sauté it in a hot skillet for about 5 to 6 minutes. This way, you will get a nice golden crust while keeping the inside moist. For flavor enhancement, consider marinating the chicken in balsamic vinegar for about 30 minutes. This adds depth to the dish. You can also sauté the mushrooms until they're nicely browned. This technique draws out their natural sweetness. Pair Chicken Marsala Pasta with a fresh green salad. A simple salad with mixed greens and a light vinaigrette works great. Garlic bread is also a wonderful choice; it soaks up the sauce nicely. When it comes to wine, a glass of dry white wine is ideal. A Pinot Grigio or Chardonnay complements the flavors without overpowering them. If you prefer red wine, a light-bodied Merlot can work too. For plating, use a large white plate to showcase the dish. Start by placing the pasta in the center. Then, gently lay the chicken and mushrooms on top. This creates an eye-catching look. Garnishing with fresh herbs adds a pop of color and flavor. A sprinkle of chopped parsley brightens the dish. Lastly, finish with a light dusting of grated Parmesan cheese for that cheesy touch. This makes the dish look and taste even better. For the full recipe, check out the recipe section. {{image_2}} You can switch up the pasta type for a fun twist. Instead of fettuccine, try penne or whole wheat pasta. Each type offers a different texture and taste. If you want a chicken substitute, use turkey or even tofu. These options keep the dish hearty. They also add new flavors and textures. To make Chicken Marsala Pasta lighter, use less oil and butter. You can swap regular pasta for zucchini noodles. This change cuts carbs and calories. For a vegetarian-friendly version, replace chicken with mushrooms. Use portobello or shiitake for a meat-like bite. Adding spinach or kale boosts nutrients and flavor. If you like heat, add red pepper flakes or a dash of hot sauce. This adds a nice kick to the dish. For different tastes, try fresh herbs like basil or oregano. These herbs brighten the flavors of the sauce. You can also mix in some lemon zest for a refreshing twist. For more details, check out the [Full Recipe]. To store leftovers of Chicken Marsala Pasta, let it cool first. Place the pasta in a shallow container. Cover it tightly with a lid or plastic wrap. This helps keep air out. Use glass or BPA-free plastic containers for the best results. These containers are great for meal prep. They also make it easy to reheat. To freeze Chicken Marsala Pasta, let it cool completely. Portion it into freezer-safe bags or containers. Make sure to remove excess air to prevent freezer burn. Label the bags with the date for easy tracking. When you're ready to eat, take it out and thaw it in the fridge overnight. For reheating, you can use the microwave or heat it on the stove. Just add a splash of chicken broth to keep it moist. Chicken Marsala Pasta lasts in the fridge for about three to four days. Always check for signs of spoilage. Look for any off smells, changes in color, or mold. If it has any of these signs, it's best to throw it away. Enjoy this tasty dish while it's fresh for the best flavor! You can find the Full Recipe for Chicken Marsala Pasta to recreate this delightful meal. Chicken Marsala Pasta is a tasty dish that mixes chicken, pasta, and mushrooms. The main components include sliced chicken breasts, fettuccine pasta, and cremini mushrooms. The sauce is rich and flavorful, made with chicken broth and balsamic vinegar. This dish brings together the savory taste of chicken and the earthiness of mushrooms, all tossed with pasta for a hearty meal. Yes, you can make Chicken Marsala Pasta ahead of time. To meal prep, cook the chicken and sauce first. Store them separately from the pasta. When you are ready to eat, reheat the chicken and sauce, then add the cooked pasta. This way, you keep the pasta from becoming mushy. To make Chicken Marsala Pasta gluten-free, use gluten-free fettuccine or any other gluten-free pasta. You can find many options in stores today. Ensure your chicken broth is also gluten-free. Check the labels to make sure. Chicken Marsala Pasta can be a healthy option. It includes lean protein from chicken and nutrients from mushrooms and onions. You can adjust the recipe for fewer calories by using less oil and butter. Consider adding more veggies for fiber, making it even more nutritious. You can find the full recipe for Chicken Marsala Pasta in the recipe section of this article. In this blog post, we explored Chicken Marsala Pasta and its key ingredients. We discussed the main components, like chicken and fettuccine, seasoning, and optional garnishes. I shared tips on cooking techniques and variations to suit your taste. Remember, cooking is about experimenting and having fun. Try different ingredients and find what you love. Enjoy making this dish for yourself or to impress others. Your kitchen will soon be filled with great flavors and smiles.

Are you ready to elevate your pasta night? Chicken Marsala Pasta combines tender chicken, savory mushrooms, and a rich sauce, making it a tasty and simple meal. With just a …

Read more

Categories Dinner

Mediterranean Tuna Salad Fresh and Flavorful Meal

May 21, 2025 by Chef Nate
To make a fresh and flavorful Mediterranean tuna salad, gather these ingredients: - 2 cans (6 oz each) tuna in olive oil, drained - 1 cup cherry tomatoes, halved - ½ cup cucumber, diced - ½ cup red onion, finely chopped - 1 cup Kalamata olives, pitted and halved - ½ cup feta cheese, crumbled - 1 tablespoon capers, rinsed and drained - 2 tablespoons fresh parsley, chopped - 3 tablespoons olive oil - 2 tablespoons lemon juice - Salt and pepper to taste You can swap some ingredients to fit your taste or pantry. For tuna, you can use canned salmon or chicken if you prefer. If you don’t have Kalamata olives, green olives work well, too. For a dairy-free option, skip the feta cheese or use a plant-based version. If fresh parsley isn’t available, try fresh basil or dill for a different twist. This salad packs many health benefits. Tuna is rich in protein and omega-3 fatty acids, which help your heart. Olive oil is a healthy fat that can lower bad cholesterol. Tomatoes are full of vitamins, like C and K, which boost your immune system. Cucumbers keep you hydrated and are low in calories. Feta cheese adds calcium for strong bones. These ingredients together create a balanced meal that tastes great and keeps you healthy. To make this Mediterranean Tuna Salad, you need to start with a large mixing bowl. In this bowl, combine the following ingredients: - 2 cans (6 oz each) tuna in olive oil, drained - 1 cup cherry tomatoes, halved - ½ cup cucumber, diced - ½ cup red onion, finely chopped - 1 cup Kalamata olives, pitted and halved - ½ cup feta cheese, crumbled - 1 tablespoon capers, rinsed and drained - 2 tablespoons fresh parsley, chopped Mix these ingredients gently to avoid breaking the tuna. In a separate small bowl, whisk together: - 3 tablespoons olive oil - 2 tablespoons lemon juice - Salt and pepper to taste Once your dressing is ready, pour it over the tuna mixture. Toss everything together carefully until the salad is well coated. Let it sit for about 10 minutes at room temperature. This time allows the flavors to blend beautifully. To save time, prepare all your ingredients before mixing. Chop the vegetables and cheese first. This way, you ensure everything is ready to go. Use a sharp knife for clean cuts, especially for the onion and cucumber. When mixing, use a spatula. It helps keep the tuna intact and prevents mushiness. For this salad, you only need a few basic tools: - A large mixing bowl for the salad - A small bowl for the dressing - A whisk to mix the dressing - A sharp knife for chopping - A cutting board for safe prep With these tools, you can make your Mediterranean Tuna Salad quickly and easily. For the full recipe, check the section above. To boost the flavor of your Mediterranean tuna salad, follow these tips: - Use good-quality tuna. Choose tuna packed in olive oil for richer taste. - Add fresh herbs. Fresh parsley and basil add great flavor. - Include citrus zest. Grate lemon zest for an extra burst of freshness. - Marinate before serving. Let the salad sit for about 10 minutes. This helps the flavors blend well. Personalize your Mediterranean tuna salad with these easy adjustments: - Change the veggies. Swap cherry tomatoes for bell peppers or artichokes. - Use different cheeses. Try goat cheese or parmesan for a new twist. - Adjust the dressing. Add more lemon juice for a tangy taste or balsamic vinegar for sweetness. - Add spices. Sprinkle in some oregano or dill for added aroma. Make your salad look as good as it tastes with these serving ideas: - Use a large bowl. Present the salad in a big, colorful bowl to catch the eye. - Garnish with herbs. Top with parsley or lemon slices for a fresh look. - Serve with crusty bread. Pair the salad with warm, crusty bread for a complete meal. - Create individual plates. Serve in smaller bowls for a nice touch at dinner parties. For the full recipe, check out the detailed instructions above. {{image_2}} If you want to switch up the protein in your Mediterranean tuna salad, there are great options. You can use canned salmon instead of tuna. It has a similar taste and texture. Another choice is chickpeas. They add protein and fiber, making the salad hearty and filling. Using seasonal ingredients keeps your salad fresh and tasty. In the summer, add sweet corn for a burst of flavor. In the fall, try roasted butternut squash for a warm touch. You can also mix in fresh herbs like basil or dill for extra zest. To make this salad vegan or vegetarian, leave out the tuna and feta. Use cooked quinoa for protein. It has a nice texture and absorbs flavors well. You can also add more veggies, like bell peppers or shredded carrots, for crunch and color. This way, you still enjoy a delicious and colorful meal. For the full recipe, check the detailed ingredients and instructions above. To keep your Mediterranean Tuna Salad fresh, store it in an airtight container. This helps to lock in the flavors and prevent odors from other foods in your fridge. If you have a large batch, divide it into smaller portions. This way, you only open what you need. Your tuna salad will stay fresh for up to three days in the fridge. After that, the ingredients may lose their taste and texture. Always check for any off-smell or changes in color before eating. If it looks or smells strange, it’s best to toss it out. You can freeze Mediterranean Tuna Salad, but it may change the texture. To freeze, put the salad in a freezer-safe container. Leave some space at the top, as it will expand. When you’re ready to eat, let it thaw in the fridge overnight. Use it within a month for the best taste. To make Mediterranean Tuna Salad from scratch, gather your ingredients first. You will need tuna, cherry tomatoes, cucumber, red onion, olives, feta cheese, capers, parsley, olive oil, lemon juice, salt, and pepper. 1. Start by draining the tuna and placing it in a large bowl. 2. Next, add halved cherry tomatoes, diced cucumber, finely chopped red onion, olives, crumbled feta cheese, rinsed capers, and chopped parsley to the bowl. 3. In a smaller bowl, mix olive oil, lemon juice, salt, and pepper. Stir well. 4. Pour this dressing over the tuna mix. Gently toss everything together. 5. Let the salad sit for about 10 minutes to let the flavors mix well. This simple process creates a tasty and colorful dish that is healthy and quick to prepare. Yes, you can use canned tuna in water if you prefer. The flavor will be slightly different since tuna in olive oil adds richness. If you use tuna in water, consider adding a bit more olive oil to your dressing. This can help enhance the taste and keep the salad moist. Serving Mediterranean Tuna Salad is easy and fun. Here are some ideas: - Serve it on a bed of greens for a light meal. - Use it as a filling in pita bread or wraps. - Pair it with whole-grain crackers for a crunchy snack. - Top it on toasted bread for a delicious bruschetta. - Serve it alongside grilled vegetables for a hearty dinner. These options make your meal exciting and cater to different preferences. Check out the Full Recipe for all the details to create your salad! Mediterranean Tuna Salad is a tasty and healthy dish. We covered its key ingredients and their health benefits. You learned easy steps for preparation and how to enhance flavor. I shared tips for customizations and serving suggestions. Variations let you adjust this dish for different diets. Lastly, good storage keeps leftovers fresh. Remember, this salad is not just a meal; it’s a way to enjoy fresh, wholesome food that fits your taste and lifestyle. Dive in and make this salad yours!

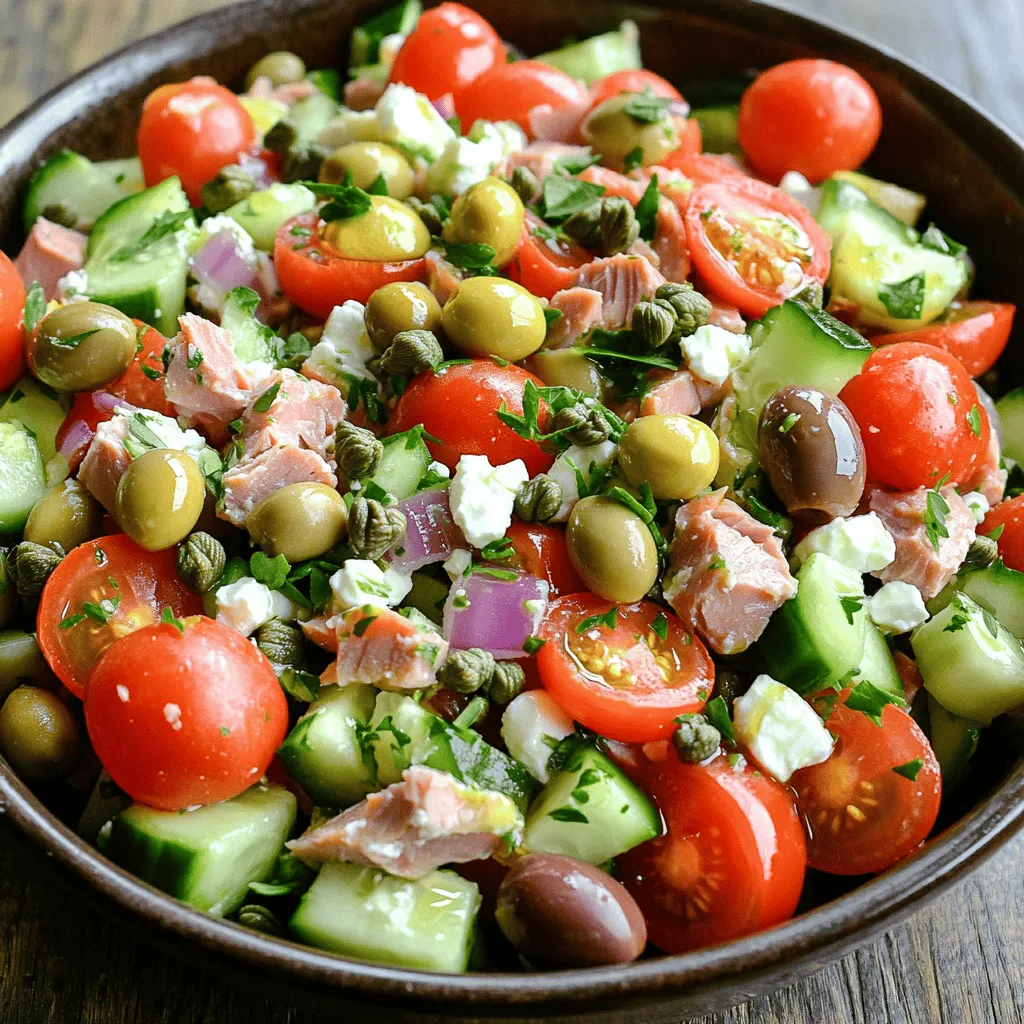
If you’re craving a meal that’s fresh, vibrant, and bursting with Mediterranean flavors, you’ve come to the right place! In this blog post, I’ll guide you through making a delightful …

Read more

Categories Salads

Blueberry Lemon Cookie Bars Delightful and Easy Recipe

May 21, 2025 by Chef Nate
To make the best Blueberry Lemon Cookie Bars, gather these fresh and tasty ingredients: - 1 cup unsalted butter, softened - 1 cup granulated sugar - 1 cup brown sugar, packed - 2 large eggs - 2 teaspoons vanilla extract - 3 cups all-purpose flour - 1 teaspoon baking powder - 1/2 teaspoon baking soda - 1/2 teaspoon salt - Zest of 1 lemon - 1/4 cup fresh lemon juice - 2 cups fresh blueberries - Powdered sugar for dusting (optional) These ingredients come together to create a delightful treat. The butter adds richness, while the sugars bring sweetness. Eggs help bind everything. The flour gives structure, and the baking powder and baking soda help the bars rise. Lemon zest and juice add bright, fresh flavor. Blueberries bring natural sweetness and juicy bursts. If you like, dust with powdered sugar for a pretty finish. For the complete recipe, check out the Full Recipe section. Enjoy the process, and let the flavors shine! Start by preheating your oven to 350°F (175°C). This step gets the oven ready for baking. Next, grease or line a 9x13-inch baking pan. Lining with parchment paper helps the bars come out easily. In a large bowl, cream 1 cup of softened unsalted butter with 1 cup of granulated sugar and 1 cup of brown sugar. Beat them together until the mix is light and fluffy. This usually takes about 3-4 minutes. Then, add in 2 large eggs one at a time, mixing well after each. Stir in 2 teaspoons of vanilla extract and the zest of 1 lemon to add that fresh flavor. In another bowl, whisk together 3 cups of all-purpose flour, 1 teaspoon of baking powder, 1/2 teaspoon of baking soda, and 1/2 teaspoon of salt. This helps to evenly distribute the leavening agents. Gradually mix this dry mixture into the wet ingredients. Mix until everything is just combined; we want to avoid over-mixing. Pour in 1/4 cup of fresh lemon juice, then gently fold in 2 cups of fresh blueberries. Be careful not to break the blueberries; they add a lovely burst of flavor. Once everything is mixed, pour the batter into your prepared baking pan. Use a spatula to smooth it out evenly. Now, it's time to bake! Place the pan in the oven and bake for 30-35 minutes. The edges should turn lightly golden, and the center should be set. To check for doneness, insert a toothpick into the center. If it comes out clean, your cookie bars are ready. For the full recipe, you can refer to the earlier sections. Enjoy your baking! Using room temperature ingredients is key. When your butter and eggs are warm, they mix better. This helps create a light and airy texture in your cookie bars. Cold butter can lead to dense bars, which we want to avoid. Mix the batter just until combined. Over-mixing can make the bars tough. Gently fold in the dry ingredients, then add the blueberries. This keeps them intact and ensures a soft bite. Dusting with powdered sugar gives a nice touch. It adds sweetness and looks pretty. I like to use a fine sieve to sprinkle it evenly on top. For gatherings, serve the bars on a colorful platter. You can add fresh blueberries and lemon slices as decoration. This makes the dessert more inviting and fun. One common mistake is overbaking the cookie bars. Keep an eye on them in the oven. They should be lightly golden and spring back when touched. A toothpick should come out clean but not dry. Another mistake is not using fresh ingredients. Fresh blueberries burst with flavor. If they are old, your bars will taste bland. Always choose the best produce for the best results. For the full recipe, check the complete guide. {{image_2}} You can easily change the taste of these cookie bars. Adding nuts like walnuts or pecans gives a nice crunch. You can also sprinkle in shredded coconut for a tropical twist. If you want to switch up the berries, try raspberries or strawberries. For a refreshing zing, use lime instead of lemon. Each change gives a new flavor to enjoy. If you need gluten-free options, swap out regular flour for almond or oat flour. Both work great and keep the bars soft. For a vegan twist, replace the eggs with flaxseed meal or applesauce. Use vegan butter to keep the texture rich and delicious. These adjustments make the cookie bars friendly for all diets. You can serve these cookie bars in fun ways. Layer them with yogurt and fruit for a tasty dessert parfait. This adds a delightful texture and flavor mix. You can also serve them warm with a scoop of ice cream or a dollop of whipped cream. This makes the bars even more indulgent. For the complete recipe, check the Full Recipe section. To keep your blueberry lemon cookie bars fresh, store them at room temperature. Place them in an airtight container. This helps keep them soft and tasty. If you need to store them longer, refrigerate them. Just remember to wrap them tightly in plastic wrap or foil. You can also freeze them for up to three months. Use a freezer-safe container or bag for best results. When stored properly, your cookie bars will last about a week at room temperature. In the fridge, they stay fresh for about two weeks. If you freeze them, they will maintain good quality for three months. Check for signs of spoilage. Look for any mold or an off smell. If they feel hard or dry, they might not taste good. Always trust your senses when enjoying these delicious treats! For the full recipe, check above. You can easily make these cookie bars gluten-free by using gluten-free flour. Look for a blend that works in baking. You may also add a bit of xanthan gum. This helps bind the ingredients together. Start with 1 teaspoon per cup of gluten-free flour. It will give your bars a great texture. Yes, you can use frozen blueberries! Just make sure to rinse them first. This helps remove extra ice. You may want to add them straight from the freezer to the batter. This prevents them from becoming mushy. They will bake well and taste delicious in your cookie bars. If you want to make these bars vegan, there are great substitutes for eggs. You can use flaxseed meal and water. Mix 1 tablespoon of flaxseed meal with 2.5 tablespoons of water. Let it sit for five minutes until it thickens. Another option is unsweetened applesauce. Use 1/4 cup of applesauce for each egg. You can tell the cookie bars are done when the edges turn golden brown. Use a toothpick to check the center. If it comes out clean, they are ready. The texture should be soft but set. Let them cool before cutting for the best results. In this post, we explored making delicious lemon blueberry cookie bars. You learned the key ingredients and followed step-by-step instructions for perfect results. I shared tips for texture, common mistakes, and fun variations to try. Remember, using fresh ingredients makes a big difference. Store your cookie bars properly for lasting freshness. Enjoy these tasty treats at home or share them with friends. Your baking skills will shine!

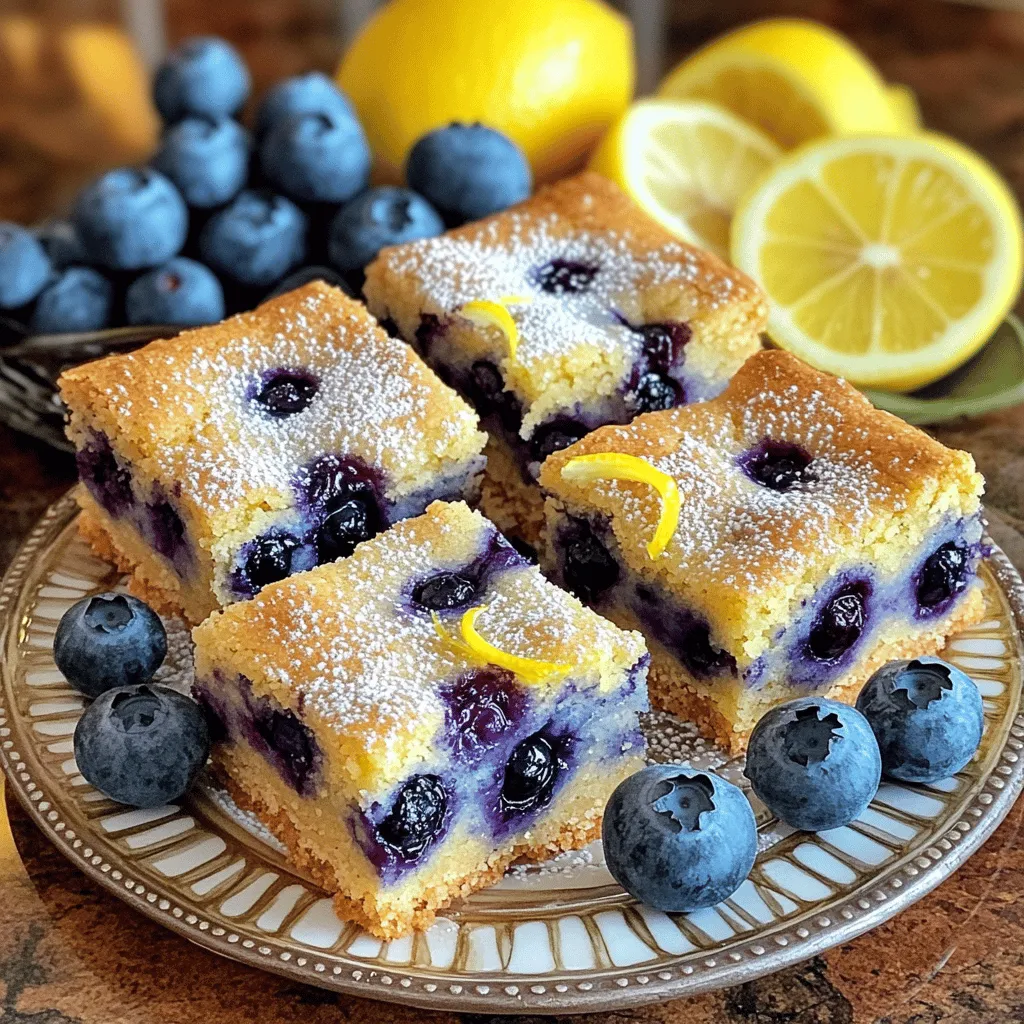
Welcome to a burst of flavor with my Blueberry Lemon Cookie Bars! This easy recipe combines the sweetness of blueberries with zesty lemon for a perfect treat. You’ll love how …

Read more

Categories Desserts

Blueberry Lemon Crème Cake Delightful Flavor Burst

May 21, 2025 by Chef Nate
To make the Blueberry Lemon Crème Cake, you need a mix of dry and wet ingredients. Here’s a detailed list: - Dry Ingredients - 1 ½ cups all-purpose flour - 1 teaspoon baking powder - ¼ teaspoon baking soda - ¼ teaspoon salt - Wet Ingredients - ½ cup unsalted butter, softened - 1 cup granulated sugar - 2 large eggs - 2 tablespoons lemon zest - ½ cup sour cream - 1 teaspoon vanilla extract - 1 cup fresh blueberries (plus extra for garnishing) - 1 tablespoon lemon juice - For the Crème Topping - 1 cup heavy whipping cream - 2 tablespoons powdered sugar - 1 teaspoon vanilla extract - 1 tablespoon lemon zest For the best results, I recommend using high-quality vanilla extract. It enhances the cake's flavor. Choose fresh blueberries for a burst of sweetness. They hold up better in baking. You can find sour cream at any grocery store. It adds moisture and richness to the cake. You can check the [Full Recipe] for more detailed guidance on making this delightful treat. First, preheat your oven to 350°F (175°C). This ensures even baking. Next, get a 9-inch round cake pan. Grease it with butter or line it with parchment paper. This helps the cake come out easily. Now it’s time to mix your dry ingredients. In a medium bowl, whisk together the flour, baking powder, baking soda, and salt. Set this aside for later. In a large bowl, cream the softened butter and granulated sugar. Use an electric mixer for about 3 to 4 minutes until it looks light and fluffy. Next, add each egg one at a time. Mix in the lemon zest, sour cream, and vanilla extract. Blend until fully combined. Now, slowly add the dry mixture to the wet mixture. Mix just until combined—this keeps your cake light. This is where the magic happens! Gently fold in the fresh blueberries and lemon juice. Be careful not to break the blueberries; you want them whole for bursts of flavor. Pour the batter into your prepared cake pan and spread it evenly. Bake in your preheated oven for 30 to 35 minutes. Check if the cake is done by inserting a toothpick into the center. If it comes out clean, it’s ready! Once baked, let the cake cool in the pan for about 10 minutes. This helps it set. Then, transfer it to a wire rack to cool completely. Cooling is key for the perfect texture. While the cake cools, let’s make the crème topping. Start with a chilled bowl to whip your heavy cream. Whip it until it starts to thicken. Gradually add the powdered sugar and vanilla extract. Keep whipping until you see stiff peaks. Finally, gently fold in the lemon zest. This adds a zesty kick. Be careful not to overmix; you want your cream light and airy. Now, once the cake is cool, spread the lemon crème over the top. This adds a smooth finish. Enjoy this delightful flavor burst! For the full recipe, check out the details above. To make your Blueberry Lemon Crème Cake perfect, avoid common mistakes. A frequent issue is overmixing the batter. This makes the cake tough. Mix just until you see no dry flour. Also, use fresh blueberries. Frozen ones may make the cake soggy. Use a light, non-stick cake pan. This helps the cake rise evenly. A good electric mixer is key for creaming butter and sugar well. For a lovely presentation, garnish your cake with whole blueberries. A sprinkle of lemon zest adds brightness. You can serve slices on white plates to make the colors pop. Pair the cake with a nice cup of tea or lemonade. These drinks enhance the cake’s fresh flavors. You can also add a scoop of vanilla ice cream for a fun twist. For the full recipe, check the earlier section. {{image_2}} You can easily change the taste of your Blueberry Lemon Crème Cake. Here are some fun ideas: - Substituting Fruits: Try raspberries or strawberries. They add a nice twist. You can also use peaches for a summer vibe. - Add-ins: Consider mixing in some chopped nuts. Walnuts or almonds add crunch and flavor. - Dietary Preferences: To make it gluten-free, swap regular flour for almond or coconut flour. For dairy-free, use coconut cream instead of heavy cream. Looking to make your cake stand out? Here are some simple tips: - Decorating the Cake: Dust the top with powdered sugar. You can also add lemon slices for a fresh look. Fresh mint leaves can add a nice touch, too. - Themed Variations: For holidays, use colored sprinkles that match the occasion. For weddings, use elegant flowers to decorate. A simple white cake can look stunning with a few fresh blooms. These variations let you create a cake that fits any occasion or taste! For the full recipe, check out the Blueberry Lemon Crème Cake 🫐. To keep your Blueberry Lemon Crème Cake fresh, store it in the fridge. Use an airtight container to prevent drying. You can keep it this way for up to five days. If you want to save it longer, wrap it tightly in plastic wrap and place it in the freezer. This cake can last up to three months in the freezer. To reheat your cake, slice it and place it in the microwave. Heat it in short bursts of about 10 seconds. This keeps the cake soft and moist. If your cake is stale, you can refresh it by adding a little milk or cream on top before reheating. This simple trick can bring back some of its original texture. Enjoy your cake even after a few days! For the full recipe, check out the detailed instructions above. What are the best blueberries to use? Use fresh blueberries for the best taste. Look for firm berries that are dark blue. They should be plump and free from wrinkles. Frozen blueberries can work too, but they may make the cake a bit soggy. Can I make this cake ahead of time? Yes, you can make the cake a day before. Wrap it in plastic wrap to keep it fresh. Just add the crème topping before serving. This helps keep the cake light and fluffy. How do I know when the cake is done baking? Check the cake at 30 minutes. Insert a toothpick in the center. If it comes out clean, the cake is ready. If it’s wet, bake for another 5 minutes and check again. What to do if the cake is too dry or too dense? If the cake turns out dry, it may have baked too long. Try reducing the baking time next time. You can also add a simple syrup to moisten each slice. To fix a dense cake, make sure to mix the batter gently. Overmixing can lead to density. How can I fix a buttercream that won’t whip? If your buttercream does not whip, check if your mixing bowl is cold. Make sure your cream is very cold too. If it still won’t whip, add a bit more cold cream and mix again until it thickens. To sum up, making a Blueberry Lemon Crème Cake is simple and fun. You learned about key ingredients, preparation steps, and baking tips to avoid common mistakes. The right tools help you get the best results. Personalizing your cake with different flavors or themes adds a special touch. Remember to store leftovers properly for freshness. Now, you’re ready to impress your friends and family with this delightful dessert. Enjoy your baking journey!

Are you ready to indulge in a sweet treat that perfectly balances tart and sweet? My Blueberry Lemon Crème Cake is a delightful flavor burst that will impress your taste …

Read more

Categories Desserts
Older posts
Newer posts
← Previous Page1 … Page82 Page83 Page84 … Page108 Next →

GRILLED FLAVORS

where delicious ideas come to life, from stovetop to backyard. Warm, simple, and always satisfying. 🍽️✨

PAGES

Home About Contact Privacy Policy Terms & Conditions Cookie Policy GDPR Policy Copyright Policy Disclaimer

CATEGORIES

Appetizers Desserts Salads Breakfast Dinner

Contact

  • Pinterest
  • Mail
Copyright © 2026 Grilled Flavors. All rights reserved.