Chocolate Chip Cookie Cake Irresistible Dessert Treat
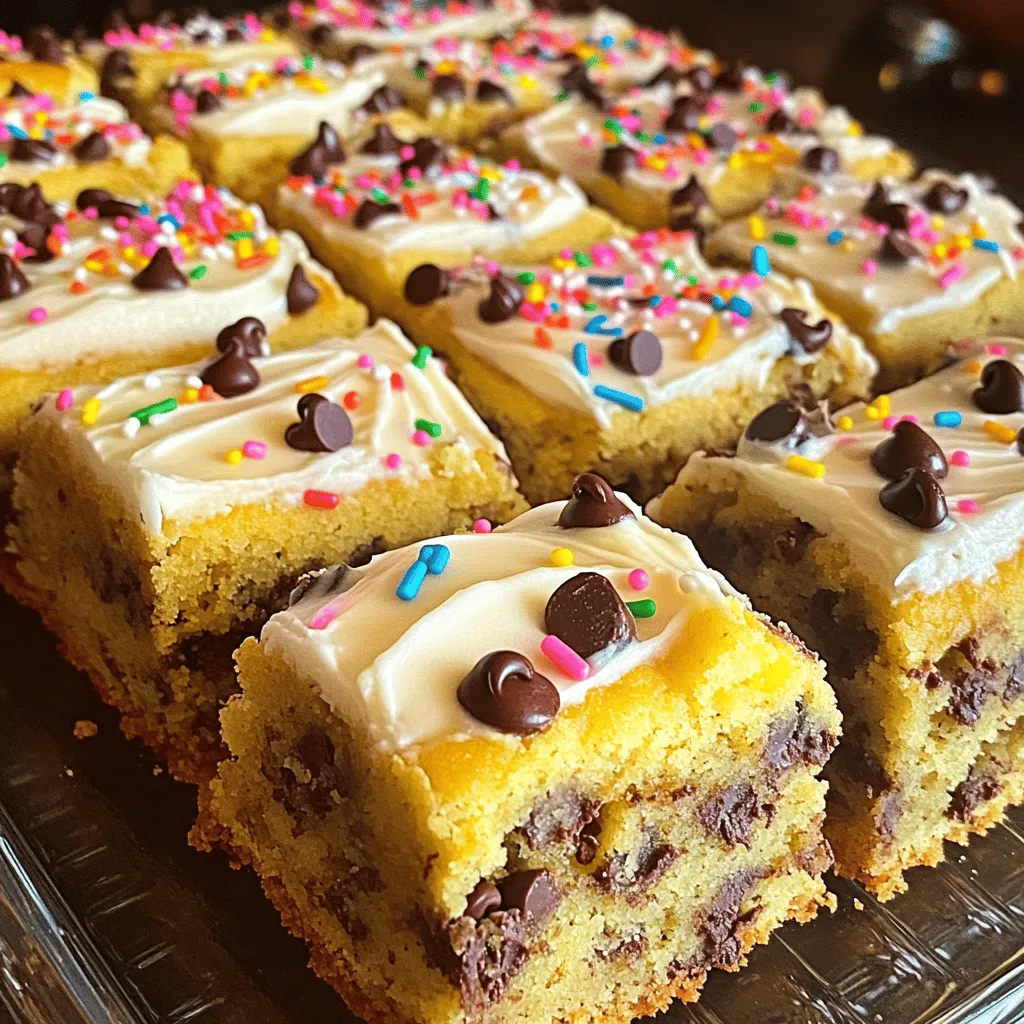
Are you ready for a dessert that will blow your mind? My Chocolate Chip Cookie Cake is the perfect blend of gooey goodness and classic flavors. With each bite, you’ll …
Are you ready for a dessert that will blow your mind? My Chocolate Chip Cookie Cake is the perfect blend of gooey goodness and classic flavors. With each bite, you’ll …
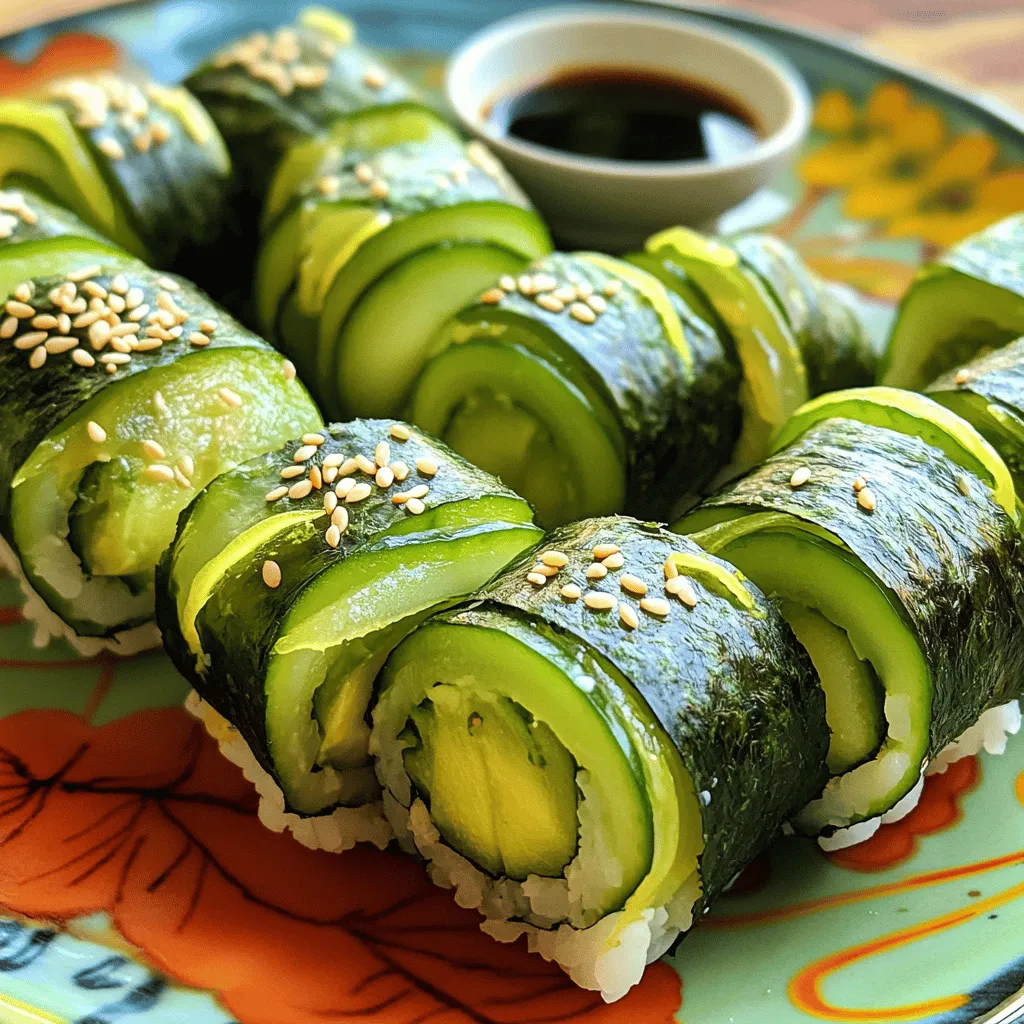
If you’re craving a fresh and tasty meal, Cucumber Avocado Sushi Rolls are a perfect choice! These rolls are not only easy to make, but they also burst with flavor …
![To make Garlic Parmesan Roasted Potatoes, you need a few simple ingredients. Each one adds flavor and texture. Here’s what you will need: - 1.5 pounds baby potatoes, halved - 4 tablespoons olive oil - 4 cloves garlic, minced - 1 cup grated Parmesan cheese - 1 teaspoon dried oregano - 1 teaspoon dried thyme - Salt and pepper to taste - Fresh parsley, chopped for garnish These ingredients come together to create a delicious side dish. The baby potatoes offer a tender bite. Olive oil helps them roast to a golden brown. Garlic brings a warm, savory taste. Parmesan cheese adds richness and depth. Dried herbs like oregano and thyme enhance the flavors. Don't forget salt and pepper for seasoning. The fresh parsley on top adds a nice color and freshness. If you want to make this dish, check out the Full Recipe for all the details. Each ingredient plays a role in making this dish special. Enjoy the process of cooking and the delightful smell that fills your kitchen! - Preheat the oven to 425°F (220°C). - In a large mixing bowl, combine the halved baby potatoes, olive oil, minced garlic, dried oregano, and dried thyme. Toss until the potatoes are well-coated. Getting the oven hot is key for crispiness. The hot air will help brown the potatoes nicely. Mixing the olive oil and garlic with the potatoes adds great flavor. Tossing ensures every piece gets coated. This simple step makes a big difference. - Roast potatoes and add Parmesan. - Bake until golden brown and bubbly. Spread the potatoes on a baking sheet in a single layer. This helps them cook evenly. Roast them for about 25 minutes. Halfway through, turn the potatoes so they brown on all sides. After they are golden and tender, take them out. Sprinkle the grated Parmesan cheese on top. Return the baking sheet to the oven for another 5-7 minutes. This melts the cheese and creates a delicious crust. Once you see it bubbling, take them out. Garnish with fresh parsley to add color and flavor. You can find the full recipe [Full Recipe]. To make Garlic Parmesan Roasted Potatoes stand out, choose fresh herbs if you can. Fresh oregano and thyme add a bright taste that dried herbs cannot match. However, dried herbs work well if fresh isn't available. Dried herbs are easy to store and last longer. For the potatoes, baby potatoes are perfect for this recipe. They are small, tender, and cook evenly. If you use larger potatoes, cut them into smaller pieces. This helps them cook at the same rate as the smaller ones. Red or yellow potatoes also add a nice flavor and texture. Spacing the potatoes on the baking sheet is key. If they are too close together, they will steam instead of roast. This makes them soggy instead of crispy. Spread them out in a single layer for best results. The cooking time for these potatoes is about 25 minutes at 425°F (220°C). Halfway through, turn them so they brown evenly. If your oven runs hot, check them a bit earlier. Once they are golden brown and tender, they are ready for that delicious sprinkle of Parmesan. {{image_2}} You can switch up the cheese. Try using Asiago or Cheddar for a new taste. Each cheese brings its own flavor to the dish. You can also add vegetables. Carrots and bell peppers work well. They add color and nutrition to your meal. Just chop them up and toss them in with the potatoes. To make the dish even better, add spices. Paprika gives a nice smoky flavor. Red pepper flakes add a bit of heat. You can also marinate the potatoes. Let them sit in olive oil and spices for an hour before cooking. This step enhances the flavor deeply. For the full recipe, check the details above. Store any leftover Garlic Parmesan Roasted Potatoes in an airtight container. They last for up to three days in the fridge. Make sure the potatoes cool down before sealing them. This step helps keep them fresh. To reheat, use an oven or an air fryer. Preheat your oven to 350°F (175°C). Spread the potatoes out on a baking sheet. Heat for about 10-15 minutes until they are warm and crispy again. Avoid using the microwave, as it can make them soggy. To freeze Garlic Parmesan Roasted Potatoes, let them cool completely first. Place them in a single layer on a baking sheet. Freeze them for about an hour. This step stops them from sticking together. After freezing, transfer the potatoes to a freezer-safe bag or container. They can last for up to three months in the freezer. When you want to enjoy them, take them out and thaw overnight in the fridge. Reheat them in the oven or air fryer at 350°F (175°C) until hot. Enjoy the same tasty flavors as before! For the full recipe, check the section above. Can I use regular potatoes instead of baby potatoes? Yes, you can use regular potatoes. Just cut them into smaller pieces. Baby potatoes cook faster and stay tender. Regular potatoes may need extra time in the oven. How do I prevent the potatoes from getting soggy? To keep the potatoes crisp, avoid overcrowding the baking sheet. Spread them out in one layer. This helps hot air circulate. Additionally, make sure to roast them at a high temperature. Can I make Garlic Parmesan Roasted Potatoes ahead of time? Yes, you can prepare these potatoes ahead. Cook them fully, then cool and store them in the fridge. Reheat them in the oven for a quick meal. This keeps them crunchy and tasty. Approximate calories and macros per serving Each serving has about 250 calories. You get 12 grams of fat and 30 grams of carbs. Protein comes in at 8 grams. Dietary considerations (gluten-free, vegetarian) These potatoes are gluten-free and vegetarian-friendly. They make a great side for many meals. Enjoy them with your favorite protein or as a snack. Check the [Full Recipe] for more details. This post covered how to make delicious garlic Parmesan roasted potatoes. We discussed key ingredients, preparation steps, and cooking methods. I shared tips for perfect flavors and variations to try. Don't forget to store your leftovers properly and consider our FAQs for common concerns. Cooking can be fun and tasty. With these steps, you can impress everyone at the table. Enjoy your flavorful creation!](https://grilledflavors.com/wp-content/uploads/2025/05/2bcc2411-9013-4f82-ad5a-6d7a19d0e525.webp)
Looking for a side dish that steals the show? Meet Garlic Parmesan Roasted Potatoes! These small bites pack a massive flavor punch. Crispy on the outside and creamy inside, they …
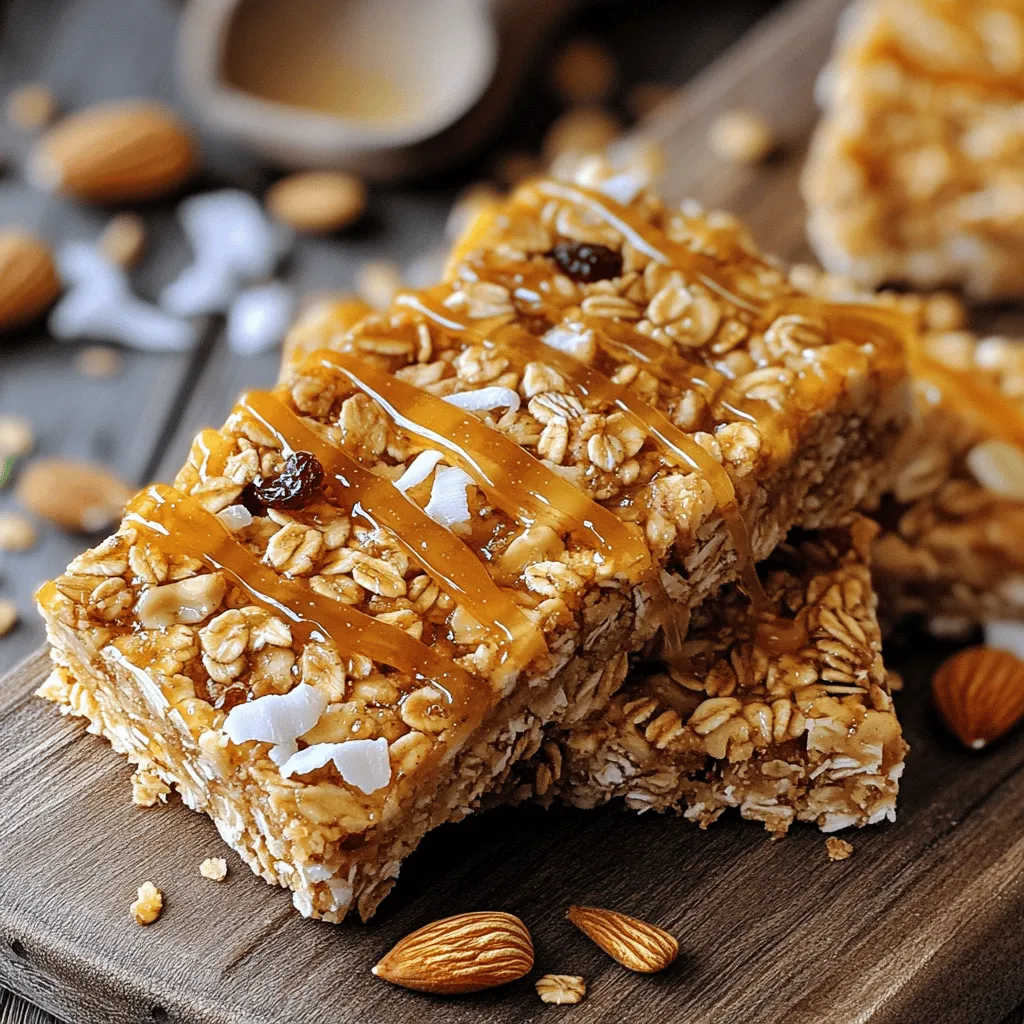
Are you tired of store-bought snacks loaded with sugar? You can make easy homemade granola bars that are not only tasty but also healthy. With simple ingredients like oats, nuts, …

Get ready for a warm, cozy treat that blends the best of fall flavors! These Pumpkin Chocolate Chip Muffins are not just easy to make; they are downright delicious. You’ll …
![- 4 medium-sized bell peppers (any color) - 1 cup fresh spinach, chopped - 1 cup canned artichoke hearts, drained and chopped - 1 cup cream cheese, softened - ½ cup sour cream - 1 cup shredded mozzarella cheese - ½ cup grated Parmesan cheese - 2 cloves garlic, minced - 1 teaspoon onion powder - 1 teaspoon crushed red pepper flakes (optional) - Salt and pepper to taste - Olive oil for drizzling To make Spinach Artichoke Dip Stuffed Peppers, you will need a few simple ingredients. First, choose 4 colorful bell peppers. They add beauty and taste. Fresh spinach gives a nice pop of green. For that creamy dip flavor, grab canned artichoke hearts and cream cheese. Sour cream adds tanginess. Cheese lovers will enjoy the mozzarella and Parmesan. Garlic gives depth, while onion powder enhances flavor. If you like a little heat, add crushed red pepper flakes. Don't forget salt and pepper to taste. Lastly, olive oil will help the peppers roast nicely. - Baking dish - Mixing bowl - Measuring cups and spoons - Oven You will also need basic kitchen tools. A baking dish holds the stuffed peppers. A mixing bowl helps combine all your ingredients. Measuring cups and spoons ensure you use the right amounts. Finally, your oven will bake these delicious stuffed peppers to perfection. Now you are ready to gather your ingredients and equipment. Let’s get cooking! For the full recipe, check [Full Recipe]. - Preheat oven to 375°F (190°C). - Prepare the bell peppers by cutting tops off and removing seeds. Start by preheating your oven. This ensures your peppers cook evenly. Next, take your bell peppers and cut the tops off. Remove the seeds and membranes carefully. This step is key for a good stuffing. - Combine chopped spinach, artichoke hearts, cream cheese, sour cream, half of the mozzarella, Parmesan, garlic, onion powder, and seasonings. In a medium bowl, mix your chopped spinach and artichoke hearts. Add the cream cheese for a rich base. Then, include sour cream to add creaminess. Next, stir in half of the mozzarella and the Parmesan cheese. Don’t forget the minced garlic and onion powder for flavor. Season with salt and pepper to taste. Mix until combined. The filling should be creamy and smooth. - Stuff each pepper with the filling, sprinkle remaining mozzarella, cover with foil, and bake. - Finish baking uncovered for a golden cheese topping. Now it's time to stuff your peppers! Spoon the filling into each pepper, packing it in gently. Make sure they are filled to the top. Next, sprinkle the remaining mozzarella cheese on top. This will give a nice golden finish. Cover your baking dish with foil. Bake for 25 minutes. After that, remove the foil and let them bake for another 10-15 minutes. This will create a bubbly, golden cheese topping that looks amazing. For more details on this delightful recipe, check out the Full Recipe. To create the best stuffed peppers, start with the flavor. Make sure you spread the seasoning evenly. This step helps achieve a balanced taste in each bite. When you pack the filling, do it lightly. This allows the cheese to melt perfectly, creating that delicious creamy texture. For a lovely finish, garnish your peppers with fresh herbs. Basil or parsley adds a pop of color and freshness. You can also drizzle a balsamic reduction for an elegant touch. Serving these peppers warm ensures you get the best flavor and texture. Get creative with your filling by trying different cheese types. Cheddar or pepper jack can add a fun twist. You can also spice things up with your favorite seasonings. If you want more variety, add extra veggies like diced tomatoes or cooked proteins like chicken. The options are endless! For the complete recipe, check out the [Full Recipe]. {{image_2}} Spinach artichoke dip stuffed peppers offer a great base for creativity. You can easily adapt the recipe to fit your taste or dietary needs. You can make these stuffed peppers vegetarian by swapping out the meat. Try using mushrooms, zucchini, or even quinoa as a filling. These vegetables will still keep the dish tasty and satisfying. You can also add more cheese for a richer flavor. Using a mix of veggies adds color and nutrients to your meal. If you want more protein, add cooked chicken or sausage to the filling. Diced rotisserie chicken works great for a quick option. You can also use ground turkey or Italian sausage for bold flavors. This change makes the dish heartier and perfect for a filling dinner or lunch. For a low-carb version, consider using zucchini boats or cauliflower instead of bell peppers. Cut zucchini in half and scoop out the seeds. This creates a perfect vessel for your filling. Cauliflower can be riced and mixed with the spinach and artichoke for a unique twist. Both options keep the flavors vibrant while reducing carbs. For the full recipe, check out the complete guide on Spinach Artichoke Dip Stuffed Peppers. To keep your stuffed peppers fresh, cover them tightly with plastic wrap or foil. Store them in the fridge. This method will help retain their taste and texture. It’s best to consume them within three days for optimal flavor. When you're ready to enjoy your leftovers, reheating them is simple. For the best texture, reheat in the oven at 350°F (175°C) for about 15 minutes. If you're short on time, use a microwave for quick warm-ups. Just be careful not to overheat them, as they can become soggy. If you want to save some for later, freezing is a great option. Place your stuffed peppers in an airtight container. They can last up to three months in the freezer. When you're ready to eat them, thaw them in the fridge overnight before reheating. This helps maintain their delicious taste and texture. Total cooking time is approximately 50 minutes. This includes prep time and baking time. Yes, prepare and stuff peppers, then refrigerate until ready to bake. This makes it easy for meal prep! Greek yogurt, ricotta, or other cream cheeses can be good alternatives. Each gives a unique taste and texture. Yes, this recipe is naturally gluten-free. You can enjoy these without worry. Absolutely! Adding ingredients like nuts or different vegetables can enhance flavor. It’s fun to get creative with your stuffing! Stuffed peppers are a tasty blend of flavors and textures. You learned how to prepare, stuff, and bake them using simple ingredients. The tips and variations provided offer endless options for your meals. Feel free to get creative with fillings. Whether you go for a vegetarian version or add protein, these peppers are sure to please. Remember, leftovers can be stored and reheated with ease, making them a great choice for meal prep. Enjoy your cooking adventure!](https://grilledflavors.com/wp-content/uploads/2025/05/cf417408-6d47-446d-8961-a905c25ef07b.webp)
Are you ready to elevate your appetizer game? These Spinach Artichoke Dip Stuffed Peppers are a fun twist on a classic favorite. Imagine vibrant bell peppers filled with creamy spinach …

Are you looking for a fun way to sneak veggies into your snack time? I’ve got just the thing! Baked Broccoli Cheese Balls are crispy, cheesy, and irresistible. They make …
![To make fudgy chewy brookies, you need simple ingredients. Here’s the list: - 1 cup all-purpose flour - 1/2 teaspoon baking powder - 1/4 teaspoon salt - 1/2 cup unsweetened cocoa powder - 1/2 cup granulated sugar - 1/2 cup brown sugar, packed - 1/2 cup unsalted butter, melted - 1 large egg - 1 teaspoon vanilla extract - 1 cup semi-sweet chocolate chips - 1 cup chocolate chip cookie dough (store-bought or homemade) These items create a rich brownie base and a chewy cookie topping. Quality matters in baking. Using fresh, high-quality ingredients makes a big difference. For example, fresh butter enhances flavor and texture. Good chocolate chips melt beautifully and add richness. When you use the best ingredients, your brookies will taste amazing. You can swap some ingredients if needed. Here are a few options: - For all-purpose flour, try oat flour or almond flour for a gluten-free option. - Instead of unsweetened cocoa powder, you can use Dutch-processed cocoa for a deeper flavor. - Use coconut oil or margarine instead of unsalted butter if you're dairy-free. - For a vegan option, replace the egg with a flax egg (1 tablespoon ground flaxseed + 2.5 tablespoons water). These substitutions allow you to enjoy brookies no matter your dietary needs. Start by preheating your oven to 350°F (175°C). This heat makes the brownies rise and bake well. Next, grab an 8x8 inch baking pan. Line it with parchment paper. Leave some paper hanging over the edges. This makes it easy to lift the brookies out later. In a bowl, mix together the dry ingredients first. Combine 1 cup of flour, 1/2 teaspoon of baking powder, 1/4 teaspoon of salt, and 1/2 cup of cocoa powder. Whisk them well until they blend nicely. In another bowl, mix the wet ingredients. Combine 1/2 cup of granulated sugar, 1/2 cup of brown sugar, and 1/2 cup of melted butter. Stir until the mix is smooth. Then, add 1 large egg and 1 teaspoon of vanilla extract. Beat this mixture well. Gradually stir the dry mix into the wet mix. Keep mixing until just combined. Finally, fold in 1 cup of semi-sweet chocolate chips. Pour the brownie batter into the lined pan. Spread it evenly across the bottom. Now, take 1 cup of cookie dough. Flatten it into small discs. Place these discs on top of the brownie layer. Cover as much of the surface as you can. Use a spatula to swirl the cookie dough gently into the brownie batter. This creates a beautiful marbled look. Now, place the pan in the oven and bake for 25-30 minutes. To check if they are done, stick a toothpick in the center. It should come out with moist crumbs, not wet batter. After baking, let the brookies cool in the pan for 10 minutes. Lift them out using the parchment paper and transfer them to a wire rack. Let them cool completely before cutting into squares. Enjoy your delicious fudgy chewy brookies! For the complete recipe, check out the Full Recipe. To get that fudgy texture, use less flour. Stick to the recipe's exact amounts. Make sure to mix the batter just until combined. Over-mixing can lead to a cake-like texture, which we don’t want. Also, avoid baking too long. Check the brookies around 25 minutes. The toothpick should come out with moist crumbs. This means they are perfectly fudgy! If your brookies turn out dry, it’s likely from overbaking. Always set a timer and check them early. If too crumbly, you might have added too much flour. Use a kitchen scale for accurate measurements. If they stick to the pan, ensure the parchment paper hangs over the edges. This makes it easy to lift them out after baking. For a lovely presentation, cut the brookies into neat squares. Serve them on a rustic wooden board for charm. A scoop of vanilla ice cream on the side elevates the dish. Dust with powdered sugar right before serving for a pretty finish. You can also drizzle some chocolate sauce over the top for extra indulgence. Follow the [Full Recipe] for all the details! {{image_2}} You can add nuts to your brookies for extra crunch. I love using walnuts or pecans. Just chop them into small pieces. Mix about 1/2 cup of nuts into the brownie batter. This gives your brookies a great texture. The nuts add a nice contrast to the soft brownie and cookie layers. Experimenting with extracts can create fun flavors. You can swap vanilla extract for almond or peppermint. A few drops of these extracts will change the taste. Try adding a dash of espresso powder for a coffee kick. This will deepen the chocolate flavor. Be careful not to add too much, as it can be strong. You can easily make brookies gluten-free or vegan. For gluten-free, replace all-purpose flour with a gluten-free blend. Make sure the blend has xanthan gum for best results. For a vegan option, substitute the egg with a flax egg. To make a flax egg, mix one tablespoon of ground flaxseed with three tablespoons of water. Let it sit for five minutes to thicken. You can also use vegan butter instead of regular butter. These swaps let everyone enjoy these tasty treats. For the full recipe, check the [Full Recipe] section. Store your leftover brookies in an airtight container. Keep them at room temperature for up to three days. If you want to keep them fresh longer, refrigerate them. Wrap each brookie in plastic wrap to keep them moist and tasty. Freezing brookies is a great way to save them for later. First, let the brookies cool completely. Then, wrap each one in plastic wrap. Place them in a freezer-safe bag or container. They can last up to three months in the freezer. When you want one, just thaw it at room temperature. To reheat your brookies, use the oven for best results. Preheat your oven to 350°F (175°C). Place the brookies on a baking sheet. Heat them for about 5-10 minutes. This will make them warm and gooey again. You can also use the microwave. Heat one brookie for about 10-15 seconds. This will make it soft but be careful not to overheat! Enjoy your brookies warm! Brookies are a blend of brownies and cookies. They have a rich brownie base topped with cookie dough. This dessert brings together two of the best treats into one. The result is fudgy, chewy, and incredibly delicious. You get the best of both worlds in every bite. Yes, you can use box brownie mix if you like. Just follow the instructions on the box for mixing. Then, add the cookie layer on top as directed in the Full Recipe. This shortcut saves time while still giving you tasty brookies. To check if your brookies are done, insert a toothpick in the center. If it comes out with moist crumbs, they are ready. If it comes out wet, give them a few more minutes. Keep an eye on them to avoid overbaking; you want them fudgy, not dry. You can skip the chocolate chips if you prefer. Use your favorite mix-ins instead, like nuts or dried fruit. You might also add white chocolate chips for a different flavor. Feel free to get creative and make a version you love. For best results, let the brookies cool completely before cutting. Use a sharp knife to cut them into squares. A gentle sawing motion works well to avoid squishing them. You can serve them warm or at room temperature with ice cream if you like! Fudgy chewy brookies mix two favorite treats perfectly. We discussed quality ingredients and substitutions that elevate flavor. I shared clear steps to ensure success, along with tips to avoid mistakes. You can also explore fun variations like nutty or gluten-free options. Storing and reheating brookies keeps them fresh. Enjoy experimenting and sharing these tasty treats. Making brookies is easy, fun, and rewarding! Keep baking and enjoy every bite.](https://grilledflavors.com/wp-content/uploads/2025/05/dc82c059-1856-4ef8-9089-b94fea50beae.webp)
If you love rich desserts, you need to try my Fudgy Chewy Brookies! This cookie-brownie combo gives you the best of both worlds. Imagine biting into warm, gooey brownies topped …
![To make Easy Boston Cream Pie Cookie Bites, gather these simple ingredients: - 1 cup all-purpose flour - 1/2 teaspoon baking powder - 1/4 teaspoon salt - 1/2 cup unsalted butter, softened - 1/2 cup granulated sugar - 1 large egg - 1 teaspoon vanilla extract - 1/2 cup vanilla pudding mix (instant) - 1 cup milk - 1/2 cup semi-sweet chocolate chips - 1 tablespoon coconut oil - A pinch of powdered sugar for dusting These ingredients come together to create the perfect treat. The all-purpose flour gives the cookies a soft texture. Baking powder helps them rise, while salt enhances the flavor. The butter and sugar mix creates a creamy base. This helps the cookies stay moist and rich. The egg adds structure, and the vanilla extract gives a lovely aroma. For the creamy filling, we use instant vanilla pudding mix mixed with milk. The chocolate chips melt into a delicious glaze. Finally, a touch of coconut oil makes the chocolate shine. Once you have all your ingredients ready, you can follow the [Full Recipe] to create these delightful treats that everyone will love. 1. Preheat your oven to 350°F (175°C). Line a baking sheet with parchment paper. 2. In a medium bowl, whisk together the flour, baking powder, and salt. Set aside. 3. In a large mixing bowl, beat the softened butter and granulated sugar until creamy. 1. Add the egg and vanilla extract into the butter mix. Stir until well combined. 2. Gradually add the dry ingredients to the wet mix. Stir until just combined. 3. Scoop small balls of dough onto the prepared baking sheet. Press them down slightly to flatten. 4. Bake for 10-12 minutes or until the edges are lightly golden. Allow to cool on the baking sheet for a few minutes. Transfer to a wire rack to cool completely. 5. While the cookies cool, prepare the vanilla pudding. In a bowl, whisk together the instant pudding mix and milk until thickened. Refrigerate for 15 minutes. 1. Once the cookies cool, spread a dollop of vanilla pudding on half of the cookies. 2. Top with the remaining cookies to create cookie sandwiches. 3. For the chocolate glaze, melt the semi-sweet chocolate chips with coconut oil in a microwave-safe bowl. Heat in 30-second intervals until smooth. 4. Dip the tops of the cookie bites in the chocolate glaze. Allow excess to drip off and place them back on the parchment paper to set. 5. Once the glaze has hardened, dust the tops with a pinch of powdered sugar for a nice touch. For the full recipe, check the main article. Happy baking! To get the right cookie texture, start with softened butter. This step helps create a creamy mix. Cream the butter and sugar well, making it light and fluffy. Ensure your oven is fully preheated before baking. This helps the cookies rise evenly. To prevent cookies from spreading too much, chill your dough for 30 minutes. This keeps the cookies thicker. Also, keep the cookie balls about an inch apart on the baking sheet. This way, they won’t stick together while baking. To achieve perfect pudding thickness, use instant pudding mix. Mix it with cold milk and whisk for about two minutes. Let it sit for 15 minutes in the fridge. This waiting time helps it thicken up nicely. If it’s too thick, add a bit more milk. If it's too runny, just whisk for a little longer. For the best ways to dip and coat the cookie bites, melt the chocolate chips and coconut oil together. Use a microwave-safe bowl, heating in short bursts. Stir until smooth and shiny. Dip the tops of the cookie bites carefully. Let excess chocolate drip back into the bowl. Place them back on parchment paper to set without sticking. This creates a lovely, smooth glaze. {{image_2}} You can add fun flavors to your cookie bites. Try using different extracts like almond or coconut. Just a teaspoon can change the taste! You can also mix in different chocolates. Dark chocolate chips add a rich flavor. Or use white chocolate for a sweeter touch. Both options will make your treats unique. If you need gluten-free cookie bites, swap the flour for gluten-free flour. This keeps the taste and texture close to the original. For a dairy-free version, use coconut milk in the pudding. You can also replace butter with a dairy-free spread. These simple swaps make this recipe fit for everyone. Make your cookie bites festive for special occasions. For Halloween, add orange food coloring to the glaze. You can sprinkle candy corn on top for extra fun! During the holidays, mix in some crushed candy canes for a minty twist. Themed variations can make any celebration more special. To keep your Easy Boston Cream Pie Cookie Bites fresh, store them in an airtight container. This will help them stay soft and tasty. You can layer the cookie bites with parchment paper to avoid sticking. If you want to keep them for a longer time, you can freeze them. Just wrap each cookie bite in plastic wrap and place them in a freezer bag. At room temperature, these cookie bites last about 3 to 4 days. If you keep them in the fridge, they can last up to a week. The pudding filling may make them a bit softer over time, but they still taste great. Just make sure to check for any signs of spoilage before enjoying. If you want to enjoy your cookie bites warm, you can reheat them easily. Place them in the microwave for about 10 to 15 seconds. This will warm them up without melting the chocolate glaze. You can also pop them in a preheated oven at 300°F (150°C) for a few minutes. This method keeps the texture nice and fresh. How to make the cookies fluffier? To make cookies fluffier, use cold butter instead of softened. Cold butter helps create more air when mixed. You can also add an extra egg white for lift. Can I use homemade pudding instead of instant? Yes, you can use homemade pudding. Make sure it is thick before using. It will add a fresh taste and smooth texture to your bites. What’s the best way to freeze Boston Cream Pie Cookie Bites? To freeze the cookie bites, place them in a single layer on a baking sheet. Once frozen, transfer them to a freezer bag. They last well for up to three months. Why did my cookies spread too much? Cookies spread too much if the dough is too warm. Chill the dough for 30 minutes before baking. This helps keep their shape during baking. How do I avoid a runny pudding filling? To avoid runny pudding, let it set in the fridge for at least 15 minutes. You can also mix in a bit of cornstarch to help thicken it. Best coffee or beverages to pair with the cookie bites I recommend pairing these cookie bites with a rich coffee or a vanilla latte. The flavors enhance each other and create a balanced treat. Creative ways to serve at gatherings Serve them on a tiered stand for a festive look. You can also sprinkle extra powdered sugar on top for a touch of elegance. Add fresh berries around for color and flavor. For the full recipe, check out the details above. You’ve learned how to make delicious Boston Cream Pie Cookie Bites. We covered the ingredients, step-by-step instructions, and tips for success. Remember to experiment with different flavors and make it your own. Store them properly to keep them fresh. Don’t hesitate to try variations or address common questions. Enjoy making these sweet treats and share them with friends and family. Happy baking!](https://grilledflavors.com/wp-content/uploads/2025/05/181aa09d-75d2-463e-a268-e36879337ea6.webp)
Are you ready to enjoy a delightful treat that combines the classic flavors of Boston cream pie with the fun of cookies? These Easy Boston Cream Pie Cookie Bites are …

If you’re craving a sweet treat that’s both cute and tangy, look no further! Key lime pie mini desserts offer all the zesty goodness of the classic pie, but in …