Appetizers
![- 2 large onions, thinly sliced - 1 cup buttermilk (or dairy-free alternative) - 1 cup all-purpose flour - 1 teaspoon garlic powder - 1 teaspoon paprika - ½ teaspoon cayenne pepper (optional for heat) - Salt and pepper to taste - Cooking spray For a dairy-free option, you can use almond milk mixed with lemon juice. This gives a similar tang to buttermilk. If you need gluten-free flour, almond flour or rice flour works well. They give a nice crunch, too. Feel free to add more spices to your mix. Onion powder and black pepper add depth. For herbs, try thyme or parsley. These will brighten the flavor and make your crispy onions even tastier. For the full recipe, check out the recipe section. - Start by soaking the onions in buttermilk. Use a large bowl for this. Let them soak for at least 30 minutes. This step helps to soften the onions and adds flavor. - Next, mix the flour and seasonings in another bowl. Add garlic powder, paprika, cayenne pepper, salt, and pepper. Whisk them well to combine. This mixture will coat the onions. - Preheat the air fryer to 375°F (190°C). This step ensures your onions cook evenly. - Spread the soaked onions in the air fryer basket. Make sure they are in a single layer. This helps them crisp up nicely. - Monitor the cooking time closely. Cook them for 10-12 minutes. Check for a golden brown color. - Shake the basket halfway through cooking. This step helps the onions cook evenly and become extra crisp. For the complete recipe, check [Full Recipe]. To get the best crunch from your air fryer crispy onions, follow these pro tips: - Soak the onions: Soaking them in buttermilk for 30 minutes helps soften and flavor them. - Coat well: Make sure each slice is coated in the flour mixture. This step is key for crunch. - Use cooking spray: A light spray helps the onions crisp up nicely as they cook. When you spray the onions, don't drown them. A little goes a long way. Just a few quick sprays will do. Nobody wants soggy onions. Here’s how to avoid that mistake: - Slice evenly: Cut the onions into thin, even slices. Uneven pieces cook differently, leading to some being soft. - Don’t overcrowd: If you pile them in the air fryer, they won’t crisp. Spread them in a single layer. If you notice soggy spots, shake the basket halfway through cooking. This helps circulate heat. Once you have those crispy onions ready, think about how to serve them: - Add to dishes: They pair beautifully with salads, burgers, and soups. - Get creative: Use leftovers in tacos, or mix them into dips. You can also serve them as a snack with a tasty dip like ranch or spicy mayo. Enjoy the crunch! {{image_2}} You can mix up the flavor of your crispy onions easily. Try adding different spice blends to the flour mixture. For a savory kick, use cumin or chili powder. A sprinkle of Italian herbs can bring a new twist. You can even make cheesy crispy onions! Just mix in some grated cheese with the flour. This adds a rich flavor that pairs well with many dishes. If you want a vegan version of crispy onions, swap buttermilk for plant-based milk. Almond milk or oat milk works well. For a healthier option, use whole wheat flour instead of all-purpose. You can also cut back on the oil or use an air fryer that requires less cooking spray. These changes keep the taste while making the dish better for you. Crispy onions are not just for topping. You can add them to salads for extra crunch or mix them into casseroles for flavor and texture. They can even be part of a main dish! Toss them into stir-fries or grain bowls. Their unique crunch adds a fun twist to any meal. Get creative and enjoy the full flavor of your crispy onions! For the complete recipe, check out the Full Recipe. To keep your crispy onions fresh, store them in an airtight container. You can use a glass jar or a plastic container. Place a paper towel inside the container to absorb moisture. This helps maintain the crunch. Avoid stacking the onions too much to keep them from getting soggy. Freezing crispy onions is not ideal. They may lose their crunch and turn soft. If you want to reheat them, use your air fryer. Preheat it to 375°F (190°C). Spread the onions in a single layer and heat for about 5 minutes. This method helps restore their crispiness. Crispy onions usually last for about one week when stored properly. Check for signs of spoilage. If they smell off or feel soggy, discard them. Freshness is key for that delightful crunch. You can soak onions in almond milk or coconut milk. Both options work well. You can also use plain water with a splash of vinegar. This helps soften them and adds flavor. Just soak the onions for about 30 minutes. Yes, you can! Try adding onion powder, black pepper, or dried herbs. A pinch of cumin or curry powder gives a nice twist too. Feel free to mix and match spices based on your taste. Your onions may not be dry enough before cooking. Ensure you remove excess liquid after soaking. Also, if they overlap in the air fryer, they won't crisp well. Spread them out evenly and avoid overcrowding. Use leftover crispy onions as toppings for salads, soups, or burgers. You can also mix them into casseroles for added crunch. Another fun idea is to create a crispy onion dip by blending them with sour cream and other spices. Crispy onions are easy and fun to make in an air fryer. You start with simple ingredients and can adjust them to fit your needs. Pay attention to the tips for the best crunch and avoid common mistakes. Storage and usage ideas allow you to enjoy these tasty onions in many ways. The options are endless, so get creative! I hope you find joy in making crispy onions your new go-to snack or topping.](https://grilledflavors.com/wp-content/uploads/2025/05/70f19e66-5c18-4280-8f2e-94b06846fc79.webp)
Air Fryer Crispy Onions Perfectly Crunchy Delight
Craving a crunchy snack that elevates any dish? You’re in the right place! In this blog post, I’ll guide you to make air fryer crispy
How to Make Chicken Taco Dip Easy and Flavorful
Are you ready to take your snacking game to the next level? I’m excited to share my simple and tasty Chicken Taco Dip recipe. This

Easy Air Fryer Lasagna Fritta Crispy Delight Recipe
Craving a tasty twist on classic lasagna? You’re in for a treat with this Easy Air Fryer Lasagna Fritta Crispy Delight Recipe! I’ll show you
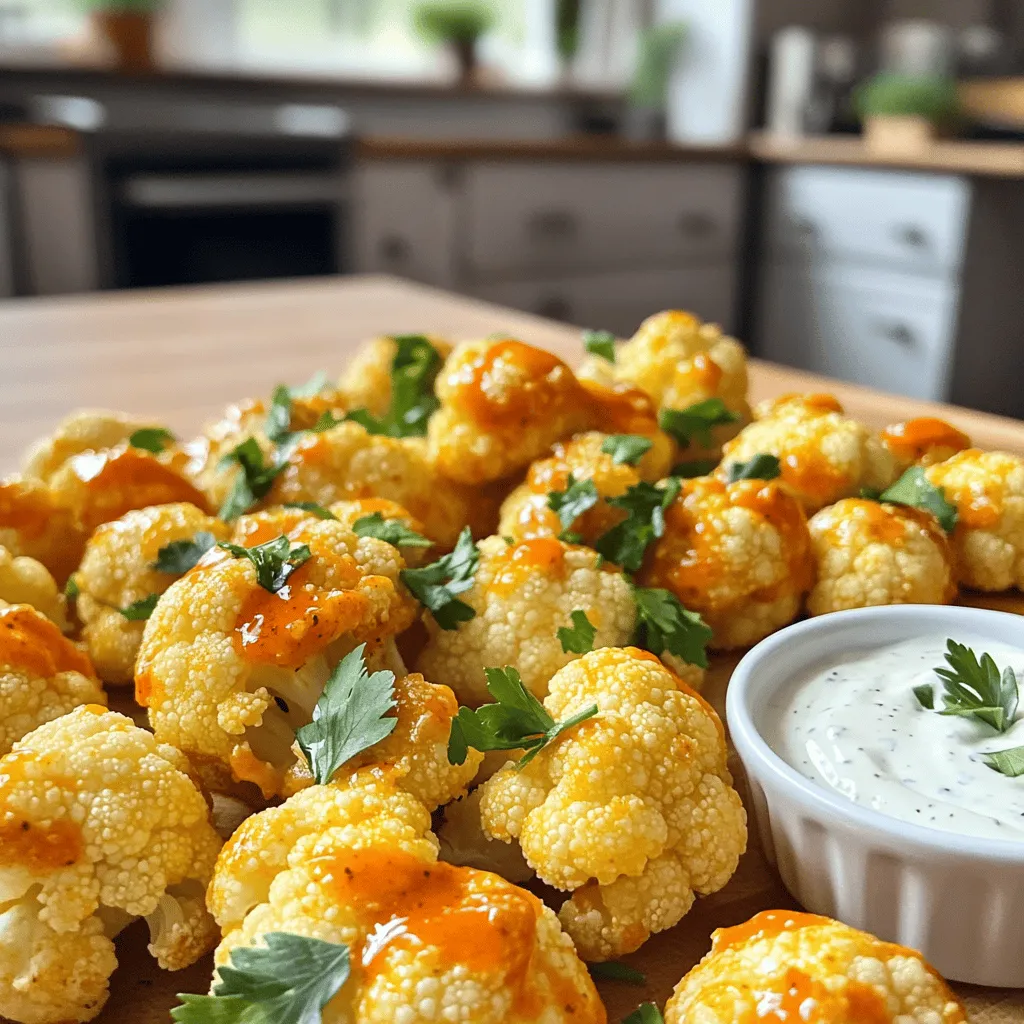
Air Fryer Buffalo Cauliflower Crispy and Flavorful Dish
If you want a dish that’s crispy, spicy, and packed with flavor, look no further! Air Fryer Buffalo Cauliflower is a perfect choice, whether you’re
![- Strawberries, diced - Fresh pineapple, diced - Medium kiwi, peeled and diced - Ripe mango, diced - Small red onion, finely chopped - Optional: Jalapeño, seeded and minced To make a great fruit salsa, start with fresh fruits. The sweet strawberries and juicy pineapple pair well. Peel and dice a kiwi for a green burst. Add ripe mango for a tropical touch. A small red onion gives a nice crunch and flavor. If you like heat, add a jalapeño, but this is optional. - Fresh lime juice - Honey or agave syrup - Fresh mint leaves, chopped Next, you need a dressing. Fresh lime juice adds tanginess. You can sweeten it with honey or agave syrup. Chop fresh mint leaves to add a fresh aroma. This dressing ties all the fruit flavors together. - Flour tortillas - Melted butter - Granulated sugar - Ground cinnamon Now, let’s talk about the chips. Use flour tortillas for a soft base. Brush them with melted butter for richness. Mix sugar and ground cinnamon together. This mix brings a sweet and spicy crunch. These chips complement the salsa perfectly. For the full recipe, check out the detailed instructions on how to put it all together! To make the fruit salsa, start by gathering all your fruits. In a large mixing bowl, combine: - 1 cup strawberries, hulled and diced - 1 cup fresh pineapple, diced - 1 medium kiwi, peeled and diced - 1 ripe mango, diced - 1 small red onion, finely chopped - 1 jalapeño, seeded and minced (optional for heat) Next, drizzle 2 tablespoons of fresh lime juice and 1 tablespoon of honey or agave syrup over the fruit. This adds zest and sweetness. Gently toss in 1/4 cup of chopped mint leaves. Mix everything well. Set the salsa aside to let the flavors blend while you prepare the chips. Now it’s time to make the cinnamon sugar chips. Preheat your oven to 350°F (175°C). Grab 4 flour tortillas and brush one side with 2 tablespoons of melted butter. This helps the sugar stick and adds flavor. In a small bowl, mix together 3 tablespoons of granulated sugar and 1 teaspoon of ground cinnamon. Sprinkle this mixture evenly over the buttered side of each tortilla. Next, cut each tortilla into triangles or strips. Place them in a single layer on a baking sheet lined with parchment paper. Bake the chips in the preheated oven for about 10-12 minutes. Keep an eye on them so they don’t burn. They should be crispy and lightly golden. Once the chips are done, take them out of the oven and let them cool slightly. Serve the fresh fruit salsa in a bowl alongside the cinnamon sugar chips for dipping. This dish is perfect for parties or a sweet snack. Enjoy your delightful treat! For the complete recipe, check out the [Full Recipe]. When making fruit salsa, freshness is key. Choose ripe fruits for the best flavor. Look for strawberries that are bright red and fragrant. Pick pineapples that feel heavy for their size. The skin should be golden and yield slightly when pressed. For kiwis, gently squeeze them; they should be slightly soft but not mushy. Mangoes should have a sweet smell and give a little when pressed. You can also swap fruits based on what's in season. Use peaches in summer or apples in fall. This keeps your salsa fresh and exciting. Don't be afraid to mix and match! For the cinnamon sugar chips, adjust the sugar and cinnamon to fit your taste. If you love cinnamon, add more! If you prefer a sweeter chip, up the sugar. You can bake the chips in an air fryer for a quick and crispy treat. Just set it to 350°F and check after 5 minutes. They should be golden and crisp. This method is faster and often healthier! To tweak the sweetness and acidity in your salsa, taste as you mix. If it's too sweet, add a splash of lime juice. If it's too tart, drizzle in more honey. For an extra kick, consider adding spices like cayenne or smoked paprika. These spices add depth and make the salsa pop with flavor. Don't be shy to experiment and find your perfect blend! For the full recipe, check out [Full Recipe]. {{image_2}} For a fun twist, try a tropical fruit salsa. You can use fruits like papaya, mango, or coconut. These fruits bring a sweet and juicy flavor. Pair them with lime juice for a zesty kick. You can also add a splash of orange juice for extra brightness. This salsa makes a great dip for parties or family gatherings. Want to spice things up? Add diced jalapeño or another hot pepper to your salsa. This heat contrasts well with the sweet fruits. You can also mix in fresh herbs like cilantro for a fresh taste. The herb adds a unique flavor that pairs perfectly with the sweet fruits. Don't be afraid to experiment with different heat levels based on your taste. You can switch up your chips for a new take. Corn tortillas make a great base. They add a nice crunch and flavor. You can bake or fry them depending on your preference. Baking is easier and gives a lighter chip. Frying offers a richer, more indulgent option. Both choices work well with the salsa. To keep your fruit salsa fresh, store it in an airtight container. This helps maintain the vibrant colors and flavors. You can keep it in the fridge for up to three days. However, the fruit may start to get mushy after a day or two. If you want to keep it longer, consider freezing it. Just remember that freezing can change the texture. To keep your cinnamon sugar chips nice and crispy, store them in a sealed bag or container. This prevents moisture from making them soft. If you have leftovers, they can last up to a week. You can also make the chips ahead of time. Just store them in a cool, dry place until you're ready to serve. If your chips lose some crispness, you can refresh them. Place the chips on a baking sheet and heat them in a 350°F (175°C) oven for about five minutes. This brings back the crunch. For the salsa, if it looks a bit sad after storage, give it a gentle stir. Add a splash of lime juice to brighten the flavors. Enjoy it fresh with your chips! Yes, you can make Fruit Salsa ahead of time. To keep it fresh, store it in an airtight container. Add lime juice just before serving. This keeps the colors bright and the flavors fresh. You can prepare the salsa up to a day ahead. Just remember to stir it gently before serving. This recipe shines with fresh fruits. Besides strawberries, pineapple, kiwi, and mango, you can use peaches, blueberries, or raspberries. Each fruit adds a unique taste and texture. You can also mix in some citrus like orange or grapefruit for a zesty twist. Experiment with your favorites! Yes, store-bought chips can work well. Look for cinnamon sugar tortilla chips for a quick option. Another choice is pita chips for a crunch. If you prefer, you can also use plain tortilla chips for a simple taste. Pairing these chips with Fruit Salsa makes a great snack! This blog post detailed how to create a tasty fruit salsa and crunchy cinnamon sugar chips. You learned about the needed ingredients, step-by-step instructions, and helpful tips for making the best dish. Remember, you can adjust the fruits and spices to fit your taste. Store your salsa and chips properly to keep them fresh. Enjoy this sweet and fruity treat at your next event or snack time! Dive into different variations to keep it exciting. Your kitchen can be a fun place to explore flavors!](https://grilledflavors.com/wp-content/uploads/2025/05/00743a64-8da8-4125-b778-a72d729a7d0b.webp)
Fruit Salsa with Cinnamon Sugar Chips Delightful Treat
Are you ready to take your snacking to the next level? This Fruit Salsa with Cinnamon Sugar Chips is a sweet treat, perfect for any

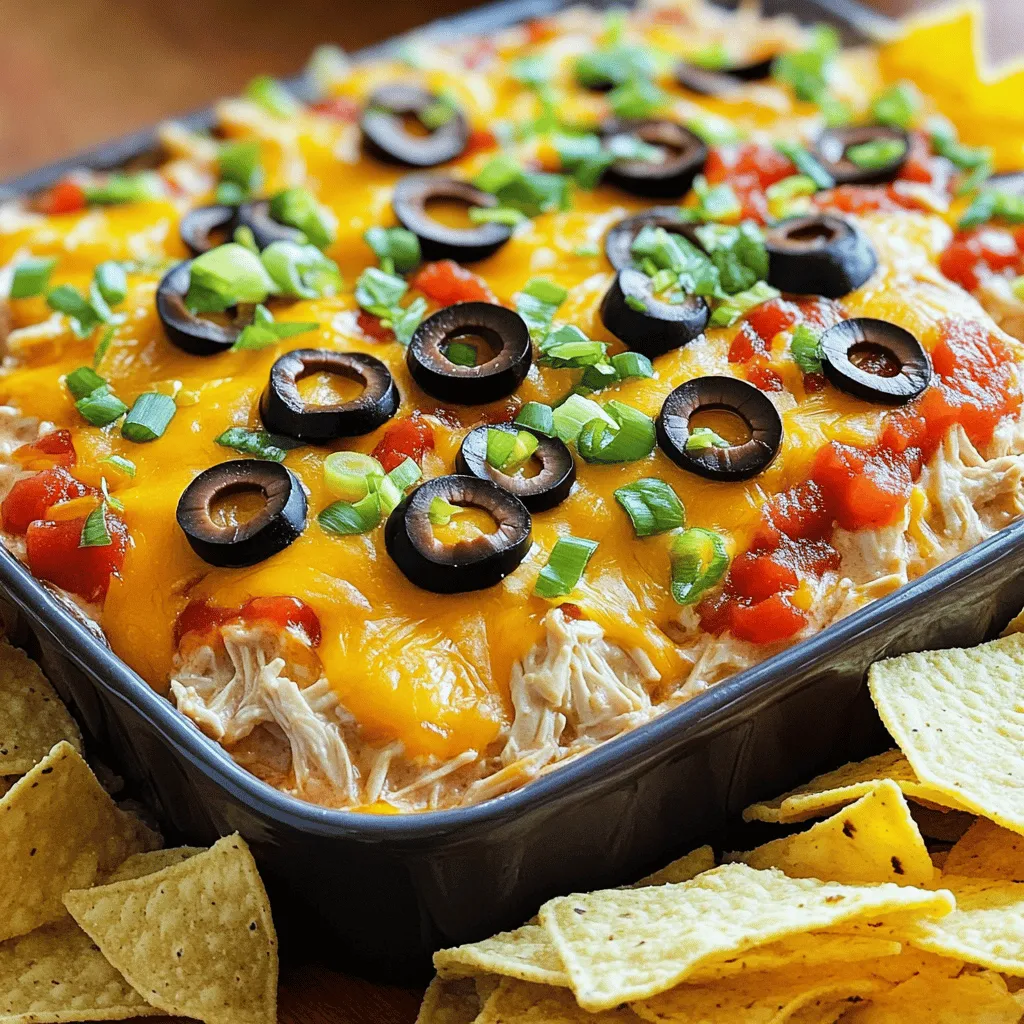
Meaty Texas Trash Dip Packed With Flavorful Goodness
Are you ready to dive into a cheesy, meaty delight? My Meaty Texas Trash Dip is packed with flavor and perfect for any gathering. With

Jamaican Vegetable Patties Rich Flavorful Delight
Are you ready to explore the rich, flavorful world of Jamaican vegetable patties? These golden pastry delights burst with vibrant veggies and spices, making them

Pull-Apart Meatball Sliders Delicious and Easy Recipe
If you’re craving a warm, cheesy treat that’s easy to make, you’ve found the right recipe! My Pull-Apart Meatball Sliders are a perfect crowd-pleaser for
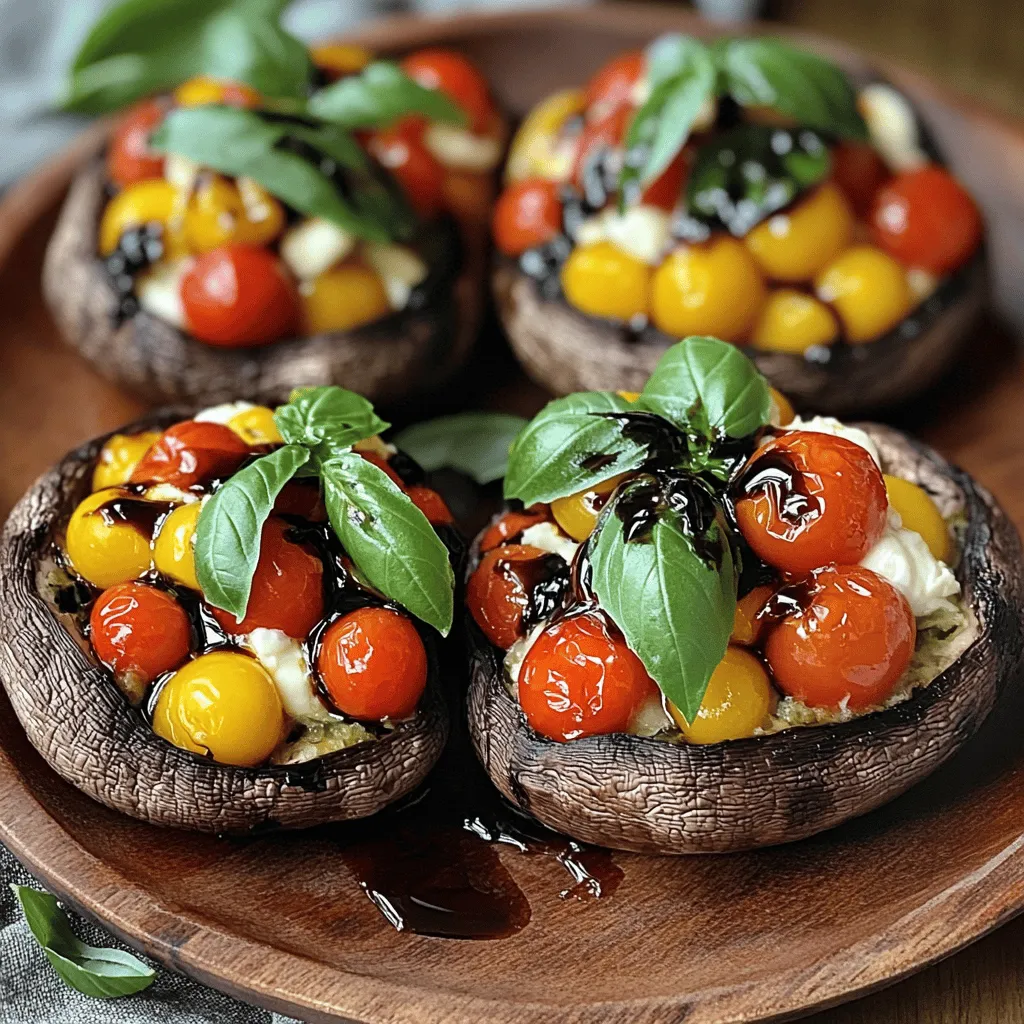
Portobello Mushrooms Filled with Caprese Delight Dish
Are you ready to impress your family or guests? Portobello Mushrooms Filled with Caprese Delight is a fun and tasty dish. It combines juicy tomatoes,

Spicy Chili Garlic Deviled Eggs Zesty and Easy Recipe
Craving a zesty twist on a classic snack? These Spicy Chili Garlic Deviled Eggs pack a flavorful punch! In this easy recipe, I’ll guide you