Appetizers

German Potato Pancakes Crispy and Flavorful Recipe
Are you ready to dive into a delicious recipe for German potato pancakes? This dish combines simplicity with rich flavors, making it a favorite for

Korean BBQ Meatballs with Spicy Mayo Delight
If you crave a bold flavor adventure, you’re in for a treat! My Korean BBQ Meatballs with Spicy Mayo are not only easy to make
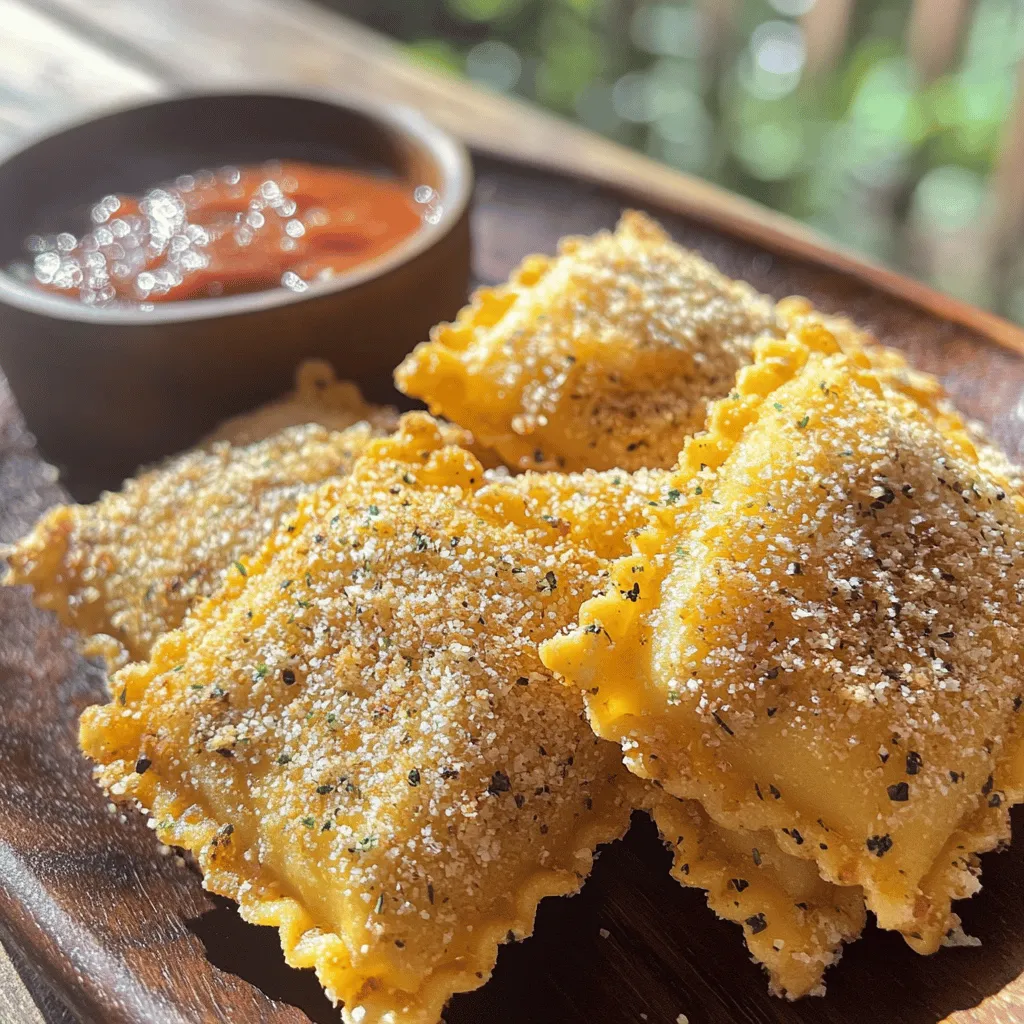
Toasted Ravioli Crispy and Flavorful Snack Option
Looking for a tasty snack that’s crispy, bursting with flavor, and easy to make? Toasted ravioli is your answer! This delightful treat takes regular ravioli
![To make crispy jalapeno popper egg rolls, you need some key ingredients. Here’s what you’ll need: - 8 oz cream cheese, softened - 1 cup shredded sharp cheddar cheese - 1/2 cup jalapeños, diced (fresh or pickled) - 1/4 cup green onions, chopped - 1 teaspoon garlic powder - 1/2 teaspoon onion powder - Salt and pepper to taste - 10-12 egg roll wrappers - Vegetable oil for frying These ingredients create a creamy filling with a nice kick from the jalapeños. The egg roll wrappers give it that crunchy texture we all love. You can easily swap some ingredients for different flavors. Here are a few ideas: - Use low-fat cream cheese for a lighter option. - Try pepper jack cheese for extra spice. - If you dislike green onions, skip them or use chives. - For a twist, add cooked bacon bits to the filling. These substitutes can change the flavor and keep your dish exciting. Serving your egg rolls with a great dip makes them even better. Here are some suggestions: - Ranch dressing provides a cool contrast. - Spicy mayo adds a nice kick. - Sweet chili sauce gives a sweet touch. - Guacamole offers a rich, smooth dip. Choose any of these sauces to enhance your crispy jalapeno popper egg rolls. For the full recipe, check out the [Full Recipe]. To start, gather your ingredients. You will need cream cheese, cheddar cheese, jalapeños, green onions, garlic powder, onion powder, salt, and pepper. Mix the softened cream cheese and shredded cheddar in a bowl. Stir until creamy and smooth. Next, add the diced jalapeños and chopped green onions. Sprinkle in garlic powder, onion powder, salt, and pepper. Mix well to combine all the flavors. This filling is key for your crispy jalapeno popper egg rolls. Now, take your egg roll wrappers. Lay one on a clean surface, with a corner facing you. Spoon about 2 tablespoons of the jalapeño mixture into the center of the wrapper. Fold the bottom corner over the filling. Then, fold in the side corners. Roll it tightly away from you to form the egg roll. Use a little water to seal the edge. Repeat this process with the rest of the wrappers and filling. Make sure each roll is sealed well to keep the filling inside. Frying is what makes these egg rolls crispy. Heat vegetable oil in a deep skillet or frying pan. Use enough oil to cover the rolls halfway. Once the oil is hot, carefully add the egg rolls in batches. Fry them for 2-3 minutes on each side until they turn golden brown. Remove the rolls from the oil and place them on paper towels to drain excess oil. This step is crucial for that perfect crispy texture. Serve warm with your favorite dipping sauces. Enjoy your crispy jalapeno popper egg rolls! For more detailed steps, check out the Full Recipe. To get that perfect crunch, oil temperature is key. Heat your oil until it reaches 350°F (175°C). If the oil is too cool, the egg rolls will soak up the oil and turn soggy. Fry only a few at a time to keep the oil hot. This gives a crispy outside while keeping the inside creamy. One big mistake is overfilling the egg rolls. Too much filling makes them hard to seal. If your rolls break open while frying, you lose all that goodness inside. Also, don't rush the frying process. Let them cook until golden brown. This ensures a nice crunch. Don’t be shy with spices! Besides garlic and onion powder, you can add smoked paprika for a smoky touch. A pinch of cayenne pepper kicks up the heat. If you love herbs, try adding fresh cilantro or parsley to the filling. This can brighten the flavors and make your egg rolls stand out. For the full recipe, check out the detailed steps to make these snacks delicious. {{image_2}} If you want a meat-free version, you can easily adapt this recipe. Skip the meat and focus on the cheese and jalapeños. You can add more veggies like corn, black beans, or bell peppers. These will add color and flavor. A mix of cream cheese and cheddar still works great. Try using a vegan cream cheese for a plant-based twist. While I love the classic sharp cheddar, you can mix it up. Cream cheese blends well with many types of cheese. Try pepper jack for a spicy kick. Mozzarella gives a nice stretch. For a rich flavor, use gouda or fontina. Each cheese adds a unique taste to your egg rolls. Want more heat? Add extra jalapeños or use spicy pickled ones. You can also mix in diced serrano or habanero peppers. For a smoky flavor, add some chipotle in adobo sauce. Another fun idea is to sprinkle some crushed red pepper flakes into the mix. Each option brings a new layer of spice to your egg rolls. For the full recipe, check out the Crispy Jalapeno Popper Egg Rolls section. To keep your crispy jalapeno popper egg rolls fresh, store them in an airtight container. Let them cool first. This helps prevent sogginess. Place a paper towel at the bottom of the container to absorb moisture. Store them in the fridge for up to three days. When you're ready to eat, reheating is key. The oven works best for crispiness. Preheat your oven to 375°F. Place the egg rolls on a baking sheet. Heat them for about 10-12 minutes, flipping halfway through. This method keeps them crispy. You can also use an air fryer for 5-7 minutes at 350°F. If you want to save some for later, freezing is a great option. Place uncooked egg rolls on a baking sheet in a single layer. Freeze them for about an hour until firm. Then, transfer them to a freezer bag. They can last up to three months. When ready to cook, fry them straight from the freezer. Just add a minute or two to the cooking time. For the full recipe, check out the section earlier. You can prepare the filling and roll the egg rolls a day before. Keep them in the fridge. This helps the flavors meld together. When you’re ready, just fry them until crispy. If you freeze them, fry straight from the freezer. This takes a little longer but still gives you great results. Yes, you can bake these egg rolls! Preheat your oven to 425°F. Place the rolled egg rolls on a baking sheet. Spray them lightly with cooking spray. Bake for 15-20 minutes until they get golden. This method is healthier but may not give you the same crunch as frying. Many people love ranch for dipping. It adds a creamy, tangy flavor. Spicy mayo is another great choice; it adds a nice kick. You can also try sweet chili sauce for a sweet and spicy mix. These sauces elevate the taste of your crispy jalapeno popper egg rolls. For the full recipe, check out the detailed instructions provided earlier. In this post, we discussed how to make crispy jalapeno popper egg rolls. We covered essential ingredients and tasty substitutes. I shared step-by-step instructions, tips for texture, and common mistakes to avoid. You learned about variations, storage tips, and answers to your FAQs. These egg rolls are fun to make and will impress everyone. Enjoy experimenting with flavors and dips to personalize your snack!](https://grilledflavors.com/wp-content/uploads/2025/05/0495ae0d-2262-413c-993c-1f92f95b9d08.webp)
Crispy Jalapeno Popper Egg Rolls Easy and Flavorful Snack
Craving a snack that packs a punch? Crispy Jalapeno Popper Egg Rolls are your answer! These bites blend the creamy goodness of jalapeno poppers with

Spicy Mexican Corn Bites Flavorful and Easy Snack
Are you ready to spice up your snack game? Spicy Mexican Corn Bites are here to satisfy your cravings! These easy-to-make treats pack a punch

Classic Deviled Eggs Tasty and Simple Appetizer
Are you ready to impress your guests with a simple and tasty appetizer? Classic deviled eggs are always a hit! They are easy to make
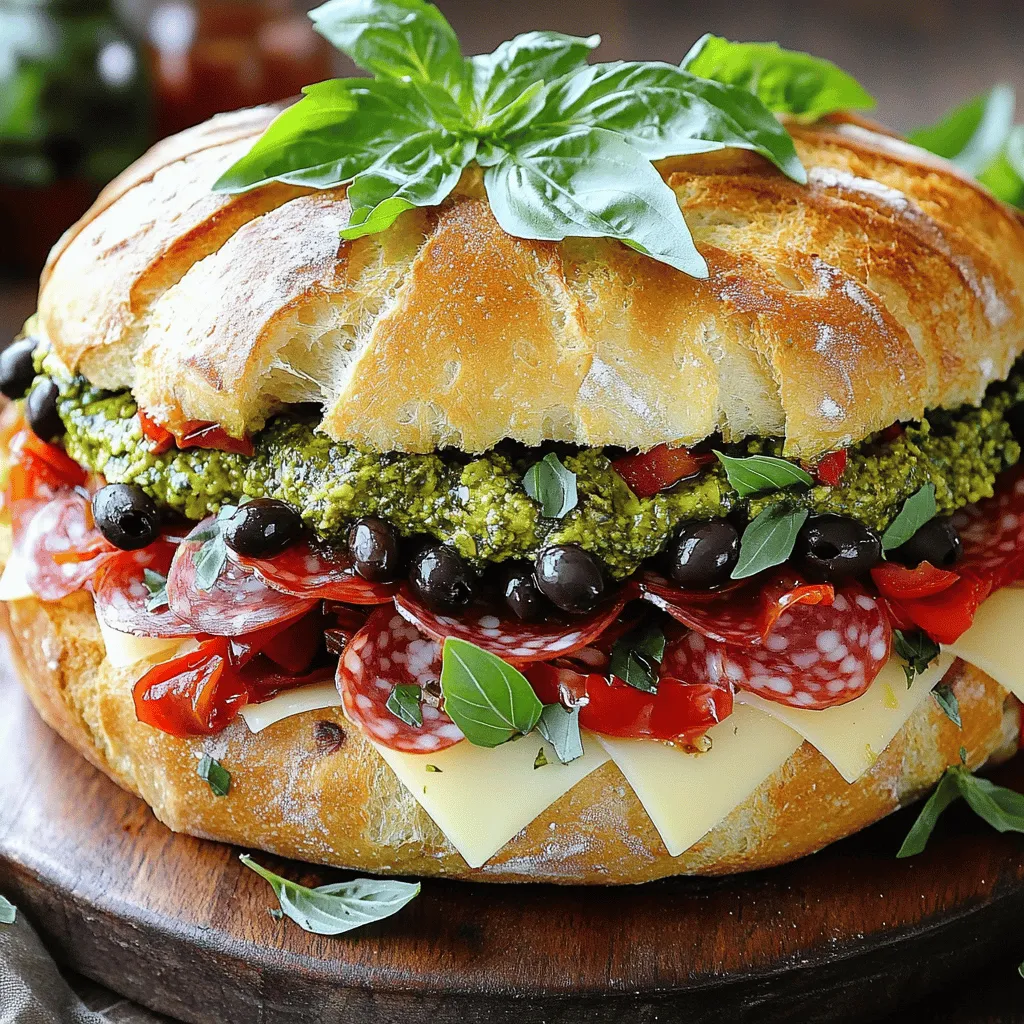
The Classic Italian Muffuletta Sandwich Delight
If you crave a sandwich bursting with flavor, the classic Italian Muffuletta is your answer. This tasty treat blends cured meats, melted cheese, and a
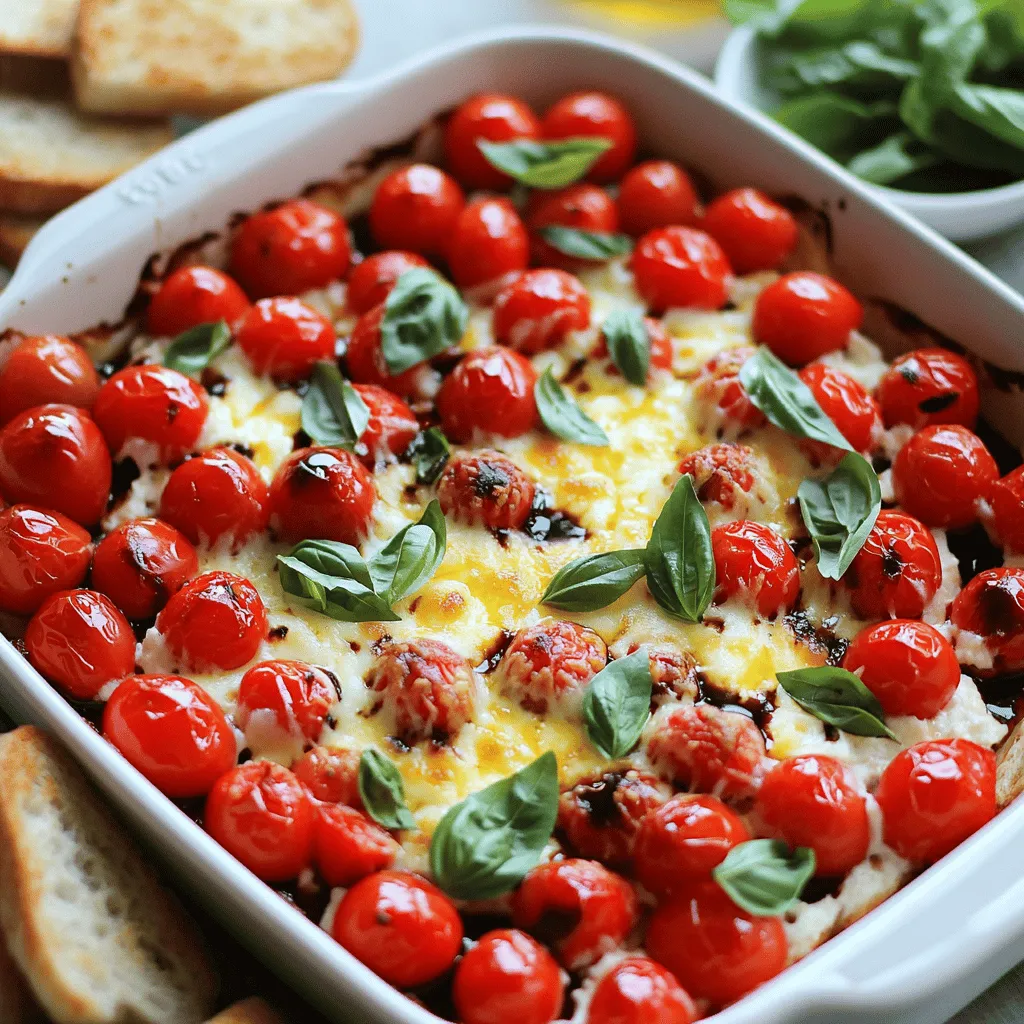
Bruschetta Dip Flavorful and Easy Party Snack
Looking for a party snack that’s both easy and delicious? This Bruschetta Dip checks all the boxes! With fresh tomatoes, creamy cheeses, and vibrant basil,

Pepperoni Mozzarella Croissant Rolls Simple Delight
If you’re craving a quick and tasty snack, look no further! These Pepperoni Mozzarella Croissant Rolls are a simple delight that you can whip up
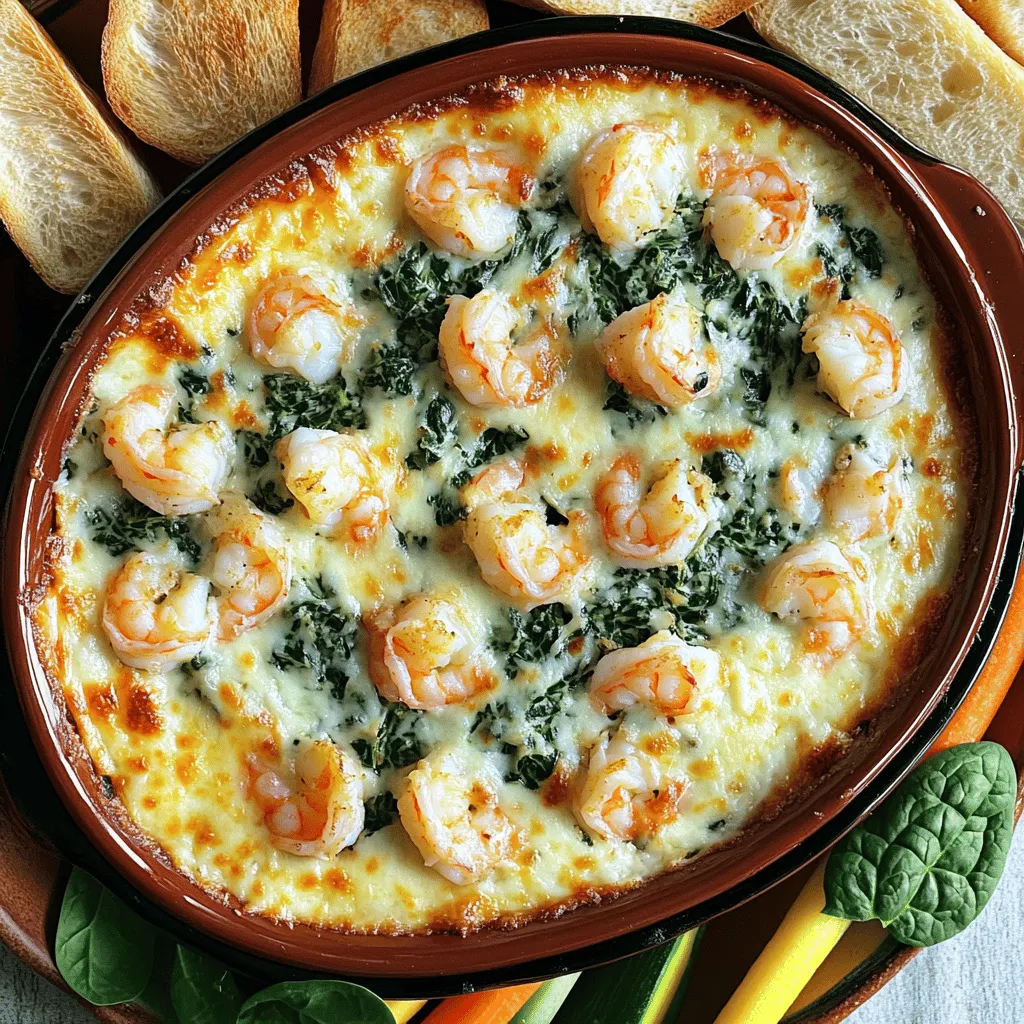
Savory Shrimp and Crab Spinach Dip Easy Recipe
Are you ready to wow your guests with a creamy, flavorful dip? This Savory Shrimp and Crab Spinach Dip is simple to prepare and packed