Appetizers

Savory Brie and Cranberry Puff Pastry Bites Recipe
If you’re looking for a simple yet delicious appetizer, this Savory Brie and Cranberry Puff Pastry Bites recipe is for you! Imagine golden, flaky pastry
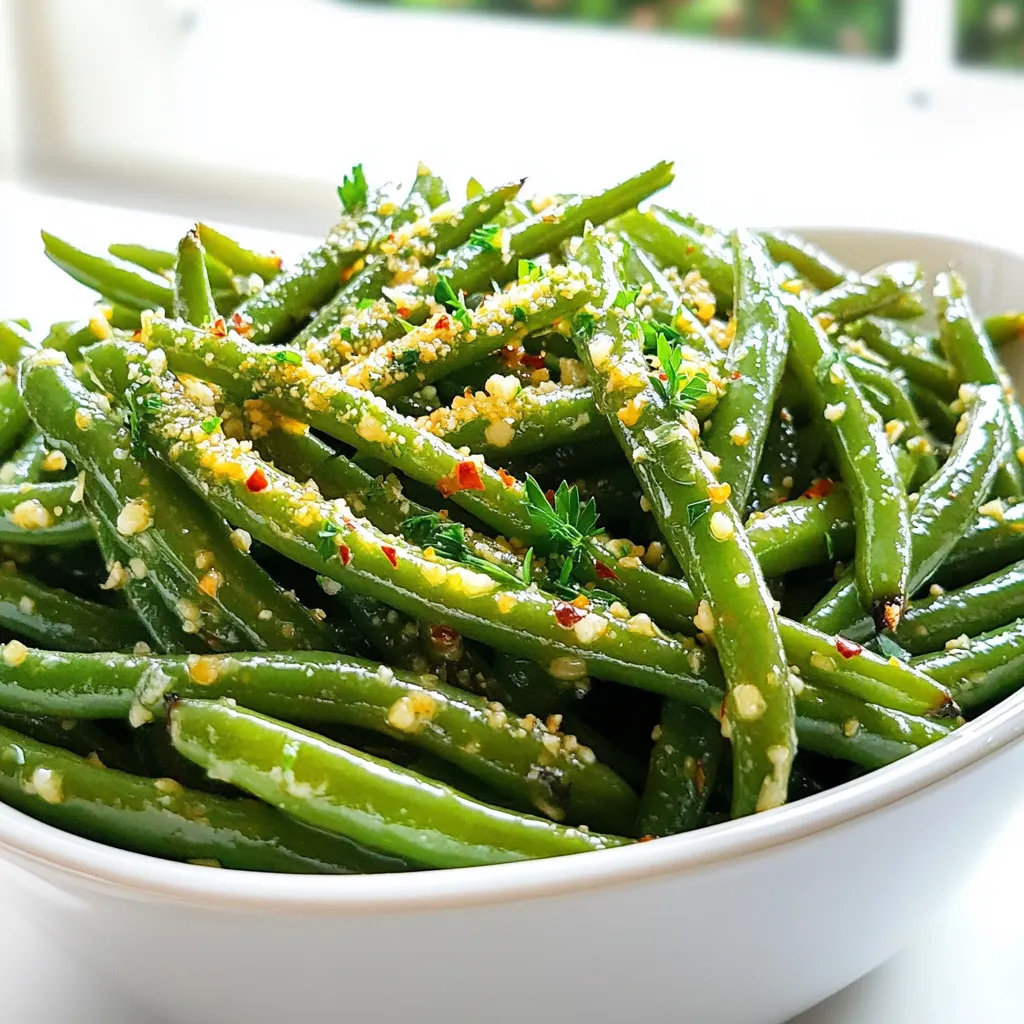
Air Fryer Crispy Garlic Parmesan Green Beans Recipe
If you want a quick and tasty side dish, you’ve come to the right place! In this post, I’ll show you how to make Air

Garlic Parmesan Knotted Pretzels Irresistible Snack Idea
Craving a tasty snack? Garlic Parmesan Knotted Pretzels are the perfect choice! These soft, cheesy bites offer a burst of savory flavor that’s hard to
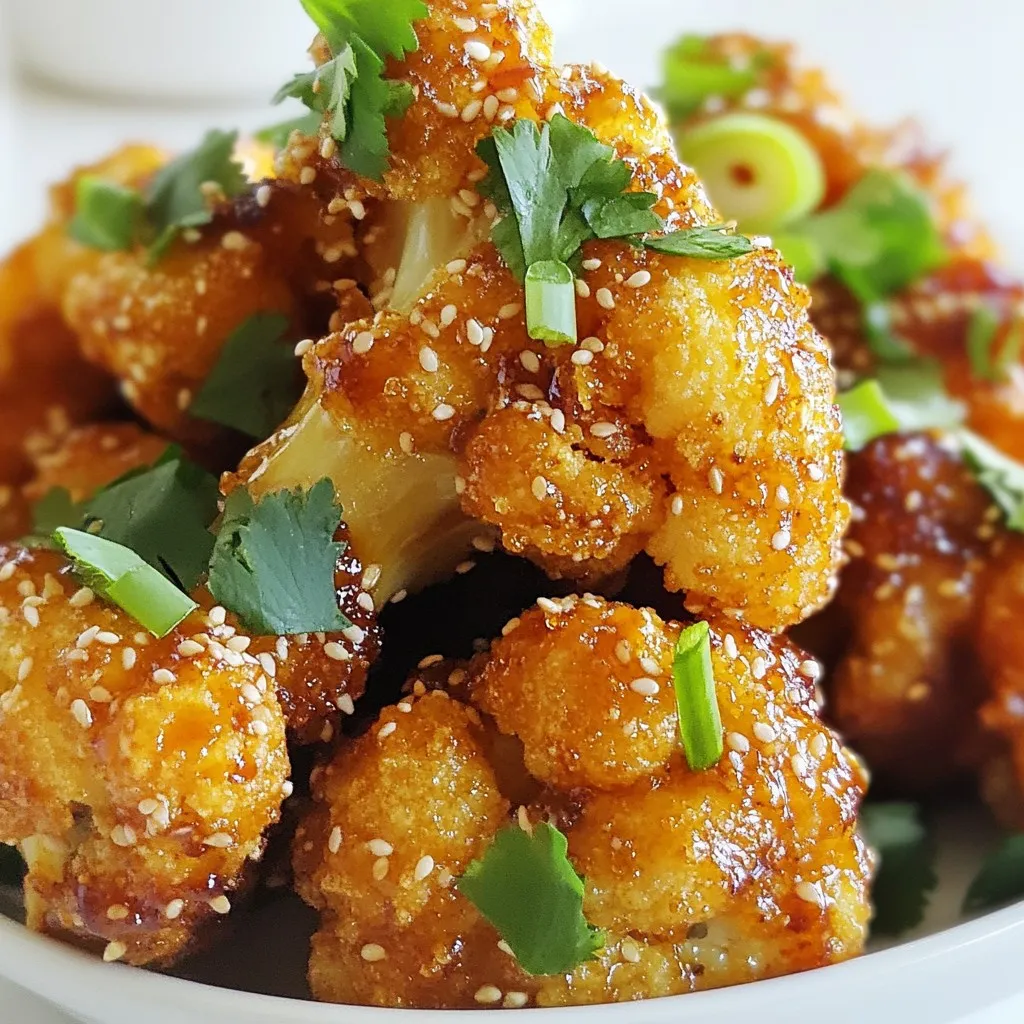
Crispy Sesame Cauliflower Wings Tasty Plant-Based Snack
Looking for a tasty snack that’s both crispy and satisfying? Try my Crispy Sesame Cauliflower Wings! These plant-based bites pack a punch of flavor while
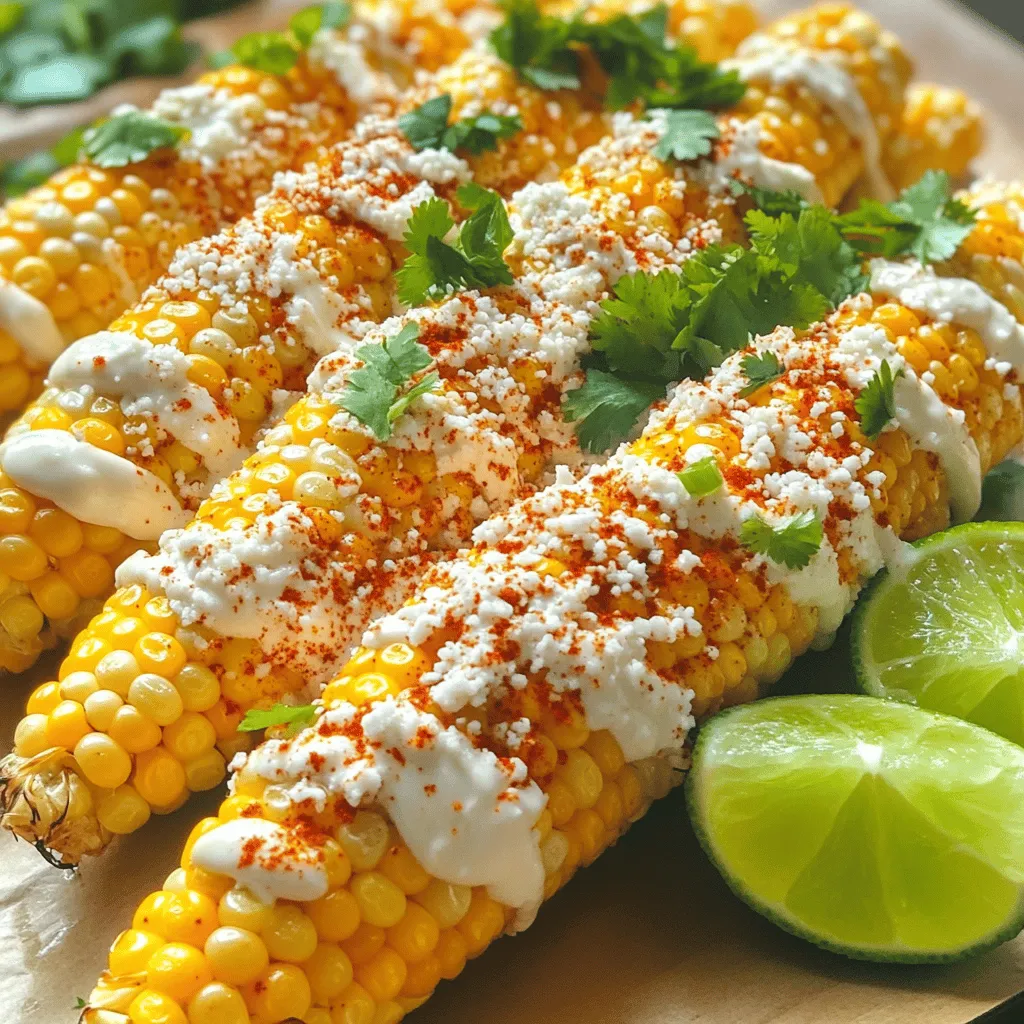
Easy Mexican Street Corn Flavorful Grilled Delight
If you crave a bold, delicious side dish, Easy Mexican Street Corn is for you! This grilled delight is a summer favorite. With simple ingredients
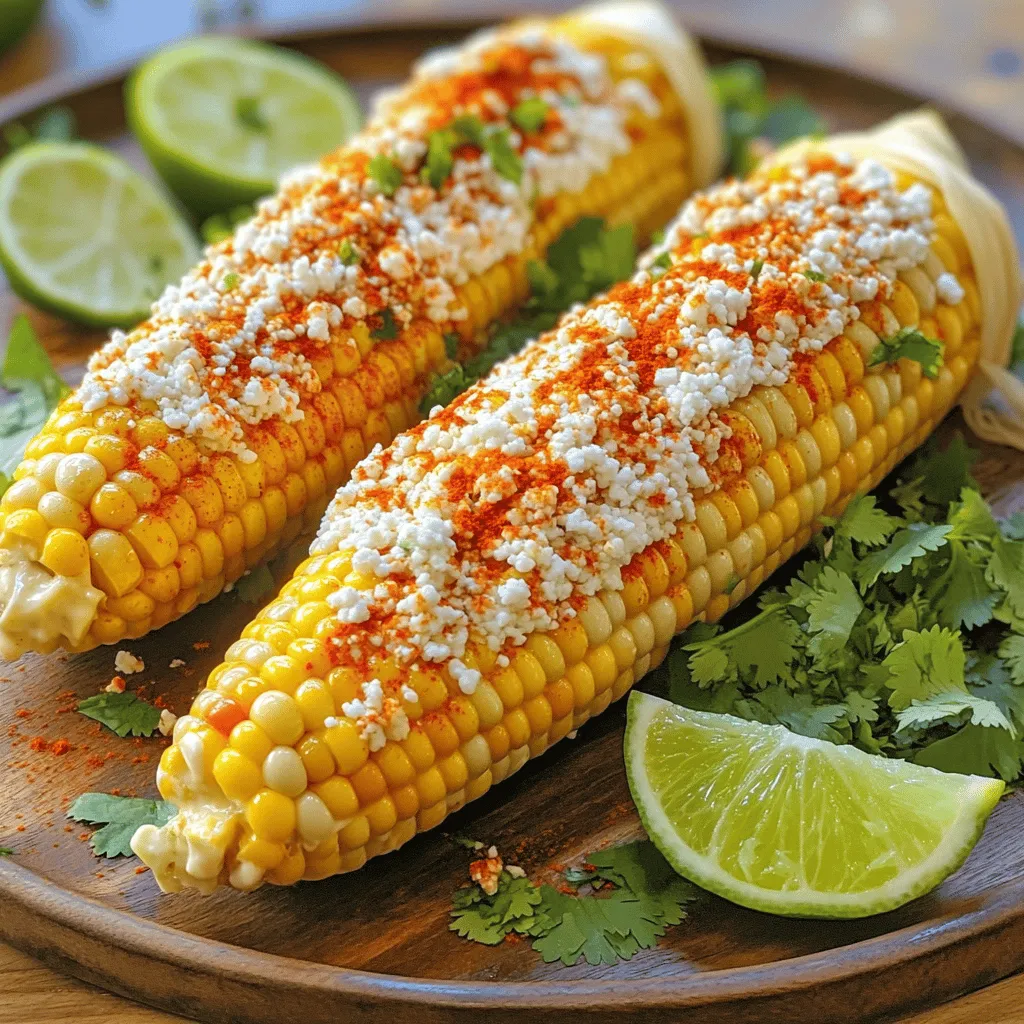
Mexican Street Corn on the Cob Savory Flavor Boost
Are you ready to elevate your summer barbecues? Mexican Street Corn on the Cob, known as Elote, offers a burst of savory flavor that will

Muffin Tin Pizza Bombs Tasty and Fun Finger Food
Looking for a fun snack that’s easy to make? Try Muffin Tin Pizza Bombs! These cheesy, tasty bites are perfect for parties or family game
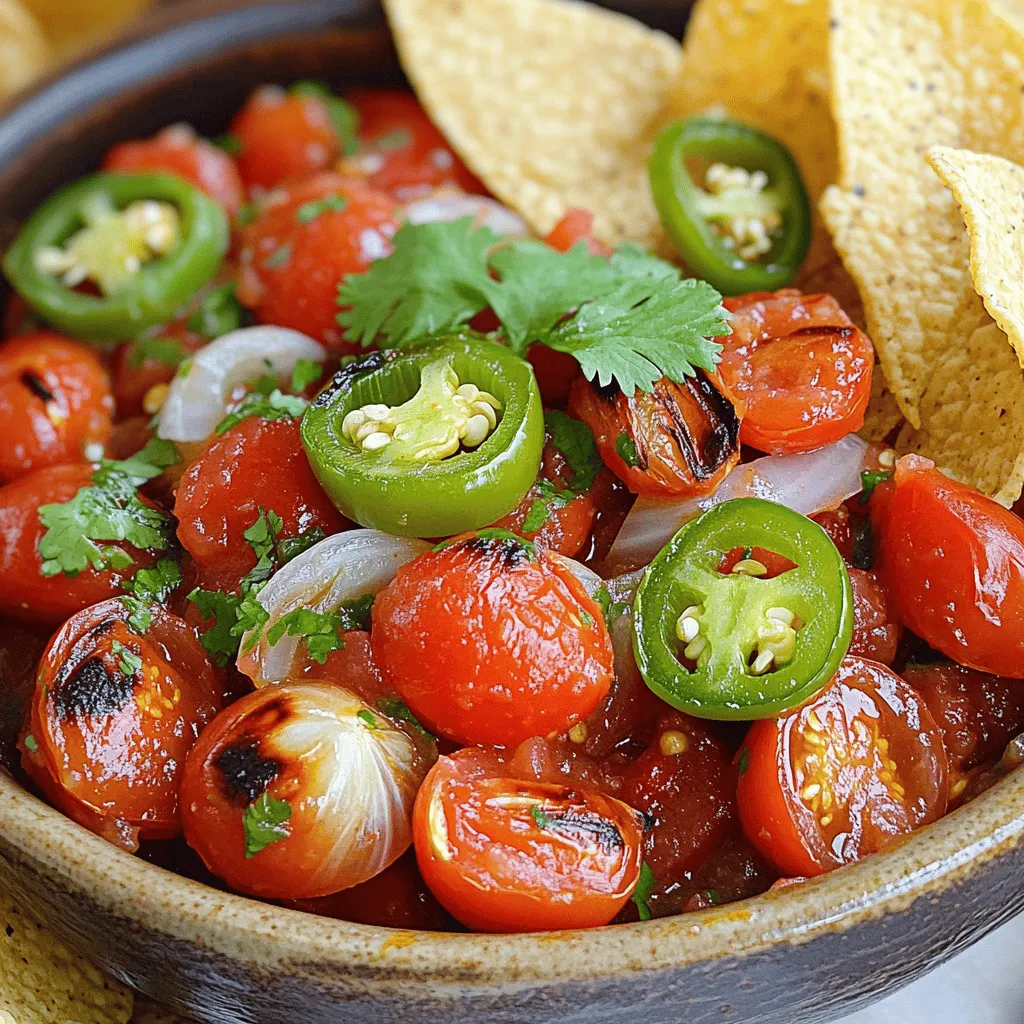
Fire Roasted Salsa Flavorful and Simple Recipe Guide
If you crave a burst of flavor in your meals, I’ve got the perfect solution: fire-roasted salsa. In this guide, I’ll walk you through a
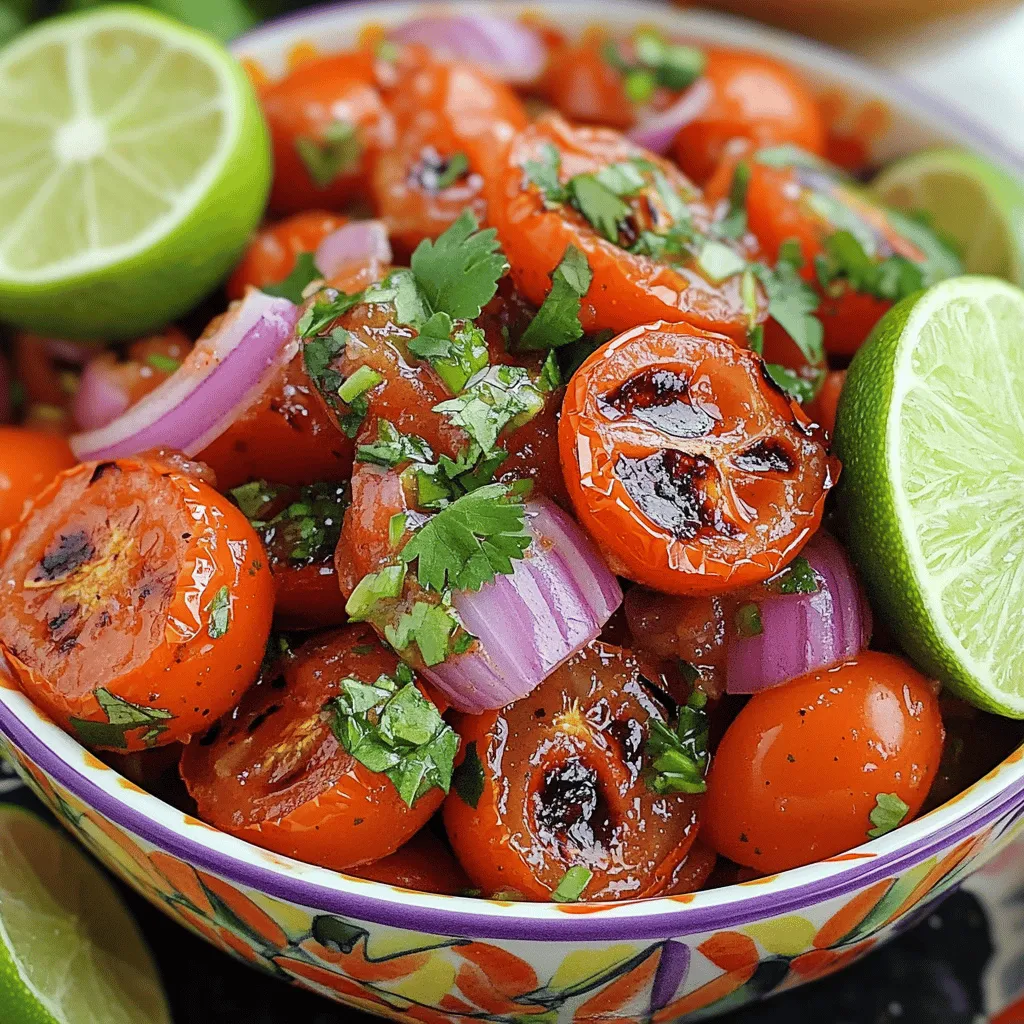
Roasted Tomato Salsa Recipe Flavorful and Fresh Dip
Are you ready to elevate your appetizer game? My Roasted Tomato Salsa recipe combines fresh ingredients and bold flavors to create the perfect dip. With
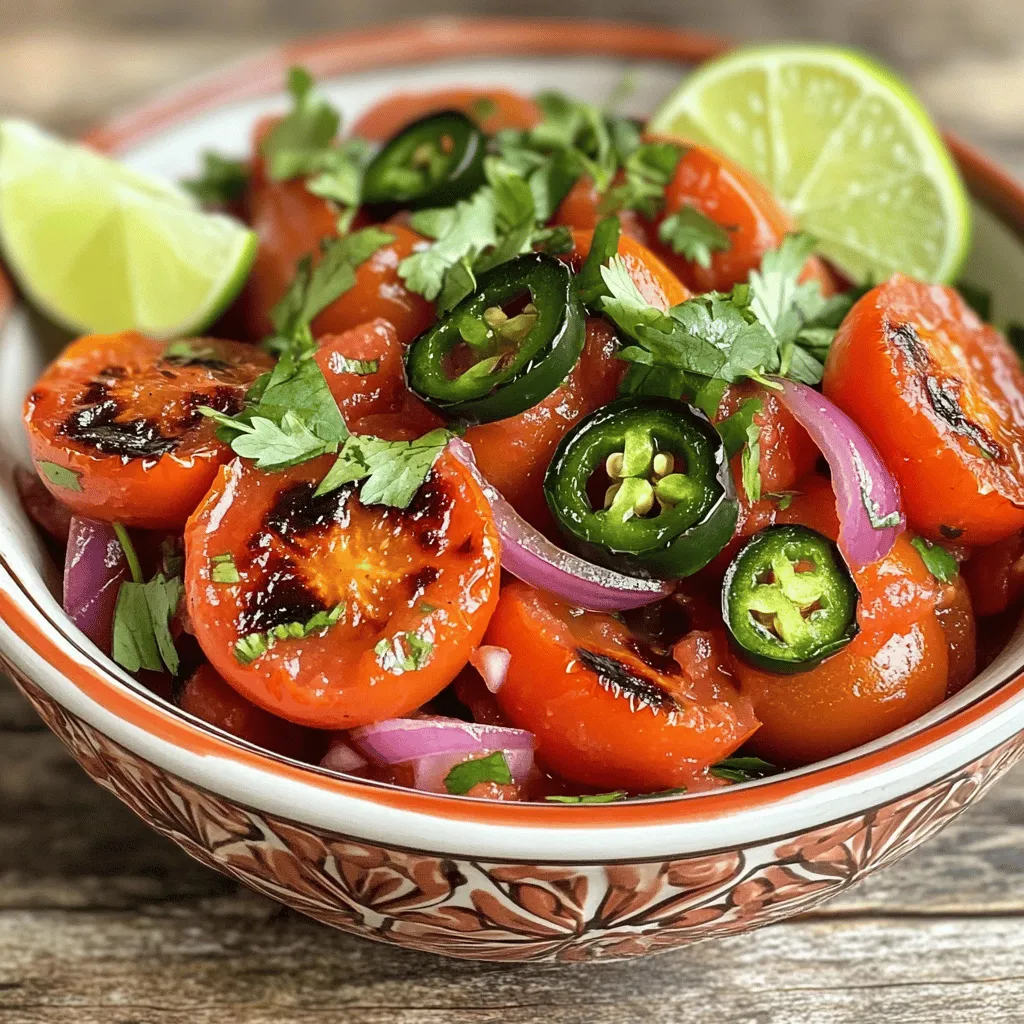
Simple Salsa Roja Recipe Fresh and Flavorful Dish
Are you ready to elevate your meals with a fresh and zesty kick? My Simple Salsa Roja recipe brings vibrant flavors to your table using