Appetizers

A quick lunch idea is simple and fast to make. You can prepare it in about ten minutes. Key factors include easy-to-find ingredients and minimal cooking time. For example, using canned chickpeas saves time. You can mix them right into your dish. Quick lunch ideas let you focus on flavors without wasting time. Ten-minute lunches keep you energized and ready for the day. They help you stay on schedule. You don’t have to spend hours cooking. This gives you more time for other tasks. Quick meals also reduce stress. You can enjoy a tasty meal without rushing. Plus, they often include healthy ingredients. This helps you maintain a balanced diet. Busy days call for easy recipes. Quick meals save you from fast food or takeout. They let you eat well even when life is hectic. I love making Zesty Chickpea Avocado Toast when I’m short on time. It’s nutritious and filling. You can have it ready in just ten minutes. This way, you can stay focused on your day without losing your lunch break. To make zesty chickpea avocado toast, you need: - 1 can (15 oz) chickpeas, drained and rinsed - 1 ripe avocado - 1 tablespoon tahini - 1 tablespoon lemon juice - 1 teaspoon garlic powder - 1 teaspoon cumin - Salt and pepper to taste - 2 slices whole grain bread These ingredients give you a tasty and filling meal. Chickpeas add protein and fiber. Avocado brings creaminess and healthy fats. For a fresh touch, you can use: - Fresh parsley, chopped - Red pepper flakes (optional, for heat) These garnishes add color and flavor. The parsley gives a nice crunch. Red pepper flakes can spice things up if you like heat. You can swap some ingredients if you have diet needs. For a vegan option, the recipe is already vegan. If you need gluten-free, use gluten-free bread. You can replace tahini with hummus for a different taste. Feel free to get creative! Cooking should be fun and suit your taste. For the full recipe, check the provided details. First, take a can of chickpeas. Drain and rinse them well. This helps remove any extra salt or liquid. In a mixing bowl, add the chickpeas. Use a fork to mash them gently. You want them to stay a bit chunky. This gives your toast a nice texture. Next, grab a ripe avocado. Cut it in half and remove the pit. Scoop the green flesh into another bowl. Mash it with a fork until smooth. Mix in tahini, lemon juice, garlic powder, and cumin. Add salt and pepper to taste. This gives the avocado a zesty flavor. Now, toast your slices of whole grain bread. Make them golden and crispy. Spread the mashed avocado on each slice. Then, add the mashed chickpeas on top. Press them down gently so they stick. Garnish with fresh parsley and red pepper flakes if you like heat. Serve your Zesty Chickpea Avocado Toast right away for a quick, tasty lunch. Enjoy your meal! {{image_2}} To get the best texture, toast your bread well. I like it golden brown. This gives a nice crunch. Use whole grain bread for extra flavor and nutrients. If you like it softer, try less toasting. You want a balance between crispy and soft. For a burst of flavor, add fresh herbs. Parsley works well on top. You can also sprinkle some red pepper flakes for heat. A dash of hot sauce can add a kick, too. Experiment with spices like smoked paprika or even a drizzle of balsamic glaze. To save time, prep your ingredients ahead. Rinse and drain chickpeas the night before. You can also mash the avocado in advance. Just mix a bit of lemon juice in to keep it fresh. Keep your bread in the freezer. Toasting frozen bread saves you a minute. This all makes your lunch quick and easy. Try these tips with the Full Recipe for Zesty Chickpea Avocado Toast! You can change up the spread on your toast to keep things fun. Try hummus for a creamy twist. Or use Greek yogurt mixed with herbs for a tangy taste. You can also spread some pesto for a fresh flavor. Each spread brings a new experience to your meal. Adding protein can make your lunch even better. Grilled chicken slices or turkey work well. If you like seafood, try topping with smoked salmon. For a plant-based option, add some hemp seeds or sunflower seeds. These options boost flavor and keep you full longer. Staying vegan? No problem! Use a nut-based cream cheese instead of yogurt. You can also add sliced radishes or cucumbers for extra crunch. Roasted chickpeas can add a nice touch too. They give a satisfying crunch and pack more protein. Enjoy your Zesty Chickpea Avocado Toast with these fun twists! For the full recipe, check out the Zesty Chickpea Avocado Toast. To make the Zesty Chickpea Avocado Toast gluten-free, simply swap the bread. Use gluten-free bread or rice cakes instead. Both options hold the toppings well and add a nice crunch. Check labels to ensure they meet your needs. Gluten-free bread can taste just as good and gives you a quick meal. Yes, you can prepare parts of the Zesty Chickpea Avocado Toast ahead of time. You can mash the chickpeas and avocado the night before. Store them in airtight containers in the fridge. Just keep the bread separate. Toast the bread fresh before serving. This keeps it crispy and tasty. Here are a few more quick lunch ideas you might enjoy: - Hummus and Veggies: Pair store-bought hummus with carrot sticks and cucumber slices. - Greek Yogurt Parfait: Layer yogurt, granola, and berries in a bowl. - Quesadilla: Fill a tortilla with cheese, fold, and heat on the stove. - Salad Wraps: Use lettuce leaves to wrap turkey, cheese, and veggies. These options are quick, easy, and satisfying! Quick lunch ideas can save your day. We discussed making Zesty Chickpea Avocado Toast in ten minutes. You learned how to prepare the chickpeas and mash the avocado. Tips and tricks help you perfect your toast and add flavor. Remember, quick recipes fit busy lives. Feel free to try new spreads or protein options. With these easy steps, you can enjoy healthy meals without the stress. Keep exploring quick lunches that work for you!
Quick 10-Minute Lunch Ideas for Busy Days
In a rush? I get it! Busy days leave little time for meals. But you can enjoy a tasty lunch in just 10 minutes. In
- Whole grain pita bread - Marinara sauce - Shredded mozzarella cheese - Pepperoni slices - Diced bell peppers - Cooked sausage - Grated Parmesan cheese - Italian seasoning - Fresh basil leaves When making DIY Pizza Lunchables, gather your essential ingredients first. Whole grain pita bread serves as the perfect base. It's soft and holds toppings well. Marinara sauce adds that classic pizza flavor. Shredded mozzarella cheese melts beautifully and gives that gooey texture we all love. Next, think about optional toppings. Pepperoni slices are a popular choice. They bring a nice, savory taste. Diced bell peppers add a fresh crunch and color. You might also like cooked sausage for a heartier option. Don't forget seasoning and garnish. Grated Parmesan cheese enhances the flavor. A sprinkle of Italian seasoning gives a nice aroma. Fresh basil leaves can add a pop of green and a hint of freshness. For the complete recipe, check the Full Recipe section. This will guide you through creating these fun and tasty lunchables! Start by cutting the whole grain pita bread. Use a round cookie cutter or a knife to make mini pizza shapes. Aim for rounds or squares about the size of your palm. This will create the perfect base for your pizza lunchables. You can even let your kids help with this part. They will love making their own shapes! Next, spoon marinara sauce into small containers. Each child can have their own sauce to dip or spread. In another container, mix shredded mozzarella cheese and grated Parmesan cheese. This combo gives a rich, cheesy flavor. Kids can sprinkle this mix on their pizzas as they build them. Now, pack the pepperoni slices and any other toppings in separate compartments. You can use diced bell peppers, olives, or cooked sausage. Kids enjoy choosing their favorite toppings. Lastly, prepare a small container with Italian seasoning. This adds a nice flavor boost. They can sprinkle it on their mini pizzas before enjoying their creations. You can change up the ingredients to suit your taste. Here are some ideas: - Alternate Breads: Try using mini bagels or tortillas for fun textures. - Vegetarian Choices: Replace pepperoni with diced bell peppers, olives, or mushrooms. This makes it healthy and tasty! Make the meal more fun with these ideas: - Side Dishes: Serve with baby carrots, cucumber slices, or fruit skewers. These add color and crunch. - Creative Presentation: Arrange the pizza components in a fun way. Use colorful containers to spark excitement for kids. If you want warm, gooey pizza, here’s how to do it right: - Warming Instructions: Heat the assembled pizza in the microwave for 15-20 seconds. This is just long enough to melt the cheese. - Ideal Cheese Melt: Watch closely while it warms. You want the cheese to be soft but not bubbling. Perfect melt means happy kids! {{image_2}} You can use many types of bread for your DIY Pizza Lunchables. Mini bagels are fun and chewy. They make a great base for your pizzas. Tortillas are another great choice. They add a nice twist and are easy to roll. For those who need gluten-free options, look for gluten-free pita bread or tortillas. They work just as well and taste great. Don't be afraid to try different sauces. Pesto adds a fresh flavor and pairs well with veggies. Alfredo sauce brings a creamy touch that kids may love. You can also make your own sauces. Mixing canned tomatoes, garlic, and herbs makes a tasty homemade pizza sauce. This way, you can control the flavors and ingredients. Make your DIY Pizza Lunchables even more exciting by creating fun themes. For a BBQ theme, use BBQ sauce and chicken. Hawaiian flavors work well with ham and pineapple. You can even use seasonal ingredients like fresh tomatoes in summer or pumpkin in fall. This not only keeps meals fresh but also introduces kids to new tastes. To keep your DIY Pizza Lunchables fresh, store them in airtight containers. This prevents air from getting in and keeps the ingredients from drying out. You can pack each component separately. This way, the pita bread stays soft, and the cheese melts perfectly when you eat. These lunchables can last in the fridge for about three days. If you want them to last longer, consider freezing them. Just make sure to wrap each component tightly. You can freeze the pita bread and toppings together, but keep the sauce separate. This way, they stay fresh for up to a month. When you're ready to eat, you can reheat them safely. Use the microwave for about 15-20 seconds. This keeps the pita warm and helps the cheese melt just right. Avoid long microwave times to prevent rubbery cheese. Enjoy them warm for the best taste experience! Yes, you can use regular pizza sauce. Both sauces offer great flavor. However, they differ in taste and texture. Marinara has a fresh tomato flavor with herbs. It’s often smoother and less thick than pizza sauce. Pizza sauce tends to be richer and thicker. If you want a nice change, try pizza sauce. It adds a fun twist to your DIY pizza lunchables. This recipe makes four servings. Each serving is based on one mini pita round. You get a nice amount of sauce, cheese, and toppings to enjoy. If you want more, simply double the recipe. You can make more for a big family lunch or a playdate with friends. Yes, you can make these ahead of time! Meal prep is easy with this recipe. Just assemble your ingredients in separate containers. Keep the pita bread, sauce, cheese, and toppings in airtight boxes. You can store them in the fridge for up to three days. This way, kids can build their lunchables whenever they want. It saves time on busy days! This blog post covered how to create easy, fun mini pizzas using pita bread. You learned about key ingredients, optional toppings, and great ways to season your pizzas. I shared simple steps to prepare, assemble, and customize your mini pizzas. You now have handy tips for storage and reheating. Remember, this is a fun recipe, so get creative! Enjoy making these easy meals with your favorite flavors, and don't hesitate to mix things up. Your mini pizzas can be delicious and customized, perfect for everyone.
DIY Pizza Lunchables Easy and Fun Kid-Friendly Meal
Looking for a fun and easy lunch idea for your kids? DIY Pizza Lunchables are the answer! With simple ingredients like whole grain pita, marinara
To make Cheesy Hatch Green Chile Dip, gather these key ingredients: - 1 cup roasted Hatch green chiles, chopped - 1 cup cream cheese, softened - 1 cup sour cream - 1 cup shredded Monterey Jack cheese - 1 cup shredded cheddar cheese - 2 cloves garlic, minced - 1 tablespoon lime juice - 1 teaspoon cumin - Salt and pepper to taste - Tortilla chips, for serving These ingredients blend to create a rich, creamy dip. The roasted Hatch green chiles add a smoky kick that makes this dip special. Cream cheese and sour cream give it a smooth texture. The cheeses melt perfectly, making each bite indulgent. You can customize the dip with these optional ingredients: - Additional spices (e.g., cayenne pepper, paprika) - Chopped fresh herbs (e.g., cilantro, parsley) - Sautéed vegetables (e.g., onions, bell peppers) Adding spices can ramp up the heat. Fresh herbs add a nice touch. Sautéed veggies can add flavor and texture. Feel free to mix and match to fit your taste. For the full recipe, check out the complete details. - Preheat oven to 350°F (175°C). - Combine cream cheese and sour cream in a bowl. - Stir in chopped Hatch green chiles and garlic. - Add lime juice and spices; mix well. - Transfer the mixture to a baking dish. - Sprinkle reserved cheese on top and bake. Baking will take about 20-25 minutes. You want the dip to be bubbling and golden. Use a spatula to smooth the top before adding the cheese. This step ensures a nice, even melt. Enjoy the warm, cheesy goodness! For the full recipe, check the details above. - Use freshly roasted Hatch green chiles for the best taste. Their smoky flavor shines in this dip. You can roast them yourself or buy them from a store. - Experiment with different types of cheese. Try pepper jack for heat or gouda for a smooth finish. Mixing cheese adds depth to the flavor. - Ensure cream cheese is softened for a smoother mixture. Take it out of the fridge 30 minutes before you start. This step makes mixing much easier. - Bake until golden and bubbly for optimal texture. This means the dip is ready to serve and will have a nice crust on top. - Pair with a variety of dippables like vegetables or crackers. Carrots, celery, and bell peppers add crunch and color. - Serve warm for the best experience. The heat brings out the flavors and makes it extra creamy. By following these tips and tricks, you will make your Cheesy Hatch Green Chile Dip shine at any gathering. For the full recipe, check the link above. {{image_2}} You can change up the cheese for a new taste. Swap Monterey Jack for Pepper Jack to add spice. This gives the dip a nice kick. If you prefer a tangy flavor, use goat cheese. It adds creaminess and a unique twist. Mix different cheeses to find your favorite blend. Want a healthier dip? Substitute Greek yogurt for sour cream. It makes the dip lighter and adds protein. You can also add black beans. They boost fiber and protein, making the dip more filling. These changes keep the dip tasty while making it better for you. For a fun twist, add jalapeños for a Mexican flair. This will spice things up and enhance the dip's flavor. You can also try adding a touch of pesto. This brings an Italian taste that surprises your guests. Feel free to mix and match flavors to suit your taste. For the complete recipe, check out the Full Recipe above. Store any extra dip in an airtight container in the refrigerator. This keeps it fresh and tasty. Best to eat it within 3-4 days for the best flavor. To reheat, microwave the dip in short intervals. Stir after each interval until it warms through. You can also reheat it in the oven for a crispy top. Just pop it in at 350°F (175°C) until bubbly. You can freeze the dip before or after baking. If you freeze it before baking, just thaw it overnight in the fridge before you heat it. This way, you can enjoy the dip whenever you want. Hatch green chiles come from Hatch, New Mexico. They have a rich, smoky flavor. Their taste is bold, yet they offer a gentle heat. I love using them in my recipes to bring depth. These chiles are great for making dips, sauces, and salsas. You can find them fresh or canned, but fresh is best when in season. Their flavor shines in dishes, making them a favorite among many cooks. Yes, you can prepare this dip a day before. Just mix all the ingredients and place them in a baking dish. Cover it tightly and store it in the fridge. When you are ready, just bake it as directed in the Full Recipe. You can also reheat leftovers easily. Just warm it in the oven or microwave. This dip tastes great even after a day, so feel free to plan ahead! The spice level of Hatch green chiles varies. It depends on their ripeness. Fresh, green chiles are usually mild to medium in heat. If you want more heat, use fully ripe chiles. You can always taste a small piece before adding them. This way, you can control the heat in your dip. If you prefer a milder flavor, remove the seeds before mixing them in. This blog post walks you through making a tasty dip using Hatch green chiles. You'll mix cream cheese, sour cream, and various cheeses to create a creamy base. I've also shared tips on enhancing flavor, serving ideas, and healthy swaps. Remember, have fun experimenting with different ingredients to find your favorite mix. This dip is sure to impress at your next gathering! Now, go ahead and enjoy every cheesy bite.
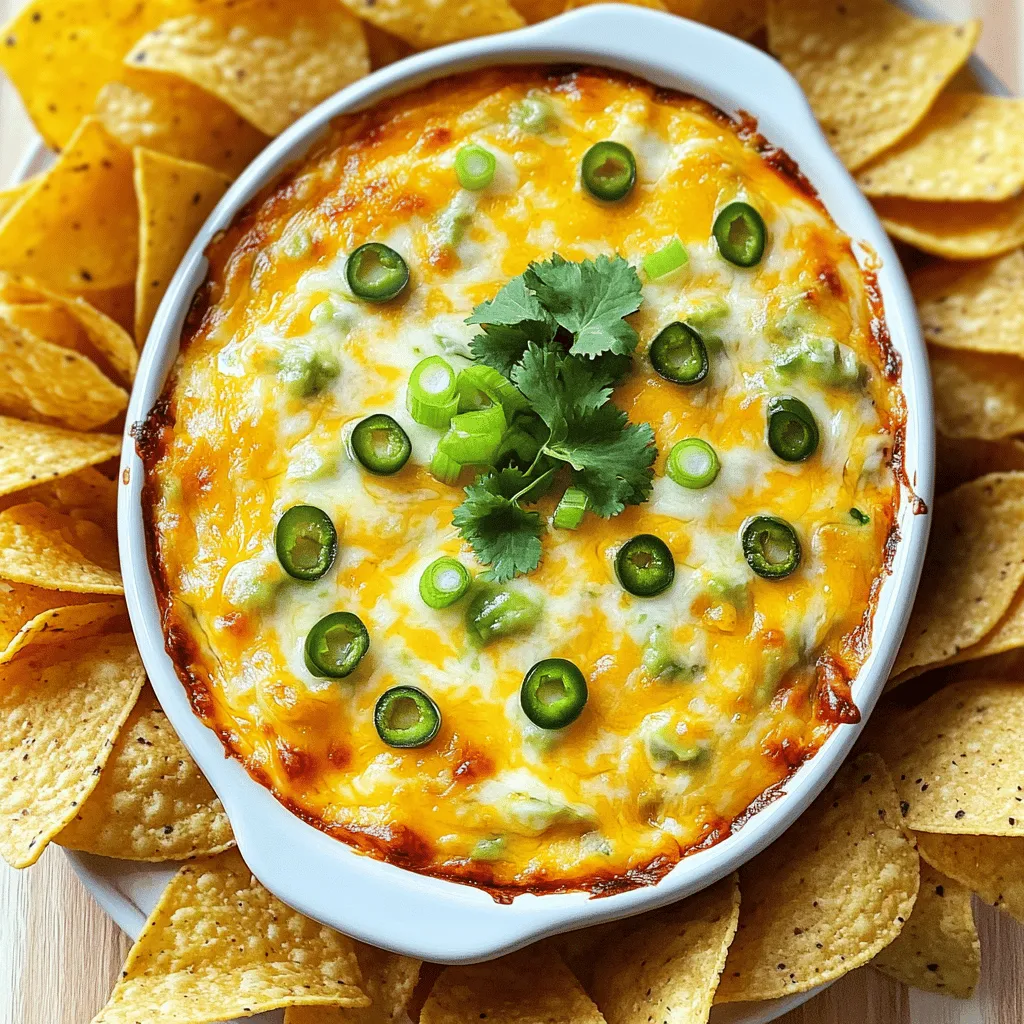
Cheesy Hatch Green Chile Dip Flavorful and Simple Recipe
Get ready to spice up your snack game with my Cheesy Hatch Green Chile Dip! This creamy, flavorful dip is easy to make and perfect
To make tasty DIY pizza crackers, you need these key ingredients: - 1 cup all-purpose flour - 1/4 cup grated Parmesan cheese - 1 teaspoon dried oregano - 1/2 teaspoon garlic powder - 1/2 teaspoon salt - 1/4 teaspoon black pepper - 1/3 cup water - 2 tablespoons olive oil - 1/2 cup shredded mozzarella cheese You can customize your pizza crackers with fun toppings. Here are some ideas: - Sliced pepperoni - Chopped bell peppers - Diced olives Feel free to get creative! Mix and match to find your favorite flavors. Don't have everything on hand? Here are some easy swaps: - Use whole wheat flour for a healthier option. - Try nutritional yeast instead of Parmesan for a vegan touch. - Swap garlic powder with fresh minced garlic for a bolder taste. These substitutes can help you make delicious pizza crackers with what you have at home. You can find the full recipe above for detailed steps on how to prepare them. First, I gather my ingredients. For this, I need: - 1 cup all-purpose flour - 1/4 cup grated Parmesan cheese - 1 teaspoon dried oregano - 1/2 teaspoon garlic powder - 1/2 teaspoon salt - 1/4 teaspoon black pepper - 1/3 cup water - 2 tablespoons olive oil Next, I preheat the oven to 375°F (190°C) and line a baking sheet with parchment paper. In a big bowl, I mix the flour, Parmesan, oregano, garlic powder, salt, and black pepper. I stir well to mix the dry items. In a separate bowl, I combine the water and olive oil. I add this mix slowly into the dry ingredients. I stir until a dough forms. If the dough feels sticky, I add a little more flour. Now, I place the dough on a floured surface and knead it for 2-3 minutes until it feels smooth. Then, I roll it out to about 1/8 inch thick. I transfer the rolled dough to my prepared baking sheet. Using a pizza cutter, I score the dough into squares or triangles. If I want to add some cheese, I sprinkle shredded mozzarella on top. I can also add toppings like sliced pepperoni or bell peppers if I’d like. After that, I bake the scored dough in the oven for 15-20 minutes. I watch for the edges to turn golden brown and crispy. Once baked, I take the tray out and let them cool for a few minutes. Then, I break apart the crackers along the scored lines. For serving, I love to pair these crackers with pizza sauce. It makes a great dip! You can also try other dips like marinara or ranch. These DIY pizza crackers are perfect for parties, movie nights, or just a snack. They are tasty, fun, and easy to make. For the full recipe, check out the earlier section. To make your pizza crackers crunchy, you need the right dough. Start with the right flour. Use all-purpose flour for a good base. Mix in grated Parmesan cheese for extra flavor and a nice bite. When you knead the dough, do it gently. Kneading too much can make it tough. Remember to roll the dough thin, about 1/8 inch thick. This helps it bake evenly. The thinner, the crunchier! When rolling out the dough, use a floured surface. This keeps it from sticking. A rolling pin works best, but you can use a wine bottle if you don’t have one. After rolling, use a pizza cutter or knife for cutting. Score your dough into shapes before baking. This makes it easy to break apart later. Try squares or triangles for fun shapes. Setting the right oven temperature is key. Preheat your oven to 375°F (190°C). This heat is perfect for crispy edges. Bake the crackers for 15 to 20 minutes. Keep an eye on them. They should be golden brown when done. If they are too pale, they might be chewy. Let them cool for a few minutes after baking. This helps them get crispier. For the full recipe, check the earlier section. {{image_2}} You can change the taste of your pizza crackers easily. For a classic Margherita flavor, add fresh basil or Italian seasoning. For a spicy kick, mix in crushed red pepper flakes. If you love BBQ, use BBQ sauce instead of pizza sauce. You can also try a Mexican twist with taco seasoning and cheese. These ideas let you explore many flavors! Making gluten-free pizza crackers is simple! Use almond flour or gluten-free flour instead of all-purpose flour. For a vegan version, swap the Parmesan cheese with nutritional yeast. You can also use plant-based cheese for topping. These swaps keep the fun flavors while meeting diet needs. Pair your pizza crackers with tasty dips to enhance your snack. Pizza sauce is a classic choice, but you can try marinara for a twist. Ranch dressing adds a creamy touch, while hummus gives a healthy option. For a fun mix, serve with a cheese dip or guacamole. These pairings make your snack even more enjoyable! To keep your leftover pizza crackers fresh, place them in an airtight container. This helps prevent them from becoming soft or stale. If you have a lot left, separate layers with parchment paper. This way, they don’t stick together. Store them at room temperature for easy access during snack time. When you want to enjoy your pizza crackers again, reheating is key. Preheat your oven to 350°F (175°C). Spread the crackers on a baking sheet in a single layer. Heat them for about 5-10 minutes. This method keeps them crispy and tasty, just like when they were fresh. If you want to keep your pizza crackers longer, they can last up to a week at room temperature. For longer storage, freeze them in a sealed bag. They can last up to three months this way. When you’re ready to eat, simply thaw them in the fridge overnight, then reheat as needed. Enjoy every bite of your tasty snack! Yes, you can use whole wheat flour. It gives a nutty flavor. The texture may be denser and heartier. You might need to add a little more water for the dough. Whole wheat flour is a healthy choice. It adds fiber to your snack. Just keep in mind that it will change the overall taste. You can serve these crackers with pizza sauce. It makes a great dip. Other options include ranch dressing or marinara sauce. You can also pair them with cheese or a fresh salad. They work well at parties or family gatherings. They are fun and tasty for kids, too. Try adding some sliced veggies for a crunch. Yes, you can bake them in an air fryer. Preheat your air fryer to 375°F (190°C). Cut the dough into cracker shapes, like in the oven method. Place them in a single layer in the air fryer basket. Cook for about 8-10 minutes. Check for a golden color and crispiness. Enjoy your crunchy snack without heating the whole oven! Making DIY pizza crackers is fun and easy. You learned about essential ingredients, optional toppings, and tasty substitutes. We covered the dough preparation, scoring, and baking. You now have handy tips for perfect texture and rolling. You explored flavor variations, including gluten-free options and pairing ideas. Lastly, we discussed storage and FAQs to boost your confidence. Enjoy your homemade crackers with your favorite dips and toppings!
DIY Pizza Crackers Tasty Snack for Any Occasion
Are you ready to take snacking to the next level? DIY Pizza Crackers are fun, easy, and perfect for any occasion! With just a few
For my Easy No Peel Salsa, you need simple, fresh items. Here’s what to gather: - 4 large ripe tomatoes, chopped - 1 small red onion, finely chopped - 1 jalapeño pepper, seeds removed and minced - 1/4 cup fresh cilantro, chopped - 2 cloves garlic, minced - Juice of 2 limes - 1 teaspoon ground cumin - Salt to taste - 1/2 teaspoon black pepper - 1 tablespoon olive oil (optional) Fresh produce makes the best salsa. I love ripe tomatoes for their juicy flavor. Red onions add sweetness and crunch. Jalapeños give a nice kick. The cilantro brings a fresh taste. Garlic adds depth. Lastly, lime juice brightens everything up. You can add more flavor with a few extras. Try including a pinch of sugar to balance the acid. If you like heat, add more jalapeño or some diced serrano peppers. For a smoky touch, mix in some smoked paprika. Each change makes the salsa unique. These options help you customize to your taste. You can find the full recipe above to guide your cooking. Start by gathering all your fresh ingredients. You need four large ripe tomatoes, one small red onion, and one jalapeño pepper. Chop the tomatoes into small pieces. Finely chop the red onion. Remove the seeds from the jalapeño and mince it carefully. Make sure to wash all your produce first. This step ensures your salsa stays fresh and clean. In a large mixing bowl, combine the chopped tomatoes and red onion. Next, add the minced jalapeño, chopped cilantro, and minced garlic. Squeeze the juice of two limes over the mix. Be careful to catch any seeds. Now, sprinkle in one teaspoon of ground cumin, salt to taste, and half a teaspoon of black pepper. If you want a richer taste, drizzle in one tablespoon of olive oil. Gently toss all the ingredients together until they are well mixed. Adjust the seasoning to your liking. Let your salsa sit for at least 15 minutes before serving. This wait time helps the flavors meld together, creating a tasty blend. You can taste it after the wait and adjust the seasoning if needed. If you like a kick, add more jalapeño. For a sweeter note, try adding diced mango or pineapple. Trust me, these small tweaks can make a big difference! For the full recipe, check out the complete instructions above. To keep your salsa fresh, use ripe tomatoes. They add great flavor. Check for a firm feel and a deep color. Store your salsa in a sealed container. This helps keep air out. Let it rest for 15 minutes before serving. This step helps the flavors mix well. If you want more heat, add more jalapeño. You can also use a pinch of cayenne. For less spice, remove all seeds from the jalapeño. Taste as you go and adjust. This way, you find the heat that suits you best. Avoid over-mixing your salsa. Too much mixing can make it mushy. Use fresh ingredients for the best taste. Don’t skip the lime juice; it brightens the flavors. Make sure to season well but taste first. Too much salt can ruin the dish. For more tips, check the Full Recipe. {{image_2}} You can make this salsa even better by adding fruits and veggies. Try diced mango or pineapple for a sweet twist. These fruits add a fun flavor to your salsa. You can also mix in bell peppers for crunch. They bring color and taste to the dish. Chopped cucumbers add freshness and a nice crunch too. Adjust the heat to fit your taste. If you like it hot, add more jalapeños. You can also try serrano peppers for extra spice. Want a milder salsa? Remove the seeds from the jalapeño. You can even use sweet peppers instead. For a smoky flavor, add a bit of chipotle powder. This gives your salsa a unique kick. You can adapt this salsa for different diets. If you're gluten-free, this recipe is safe for you. Just make sure your chips are also gluten-free. For low-carb diets, skip the chips. Serve the salsa with sliced veggies instead. If you’re vegan, this recipe is perfect as it is. You can also make it without salt for a low-sodium option. Just taste as you go! Check out the Full Recipe for more details on making this easy salsa. To keep your easy no peel salsa fresh, store it in an airtight container. Glass jars work well, as they do not absorb odors. Make sure to fill the container to the top to limit air exposure. This helps keep the flavors vibrant and prevents spoilage. When stored correctly, your salsa will last up to 5 days in the fridge. After that, it may start to lose its fresh taste. If you notice any changes in color or smell, it's best to toss it. Always trust your senses when it comes to food safety. You can freeze no peel salsa for up to 3 months. Use freezer-safe bags or containers, leaving some space for expansion. Thaw it in the fridge overnight when you’re ready to use it. The texture may change, but the taste will still be great. Enjoy your homemade salsa whenever you need it! For the full recipe, check out the Easy No Peel Salsa section. Yes, you can use canned tomatoes. Choose a brand with no added sugar or salt. Canned tomatoes save time and still taste good. They can make your salsa smooth and rich. If you use canned tomatoes, drain them first. This prevents your salsa from getting too watery. You might want to adjust the spices a bit. Taste it as you mix! Your Easy No Peel Salsa will last about 3 to 5 days in the fridge. Keep it in an airtight container to keep it fresh. If you see any water pooling on top, stir it before serving. This helps bring back the flavor. Always check for any change in smell or color. If it doesn't smell right, throw it out. You want to enjoy fresh salsa! This salsa pairs well with many dishes. You can serve it with tortilla chips for a tasty snack. It also makes a great topping for tacos or grilled chicken. Try it with scrambled eggs for breakfast. You can even mix it into a salad for extra flavor. The options are endless! Get creative and enjoy your salsa in different ways. This blog post covered how to make easy no-peel salsa. We explored the main ingredients, like fresh produce, and optional flavor boosts. I shared step-by-step instructions to mix and enhance your salsa. Tips on freshness, spice levels, and common mistakes helped you get it right. We even looked at fun variations and proper storage techniques. Finally, the FAQs answered your burning questions. Now, you can enjoy delicious salsa that fits your taste and needs. Dive in and start creating your own perfect dish today!
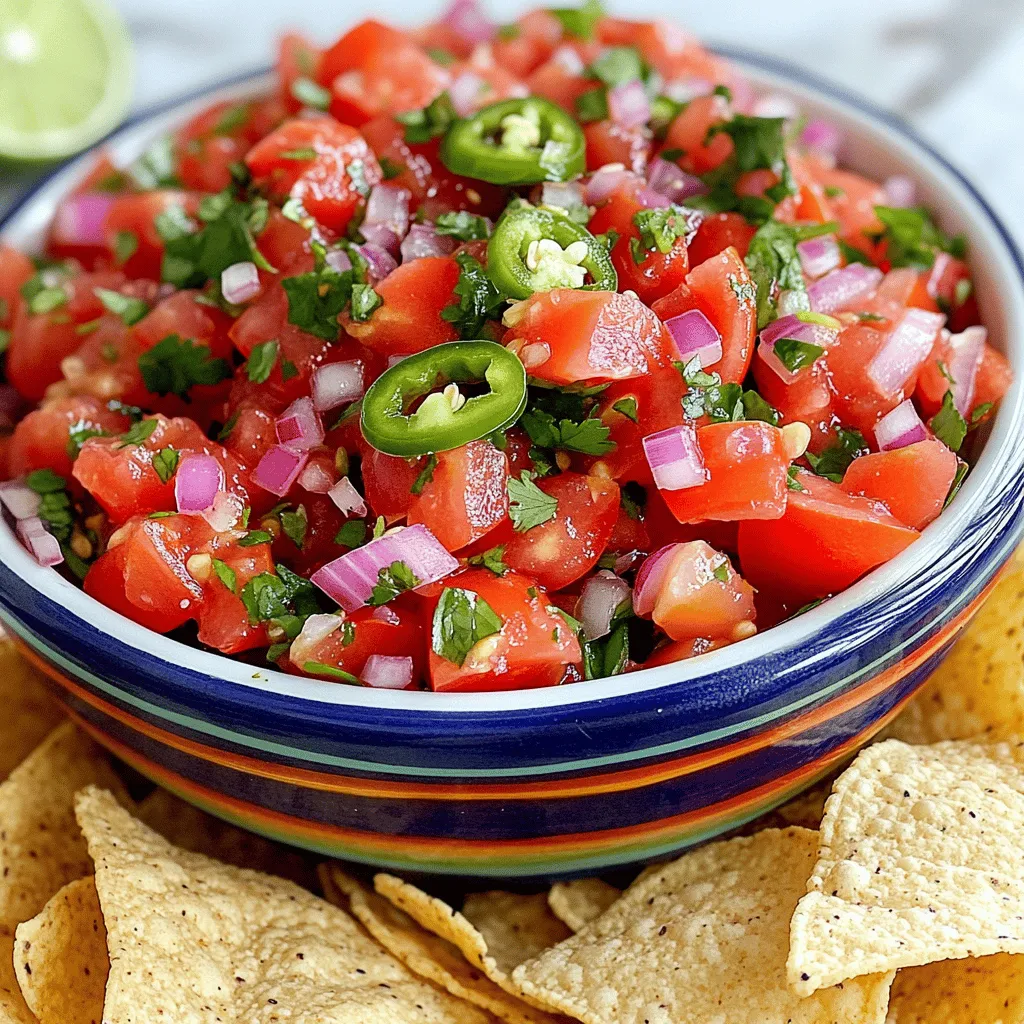
Easy No Peel Salsa Quick and Flavorful Recipe
Craving a fresh and zesty salsa without the hassle of peeling? You’ve come to the right place! In this Easy No Peel Salsa Quick and
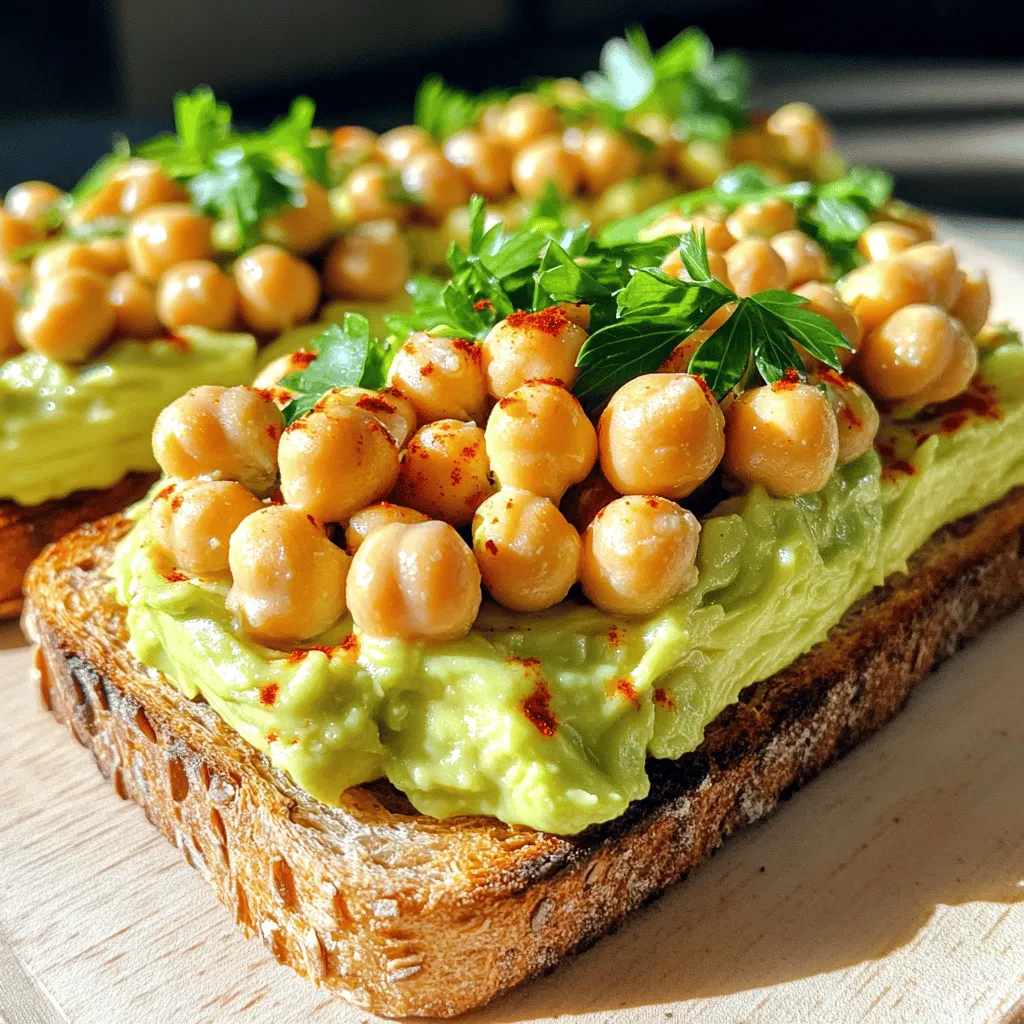
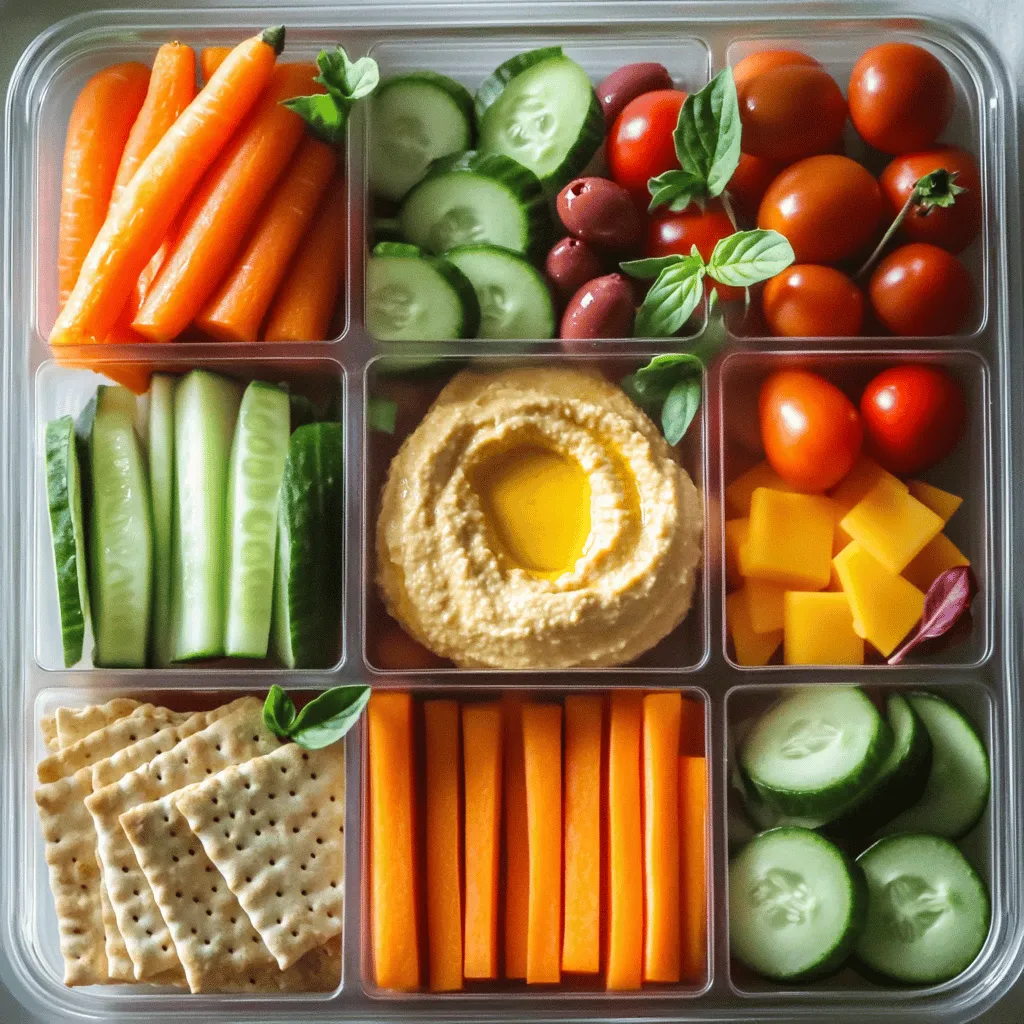
- 1 cup hummus (store-bought or homemade) - 1 cup mixed seasonal vegetables (carrot sticks, cucumber slices, bell pepper strips) - 1 cup sliced roasted chicken breast or turkey - 1 cup cheese (cubed cheddar, gouda, or a cheese of choice) - 1 cup whole grain crackers (or your favorite type) - ¼ cup olives (green or black, pitted) - ¼ cup dried fruit (such as apricots, apples, or cranberries) - 1 tablespoon chia seeds (for added crunch on veggies, optional) You can mix and match these ingredients. I often use seasonal veggies for freshness. Hummus serves as a great dip and adds flavor. You can choose a protein like chicken or turkey for a filling lunch. Cheese adds creaminess and pairs well with crackers. Whole grain crackers give a nice crunch and energy. Adding olives brings a burst of flavor. Dried fruit adds sweetness and texture. Chia seeds give a fun crunch to veggies. These options make your Adult Lunchable Bento Box tasty and fun! For the full recipe, refer to the [Full Recipe]. Start by gathering your bento box or meal prep containers. I recommend a 3-compartment bento box. This design lets you keep your food separate and fresh. It also makes meal prep simple and fun. Choose a container that seals well to avoid spills. Portion out mixed seasonal vegetables into one compartment. I like to use bright carrot sticks, crunchy cucumber slices, and colorful bell pepper strips. These choices add taste and visual appeal. To keep your veggies fresh and crunchy, store them in a cool place until you pack your lunch. You can even wrap them in a damp paper towel to retain moisture. In the second compartment, arrange sliced roasted chicken breast or turkey. If you prefer a vegetarian option, marinated chickpeas or edamame work well. Both options add protein and flavor. For a quick meal, make sure to slice the meat thinly. This helps with eating and keeps your bento box neat. In the third compartment, add cubed cheese. Cheddar and gouda pair nicely with the chicken or turkey. For a fun twist, try a cheese with a bold flavor. To keep cheese fresh in meal prep, pack it separately from other items. This prevents it from getting soggy or losing its texture. Fill a small section with whole grain crackers. Choose your favorite type, like seed-based crackers for extra crunch or whole wheat for fiber. To manage portion control, keep a small handful in the box. This way, you enjoy a satisfying snack without overdoing it. Add a handful of olives and a small portion of dried fruit, like apricots or cranberries, for visual appeal. Arrange them nicely for a fun look. If you want, use mini containers for dips like hummus or yogurt dressing. This adds flavor and makes your meal even more enjoyable. Follow these steps for the perfect Adult Lunchable Bento Box Meal Prep! You can find the full recipe for more ideas. To make meal prep quick, focus on batch cooking. Prepare all ingredients in one go. Set aside 15 minutes at the start of your week. Choose a day when you have a little extra time, like Sunday. This helps you gather all your supplies. Chop veggies and cook proteins ahead of time. Store them in airtight containers. This way, everything stays fresh and ready. When making your bento box, use a 3-compartment container. It allows for better organization of flavors and textures. You can even mix and match ingredients for variety. This keeps your meals exciting. To wow your eyes and taste, make your bento box colorful. Use different veggies to create a rainbow effect. Arrange them in neat rows or fun shapes. This can make even simple foods look gourmet. Colorful meals are more inviting and fun to eat. For a finishing touch, add small dips in mini containers. You can try honey mustard or a yogurt dressing. This adds flavor and makes your bento box pop. Always remember, a good presentation makes your meal more enjoyable. Dips can change the whole taste of your meal. Include hummus, guacamole, or tzatziki. These add creaminess and depth to your bento box. Don’t forget spices! Sprinkle some on your veggies or proteins. Try garlic powder or paprika for extra flavor. These small additions can elevate your meal. They make each bite more exciting. For the full recipe, check out Adult Lunchable Bento Box Meal Prep. {{image_2}} You can easily adapt the adult Lunchable bento box for different diets. For vegetarians and vegans, swap the chicken with marinated chickpeas or edamame. Both options pack in protein and flavor. If you need gluten-free options, choose rice cakes or gluten-free crackers. These alternatives keep your meal tasty and satisfying. Mixing flavors adds fun to your bento box. Try pairing hummus with sliced bell peppers for a crunchy snack. If you want something unique, add a sprinkle of smoked paprika to your veggies. This adds a nice touch. For an international twist, use fresh herbs like basil or cilantro. They brighten up your meal while giving it character. Using seasonal fruits and vegetables makes your bento box fresh and exciting. In spring, add strawberries or snap peas. Summer is perfect for cherry tomatoes and cucumbers. In fall, think apples and roasted squash. Winter brings hearty veggies like carrots and Brussels sprouts. Adjust your recipe throughout the year to keep it interesting. To keep your Adult Lunchable Bento Box fresh, store it in a sealed container. Use a bento box with compartments to separate the food. This helps maintain texture and flavor. The ideal temperature for your refrigerator is 32°F to 40°F (0°C to 4°C). This range slows spoilage and keeps ingredients crisp. Yes, you can freeze bento boxes, but not all ingredients freeze well. For best results, freeze only the proteins and some veggies. Avoid freezing creamy dips like hummus or cheese, as they can change texture. When ready to eat, thaw the box in the fridge overnight. This keeps food safe and tasty. Each ingredient in your bento box has its own shelf life: - Hummus: 4 to 7 days in the fridge. - Vegetables: 3 to 5 days, depending on the type. - Chicken or turkey: 3 to 4 days after cooking. - Cheese: 1 week after opening, if stored properly. - Crackers: Check the package for the best-by date. Watch for signs of spoilage like off smells or discoloration. When in doubt, throw it out! You can use several other spreads. Some popular options include: - Guacamole: Creamy and full of healthy fats. - Bean dip: This is protein-rich and flavorful. - Nut butter: Almond or cashew butter adds a sweet twist. - Yogurt dip: A tangy choice that pairs well with veggies. These alternatives cater to different dietary needs, making your bento box fun and varied. Absolutely! Fresh fruits add color and flavor. Here are a few ideas: - Apple slices: Crunchy and sweet, they pair well with cheese. - Grapes: Easy to grab and eat, plus they’re hydrating. - Berries: Strawberries or blueberries offer antioxidants and taste great. - Mandarin oranges: These are juicy and refreshing. Including fruits boosts your vitamins and can satisfy sweet cravings. To keep your veggies fresh, follow these tips: - Use airtight containers: This reduces moisture buildup. - Pat veggies dry: Remove excess water before packing. - Separate wet and dry items: Keep dips and moist items apart. - Add a paper towel: Place one in the container to absorb moisture. These simple steps help maintain crunch and freshness. You can keep your bento box in the fridge for up to four days. Here are some general guidelines for food safety: - Check the ingredients: Cooked proteins last about three to four days. - Fresh veggies: They can stay fresh for five days if stored correctly. - Dairy products: Cheese should also stay good for the same time frame. Always check for any signs of spoilage before eating. In this blog post, we covered how to create a healthy Adult Lunchable Bento Box. We discussed main ingredients like hummus, seasonal veggies, and protein options. I shared tips for assembling your bento box, including snacks and presentation ideas. You learned about storage practices to keep your lunch fresh. As you prepare your bento box, remember to enjoy experimenting with flavors and ingredients. This way, your meals will always be fun and delicious. With these ideas, you can make lunchtime exciting and healthy.
Adult Lunchable Bento Box Meal Prep for Busy Days
Busy days call for simple yet satisfying meals. That’s where the Adult Lunchable Bento Box comes in. This fun and easy meal prep solution lets
- 4 medium ripe tomatoes, roughly chopped - 1 small yellow onion, quartered - 2 cloves garlic, peeled - 2 jalapeños, deseeded and chopped - 1/4 cup fresh cilantro, chopped - 1 teaspoon ground cumin - 1 tablespoon lime juice - Salt to taste The main ingredients are simple yet full of flavor. I love using ripe tomatoes. They bring a sweet taste that pairs well with the other ingredients. The yellow onion adds a nice crunch. Garlic gives a bold flavor that makes the salsa pop. Jalapeños add heat, but you can adjust how many you use based on your spice level. Fresh cilantro adds a burst of freshness. Ground cumin gives that earthy note you just can’t miss. The lime juice brightens everything up, making each bite refreshing. Lastly, adding salt enhances all these flavors. - Additional herbs or spices - Avocado for creaminess - Tomato paste for thicker consistency If you want to mix it up, try adding more herbs or spices. You can add avocado to make the salsa creamy. This also adds healthy fats. If you prefer a thicker salsa, just add a bit of tomato paste. It will change the texture but keep the flavor. For the full recipe, check the section above. Enjoy making this fresh and vibrant salsa! First, preheat your skillet over medium-high heat. This step is key for that smoky flavor. Next, add the tomatoes, onion, garlic, and jalapeños to the skillet. Let them char slightly. Turn them occasionally for about 8 to 10 minutes. You want the vegetables to soften. The tomatoes' skins should get slightly blistered, adding depth to your salsa. Once the vegetables are charred, take them off the heat and let them cool for a few minutes. This helps with blending. Now, transfer the charred mix to a blender. Add in fresh cilantro, ground cumin, and a splash of lime juice. Don't forget to add a pinch of salt to enhance the flavor. Blend until you reach your desired texture. You can make it smooth or keep it chunky, based on your taste. After blending, taste your salsa. Adjust the seasoning with more salt or lime juice as needed. If you want even better flavor, let the salsa sit at room temperature for about 30 minutes before serving. This resting time allows the flavors to meld together beautifully. Enjoy your fresh salsa ranchera with your favorite dishes! For the full recipe, check the section above. To make salsa ranchera shine, balance spice and acidity. Use fresh ingredients for the best taste. Ripe tomatoes bring sweetness, while lime juice adds zing. Adjust the heat by adding more or fewer jalapeños. Always taste as you go to find your perfect mix. You can choose a smooth or chunky salsa. For a smooth texture, blend longer. If you prefer chunkiness, pulse gently. If the salsa feels too thick, add a bit of water or extra lime juice. This helps you reach your desired consistency. Salsa ranchera pairs well with many dishes. Use it with tacos, grilled meats, or as a dip for chips. It also works great in recipes like enchiladas. You can use it as a condiment or a key ingredient in meals. For the full recipe, check out the details above! {{image_2}} To change the heat of your salsa ranchera, start with the jalapeños. Remove the seeds for a milder taste. If you want more heat, leave some seeds in. You can also add other peppers, like serranos, for a different kick. Serranos are hotter than jalapeños. Try a mix for a unique flavor! You can make your salsa even more fun by adding fruits. Mango or pineapple gives a sweet twist. Just chop the fruit and blend it with your salsa. You can also try different herbs, like basil or mint. These fresh herbs can change the taste and make it more exciting. How you prepare the veggies makes a big difference. Roasting gives a deep, warm flavor. Charring adds a smoky touch. You can roast everything in the oven or on a grill. For mixing, you can use a food processor or a blender. A food processor gives a chunkier salsa, while a blender makes it smooth. Choose your method based on what you like! To keep your salsa ranchera fresh, use airtight containers. Glass jars with tight lids work well. They help keep out air and moisture. Store the salsa in the fridge right after you make it. It lasts about 5 to 7 days. The flavors blend over time, making it even better! Want to save some salsa for later? You can freeze it! Pour the salsa into freezer-safe bags or containers. Leave a little space at the top for expansion. It can stay good for up to 3 months. When you're ready to use it, thaw the salsa in the fridge overnight. Stir it well before serving. Keep an eye on your salsa. If you see mold or a change in color, it’s time to toss it. A sour smell or off taste also means it’s gone bad. Always store leftovers safely in the fridge and use them within a week. If you're unsure, it’s best to be safe and not eat it. For the full recipe of the best homemade salsa ranchera, check back at the beginning! Homemade salsa ranchera lasts about 4 to 5 days in the fridge. Store it in an airtight container. This helps keep it fresh and tasty. Yes, you can make salsa ranchera ahead of time. In fact, making it a day before can enhance the flavors. Just keep it in the fridge until you're ready to serve. Salsa ranchera pairs well with many dishes. You can serve it with: - Grilled meats - Tacos - Nachos - Eggs - Rice and beans This salsa adds a fresh kick to any meal. Yes, you can make a version without tomatoes. Use roasted peppers or tomatillos instead. This gives a unique flavor and keeps it fresh. Salsa ranchera is medium spicy. The heat comes from jalapeños. You can adjust the spice level by adding more or less. Compared to salsa verde, it is usually milder. For a hotter kick, add serrano peppers. You can control the heat to fit your taste. Making Salsa Ranchera is simple and fun. You learned about key ingredients, like ripe tomatoes, jalapeños, and fresh cilantro. I shared step-by-step instructions for perfect preparation, blending, and serving. With tips to balance flavor and adjust texture, you’re ready to make it your own. You can even customize it with extras like mango or avocado. Store it right to keep it fresh. Enjoy your tasty salsa as a dip or on your favorite dishes! Now, gather your ingredients and start blending. Your perfect Salsa Ranchera awaits!
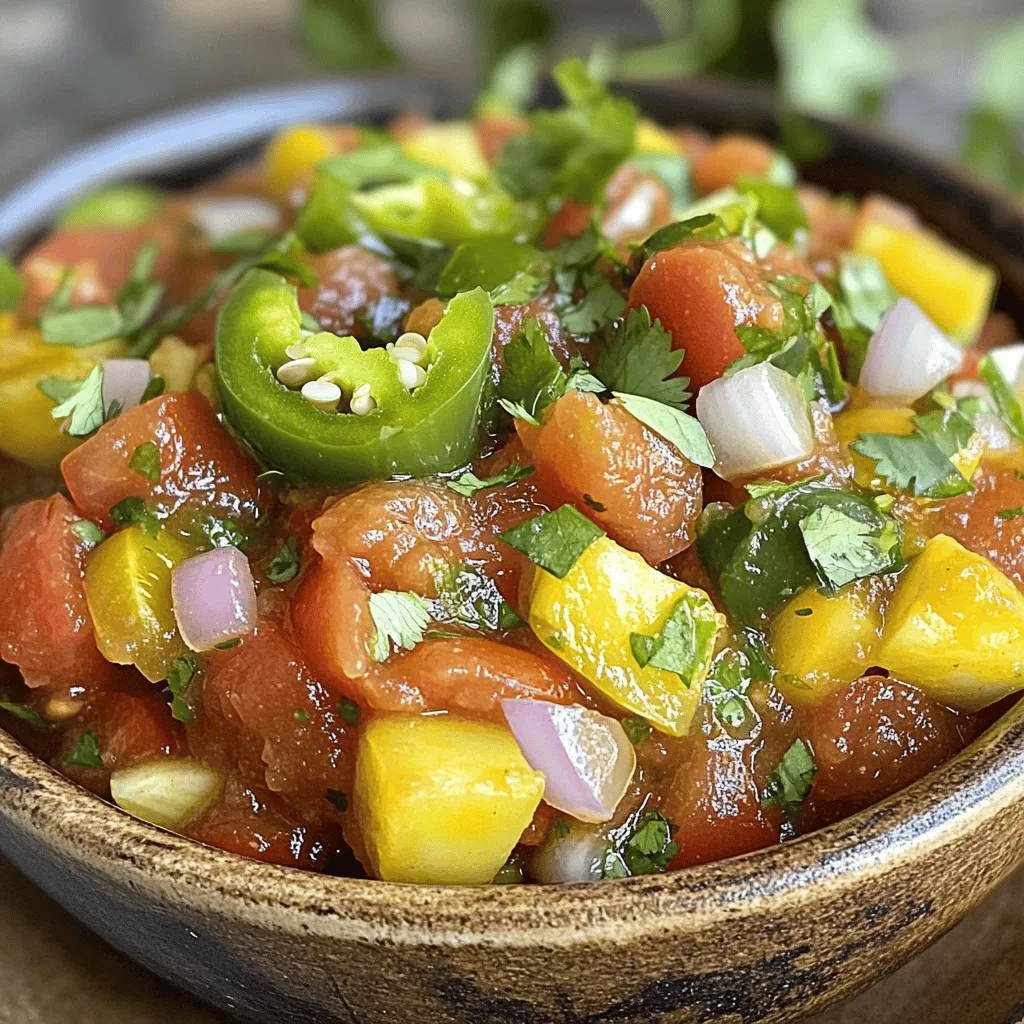
The Best Homemade Salsa Ranchera Simple and Fresh
Looking to spice up your meals? The Best Homemade Salsa Ranchera is your answer! This fresh and simple recipe uses ripe tomatoes, zesty jalapeños, and
- 1 lb pizza dough (store-bought or homemade) - 4 tablespoons unsalted butter, melted - 4 cloves garlic, minced - 2 tablespoons fresh parsley, chopped - 1 teaspoon dried oregano - 1/2 teaspoon salt - 1/4 teaspoon black pepper - Grated Parmesan cheese (optional, for garnish) Buttery garlic knots are simple yet full of flavor. The main ingredient is pizza dough. You can use store-bought dough for speed or make your own if you prefer. The dough gives the knots their soft and chewy texture. Next, we have unsalted butter. It adds richness and helps the garlic flavor shine. Minced garlic provides that classic taste we all love. I use four cloves to make it strong, but you can adjust it to your liking. Fresh parsley brings a bright note. It also adds a nice pop of color. Dried oregano gives an earthy taste that pairs well with the garlic. Salt and black pepper enhance all these flavors, making each bite delicious. Finally, sprinkle grated Parmesan cheese on top if you want extra flavor. It melts slightly and adds a nice salty touch. Gather these ingredients, and you’re ready to make your buttery garlic knots! {{ingredient_image_1}} First, you need to preheat your oven to 400°F (200°C). While it heats, line a baking sheet with parchment paper. This step keeps the knots from sticking. Next, take your pizza dough and place it on a lightly floured surface. Divide it into 8 equal pieces. Now, roll each piece into a long rope, about 8 inches long. Once you have the ropes, tie each one into a knot. Place all the knots on the prepared baking sheet. Make sure they have some space between them. This helps them rise and bake evenly. In a small bowl, combine the melted butter, minced garlic, chopped parsley, oregano, salt, and black pepper. This mix makes your garlic butter. Stir everything until it blends well. The garlic and herbs will give the knots great flavor. Now it’s time to coat the knots. Brush the garlic butter mixture over each knot. Be generous! You want every bit to soak up that buttery goodness. After coating them, pop the baking sheet into the oven. Bake for about 15 to 20 minutes. Keep an eye on them. You want them to be golden brown and fluffy. When they are done, take them out of the oven. Brush any leftover garlic butter on top. If you like, sprinkle some grated Parmesan cheese for extra flavor. Serve these knots warm, and enjoy every bite! To get soft and fluffy garlic knots, kneading is key. Knead your dough for about five minutes. This helps develop gluten, which gives the knots structure. After kneading, let the dough rise in a warm spot. Cover it with a clean towel. This helps the dough double in size. A good rise makes the knots light and airy. To boost the garlic flavor, add a pinch of red pepper flakes. This gives a nice kick to your knots. You can also mix in fresh basil or thyme with the parsley. These herbs add depth to the taste. For a richer flavor, try using roasted garlic instead of raw garlic. It adds a sweet, mellow taste. For storage, keep your garlic knots in an airtight container. They stay fresh for up to three days at room temperature. If you want to keep them longer, freeze them. Wrap each knot in plastic wrap and place them in a freezer bag. To reheat, preheat your oven to 350°F (175°C). Bake for about 10 minutes until warm. This keeps them soft and tasty. Pro Tips Use Fresh Ingredients: Fresh garlic and parsley will enhance the flavor of your garlic knots significantly, giving you a more aromatic and tasty result. Don't Overwork the Dough: Be gentle when tying the knots to maintain the dough's airiness, which helps achieve a fluffy texture after baking. Experiment with Herbs: Feel free to add other herbs such as thyme or basil to the garlic butter for an extra depth of flavor. Serve Immediately: These knots taste best when served warm right out of the oven, so have them ready to enjoy straight away! {{image_2}} You can make cheese-stuffed garlic knots by adding cheese to the dough. Start with your pizza dough, then flatten it a bit. Place a small piece of cheese in the center. Fold the dough over the cheese and roll it into a knot. This adds a melty surprise inside that everyone loves! Want some heat? Just add red pepper flakes to your garlic butter mix. Use about a teaspoon for a nice kick. Brush this spicy mix over the knots before baking. The heat from the flakes pairs so well with the garlic. It gives your knots a tasty twist! Try using different herbs for a fresh flavor. You can mix in dried basil, thyme, or rosemary into the dough. Just replace some of the oregano with your choice of herb. This simple change gives the knots a unique taste. Each bite can bring a new flavor that makes them special! Buttery garlic knots taste great with dips. Here are some of my favorites: - Marinara Sauce: This classic dip adds a nice tomato flavor. - Ranch Dressing: Creamy ranch offers a cool contrast to warm knots. - Spinach Artichoke Dip: Rich and cheesy, this dip brings a fun twist. - Garlic Butter Dip: For garlic lovers, this dip is a must-try. Each dip brings out unique flavors in the knots. I love mixing and matching to keep it fun! Buttery garlic knots fit well with many meals. They make a great side or snack. Here’s what I recommend: - Pasta Dishes: Serve them with spaghetti or fettuccine for a hearty meal. - Salads: Pair them with a fresh garden salad for a light option. - Soups: Enjoy them alongside tomato soup or minestrone for a cozy combo. - Grilled Meats: They complement grilled chicken or steak perfectly. These pairings enhance the flavors of both the knots and the main dish. How you serve your buttery garlic knots can impress your guests. Here are some fun ideas: - Use a Wooden Board: Place the knots on a rustic board for a casual look. - Garnish with Herbs: Sprinkle fresh parsley or basil for a pop of color. - Serve in a Basket: A lined basket gives a homey feel. - Add Dips in Small Bowls: Place dips in cute bowls around the knots. These ideas make your dish more inviting and fun to eat! Buttery garlic knots stay fresh for about 2-3 days. To keep them tasty, store them in an airtight container. You can also wrap them in foil. If you need them to last longer, freeze them. They will remain good for about a month in the freezer. Yes, you can use homemade pizza dough! Making your own dough is easy and fun. Use flour, water, yeast, and salt. Mix them well and let the dough rise. This can take about 1-2 hours. When it’s ready, shape it into knots as you would with store-bought dough. If you don't want to use garlic, there are good options. You can use garlic powder for a milder flavor. Onion powder is another choice that adds depth. Chopped green onions can also work well. They give a fresh taste without the strong garlic bite. In this article, we covered how to make buttery garlic knots, starting with the key ingredients. We explored step-by-step instructions, helpful tips, and variations to try. You'll find ways to serve these knots, whether you pair them with dips or add cheese for a twist. These garlic knots can impress anyone at your table. They are delicious, easy, and fun to make. So gather your ingredients, follow the steps, and enjoy every bite. Happy baking!
Buttery Garlic Knots Simple and Tasty Delight
Are you ready to impress your taste buds? These buttery garlic knots are simple to make and oh-so-delicious. With just a few ingredients, you can
To make a fun and tasty Homemade Lunchable, gather these main ingredients: - 1 cup whole grain crackers - 4 ounces cheddar cheese, sliced - 4 ounces turkey or chicken breast, sliced - 1/2 cup hummus - 1/2 cup carrot sticks - 1/2 cup cucumber sticks - 1/2 cup grape tomatoes - 1/4 cup olives (black or green, pitted) These ingredients give you a mix of flavors and textures. You can customize this list based on what you like. If you want to add a special touch, consider these sweet dip options: - 1 tablespoon honey - Any sweet dip you love Adding a sweet dip can make lunch even more fun! Kids enjoy dipping their food. Garnishing can enhance the look and taste. Try using: - Fresh herbs like basil or parsley These fresh herbs provide a burst of color and flavor. They also make your Homemade Lunchable feel gourmet. For the complete set of instructions, check out the Full Recipe. First, gather all your ingredients. You will need: - 1 cup whole grain crackers - 4 ounces cheddar cheese, sliced - 4 ounces turkey or chicken breast, sliced - 1/2 cup hummus - 1/2 cup carrot sticks - 1/2 cup cucumber sticks - 1/2 cup grape tomatoes - 1/4 cup olives (black or green, pitted) - 1 tablespoon honey or a sweet dip (optional) - Fresh herbs (like basil or parsley) for garnish Next, slice the cheddar cheese and turkey or chicken breast into small, bite-sized pieces. This makes it easy for kids to grab them with crackers. Wash your veggies well. Cut the carrots and cucumbers into sticks. This gives a nice crunch and adds color. Now, let’s build your lunchable! Take a lunchbox or a compartmentalized container. Start by placing the whole grain crackers in one section. Next, arrange the sliced cheddar and turkey or chicken in separate compartments. This keeps flavors distinct. In another section, add a scoop of hummus. Kids love to dip! Arrange the carrot and cucumber sticks in their own areas. Add the grape tomatoes next to the veggies. Lastly, put olives in a small cup or section. This keeps them from mixing with everything else. If you want a sweet touch, drizzle honey in a tiny container for a fun treat. Finish by garnishing with fresh herbs. This adds a pop of freshness and makes it look pretty. To keep your lunchable fresh, secure the lunchbox with its lid. If you plan to pack it for school or a trip, make sure to refrigerate it until you leave. For best results, eat it within a day. Enjoy this easy and fun meal anytime. You can mix flavors to make your lunchable more fun. Try using different cheeses, like gouda or pepper jack. Add some spicy mustard for a zesty twist. Mixing sweet and salty works well too. Pair grapes with cheese or turkey with honey. This makes each bite a little surprise! Store your lunchable in a tight container. This keeps everything fresh and tasty. If you make it the night before, place it in the fridge. Use an ice pack if you take it to school. This helps keep the cheese and meats cool. Always check the dates on your ingredients for freshness. Make your lunchable eye-catching! Use colorful veggies to add brightness. Arrange food in fun shapes or patterns. Let your kids help with this! You can use cookie cutters to shape the cheese or veggies. Put the ingredients in a fun lunchbox. This makes lunchtime exciting and enjoyable! {{image_2}} You can easily make a vegetarian or vegan lunchable. Swap out meat for plant-based items. Use roasted chickpeas or marinated tofu. Include a variety of veggies like bell peppers, zucchini, and snap peas. For cheese, try vegan cheese slices or nut-based spreads. Hummus is a great dip for all these ingredients. This way, kids enjoy a tasty meal without animal products. If you need gluten-free options, replace whole grain crackers with gluten-free crackers. Rice cakes work well too. Use sliced cheese made from nuts or dairy-free alternatives. For protein, include sliced turkey or chicken that is confirmed gluten-free. Always read labels to avoid hidden gluten. This way, everyone can enjoy the lunchable without worry. You can take your lunchable around the world! Try a Mexican theme with tortilla chips, guacamole, and salsa. Add sliced bell peppers and cheese for a fun mix. For an Italian twist, use pita bread, mozzarella, and sun-dried tomatoes. Pair these with basil pesto as a dip. Each option offers a new taste adventure, making lunch fun and exciting! Store any leftovers in an airtight container. This keeps the food fresh and safe. Place the container in the fridge. Enjoy leftovers within two days for the best taste. If you want to keep the flavors, separate the wet and dry items. For example, keep hummus away from crackers to avoid sogginess. You can freeze some parts of your Homemade Lunchable. Cheese and meats freeze well. Cut them into small portions for easy thawing. Place them in freezer-safe bags. When you're ready to eat, move them to the fridge to thaw overnight. Avoid refreezing after you thaw to keep the taste fresh. Most of your ingredients have a good shelf life. Whole grain crackers can last for months if sealed. Cheese stays fresh for about a week in the fridge. Turkey or chicken breast should be eaten within three days. Hummus lasts about a week too. Always check for an off smell or color to ensure freshness. You can change your Homemade Lunchable to fit your taste. Use different meats like ham, roast beef, or even plant-based options. Add various cheeses, such as mozzarella or pepper jack, for new flavors. You can also swap out the veggies. Try bell peppers, celery sticks, or snap peas. For a fun twist, add some fruit, like apple slices or strawberries. The sweet dip can change too. Use yogurt, peanut butter, or chocolate sauce for something sweet. The options are endless! For packing Lunchables, I suggest using a divided container. Look for ones with sections to keep food separate. This way, crackers stay crunchy, and dips don’t mix. Choose a container with a tight lid to prevent spills. If you need to pack it for travel, consider insulated containers. They keep food fresh and cool longer. You can also use bento boxes, which are perfect for kids. They make lunch fun and easy to eat. Yes, you can make Lunchables ahead of time! Prepare them the night before and store them in the fridge. Just keep the crackers separate until you’re ready to eat. This keeps them from getting soggy. You can also pack them for school or work. Make sure to store them in a cool place to keep everything fresh. A small ice pack can help too. This way, you can enjoy a tasty lunch anytime! Homemade Lunchables beat store-bought ones in many ways. First, they are fresher. You choose the ingredients, so you control the taste. You can use high-quality cheese and meats, making them healthier. You also skip the preservatives found in store-bought options. Plus, they are fun to make! Kids can help pick their favorites. With Homemade Lunchables, you save money and waste less packaging. Overall, they offer a better meal for you and your family. For a full recipe, check out the DIY Gourmet Lunchable section above! Homemade Lunchables are fun and easy to make. We covered key ingredients, like meats and cheeses, and stepped through prep and assembly. Tips and tricks help you boost flavor and make your lunch more fun. I shared vegan and gluten-free options to meet all needs. Proper storage keeps everything fresh, with helpful FAQs for customization and packing. Now, you can create tasty, homemade lunch choices. Enjoy making your perfect Lunchable.
Homemade Lunchable Easy and Fun Recipe for Kids
Looking for a fun lunch idea that kids will love? Try making your own Homemade Lunchable! This simple recipe is packed with tasty ingredients and
To make a tasty buffalo chicken wrap, gather these simple ingredients: - 2 cups cooked chicken, shredded - 1/2 cup buffalo sauce - 1/2 cup cream cheese, softened - 1/2 cup shredded lettuce - 1/4 cup diced tomatoes - 1/4 cup shredded cheddar cheese - 4 large tortillas - 1 tablespoon olive oil - Salt and pepper to taste You can swap out some ingredients to fit your taste. If you want less heat, choose a mild buffalo sauce. For a lighter option, use Greek yogurt instead of cream cheese. You can also use any cooked chicken you have on hand, like rotisserie chicken. For a vegetarian wrap, chickpeas or grilled veggies work well in place of chicken. When picking ingredients, freshness matters. Choose bright, crisp lettuce and ripe tomatoes for the best flavor. Look for chicken that is tender and juicy. If you buy buffalo sauce, check the label for quality ingredients. A good sauce has a nice balance of heat and flavor. For cream cheese, aim for a brand with simple ingredients. This attention to quality will make your buffalo chicken wrap shine! First, take 2 cups of cooked chicken and shred it. You can use a fork or your hands. Next, pour in 1/2 cup of buffalo sauce. Mix well until the chicken is fully coated. This gives the chicken a nice kick! If you want it spicier, add more sauce. Now, let’s build your wrap! Grab 4 large tortillas and lay them on a flat surface. Take a bowl and blend 1/2 cup of softened cream cheese with a pinch of salt and pepper. Spread a generous tablespoon of this cream cheese mixture in the center of each tortilla. Then, add the buffalo chicken mix on top. Next, toss on a handful of shredded lettuce, some diced tomatoes, and a sprinkle of shredded cheddar cheese. It adds flavor and crunch! Now, fold the sides of the tortilla inward. Then, roll it tightly from the bottom to keep everything inside. Heat a pan over medium heat and add 1 tablespoon of olive oil. Once the oil is hot, place each wrap seam-side down in the pan. Cook for about 2-3 minutes on each side. You want them to be golden brown and crispy. When done, take them out and let them cool for a minute. For easy eating, cut each wrap in half diagonally. Enjoy your meal! For the full recipe, refer to the instructions above. To make a great cream cheese spread, start with softened cream cheese. This helps it blend smoothly. Add a pinch of salt and pepper for flavor. Mix it well until it is creamy. You want it to spread easily on the tortilla. If you like, add herbs like chives or dill for more taste. This small change makes a big difference. Garnishes add color and flavor. You can use shredded lettuce, diced tomatoes, and shredded cheese. These toppings give your wrap crunch and freshness. You could also add sliced jalapeños for heat or diced avocado for creaminess. Fresh cilantro or parsley can brighten up the dish. Get creative with what you have at home! To keep your wraps crisp, avoid overfilling them. Use just enough filling to enjoy the flavor but not so much that it spills out. Spread the cream cheese evenly to create a barrier. This helps keep the moisture in check. Wrapping them tightly also helps. If you plan to eat them later, store them in a dry place or wrap them in parchment paper. This keeps them fresh and ready to eat. {{image_2}} You can adjust the heat of your buffalo chicken wraps. For a spicy kick, use extra hot buffalo sauce. You can also mix in some chopped jalapeños for added heat. If you prefer mild flavors, opt for a milder sauce or blend in ranch dressing. This will tame the spice but keep the flavor. If you want a vegetarian wrap, swap the chicken for roasted cauliflower or chickpeas. Both options soak up flavors well. You can also use tempeh or tofu marinated in buffalo sauce. These ingredients add protein and texture. Don't forget to use the same cream cheese mix for a creamy touch. Get creative with your fillings! Try adding sliced avocado for creaminess or crunchy celery for texture. You could even add black beans for a hearty bite. Mixing in other veggies like bell peppers or corn can change the taste. Use the full recipe as a base and make it your own. To keep your buffalo chicken wraps fresh, wrap them tightly in plastic wrap or foil. Place them in an airtight container. This helps avoid any drying out. Store them in the fridge for up to three days. If you want to keep them longer, consider freezing. When you are ready to eat your leftovers, reheat them in a skillet for best results. Heat the skillet on medium and add a little olive oil. Place the wrap seam-side down. Cook for about 2-3 minutes on each side. This keeps the wrap crispy. You can also use a microwave, but it may make the wrap softer. Freezing wraps is a great way to prepare meals ahead of time. Make sure the wraps are fully cooled before freezing. Wrap each one in plastic wrap and then in foil. Place them in a freezer bag. They can last for up to three months. When ready to eat, thaw in the fridge overnight before reheating. Yes, you can use store-bought rotisserie chicken. It saves time and works great. Just shred the chicken and mix it with buffalo sauce. This option is perfect for quick meals. You still get that tasty flavor without the extra work. Buffalo chicken wraps go well with many sides. Here are some tasty ideas: - Celery sticks - Carrot sticks - Fresh fruit salad - Chips and salsa - A light salad These sides add crunch and freshness. They make a great meal together. To make a lower-calorie version, try these tips: - Use low-fat cream cheese or Greek yogurt instead. - Choose whole wheat tortillas for more fiber. - Add more veggies like spinach or cucumbers. These changes help cut calories while keeping the flavors. You can enjoy a healthier meal without losing taste. For the full recipe, check out the Buffalo Bliss Chicken Wraps. You now have all you need to make tasty buffalo chicken wraps. We discussed the right ingredients, how to prepare and assemble them, and tips to keep them crispy. You also learned ways to vary the recipe, store leftovers, and answer common questions. With this knowledge, you can create delicious wraps that everyone will love. Enjoy making and sharing them!
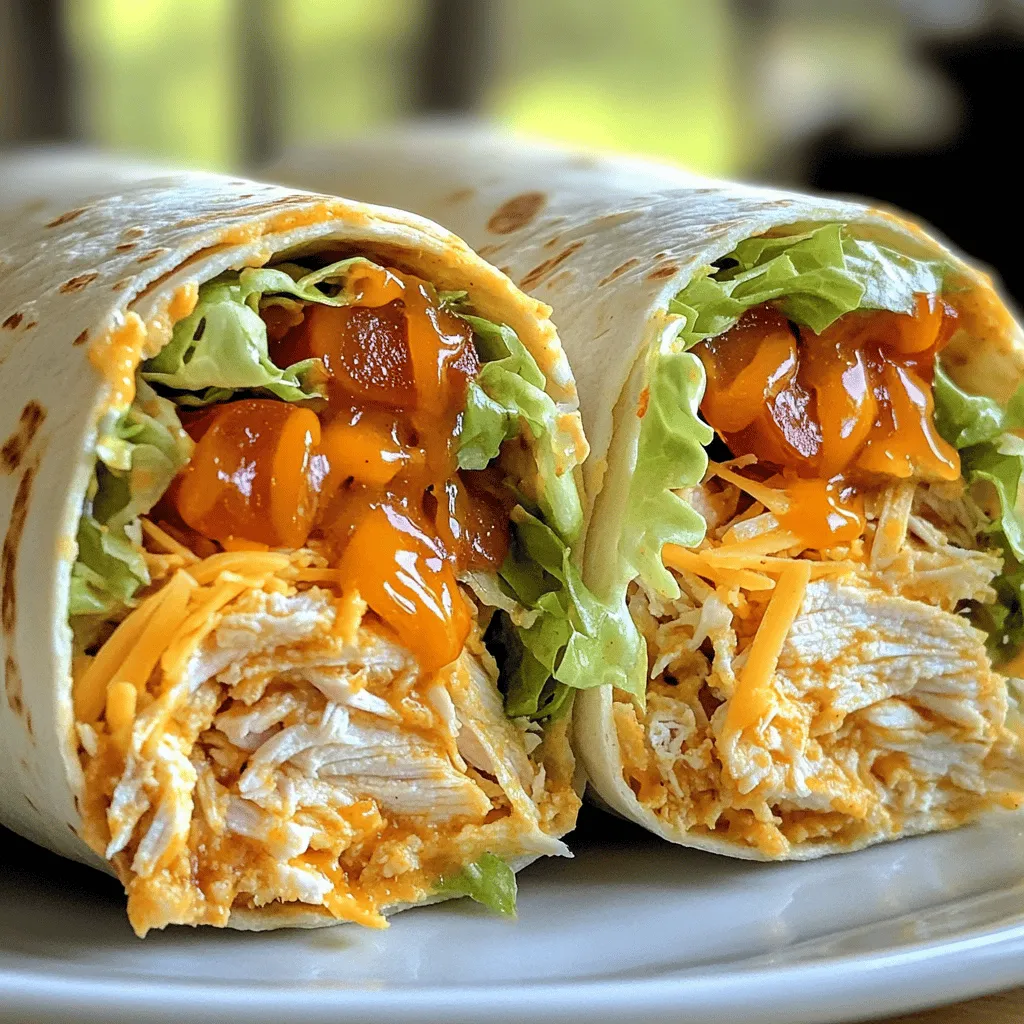
Easy Buffalo Chicken Wrap Perfect for Quick Meals
Are you ready to spice up your meal routine? This Easy Buffalo Chicken Wrap is here to save the day! With just a few simple