Appetizers
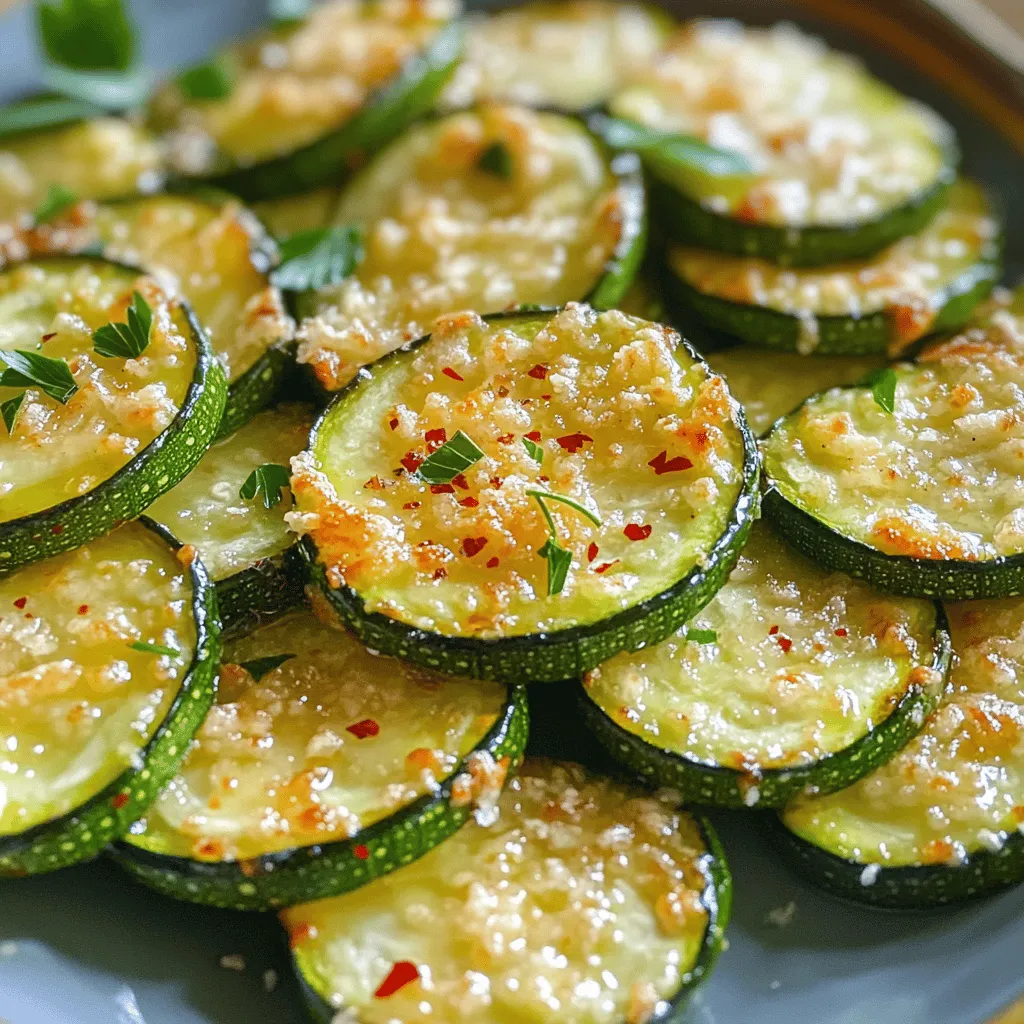
Oven Roasted Parmesan Zucchini Simple and Tasty Dish
Looking for a simple yet tasty dish to brighten your dinner table? Oven roasted Parmesan zucchini is your answer! This easy recipe enhances fresh zucchini
![- 2 medium zucchinis - 1 cup breadcrumbs (panko preferred for extra crunch) - 1 teaspoon garlic powder - 1 teaspoon onion powder - 1 teaspoon smoked paprika - 1/2 teaspoon salt - 1/2 teaspoon black pepper - 1 large egg - 1 tablespoon olive oil - Fresh parsley, chopped (for garnish) - Optional: Grated Parmesan cheese for topping - Spiralizer or vegetable peeler - Colander - Mixing bowls - Air fryer To create air fryer curly zucchini fries, you need fresh and crisp ingredients. Start with medium zucchinis. They hold their shape well and have a nice flavor. For the crunch, use panko breadcrumbs. They give that extra crisp you want. The spices are key. Garlic powder adds depth, while onion powder gives a sweet touch. Smoked paprika brings a warm flavor. Salt and pepper enhance all the tastes. You can also add a large egg to help the breading stick better. A tablespoon of olive oil adds richness and flavor. Finally, sprinkle some fresh parsley on top for color. If you love cheese, a light dusting of grated Parmesan is a tasty option. Gather these tools: a spiralizer or vegetable peeler to cut the zucchini, a colander to drain moisture, mixing bowls for your ingredients, and of course, your air fryer to cook everything evenly. With these items ready, you're set to make a delightful snack! For the full recipe, check out the details provided in the earlier section. - Spiralizing the zucchinis: Start by washing your zucchinis well. Use a spiralizer or a vegetable peeler to create curly shapes. If you use a peeler, make long strips. Twist them into curls for a fun look. This shape helps the fries cook evenly and get crispy. - Draining excess moisture: Place the curly zucchini in a colander. Sprinkle them lightly with salt. Let them sit for about 15 minutes. This step pulls out extra moisture. Pat them dry with paper towels. When less water is left, the fries will crisp up better in the air fryer. - Mixing the breadcrumb seasoning: Grab a bowl and combine 1 cup of breadcrumbs with garlic powder, onion powder, smoked paprika, salt, and black pepper. Mix it well. This mix gives the fries a burst of flavor. Panko breadcrumbs work best for extra crunch. - Coating the zucchini properly: In another bowl, beat one egg and mix it with 1 tablespoon of olive oil. Dip each curly zucchini piece into the egg mix. Then, coat it well in the breadcrumb mixture. Make sure every piece is covered. This helps the seasoning stick and adds a tasty crunch. - Preheating the air fryer: Preheat your air fryer to 400°F (200°C). This takes about 3 to 5 minutes. Preheating ensures even cooking and crispy fries. - Cooking the zucchini fries: Place the coated zucchini fries in a single layer in the air fryer basket. Cook them at 400°F (200°C) for 10 to 12 minutes. Shake the basket halfway through to cook them evenly. When they turn golden and crispy, they are ready to enjoy. For the full recipe, check out the details above. To get crispy curly zucchini fries, you must drain moisture. Zucchini holds a lot of water. After you spiralize, sprinkle salt on the curls. Let them sit in a colander for 15 minutes. This process removes excess water. After that, pat them dry with paper towels. Using panko breadcrumbs is key for crunch. They are lighter and create a crispier texture. Mix them with garlic powder, onion powder, smoked paprika, salt, and black pepper. This mix enhances the flavor and adds extra crunch. Spices and herbs boost the taste of your fries. Try adding Italian seasoning or a pinch of cayenne for heat. You can also mix in fresh herbs like basil or thyme. These additions make your fries unique. Dipping sauces can take your fries to the next level. I love ranch or garlic aioli with these fries. You can also serve them with marinara sauce. This adds a fun twist to the snack. Air fryers can vary in cooking times. Check your model's manual for specific times. Start with 10 to 12 minutes at 400°F (200°C). If they need more time, add a minute or two. If you want to make more fries, cook them in batches. Avoid overcrowding the air fryer. This way, every fry gets crispy and golden. You’ll enjoy a perfect snack every time. For the full recipe, check out the [Full Recipe]. {{image_2}} You can change up the flavor of your curly zucchini fries easily. Here are two fun ideas: - Italian Herb Blend: Mix dried oregano, basil, and thyme into your breadcrumbs. This adds a classic Italian taste that goes great with marinara sauce. - Spicy Cajun Twist: Add cayenne pepper and paprika to the mix. This blend gives a spicy kick, making your fries exciting and bold. You can prepare zucchini in different ways: - Baking vs. Air Frying: Air frying gives you crispy fries with less oil. Baking can take longer and may not get as crisp. If you want a healthier option, air fry your zucchini. - Using Other Vegetables: Try sweet potatoes or carrots. They also make great curly fries. Just adjust the cooking time based on the vegetable's thickness. You can easily modify the recipe to suit your needs: - Gluten-Free Alternatives: Use gluten-free breadcrumbs. They work well to keep your fries crisp and tasty without gluten. - Vegan Options: Skip the egg and use a flaxseed mixture instead. Combine 1 tablespoon of flaxseed meal with 2.5 tablespoons of water. Let it sit to thicken before using it to coat the zucchini. For the full recipe, check out the Air Fryer Curly Zucchini Fries 🥒. To keep your curly zucchini fries fresh, store them in the fridge. Place them in an airtight container. This helps prevent them from drying out or getting soggy. You can keep them in the fridge for up to three days. If you want to save them longer, consider freezing. Lay the fries on a baking sheet in a single layer first. Once frozen, transfer them to a freezer bag. This way, they won’t stick together. You can freeze them for up to three months. The best way to reheat your curly zucchini fries is in the air fryer. Preheat your air fryer to 400°F (200°C). Place the fries in the basket and cook for about 5 minutes. This method helps them regain their crispy texture. You can also use the oven. Preheat your oven to 375°F (190°C). Spread the fries on a baking sheet and bake for 10-15 minutes. Flip them halfway to ensure even heating. In the fridge, curly zucchini fries last about three days. If they sit longer, check for spoilage. Signs of spoilage include a slimy texture or an off smell. If you see or smell anything strange, throw them away for safety. For frozen fries, they can last up to three months. After that, they may lose flavor and texture. Always label your freezer bags with the date to keep track. Yes, you can use regular zucchini. Simply slice it into thin strips or rounds. Curly zucchini adds fun shapes, but regular zucchini tastes just as good. For a gluten-free option, use almond flour or crushed nuts. You can also coat zucchini in a mix of eggs and spices. This method gives flavor without the crunch of breadcrumbs. Serve them hot, right from the air fryer. They taste best with a sprinkle of salt and fresh herbs. Add grated Parmesan cheese for extra flavor. Yes, you can make them in advance. Store them in the fridge for up to three days. Reheat in the air fryer for a few minutes until crispy again. Zucchini fries pair well with ranch, marinara, or garlic aioli. You can even try spicy ketchup for a kick. Experiment with your favorite sauces for a fun twist. For the full recipe, check the recipe section above. You learned how to make crispy zucchini fries. We covered the ingredients, tools, and easy steps. With tips, variations, and storage info, you can enjoy different flavors. Feel free to adjust seasonings and try other veggies. These zucchini fries are simple and quick to make in the air fryer. Enjoy them fresh or as leftovers. Whatever option you choose, they will taste great! Happy cooking!](https://grilledflavors.com/wp-content/uploads/2025/07/7075e1f9-011d-456c-832a-5fc643121622.webp)
Air Fryer Curly Zucchini Fries Crispy and Tasty Snack
Are you ready to elevate your snack game? Air fryer curly zucchini fries deliver a crispy, tasty treat that’s perfect for any craving. In this
![To make crispy fried squash, you need a few simple items. Here’s what you will need: - 2 medium yellow squash, sliced into 1/4-inch rounds - 1 cup buttermilk - 1 cup all-purpose flour - 1/2 cup cornmeal - 1 teaspoon garlic powder - 1 teaspoon onion powder - 1 teaspoon smoked paprika - Salt and pepper to taste - Vegetable oil for frying - Fresh parsley, chopped (for garnish) Using fresh, medium yellow squash makes a big difference in flavor and texture. Buttermilk helps the batter cling well. The mix of flour and cornmeal gives a great crunch. Seasoning is key; garlic powder, onion powder, and smoked paprika add depth. Don't forget the oil—it's essential for frying. If you want, you can sprinkle fresh parsley on top for a nice look and flavor boost. This is the base for your crispy fried squash. Check the [Full Recipe] for detailed steps. 1. Soaking in buttermilk: Start by slicing the squash into 1/4-inch rounds. Place them in a large bowl and cover them with buttermilk. Let them soak for at least 30 minutes. This step makes the squash tender and adds a nice flavor. 2. Slicing the squash: Make sure your slices are even. This helps them cook at the same rate. If you cut them too thick, they may not fry well. 1. Mixing dry ingredients: In a shallow dish, mix together 1 cup of all-purpose flour, 1/2 cup of cornmeal, 1 teaspoon of garlic powder, 1 teaspoon of onion powder, and 1 teaspoon of smoked paprika. Add salt and pepper to taste. This mix will give your squash a tasty coating. 2. Dredging the squash: After the squash has soaked, take each piece out. Let the excess buttermilk drip off. Dredge each piece in the flour mixture, making sure they are fully coated. Shake off any extra flour. 1. Heating the oil: Heat about 1 inch of vegetable oil in a large skillet over medium-high heat. To check if the oil is ready, drop a bit of the flour mix into it. If it sizzles, the oil is hot enough. 2. Frying in batches: Carefully place the coated squash into the hot oil. Do not overcrowd the pan; fry in small batches. Cook for about 2-3 minutes on each side until golden brown and crispy. 3. Draining excess oil: Once cooked, transfer the fried squash to a plate lined with paper towels. This helps soak up any extra oil. Enjoy your crispy and flavorful fried squash. For the full recipe, check out the complete details in the earlier section. To get that perfect crispy texture, focus on the oil temperature. Heat your oil to about 350°F. You can test it by dropping a bit of your flour mix in. If it bubbles and sizzles, it's ready. If it smokes, it's too hot. Prevent sogginess by not soaking the squash too long. Thirty minutes in buttermilk is enough. When you coat the squash, shake off the extra flour mix. This keeps the batter light and crispy. You can make your fried squash even tastier by adding spices or herbs to the batter. Try adding a pinch of cayenne for heat or some dried thyme for a fresh touch. Your options are endless! If you don't have buttermilk, don't worry. You can use regular milk with a splash of vinegar. Let it sit for a few minutes to sour. This will give your batter a nice tang. For the full recipe, check the detailed instructions above! {{image_2}} You can make fried squash in different ways. If you want a healthier option, try oven-baking. Preheat your oven to 425°F (220°C). Coat the squash with the batter, then place them on a baking sheet. Bake for about 20 minutes, flipping halfway through. This method gives you a crispy texture while using less oil. An air fryer is another great tool. It uses hot air to cook food, making it crispy. Set your air fryer to 400°F (200°C). Arrange the squash in a single layer in the basket. Cook for about 10 minutes. Shake the basket halfway through for even cooking. The result? Crispy squash with less fat! You can also switch up the main ingredient. Zucchini works well in place of squash. It has a similar texture and flavor. Just slice it the same way, soak it in buttermilk, and coat it with the same batter. If you need a gluten-free option, use gluten-free flour instead of all-purpose flour. There are many blends available that work great. You can also swap cornmeal for almond flour for a nutty taste. These changes keep the dish tasty while catering to dietary needs. For the full recipe, check out the detailed instructions above. Enjoy your cooking adventures! To keep fried squash fresh, store it in the fridge. Place it in an airtight container. This helps keep it crisp and flavorful. It is best to eat leftovers within two days. If you need to reheat it, use an oven for the best results. Preheat the oven to 350°F (175°C). Place the squash on a baking sheet and heat for about 10-15 minutes. This method keeps it crispy. If you want to save fried squash longer, freezing is a great option. First, let the squash cool completely. Then, arrange the pieces in a single layer on a baking sheet. Freeze them for about an hour. Once frozen, transfer the squash to a freezer bag. Make sure to remove as much air as possible. This helps avoid freezer burn. When you are ready to eat, take the squash out of the freezer. Thaw it in the fridge overnight. To reheat, you can bake it again at 350°F (175°C) for about 15-20 minutes. This keeps the flavor and texture nice. For the full recipe, check the Fried Squash Recipe Crispy and Delicious Delight. The best way to cut squash for frying is to slice it into 1/4-inch rounds. This thickness allows for even cooking and a nice crunch. If the slices are too thick, they may not cook well. If they're too thin, they can burn quickly. Aim for uniform slices for the best results. Yes, you can use other types of squash. Zucchini works well and has a similar texture. Acorn squash and pattypan squash are good alternatives too. Just remember to adjust the cooking time if the squash is thicker or thinner than yellow squash. Each type brings a unique flavor and texture. To keep the batter on the squash, make sure to let the slices soak in buttermilk. This adds moisture and helps the flour stick. After soaking, dredge each piece in the flour mixture. Shake off any excess before frying. Frying at the right temperature also helps the batter adhere better. Fried squash is a simple and tasty dish. We covered the right ingredients, like yellow squash and buttermilk, and how to prepare them. Following our steps will help you achieve a crispy outside and tender inside. Remember, you can swap in zucchini or modify cooking methods to suit your needs. Now you are ready to make fried squash your own. Enjoy experimenting with flavors and cooking methods. Happy cooking!](https://grilledflavors.com/wp-content/uploads/2025/07/3900a9f8-0055-4be8-8e89-066f0721d06f.webp)
Fried Squash Recipe Crispy and Delicious Delight
Looking for a tasty side dish that steals the show? My Fried Squash Recipe is your answer! With just a few simple ingredients, you can
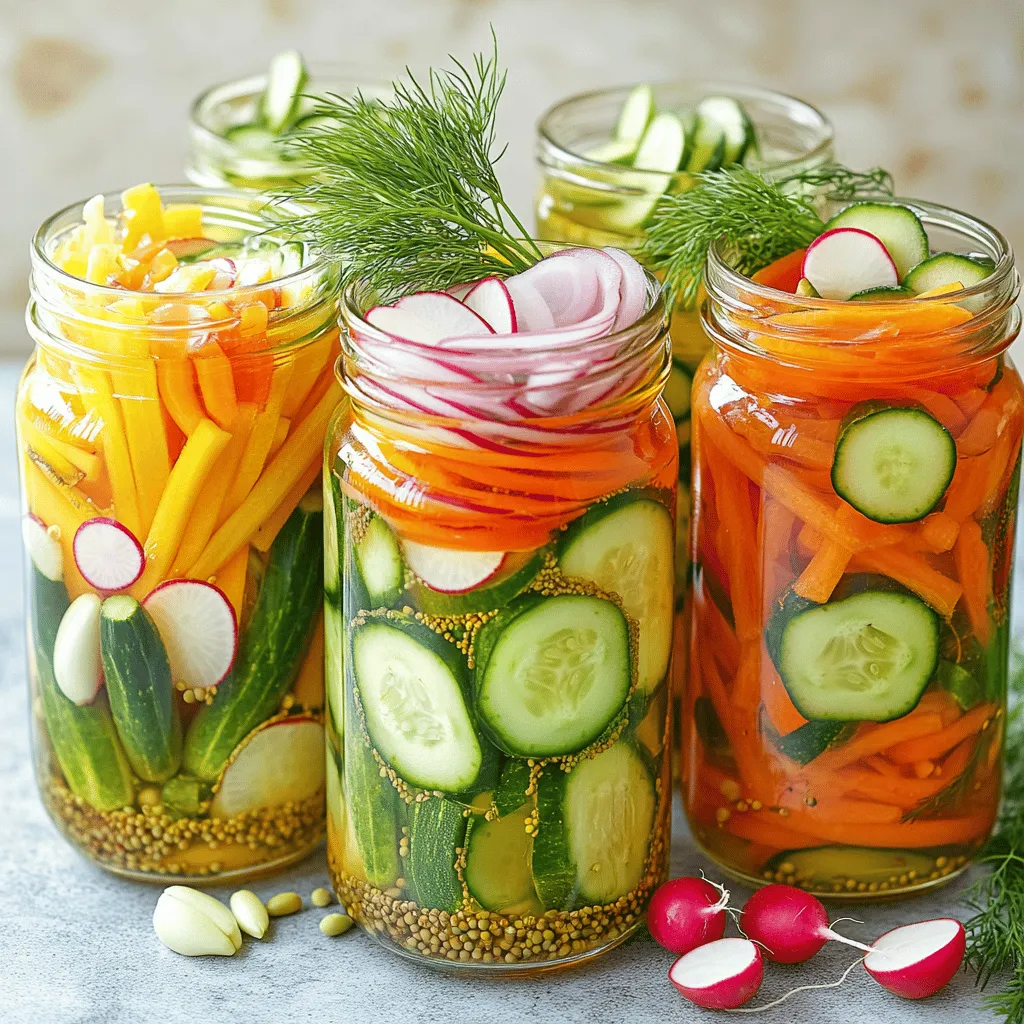
Pickled Vegetables for a Healthy Snack Delight
Are you looking for a tasty and healthy snack? Pickled vegetables offer a crunchy bite and bold flavors that pack a nutritious punch. In this

Parmesan Zucchini Chips Crispy and Flavorful Snack
Looking for a snack that’s both crispy and tasty? You’re in the right place! These Parmesan Zucchini Chips are easy to make and loaded with

Caprese Stuffed Avocados Fresh and Delicious Delight
Are you ready to elevate your snack game? Caprese Stuffed Avocados are fresh, tasty, and packed with flavor. This dish combines creamy avocados with tangy

Zucchini Röllchen Delightful and Flavorful Dish
Are you ready to impress your friends with a dish that’s both tasty and beautiful? Zucchini Röllchen is your go-to choice! This delightful recipe combines
![To make air fryer zucchini fries, gather the following items: - 2 medium zucchinis, cut into fry shapes - 1/2 cup all-purpose flour - 2 large eggs, beaten - 1 cup breadcrumbs (preferably panko for extra crunch) - 1 teaspoon garlic powder - 1 teaspoon onion powder - 1 teaspoon paprika - Salt and pepper to taste - Olive oil spray These simple ingredients create a tasty snack. Zucchinis are low in calories and full of nutrients. You can use all-purpose flour for coating, but gluten-free flour works too. The eggs help the breadcrumbs stick well to the zucchini. Panko breadcrumbs give extra crunch. Seasoning is key. Garlic powder, onion powder, and paprika add great flavor. Adjust salt and pepper to your liking. Olive oil spray helps achieve that perfect crispiness. For the full recipe, check out the section above. Enjoy making these delicious zucchini fries! - Preheating the Air Fryer Start by preheating your air fryer to 400°F (200°C). This step is key for even cooking. - Setting up the Breading Station Use three shallow bowls. In the first, add 1/2 cup all-purpose flour. The second bowl should hold 2 beaten eggs. In the third, mix 1 cup of breadcrumbs with 1 teaspoon garlic powder, 1 teaspoon onion powder, 1 teaspoon paprika, salt, and pepper. This setup makes coating easy. - Coating the Zucchini Fries Take each zucchini fry and first coat it in the flour. Shake off any extra flour. Next, dip it in the egg, making sure it is fully covered. Finally, roll it in the breadcrumb mix, pressing gently so the crumbs stick well. - Placing Zucchini Fries in the Air Fryer Arrange the coated zucchini fries in the air fryer basket. Keep them in a single layer for the best results. Lightly spritz them with olive oil spray. This adds to their crunchiness. - Cooking Time and Temperature Cook the fries for about 10-12 minutes. Flip them halfway through to ensure they brown evenly. You want them golden brown and crispy. - Checking for Doneness Once the time is up, check the fries. They should be golden and crispy. If they need more time, pop them back in for a few minutes. - Serving Suggestions Let the zucchini fries cool slightly before serving. They pair well with dips like ranch or marinara. You can also serve them as a side dish with your favorite meal. For the complete recipe, check out the Full Recipe. To get the best crunch from your zucchini fries, olive oil spray is key. A light spritz helps the fries brown nicely. It’s important not to drown them in oil. Just a few sprays will do. This keeps them crispy without being soggy. Using panko breadcrumbs also makes a big difference. Panko is lighter and flakier than regular breadcrumbs. This gives your fries that perfect crunch. They will turn golden brown and crisp in the air fryer. Make sure to adjust the seasoning to your taste. Start with the basics like salt and pepper. From there, you can add more spices if you want. Garlic powder, onion powder, and paprika are great for flavor. You can also try flavor variations. Add parmesan cheese for a cheesy touch. Or mix in some Italian herbs for a fresh taste. Experimenting with spices can make each batch unique. One common mistake is overcrowding the basket. If you pile too many fries in, they won’t cook evenly. Give them space to crisp up. Cook in batches if needed. Another mistake is using the wrong cooking temperature. Preheat your air fryer to 400°F (200°C). This helps the fries cook quickly and evenly. If it's too low, they may end up soft instead of crispy. {{image_2}} You can make zucchini fries even more fun by using other veggies. Here are two great choices: - Sweet Potato Fries: Sweet potatoes add a sweet taste and a nice color. Cut them into fry shapes, coat them like zucchini, and air fry. They will turn crispy and delicious. - Eggplant Fries: Eggplant has a unique flavor and texture. Slice it into fry shapes, salt it a bit, and let it rest. This will remove some moisture. Then, bread and cook it just like the zucchini. You can switch up how you bread your fries for different flavors. Here are a couple of ideas: - Gluten-Free Options: Use almond flour or crushed gluten-free crackers instead of regular flour. For the breadcrumbs, you can use gluten-free panko. This way, everyone can enjoy the fries. - Spicing Things Up: Add your favorite spices to the breadcrumbs. Consider chili powder, cumin, or even some Italian herbs. This gives your fries a unique kick and makes them extra tasty. Now that your fries are done, think about how to serve them. Here are some ideas: - Dipping Sauces: Pair your fries with tasty dips. Try ranch, spicy mayo, or garlic aioli. These sauces add a burst of flavor and make the meal more fun. - Pairing with Meals: These fries are a great side for many dishes. Serve them with burgers, grilled chicken, or even a fresh salad. They add crunch and flavor to any meal. For the full recipe on making these tasty air fryer zucchini fries, check out the [Full Recipe]. After you enjoy your air fryer zucchini fries, store any leftovers properly. - Refrigeration Tips: Place the cooled fries in an airtight container. Keep them in the fridge for up to three days. This way, they stay fresh and tasty. - Freezing Zucchini Fries: If you want to save them longer, freeze the fries. Lay them flat on a baking sheet until frozen. Then, transfer them to a freezer-safe bag. They can last up to three months in the freezer. When you want to enjoy your leftover fries, reheating them is simple. - Best Methods for Reheat: The best way to reheat zucchini fries is in the air fryer. This keeps them crispy. You can also use a conventional oven. Set it to 375°F (190°C) and bake for about 5-7 minutes. - Re-crisping in Air Fryer: For the air fryer, heat it to 350°F (175°C). Place the fries in a single layer, and cook for about 3-5 minutes. Check them often to avoid burning. Knowing how long your zucchini fries last helps you plan meals. - How Long Do They Last? When stored in the fridge, zucchini fries last about three days. In the freezer, they can last three months. - Signs of Spoilage: Look for signs like a sour smell or slimy texture. If they smell off or feel mushy, it’s best to toss them. Enjoy your air fryer zucchini fries fresh whenever possible. For the full recipe, check out the main section. Cook zucchini fries in your air fryer for about 10-12 minutes. Set the temperature to 400°F (200°C). Flip them halfway for even cooking. You want them golden brown and crispy. This timing works well for most air fryers. Yes, you can prep them ahead. Cut the zucchinis and coat them as the recipe says. Store them in the fridge for a few hours. When ready, just pop them in the air fryer. They will still taste great! Zucchini fries pair nicely with many sauces. Here are some tasty options: - Ranch dressing - Marinara sauce - Garlic aioli - Spicy ketchup Feel free to mix and match! Zucchini fries are a healthier snack. Zucchini is low in calories and high in nutrients. The air fryer uses less oil than frying. You can enjoy them without guilt! You can bake zucchini fries in the oven. Preheat your oven to 425°F (220°C). Place the coated zucchini on a baking sheet. Bake for about 20-25 minutes, flipping halfway. They may not be as crispy, but they will still taste great! Check the [Full Recipe] for more details. In this guide, we explored how to make tasty air fryer zucchini fries. We covered ingredients, preparation steps, and cooking techniques to achieve crispiness. You learned how to avoid common mistakes and tried variations with other veggies and sauces. Keeping leftovers and reheating correctly ensures you enjoy these fries later. In summary, air fryer zucchini fries are easy, fun, and healthy. Enjoy perfecting this recipe and making it your own!](https://grilledflavors.com/wp-content/uploads/2025/07/bc687652-87d6-42a3-9e31-0c89932a783b.webp)
Air Fryer Zucchini Fries Crunchy and Delicious Snack
If you’re searching for a tasty snack that’s easy to make, you’ve found it! Air fryer zucchini fries offer a crunchy bite that satisfies your
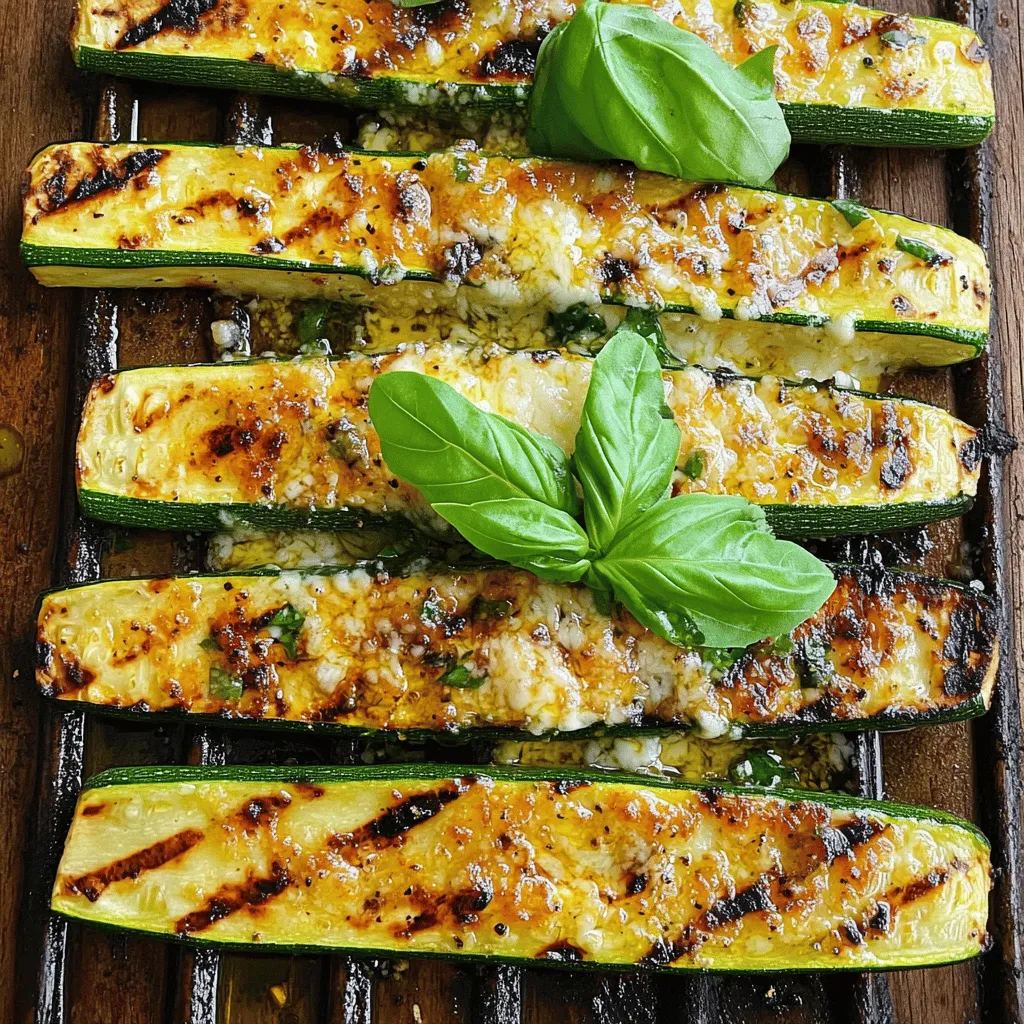
Grilled Zucchini with Parmesan Flavorful Side Dish
Looking for a simple yet flavorful side dish? Grilled zucchini with Parmesan is a top choice! This tasty recipe transforms fresh zucchini into a smoky,

Garlic Parmesan Roasted Brussels Sprouts Delight
If you’re looking for a tasty side dish that everyone will love, try my Garlic Parmesan Roasted Brussels Sprouts Delight. This dish mixes crisp Brussels