Appetizers
![To make tasty Air Fryer Taco Bombs, gather these key ingredients: - 1 lb ground beef or turkey - 1 taco seasoning packet - 1 can of refrigerated biscuit dough (8-count) - 1 cup shredded cheddar cheese - ½ cup chopped tomatoes - ½ cup diced onions - ¼ cup sliced black olives These ingredients create a delicious and hearty filling for your taco bombs. You can add extra flavor and fun with these garnishes and sauces: - ½ cup sour cream (for dipping) - Fresh cilantro (for garnish) - Hot sauce (for spice) - Salsa (for extra flavor) These options let you customize your dish to your taste. You will need a few essential tools to make your taco bombs: - Air fryer - Skillet - Mixing spoon - Baking sheet or plate (for assembling) - Measuring cups Having the right equipment makes the cooking process smooth and easy. For the complete recipe, check [Full Recipe]. First, start by cooking the meat. I like to use ground beef, but turkey works too. Heat a skillet over medium heat. Add the meat and cook until it is brown. This should take about 5 to 7 minutes. If there's extra fat, drain it. Next, stir in the taco seasoning. Follow the packet instructions for adding water. Let it simmer for a few minutes, then remove it from the heat. This mixture will give the taco bombs their bold flavor. Now, let’s assemble the taco bombs. Preheat your air fryer to 320°F (160°C). Take a can of refrigerated biscuit dough. For each biscuit, flatten it into a round shape, about 4 to 5 inches wide. Place a spoonful of the meat mixture in the center of each disc. Then, add some shredded cheddar cheese, chopped tomatoes, diced onions, and black olives on top. Next, gather the edges of the biscuit dough around the filling. Pinch the edges to seal them tightly. Roll the filled dough into a ball shape. This will help keep all the tasty fillings inside while they cook. It’s time to cook the taco bombs! Lightly spray the air fryer basket with olive oil. Place the taco bombs in the basket, making sure to leave space between each one. This helps them cook evenly. Spray the tops of the bombs with more olive oil for a nice, crispy finish. Set the air fryer to cook for about 10 to 12 minutes. Keep an eye on them until they turn golden brown and look delicious. Once they’re done, let them cool for a bit. Serve them warm with a side of sour cream for dipping. Don't forget to garnish with fresh cilantro for that extra pop! For the full recipe, check out the details above. Enjoy your tasty taco bombs! To get that perfect golden finish on your taco bombs, keep these tips in mind: - Use Olive Oil Spray: Lightly spray the tops with olive oil before cooking. - Adjust Air Fryer Temp: Set your air fryer to 320°F (160°C) for even cooking. - Don’t Overcrowd: Leave space between each taco bomb in the basket. This helps air circulate. These steps ensure even browning. You'll love the crunchy texture! Here are some common mistakes to watch out for: - Overfilling the Dough: If you add too much filling, the bombs won’t seal well. - Skipping the Simmer: Always let the meat mixture simmer to enhance the flavor. - Not Preheating the Air Fryer: Preheating helps cook the dough evenly. Avoiding these errors will lead to better results! To make your taco bombs even tastier, consider these ideas: - Add Spices: Mix in extra chili powder or cumin with the taco seasoning. - Fresh Herbs: Try adding chopped cilantro or green onions to the filling. - Cheese Variety: Use pepper jack or queso fresco for a different flavor. These tips will help you create a flavor explosion in every bite. For the complete recipe, check out the [Full Recipe]. {{image_2}} You can make tasty vegetarian taco bombs. Start with a meat substitute like lentils or black beans. Cook them with taco seasoning, just like you would with meat. You can also add veggies like bell peppers, corn, or zucchini. These ingredients add great flavor and texture. Cheese makes taco bombs extra yummy. While cheddar is classic, you can try other kinds. Monterey Jack adds a creamy touch. For a kick, use pepper jack cheese. If you want a tangy taste, try feta or goat cheese. Mix and match to find your favorite combo. Want it spicy? Add chopped jalapeños or a sprinkle of cayenne pepper to the meat mix. For a milder taste, skip the heat. You can also use diced bell peppers for sweetness. This way, everyone can enjoy taco bombs just the way they like. Explore these options to find your perfect flavor balance. For the full recipe, check out the above section. To store leftover taco bombs, let them cool completely. Place them in an airtight container. You can keep them in the fridge for up to three days. If you want to keep them longer, consider freezing. To reheat the taco bombs, preheat your air fryer to 350°F (175°C). Place the taco bombs in the basket. Heat them for about 5-7 minutes. This method keeps them crispy and tasty. To freeze taco bombs, arrange them on a baking sheet. Ensure they don't touch each other. Freeze for about one hour, then transfer to a freezer bag. They can stay frozen for up to three months. When ready to eat, cook from frozen for 12-15 minutes at 350°F (175°C). Check the Full Recipe for details on how to make these delicious treats! Yes, you can use pre-cooked meat. Just warm it up before adding it to the dough. This saves time. Make sure to mix in the taco seasoning for great flavor. You can use rotisserie chicken, leftover beef, or turkey. This way, you keep the taste and have fun making taco bombs! You have many options for fillings! Try using beans, corn, or peppers. You can add cooked vegetables for a healthy twist. Different cheeses like pepper jack or mozzarella can add a nice kick. Don't forget to mix in spices to match your taste. Get creative and make it your own! Check the color of the taco bombs. They should be golden brown and crispy on the outside. You can also use a meat thermometer. The inside should reach 165°F (74°C). If they look puffy and the dough is firm, they are ready to eat. Let them cool for a few minutes before serving! In this post, I covered how to make delightful air fryer taco bombs. We explored main ingredients, easy steps, and helpful tips. I shared options for vegetarian variants and ways to adjust the spice level. You learned how to store and reheat your taco bombs. Taco bombs are simple and fun to make. With these steps and tricks, you will impress everyone. Enjoy creating tasty bites that can fit many tastes!](https://grilledflavors.com/wp-content/uploads/2025/06/df4e66a1-6969-45b9-bbfe-b2e9f9cc8516.webp)
Air Fryer Taco Bombs Flavorful and Easy Recipe
Are you ready to make a snack that wows everyone? Air Fryer Taco Bombs are not just tasty; they’re super easy to whip up! Packed
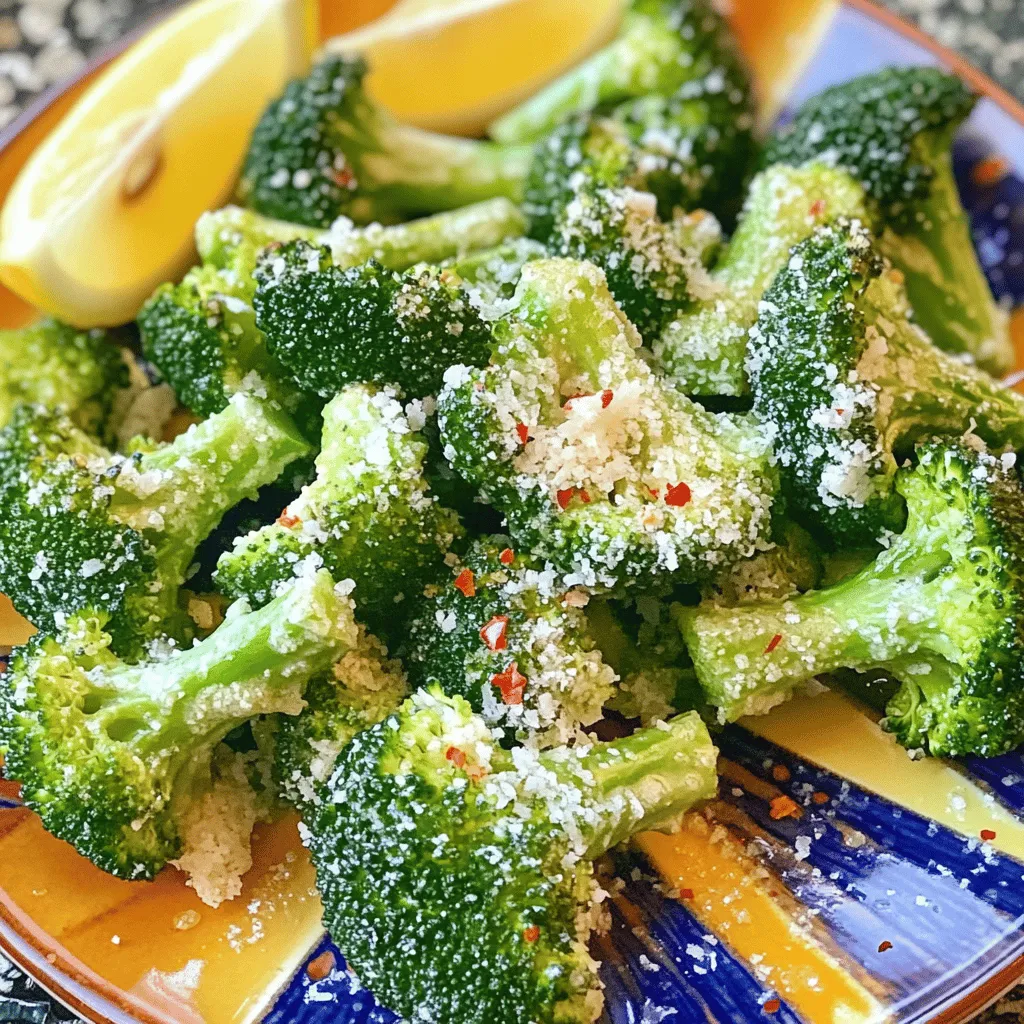
Crispy Garlic Air Fryer Broccoli Quick and Easy Recipe
Get ready to elevate your snack game with my Crispy Garlic Air Fryer Broccoli! This quick and easy recipe turns ordinary broccoli into a crunchy
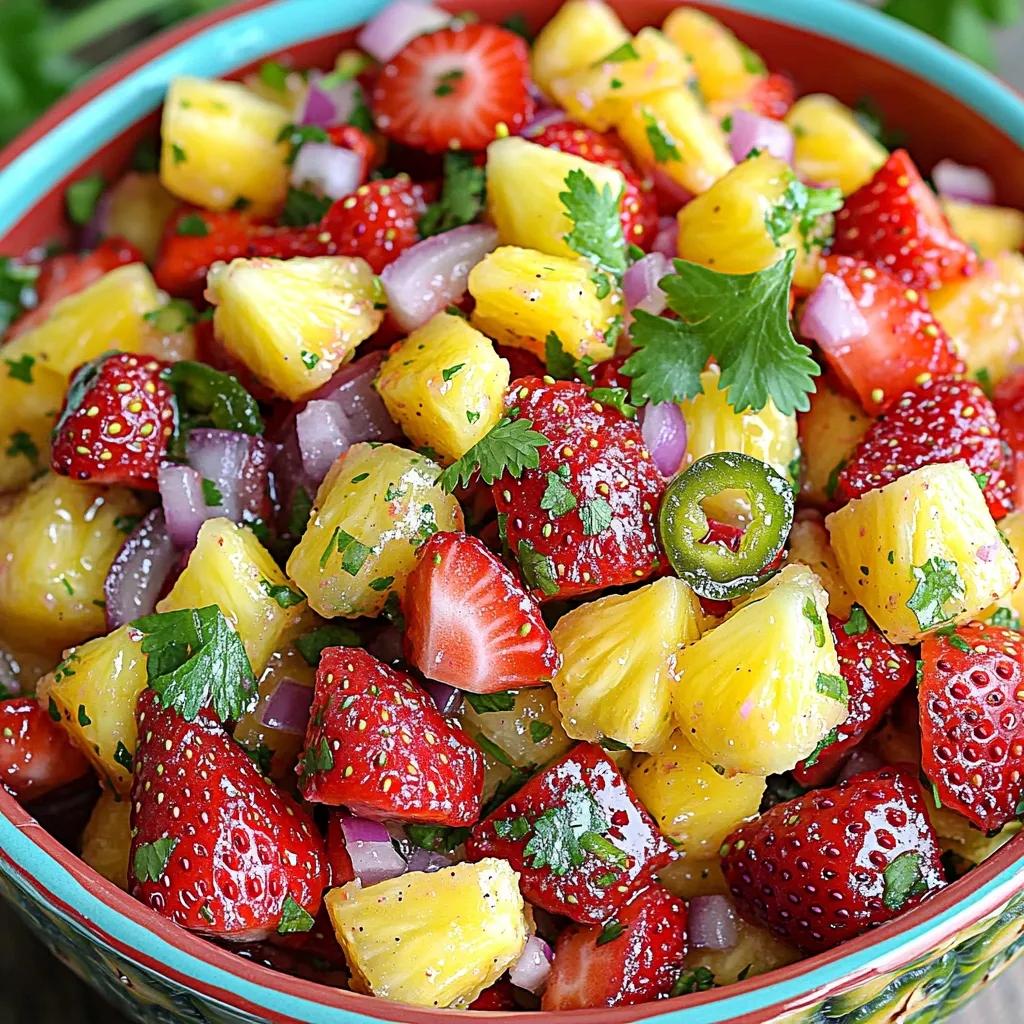
Strawberry Pineapple Fruit Salsa Fresh and Flavorful Dish
Are you looking for a vibrant and tasty treat? Look no further! This Strawberry Pineapple Fruit Salsa combines fresh strawberries and juicy pineapple for a
![To make the best Italian grilled cheese, you need key ingredients. Here’s what you should gather: - 4 slices of sourdough bread - 1 cup fresh mozzarella cheese, sliced - 1 cup fontina cheese, shredded - 1/2 cup sun-dried tomatoes, chopped - 1/4 cup fresh basil leaves, chopped - 2 tablespoons pesto - 2 tablespoons olive oil - Salt and pepper to taste These ingredients bring together a mix of creamy, tangy, and savory flavors. The mozzarella offers a soft, melty texture while the fontina adds a rich, nutty taste. Sun-dried tomatoes provide a sweet and tangy burst in each bite, and fresh basil brings a fragrant aroma. Choosing the right brands makes a big difference. For cheese, I love using BelGioioso mozzarella and Emmi fontina. They melt well and taste great. For bread, Acme Bread Company sourdough is my top pick. It’s crusty and has a nice chew. These brands enhance the flavor and texture of your sandwich. If you want to kick up the flavor, try adding these optional ingredients: - A sprinkle of garlic powder - A dash of crushed red pepper flakes - A layer of roasted red peppers - A slice of prosciutto These additions can bring unique tastes and textures to your grilled cheese. Garlic powder gives an aromatic boost, while crushed red pepper adds heat. Roasted red peppers offer sweetness, and prosciutto adds a salty, savory touch. You can mix and match to find your favorite flavor combo. For the complete recipe, check out the Full Recipe. To make a tasty Italian grilled cheese, follow these simple steps. Start by gathering your ingredients. You will need: - 4 slices of sourdough bread - 1 cup fresh mozzarella cheese, sliced - 1 cup fontina cheese, shredded - 1/2 cup sun-dried tomatoes, chopped - 1/4 cup fresh basil leaves, chopped - 2 tablespoons pesto - 2 tablespoons olive oil - Salt and pepper to taste Now, heat a non-stick skillet over medium heat. Brush one side of each slice of sourdough with olive oil. On the unbuttered side of two slices, spread 1 tablespoon of pesto each. Next, layer the mozzarella and fontina cheese evenly over the pesto. Add the sun-dried tomatoes and fresh basil, seasoning with salt and pepper. Place the other two slices on top, pressing down gently. You can cook your sandwich in two ways: a panini press or a skillet. A panini press cooks the sandwich evenly and gives it nice grill marks. It also saves time, as you can cook both sides at once. If you choose a skillet, you will need to flip the sandwich. Cook the first side for about 3-4 minutes until golden brown. Use a spatula to press down gently. Then, flip the sandwich and cook for another 3-4 minutes. This method allows you to control the heat better. Both methods work well, so choose the one you prefer! Serve your Italian grilled cheese warm for the best taste. You can pair it with a simple salad or a bowl of tomato soup. For extra flavor, drizzle some balsamic glaze on top. This adds a sweet and tangy touch to your meal. If you want to impress guests, cut the sandwich into small triangles. Arrange them on a platter with fresh basil leaves for a nice touch. Enjoy your delicious creation! For the full recipe, check the details above. Choosing the right cheese is key to a great melt. I recommend using fresh mozzarella. It gives a soft, creamy texture. Fontina cheese is also a great choice. It melts well and adds a rich flavor. Mixing different cheeses enhances taste and texture. Try using a blend of mozzarella and fontina for a delightful experience. This combination creates a gooey center that pulls apart beautifully. To keep the bread crispy, use a good quality sourdough. Its sturdy crust holds up well. Before cooking, brush the outside with olive oil. This adds flavor and helps it brown nicely. Cook on medium heat; too high can burn the bread. Press down gently with a spatula while cooking. This ensures even crispiness and makes the cheese melt perfectly. You can personalize your Italian grilled cheese easily. Add ingredients like sun-dried tomatoes or fresh basil for extra flavor. If you like spice, try adding red pepper flakes. For a savory twist, include prosciutto or salami. Don’t be afraid to experiment! Each addition makes the sandwich your own. For the complete details and steps, check out the Full Recipe. {{image_2}} The classic Italian grilled cheese uses simple, fresh ingredients. It features sourdough bread, mozzarella, and maybe a hint of basil. The gourmet version takes it up a notch. It adds rich flavors with sun-dried tomatoes, pesto, and fontina cheese. Each bite bursts with deliciousness. The key is to balance flavors and textures. You want a crispy outside and a gooey inside. Try both styles to see what you love best. Adding protein can make your sandwich heartier. Thin slices of prosciutto or salami work great. They add a salty kick that pairs well with cheese. If you prefer plant-based options, try roasted vegetables or tempeh. Both add depth and flavor. Layer your choice on top of the cheese, just before grilling. This makes every bite more satisfying and filling. For a vegetarian option, stick to the classic ingredients. You can use rich cheeses and fresh herbs. If you're vegan, swap cheese for a plant-based alternative. Look for vegan mozzarella or cashew cheese. Both melt well and taste great. Add extra veggies like spinach or mushrooms for even more flavor. These choices keep your meal tasty and satisfying while meeting dietary needs. You can find the full recipe [here]. After enjoying your Italian grilled cheese, store leftovers in an airtight container. This keeps the bread from getting soggy. Let the sandwich cool before placing it in the fridge. It stays fresh for up to three days. If you want to keep it longer, consider freezing. To reheat, use a skillet for the best results. Heat the skillet on low. Place the sandwich in and cover it with a lid. This method warms the cheese without burning the bread. Cook for about five minutes on each side. If you prefer a microwave, wrap the sandwich in a damp paper towel. Heat it for 30 seconds, then check. Add more time if needed. You can freeze the Italian grilled cheese for later. Wrap each sandwich tightly in plastic wrap, then place it in a freezer bag. This prevents freezer burn. It can last up to three months in the freezer. When you're ready to eat, thaw it in the fridge overnight before reheating. Enjoy the taste of Italy anytime with this simple storage method! To make your grilled cheese crispy, use enough oil. I suggest olive oil or butter. Coat the bread well on each side. Heat your skillet to medium heat. This helps the bread toast evenly. Flip the sandwich carefully to avoid spills. Cooking it slow gives the cheese time to melt. For Italian grilled cheese, I love fresh mozzarella and fontina. They melt well and taste great. You can also try provolone or aged cheddar for a twist. Each cheese adds its own flavor. Mixing cheeses gives you a richer taste. Don't forget to use good quality cheese for the best results. Yes, you can make Italian grilled cheese ahead of time. Cook the sandwiches, but don’t slice them yet. Let them cool, then wrap in foil. Store in the fridge for up to two days. When you’re ready, reheat them in a skillet. This keeps the bread crispy while warming the cheese. For the full recipe, check out the detailed instructions above. Italian grilled cheese combines simple ingredients with tasty options. We explored essential cheeses and breads that make this dish shine. You learned cooking methods, like using a panini press or skillet. We also discussed tips for achieving the perfect melt and keeping your bread crisp. Don’t forget about flavor variations, including adding proteins or making it vegetarian. Store leftovers properly for the best taste when reheating. Now, it's time to enjoy your delicious creation!](https://grilledflavors.com/wp-content/uploads/2025/06/2389d145-f7d0-4071-9030-a80119cbc93e.webp)
Italian Grilled Cheese Sandwiches Savory Flavor Boost
Get ready to elevate your grilled cheese game with Italian flavors! In this guide, I’ll show you how to make the ultimate Italian Grilled Cheese
![For this dish, you need some basic items. Here’s what to gather: - 2 cups cooked sushi rice - 1 tablespoon rice vinegar - 1 teaspoon sugar - Salt to taste - 1 pound fresh salmon, skinless - 2 tablespoons sriracha - 1 tablespoon mayonnaise (preferably Kewpie) - 1 avocado, thinly sliced - 1/4 cup green onions, finely chopped - 1 teaspoon sesame oil - 1 tablespoon panko breadcrumbs - Seaweed sheets for garnish (optional) These ingredients form the base of our crispy rice and spicy salmon. The sushi rice provides a nice sticky texture. The salmon, mixed with sriracha and mayo, gives a creamy and spicy kick. You can add some seasonings to boost the flavor. Here are a few ideas: - Soy sauce for dipping - Lime juice for freshness - Toasted sesame seeds for crunch - Chili flakes for extra heat These seasonings help enhance the dish’s flavor. Use them as you like, based on your taste. Garnishes make your dish look great. They also add more flavor. Here are some you can use: - Fresh cilantro leaves - Thinly sliced radishes - Microgreens - Extra green onions These garnishes add color and freshness. They can make your presentation pop, making your meal even more special. For the full recipe, check the earlier section. To start, you need cooked sushi rice. Place it in a medium bowl. Add the rice vinegar, sugar, and a pinch of salt. Mix it gently so you do not break the rice. Allow it to cool slightly. Once cool, shape the rice into rectangular patties. Aim for about 1-inch thick. This will help them fry well. Heat a non-stick skillet over medium heat. Drizzle in some sesame oil. When the oil is hot, add your rice patties. Cook each side for about 3-4 minutes. You want them to turn golden brown and crispy. Once done, remove them from the skillet and set aside. Take fresh salmon and chop it into small cubes. In a bowl, mix sriracha and mayonnaise. I like to use Kewpie mayo for extra flavor. Toss the salmon cubes in the spicy mayo. Make sure all pieces are well coated. This mixture is what makes the dish pop with flavor. Now it’s time to put everything together. Place the crispy rice patties on a serving plate. Top each patty with a scoop of the spicy salmon mix. For a fresh touch, add a slice of avocado on each piece. Then, sprinkle with chopped green onions. For extra crunch, add panko breadcrumbs on top. Lastly, if you like, serve with strips of seaweed on the side. This adds a nice touch and flavor. Follow the [Full Recipe] to explore more about these steps! To make the best crispy rice, start with good sushi rice. Use short-grain rice for the best stickiness. After cooking, let it cool slightly before shaping. The rice should be warm but not hot. Form rectangular patties about one inch thick. When pan-frying, use a non-stick skillet and enough sesame oil. Heat the skillet over medium heat. Cook the patties for three to four minutes on each side. They should turn golden brown and crispy. If they stick, add a bit more oil. You want each bite to be crunchy. You can change up the spice level in the salmon mix. If you like it mild, use less sriracha. For a kick, add more sriracha or some chili flakes. You can also mix in lime juice for a zesty touch. Feel free to add chopped herbs, like cilantro or chives, for more flavor. The mayonnaise gives creaminess, but you can swap it for Greek yogurt if you want. Just make sure to mix the salmon well, so every piece gets that tasty sauce. When it comes to serving, lay the crispy rice on a nice plate. Top each patty with the spicy salmon mix. A slice of avocado adds color and creaminess. Use chopped green onions to give it a fresh look. For extra crunch, sprinkle panko breadcrumbs on top. If you want a fun twist, add strips of seaweed on the side. It adds a nice touch and flavor. Color and texture are key to making this dish pop. Try to arrange everything neatly for a great presentation. {{image_2}} If you want to switch things up, try other fish. Tuna is a great choice. It has a meaty texture and pairs well with spicy sauces. You can also use yellowtail or even shrimp. Each fish brings its own flavor. Just make sure it’s fresh. The key is to keep the spicy mayo mix, so you still have that bold taste. For a vegetarian twist, you can use tofu. Firm tofu works best. Just press it to remove extra water, then cube it. Toss it in the spicy mayo just like the salmon. You can also use roasted vegetables. Zucchini or bell peppers add nice flavor and texture. This way, you get a delicious meal without any fish. Want to get creative? Try adding Asian flavors like kimchi. Layer some on top of the spicy salmon. This gives it a tangy kick. Or, go for a Mexican twist with guacamole. This adds creaminess and a different taste. You can even use a Thai chili sauce for a unique spin. The options are endless, and each twist makes the dish fun! To store leftover crispy rice, place it in an airtight container. Let it cool to room temperature first. This helps prevent condensation and keeps the rice fresh. Store it in the fridge for up to three days. If you want to keep it longer, consider freezing. When you reheat crispy rice, use a skillet for the best results. Heat the skillet over medium heat and add a tiny bit of oil. Place the rice patties in the pan and heat each side for about two to three minutes. This keeps them crispy. You can also use an oven. Preheat it to 350°F (175°C) and bake the rice for about 10 minutes. If you freeze your crispy rice, wrap each patty in plastic wrap and place them in a freezer bag. They can last for up to two months. To thaw, move them to the fridge for a few hours or overnight. After thawing, reheat as mentioned above. This way, you maintain that delicious crunch. No, I don’t recommend using instant rice. Sushi rice has the right stickiness. This helps form the crispy patties. Instant rice does not have the same texture. It won’t hold together well when cooked. You can use any hot sauce for a different taste. Try chili garlic sauce or sambal oelek. If you want less heat, use a mild hot sauce. You can also mix ketchup with a bit of hot sauce for a sweet twist. While mayonnaise adds creaminess, you can skip it if you wish. You can use plain yogurt or even avocado instead. This keeps it light and healthy. Just make sure to mix it well with the salmon for flavor. This recipe makes four servings. It’s perfect for a small group or family meal. You can easily double the recipe for more guests. Each person can enjoy their own crispy rice with spicy salmon. Yes, you can prepare some parts ahead of time. Make the rice patties and spicy salmon mix earlier. Store them in the fridge. Just fry the patties and assemble when you are ready to eat. This keeps everything fresh and crispy. For the Full Recipe, check the details above. This blog post covered all you need for crispy rice with spicy salmon. We discussed key ingredients, cooking steps, and great tips. I shared fun variations and how to store leftovers too. You can make this dish your own by trying different fish or sauces. Enjoy experimenting and finding your perfect flavor. Cooking can be fun and tasty with this guide. Start making your own crispy rice today!](https://grilledflavors.com/wp-content/uploads/2025/05/ce5b9f05-38e8-44e2-b94c-5850d918ee5c.webp)
Crispy Rice with Spicy Salmon Flavorful and Simple Meal
Are you craving a delicious meal that bursts with flavor? Look no further than crispy rice with spicy salmon! This dish is simple to make

Easy Bang Bang Salmon Bites Crispy and Delicious Treat
Looking for a quick, crispy treat that packs a punch? You’ll love these Easy Bang Bang Salmon Bites! Made with tender, flaky salmon and a

Air Fryer Quesadillas Crispy and Flavorful Recipe
Get ready to elevate your snack game with my crispy and flavorful air fryer quesadillas! With just a few key ingredients like cheese, veggies, and
![- 12 large jalapeño peppers - 1 pound shrimp, peeled and deveined - 1 tablespoon Cajun seasoning - 1 cup cream cheese, softened - 1/2 cup shredded sharp cheddar cheese - 1/4 cup green onions, finely chopped - 2 cloves garlic, minced - 1 tablespoon olive oil - Salt and pepper to taste To create Fiery Cajun Shrimp Stuffed Jalapeños, you need fresh ingredients. The jalapeños should be large and firm. This helps them hold the stuffing well. The shrimp must be peeled and deveined for a clean taste. Cajun seasoning adds that kick. Cream cheese gives the filling a creamy texture, while shredded cheddar adds flavor. Chop the green onions finely for the best taste. Minced garlic adds a nice aroma. You will use olive oil to sauté the garlic and shrimp. Always keep salt and pepper nearby. They help bring out all the flavors. - Extra green onions - Hot sauce for drizzling - Lime wedges These garnishes enhance your dish. Extra green onions add color and crunch. Hot sauce gives a spicy kick. Lime wedges add a fresh touch. Each adds a unique layer of flavor. For the full experience, check the [Full Recipe]. - Preheat the oven to 375°F (190°C). - Slice the jalapeños in half and remove seeds. This step is key for less heat. - In a skillet, heat olive oil over medium heat. - Add minced garlic and sauté for one minute. It will smell amazing! - Toss in the shrimp and sprinkle with Cajun seasoning. - Cook until pink and opaque, about 3-4 minutes. Remove from heat and cool slightly. - In a bowl, mix the shrimp with cream cheese and cheddar. - Stuff each jalapeño half generously with the shrimp mix. - Arrange the stuffed jalapeños on a baking sheet. - Bake for 20-25 minutes until tender and golden. This simple recipe creates a tasty delight that’s sure to impress! For the full recipe, check out the ingredients and cooking steps above. If you want a milder flavor, take out the seeds and membranes from the jalapeños. This helps lower the heat. You can also soak them in cold water for a few minutes. It makes them less spicy. For a less fiery option, try using a mild seasoning blend instead of Cajun. This keeps the flavor without the heat. You can cook the stuffed jalapeños in two ways: skillet or oven. The skillet gives a nice crisp on the outside, while baking makes them tender. If you are short on time, prep the shrimp ahead. Cook it the night before and store it in the fridge. This saves time when you're ready to cook. When serving your stuffed jalapeños, use a large platter. Arrange them neatly and add some garnishes. Extra green onions give a nice touch. A drizzle of hot sauce adds color and flavor. For parties, these look great with lime wedges on the side. They are perfect for sharing and impress your guests. For the full recipe, check out the details mentioned earlier. {{image_2}} You can switch shrimp for chicken or tofu. Chicken works well with Cajun spices. Use cooked, shredded chicken for a hearty bite. For a vegan option, tofu is great. Press the tofu to remove water, then cube it. Sauté it with Cajun seasoning until it’s crispy. Both options keep the dish flavorful and fun. Cheese makes this dish creamy and rich. You can try different cheese blends for fun flavors. Goat cheese offers a tangy twist. Mozzarella gives a milder taste and gooey texture. Blend cheeses, like pepper jack for heat or gouda for smokiness. Each choice adds a unique flair to your stuffed jalapeños. Think about adding more spices or herbs to boost the Cajun flavor. Smoked paprika or cayenne pepper can give extra heat. Fresh herbs like parsley or cilantro brighten the dish. A squeeze of lemon or lime adds freshness. Experiment with flavors to find your perfect mix. Your stuffed jalapeños will shine with bold tastes. For the full recipe, check out the details above. To keep your stuffed jalapeños fresh, place them in an airtight container. Make sure they cool down first. Store them in the fridge for up to three days. If you want to keep them longer, try freezing them. Freezing stuffed jalapeños is easy. First, let them cool completely. Next, wrap each jalapeño in plastic wrap or aluminum foil. Then, place them in a freezer-safe bag. They can last up to three months in the freezer. When you're ready to eat, just thaw them in the fridge overnight. To reheat stuffed jalapeños, the oven is best. Preheat the oven to 350°F (175°C). Place the jalapeños on a baking sheet and cover them with foil. Heat for about 15-20 minutes until they are warm. This method keeps them from getting soggy and preserves their flavor. You can also microwave them for a quick option, but they may lose some crispness. To find milder jalapeños, select peppers that are larger and have a smooth skin. Look for those that are light green in color. Avoid small, wrinkled, or very dark jalapeños. When you slice them, remove all seeds and the white membranes inside. These parts hold the most heat. Yes, you can prep these stuffed jalapeños ahead of time. Prepare the filling and stuff the peppers. Place them in an airtight container and keep them in the fridge for up to 24 hours. When you’re ready to bake, just pop them in the oven. You might need an extra few minutes to cook. These stuffed jalapeños pair well with many side dishes. Try serving them with a fresh garden salad or some crispy tortilla chips. For drinks, a cold beer or a refreshing lemonade works great. You can also serve them with a creamy dip or a zesty salsa for extra flavor. For the full recipe, check the complete guide above. In this blog post, we covered how to make Fiery Cajun Shrimp Stuffed Jalapeños. You learned about the key ingredients, simple steps to prepare them, and helpful tips for serving. Remember, you can adjust the heat and even try different meats or cheeses. With these variations and storage methods, your leftovers will stay tasty too. Enjoy making these flavorful jalapeños for your next gathering. They're sure to impress.](https://grilledflavors.com/wp-content/uploads/2025/05/a720fe4c-9b73-4163-bffa-cbe3c3cd17ce.webp)
Fiery Cajun Shrimp Stuffed Jalapeños Tasty Delight
Are you ready for a snack that packs a punch? Fiery Cajun Shrimp Stuffed Jalapeños are the perfect blend of spice and flavor. With creamy
![- 2 medium zucchini, grated - 1 cup all-purpose flour - 1/2 cup grated Parmesan cheese - 2 large eggs - 1/4 cup chopped fresh parsley - 2 green onions, finely sliced - Additional seasonings (garlic powder, black pepper) - Vegetable oil for frying To get the best results, grate your zucchini using a box grater or food processor. This will save you time and effort. Aim for even grating so your fritters cook evenly. Measuring ingredients accurately is key. Use dry measuring cups for flour and a liquid measuring cup for eggs. This helps ensure the right texture in your fritters. Too much flour can make them dry. Too little can make them too wet. Balance is essential for crispy zucchini fritters. For the best flavor, don’t skip the salt on the zucchini. Salting helps draw out moisture. Use a clean kitchen towel to squeeze out the excess moisture before mixing. This step is crucial for getting that perfect crunch. For the full recipe, check out the detailed instructions. Happy cooking! Start by grating your zucchini. Use a box grater or a food processor. Place the grated zucchini in a large bowl. Sprinkle one teaspoon of salt over it. Mix well and let it sit for about 10 minutes. This helps to draw out excess moisture. After 10 minutes, take a clean kitchen towel. Place the zucchini in the center of the towel. Twist the towel and squeeze out the moisture. This step is key for crispy fritters. If you skip this, the fritters may turn out soggy. In the same bowl with the zucchini, add the dry and wet ingredients. Combine one cup of flour, half a cup of grated Parmesan, two large eggs, a quarter cup of chopped parsley, two sliced green onions, one teaspoon of garlic powder, and half a teaspoon of black pepper. Mix until everything is well combined. You want a thick batter that holds together. If it feels too wet, add a little more flour. If it seems dry, you can add a splash of water. Next, heat a few tablespoons of vegetable oil in a large skillet over medium heat. You can test if the oil is ready by dropping in a small bit of batter. If it sizzles, you are good to go. Scoop about a quarter cup of the batter and drop it into the skillet. Use the back of a spatula to flatten it slightly. Don’t overcrowd the skillet; this helps them cook evenly. Fry for about 3-4 minutes on each side. You want them golden brown and crispy. Once cooked, transfer the fritters to a plate lined with paper towels to absorb excess oil. Repeat the process until you cook all the batter. You can add more oil to the skillet as needed. For the full recipe, refer to the detailed instructions above. To make your zucchini fritters really crispy, you must remove moisture. After grating the zucchini, add salt and let it sit for 10 minutes. This process pulls out excess water. Then, use a clean towel to squeeze out the moisture. The drier the zucchini, the crispier the fritters will be. For frying, use medium heat. If the oil is too cool, the fritters will absorb oil and become soggy. If it’s too hot, they’ll burn. The right temperature makes a golden, crispy outside. Pair your fritters with tasty dips like sour cream or Greek yogurt. These creamy dips enhance flavor and balance the crispiness. You can also sprinkle fresh parsley on top for color. A pinch of black pepper adds a nice touch too. One big mistake is overcrowding the skillet. If you add too many fritters at once, they won’t fry evenly. Stick to a few at a time. Another error is skipping the moisture extraction step. If you don’t remove the water from the zucchini, your fritters might turn out mushy. Following these steps will help you make perfect crispy zucchini fritters. For the full recipe, see the instructions above. {{image_2}} You can easily change some ingredients in crispy zucchini fritters. For cheese, try feta or cheddar instead of Parmesan. This swap gives a new flavor twist. You can also add spices like cumin or cayenne to heat things up. These little changes can make your fritters exciting and unique. If you want a lighter version, bake the fritters instead of frying them. Preheat your oven to 400°F (200°C). Spread the fritters on a baking sheet lined with parchment paper. Bake for about 20-25 minutes. Flip them halfway through to get both sides crispy. This method cuts down on oil while still giving you a tasty snack. You can mix in other veggies for a fun twist. Try adding grated carrots or diced bell peppers to the batter. These not only add color but also extra nutrients. Fresh herbs like basil or dill can enhance the flavor too. Experimenting with these additions can make each batch of fritters special. For the complete recipe, check out the [Full Recipe]. To keep leftover fritters fresh, place them in an airtight container. This helps seal in moisture and flavor. Store them in the fridge for up to three days. If you want to stack them, place parchment paper between layers. This prevents sticking and keeps them intact. For crispy fritters, I recommend using the oven. Preheat it to 350°F (175°C). Place the fritters on a baking sheet for about 10-15 minutes. This method maintains their crunch. If you use a microwave, heat them for about 30-60 seconds. However, this may make them soft. To freeze fritters, let them cool completely first. Then place them in a single layer on a baking sheet. Freeze for about an hour until solid. After that, transfer them to a freezer-safe bag or container. This way, they won't stick together. To thaw, leave them in the fridge overnight. Reheat them in the oven for the best results. To make your zucchini fritters crispier, remove as much moisture as possible from the zucchini. After grating the zucchini, sprinkle it with salt and let it sit for 10 minutes. This helps draw out excess liquid. Then, squeeze the zucchini with a clean towel to remove more moisture. Use a hot skillet with enough oil to fry the fritters. Fry them in batches, avoiding overcrowding. This allows even cooking and crispiness. Yes, you can prepare the batter ahead of time. Store it in an airtight container in the fridge for up to 2 hours. However, it’s best to cook the fritters soon after mixing to ensure the best texture. If you wait too long, the batter may become too watery as the zucchini releases more moisture. You can make zucchini fritters gluten-free by swapping the all-purpose flour for a gluten-free flour blend. Almond flour or chickpea flour are great alternatives. These options will give a nice texture and flavor. Always check ingredient labels to ensure they are gluten-free. Zucchini fritters pair well with several sides. Consider serving them with a dollop of sour cream or Greek yogurt. You can also add a side salad for freshness. For a heartier meal, serve them with a light pasta dish or grilled chicken. These combinations create a balanced and tasty meal. For the full recipe, check out the complete guide. Zucchini fritters are simple and fun to make. You learned the key ingredients, such as zucchini, flour, and Parmesan. I shared tips for making the batter and cooking methods to achieve crispy fritters. Remember to remove moisture for the best texture and avoid common mistakes like overcrowding your skillet. These fritters are versatile. You can change ingredients or try baking them for a different twist. Enjoy these delicious bites with your favorite dips or sides. You now have the know-how to impress your friends and family. Happy cooking!](https://grilledflavors.com/wp-content/uploads/2025/05/5f43e5fa-f245-458c-81a9-a808bfdb9156.webp)
Crispy Zucchini Fritters Simple and Flavorful Snack
If you’re craving a tasty snack that’s simple to make, try these crispy zucchini fritters! Packed with flavor and easy to put together, they make

Best Crunchy Zucchini Chips Simple and Tasty Snack
Are you ready to discover your new favorite snack? Crunchy Zucchini Chips are simple to make and utterly delicious. With just a few basic ingredients