Breakfast
![- 1 ½ cups all-purpose flour - 1 teaspoon baking powder - 1 teaspoon baking soda - ½ teaspoon salt - 1 teaspoon ground cinnamon - ½ teaspoon ground nutmeg - ½ teaspoon ground ginger - 1 cup canned pumpkin puree - ½ cup vegetable oil - 1 cup granulated sugar - ½ cup brown sugar, packed - 2 large eggs - 1 teaspoon vanilla extract - ½ cup chopped walnuts or pecans - ½ cup chocolate chips I love gathering these ingredients for my best pumpkin muffins. The dry ingredients create a strong base. The flour, baking powder, and baking soda provide the perfect rise. The spices, like cinnamon and nutmeg, fill the kitchen with warmth. For the wet ingredients, I use canned pumpkin puree. It gives the muffins a rich flavor and a moist texture. The sugars, both granulated and brown, add sweetness and depth. The oil keeps the muffins soft, while the eggs help bind everything together. Feel free to get creative with optional add-ins. Chopped nuts add crunch, and chocolate chips offer a delightful surprise. You can mix them in or leave them out. Either way, this recipe shines. You can find the full recipe for my best pumpkin muffins above. Enjoy baking! - Preheat your oven to 350°F (175°C). - Line the muffin tin with paper liners or lightly grease it. - In a bowl, combine the flour, baking powder, baking soda, salt, and spices. - Whisk these dry ingredients together until well mixed, then set them aside. - In another bowl, beat together the granulated sugar, brown sugar, vegetable oil, and eggs until smooth. - Next, stir in the pumpkin puree and vanilla extract until fully mixed. - Gradually add the dry ingredients to the wet ingredients. - Mix gently until just combined. Remember, some lumps are okay! - If you want, fold in the chopped nuts and chocolate chips for extra flavor. - Spoon the batter into the muffin tin, filling each cup about ¾ full. - Bake in the preheated oven for 18-20 minutes. Check for doneness with a toothpick inserted in the center. For the complete recipe, refer to My Best Pumpkin Muffins Recipe. For the best pumpkin muffins, measuring ingredients correctly is key. I recommend using a kitchen scale. This tool gives you precise measurements, which helps each muffin come out just right. If you don’t have a scale, spoon and level the flour. This means you scoop flour, then level it off with a knife. Avoid packing it down. This method keeps the flour light and fluffy. You can swap some ingredients to fit your needs. If you want a healthier muffin, try using coconut sugar instead of granulated sugar. You can also use applesauce instead of vegetable oil for a lighter texture. For gluten-free muffins, almond flour or oat flour works well. Just remember to adjust your baking time, as these flours may bake faster. To make your muffins even tastier, think about adding extra spices. A bit of cardamom or allspice can bring out richer flavors. If you love texture, mix in raisins or dried cranberries. They add sweetness and chewiness that pairs well with pumpkin. This way, each bite is a delightful surprise. {{image_2}} You can make vegan pumpkin muffins easily. To replace eggs, use flax eggs. Mix one tablespoon of flaxseed meal with three tablespoons of water, and let it sit for five minutes. This mixture works well in muffins. For oil, choose plant-based options like coconut oil or avocado oil. These swaps keep your muffins moist and delicious without animal products. To make pumpkin chocolate muffins, add more chocolate chips. I recommend using one cup for a rich taste. You can also mix in cocoa powder. Just add a quarter cup to your dry ingredients. This change gives your muffins a chocolate twist that pairs perfectly with pumpkin. The sweet chocolate and warm spices create a delightful treat. For a savory option, try adding herbs or cheese. Fresh rosemary or thyme can enhance the flavor. You can also mix in shredded cheese, like cheddar or feta. For this variation, reduce the sugar to one-fourth cup. This change creates a less sweet muffin, perfect for breakfast or a snack. These savory bites are a fun way to enjoy pumpkin in a new way. To store my pumpkin muffins, place them in an airtight container. This keeps them fresh and moist. You can also use a plastic bag if you don’t have a container. At room temperature, they last about three days. After that, they may dry out or lose flavor. For longer storage, freeze the muffins. First, let them cool completely on a wire rack. This step is key to avoid ice crystals. Once cool, wrap each muffin tightly in plastic wrap. Place them in a freezer bag or a container. They can stay in the freezer for about three months. When you want to eat them, take a muffin out and let it thaw. You can leave it at room temperature or defrost it in the fridge overnight. For a quick option, microwave it for 15-20 seconds. To reheat your muffins, you have a few choices. You can use the microwave, oven, or even a toaster oven. If using a microwave, heat each muffin for about 15-20 seconds. This warms them up nicely. If you prefer the oven, set it to 350°F (175°C) and heat muffins for about 5-10 minutes. To keep muffins moist, cover them with foil or a damp paper towel while reheating. This prevents them from drying out. Enjoy your warm, tasty muffins! These muffins stay fresh for about three days at room temperature. Store them in an airtight container. If you keep them in the fridge, they can last up to a week. Just remember to let them warm up a bit before you eat them. Yes, you can! Butternut squash puree works great as a substitute. You can also use sweet potato puree. Both options give a nice flavor and texture. Just ensure they are smooth, like pumpkin puree, for best results. To boost moisture, try adding yogurt or applesauce. Both add extra moisture without changing the flavor much. Use about 1/4 cup of yogurt or applesauce for each cup of pumpkin. This keeps your muffins soft and tasty. If your muffins turn out dry, check your oven temp first. It might be too high. Next time, try adding a little more oil or an extra egg. You can also mix in yogurt or applesauce to help keep them moist. Absolutely! To make mini muffins, fill each cup about halfway. Bake them for 10 to 12 minutes instead of 18 to 20. Check for doneness with a toothpick, just like the regular muffins. Enjoy your bite-sized treats! For the full recipe, click [Full Recipe]. My best pumpkin muffins recipe combines simple ingredients for a tasty treat. We started with dry and wet ingredients, mixed them well, and added fun options like nuts or chocolate. Followed by tips for perfect muffins, variations for every taste, and easy storage options. Now you can bake delicious muffins at home. Enjoy sharing them with friends and family or savoring them yourself!](https://grilledflavors.com/wp-content/uploads/2025/08/c1912324-1b5e-4e6a-9acd-80907bc9af93.webp)
My Best Pumpkin Muffins Recipe Easy and Delicious Treat
Fall is the perfect time to indulge in homemade treats, and my best pumpkin muffins recipe is a must-try. These easy and delicious muffins blend
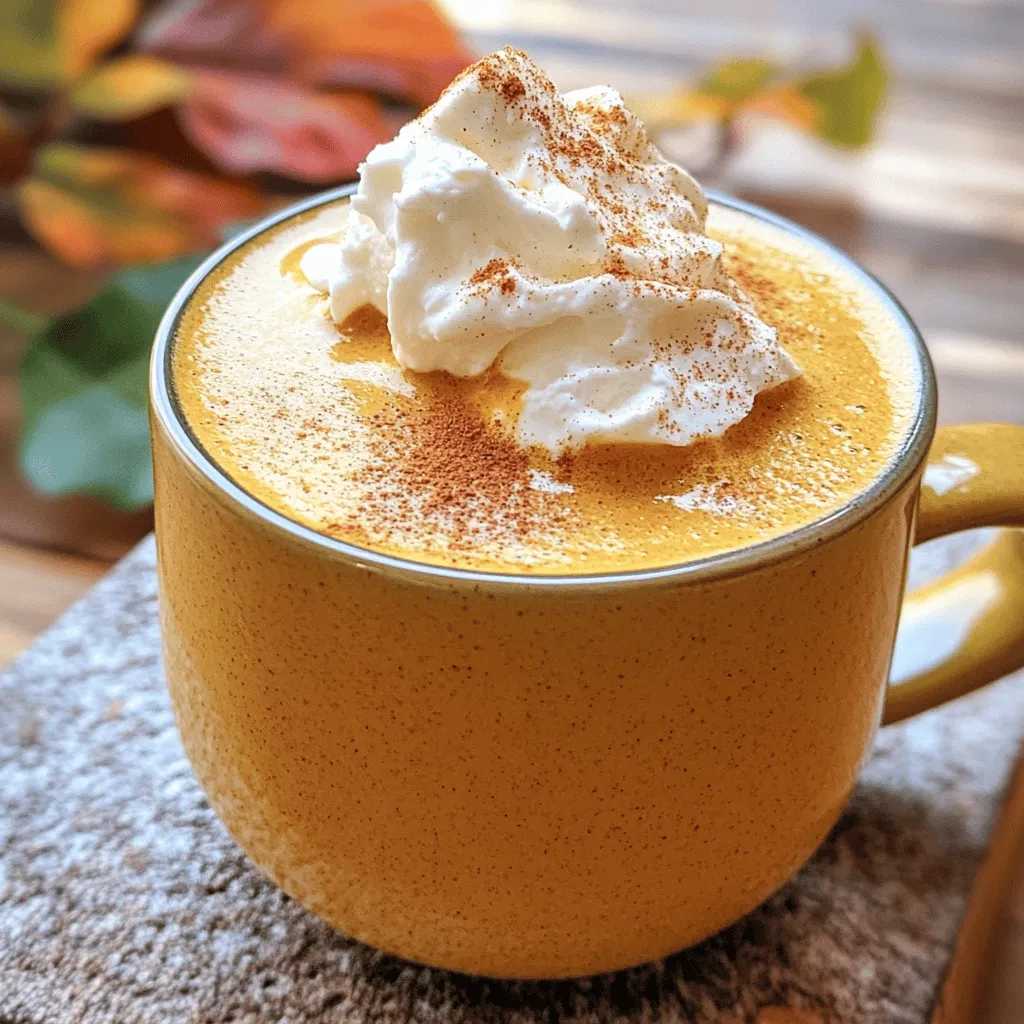
Healthy Pumpkin Spiced Latte Wholesome Fall Treat
Fall is here, and nothing says autumn like a cozy Pumpkin Spiced Latte! But how do you enjoy this classic drink without the guilt? In
![To make a Pumpkin Chai Iced Latte, gather the following items: - 1 cup brewed chai tea (preferably strong) - 1/2 cup pumpkin puree (canned or fresh) - 1/4 cup milk of choice (dairy or non-dairy) - 2 tablespoons maple syrup (adjust to taste) - 1/2 teaspoon vanilla extract - 1/2 teaspoon pumpkin pie spice (plus extra for garnish) - Ice cubes - Whipped cream (optional for topping) These ingredients blend to create a rich and creamy drink. You can easily adjust this recipe for your needs. If you’re dairy-free, try almond, oat, or coconut milk. These options still keep the drink creamy and delicious. For sweeteners, you can replace maple syrup with agave or honey. Each will add a unique flavor twist. When choosing pumpkin, look for bright orange puree. If using fresh pumpkin, select a sugar pumpkin. They are sweeter and smoother. For canned pumpkin, check the label to ensure it’s 100% pumpkin. This keeps flavors pure and avoids fillers. Always trust your taste buds; quality pumpkin makes a big difference in your iced latte. For the full recipe, check out the detailed instructions to enjoy this drink at home. To start, you need to brew strong chai tea. Use 1 1/2 teaspoons of loose chai tea leaves or one tea bag in 1 cup of boiling water. Let it steep for 5 to 7 minutes. This time gives the tea a bold flavor. Once done, let the tea cool to room temperature. This step is key for a great iced latte. Now, let’s make the pumpkin mixture. In a mixing bowl or a blender, add 1/2 cup of pumpkin puree, 2 tablespoons of maple syrup, 1/4 cup of your milk choice, 1/2 teaspoon of vanilla extract, and 1/2 teaspoon of pumpkin pie spice. Blend these ingredients until smooth. This mixture will give your latte a rich and creamy texture. Take a tall glass and fill it halfway with ice cubes. Pour the cooled chai tea over the ice. Next, carefully layer the pumpkin mixture on top. This creates a beautiful visual effect. You can gently stir the drink to mix the flavors or leave it layered for a stunning look. For a final touch, consider topping it with whipped cream and a sprinkle of extra pumpkin pie spice. This simple process leads to a delicious Pumpkin Chai Iced Latte. For the complete recipe, please refer to [Full Recipe]. To make your Pumpkin Chai Iced Latte even tastier, add a pinch of extra spices. You can try cinnamon, nutmeg, or even a bit of ginger. These spices will boost the warm flavors of chai and pumpkin. Just a dash can make a big difference. You can mix the spices into the pumpkin blend or sprinkle them on top for a nice look. Choosing the right milk is key for a creamy drink. You can use whole milk for richness or almond milk for a light feel. Oat milk is also a great option; it adds a nice creaminess. If you want a protein boost, consider using soy milk. Each milk gives a different texture, so pick the one that fits your taste best. If you want to prep your Pumpkin Chai Iced Latte in advance, here’s how. Brew extra chai tea and store it in the fridge. You can also mix the pumpkin blend ahead of time. Just keep it in an airtight container. When you’re ready to enjoy, layer the chilled tea and pumpkin mix over ice. This way, you save time and still enjoy a delicious drink. For more details on the recipe, check out the Full Recipe. {{image_2}} You can change the sweetener in your Pumpkin Chai Iced Latte. If you want less sugar, try using stevia or erythritol. For a richer taste, brown sugar or honey works well. Each sweetener brings a unique flavor. Adjust the amount to suit your taste. Add fun flavors to your latte! A splash of caramel syrup gives it a sweet twist. Vanilla extract can enhance the warm spices. If you love chocolate, mix in cocoa powder or chocolate syrup. These flavors can make your drink even more special. Switch up the chai for a new twist. Try rooibos tea for a caffeine-free option. Green tea adds a fresh taste with health benefits. For a spicy kick, use ginger tea. Each tea changes the latte's flavor and feel. Explore different blends to find your favorite! Store any leftover Pumpkin Chai Iced Latte in a sealed jar or container. Keep it in the fridge. Make sure to consume it within a few days for the best flavor. The chai and pumpkin mixture can separate, so give it a gentle shake before drinking. Brewed chai tea lasts about 3-5 days in the fridge. Pumpkin puree, if opened, is good for about a week. If unopened, it can last months. Milk varies; check the date on the carton. Always smell and taste before using any old ingredients. To reheat chai tea, pour it into a saucepan. Heat it on low until warm, not boiling. Stir gently to avoid burning. You can also microwave it in a safe mug. Heat for about 30 seconds, then check the temperature. If it's not warm enough, heat a bit more. You can use honey or agave nectar instead of maple syrup. Both sweeteners add great flavor. You can also try brown sugar or coconut sugar for a different twist. Adjust the amount to your taste. Each option will give your Pumpkin Chai Iced Latte a unique flair. Yes, you can prepare a hot version of this drink. Just brew the chai tea as usual. Mix the pumpkin puree and other ingredients in a pot over low heat. Stir until warm and combined. Pour it into your favorite mug. Enjoy the cozy warmth of your Pumpkin Chai Iced Latte. You can find ready-made Pumpkin Chai Iced Latte at many coffee shops in fall. Some grocery stores also sell bottled versions. If you want to make it at home, check the recipe for all the ingredients. You can easily whip up this tasty drink in your kitchen. This blog post shared a full guide to making a Pumpkin Chai Iced Latte. You learned about the key ingredients, helpful tips for brewing, and ways to customize your drink. Remember, you can swap ingredients for allergies and enjoy creative flavor twists. Proper storage helps keep your latte fresh for longer. Use this info to impress friends or enjoy a tasty treat at home. Get ready to sip something special and explore the delicious world of pumpkin chai!](https://grilledflavors.com/wp-content/uploads/2025/08/d76586e7-9300-4374-9590-684485a31eac.webp)
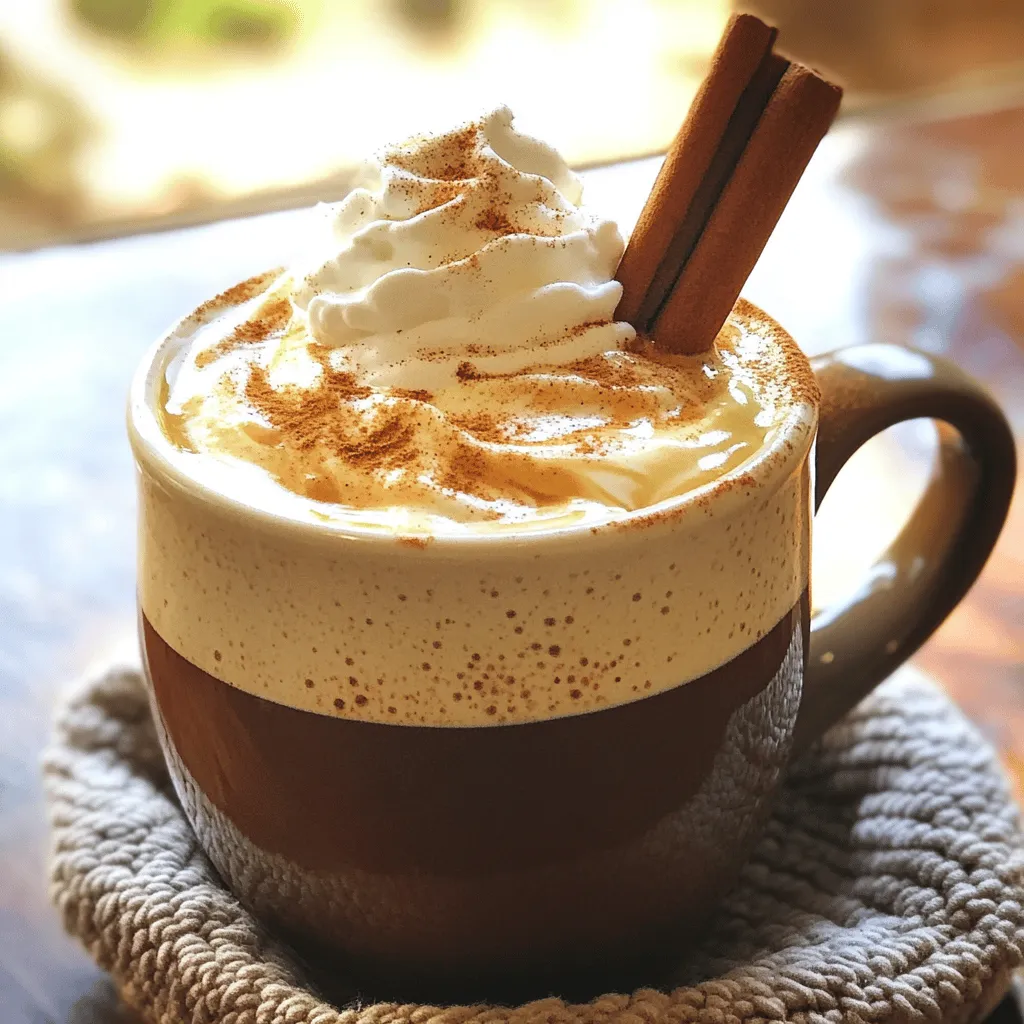
Pumpkin Chai Iced Latte Rich and Creamy Recipe
If you love cozy fall flavors, you’ll adore this Pumpkin Chai Iced Latte! This rich and creamy drink blends warm spices with smooth pumpkin for
![To make great mini bagels, you need a few key items: - 2 cups all-purpose flour - 1 tablespoon granulated sugar - 1 teaspoon salt - 2 teaspoons instant yeast - 3/4 cup warm water (about 110°F) - 1 tablespoon vegetable oil These ingredients form the base of our mini bagels. All-purpose flour gives the bagels structure. Instant yeast helps them rise quickly. Sugar and salt add flavor. Toppings make your mini bagels tasty and fun. Here are some popular choices: - Sesame seeds - Poppy seeds - Everything bagel seasoning You can choose one or mix them. These toppings add crunch and a burst of flavor. Boiling bagels is key to their texture. For boiling, you will need: - 1 teaspoon honey (for boiling) Adding honey to the boiling water gives the bagels a nice shine. It also adds a hint of sweetness. This step makes your mini bagels unique and delightful. You can find the full recipe to guide you through each step. Enjoy making these tasty treats! 1. Start by mixing the dry ingredients. In a large bowl, combine 2 cups of all-purpose flour, 1 tablespoon of granulated sugar, 1 teaspoon of salt, and 2 teaspoons of instant yeast. Stir well to blend the ingredients. 2. Next, make a well in the center of the dry mix. Pour in 3/4 cup of warm water and 1 tablespoon of vegetable oil. Stir until you form a shaggy dough. 1. Now, transfer the dough to a lightly floured surface. Knead it for about 5 to 7 minutes. Use the palms of your hands to push and fold the dough. You want it to feel smooth and elastic. 2. After kneading, shape the dough into a ball. Place it in a greased bowl and cover it with a damp cloth. This helps it rise. Let it sit in a warm place for about 1 hour, or until it doubles in size. 1. Once the dough has risen, punch it down. Divide it into 12 equal pieces. Roll each piece into a ball. 2. Flatten each ball slightly. Use your finger to poke a hole in the center, creating the bagel shape. Make sure the hole is big enough; it will shrink a bit while baking. 1. Boiling the bagels is a key step. It gives them that chewy texture we love. Bring a large pot of water to boil. Add 1 teaspoon of honey to the water for extra flavor. 2. Carefully place a few bagels in the boiling water. Boil each side for about 30 seconds. Use a slotted spoon to remove them and place them on a baking sheet lined with parchment paper. 1. Preheat your oven to 425°F (220°C). Once the bagels are boiled, it’s time to bake them. 2. Bake for 15 to 20 minutes. Look for a golden brown color on top. When they are done, let the mini bagels cool on a wire rack before serving. Follow these steps for perfect mini bagels, and enjoy a simple and flavorful treat! For the complete recipe, check out the [Full Recipe]. To make the best mini bagels, avoid some common mistakes. One big mistake is not kneading the dough enough. Knead until your dough is smooth and elastic. This gives your bagels the right texture. Another mistake is not letting the dough rise long enough. Make sure it doubles in size for fluffy bagels. To ensure the right texture, always measure your ingredients carefully. Too much flour can make your bagels dense. Use a kitchen scale for best results. When shaping the bagels, poke a hole in the center gently. This helps them cook evenly. Want to add more flavor? You can mix in herbs or spices. Try adding garlic powder or dried oregano to the dough. This makes the bagels taste great. For toppings, get creative! Use sesame seeds, poppy seeds, or everything bagel seasoning. You can even try melted cheese or spices like chili flakes. Mini bagels are fun to serve! Pair them with cream cheese, smoked salmon, or fresh herbs. You can create a mini bagel platter. Add small bowls of toppings like pesto, hummus, or jam. This makes them perfect for brunch or a snack. For a fun twist, stack them with different toppings for a colorful display. Check the Full Recipe for more ideas! {{image_2}} You can change the taste of mini bagels in fun ways. - Garlic and herb mini bagels: Mix garlic powder and dried herbs into the dough. This adds a savory twist. You can top them with crushed garlic for more flavor. - Sweet mini bagels with cinnamon: Add ground cinnamon and sugar to the dough. After baking, brush with melted butter and sprinkle more cinnamon sugar on top. This makes a tasty treat for breakfast or dessert. You can make mini bagels that fit different diets. - Gluten-free mini bagels: Use gluten-free flour blends instead of all-purpose flour. Add xanthan gum to help with texture. Make sure all other ingredients are gluten-free too. - Vegan mini bagel recipe tips: Replace the honey in boiling water with maple syrup. Use non-dairy milk and oil. This keeps the bagels vegan but still delicious. You can also make mini bagels for special times of the year. - Holiday-themed flavors and toppings: Try pumpkin spice mini bagels for fall. Top with cream cheese mixed with cranberries for a festive touch during the holidays. - Ideas for mini bagels for special occasions: For birthdays, use colorful sprinkles in the dough. For brunch, serve bagels with different spreads, like herb cheese or smoked salmon. For the full recipe, check out the detailed steps above. To keep your mini bagels fresh, store them at room temperature. Place them in a paper bag. This keeps them soft. Avoid plastic bags, as they trap moisture and make them soggy. If you have extra bagels, you can refrigerate them. Wrap each bagel in plastic wrap. Then, put them in an airtight container. This helps prevent them from drying out. Freezing mini bagels is easy and keeps them tasty. First, let the bagels cool completely. This stops ice from forming on them. Next, place each bagel in a freezer bag. Squeeze out the air before sealing. This helps keep them fresh for up to three months. When you want to eat them, take out a bagel. Leave it at room temperature to thaw. For the best texture, you can also toast it. This gives the bagel a nice, warm crunch. If you want to explore more about making these treats, check the Full Recipe for detailed instructions. Homemade mini bagels last about 2-3 days at room temperature. Store them in a paper bag to keep them fresh. For longer storage, place them in a sealed bag and refrigerate them. This can extend their life to about a week. If you want to keep them even longer, freezing is a great option. Wrap each bagel tightly in plastic wrap and then place them in a freezer bag. They can last up to 3 months in the freezer. Yes, you can use different types of flour! All-purpose flour works best, but you can try whole wheat flour for a nuttier taste. If you want a gluten-free option, use a gluten-free flour blend. Just make sure it is designed for baking. Some readers enjoy experimenting with oat flour or almond flour too. Each type of flour can change the taste and texture slightly. The mini bagels are fully baked when they turn a nice golden brown. You can also tap the bottom of a bagel; if it sounds hollow, it’s done! Another way to check is to use a toothpick. If it comes out clean, your bagels are ready. Keep an eye on them, as they can go from perfect to overbaked quickly. Mini bagels can be healthier than regular bagels, mainly due to their size. They have fewer calories and carbs than full-sized bagels. However, the overall healthiness depends on the toppings you choose. If you load them with cream cheese, they may not be as healthy. Choose lighter toppings like avocado or fresh veggies for a healthier option. You can find mini bagels at many grocery stores. Look in the bread aisle or the bakery section. Some popular brands offer mini bagels, so check your local store. If you can’t find them, consider asking your baker to make a batch. You can also find them online, with many bakeries shipping directly to your door. Making mini bagels is fun and easy. You learned about key ingredients like flour, yeast, and honey. We discussed how to shape, boil, and bake your bagels perfectly. Tips for flavor and dietary changes can help you customize your bagels. Storage tips ensure freshness for days. Now, it's time to create your mini bagels. Enjoy sharing them with friends and family!](https://grilledflavors.com/wp-content/uploads/2025/07/21847389-7c26-4b5a-ba52-196ea5b98a32.webp)
Mini Bagels Recipe Simple and Flavorful Treat
Looking for a fun and tasty treat? My Mini Bagels Recipe is both simple and packed with flavor. Imagine fresh, warm bagels right from your
. It includes all the steps and tips you need to make this delicious dish! This blog post covered making a tasty Pumpkin French Toast Bake. We discussed essential and optional ingredients, plus how to substitute if needed. You learned the steps to prepare, bake, and check for doneness. I shared tips for perfect texture and great serving ideas. We explored gluten-free and vegan variations, along with storage and reheating tips. Now, grab your ingredients and start baking. Enjoy this dish any time of the year!](https://grilledflavors.com/wp-content/uploads/2025/07/a9636d89-8f78-44bb-be88-2f4070999397.webp)
Pumpkin French Toast Bake Simple and Tasty Recipe
Are you ready to spice up your breakfast? I’m excited to share my Pumpkin French Toast Bake with you! This easy and tasty recipe combines
Warm Fall Spiced Coffee Drink Flavorful and Cozy Treat
As the days grow shorter and temperatures drop, there’s nothing quite like a warm fall spiced coffee to cozy up your routine. In this post,
![To make Apple Pumpkin Streusel Muffins, gather these simple ingredients. Each one plays a key role in creating a tasty treat. - Dry Ingredients - 1 cup all-purpose flour - 1 cup whole wheat flour - 1 teaspoon baking powder - 1 teaspoon baking soda - 1 teaspoon cinnamon - 1/2 teaspoon nutmeg - 1/2 teaspoon ginger - 1/2 teaspoon salt - Wet Ingredients - 1 cup pumpkin puree - 1/2 cup brown sugar - 1/4 cup granulated sugar - 1/3 cup vegetable oil - 2 large eggs - 1 teaspoon vanilla extract - 1 medium apple, peeled and diced - Streusel Topping Ingredients - 1/2 cup oats - 1/3 cup brown sugar - 1/4 cup all-purpose flour - 1/4 teaspoon cinnamon - 2 tablespoons cold butter, cubed These ingredients come together to create a muffin that’s moist and full of flavor. You can use the Full Recipe for step-by-step guidance to bake these delicious muffins. - Preheat the Oven: Start by preheating your oven to 350°F (175°C). Line a standard muffin tin with paper liners. This step ensures even baking and easy cleanup. - Combine Dry Ingredients: In a large mixing bowl, whisk together the all-purpose flour, whole wheat flour, baking powder, baking soda, cinnamon, nutmeg, ginger, and salt. Mix until combined. This blend adds flavor and structure to your muffins. - Mix Wet Ingredients: In another bowl, whisk together the pumpkin puree, brown sugar, granulated sugar, vegetable oil, eggs, and vanilla extract. Mix until smooth. This creates a rich base for your muffins. - Combine Mixtures: Pour the wet mixture into the bowl with the dry ingredients. Gently fold together until just combined. Be careful not to overmix. Overmixing can lead to dense muffins. - Add Apples and Nuts: Fold in the diced apple and chopped walnuts, if using. Distribute them evenly through the batter. This adds texture and flavor to each bite. - Prepare the Streusel: In a small bowl, mix together the oats, brown sugar, flour, and cinnamon. Cut in the cold butter using a fork until the mixture looks like coarse crumbs. This topping will give your muffins a delightful crunch. - Fill Muffin Tin: Divide the muffin batter evenly among the prepared muffin cups. Fill each cup about two-thirds full. Generously sprinkle the streusel topping over each muffin. - Bake: Place the muffin tin in the oven and bake for 20-25 minutes. Check for doneness by inserting a toothpick into the center of a muffin. It should come out clean. - Cool Down: Remove the muffins from the oven and let them cool in the pan for 5 minutes. Then, transfer them to a wire rack to cool completely. This helps maintain the muffins' texture. For the complete recipe, head over to [Full Recipe]. - Ensuring Proper Mixing: Mix your dry and wet ingredients separately. This helps keep the muffins light. When you combine them, fold gently. Overmixing can make them tough. - Oven Temperature Check: Always preheat your oven to 350°F (175°C). This ensures even baking. If your oven runs hot or cold, adjust the temperature as needed. An oven thermometer can help. - Muffin Texture Enhancements: For extra moisture, add a bit more pumpkin puree. You can also swap out some all-purpose flour for more whole wheat flour. This gives a heartier texture. - Gluten-Free Options: If you need gluten-free muffins, use a gluten-free flour blend. Look for one with xanthan gum added. This helps mimic the texture of wheat flour. - Sugar Alternatives: You can use coconut sugar or maple syrup instead of brown sugar. Just adjust the liquid in your mix if you use syrup. This adds a nice flavor twist. - Dairy-Free Alternatives: Replace eggs with flaxseed meal mixed with water. For oil, use melted coconut oil. This keeps the muffins moist and rich without dairy. For the full recipe, check out the full recipe section and enjoy baking these delightful treats! {{image_2}} You can boost flavor by adding spices. Try adding a pinch of cloves for warmth. A dash of allspice can add depth too. You can even mix in some cardamom if you like a twist. Each spice gives a unique taste, making the muffins exciting. Want more fruit? You can add dried cranberries or raisins. These will add a sweet burst in every bite. Chopped pears can work well, too, giving a lovely texture. Consider using different apple varieties for varied sweetness. Each fruit brings its charm to the muffins. For chocolate lovers, adding chocolate chips is a great idea. Dark chocolate pairs nicely with pumpkin and apple. You can also use white chocolate for a sweeter contrast. This adds a fun twist, making the muffins even more indulgent. These muffins shine with warm drinks. Serve them with hot apple cider or spiced tea. A scoop of vanilla ice cream on the side makes a tasty dessert. You can even pair them with yogurt for a filling breakfast. Serve the muffins warm for the best taste. Place them on a rustic wooden board to enhance their charm. You can drizzle honey on top for extra sweetness. A sprinkle of cinnamon or a few apple slices makes it look stunning. Each muffin should be a delight to the eyes and the palate. Once your Apple Pumpkin Streusel Muffins are baked, let them cool on a wire rack. This helps keep the muffins from getting soggy. After they cool completely, store them in an airtight container. You can use a plastic or glass container. Keep them at room temperature for up to three days. For longer storage, consider refrigerating them. They last about a week in the fridge. Just remember to wrap them tightly to avoid drying out. If you want to save some for later, freezing works great. Wrap each muffin in plastic wrap or foil. Then, place them in a freezer-safe bag. They stay fresh in the freezer for up to three months. When you crave one, just take it out and thaw it. To enjoy your muffins warm, reheating is key. The best way to keep them fresh is to use the oven. Preheat your oven to 350°F (175°C). Place the muffins on a baking sheet and heat for about 10 minutes. This method keeps them soft and tasty. You can also use the microwave if you're in a rush. Place a muffin on a microwave-safe plate. Heat for about 15-20 seconds. This method is quick, but it may make the muffins a bit rubbery. Enjoy your delicious Apple Pumpkin Streusel Muffins with these storage tips! For the full recipe, check out the recipe card. How do I ensure my muffins are moist? To keep your muffins moist, use pumpkin puree. It adds moisture and flavor. Also, mix wet and dry ingredients just until combined. Overmixing can lead to dry muffins. Can I make these muffins ahead of time? Yes, you can make these muffins ahead of time. They store well in an airtight container. Enjoy them within three days for the best taste. What types of apples work best for this recipe? I recommend using Honeycrisp or Granny Smith apples. Both add sweetness and a nice crunch to the muffins. They balance well with the pumpkin flavor. How long do Apple Pumpkin Streusel Muffins last? These muffins last about three days at room temperature. For longer storage, keep them in the fridge for up to a week. You can also freeze them for up to three months. Can I make a mini version of these muffins? Absolutely! Just use a mini muffin tin and reduce the baking time. Check them after 12-15 minutes. They will be perfect bite-sized treats! For the full recipe, check out the details above. You now know how to make delicious Apple Pumpkin Streusel Muffins. We covered the key ingredients, step-by-step instructions, and helpful tips. You learned about variations and how to store and reheat your muffins. Baking muffins can be fun and simple. Experiment with flavors and share them with friends. Enjoy your fresh, tasty treats!](https://grilledflavors.com/wp-content/uploads/2025/07/0ac0500a-fc2d-4a48-b925-e60665dfdce1.webp)
Apple Pumpkin Streusel Muffins Delightful Fall Snack
Fall is here, and what better way to embrace the season than with Apple Pumpkin Streusel Muffins? These tasty treats combine the warm flavors of

Mint Chocolate Chip Protein Shake Nourishing Recipe
If you’re craving something delicious and healthy, try my Mint Chocolate Chip Protein Shake! This recipe combines rich chocolatey flavor and refreshing mint in each
![To make the perfect Gilmore Girls pumpkin pancakes, you need the right ingredients. Here’s a simple list: - 1 cup all-purpose flour - 1 tablespoon baking powder - 1/2 teaspoon baking soda - 1 teaspoon ground cinnamon - 1/2 teaspoon ground nutmeg - 1/4 teaspoon ground ginger - 1/4 teaspoon salt - 1 cup pumpkin puree (canned or fresh) - 1 cup milk (or a dairy-free alternative) - 2 large eggs - 2 tablespoons maple syrup - 2 tablespoons melted butter (or coconut oil) - Optional: pecans or walnuts for topping These ingredients combine to create a warm and cozy dish that celebrates fall. The pumpkin puree adds a rich, sweet flavor, while the spices bring warmth. The baking powder and baking soda help the pancakes rise, making them light and fluffy. Using fresh pumpkin can enhance the taste, but canned is quick and easy. You can also switch to dairy-free milk if you prefer. Topping with nuts adds a nice crunch and flavor. For the full recipe, check the details above. Enjoy your cooking! How to mix dry ingredients Start with a large bowl. Add 1 cup of all-purpose flour, 1 tablespoon of baking powder, 1/2 teaspoon of baking soda, 1 teaspoon of ground cinnamon, 1/2 teaspoon of ground nutmeg, 1/4 teaspoon of ground ginger, and 1/4 teaspoon of salt. Whisk these together until they blend well. Combining wet ingredients for the batter In another bowl, mix 1 cup of pumpkin puree, 1 cup of milk, 2 large eggs, 2 tablespoons of maple syrup, and 2 tablespoons of melted butter. Stir until you achieve a smooth mixture. Techniques for cooking the pancakes Pour the wet mixture into the dry mix. Stir gently until you see a few lumps. This means your batter is just right! Heat a non-stick skillet over medium heat. Lightly grease it with butter or oil. Recommended skillet temperature Aim for medium heat on your skillet. If it's too hot, the pancakes may burn. Timing for pancake flipping Cook each pancake for about 2-3 minutes. Look for bubbles on the surface. When the edges set, it’s time to flip! Tips for maintaining perfect texture Avoid overmixing the batter. This keeps your pancakes fluffy. If they seem too thick, add a splash of milk. Enjoy making these delicious Gilmore Girls pumpkin pancakes! For the complete recipe, check the [Full Recipe]. To make your pancakes fluffy, focus on key ratios. Use 1 cup of flour with 1 tablespoon of baking powder. This mix helps create lift in your pancakes. Remember, don’t overmix your batter. Stir gently until you see a few lumps. Overmixing can lead to tough pancakes. Keep it light and simple for the best results. You can boost the flavor of your pancakes with spices. Try adding 1 teaspoon of cinnamon and a pinch of nutmeg. Ground ginger also adds a warm touch. For extra fun, toss in some chocolate chips or chopped nuts. Top your pancakes with pecans or walnuts to add crunch. Drizzle with maple syrup to make them even more delicious. Enjoy the warmth of fall with every bite! {{image_2}} If you want to go gluten-free, there are great alternatives for flour. You can use almond flour, coconut flour, or a gluten-free all-purpose blend. Each option gives a unique taste and texture. The best gluten-free flour blends combine different types of flours. Look for blends that include rice flour, tapioca flour, and potato starch. These blends work well in pancakes, keeping them fluffy and soft. To make your pancakes even more fun, consider adding chocolate chips or dried fruits. Chocolate chips bring sweetness and richness. Dried fruits, like cranberries or raisins, add a chewy texture and burst of flavor. You can also change up the nuts or syrups you use. Try topping your pancakes with pecans, walnuts, or even hazelnuts. Each nut adds a different crunch. For syrup, maple is classic, but you can also use caramel or honey for a new twist. For the full recipe, check out the detailed instructions and enjoy these delicious variations! To keep your leftover pumpkin pancakes fresh, follow these tips. First, let them cool completely. This step stops steam from forming inside the storage container. Place the pancakes in a single layer in an airtight container. If you have many, use parchment paper between layers. For refrigerating, you can store the pancakes for up to three days. Just remember to seal them well to avoid drying out. If you want to keep them longer, freezing is a great option. To freeze pancakes, stack them with parchment paper between each one. Place the stack in a freezer-safe bag. You can store them for up to three months. When you're ready to enjoy your pancakes again, reheating them is simple. The best method is to use a skillet over low heat. This way, they warm evenly. Flip them once to heat both sides. You can also use a microwave for quick reheating. Just place a few pancakes on a plate and cover them with a damp paper towel. Heat for about 30 seconds. To keep their texture and flavor, avoid overcooking. If they seem dry, add a splash of syrup or milk when reheating. This will help bring back their original moistness. Enjoy your tasty pancakes just like the first time! Can I use fresh pumpkin instead of canned? Yes, you can use fresh pumpkin! Start with a small pumpkin. Cut it, bake it, and scoop out the soft flesh. Blend it into a smooth puree. This will give your pancakes a fresh taste. Just make sure to measure out one cup for the recipe. How do I make vegan pumpkin pancakes? To make vegan pumpkin pancakes, replace the eggs with flax eggs. Mix one tablespoon of ground flaxseed with two and a half tablespoons of water. Let it sit until it thickens. Also, use a non-dairy milk like almond or oat milk. Replace melted butter with coconut oil or a vegan butter. Connection to "Gilmore Girls" episodes or characters In "Gilmore Girls," food has a special place. The show's warmth shines through its cozy meals. Pumpkin pancakes fit right in with the fall vibe. They remind fans of family breakfasts at Luke's Diner. It’s a sweet nod to the show's love for food and connection. Why pumpkin pancakes resonate with fans of the show Fans love pumpkin pancakes because they are comforting. They bring to mind memories of autumn and family. Just like the Gilmore girls, pumpkin pancakes are full of warmth and charm. They make you feel at home, just like a good episode of the show. Plus, they are easy to make and share! These Gilmore Girls pumpkin pancakes are simple and fun to make. We covered the key ingredients, from flour to spices. The step-by-step guide helps you mix and cook perfectly fluffy pancakes. You can also try gluten-free options and flavor twists for variety. Remember to store any leftovers correctly and enjoy them later. Whether you stick to the classic recipe or get creative, these pancakes will please everyone. Dive in and savor the cozy taste of fall, just like the Gilmore girls would!](https://grilledflavors.com/wp-content/uploads/2025/07/f60fe143-7ab3-4def-9f00-fa099d6971a7.webp)
Gilmore Girls Pumpkin Pancakes Delightful Fall Recipe
Fall is here, and what better way to celebrate than with Gilmore Girls Pumpkin Pancakes? These fluffy, spiced pancakes capture the warm, cozy vibe of
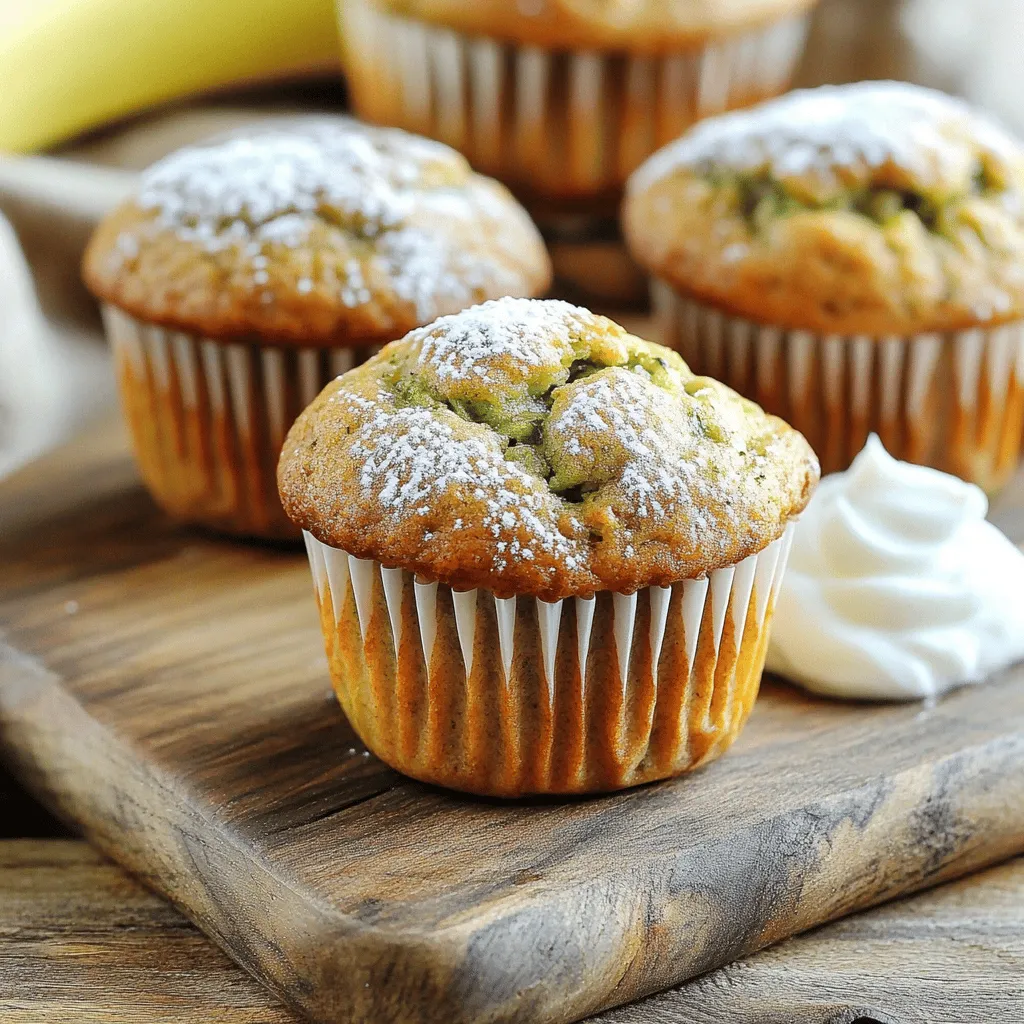
Delicious Banana Zucchini Muffins Easy and Healthy Treat
Are you ready to bake some delicious Banana Zucchini Muffins that are both easy and healthy? You’ll love how these muffins blend sweet bananas with