Desserts

Kid-Friendly Healthy Oatmeal Pumpkin Cookies Recipe
Looking for a healthy treat that kids will love? These Kid-Friendly Healthy Oatmeal Pumpkin Cookies are the perfect solution! With simple ingredients like oats, pumpkin,
![To make these Pumpkin Pie Crumble Bars, you need: - 2 cups all-purpose flour - 1/2 cup brown sugar - 1/2 cup granulated sugar - 1 cup unsalted butter, melted - 1 teaspoon cinnamon - 1/2 teaspoon nutmeg - 1/4 teaspoon ginger powder - 1 can (15 oz) pumpkin puree - 1/2 cup sweetened condensed milk - 2 large eggs - 1 teaspoon vanilla extract - 1/4 teaspoon salt - 1 cup rolled oats (for crumble topping) These ingredients work together to create a rich and delicious treat. The pumpkin puree gives it a creamy texture and that classic fall flavor. For substitutions, you can use whole wheat flour instead of all-purpose flour for added fiber. If you prefer a less sweet version, reduce the granulated sugar to 1/4 cup. You can swap the sweetened condensed milk with coconut milk for a dairy-free option. If you don’t have rolled oats, quick oats will work too, though they may change the texture slightly. Always remember to adjust spices to your taste. This recipe is flexible and can adapt to what you have at home. For the full recipe, follow the steps closely to achieve the best results. Enjoy baking these bars as they fill your kitchen with warm, inviting aromas! 1. Preheat and Prepare the Baking Pan Start by preheating your oven to 350°F (175°C). While it heats, grease a 9x9-inch baking pan. Line the pan with parchment paper, leaving some paper hanging over the edges. This helps you lift the bars out later. 2. Make the Crust and Pumpkin Filling In a mixing bowl, combine 2 cups of all-purpose flour, 1/2 cup of brown sugar, 1/2 cup of granulated sugar, and 1 cup of melted unsalted butter. Add 1 teaspoon of cinnamon, 1/2 teaspoon of nutmeg, 1/4 teaspoon of ginger powder, and 1/4 teaspoon of salt. Mix until crumbly. Reserve 1/2 cup of this mixture for the topping. Press the remaining mixture into the bottom of the pan to form the crust. Bake this crust for 10 minutes. While the crust bakes, mix in a separate bowl 1 can of pumpkin puree, 1/2 cup of sweetened condensed milk, 2 large eggs, and 1 teaspoon of vanilla extract. Stir until smooth. 3. Assemble and Bake the Bars Once the crust is done, take it out of the oven. Pour the pumpkin filling evenly over the warm crust. For the crumble topping, add 1 cup of rolled oats to the reserved crumb mixture. Mix well and sprinkle this over the pumpkin layer. Return the pan to the oven and bake for another 25-30 minutes. Look for the pumpkin layer to be set and the topping to turn golden brown. After baking, let the bars cool for at least 30 minutes in the pan. Lift them out using the parchment paper, cut into squares, and enjoy! For the full recipe, check the details above. To ensure a perfect crust, start with cold butter. Cut it into small pieces and mix it quickly with the dry ingredients. This keeps the crust flaky. Press the crust firmly into the pan for even baking. For a creamy pumpkin layer, blend the pumpkin puree and condensed milk until smooth. Make sure to beat the eggs well before adding them. This helps create a light texture. If your oven runs hot or cold, adjust the baking time. Check the bars a few minutes early. This helps avoid overbaking and keeps the pumpkin layer moist. Garnish your bars with a light dusting of powdered sugar. This adds a sweet touch and enhances the look. Fresh cinnamon or nutmeg on top can also add flavor and beauty. For special occasions, serve with whipped cream or a scoop of vanilla ice cream. You can also add caramel sauce for extra sweetness. These little touches make the bars feel extra special and inviting. {{image_2}} You can make these pumpkin pie crumble bars even better! Adding chocolate chips can give a rich twist. You can also mix in chopped nuts like walnuts or pecans for a crunchy bite. Changing spices can create new flavors. Try adding cardamom or allspice for a warm touch. You can use flavored extracts too. Maple or almond extract can add a nice depth. Just a little goes a long way, so start small! If you need gluten-free bars, swap the all-purpose flour for a gluten-free blend. Make sure it works well in baking. For a vegan option, use flax seeds mixed with water instead of eggs. Mix one tablespoon of ground flax with three tablespoons of water, then let it sit until it thickens. For dairy, replace sweetened condensed milk with coconut milk or a dairy-free alternative. Both options keep the bars creamy and delicious. You can find the full recipe [here]. After enjoying your pumpkin pie crumble bars, you may have leftovers. To keep them fresh, store the bars in an airtight container. Place parchment paper between layers to avoid sticking. Refrigerate them for up to five days. For longer storage, consider freezing. Cut the bars into squares, wrap each one tightly in plastic wrap, then place them in a freezer-safe bag. They can last in the freezer for three months. When it’s time to enjoy your bars again, reheating is key. You can use the oven or microwave. For the oven, preheat it to 350°F (175°C). Place the bars on a baking sheet and cover them with foil. Heat for about 10-15 minutes. This method keeps the texture nice. If you use the microwave, heat one bar at a time for 15-20 seconds. Check to avoid overheating, which can make them tough. Enjoy your delicious treats warmed up! How to know when the bars are done baking? You can tell the bars are done when the pumpkin layer looks set. The edges may pull away slightly from the pan. A toothpick inserted in the center should come out clean or with just a few moist crumbs. Can I use fresh pumpkin instead of canned? Yes, you can use fresh pumpkin. Just cook and puree it before measuring. Fresh pumpkin may have a different texture, so ensure it is smooth to match the canned version. What can I serve with pumpkin pie crumble bars? These bars are great with whipped cream or vanilla ice cream. You can also sprinkle some nuts on top or add a drizzle of caramel sauce for extra flavor. What to do if the topping is too dry? If your topping turns out too dry, try adding a bit more melted butter or a splash of milk. Mix it in slowly until you reach a crumbly yet moist texture. How to avoid cracks in the pumpkin layer? To prevent cracks, bake at a lower temperature. Avoid overmixing the pumpkin filling. Let the bars cool slowly at room temperature before refrigerating. This helps maintain a smooth surface. The blog post covered the essential ingredients, preparation steps, and tips for pumpkin pie crumble bars. It emphasized adjusting flavors, storing leftovers, and answered common questions. Remember, baking is creative and can be fun. Don't hesitate to experiment with ingredients and flavors. Use the tips here to make your bars perfect every time. Enjoy sharing your tasty treats with family and friends!](https://grilledflavors.com/wp-content/uploads/2025/07/55eb8c96-7d44-4a90-a150-abc77af74e89.webp)
Pumpkin Pie Crumble Bars Irresistible Fall Dessert
Fall is here, and it’s time to indulge in the deliciousness of Pumpkin Pie Crumble Bars! These bars blend the warm flavors of spiced pumpkin
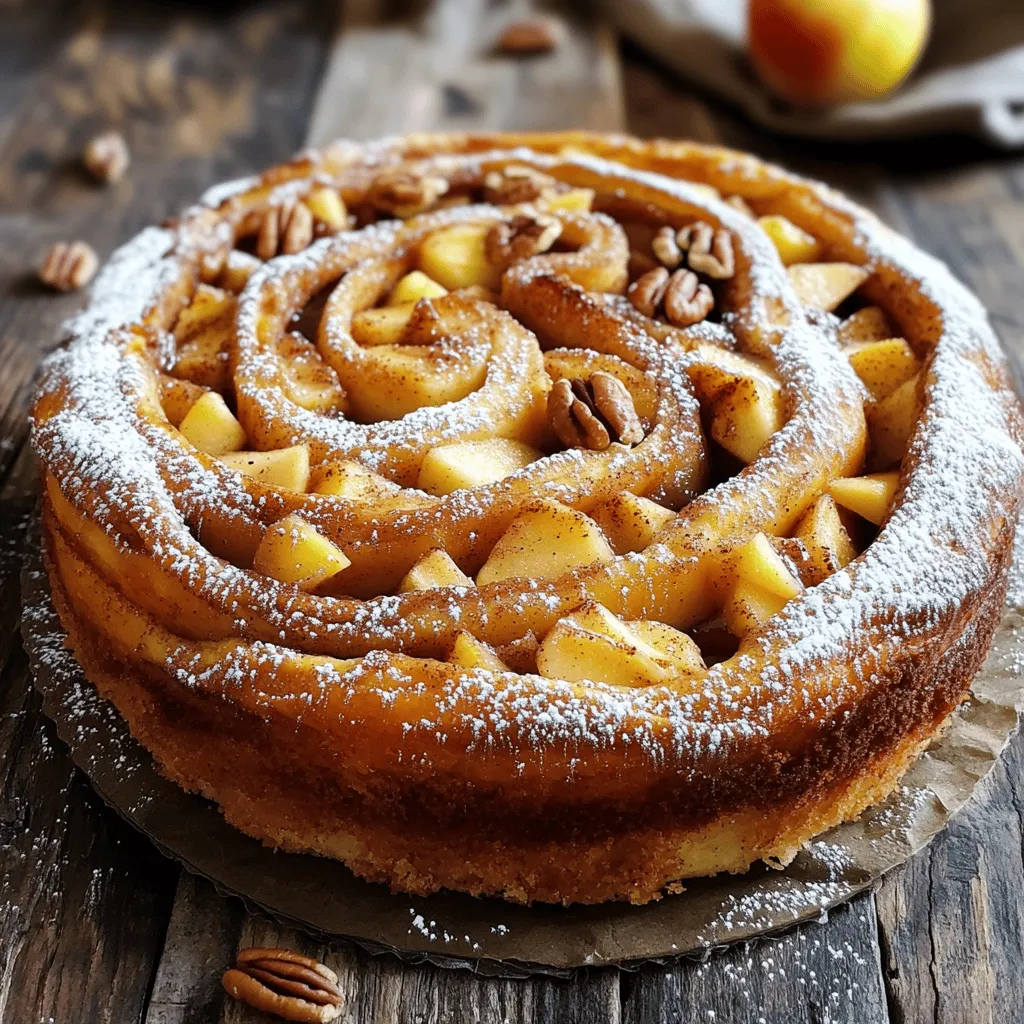
Apple Cinnamon Roll Cake Delightful and Easy Recipe
Are you ready to bake something that tastes like fall in every bite? This Apple Cinnamon Roll Cake is both delightful and easy to make.
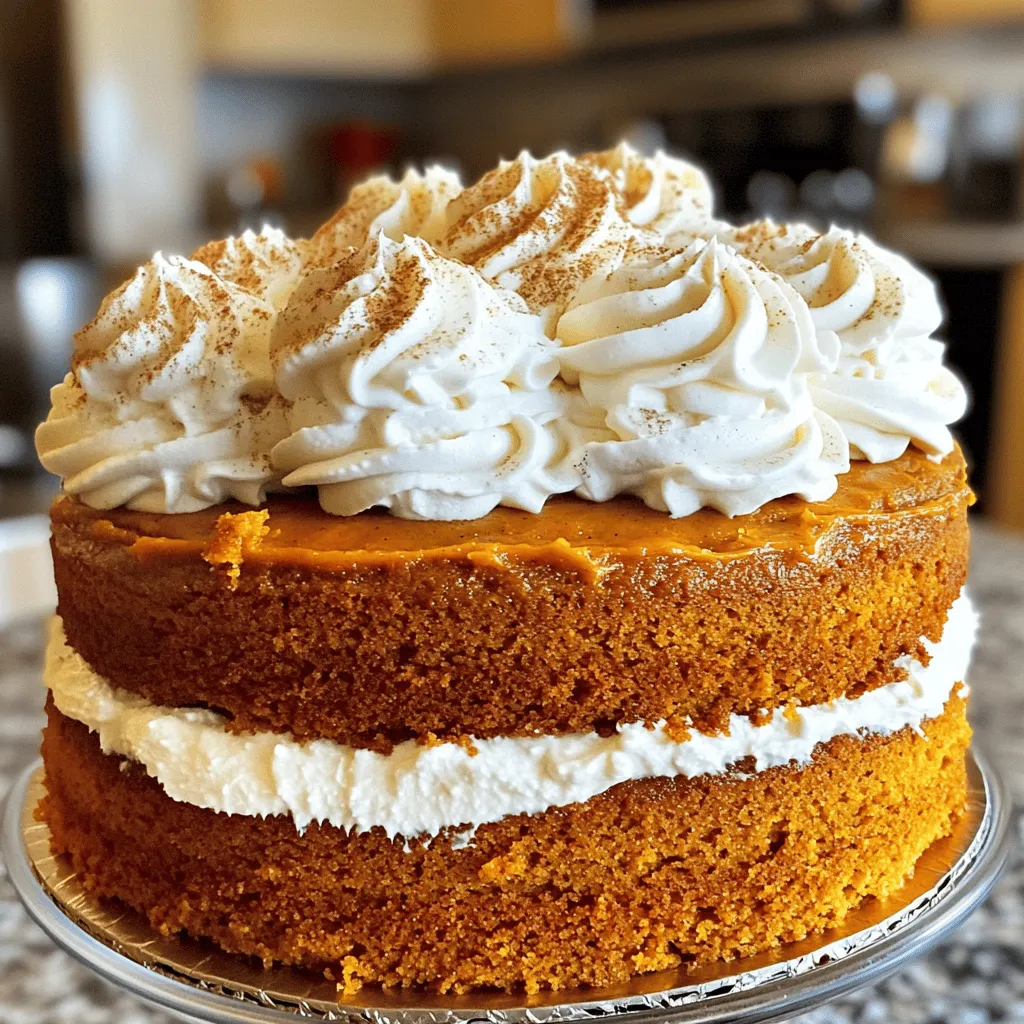
Pumpkin Spice Latte Cake Irresistible Fall Flavor
Fall is here, and it’s time to indulge in warm, cozy flavors! Have you ever dreamed of a cake that combines the rich spices of

Halloween Cookies Delightful and Easy to Make
Looking to make Halloween special this year? Let’s dive into the delightful world of Halloween cookies! These treats are easy to whip up and perfect
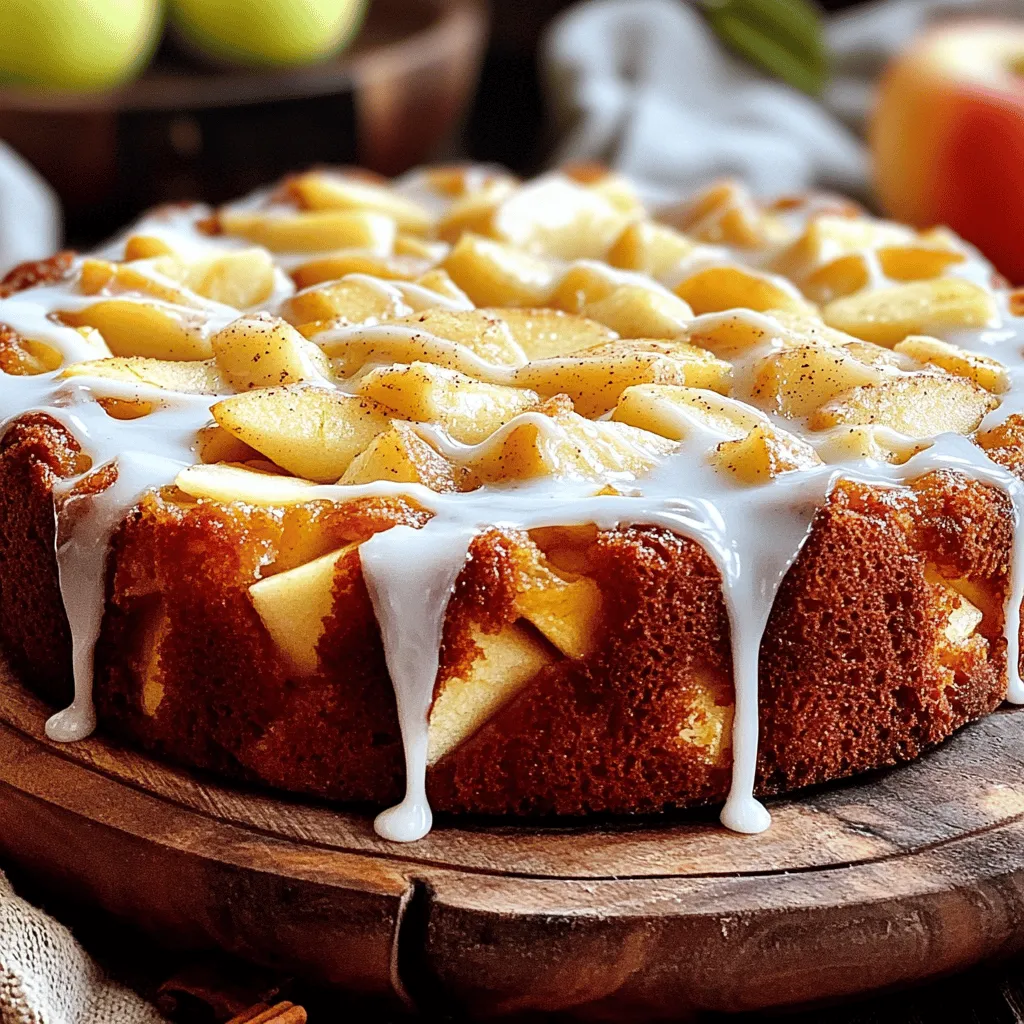
Apple Fritter Cake Delectable and Simple Recipe
Are you ready to bake something truly special? This Apple Fritter Cake is soft, sweet, and filled with delicious apples. In just a few easy
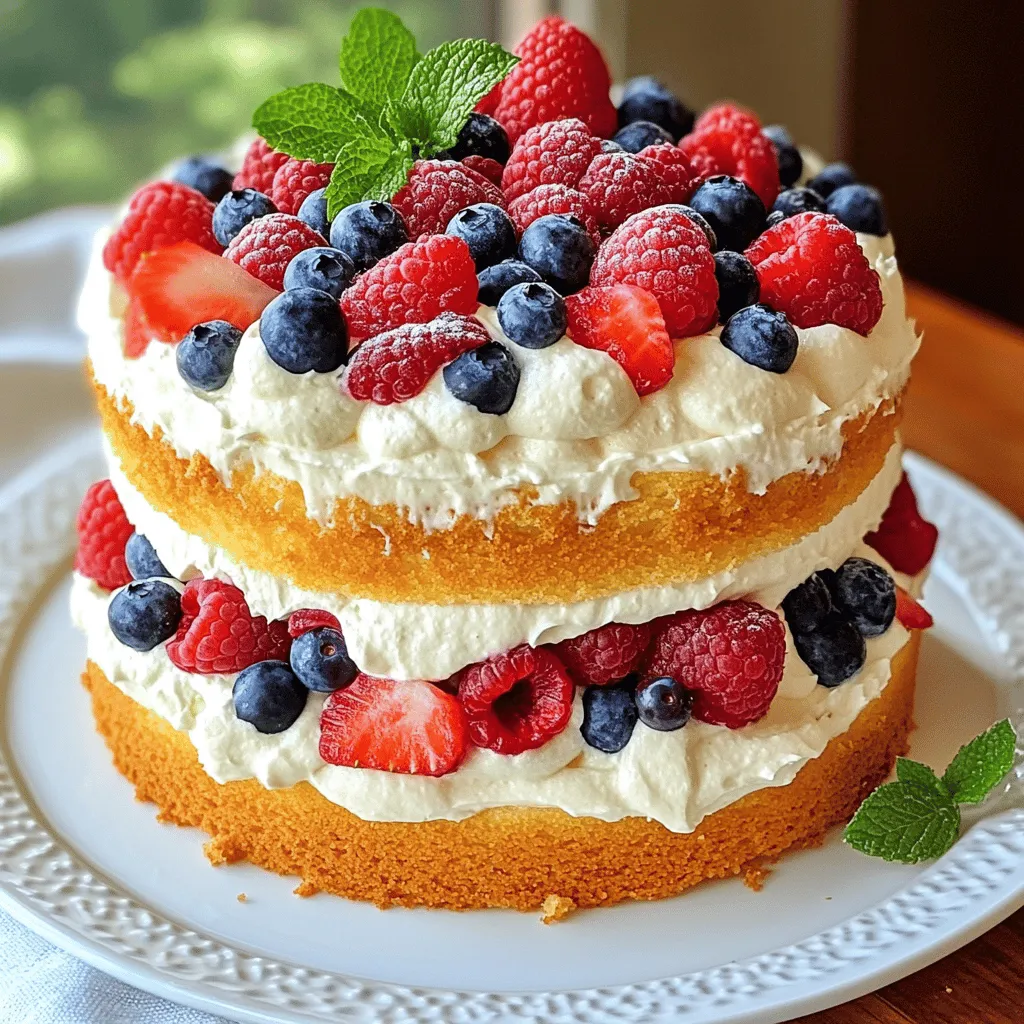
Berry Chantilly Cake Delightful and Easy Recipe
If you’re craving a delicious dessert that’s both easy and impressive, look no further! Berry Chantilly Cake offers a perfect blend of fluffy cake, rich
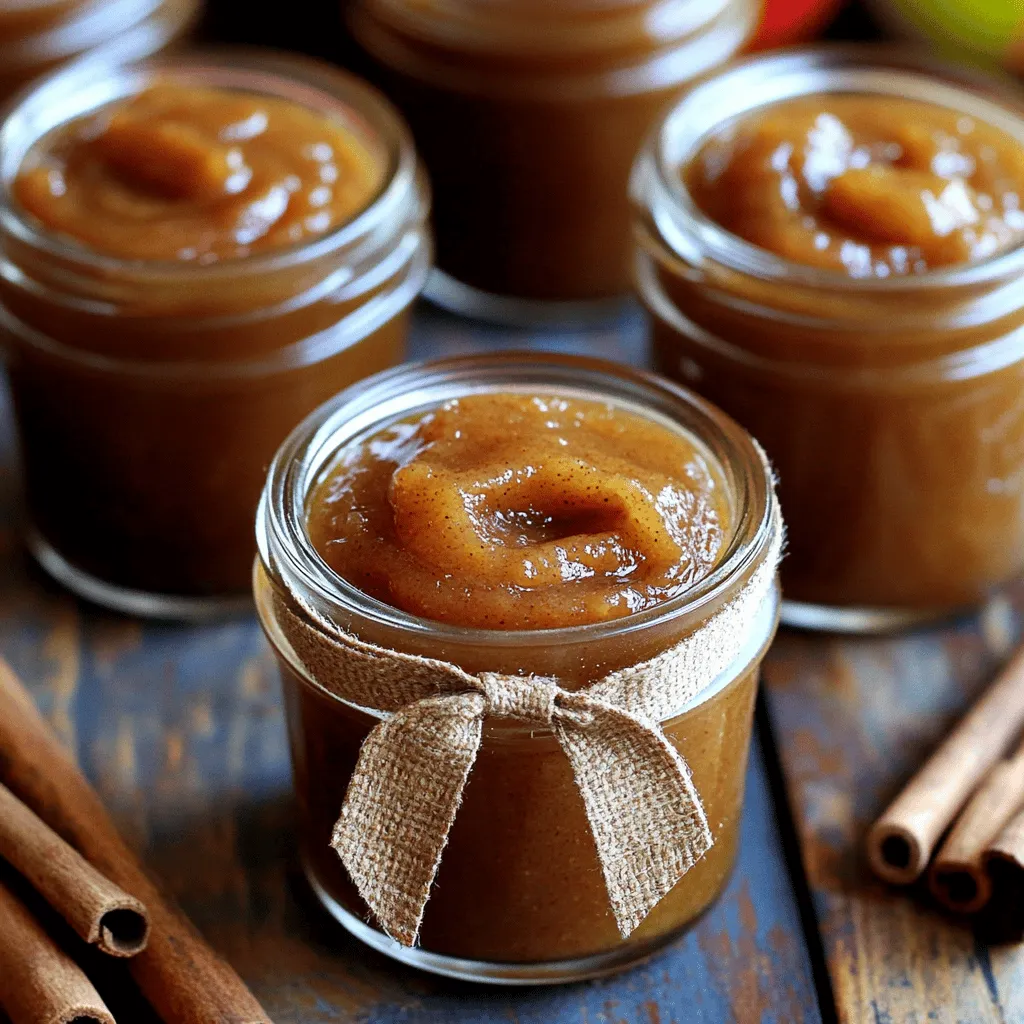
Heartwarming Traditional Apple Butter Recipe Delight
If you crave a warm, cozy treat, you need to try this heartwarming traditional apple butter recipe. With just a few simple ingredients like sweet
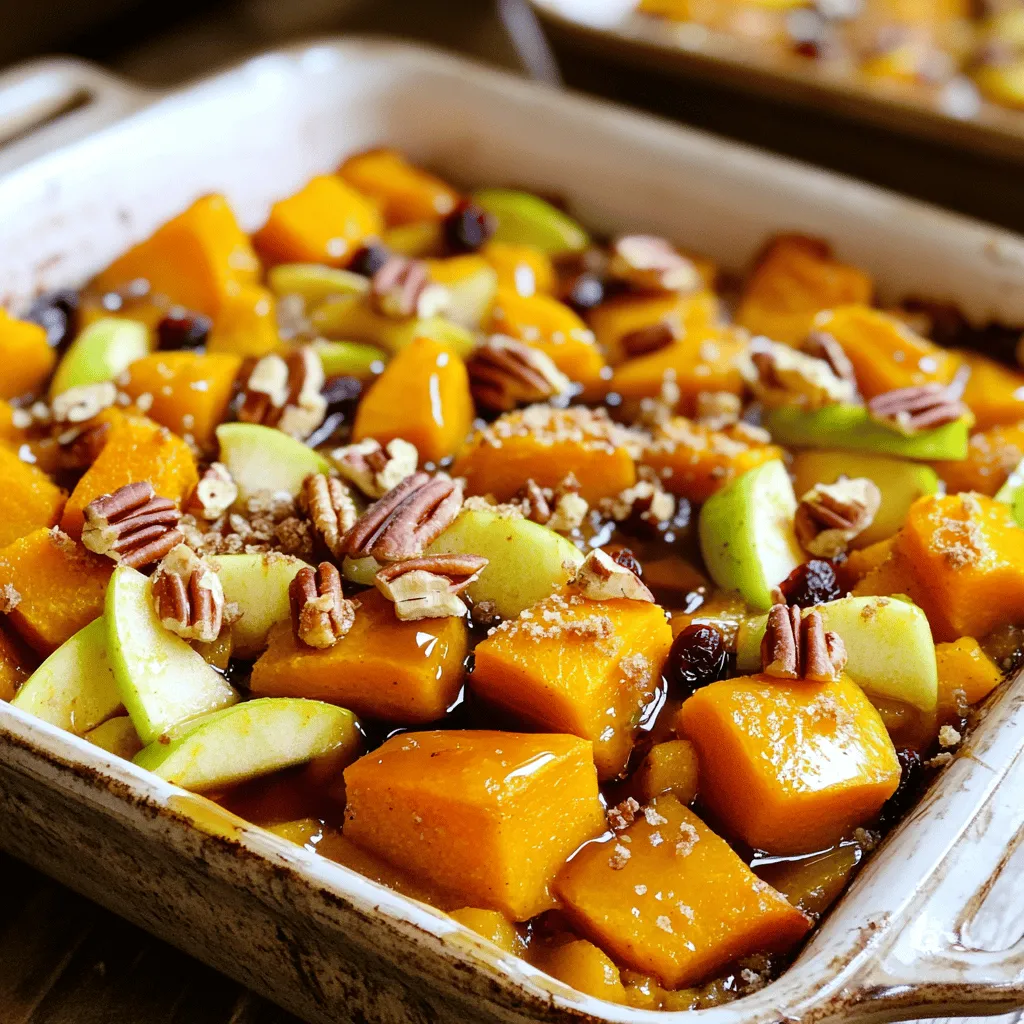
Butternut Squash Apple Bake Cozy and Comforting Dish
If you’re looking for a dish that brings warmth and comfort, Butternut Squash Apple Bake is a must-try. This cozy recipe combines sweet apples and
![To make the best caramel apple cider, gather these items: - 4 cups apple cider - 1 cup caramel sauce (store-bought or homemade) - 1 teaspoon ground cinnamon - 1/2 teaspoon ground nutmeg - 1/4 teaspoon allspice These ingredients create a warm, cozy drink. The apple cider gives a sweet base. The caramel sauce adds a rich flavor. The spices make it smell like fall. You can add these optional ingredients for a twist: - 2 tablespoons brown sugar (optional) Brown sugar boosts the sweetness. You can skip it if you prefer less sugar. Finishing touches make your drink special. Try these toppings: - Whipped cream for topping - Extra caramel sauce for drizzling - Sliced apples for garnish The whipped cream adds creaminess. Drizzling caramel gives extra sweetness. Sliced apples offer a fresh crunch and look great. For the full recipe, visit [Full Recipe]. To start making caramel apple cider, gather your ingredients. You will need: - 4 cups apple cider - 1 cup caramel sauce (store-bought or homemade) - 1 teaspoon ground cinnamon - 1/2 teaspoon ground nutmeg - 1/4 teaspoon allspice - 2 tablespoons brown sugar (optional) - Whipped cream for topping - Extra caramel sauce for drizzling - Sliced apples for garnish First, pour the apple cider into a large saucepan. Heat it over medium heat. Stir it occasionally until it steams. This helps to bring out the apple flavors. Next, add the caramel sauce and spices. Stir them in well. The caramel should melt and blend with the cider. I love to taste it at this point. If you like it sweeter, add some brown sugar. Stir until it dissolves completely. Once the cider is hot and mixed, take it off the heat. Pour it into mugs, leaving some space at the top. This will make room for the toppings. Now, it’s time to dress up your cider! Add a generous dollop of whipped cream on top of each mug. Then, drizzle some extra caramel sauce over the cream. For a fun touch, garnish with sliced apples. To make it look even better, serve in clear mugs. This way, everyone can see the beautiful layers. You can also add a cinnamon stick for a rustic feel. Enjoy this cozy drink with friends or family. For the full recipe, check out the details above! When picking apple cider, you want fresh cider. Look for cider that smells sweet and fruity. Check the label for no added sugars or preservatives. I prefer local cider, as it tends to taste better. You can ask at farmers' markets for the best options. A good cider will make your drink shine. Finding the right sweetness is key. Start with a quality apple cider. Add caramel sauce slowly and taste as you go. I often mix in brown sugar for extra sweetness. Don't overdo it; you want to keep some apple flavor. A pinch of salt can also help balance the sweetness. This way, your drink won't taste too sugary. Presentation makes a big difference. Use clear mugs to show off the colors and layers. Top with whipped cream for a nice touch. Drizzle extra caramel sauce on top for a sweet finish. Sliced apples add color and charm. You can even add a cinnamon stick for a rustic feel. This simple step makes your cider look inviting and festive. {{image_2}} Want to add a twist to your caramel apple cider? You can make it spiked! This gives your drink an adult touch. Try adding a splash of spiced rum or bourbon. You only need about 1 to 2 ounces per mug. Mix it in after you heat the cider. This adds warmth and depth to the flavor. If you love to experiment, there are many flavor combos you can try. Add a hint of vanilla extract for a sweet twist. You might also enjoy using pear juice instead of apple cider. It gives a unique taste that’s still cozy. For a fruity kick, try adding cranberry juice. This makes the drink a little tart and very refreshing. Caramel apple cider is not just for fall! You can enjoy it all year. In spring, try mixing in fresh strawberries or peaches. These fruits add a bright and fruity flavor. Summer calls for chilled cider. Pour it over ice for a refreshing treat. In winter, add peppermint extract for a cozy holiday drink. Each season brings new tastes to enjoy with caramel apple cider. For the full recipe, check out Caramel Apple Cider Delight . To keep your caramel apple cider fresh, let it cool first. Pour the cider into an airtight container. Seal it tightly and place it in the fridge. It will stay good for about three days. When you're ready to enjoy the cider again, pour it into a saucepan. Heat it over low to medium heat. Stir gently until it's warm. This keeps the flavors intact and delicious. Avoid boiling to prevent losing that sweet taste. Caramel apple cider lasts up to a week in the fridge. If you want to store it longer, you can freeze it. Pour the cider into freezer-safe containers, leaving some space at the top. It can last up to three months in the freezer. To use, thaw it overnight in the fridge, then reheat as above. For a quick treat, grab the [Full Recipe] and make a fresh batch anytime! The best apple cider for caramel apple cider is fresh, unfiltered cider. Look for local brands that use high-quality apples. The stronger the apple flavor, the better. You want a cider that tastes sweet and a bit tart. This balance makes the drink more delicious. Avoid cider with added preservatives, as they can change the taste. Yes, you can make caramel apple cider in advance. Prepare it and store it in the fridge for up to three days. When you are ready to serve, heat it on the stove. Stir often to keep it smooth. You can also use a microwave, but be careful not to overheat it. Apple cider has several health benefits. It contains vitamins and antioxidants that are good for you. Drinking apple cider may help with digestion. It can also boost your immune system during colder months. However, remember that too much sugar can be a concern. Enjoy it in moderation for the best health effects. If you're eager to dive into making this cozy drink, don't forget to check out the Full Recipe! You now have all the tools to make delicious caramel apple cider at home. We covered the key ingredients, from main to optional. You learned important steps and clever tips for a great drink. I shared fun variations to keep it fresh all year. Lastly, storage tips help keep your cider tasty. Try different flavors or share with friends to enjoy. Making caramel apple cider can be fun and rewarding. Enjoy every warm sip of this tasty treat!](https://grilledflavors.com/wp-content/uploads/2025/07/90ba617d-16e8-42d0-b4aa-eb81fca41577.webp)
Caramel Apple Cider Irresistible Fall Treat Recipe
Fall is here, and that means it’s time for cozy treats! Today, I’ll share my favorite recipe for Caramel Apple Cider, a warm and delightful