Desserts

For making vegan chocolate zucchini bread, you need specific ingredients. Here’s what you’ll use: - 2 cups grated zucchini (about 1 medium zucchini) - 1 cup all-purpose flour - 1/2 cup cocoa powder - 1/2 cup coconut sugar (or brown sugar) - 1/2 teaspoon baking soda - 1/2 teaspoon baking powder - 1/4 teaspoon salt - 1/2 cup unsweetened applesauce - 1/4 cup almond milk (or any non-dairy milk) - 1/4 cup vegetable oil (or melted coconut oil) - 1 teaspoon vanilla extract - 1/2 cup vegan chocolate chips - Optional: 1/2 teaspoon cinnamon for extra flavor Every ingredient in this recipe serves a purpose. Here are the benefits: - Zucchini adds moisture and fiber. It keeps the bread soft and healthy. - All-purpose flour provides structure. It helps hold the bread together. - Cocoa powder gives rich flavor and color. It's a great source of antioxidants. - Coconut sugar is less processed. It has a lower glycemic index than regular sugar. - Baking soda and baking powder help the bread rise. They create a light texture. - Salt enhances flavors. It balances sweetness and enriches taste. - Applesauce acts as a binder. It replaces eggs and adds natural sweetness. - Almond milk adds creaminess. It's a great dairy-free choice. - Vegetable oil keeps the bread moist. It helps with texture. - Vanilla extract adds depth. It makes the bread smell and taste great. - Vegan chocolate chips bring indulgence. They melt and add sweetness. - Cinnamon (optional) offers warmth. It adds a lovely spice note. You can customize this recipe with different ingredients. Here are some ideas: - Swap all-purpose flour for whole wheat or gluten-free flour. - Use maple syrup or agave instead of coconut sugar for a different sweetness. - Replace almond milk with oat or soy milk based on your preference. - Use flaxseed meal mixed with water instead of applesauce for binding. - Add nuts like walnuts or pecans for crunch. - Mix in dried fruits like raisins or cranberries for added flavor. Feel free to mix and match to make this vegan chocolate zucchini bread your own! For the complete recipe, check the Full Recipe section. To make this delicious vegan chocolate zucchini bread, follow these steps closely. First, preheat your oven to 350°F (175°C). Grease a 9x5-inch loaf pan or line it with parchment paper. This helps the bread come out easily. In a large bowl, combine 2 cups of grated zucchini and 1/2 cup of applesauce. Mix well until they blend smoothly. In another bowl, whisk together 1 cup of all-purpose flour, 1/2 cup of cocoa powder, 1/2 cup of coconut sugar, 1/2 teaspoon of baking soda, 1/2 teaspoon of baking powder, and 1/4 teaspoon of salt. If you like, add 1/2 teaspoon of cinnamon for extra flavor. Gradually mix the dry ingredients into the wet mixture. Stir until just combined. Now, add in 1/4 cup of almond milk, 1/4 cup of vegetable oil, and 1 teaspoon of vanilla extract. Mix until the batter is smooth. Gently fold in 1/2 cup of vegan chocolate chips. Pour the batter into the prepared loaf pan. Smooth the top using a spatula. Bake for 45-55 minutes. Check if it’s done by inserting a toothpick in the center. If it comes out clean, your bread is ready! Let it cool for about 10 minutes in the pan before moving it to a wire rack. Avoid these common mistakes for the best results. First, don’t skip grating the zucchini. It adds moisture and flavor. If the zucchini is not grated, the bread may be dry. Second, measure the flour correctly. Too much flour can make your bread dense. Use the spoon-and-level method for accuracy. Next, don’t overmix the batter. Mixing too much can create tough bread. Mix until just combined. Finally, keep an eye on your bread as it bakes. Every oven is different, so check it a few minutes early. Mixing wet and dry ingredients properly is key. Start with the wet ingredients in one bowl. Stir them well to ensure they’re fully combined. When adding the dry ingredients, do it gradually. This helps the batter mix evenly. Avoid adding all the dry at once. It can create lumps. Once mixed, stop as soon as you don’t see dry flour. Folding in the chocolate chips last helps them spread evenly. With these tips, you'll get a smooth batter that bakes beautifully. For the full recipe, check out the Vegan Chocolate Zucchini Bread recipe above. To keep your vegan chocolate zucchini bread moist, use fresh zucchini. Grate the zucchini and squeeze out some water. This step helps avoid excess liquid. Applesauce also adds moisture. It binds well with other ingredients. For best results, use a mixture of applesauce and oil. This combo keeps the bread tender and fluffy. When grating zucchini, choose a medium-sized one. A food processor makes this task quick. You want small, even pieces for even cooking. After grating, place the zucchini in a clean cloth. This will help you remove extra moisture. Less water means a denser, richer bread. Adding extras can make your bread even better. Try tossing in chocolate chips for a rich taste. You can also add nuts for crunch. Walnuts or pecans work well here. Want a hint of spice? Add cinnamon or nutmeg for warmth. These small tweaks can elevate your vegan chocolate zucchini bread to a new level. For the full recipe, check out the earlier section. {{image_2}} To make this bread gluten-free, swap all-purpose flour for a gluten-free blend. Look for a blend that includes xanthan gum. This will help the bread rise and hold its shape. You can also use almond flour or coconut flour, but adjust the liquid since these absorb more moisture. While coconut sugar is great, you can try maple syrup or agave nectar. These liquid sweeteners add a unique flavor. If you prefer a lower-calorie option, consider using stevia or monk fruit sweetener. Just check the conversion ratio as they can be sweeter than regular sugar. For added texture, mix in some chopped walnuts or pecans. They give a nice crunch and pair well with chocolate. You can also add dried fruits like raisins or cranberries for a chewy surprise. Just make sure to keep an eye on the moisture level, as these additions can change the texture slightly. For the full recipe, check out the complete details on how to create this delicious treat! To keep your vegan chocolate zucchini bread fresh, first let it cool completely. Once cooled, wrap it tightly in plastic wrap or place it in an airtight container. This helps to keep the moisture in. Store it at room temperature for up to four days. If you want it to last longer, refrigeration is a good option, but it may dry out a bit. You can also keep it in the fridge for up to a week. Freezing is a great way to save your vegan chocolate zucchini bread for later. Start by slicing the bread into pieces. Wrap each slice in plastic wrap, then place them in a freezer-safe bag. This method helps prevent freezer burn. You can freeze the bread for up to three months. When you’re ready to eat it, just take out a slice and let it thaw at room temperature. To enjoy leftover vegan chocolate zucchini bread, you can reheat it in a few ways. For the best texture, place a slice in the toaster or oven. Heat it at 350°F (175°C) for about 5-10 minutes. This warms it up and makes it soft again. You can also microwave it for about 20-30 seconds if you’re in a hurry. Enjoy your tasty treat! Yes, you can replace applesauce. Use mashed bananas or pureed silken tofu. Both keep the bread moist. Each substitute adds a unique taste. Bananas add sweetness, while tofu keeps it neutral. Check the bread around 45 minutes. Insert a toothpick into the center. If it comes out clean, the bread is ready. The top should look set and slightly cracked. You can also gently press the top; it should spring back. Yes, you can make it oil-free. Substitute the oil with more applesauce or use unsweetened nut butter. This change will keep the bread moist. It may alter the flavor slightly, but it will still be delicious. Cinnamon and nutmeg add warmth to the bread. You can also mix in orange zest for brightness. A dash of espresso powder can deepen the chocolate flavor. Experiment with these to find your favorite combination. The bread lasts for about five days at room temperature. Store it in an airtight container to keep it fresh. If you want it to last longer, freeze slices. You can thaw them easily whenever you want a treat. For the full recipe, check the Vegan Chocolate Zucchini Bread section. This post covered the key ingredients and steps for making Vegan Chocolate Zucchini Bread. You learned about each ingredient's benefits and how to customize the recipe to match your tastes. I shared tips for moistness, avoiding common mistakes, and storing your bread for future enjoyment. Remember, baking is fun, so feel free to experiment. With these insights, you can create a delicious treat that fits your diet. Enjoy your baking adventure!
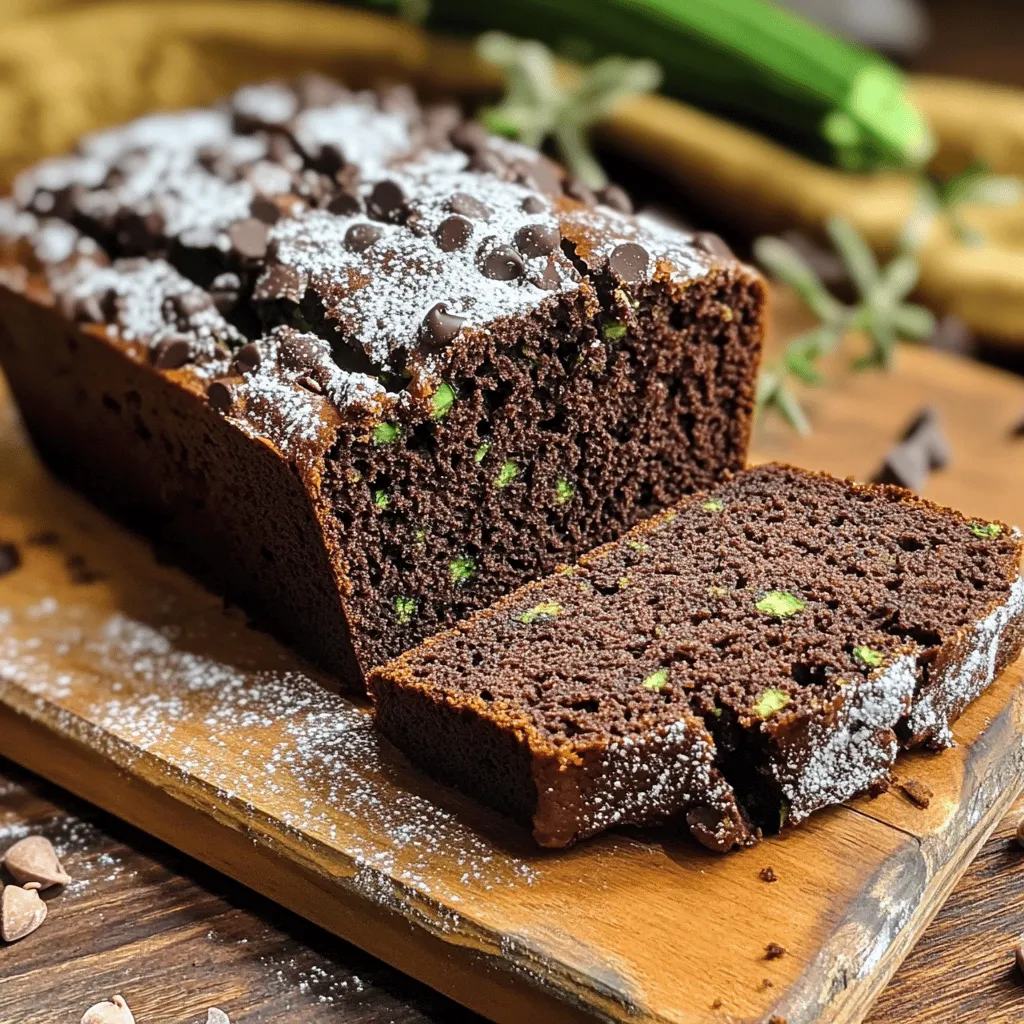
Vegan Chocolate Zucchini Bread Easy and Tasty Recipe
Are you ready to enjoy a delicious treat without any guilt? This Vegan Chocolate Zucchini Bread is easy to make and brimming with flavor. Packed
- 1 cup chocolate wafer cookies, crushed - 4 tablespoons unsalted butter, melted - 2 cups fresh strawberries, hulled and halved - 2 cups heavy cream - 1 cup powdered sugar - 1 teaspoon vanilla extract - 1/2 cup chocolate ganache - Optional: Fresh mint leaves for garnish To make the Frozen Chocolate Strawberry Cake, you need simple ingredients. First, gather chocolate wafer cookies. These make a crunchy crust. Next, you'll need unsalted butter to hold the cookies together. Fresh strawberries add a sweet and juicy touch. Heavy cream is essential for that rich filling. Powdered sugar gives it a sweet kick, while vanilla extract enhances the flavor. Lastly, chocolate ganache adds a decadent layer. If you want, add fresh mint leaves for a pop of color and flavor. I love using fresh strawberries in this recipe. They taste so much better than frozen ones. The chocolate and strawberry mix is a classic that never fails to impress. Remember, each ingredient plays a role in making this cake special. Be sure to check the Full Recipe for detailed amounts and steps. Enjoy the process and have fun in the kitchen! To start, combine the crushed chocolate wafer cookies and melted butter in a medium bowl. Mix them well until the cookies are fully coated. This mix will be your base. Next, press the mixture into the bottom of a 9-inch springform pan. A flat bottom of a glass works well for this. After you press it down evenly, place the pan in the freezer for about 15 minutes. This will help the crust firm up nicely. Now it’s time for the strawberry filling. First, take half of the strawberries and puree them in a blender until smooth. Chop the remaining strawberries into small pieces. Set these aside for mixing later. This mix will give your cake a burst of fresh strawberry flavor. For the whipped cream, start by whipping the heavy cream in a large mixing bowl. Whip it until it starts to thicken. Then, gradually add the powdered sugar and vanilla extract while you keep whipping. You want to achieve soft peaks. This means the cream should hold its shape but still be smooth and creamy. With all parts ready, it’s time to assemble the cake. Gently fold the strawberry puree and chopped strawberries into the whipped cream. Be careful not to over-mix; you want to keep that fluffy texture. Next, remove the crust from the freezer and pour the strawberry filling over it. Smooth the top with a spatula. Drizzle the chocolate ganache over the filling. Use a knife or skewer to swirl the ganache into the filling. This adds a marbled effect that looks great. After assembly, cover the cake with plastic wrap. Place it in the freezer for at least 4 hours, or overnight if you can wait. This time allows the cake to set properly and makes it easier to serve later. When you’re ready to serve, let the cake sit at room temperature for about 10 minutes. This helps soften it just enough for easy slicing. Carefully release the sides of the springform pan and remove the cake. When slicing, use a warm knife for clean cuts. Garnish with fresh mint leaves and extra halved strawberries for a lovely presentation. Enjoy this delightful treat! Don't forget to check out the Full Recipe for complete details. To get the right whipped cream, start with cold heavy cream. Whip it until you see soft peaks. This means the cream holds its shape but still has a nice, fluffy look. It's key not to over-whip. If you do, it can turn grainy and lose its lightness. When mixing in the strawberry puree, folding is best. This keeps the air in the whipped cream. Mixing can deflate it, making your cake heavy. Gently fold in the puree and chopped strawberries to keep that fluffy texture. For a beautiful finish, use fresh mint leaves. Place them on top of the cake in a way that looks natural. Just a few leaves can brighten the look. You can also try nuts or chocolate shavings. These add a nice crunch and extra flavor to each bite. Before serving, let the cake sit out for about ten minutes. This helps soften it slightly, making it easier to cut. Use a warm knife to slice through the frozen cake. This way, you get clean cuts without breaking the layers apart. Enjoy each slice and celebrate the flavors! {{image_2}} You can easily make this cake fit different diets. For a gluten-free crust, swap chocolate wafer cookies for gluten-free ones. Look for brands that use almond or rice flour. This change keeps the cake tasty without gluten. If you need a dairy-free option, try coconut cream instead of heavy cream. It whips up nicely and adds a hint of coconut flavor. For ganache, use dairy-free chocolate. Just melt it with a splash of coconut milk for a rich taste. This cake is not just for strawberries. You can use other fruits too. Raspberries add a tart punch, while blueberries bring a sweet note. Simply blend or chop them as you would the strawberries for a fun twist. For the ganache, experiment with different types of chocolate. Dark chocolate gives a deep flavor, while white chocolate adds sweetness. You can mix chocolates for a unique taste that suits your mood. Presentation can change how your cake looks and feels. Consider layering the cake in individual cups. This way, each guest gets their own portion, making it more personal and fun. Mini versions are great for parties. Use a muffin tin to create small cakes. They are perfect for single servings and easy to grab. Plus, they look cute on any dessert table. For the full recipe, check out the main section. To freeze the cake, wrap it tightly in plastic wrap. Make sure there are no air pockets. Then, place it in an airtight container or a heavy-duty freezer bag. This helps prevent freezer burn. The cake can stay frozen for up to three months. After that, it may lose flavor and texture. To thaw the cake safely, move it from the freezer to the fridge. Let it thaw overnight for the best results. If you are in a hurry, you can leave it at room temperature for about 30 minutes before serving. This way, the cake will soften without melting. If you have leftover cake, store it in the fridge. Cover it with plastic wrap or aluminum foil. The cake stays fresh for about three days this way. You can re-freeze if you have too much. But keep in mind that the texture may change when thawed again. Yes, you can make this cake a day ahead. It will taste even better after chilling overnight. The flavors blend nicely, and the texture firms up well. Just remember to cover it tightly with plastic wrap. This keeps it fresh and prevents ice crystals from forming. For leftover cake, wrap it well in plastic wrap or foil. Store it in the freezer if you won’t eat it soon. If you keep it in the fridge, enjoy it within two days. This helps maintain the taste and texture. You can use frozen strawberries, but the taste and texture will change slightly. Fresh strawberries have a brighter flavor and a firmer texture. Frozen strawberries may be mushier and less flavorful. If you must use frozen ones, thaw and drain them first to remove extra water. To cut a frozen cake, use a warm knife. Run the knife under hot water first, then dry it off. This helps make cleaner cuts. Slice quickly to avoid melting the cake. You can also let it sit for a few minutes at room temperature for easier cutting. This blog post covered how to create a delicious strawberry cake with easy steps. You learned about the ingredients, from the crust to the filling and cream. I shared tips for the best texture and presentation. You can even try different flavors or dietary swaps. In the end, this cake is fun to make and share. You’ll impress family and friends with your skills. Enjoy your tasty treat!
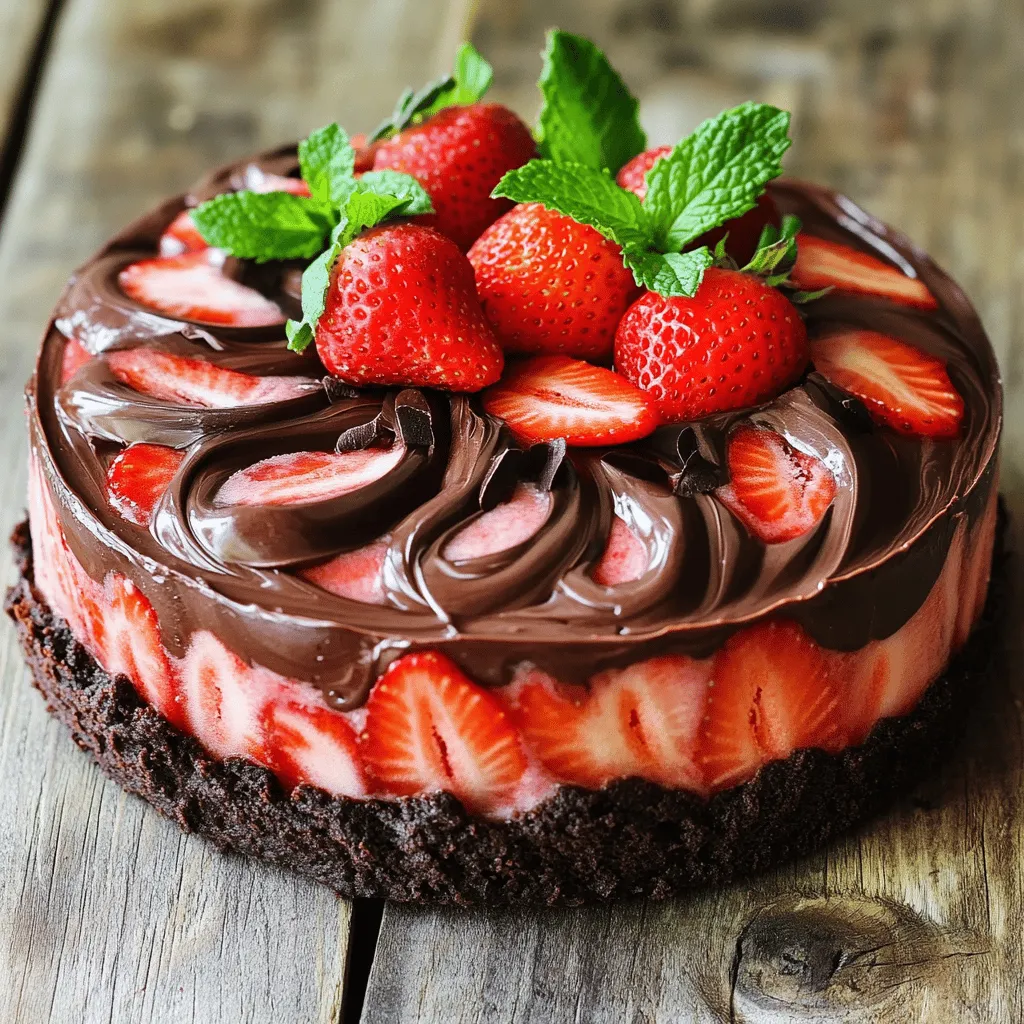
Frozen Chocolate Strawberry Cake Irresistible Delight
Get ready to enjoy a sweet treat! My Frozen Chocolate Strawberry Cake is a delightful dessert that’s perfect for any occasion. With a crunchy chocolate
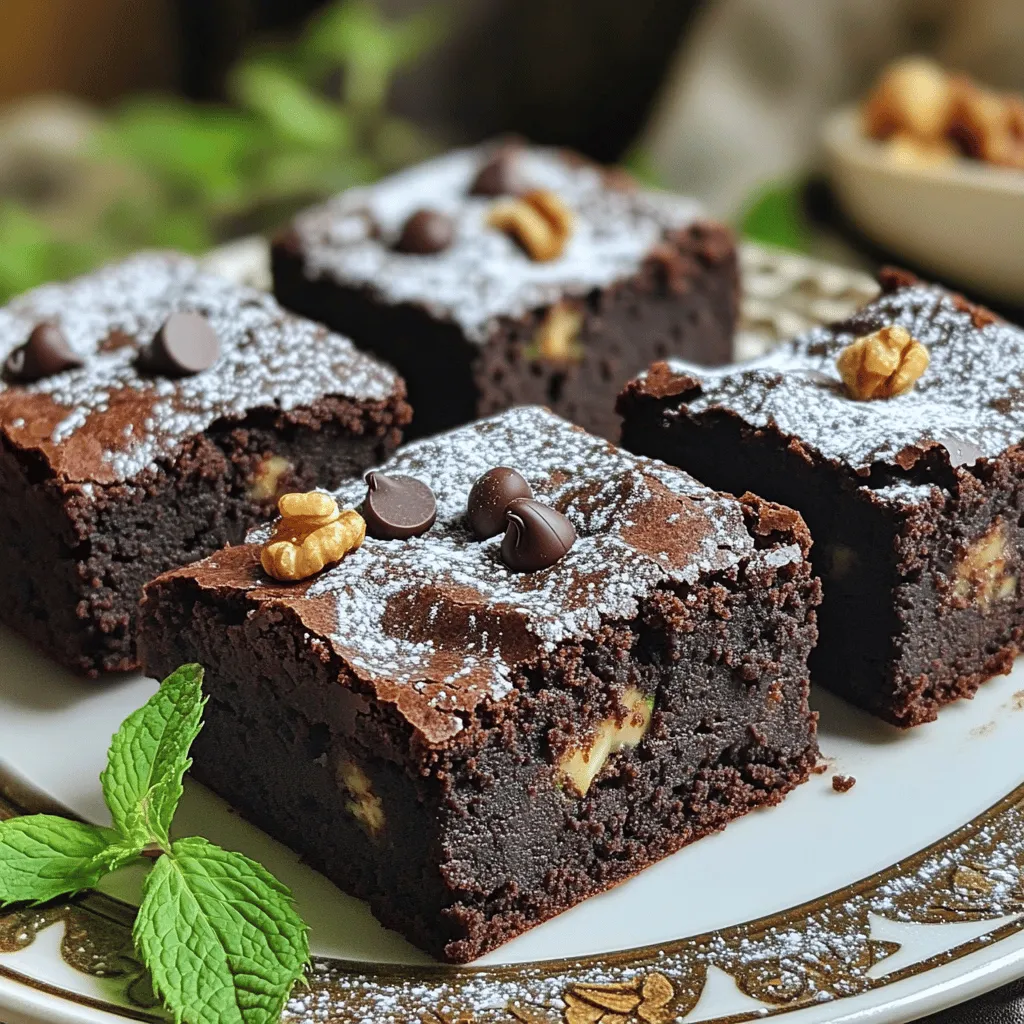
To make these brownies shine, you need simple yet key ingredients. Here’s what you’ll need: - 1 cup all-purpose flour - 1/2 cup unsweetened cocoa powder - 1 teaspoon baking powder - 1/2 teaspoon baking soda - 1/4 teaspoon salt - 1/2 cup granulated sugar - 1/2 cup brown sugar, packed - 1/2 cup vegetable oil - 1/2 cup sour cream - 2 large eggs - 1 teaspoon vanilla extract - 1 cup grated zucchini (about 1 medium zucchini) - 1/2 cup semi-sweet chocolate chips - 1/4 cup chopped walnuts (optional) These ingredients work together to create a rich and moist texture. The zucchini adds a subtle flavor and keeps the brownies tender. You can customize your brownies with fun add-ins or swaps. If you want to change things up, consider these options: - Chocolate chips: Swap semi-sweet for milk or dark chocolate chips. - Nuts: Use pecans or almonds instead of walnuts. - Sweeteners: Replace some sugar with honey or maple syrup for a different taste. - Dairy-free: Use coconut cream instead of sour cream if you prefer. These adjustments can enhance flavors or meet dietary needs, making your brownies even more special. Using high-quality ingredients makes a big difference in your baking. Fresh zucchini provides moisture and flavor. Choose ripe, flavorful zucchini for the best results. For cocoa powder, select a brand with rich, dark chocolate notes. The type of sugar you use also affects the brownies' texture. Brown sugar adds depth and moisture, while granulated sugar gives a nice structure. When you focus on quality, you elevate your baking. This care shines through in every bite of your moist sour cream zucchini brownies. For the complete recipe, refer to [Full Recipe]. Start by preheating your oven to 350°F (175°C). Grease an 8x8 inch baking dish and line it with parchment paper. This helps you lift out the brownies easily. In a medium bowl, mix the flour, cocoa powder, baking powder, baking soda, and salt. This is your dry mix. In a large bowl, combine the granulated sugar, brown sugar, and vegetable oil. Mix these ingredients until smooth. Next, add the sour cream, eggs, and vanilla extract. Whisk until everything is well blended. Now, slowly add the dry mix to the wet mix. Stir just until combined. You don’t want to overmix! Gently fold in the grated zucchini, semi-sweet chocolate chips, and walnuts if you choose to use them. This batter will be thick and rich. Pour the batter into your prepared baking dish. Use a spatula to smooth the top evenly. Place the dish in the oven and bake for 25 to 30 minutes. You can check if they're done by inserting a toothpick in the center. If it comes out with a few moist crumbs, they are ready! After baking, let the brownies cool in the pan for about 10 minutes. Carefully lift them out using the parchment paper. Transfer the brownies to a wire rack to cool completely. Once cooled, cut them into squares. These brownies are great on their own or served with ice cream. Enjoy the rich, moist goodness of your creation! For the full recipe, check out the detailed instructions above. To get that rich, moist texture, use fresh zucchini. Grate it finely and squeeze out excess water. This keeps your brownies soft. The sour cream adds creaminess that enhances the flavor. Always measure your ingredients accurately. Too much flour or cocoa can dry them out. One common mistake is overmixing the batter. Mix until just combined to keep brownies fudgy. Another mistake is baking too long. Check for doneness with a toothpick. It should have a few moist crumbs, not clean. Also, don't skip the parchment paper. It makes removing brownies easy. Store your brownies in an airtight container. This keeps them fresh for up to five days. You can also freeze them for longer storage. Wrap brownies well in plastic wrap, then place them in a freezer bag. To reheat, microwave for 10-15 seconds. This brings back their warm, gooey goodness. You can also enjoy them cold with a scoop of ice cream on top. For the full recipe, you can check the section above. {{image_2}} You can make these brownies gluten-free. Swap out the all-purpose flour for a gluten-free blend. Ensure the blend includes a binding agent like xanthan gum. This keeps your brownies from being too crumbly. The taste remains rich and delicious. To make a vegan version, replace the eggs with flax eggs. Mix 1 tablespoon of ground flaxseed with 2.5 tablespoons of water for each egg. You can also substitute sour cream with plant-based yogurt. This keeps the brownies moist and tasty without using animal products. Add fun flavors to your brownies! Consider these extras: - 1/2 cup of peanut butter or almond butter for a nutty taste. - 1 teaspoon of instant coffee to enhance the chocolate flavor. - 1/2 cup of shredded coconut for a tropical twist. These additions make your brownies unique and exciting. You can find the full recipe in the main section. To keep your Moist Sour Cream Zucchini Brownies fresh, store them in an airtight container. Place a piece of parchment paper between layers to avoid sticking. This will help them stay soft and tasty. Keep the container in a cool, dry place. If your kitchen is warm, the fridge is a good option, too. Just let the brownies come to room temperature before serving. You can freeze these brownies for later enjoyment. First, let the brownies cool completely. Cut them into squares. Wrap each square tightly in plastic wrap or foil. Then, place the wrapped brownies in a freezer-safe bag or container. They can last up to three months in the freezer. When you're ready to eat them, thaw at room temperature or pop them in the microwave for a quick warm-up. These brownies stay fresh for about four to five days at room temperature. In the fridge, they can last up to a week. To ensure they stay moist, avoid exposing them to air. If you notice any signs of drying out, a slice of bread in the container can help keep them soft. Remember, the key to great brownies is keeping them well-stored. Try to enjoy them while they are at their best! For the full recipe, check out the details above. Yes, you can use frozen zucchini. Just make sure to thaw it first. Squeeze out extra water using a clean cloth or paper towel. This step helps keep your brownies from becoming soggy. To cut brownies neatly, use a sharp knife. Dip the knife in hot water, then wipe it dry. Make clean cuts for even squares. This method helps prevent sticking and crumbles. Brownies are done when a toothpick inserted in the center comes out with a few moist crumbs. If it comes out wet, bake a few more minutes. Keep an eye on them to avoid overbaking. Absolutely! You can add nuts or chocolate chips for extra flavor. I like to use semi-sweet chocolate chips. They blend well with the rich taste of the brownies. Store leftover brownies in an airtight container at room temperature. They stay fresh for about three days. For longer storage, place them in the fridge to extend their shelf life. Yes, you can make egg-free brownies. Use a flaxseed meal or applesauce as a substitute. For each egg, mix one tablespoon of flaxseed meal with three tablespoons of water. Let it sit until thickened. The sour cream and zucchini add moisture to the brownies. This combination creates a rich, tender texture. It also adds a hint of flavor without overpowering the chocolate. Grease the baking dish and line it with parchment paper. This step helps the brownies lift out easily. After cooling, use the parchment to pull them out without damage. For the full recipe, check out the details above! In this post, we explored how to make moist sour cream zucchini brownies. We covered key ingredients, preparation steps, and essential tips. You learned the importance of using quality ingredients for the best flavor. We also shared storage tips and discussed variations, like gluten-free and vegan options. Remember, great brownies need careful baking and proper storage. With these tips, you can make a delicious batch every time. Enjoy baking, and share these treats with friends and family!
Moist Sour Cream Zucchini Brownies Delightfully Rich
If you think brownies can’t get any better, think again! My Moist Sour Cream Zucchini Brownies are a game changer. They blend rich flavors with
- 2 cups finely grated zucchini - 1 ¾ cups all-purpose flour - ½ cup unsweetened cocoa powder - 1 teaspoon baking soda - ½ teaspoon baking powder - ½ teaspoon salt - 1 cup granulated sugar - ½ cup brown sugar - ½ cup vegetable oil - 1 teaspoon vanilla extract - 3 large eggs - 1 cup semi-sweet chocolate chips - ½ cup chopped walnuts (optional) In this recipe, the zucchini adds moisture while keeping the cake light. You will need fresh zucchini, about two medium ones, for two cups. The cocoa powder gives that rich chocolate taste we all love. The mix of granulated and brown sugars brings out sweetness and depth. You also need a few basic pantry items like flour, baking soda, and baking powder. The oil keeps the cake moist, while the eggs help bind everything together. The chocolate chips add little bursts of chocolate in every bite. If you like crunch, toss in some walnuts for texture. This ingredient blend creates a perfect balance of flavors. You can enjoy this cake as a delightful treat, satisfying your chocolate cravings while sneaking in some veggies. For the full recipe, check the instructions that follow. - Preheat the oven and prepare the baking pan Set your oven to 350°F (175°C). Take a 9x13-inch pan and grease it well. You can also flour it or line it with parchment paper to help with easy removal. - Mix wet ingredients in a large bowl In a big bowl, combine 2 cups of grated zucchini, 1 cup of granulated sugar, and ½ cup of brown sugar. Add ½ cup of vegetable oil, 3 large eggs, and 1 teaspoon of vanilla extract. Mix until smooth. - Combine dry ingredients in another bowl In a separate bowl, whisk together 1 ¾ cups of all-purpose flour, ½ cup of unsweetened cocoa powder, 1 teaspoon of baking soda, ½ teaspoon of baking powder, and ½ teaspoon of salt. This mix will give your cake its structure and flavor. - Combine wet and dry mixtures carefully Slowly add the dry ingredients to the wet mixture. Stir gently until just combined. It’s okay if there are a few lumps; just don’t overmix. This helps keep the cake soft. - Fold in chocolate chips and walnuts Add 1 cup of semi-sweet chocolate chips and ½ cup of chopped walnuts, if you like. Use a spatula to fold them into the batter. Make sure they spread evenly throughout. - Bake and check for doneness Pour the batter into your prepared baking pan. Smooth the top with a spatula. Bake for 30 to 35 minutes. To check if it’s done, insert a toothpick into the center. It should come out clean. - Cooling instructions for the cake Let the cake cool in the pan for about 10 minutes. Then, carefully transfer it to a wire rack to cool completely. This step is key to keeping it moist. You can find the full recipe with all the details to make this delightful treat. - Grease and line your pan with parchment paper. This will help the cake come out easily. - Measure zucchini by grating it finely. Pack it lightly in your measuring cup. - Mix gently to avoid overmixing. A few lumps in the batter are just fine. - For a tasty finish, frost with chocolate ganache or dust with powdered sugar. - Top the cake with fresh berries or a scoop of vanilla ice cream to enhance flavor. - Store leftovers in an airtight container at room temperature for up to three days. - For longer storage, wrap slices in plastic and freeze for up to three months. If you're excited to make this delightful cake, check out the Full Recipe for all the details! {{image_2}} You can make this cake fit many diets. For those who need gluten-free options, use a blend of gluten-free flour. It works great in this recipe. For sugar substitutes, consider using coconut sugar or stevia. Both add sweetness without the extra calories. If you're dairy-free, try dark chocolate chips made from almond milk. They melt well and taste amazing. Feel free to play with flavors in this cake. Adding a pinch of cinnamon or nutmeg can spice things up. A splash of almond or orange extract can add a nice twist too. You can also mix in different nuts or fruits. Chopped apples or pecans can bring new tastes. Try crushed pineapple for a tropical touch. Want to have some fun? Make mini cupcakes instead of a full cake. They bake faster and are easy to share. If you prefer a grander look, create a layer cake with extra frosting. Stack two or three layers for a showstopper. You can use the Full Recipe to guide you through these ideas. Can I use yellow squash instead of zucchini? Yes, you can use yellow squash. It has a similar texture and taste. The cake will still be moist and flavorful. Just make sure to grate it finely, just like zucchini. What can I substitute for eggs in the recipe? You can use applesauce or mashed bananas as an egg substitute. Use 1/4 cup for each egg. This will keep the cake moist while adding a hint of sweetness. How long does the Chocolate Lover’s Zucchini Cake last? The cake stays fresh for about 3 to 4 days at room temperature. If you store it in the fridge, it can last up to a week. Just make sure to cover it well. How many calories are in a slice of the cake? Each slice of this cake has about 250 calories. This can vary based on your specific ingredients, like the type of sugar used. What are the health benefits of including zucchini in baking? Zucchini adds moisture and fiber to the cake. It also provides vitamins A and C. This helps support your immune system and skin health. Plus, it sneaks in some veggies without changing the taste too much. What if my cake is too dense or dry? If your cake turns out dense, it might be overmixed. Make sure to mix the batter until just combined. If it's dry, try adding a bit more oil or a splash of milk next time. How do I fix a cake that hasn't risen properly? If your cake hasn't risen, check your baking powder and baking soda. They should be fresh. Also, ensure you mix the dry ingredients well before adding them to the wet ingredients. This Chocolate Lover’s Zucchini Cake is a rich and moist treat. It uses zucchini to add moisture without overpowering the rich chocolate flavor. Here’s a quick recap of the ingredients and instructions: - 2 cups finely grated zucchini (about 2 medium zucchinis) - 1 ¾ cups all-purpose flour - ½ cup unsweetened cocoa powder - 1 teaspoon baking soda - ½ teaspoon baking powder - ½ teaspoon salt - 1 cup granulated sugar - ½ cup brown sugar, packed - ½ cup vegetable oil - 1 teaspoon vanilla extract - 3 large eggs - 1 cup semi-sweet chocolate chips - ½ cup chopped walnuts (optional) 1. Preheat your oven to 350°F (175°C). Grease and flour a 9x13-inch baking pan or line it with parchment paper. 2. In a large bowl, mix the grated zucchini with the granulated sugar, brown sugar, vegetable oil, eggs, and vanilla extract until smooth. 3. In another bowl, whisk together the flour, cocoa powder, baking soda, baking powder, and salt. 4. Gradually add the dry mix to the wet mix. Stir gently until just combined. A few lumps are fine. 5. Fold in the chocolate chips and chopped walnuts if you’re using them. 6. Pour the batter into the prepared pan and smooth the top. 7. Bake for 30 to 35 minutes. Check with a toothpick; it should come out clean. 8. Cool in the pan for about 10 minutes, then transfer to a wire rack to cool completely. 9. Dust with powdered sugar or frost with chocolate ganache if you wish. Prep Time: 15 minutes | Total Time: 50 minutes | Servings: 12 This recipe makes a delicious cake that everyone will love. It’s perfect for gatherings or a sweet treat at home. Enjoy baking! This blog post shared a delicious Chocolate Lover’s Zucchini Cake recipe. You found the main ingredients, step-by-step instructions, tips, and ways to adjust the recipe. Remember to measure zucchini correctly and avoid overmixing. You can store leftovers well and even freeze portions for later. Feel free to try variations like gluten-free options or mini cupcakes. This cake is a fun way to enjoy zucchini, balancing taste and health. Happy baking!
Chocolate Lover’s Zucchini Cake Delightful Treat
Are you ready to indulge in a scrumptious dessert that hides a secret? This Chocolate Lover’s Zucchini Cake is moist, rich, and packed with flavor,
To make these tasty zucchini brownies, you will need the following ingredients: - 2 cups grated zucchini (about 2 medium zucchinis) - 1 cup all-purpose flour - 1/2 cup unsweetened cocoa powder - 1 cup granulated sugar - 1/2 cup brown sugar, packed - 1/2 cup vegetable oil - 2 large eggs - 1 teaspoon vanilla extract - 1/2 teaspoon baking powder - 1/2 teaspoon baking soda - 1/4 teaspoon salt - 1/2 cup semi-sweet chocolate chips (plus extra for topping) - 1/2 cup chopped walnuts (optional) Use a food scale for accuracy. Zucchini can hold water, so press it lightly in a towel to remove excess moisture. This step helps your brownies bake evenly. Ensure your eggs are at room temperature for easier mixing. When measuring flour, spoon it into the cup and level it with a knife. This keeps your brownies from being too dry. Zucchini adds moisture and nutrition. It brings fiber, vitamins, and minerals to your dessert. Each brownie contains less fat than typical recipes. This makes them a healthier choice. Zucchini is low in calories, which helps balance the sugars. Plus, it keeps the brownies soft and fudgy. So, you enjoy a tasty treat without guilt. Start by preheating your oven to 350°F (175°C). This step warms the oven for even baking. Next, take an 8x8-inch baking pan. Grease it lightly and line it with parchment paper. Leave some paper hanging over the edges for easy removal later. In a large bowl, combine the granulated sugar, brown sugar, and vegetable oil. Whisk them together well until they mix smoothly. Then, crack in two large eggs and add one teaspoon of vanilla extract. Whisk again until the mixture is smooth and creamy. In a separate bowl, sift together the dry ingredients. This includes one cup of all-purpose flour, half a cup of cocoa powder, half a teaspoon of baking powder, half a teaspoon of baking soda, and a quarter teaspoon of salt. Sifting helps remove lumps and makes mixing easier. Now, gradually add the dry mix to the wet mixture. Stir gently until just combined. Do not overmix; this keeps the brownies soft. Finally, fold in two cups of grated zucchini and half a cup of semi-sweet chocolate chips. Optionally, add half a cup of chopped walnuts if you like a little crunch. Pour the brownie batter into your prepared baking pan. Use a spatula to spread it evenly. If you want, sprinkle extra chocolate chips on top for a rich finish. Bake the brownies in your preheated oven for 25 to 30 minutes. To check if they're done, insert a toothpick in the center. It should come out with a few moist crumbs, not wet batter. This means they're perfectly baked. Once baked, let the brownies cool in the pan for about 10 minutes. Use the parchment paper to lift them out carefully. Place them on a wire rack to cool completely. This prevents sogginess and helps them set properly. When ready to serve, cut the brownies into squares. For a nice touch, dust them with powdered sugar and add fresh mint leaves on top. Enjoy your healthy treat! For the full recipe, you can refer back to the ingredients list. When making zucchini brownies, some mistakes can spoil the fun. Here are a few to watch out for: - Using too much zucchini: Stick to the 2 cups of grated zucchini. Too much moisture can make your brownies soggy. - Skipping the sifting: Sift your dry ingredients. This step helps mix them well and prevents lumps. - Overmixing the batter: Mix just until combined. Overmixing can make brownies tough instead of soft. - Not greasing the pan: Always grease your pan, or your brownies may stick and break apart. Texture is key for delicious brownies. Here are some tips: - Choose the right flour: All-purpose flour works best here. It gives the perfect chewy texture. - Check baking time: Bake until a toothpick comes out with a few moist crumbs. This ensures a fudgy center. - Let them cool: Allow the brownies to cool completely before cutting. This helps them firm up and hold their shape. - Use room temperature eggs: Room temperature eggs mix better, helping your brownies rise nicely. Want to take your zucchini brownies to the next level? Here are some fun ideas: - Add nuts: Chopped walnuts or pecans give a nice crunch and added flavor. - Spices: A dash of cinnamon or nutmeg can enhance the taste. Start with 1/2 teaspoon. - Chocolate chunks: Swap chocolate chips for chunks. They melt beautifully and create gooey pockets. - Dried fruit: Consider adding raisins or dried cherries for a fruity twist. Just use 1/2 cup. These tips and tricks will help you make the best zucchini brownies ever. For the complete cooking process, check the Full Recipe to get baking! {{image_2}} You can easily make gluten-free zucchini brownies. Just swap the all-purpose flour for a gluten-free blend. Look for a mix that includes xanthan gum for the best texture. The zucchini keeps these brownies moist. This makes them a great choice for those avoiding gluten. To make vegan zucchini brownies, replace the eggs with flax eggs. Mix one tablespoon of flaxseed meal with three tablespoons of water. Let it sit for a few minutes to thicken. Use a plant-based oil instead of vegetable oil. Choose dairy-free chocolate chips for a fully vegan treat. You can play with flavors in your zucchini brownies. For a minty twist, add a teaspoon of mint extract. This gives a refreshing taste. If you love peanut butter, swirl in some creamy peanut butter before baking. You can also add nuts, like almonds or pecans, for extra crunch. All these variations keep the brownies delicious while adding your personal touch. For the full recipe, check out the details above. To keep your zucchini brownies fresh, store them in an airtight container. This helps maintain their moist texture. Place a piece of parchment paper between layers if you stack them. This prevents sticking. You can keep them at room temperature for up to three days. If you want to keep them longer, refrigeration works well too. Just note that chilled brownies may lose some of their softness. Freezing is a great option for long-term storage. First, let the brownies cool completely. Then, cut them into squares. Wrap each square in plastic wrap. After that, place the wrapped brownies in a freezer-safe bag. Be sure to remove as much air as possible. Label the bag with the date. You can freeze them for up to three months. When you’re ready to enjoy them, just thaw them in the fridge overnight. To reheat your brownies, use the oven for the best results. Preheat your oven to 350°F (175°C). Place the brownies on a baking sheet. Cover them with foil to keep them from drying out. Heat for about 10 minutes. If you like a warm, gooey brownie, you can microwave a single piece. Heat it for about 10-15 seconds. Enjoy your tasty treat! For the full recipe, check the link above. Yes, you can use frozen zucchini. Just make sure to thaw and drain it first. Frozen zucchini has a high water content. If not drained, your brownies may turn out too wet. After draining, use it just like fresh zucchini in the recipe. To make your brownies fudgier, try these tips: - Reduce the flour by a few tablespoons. - Add an extra egg yolk for richness. - Use less baking powder for denser texture. - Bake for a shorter time. Start checking for doneness at 20 minutes. You want some moist crumbs on your toothpick for that fudgy feel. The best way to check if brownies are done is to use a toothpick. Insert it into the center of the brownies. If it comes out with a few moist crumbs, they are done. If it comes out clean, they may be overbaked. Remember, they will continue to cook a bit as they cool. Zucchini brownies offer a tasty treat packed with nutrients. We discussed ingredients, measurements, and health benefits. Then, I shared step-by-step instructions for making them. Remember to avoid common mistakes and explore fun variations. Store brownies correctly for fresh flavors later. In the end, zucchini brownies are wholesome and easy to make. Enjoy experimenting with flavors and textures, and savor your delicious, guilt-free dessert!
Zucchini Brownies Irresistible Healthy Dessert Recipe
Looking for a dessert that’s both tasty and healthy? I’ve got just the recipe for you: Zucchini Brownies! These rich and fudgy brownies hide a
The best chocolate chip cake starts with quality ingredients. Here’s what you need: - 1 ¾ cups all-purpose flour - 1 cup granulated sugar - ½ cup brown sugar, packed - ½ cup unsalted butter, softened - 3 large eggs - 1 teaspoon vanilla extract - 1 teaspoon baking powder - ½ teaspoon baking soda - ½ teaspoon salt - 1 cup buttermilk - 1 cup semi-sweet chocolate chips - ½ cup chopped walnuts (optional) Using these ingredients ensures your cake is soft and rich. The mix of sugars gives depth to the flavor. Butter adds moisture, while eggs help the cake rise. Buttermilk makes the cake tender. You can use walnuts for a nice crunch, but they’re not needed. For a great result, measure your ingredients carefully. I recommend using a kitchen scale for precision. This chocolate chip cake is sure to impress. You’ll find the full recipe at the end of this section. Let’s get baking! Follow these clear steps to make your chocolate chip cake. - Preheat oven and prepare baking pan: Start by preheating your oven to 350°F (175°C). Grease and flour a 9x13 inch baking pan or two 9-inch round pans. This step helps the cake come out easily. - Cream butter and sugars, then add eggs and vanilla: In a big bowl, cream together the softened butter, granulated sugar, and brown sugar until it looks light and fluffy. Add the eggs one at a time, mixing well after each. Then, stir in the vanilla extract until everything is combined. - Combine dry ingredients and alternate with buttermilk: In another bowl, whisk together the flour, baking powder, baking soda, and salt. Slowly add this dry mix to the wet mixture, alternating with buttermilk. Start and end with the dry mix. Mix just until everything is combined. - Fold in chocolate chips and walnuts: Now, gently fold in the chocolate chips and walnuts, if you choose to use them. Be careful not to overmix; we want those chocolate chips to be evenly spread but not crushed. - Bake and cool the cake: Pour the batter into your prepared pan(s). Smooth the top with a spatula. Bake in the oven for 25 to 30 minutes. To check if it’s done, insert a toothpick in the center; it should come out clean. Once baked, cool the cake in the pan for 10 minutes, then transfer it to a wire rack. Let it cool completely before adding any frosting. For the complete details, you can check the full recipe. Enjoy your baking adventure! - Temperature of ingredients: Use room temperature eggs and butter. It makes mixing easier and helps the cake rise better. Cold ingredients can make the cake dense. - Using room temperature eggs and butter: Let your eggs and butter sit out for 30 minutes before mixing. This step helps create a light and fluffy texture. - Proper mixing technique to avoid overmixing: Mix just until ingredients blend. Overmixing can lead to a tough cake. Stop mixing as soon as you see no dry flour. - Classic buttercream recipe: Beat 1 cup of softened butter with 4 cups of powdered sugar. Add 2-4 tablespoons of milk and 1 teaspoon of vanilla. Mix until smooth and creamy. - Cream cheese frosting option: Blend 8 ounces of softened cream cheese with ½ cup of softened butter. Add 4 cups of powdered sugar and 1 teaspoon of vanilla. This frosting pairs well with the cake's sweetness. - Serving suggestions for added flavor: Serve slices with a scoop of vanilla ice cream. Add a drizzle of chocolate sauce or sprinkle some chopped nuts on top for more texture. For more detailed instructions, check the Full Recipe. {{image_2}} You can change the flavor of the best chocolate chip cake easily. Here are some fun ideas: - Different Types of Chocolate: Try using dark or white chocolate chips for new tastes. Dark chocolate gives a rich flavor, while white chocolate adds sweetness. - Incorporating Spices: Add spices like cinnamon or nutmeg for warmth. A dash can make your cake feel cozy and special. - Gluten-Free Alternatives: Use almond flour instead of all-purpose flour. This option makes it gluten-free and gives a nutty taste. You can also customize the cake to fit different diets: - Dairy-Free Options: Swap out regular milk for plant-based milk. Almond or oat milk works great here and keeps the cake moist. - Nut-Free Variations: If you want a nut-free cake, just leave out the walnuts. The cake will still be delicious and chocolatey. - Alternative Sweeteners: For health-conscious bakers, use honey or agave nectar instead of sugar. This change can cut down on refined sugars. These variations and customizations let you make the best chocolate chip cake your own. For the full recipe, check out the link provided! To keep your chocolate chip cake fresh, store it in a cool, dry place. Use an airtight container to prevent moisture loss. A cake dome works well too. If you want to freeze it, wrap slices in plastic wrap, then place them in a freezer bag. This helps to lock in flavor. At room temperature, the cake stays fresh for about three days. If you keep it in the fridge, it can last up to a week. Remember to check for any signs of spoilage before serving. Enjoy your cake longer by following these tips! Can I make this cake ahead of time? Yes, you can make this cake a day before. Just store it in an airtight container. If you want to frost it, do that just before serving. What is the best way to ensure my cake rises? Use fresh baking powder and baking soda. Make sure your oven is preheated and don’t open the door while baking. Also, room temperature eggs help a lot. Can I substitute ingredients for dietary restrictions? Yes! You can use almond milk instead of buttermilk. For a gluten-free option, try almond flour. You can also use coconut oil in place of butter. Is this recipe easy for beginner bakers? Absolutely! This recipe is simple and straightforward. The steps are clear, and it’s hard to mess up. Just take your time and follow the steps. How do I know when the cake is done baking? Insert a toothpick into the center. If it comes out clean, the cake is done. If it has batter on it, bake for a few more minutes. This blog post covered everything you need for a great chocolate chip cake. We listed the key ingredients and provided detailed steps. You learned tips for baking success and explored fun variations. Proper storage can keep your cake fresh, and we answered common questions to help you bake with confidence. Now, it’s time for you to enjoy baking. Get creative and make your own delicious cake today!
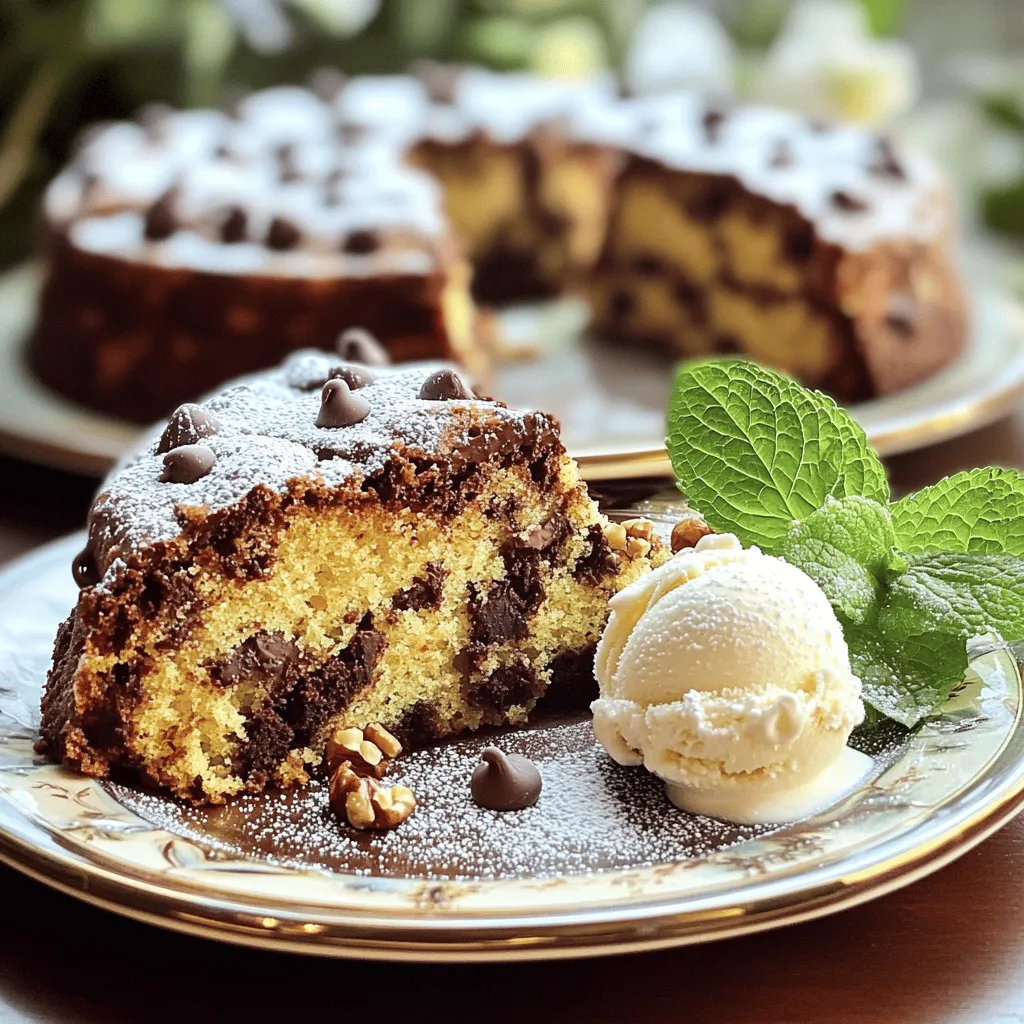
The Best Chocolate Chip Cake Irresistible Dessert Recipe
If you’re craving a dessert that combines rich chocolate flavor with a moist, tender crumb, you’re in for a treat. This chocolate chip cake is
- 1 cup all-purpose flour - 1/2 cup almond flour - 1 teaspoon baking powder - 1/2 teaspoon baking soda - 1/4 teaspoon salt - 1/2 cup unsalted butter, softened - 1 cup granulated sugar - 2 large eggs - 1 teaspoon vanilla extract - 1/2 teaspoon almond extract - 1 cup fresh or frozen cherries, pitted and halved - 1/4 cup sliced almonds (for topping) - Powdered sugar (for dusting) This cake uses simple ingredients that work well together. The all-purpose flour gives the cake its structure. The almond flour adds a nutty flavor and moist texture that you will love. Baking powder and baking soda help the cake rise. Using unsalted butter creates a rich flavor. Granulated sugar sweetens the cake perfectly. Eggs add moisture and help bind the ingredients together. Vanilla extract brings warmth, while almond extract adds that lovely nutty taste. Cherries give the cake a burst of flavor. Don’t forget the sliced almonds! They add a crunchy topping that contrasts nicely with the soft cake. For an eye-catching finish, dust the cake with powdered sugar. This gives a nice touch and makes it look fancy. If you want to make it even prettier, add a few fresh cherries and mint leaves as a garnish. You can find the full recipe with all the steps and baking tips to enjoy this Cherry Almond Cake. - Preheat the oven to 350°F (175°C). - Grease and line the cake pan for easy removal. - Cream butter and sugar until light and fluffy. - Beat in eggs and extracts, then add dry ingredients. - Fold in cherries and pour batter into the pan, then top with almonds. - Bake for 30-35 minutes, check with a toothpick. - Let cool and dust with powdered sugar before serving. This simple method makes your cherry almond cake easy and fun to make. You will enjoy each step from mixing to baking. Remember, the key is to not overmix the batter after adding cherries. This keeps your cake light and fluffy. Follow these steps, and you will create a delightful treat everyone loves! For more details, check the Full Recipe. To make the best cherry almond cake, focus on texture. Start by measuring flour correctly. Too much flour can lead to a dry cake. Use a light hand when mixing the batter. Overmixing can make the cake tough. Mix until just combined, then stop. This helps keep your cake soft and tender. For a beautiful presentation, serve slices on a pretty plate. Add fresh cherries and mint leaves for color. Dust the top with powdered sugar for a sweet touch. This cake pairs well with coffee or tea. You can also serve it with a scoop of vanilla ice cream. This adds a creamy contrast to the flavors. Enjoy your delicious cherry almond cake! {{image_2}} You can play with flavors in your Cherry Almond Cake. Adding chocolate chips gives a nice twist. The rich chocolate pairs well with the sweet cherries. You can use about half a cup of chips. Just fold them in with the cherries. You can also swap cherries for other fruits. Blueberries or raspberries work great too. They add a fresh taste and lovely color. Feel free to mix and match until you find your favorite. If you need a gluten-free cake, use alternative flours. Almond flour or coconut flour can replace all-purpose flour. This change keeps the cake moist and tasty. For a vegan version, substitute eggs with applesauce or flaxseed. Use a ratio of one tablespoon of flaxseed mixed with three tablespoons of water. This makes a great egg replacement. You can still enjoy this delicious cake without animal products. For the full recipe, check out the Cherry Almond Bliss Cake. To keep your Cherry Almond Cake fresh, store it in the fridge. Use an airtight container to prevent it from drying out. Slice the cake first if you plan to share. This way, you can easily take out pieces. If you want to freeze portions, wrap each slice tightly in plastic wrap. Then, place them in a freezer bag. Label the bag with the date. The cake can last up to three months in the freezer. When you want to enjoy your cake again, reheating is key. Use the microwave for a quick option. Heat a slice for about 15-20 seconds. Check if it’s warm enough. If you prefer the oven, set it to 350°F (175°C). Place the slice on a baking sheet for about 5-10 minutes. Cover it with foil to keep it moist. Enjoy your cake warm, and savor the flavors! Cherry Almond Cake can last about 3 to 4 days when stored properly. Keep it in an airtight container at room temperature. If you place it in the fridge, it may last up to a week. However, the cake's texture might change in the fridge. For longer storage, wrap it tightly in plastic and freeze it. It can stay fresh for about 2 months in the freezer. Yes, you can use frozen cherries instead of fresh ones. Just make sure to thaw and drain them first. This step prevents excess moisture in your cake. The flavor will still be delicious! Frozen cherries can add a nice burst of flavor, just like fresh ones. They also make the recipe easier when fresh cherries are out of season. You can serve Cherry Almond Cake with various tasty options. A scoop of vanilla ice cream pairs well for a warm dessert. Fresh whipped cream adds a light touch, enhancing the cake's flavor. You can also sprinkle toasted almonds on top for added crunch. Consider a cup of coffee or tea for a cozy afternoon treat. Yes, you can make this cake ahead of time. It is great for parties or gatherings. Bake the cake a day before your event and store it properly. You can freeze it too! Just wrap it well and place it in the freezer. Thaw it overnight in the fridge before serving. This way, you save time and enjoy a stress-free baking experience. For the full recipe, check the earlier section above. This blog post covered how to bake a delicious Cherry Almond Cake. We discussed the key ingredients, step-by-step instructions, and vital tips. You learned about variations, storage, and answers to common questions. Baking can be fun and easy. Don't be afraid to experiment with flavors. Enjoy every bite of your cake, whether you serve it at a party or savor it on your own. Happy baking!
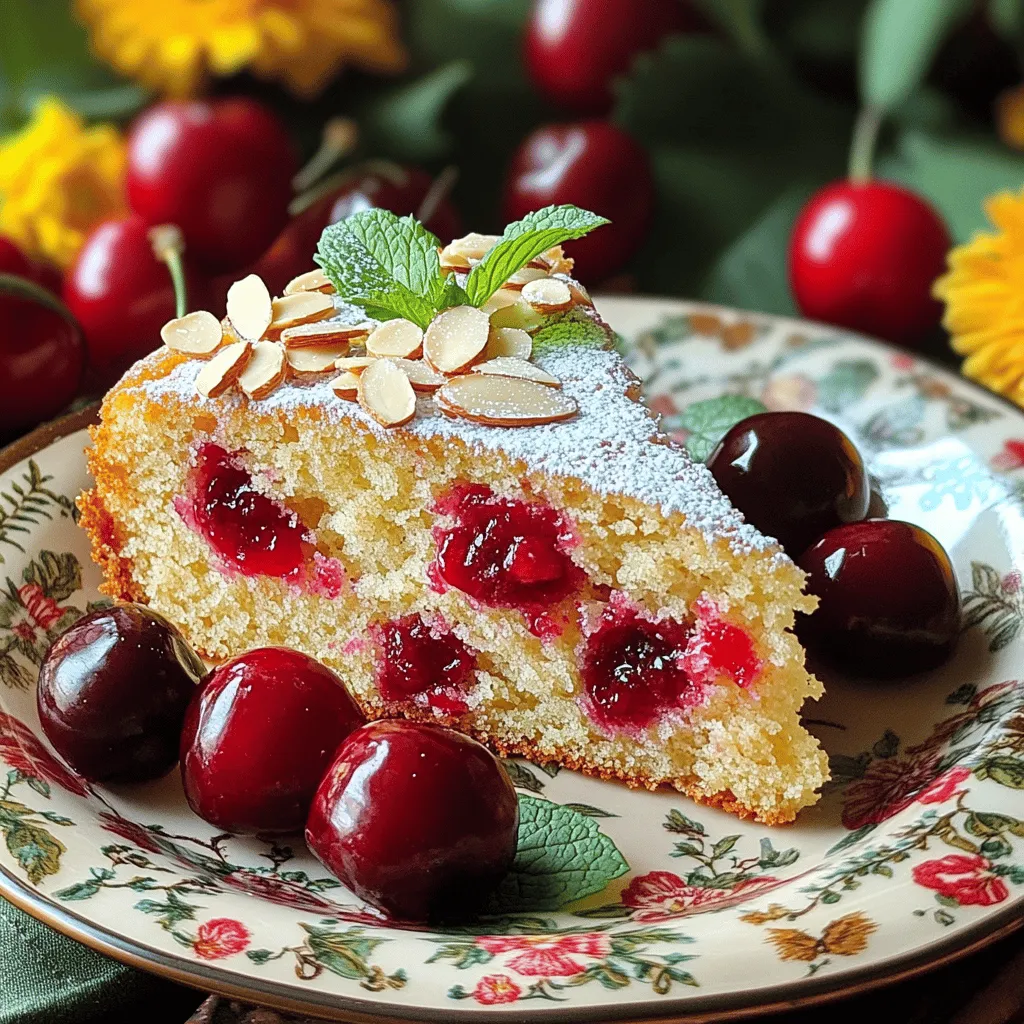
Cherry Almond Cake Delightful and Easy Recipe
Ready to indulge in a sweet treat? My Cherry Almond Cake is simple, delicious, and perfect for any occasion. Made with fresh or frozen cherries
To make the airy strawberry roll cake, gather these essential ingredients: - 4 large eggs - 1 cup granulated sugar - 1 teaspoon vanilla extract - 1 cup all-purpose flour - 1 teaspoon baking powder - 1/4 teaspoon salt - 1/4 cup milk - 1 cup heavy cream - 2 tablespoons powdered sugar - 1 cup fresh strawberries, sliced - 1 tablespoon lemon juice - Fresh mint leaves (for garnish, optional) Using high-quality ingredients makes a big difference in taste. Fresh strawberries will give your cake bright flavor. Look for eggs that are organic or free-range for richer yolks. Use pure vanilla extract instead of imitation for a true vanilla flavor. You can also add optional ingredients for extra flair. Consider a splash of almond extract in the batter or a sprinkle of orange zest with the strawberries. These small touches can elevate your cake to new heights. For the full recipe, you can find detailed steps in the next section. To make the cake batter, start by preheating your oven to 350°F (175°C). Line a 15x10 inch jelly roll pan with parchment paper and grease it lightly. In a large bowl, beat 4 large eggs and 1 cup granulated sugar with an electric mixer on high speed for about 5-7 minutes. You want the mix to look pale and fluffy. Next, add 1 teaspoon of vanilla extract and mix until combined. In a separate bowl, whisk together 1 cup all-purpose flour, 1 teaspoon baking powder, and 1/4 teaspoon salt. Gradually fold this dry mix into the egg mix. Be gentle to avoid deflating the batter. Now, pour in 1/4 cup of milk and fold until just combined. Spread the batter evenly in the pan and bake for 12-15 minutes. It should be lightly golden. To check, insert a toothpick in the center; it should come out clean. While it bakes, prepare a clean kitchen towel with powdered sugar. Once the cake has baked, invert it onto the towel right away. Carefully peel off the parchment paper. Roll the cake tightly in the towel from one short end. Let it cool completely in this rolled form. For the filling, whip 1 cup of heavy cream with 2 tablespoons of powdered sugar until stiff peaks form. This means the cream holds its shape well. Set this aside. Next, slice 1 cup of fresh strawberries and toss them with 1 tablespoon of lemon juice. Let them sit for about 10 minutes. This step helps bring out the strawberries' natural sweetness. Once the cake is cool, unroll it carefully. Spread the whipped cream evenly over the surface, leaving a small border around the edges. Then, arrange the macerated strawberries on top of the cream. Now, start rolling the cake back up without the towel. Do this gently to keep the filling inside. Place the cake seam-side down on a serving platter. If you like, dust the top with more powdered sugar and add fresh mint leaves for decoration. Follow these steps for a delightful Airy Strawberry Roll Cake. For the complete instructions, check the Full Recipe. To make your cake light and fluffy, focus on beating the eggs well. Use an electric mixer on high speed. Beat the eggs and sugar for about 5-7 minutes. This step adds air, which helps the cake rise. Bake the cake at 350°F (175°C) for 12-15 minutes. Check it with a toothpick. It should come out clean when the cake is done. A light golden color means it is perfect. One key pitfall is overmixing the batter. Be gentle when folding in the dry ingredients. Too much mixing can make your cake dense. Also, be sure to cool the cake properly. If you unroll it too soon, it may crack. On the other hand, if it bakes too long, it can dry out. You will need a few essential tools. A jelly roll pan is a must for this cake. A clean kitchen towel is also important for rolling the cake. Use a large mixing bowl for the batter and a whisk for the dry ingredients. An electric mixer makes beating the eggs easier. These tools help you create a smooth and tasty roll cake. For the full recipe, check the earlier section. {{image_2}} You can switch up the filling in your airy strawberry roll cake. Try using other fruits like blueberries, raspberries, or peaches. Each fruit adds a unique taste. For the whipped cream, you can add flavors like almond extract, chocolate, or even a hint of citrus zest. These small changes can make the cake feel fresh each time you bake it. If you want a gluten-free cake, use almond flour or a gluten-free mix. Both options keep the cake fluffy. For a dairy-free whipped cream, use coconut cream instead. Just chill the can overnight and whip it up like regular cream. These swaps let you enjoy the cake without the usual ingredients. Get creative when serving your cake! Try slicing it into individual pieces and placing them on colorful plates. You can drizzle some berry sauce on the plate for extra flair. Pair the cake with a light tea or a fruity sparkling drink. These ideas make the cake not just tasty but also a feast for the eyes. Check out the Full Recipe for more details on making this delightful dessert! To keep your airy strawberry roll cake fresh, place it in an airtight container. This helps prevent it from drying out. You can also cover it tightly with plastic wrap. The roll cake stays fresh in the fridge for about 3 to 4 days. After that, it may lose its light texture and flavor. To freeze your roll cake, wrap it tightly in plastic wrap. Then, place it in a freezer-safe bag. Make sure to remove any air to avoid freezer burn. You can freeze it for up to 3 months. When you're ready to serve, take it out and let it thaw in the fridge overnight. For a quick thaw, leave it at room temperature for about 2 hours. Once thawed, you can dust it with powdered sugar and enjoy! To make a light roll cake, you focus on a few key techniques. First, beating the eggs and sugar together until fluffy adds air, which helps lift the cake. Use an electric mixer for best results. Next, gently fold in the dry ingredients. This keeps the air you’ve added. Avoid stirring too hard or you will lose that fluffiness. Lastly, bake it at the right temperature and for the right time. This helps it rise and stay soft. Yes, you can prepare this cake ahead of time! Bake and cool the cake as usual. Once cool, wrap it tightly in plastic wrap. This keeps it fresh. You can store it in the fridge for up to two days. If you want to keep it longer, freeze it. Just make sure to wrap it well. When you’re ready to serve, let it thaw in the fridge for a few hours. Then, fill and roll it right before serving. If your roll cake cracks, don’t worry. You can fix it! First, check if you rolled it too tight. A gentle roll gives it room to expand. If it cracks, use whipped cream to cover the cracks when you assemble it. This hides the flaws and keeps it moist. If it cracks while baking, check your oven temperature. Too hot can cause it to dry out. Next time, lower the temperature a bit for better results. This blog post covered everything you need to make a light strawberry roll cake. We went over the ingredients, from essentials to optional flavors. I gave you step-by-step instructions for preparation, making the filling, and assembling the cake. We also shared tips for great texture and common mistakes to avoid. In the end, a homemade roll cake is simple and fun. With a few variations and proper storage tips, you can enjoy this treat anytime. Happy baking!
Airy Strawberry Roll Cake Delightful and Simple Recipe
Welcome to my guide on making an Airy Strawberry Roll Cake! This dessert is not just a treat for the eyes, but it’s also fun
- 1 ¾ cups all-purpose flour - 1 ½ cups granulated sugar - ¾ cup unsweetened cocoa powder - 1 ½ teaspoons baking powder - 1 ½ teaspoons baking soda - 1 teaspoon salt - 2 large eggs - 1 cup whole milk - ½ cup vegetable oil - 2 teaspoons vanilla extract - 1 cup boiling water - 2 cups fresh strawberries, hulled and sliced - ½ cup powdered sugar - 1 tablespoon lemon juice - 1 cup heavy whipping cream - 1 teaspoon vanilla extract - 1 tablespoon gelatin powder - 3 tablespoons cold water When you gather these ingredients, you set the stage for a delicious treat. Each element plays its part. The all-purpose flour gives structure. The cocoa powder adds rich flavor. Eggs help bind everything together, while the boiling water makes the cake extra fluffy. For the strawberry mousse, fresh strawberries bring a bright taste. The powdered sugar sweetens, while lemon juice balances flavors. Heavy cream makes it light and airy. Gelatin helps the mousse hold its shape. You can find the full recipe for the Fluffy Chocolate Cake with Strawberry Mousse on your favorite food sites. Just remember, quality ingredients lead to tasty results. Enjoy the process of making this dessert. It’s rewarding and fun! - Preheat your oven to 350°F (175°C) and prepare two 9-inch round cake pans by greasing and flouring them. - In a large bowl, mix these dry ingredients: 1 ¾ cups all-purpose flour, 1 ½ cups granulated sugar, ¾ cup cocoa powder, 1 ½ teaspoons baking powder, 1 ½ teaspoons baking soda, and 1 teaspoon salt. - Next, add 2 large eggs, 1 cup whole milk, ½ cup vegetable oil, and 2 teaspoons vanilla extract. Mix until the batter is smooth. - Carefully stir in 1 cup of boiling water. The batter will be thin, which is normal. - Divide the batter evenly between the two prepared pans. Bake for 30-35 minutes. Check with a toothpick; it should come out clean. - Allow the cakes to cool in the pans for 10 minutes, then transfer them to a wire rack to cool completely. - In a blender, combine 2 cups of hulled and sliced strawberries, ½ cup powdered sugar, and 1 tablespoon lemon juice. Blend until smooth. - In a small bowl, sprinkle 1 tablespoon of gelatin over 3 tablespoons of cold water. Let it bloom for about 5 minutes. - Gently heat the gelatin mixture until it dissolves. Do not let it boil. - In a mixing bowl, whip 1 cup of heavy cream until soft peaks form. Add 1 teaspoon vanilla extract and continue whipping until stiff peaks form. - Fold the strawberry puree into the whipped cream gently. Pour in the dissolved gelatin and fold until just combined. - Once your chocolate cakes are completely cool, place one layer on a serving plate. - Spread half of the strawberry mousse evenly on top of this layer. - Place the second chocolate cake layer on top. Add the remaining strawberry mousse on top or around the sides as desired. This Fluffy Chocolate Cake with Strawberry Mousse is now ready to chill and serve! Enjoy this sweet treat with family and friends. If you're looking for more details, check out the Full Recipe. To make your chocolate cake fluffy, focus on mixing. Start by creaming the sugar and eggs well. This helps add air. When you mix in the dry ingredients, do not overmix. Just stir until combined. Using boiling water is key. It helps the cocoa powder bloom, releasing rich flavor. When you add the water, your batter will look thin. Don't worry; this is normal. Whipping cream is all about timing. Start with cold cream and whip until soft peaks form. Then, add vanilla extract for flavor. Continue whipping until stiff peaks appear. Folding is an art. When you mix the strawberry puree into the whipped cream, use a gentle motion. Scoop from the bottom and fold over the top. This keeps the mousse light and airy. For the gelatin, sprinkle it over cold water first. Let it sit for a few minutes to bloom. Then, gently heat until it dissolves. Add the gelatin last, folding carefully into the mousse. These tips ensure your Fluffy Chocolate Cake with Strawberry Mousse is a delight to eat. {{image_2}} You can change the flavor of the mousse easily. One fun option is to make chocolate mousse instead of strawberry. Just swap the strawberries for melted chocolate. Mix it in with the whipped cream for a rich treat. You can also use other fruits for the mousse. Raspberries and blueberries work great. Just replace the strawberries with your chosen fruit. Their bright colors and fresh tastes will bring joy to your cake. If you need a gluten-free cake, use gluten-free flour instead of all-purpose flour. Many brands work well and taste great. Just check the package for the right amount to use. For a dairy-free mousse, you can use coconut cream. Chill a can of coconut milk overnight. Scoop the solid part out and whip it like heavy cream. This gives a light and tasty mousse without dairy. To keep your fluffy chocolate cake with strawberry mousse fresh, store it in the fridge. Place the cake in an airtight container. If you don't have one, cover it tightly with plastic wrap. This helps keep the cake moist and tasty. For individual slices, wrap each slice in plastic wrap. Then, store them in a container. This method keeps each slice fresh without drying out. You can enjoy your leftovers for up to three days! Can the cake be frozen? Yes, you can freeze the cake, but it’s best to freeze it before adding the mousse. Wrap each layer tightly in plastic wrap. Then, place them in a freezer bag or container. The cake can last up to three months in the freezer. When you're ready to enjoy it, take the cake out and thaw it in the fridge overnight. For best results, frost the cake with strawberry mousse after thawing. This keeps the mousse light and fluffy. Make sure to follow these tips to enjoy your fluffy chocolate cake with strawberry mousse at its best! The Fluffy Chocolate Cake with Strawberry Mousse stays fresh for about 3 to 4 days in the fridge. Store it in an airtight container. This helps keep the cake moist and the mousse creamy. After a few days, the texture may change, but it still tastes great! Yes, you can make the cake ahead. Bake the chocolate cake a day or two before serving. Just let it cool completely. Wrap the layers tightly in plastic wrap. You can also prepare the strawberry mousse in advance. Just store it in the fridge until you assemble the cake. This makes your day of serving much easier! If you need a gelatin substitute, you can use agar-agar. It is a plant-based thickener. Use 1 tablespoon of agar-agar for each tablespoon of gelatin. Dissolve it in hot liquid, just like gelatin. This way, your mousse remains light and fluffy without any animal products. You've learned how to make a delicious Chocolate Cake with Strawberry Mousse. We covered key ingredients for both the cake and mousse. I shared step-by-step instructions to guide your baking process. Plus, I offered practical tips to achieve the best texture and flavor. You also discovered fun variations and storage methods for your treats. Enjoy experimenting with these recipes, and impress your friends and family with your skills!
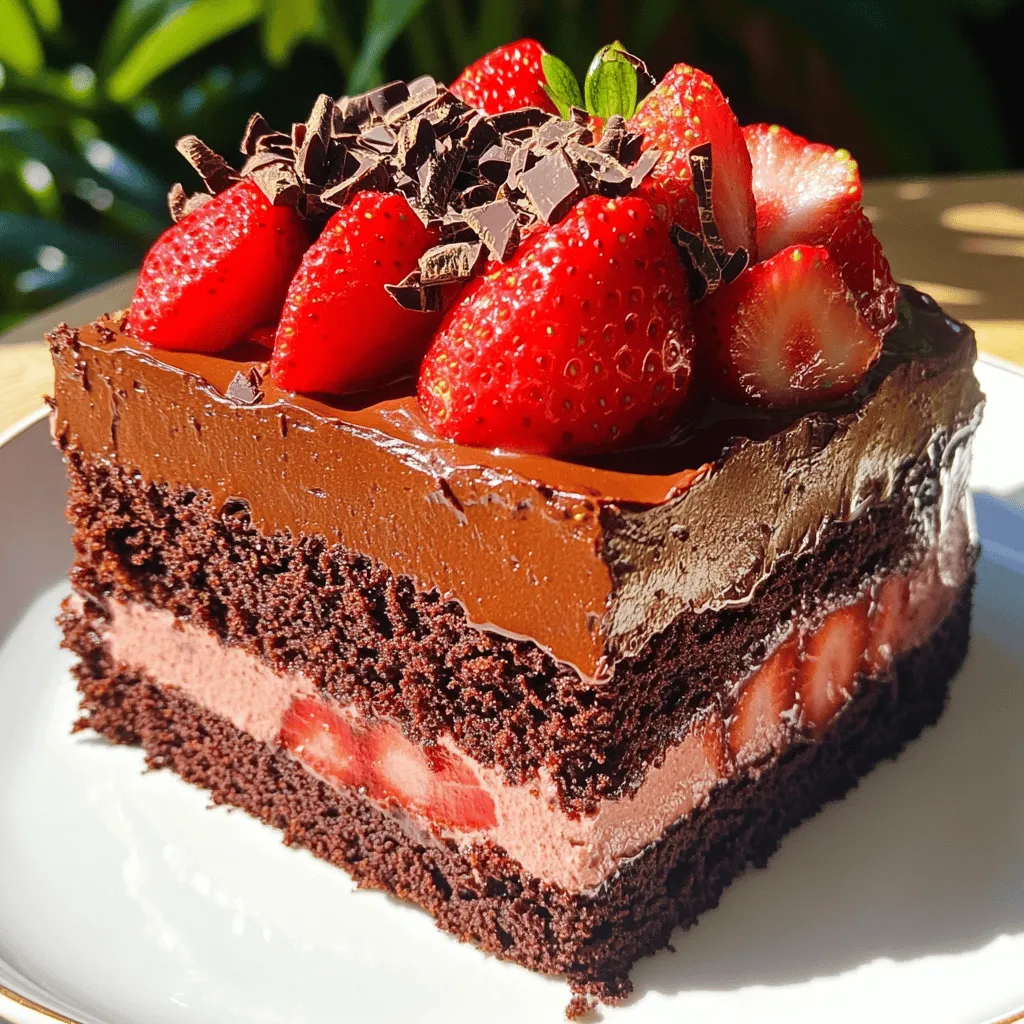
Fluffy Chocolate Cake with Strawberry Mousse Delight
Do you crave a rich, fluffy chocolate cake topped with creamy, fruity strawberry mousse? I’m excited to share my recipe for Fluffy Chocolate Cake with
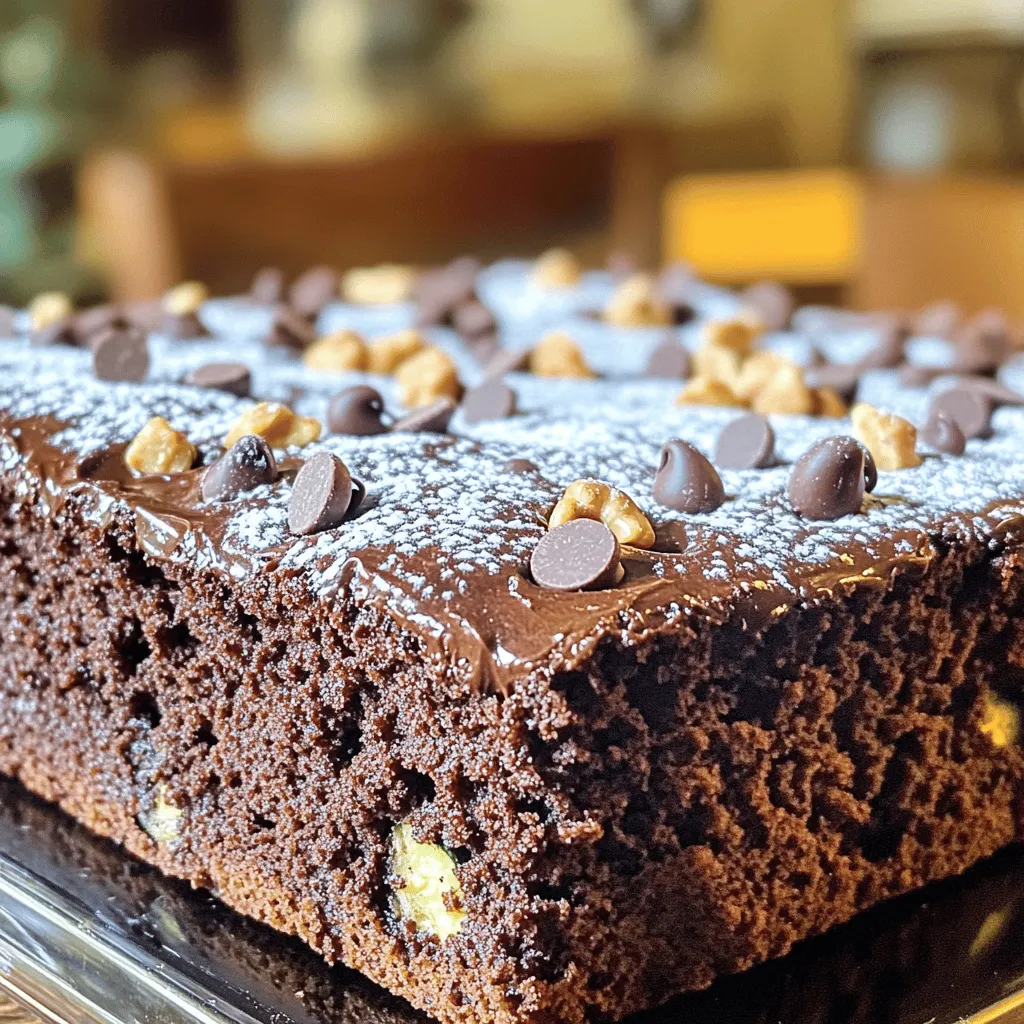
- 1 cup ripe bananas, mashed - 1 cup unsweetened applesauce - 1/2 cup granulated sugar - 1/4 cup brown sugar, packed - 1/2 cup vegetable oil or melted coconut oil - 2 large eggs - 1 teaspoon vanilla extract - 1 1/2 cups all-purpose flour - 1/2 cup unsweetened cocoa powder - 1 teaspoon baking soda - 1/2 teaspoon baking powder - 1/4 teaspoon salt - 1/2 cup chocolate chips (optional) Gather all these ingredients before you start. The ripe bananas and applesauce give the cake its moist texture. You can use two large bananas to make one cup of mashed bananas. The sugars add sweetness and depth to the flavor. Using vegetable oil or coconut oil keeps the cake soft. The eggs help bind everything together. The vanilla extract adds a lovely aroma. For the dry mix, all-purpose flour and cocoa powder create the cake's body and rich chocolate taste. Baking soda and baking powder ensure the cake rises well. Finally, if you like chocolate, add the chocolate chips for an extra treat. They melt in the cake and create gooey pockets of chocolate. Don't forget to check the [Full Recipe] for exact amounts and tips! - Mixing bowls - Whisk and spatula - 9-inch round cake pan - Parchment paper (optional) - Toothpick Having the right tools makes baking easier. Mixing bowls are essential for combining ingredients. A whisk helps blend the wet ingredients smoothly. A spatula is perfect for scraping the bowl and folding in dry ingredients. The 9-inch round cake pan is ideal for this recipe. You can use parchment paper to line the pan for easy cake removal. A toothpick tests if the cake is done. Just insert it into the center; if it comes out clean, your cake is ready! With everything ready, you are all set to bake a delicious Chocolate Banana Applesauce Cake! - Preheat your oven to 350°F (175°C). - Grease and flour a 9-inch round cake pan or use parchment paper. This helps the cake come out easily. - In a large bowl, combine the mashed bananas, applesauce, granulated sugar, brown sugar, vegetable oil, two eggs, and vanilla extract. - Whisk until the mixture is smooth and well blended. - In another bowl, whisk together the all-purpose flour, cocoa powder, baking soda, baking powder, and salt. - Make sure there are no lumps. This step helps the cake rise well. - Gradually add the dry ingredients to the wet mixture. - Gently fold in chocolate chips if you want extra chocolate flavor. - Pour the batter into your prepared cake pan. - Bake for 25-30 minutes. Check if it's done by inserting a toothpick; it should come out clean. - Let the cake cool in the pan for 10 minutes. - Transfer it to a wire rack to cool completely. This prevents sogginess. To get a soft and fluffy cake, avoid overmixing the batter. Mix just until you see no dry flour. A few lumps are okay! Also, make sure your ingredients are at room temperature. This helps them blend better and gives a nice rise. For a sweeter cake, use overripe bananas. They are softer and add more flavor. You can also add spices like cinnamon or nutmeg. These spices bring warmth and depth to your cake, making it even more delicious. Make your cake look extra special by dusting it with powdered sugar. This simple touch adds elegance. You can also garnish with banana slices or chocolate shavings. These additions make each slice pop and look inviting. {{image_2}} You can make a few swaps to boost your cake's health. First, try using pureed pumpkin instead of applesauce. This change adds a different flavor and keeps the cake moist. Second, swap all-purpose flour for whole wheat flour. Whole wheat flour adds fiber and nutrients. Your cake will still taste great! Want to make your cake even better? Think about adding some mix-ins. Nuts add crunch and healthy fats. You can use walnuts or pecans for a nice bite. Dried fruits like raisins or cranberries also work well. They give a sweet burst in every slice. Don’t forget about chocolate chips! Try different kinds like dark, milk, or even white chocolate. Frosting can change the whole cake experience. A simple cream cheese frosting is a great choice. It adds a tangy flavor that goes well with chocolate. If you want something richer, use chocolate ganache. Ganache is made from chocolate and cream, and it gives a smooth finish. Just pour it over the cooled cake for a delicious treat. To keep your cake fresh, store it in an airtight container at room temperature. This method works well for a day or two. If you want it to last longer, refrigerate it. The cold will help maintain its moisture and taste. Freezing is a great option for longer storage. To freeze individual slices, wrap each one in plastic wrap, then place them in a freezer bag. This keeps them fresh and prevents freezer burn. When you're ready to enjoy a slice, simply take it out and let it thaw at room temperature. For the best taste, avoid using a microwave, as it can change the cake's texture. At room temperature, the cake has a shelf life of about three days. To keep it fresh, always store it in an airtight container. If you refrigerate it, it can last up to a week. Remember, the key to maintaining flavor and moisture is proper storage. Yes, just make sure to thaw and drain excess liquid. Frozen bananas can work well. They often become very soft, which makes them easy to mash. This adds great flavor to your cake. Use flax eggs or unsweetened applesauce as egg replacements. For a flax egg, mix one tablespoon of ground flaxseed with three tablespoons of water. Let it sit for a few minutes until it thickens. This method keeps your cake moist and yummy. Insert a toothpick into the center; it should come out clean. If it has wet batter on it, bake for a few more minutes. Keep an eye on the time, but trust your toothpick! Yes, substitute with a gluten-free flour blend and adjust baking time. Gluten-free blends can vary, so check the package for the best results. Your cake will still taste great! It can last up to 3 days at room temperature and about a week in the refrigerator. Store it in an airtight container to keep it moist. If you want it to last longer, consider freezing it. Check the full recipe for detailed instructions and ingredient measurements. It has everything you need to make this cake perfect! You now have a clear path to making a delicious cake. We discussed the key ingredients, necessary kitchen tools, and step-by-step instructions. I shared tips for perfect texture and great flavor. You learned about fun variations and proper storage methods. Cake baking is simple and rewarding. Enjoy making this treat and share it with friends and family. Happy baking, and remember: practice makes perfect!
Chocolate Banana Applesauce Cake Simple and Sweet Treat
Are you craving a delicious treat that’s both easy to make and satisfying? Look no further! This Chocolate Banana Applesauce Cake is the perfect blend