Desserts
![To make a delicious Blueberry Chocolate Cake, gather these ingredients: - 1 ½ cups all-purpose flour - 1 cup unsweetened cocoa powder - 1 cup granulated sugar - 1 teaspoon baking soda - ½ teaspoon salt - ½ cup unsalted butter, softened - 1 cup buttermilk (or yogurt) - 2 large eggs - 1 teaspoon vanilla extract - 1 cup fresh blueberries - ½ cup dark chocolate chips (or chunks) Each ingredient plays a key role in the cake's flavor and texture. The flour gives structure, while the cocoa adds rich taste. Sugar sweetens the cake and helps it rise. Baking soda acts as a leavening agent, making the cake fluffy. The butter creates a tender crumb, and buttermilk adds moisture and tang. You can substitute buttermilk with plain yogurt if needed. For a healthier twist, use less sugar or choose dark chocolate with higher cocoa content. You can also mix in nuts or other fruits to change the flavor. With this list, you are ready to bake the Blueberry Chocolate Cake. For the complete process, check the Full Recipe. 1. Start by prepping your baking pans. Grease and flour two 9-inch round cake pans. This helps the cake slide out easily after baking. 2. Next, mix your dry ingredients. In a large bowl, whisk together 1 ½ cups of flour, 1 cup of cocoa powder, 1 teaspoon of baking soda, and ½ teaspoon of salt. Mix until everything is well combined. 3. Now, cream the butter and sugar. In another bowl, beat ½ cup of softened unsalted butter with 1 cup of granulated sugar. Mix until it turns creamy and fluffy. 1. Time to add the eggs and buttermilk. Add 2 large eggs one at a time. Mix well after each egg. Then, stir in 1 cup of buttermilk and 1 teaspoon of vanilla extract. Keep mixing until the mixture is smooth. 2. Incorporate the dry ingredients. Gradually add the flour mixture to the wet mixture. Stir until just combined. Be careful not to overmix! It’s okay to see some lumps. 1. Fold in the blueberries and chocolate chips. Gently add 1 cup of fresh blueberries and ½ cup of dark chocolate chips into the batter. Ensure they are evenly mixed throughout. 2. Divide and bake. Pour the batter evenly into the prepared pans. Bake at 350°F (175°C) for 25-30 minutes. Check with a toothpick; it should come out clean. 3. Cool the cakes. Let them cool in the pans for 10 minutes. Then, move them to wire racks to cool completely. For a full recipe, check the details above. Enjoy every bite of your Blueberry Chocolate Cake! To ensure even baking, I recommend using room temperature ingredients. When butter, eggs, and buttermilk are at room temp, they blend better. This gives you a smooth batter. Also, remember to preheat your oven to 350°F (175°C). This step is key to a perfect rise. Avoiding overmixing is crucial. When you mix too much, your cake can turn out tough. Mix just until the dry ingredients disappear. Gently fold in the blueberries and chocolate chips. This keeps them whole and prevents them from sinking. For frosting, I suggest using a rich chocolate ganache. It pairs well with the blueberries. You can also use vanilla buttercream for a lighter touch. Top your cake with fresh blueberries and dark chocolate shavings. This adds a pop of color and makes it look fancy. To serve the cake elegantly, slice it into even pieces. Place each slice on a dessert plate. Add a few extra blueberries on the side for a nice touch. You can also drizzle some ganache over the top for extra flair. Enjoy your Blueberry Chocolate Cake Divine Flavor Delight! For the complete recipe, check out the [Full Recipe]. {{image_2}} You can change the flavor of your blueberry chocolate cake in many fun ways. One easy option is to add nuts. Chopped walnuts or pecans give a nice crunch and taste. You can also try different types of chocolate. Using white chocolate chips can add sweetness. Dark chocolate also works well for a rich flavor. Another great idea is to swap the blueberries with other fruits. Raspberries bring a nice tartness. Strawberries can add a sweet, fruity twist. Mix and match to discover your favorite combination. Each fruit changes the cake's taste and makes it unique. If you want to make the cake gluten-free, you can use almond flour or gluten-free flour blends. This keeps the cake soft and delicious. For a vegan option, replace the eggs with flax eggs. You can also use plant-based milk instead of buttermilk. To reduce sugar, try using applesauce or mashed bananas. These alternatives keep the cake moist without too much sweetness. These dietary changes make the cake healthier without losing its delightful flavor. For the full recipe, check out the details above and enjoy baking! To keep your blueberry chocolate cake fresh, store it in an airtight container. This helps keep moisture in and prevents the cake from drying out. If you have leftovers, slice the cake into pieces for easier storage. Use parchment paper between layers if stacking. This will avoid sticking and keep each slice intact. The best containers for storage are glass or plastic with tight-fitting lids. These prevent air from entering and keep your cake safe. If you don’t have a container, wrap the cake in plastic wrap. Make sure to cover it well. This will help maintain its flavor and texture. To freeze an un-frosted cake, first let it cool completely. Wrap it tightly in plastic wrap. Then, add a layer of aluminum foil for extra protection. This will keep the cake fresh for up to three months. Label the package with the date to track how long it has been frozen. To thaw and serve after freezing, remove the cake from the freezer. Unwrap it and place it in the fridge overnight. If you’re short on time, leave it at room temperature for a few hours. Once thawed, frost it with your favorite icing or ganache. Enjoy every bite of your delicious blueberry chocolate cake! Check out the Full Recipe for more tips. How long does the cake last? The cake lasts about three days when stored in an airtight container. Keep it in a cool place. If you want it to last longer, you can place it in the fridge. Can I make this cake in advance? Yes, you can make this cake one day ahead. Just bake it and let it cool. Wrap it well in plastic wrap and store it at room temperature. This helps the flavors blend together. What can I substitute for buttermilk? You can use plain yogurt or milk mixed with vinegar. For each cup of buttermilk, add one tablespoon of vinegar to regular milk. Let it sit for five minutes before using. Is it possible to make this cake in a bundt pan? Yes, you can use a bundt pan. Just be sure to grease it well to avoid sticking. The baking time may be longer, so check for doneness with a toothpick. Enjoy the lovely shape! For the complete recipe, check the Full Recipe section. You now have all the tools to make a great blueberry chocolate cake. We discussed ingredients, instructions, and tips for success. We explored fun variations and best storage methods. Remember, baking is an art. Experiment with flavors and find what works for you. Enjoy the process and share your creation with friends and family. A delicious cake awaits, and I can’t wait for you to savor every bite!](https://grilledflavors.com/wp-content/uploads/2025/07/c707b4f1-3232-4508-8bb1-c90a31413876.webp)
Blueberry Chocolate Cake Divine Flavor Delight
Are you ready to savor a unique treat? My Blueberry Chocolate Cake combines rich chocolate with juicy blueberries for a delightful flavor explosion. This cake
![To make the best strawberry cake ever, you need fresh, high-quality ingredients. Here is what you'll need: - 2 cups all-purpose flour - 1 and 1/2 cups granulated sugar - 1/2 cup unsalted butter, softened - 3/4 cup whole milk - 3 large eggs - 1 tablespoon baking powder - 1 teaspoon vanilla extract - 1/4 teaspoon salt - 2 cups fresh strawberries, pureed (plus extra for garnish) - 1 cup heavy whipping cream - 1/4 cup powdered sugar These ingredients create a soft, moist cake full of strawberry flavor. The key is using ripe strawberries for the best taste. Each ingredient plays a role in the texture and flavor of the cake. For example, the butter gives richness, while the milk keeps it moist. When measuring, be precise. Use a kitchen scale for the best accuracy, especially for flour. This ensures your cake bakes evenly. If you want to dive deeper into the baking process, check out the Full Recipe for step-by-step instructions on how to bring these ingredients together. - Preheating and Greasing: Start by preheating your oven to 350°F (175°C). Grease and flour two 9-inch round cake pans. This step helps your cakes slide out smoothly. - Mixing Wet Ingredients: In a large bowl, cream together 1/2 cup softened unsalted butter and 1 and 1/2 cups granulated sugar until the mix is light and fluffy. Add 3 large eggs one by one, mixing well after each. Stir in 1 teaspoon vanilla extract for a lovely flavor. - Combining Dry Ingredients: In another bowl, whisk together 2 cups all-purpose flour, 1 tablespoon baking powder, and 1/4 teaspoon salt. This mix adds the right texture to your cake. - Alternating Dry and Wet Mixtures: Gradually add the dry mix to the butter mix. Alternate this with 3/4 cup whole milk. Mix until just combined. Don’t overmix; you want a light cake. - Dividing Batter and Baking: Fold in 2 cups pureed strawberries gently. Divide the batter evenly between the two prepared pans. Bake them for about 25-30 minutes. A toothpick inserted in the center should come out clean. - Cooling Cakes: After baking, let the cakes cool in the pans for 10 minutes. Then, transfer them to wire racks to cool completely. This step is key for easy frosting. - Whipping the Cream: While the cakes cool, whip 1 cup heavy whipping cream in a chilled bowl. Once soft peaks form, add 1/4 cup powdered sugar. Keep whipping until you see stiff peaks. This will be your frosting. - Layering the Cakes: Once the cakes are cool, place one layer on a serving plate. Spread a generous amount of whipped cream on top and add some whole strawberries. - Garnishing for Presentation: Place the second cake layer on top. Frost the whole cake with the remaining whipped cream. Garnish it with extra fresh strawberries on top. This makes your cake pop with color! For the full recipe, check out the [Full Recipe]. Enjoy this delightful treat! - Ensuring Even Baking: To bake evenly, make sure to preheat your oven fully. Place the cake pans in the center of the oven. This helps the heat circulate well. Turn the pans halfway through baking for best results. - Testing Cake Doneness: Use a toothpick to check if the cake is done. Insert it into the center of the cake. If it comes out clean, your cake is ready. If not, give it a few more minutes. - Perfecting Whipped Cream: Chill your mixing bowl and beaters before whipping cream. This helps it whip faster and hold its shape. Stop whipping when you see soft peaks for a light texture. - Serving Suggestions: Serve the cake on a pretty cake stand. This makes it look special. You can slice it into wedges for easy serving. - Adding Garnishes Effectively: Use whole strawberries on top for color. A sprinkle of mint leaves adds freshness. You can also drizzle strawberry puree around the edges for extra flair. - Creative Plating Ideas: Plate individual slices on small plates. You can add a dollop of whipped cream next to each slice. A few fresh berries on the side make it look even better. - Overmixing Batter: Mix just until combined. Overmixing can make the cake dense. This happens when you stir too long after adding the flour. - Incorrect Oven Temperature: Always check your oven's temperature with an oven thermometer. An oven that runs hot can burn the cake. A cooler oven can lead to undercooked centers. - Inadequate Cooling Time: Let the cakes cool completely before frosting. If you frost a warm cake, the frosting will melt. This can ruin your beautiful layers. {{image_2}} Adding Lemon Zest Lemon zest brightens the cake's flavor. Just add one teaspoon to the batter. It gives a fresh twist to the sweet strawberries. Incorporating Almond Extract Almond extract adds a warm, nutty taste. Use half a teaspoon in place of vanilla extract. It pairs beautifully with strawberries. Using Different Types of Strawberries Try using different strawberries, like June-bearing or everbearing. These types can change the taste. Fresh, ripe strawberries yield the best flavor, so choose carefully. Gluten-Free Options To make a gluten-free cake, swap all-purpose flour with gluten-free flour. Look for a 1:1 blend for best results. This way, everyone can enjoy your cake. Dairy-Free Substitutes For a dairy-free version, use coconut milk instead of whole milk. Replace butter with vegan margarine. This keeps the cake moist and tasty. Lower Sugar Alternatives Try using a sugar substitute like Stevia or coconut sugar. Adjust the amount to match your taste. This allows you to enjoy cake with less sugar. Strawberry Shortcake Cupcakes Transform the cake into cupcakes for fun. Bake in muffin tins and top with whipped cream and strawberries. They are easy to grab and enjoy. Layered Strawberry Parfaits Create parfaits by layering cake pieces with whipped cream and fresh strawberries. Serve in clear cups for a beautiful display. This makes a lovely dessert for parties. Strawberry Cake Pops Make cake pops by crumbling the cake and mixing it with frosting. Roll into balls and dip in chocolate. This fun treat is perfect for kids and gatherings. For all these ideas, you can find the Full Recipe to help guide your culinary adventures! - Refrigerating the Cake: Once your strawberry cake cools, cover it with plastic wrap. It keeps the cake moist. Place it in the fridge. This way, it stays fresh for up to five days. - Freezing Techniques: If you want to save some for later, freeze it. Wrap each cake layer in plastic wrap, then place them in a freezer bag. You can freeze the cake for up to three months. Just remember to thaw it in the fridge before serving. - Storing Leftovers Safely: If you have leftover slices, store them in an airtight container. This keeps them from drying out. You can enjoy them for up to five days if stored correctly. - How Long Does Strawberry Cake Last?: When stored in the fridge, your cake stays good for about five days. In the freezer, it lasts much longer, up to three months. - Signs of Spoilage: Look for mold or an off smell. If the cake feels dry or hard, it may not taste good anymore. Always check before eating. - Best Ways to Reheat: To reheat, use the oven. Preheat it to 350°F (175°C). Wrap the cake in foil and heat for about 10 minutes. This keeps it from drying out. - Maintaining Moisture and Texture: Adding a little splash of milk can help. Place a small dish of water in the oven while reheating. This trick keeps the cake moist and soft. To make a strawberry cake, start with pureed fresh strawberries. Mix them with flour, sugar, eggs, and butter. Follow the instructions in the Full Recipe for perfect results. Always preheat your oven to ensure even baking. Yes, you can use frozen strawberries. Just thaw and drain them first. This helps avoid excess moisture in your cake. Keep in mind that fresh strawberries give a brighter flavor and color. Store leftover strawberry cake in an airtight container. Keep it in the fridge for up to four days. You can also wrap it well in plastic wrap and freeze it for up to three months. Baking a strawberry cake takes about 25 to 30 minutes. Check it by inserting a toothpick in the center. If it comes out clean, the cake is ready. You can use coconut cream or whipped topping as alternatives. For a lighter version, try Greek yogurt. Each option gives a different flavor, so choose what you like best. For step-by-step details, check the Full Recipe. This blog post covered everything you need to make a delicious strawberry cake. We explored the ingredients and detailed steps for baking, assembling, and presenting your cake. You also learned helpful tips and common mistakes to avoid. Finally, we discussed fun variations and storage for leftovers. With this knowledge, you're ready to bake your own tasty creation. Enjoy the process and delight in your sweet success!](https://grilledflavors.com/wp-content/uploads/2025/07/b2456e17-02b8-4e98-acb1-884566825b45.webp)
Best Strawberry Cake Ever Irresistibly Delicious Recipe
Welcome to the world of baking bliss! If you love fresh strawberries, you’re in for a treat. This Best Strawberry Cake Ever recipe is not
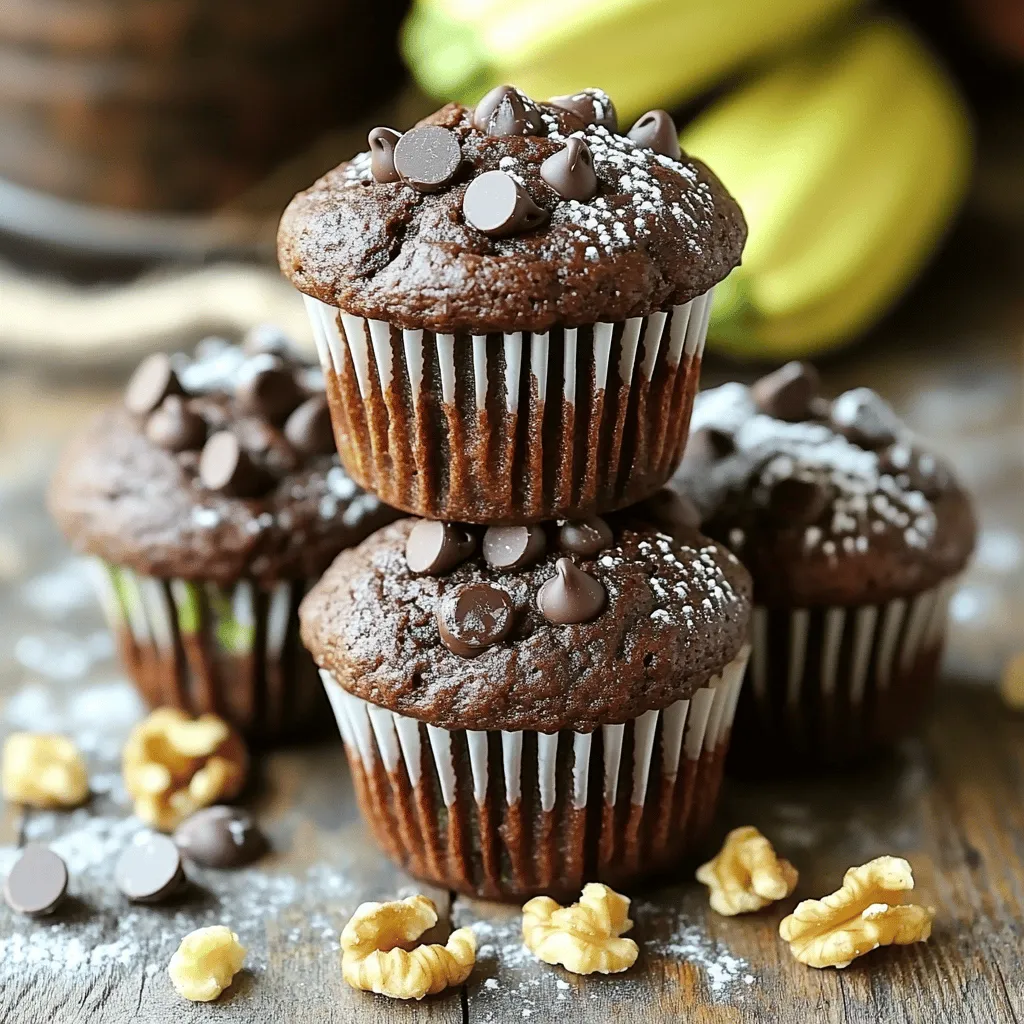
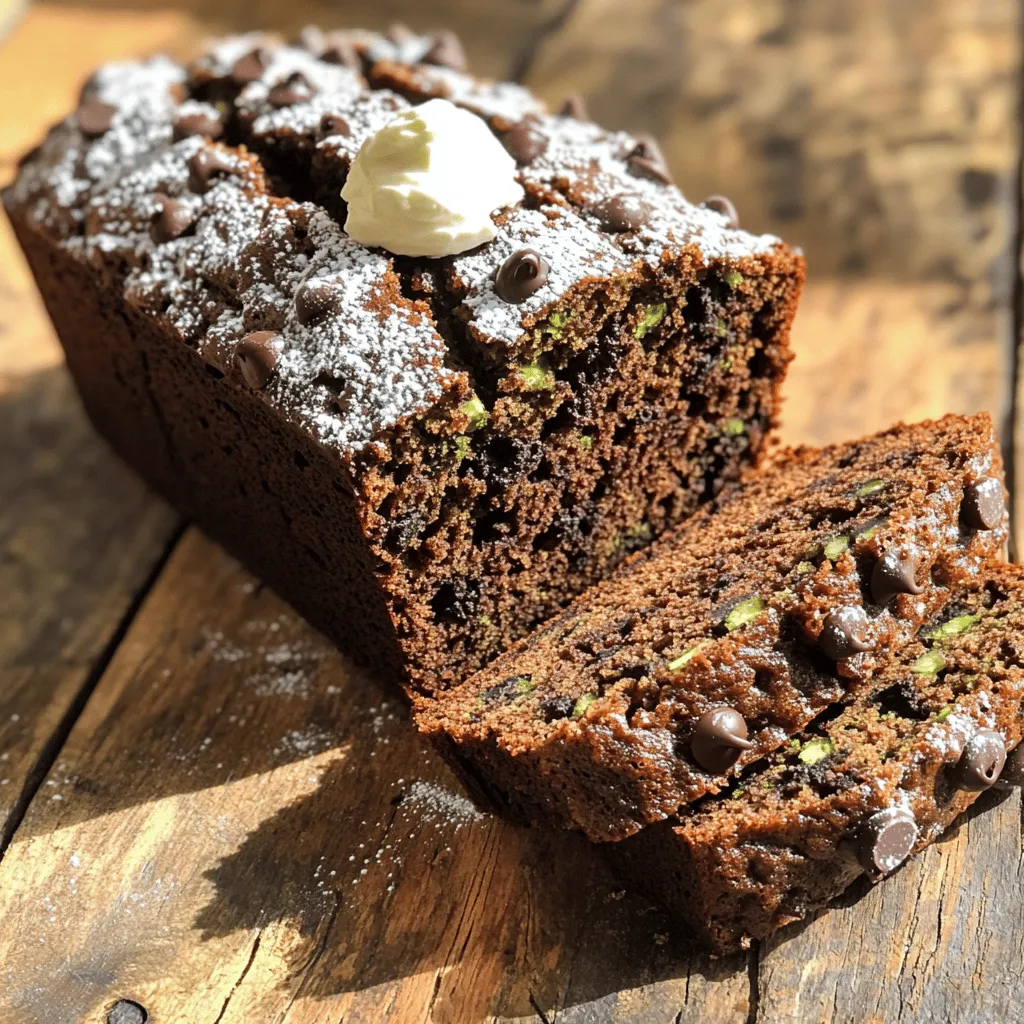
Bakery Style Double Chocolate Zucchini Muffins Delight
If you think muffins can’t be both delicious and healthy, think again! My Bakery Style Double Chocolate Zucchini Muffins are a game-changer. Packed with rich
Double Chocolate Zucchini Cake Rich and Moist Treat
If you love cake that is rich, moist, and full of chocolate, you’re in the right place! This Double Chocolate Zucchini Cake combines sweet chocolate
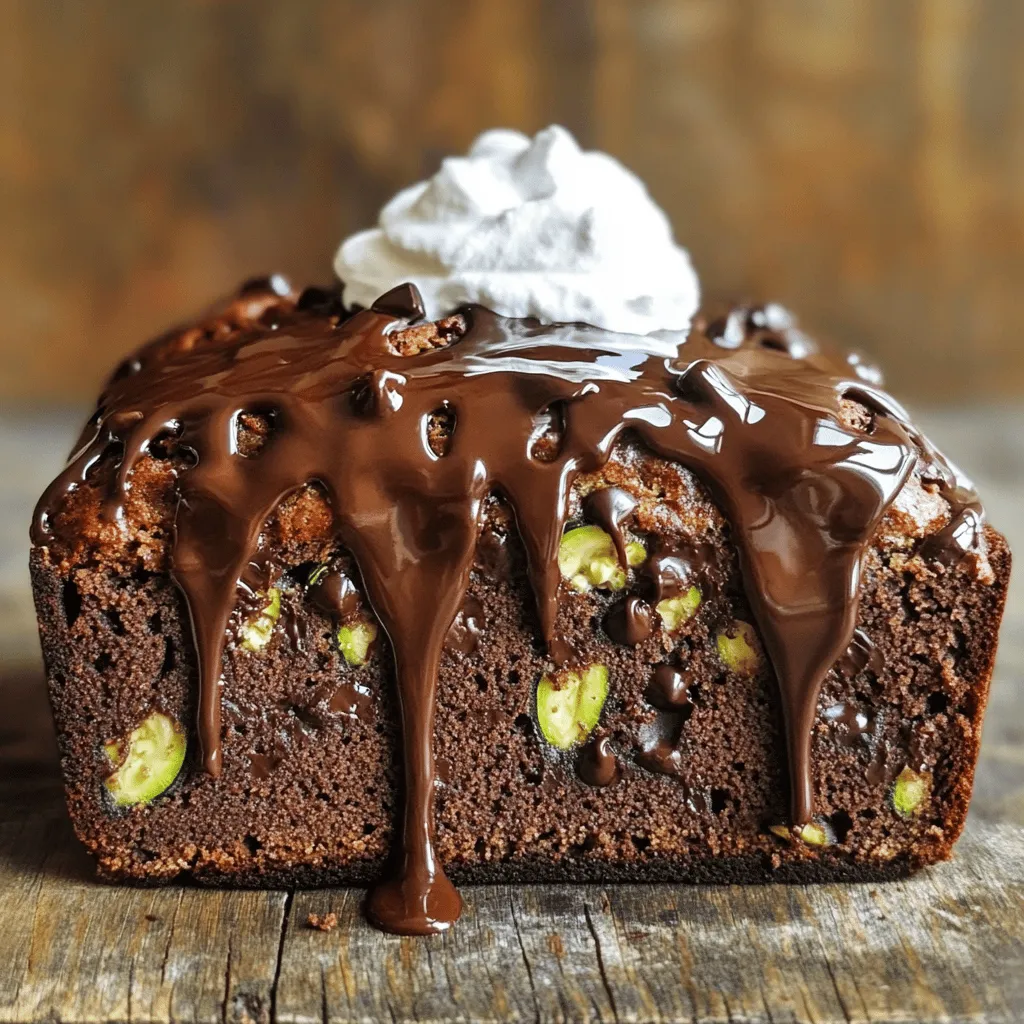
Irresistible Chocolate Zucchini Banana Bread Delight
If you love warm, moist bread that delights the senses, you’ve come to the right place! My Irresistible Chocolate Zucchini Banana Bread is a perfect
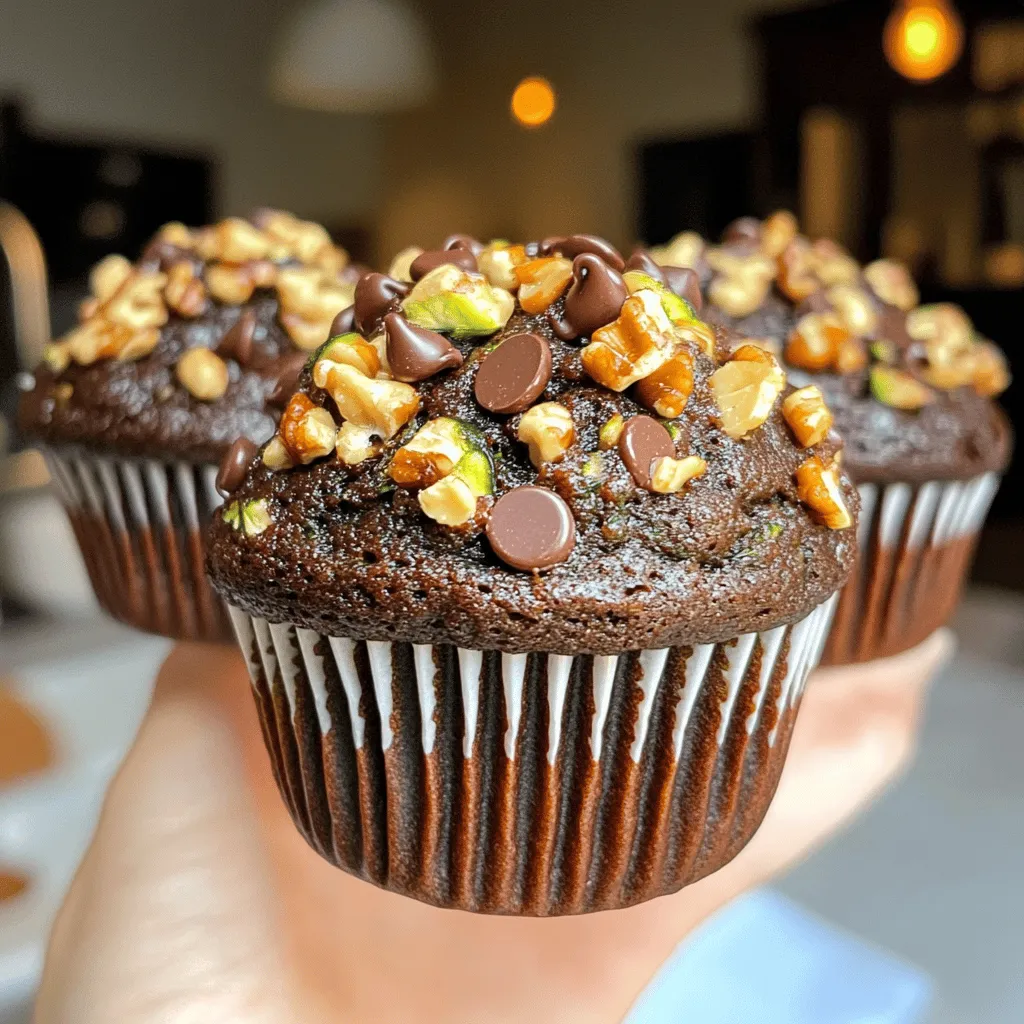
Moist Zucchini Chocolate Muffins Irresistible Recipe
Craving a sweet treat that’s also a bit healthy? Look no further! My Moist Zucchini Chocolate Muffins blend rich chocolate flavor with the goodness of

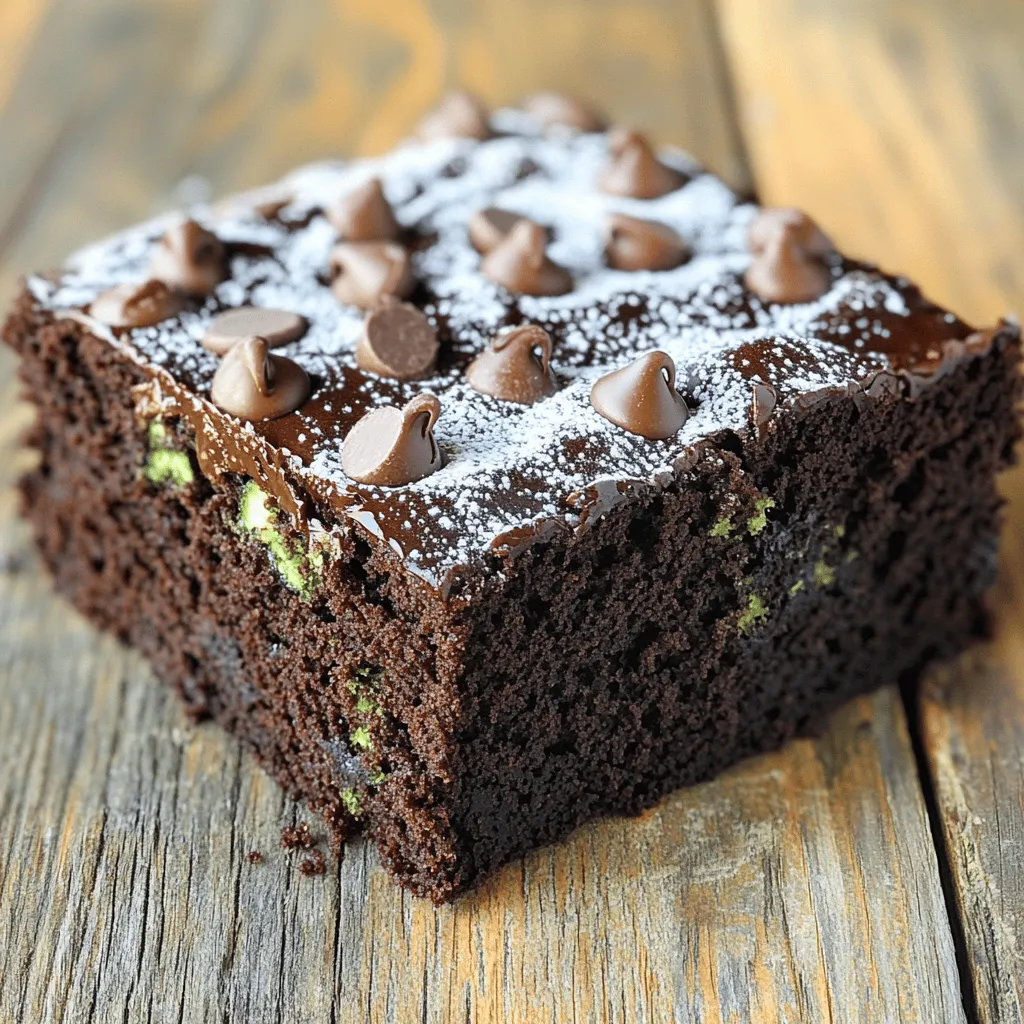
Healthy Chocolate Brownies with Zucchini Delight
If you love chocolate but want to eat healthier, these Healthy Chocolate Brownies with Zucchini are for you! I’ll show you how to mix rich
![To make the best Tasty Lemon Coconut Zucchini Cake, you need fresh, quality ingredients. Each one plays a key role in the flavor and texture. Here’s what you will need: - 1 medium zucchini, grated (about 1 cup) - 1 cup all-purpose flour - 1/2 cup shredded unsweetened coconut - 1/2 cup granulated sugar - 1/4 cup brown sugar - 1/2 cup unsalted butter, softened - 2 large eggs - 1/4 cup freshly squeezed lemon juice - Zest of 1 lemon - 1 teaspoon baking powder - 1/2 teaspoon baking soda - 1/4 teaspoon salt - 1 teaspoon vanilla extract These ingredients create a moist cake, bursting with lemon and coconut flavors. The zucchini adds moisture and nutrients without altering the taste. You can make this cake even better with a few add-ins. Here are some tasty options: - 1/2 cup chopped walnuts or pecans for added crunch - 1/2 teaspoon almond extract for extra depth - 1/4 cup dried cranberries or raisins for a sweet twist Feel free to mix and match these extras. They can elevate the cake's flavor and texture. If you don't have an ingredient, don't worry. Here are some easy swaps: - Swap all-purpose flour for whole wheat flour for extra fiber. - Use coconut oil instead of unsalted butter for a vegan option. - Replace granulated sugar with honey or maple syrup for natural sweetness. These substitutions can change the taste slightly, but they still work great in this recipe! Gather all your ingredients before you start. This makes your work easier and faster. For this recipe, you need: - 1 medium zucchini, grated (about 1 cup) - 1 cup all-purpose flour - 1/2 cup shredded unsweetened coconut - 1/2 cup granulated sugar - 1/4 cup brown sugar - 1/2 cup unsalted butter, softened - 2 large eggs - 1/4 cup freshly squeezed lemon juice - Zest of 1 lemon - 1 teaspoon baking powder - 1/2 teaspoon baking soda - 1/4 teaspoon salt - 1 teaspoon vanilla extract - Optional: 1/2 cup chopped walnuts or pecans Make sure your zucchini is fresh and firm. Grate it finely for even mixing. Softened butter helps combine better with sugar. Also, squeeze fresh lemon juice for the best flavor. Start by creaming the softened butter with both sugars in a large bowl. Mix until light and fluffy. This step is key for a soft cake. Next, add eggs one at a time. Mix well after each addition. Then, stir in the lemon juice, zest, and vanilla extract. In a separate bowl, mix the dry ingredients: flour, coconut, baking powder, baking soda, and salt. Stir them well to combine. Gradually add the dry mix to the wet mixture. Mix just until combined to avoid a tough cake. Now, gently fold in the grated zucchini and nuts, if using. This adds moisture and flavor to your cake. Be careful not to over-mix. The batter should be thick but smooth. Pour the batter into a prepared loaf pan. Smooth the top with a spatula for even baking. Bake in a preheated oven at 350°F (175°C) for 45-55 minutes. Check for doneness by inserting a toothpick in the center. It should come out clean. Once baked, remove the cake from the oven. Let it cool in the pan for about 10 minutes. Then, transfer it to a wire rack to cool completely. This helps keep the cake moist and fluffy. For more details, refer to the Full Recipe. To boost the lemon and coconut in your cake, use fresh ingredients. Fresh lemon juice and zest give the cake a bright flavor. For coconut, shredded unsweetened coconut works best. If you want more coconut taste, try adding coconut extract. A pinch of salt can also bring out these flavors. It balances the sweetness and enhances the overall taste. Avoid these common mistakes to ensure success. First, don’t skip grating the zucchini. This keeps the cake moist. Second, don’t over-mix the batter. Mixing too much can make the cake dense. Third, always measure your flour correctly. Too much flour can lead to a dry cake. Lastly, make sure your oven is at the right temperature. Baking at the wrong temp can ruin the cake. To make your cake moist, follow these simple tips. Use room temperature ingredients, like butter and eggs. They mix better and help the cake rise. Adding the zucchini is also key. It adds moisture and keeps the cake soft. Don't leave the cake in the oven too long. Check it a few minutes early. A toothpick should come out clean, but not dry. For an extra touch, brush the cooled cake with lemon syrup. This adds flavor and keeps it moist. For the full recipe, check out the [Full Recipe]. {{image_2}} If you want a gluten-free cake, use almond flour instead of all-purpose flour. Almond flour gives the cake a nice, nutty taste. You can also use gluten-free all-purpose flour blends. Be sure they have xanthan gum to help with texture. Follow the same steps from the Full Recipe to bake your cake. It will be just as tasty! You can make this cake even better by adding nuts or fruits. Try walnuts or pecans for a crunchy bite. You can chop them and fold them into the batter. If you like fruits, add blueberries or raspberries. They will add a sweet and tangy flavor. Just make sure to adjust the sugar if you add more fruits. To make a vegan version, swap eggs for flax eggs. Mix 1 tablespoon of ground flaxseed with 2.5 tablespoons of water for each egg. Let it sit for a few minutes until it thickens. Replace butter with coconut oil or a vegan butter. Use plant-based milk to replace the dairy ingredients. This way, you can enjoy a delicious vegan Tasty Lemon Coconut Zucchini Cake! Store leftover Tasty Lemon Coconut Zucchini Cake in an airtight container. This keeps it fresh and moist. You can leave it at room temperature for about two days. If you want to keep it longer, place it in the fridge. Make sure to wrap it well in plastic wrap or foil to avoid drying out. To freeze the cake, first let it cool completely. Then, slice it into pieces for easy serving. Wrap each slice tightly in plastic wrap. Place the wrapped slices in a freezer-safe bag. This way, you can enjoy a slice whenever you crave it. The cake can last in the freezer for up to three months. When you're ready to eat, simply thaw it in the fridge overnight. To reheat your cake, preheat the oven to 350°F (175°C). Place the slices on a baking sheet. Heat them for about 10-15 minutes. This warms the cake without drying it out. You can also microwave a slice for about 15-20 seconds. Just be careful not to overheat it. Enjoy it warm for a delightful treat! For the complete process, check out the Full Recipe. Yes, you can use other squash. Yellow squash works well. It has a similar texture and flavor. You can also try butternut squash for a sweeter taste. Just make sure to grate it well. This keeps the cake moist and tasty. Check the cake with a toothpick. Insert it into the center of the cake. If it comes out clean, your cake is ready. You can also gently press the top. It should spring back if it’s done. The edges may pull away from the pan too. This cake pairs well with many things. A scoop of vanilla ice cream adds a creamy touch. Fresh berries can add a nice, tart contrast. You could also serve it with whipped cream for extra sweetness. For a light drink, try iced tea or lemonade. Check out the Full Recipe for more serving ideas. This blog post covered key ingredients, baking steps, and helpful tips for Tasty Lemon Coconut Zucchini Cake. You learned how to enhance flavors and avoid common mistakes. We explored gluten-free and vegan options for all to enjoy. Proper storage keeps your cake fresh, while our FAQs answered your pressing questions. Baking can be fun and rewarding. With these tips, you can enjoy a delicious cake time and again.](https://grilledflavors.com/wp-content/uploads/2025/07/1c31e323-469d-4dd4-b0f3-37aa4ea13188.webp)
Tasty Lemon Coconut Zucchini Cake Delightful Recipe
Are you ready to bake something truly delicious? This Tasty Lemon Coconut Zucchini Cake is a unique twist on a classic treat. With fresh zucchini,
Indulge in Decadent Chocolate Chip Zucchini Bread Delight
Ready to satisfy your sweet tooth? You’ll love my decadent chocolate chip zucchini bread! This easy recipe combines moist, grated zucchini with rich chocolate chips
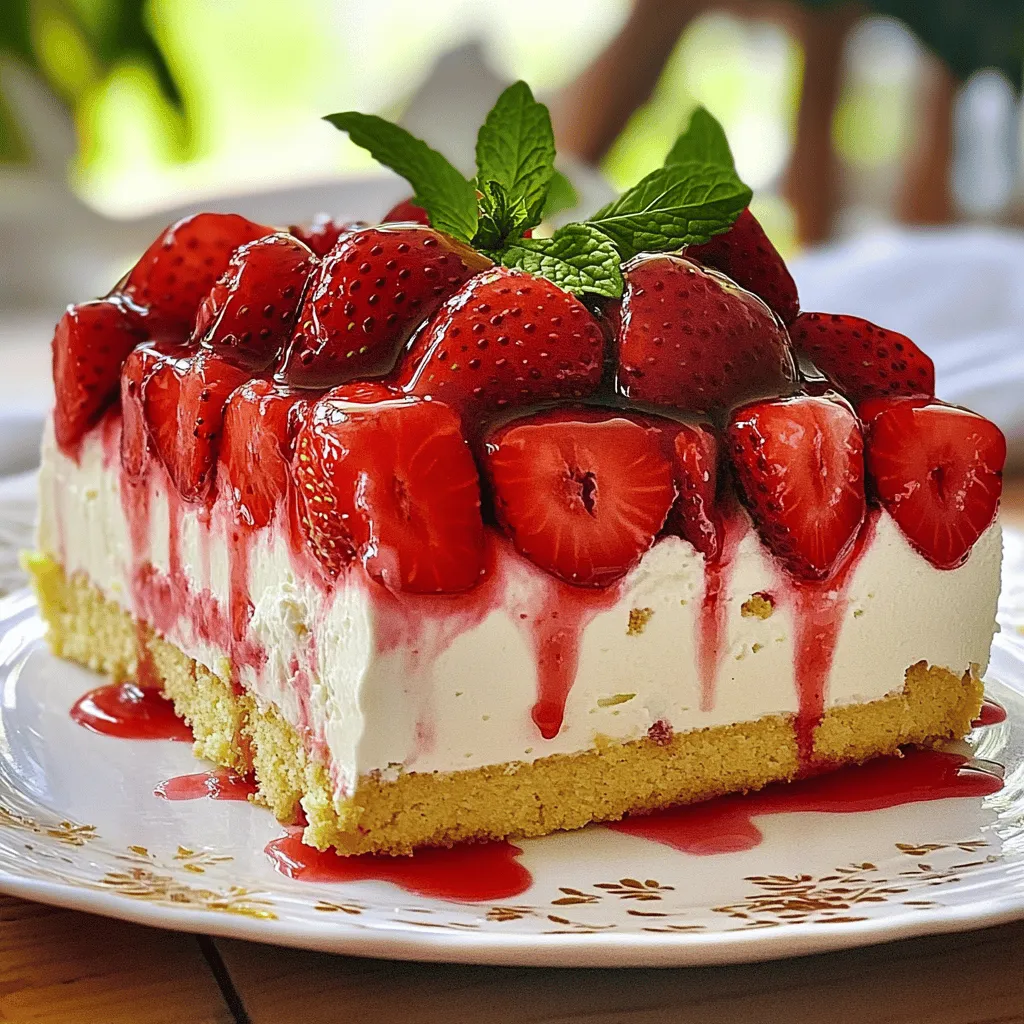
Roasted Strawberry Mousse Cake Divine and Simple Treat
If you’re craving a sweet and easy dessert, look no further than my Roasted Strawberry Mousse Cake. This simple treat combines warm roasted strawberries with