Desserts

- 2 cups rolled oats - 1 cup almond flour - 1/4 cup honey or maple syrup - 1/2 cup coconut oil, melted - 1/4 teaspoon salt - 1 teaspoon vanilla extract - 1 1/2 cups fresh strawberries, hulled and diced - 1 tablespoon lemon juice - 1/2 teaspoon cinnamon - 1/4 cup chia seeds The ingredients for these healthy strawberry oatmeal bars are simple but full of flavor. Rolled oats form the base of the bars, giving them texture and heartiness. Almond flour adds a nutty taste while making the bars gluten-free. Oats and almond flour are great for your health. Oats are high in fiber, which is good for digestion. They help keep you full and can lower cholesterol. Almond flour is rich in protein and healthy fats, which support heart health. Strawberries are not just tasty; they act as a natural sweetener. They provide vitamins and antioxidants. The bright red fruit adds color and freshness to the bars. Choosing between honey and maple syrup depends on your taste. Honey is sweeter and has more nutrients. Maple syrup has a unique flavor and is lower in calories. Both do a great job of sweetening your bars. For the full recipe, check out the detailed steps to make these delicious bars. 1. Start by preheating your oven to 350°F (175°C). This gives the bars an even bake. 2. Grab a 9x9-inch baking pan. Line it with parchment paper. Leave some paper hanging over the sides. This makes it easy to lift out the bars later. 3. In a big bowl, mix the rolled oats, almond flour, salt, and cinnamon. Stir this until it is blended well. 4. In a different bowl, whisk the melted coconut oil, honey (or maple syrup), and vanilla extract together. Make sure it is smooth. 1. Pour the wet mix into the dry mix. Stir until they come together. 2. Reserve about 1/2 cup of this mixture for the topping later. 3. Take the diced strawberries and drizzle them with lemon juice. Add the chia seeds. 4. Gently fold this strawberry mix into the oat mixture. Be careful not to smash the strawberries. 1. Press the oat-strawberry mixture evenly into your prepared pan. Make sure it is flat and firm. 2. Sprinkle the reserved oat mix on top. This will create a crumbly layer. 3. Bake in your preheated oven for 25 to 30 minutes. You want the edges to turn golden brown and the center to feel firm. 4. Once baked, take the pan out. Allow the bars to cool completely in the pan. Use the parchment paper to lift them out easily. Cut the cooled bars into squares. For the full recipe, you can refer to the complete steps provided. Enjoy your healthy strawberry oatmeal bars! To get the right crumb texture, use rolled oats. They give a nice chew. Almond flour adds a light fluffiness. Make sure to mix the dry and wet ingredients well. This step is key to a good blend. For extra taste, add spices like cinnamon. Vanilla extract also boosts the flavor. You can even try a bit of nutmeg for warmth. When serving healthy strawberry oatmeal bars, keep it simple. Place them on a wooden board for a rustic look. You can dust them lightly with powdered sugar. Add a side of fresh strawberries for a pop of color. These bars are great for breakfast. They also make a perfect snack. Pair them with yogurt or a smoothie for a balanced meal. Need to make the recipe gluten-free? Swap the rolled oats for certified gluten-free oats. This keeps the bars safe for those with gluten issues. If someone has nut allergies, use oat flour instead of almond flour. For sweeteners, you can use agave syrup in place of honey or maple syrup. These simple swaps make the recipe more inclusive for everyone. {{image_2}} You can change the flavor of your strawberry oatmeal bars easily. Try using different fruits like blueberries or raspberries. These fruits add new tastes and colors. You can also mix in nuts or seeds for extra crunch. Almonds, walnuts, or pumpkin seeds work great. They bring protein and healthy fats, making the bars more filling. If you want to cut back on sugar, consider using agave syrup or coconut sugar. These sweeteners have a lower glycemic index. They can help keep your blood sugar level steady. For sugar-free options, you could use mashed bananas or unsweetened applesauce. These options add sweetness and moisture without the sugar. Using seasonal berries makes your bars fresher and tastier. In summer, go for ripe strawberries or blueberries. In the fall, try adding pumpkin puree or apples. You can mix in spices like nutmeg or ginger for warmth. This way, you adapt the recipe to fit the season and keep your snacks exciting. Check out the Full Recipe for details on creating these yummy bars! To keep your healthy strawberry oatmeal bars fresh, store them in an airtight container. The best temperature is room temperature for short-term storage. If you plan to keep them longer, the fridge is the way to go. At room temperature, they last about three days. In the fridge, they can stay good for up to a week. Just remember to let them cool completely before sealing them. Freezing is a great way to save your bars for later. To freeze them, wrap each bar tightly in plastic wrap or foil. Place them in a freezer-safe bag or container. This keeps them fresh and prevents freezer burn. You can freeze the bars for up to three months. When you’re ready to eat one, take it out and let it thaw at room temperature. For a warm treat, pop it in the microwave for about 20 seconds. Enjoy your tasty snack anytime! These bars can last about 5 days at room temperature. They stay fresh longer in the fridge, up to 10 days. Make sure to keep them in an airtight container. This helps maintain their flavor and texture. Yes, you can use frozen strawberries. However, the texture will change slightly. Frozen strawberries may release more juice. This can make the bars a bit softer. If you want to use them, add a little more oats to help absorb the extra moisture. Absolutely! These bars are packed with nutrients. They have oats, which provide energy and fiber. Strawberries add vitamins and a natural sweetness. Kids love the fruity flavor and chewy texture. They make a great snack for lunchboxes or after school. Yes, you can easily make these bars vegan. Instead of eggs, use flaxseed meal mixed with water. For a dairy-free option, use plant-based milk or yogurt. Maple syrup is a great alternative to honey for sweetness. Look for a golden brown color around the edges. The center should be firm to the touch. You can also insert a toothpick; it should come out clean. These signs mean your bars are ready to cool and cut. You can find the Full Recipe for these healthy strawberry oatmeal bars above. It has detailed steps and all the ingredients you need to make them. Enjoy your cooking! These healthy strawberry oatmeal bars are easy to make and full of flavor. We discussed the key ingredients, nutritional benefits, and how to prepare them step by step. Remember, you can customize them to fit your diet or use different fruits for variety. Store them properly, and they’ll last for days. Whether you enjoy them as a snack or breakfast, they are sure to please. Try making them today and enjoy a tasty treat that boosts your health!
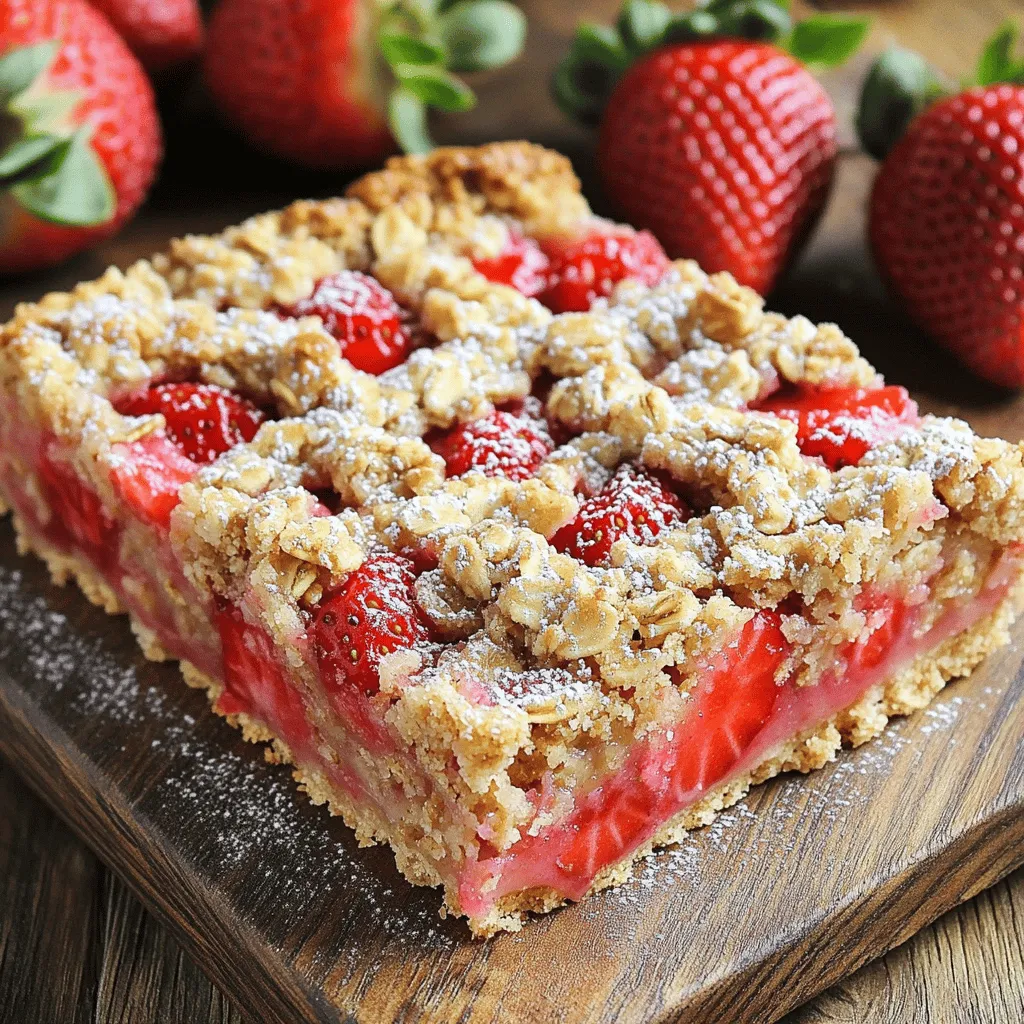
Healthy Strawberry Oatmeal Bars for Wholesome Snacking
Looking for a tasty and healthy snack? These Healthy Strawberry Oatmeal Bars are the perfect choice! Packed with wholesome ingredients like oats, strawberries, and chia
To make these gluten free peanut butter banana muffins, gather these items: - 2 ripe bananas, mashed - 1/2 cup creamy peanut butter - 1/3 cup honey or maple syrup - 2 large eggs - 1 teaspoon vanilla extract - 1 cup gluten-free all-purpose flour - 1 teaspoon baking powder - 1/2 teaspoon baking soda - 1/4 teaspoon salt - 1/2 teaspoon cinnamon (optional) - 1/4 cup chocolate chips or chopped nuts (optional) You can easily swap some ingredients for your needs: - Use almond butter or sunflower seed butter for peanut butter. - Maple syrup works well if you want a vegan option. - For eggs, try flax eggs (1 tablespoon flaxseed meal + 2.5 tablespoons water). - Replace gluten-free flour with almond flour or oat flour if preferred. - You can omit chocolate chips for a lower-sugar option. These muffins are not only tasty but also healthy! Here’s a quick look at their nutrition: - Each muffin has about 150 calories. - They provide healthy fats from peanut butter. - Bananas add potassium and natural sweetness. - Gluten-free flour keeps them light and fluffy. For the full recipe and more details, check out the [Full Recipe]. 1. Start by preheating your oven to 350°F (175°C). This gets the oven hot and ready. 2. Line a muffin tin with paper liners or grease it with non-stick spray. This makes for easy muffin removal. 3. In a large bowl, mash the ripe bananas with a fork. Aim for a smooth texture. 4. Add the creamy peanut butter to the mashed bananas. Mix well until smooth and combined. 5. Pour in the honey or maple syrup. Then, crack in the two large eggs. Don't forget the vanilla extract! Mix everything thoroughly. 6. In another bowl, whisk together the gluten-free all-purpose flour, baking powder, baking soda, salt, and optional cinnamon. This helps to evenly distribute the dry ingredients. 7. Slowly add the dry mix to the wet mix. Stir gently and stop as soon as it's combined. Overmixing can make the muffins tough. 8. If you want extra flavor, fold in chocolate chips or chopped nuts at this stage. This adds a delightful crunch. 9. Divide the batter evenly among the muffin cups, filling each about halfway. This allows room for rising. 10. Bake in the preheated oven for 18-20 minutes. Keep an eye on them! They should rise and turn golden brown. 11. To check if they're done, insert a toothpick into the center of a muffin. If it comes out clean, they’re ready! 12. Let the muffins cool in the tin for 5 minutes. This helps them firm up before you transfer them. 13. Move the muffins to a wire rack to cool completely. This keeps them from getting soggy. For the full recipe, check the ingredients and instructions above! Enjoy making these easy gluten-free peanut butter banana muffins! To make the best gluten free peanut butter banana muffins, start with very ripe bananas. The riper the bananas, the sweeter and moister your muffins will be. Use creamy peanut butter for a smooth batter. Mixing the wet and dry ingredients gently keeps the muffins light and fluffy. Overmixing makes them dense. Also, do not skip the baking powder and baking soda; they help the muffins rise well. One common mistake is using cold ingredients. Always let your eggs and peanut butter reach room temperature. This helps them mix better. Another mistake is not measuring the gluten-free flour correctly. Use a spoon to fill your measuring cup and level it off. Don’t pack the flour down. Lastly, resist the urge to open the oven too soon. This can cause your muffins to sink. These muffins taste great warm, right out of the oven. For a fun twist, serve them with a drizzle of honey or maple syrup. You can also add a sprinkle of cinnamon on top for extra flavor. Pair them with a glass of milk or a cup of tea to balance the sweetness. For a healthy snack, enjoy them with a side of fresh fruit. For the full recipe, check out the details above! {{image_2}} You can change the flavor of your muffins easily. Try adding spices like nutmeg or ginger for warmth. You can also mix in fruits like blueberries or diced apples. These fruits add sweetness and moisture. If you want a twist, add a splash of coconut extract for a tropical vibe. Each flavor change makes the muffins unique. If you need a vegan option, swap the eggs. Use 1/4 cup of unsweetened applesauce for each egg. This keeps the muffins moist and fluffy. Instead of honey, use maple syrup or agave nectar. Both options work well and keep the muffins sweet. You can enjoy these muffins without eggs or honey. Want to add some crunch? Toss in 1/4 cup of chopped nuts like walnuts or pecans. Seeds like sunflower or pumpkin seeds also add great texture. For a chocolatey touch, mix in 1/4 cup of chocolate chips. You can combine any of these extras to create your perfect muffin. Each addition gives you a new taste experience. For the full recipe, check out the Gluten Free Peanut Butter Banana Muffins recipe! You can keep your gluten-free peanut butter banana muffins at room temperature. Place them in an airtight container. They will stay fresh for about 2 to 3 days. Make sure to keep them in a cool, dry place. This way, you can enjoy a quick snack or breakfast any time! If you want to save your muffins for later, freezing is a great option. First, let the muffins cool completely. Then, wrap each muffin in plastic wrap. After that, put them in a freezer-safe bag or container. When stored this way, they last for up to 3 months. When you're ready to eat them, simply thaw at room temperature. To reheat your muffins, take them out of the container. You can warm them in the microwave for about 15-20 seconds. For a crispy outside, try putting them in the toaster oven for a few minutes. Enjoy the warm, fresh taste like it just came out of the oven! For the full recipe, check out the Gluten Free Peanut Butter Banana Muffins section. Yes, these muffins are perfect for a gluten-free diet. I use gluten-free all-purpose flour in the recipe. This flour mix helps create a light and fluffy texture without any gluten. You can enjoy these muffins without worrying about gluten. Yes, you can replace peanut butter with another nut butter. Almond butter or cashew butter works well. Just keep in mind that the flavor may change a bit. If you have nut allergies, sunflower seed butter is a great choice too. These muffins can last about 3 days at room temperature. Store them in an airtight container to keep them fresh. If you want to keep them longer, you can freeze them. They will stay good in the freezer for up to 3 months. When ready to eat, just thaw and enjoy! You can find the full recipe above. We covered key ingredients, substitutions, and nutritional facts for your muffins. I shared step-by-step instructions to help you bake perfectly. Use my tips to achieve the best texture and avoid common mistakes. Explore fun flavor variations and dietary modifications. Lastly, learn how to store them for freshness and reheat for taste. Muffins are easy to make and fun to share. Enjoy your baking journey!
Gluten Free Peanut Butter Banana Muffins Simple Recipe
Looking for a tasty treat that’s both gluten-free and easy to make? You’ve come to the right place! These Gluten Free Peanut Butter Banana Muffins
To make the best hot fudge brownie bread, gather these simple ingredients. Each one plays a key role in creating that rich, fudgy flavor we all love. - 1 cup all-purpose flour - 1/2 cup unsweetened cocoa powder - 1 teaspoon baking powder - 1/2 teaspoon salt - 1/2 cup unsalted butter, melted - 1 cup granulated sugar - 2 large eggs - 1 teaspoon vanilla extract - 1/4 cup hot fudge sauce (plus extra for drizzling) - 1/2 cup chocolate chips - 1/4 cup chopped walnuts (optional) Each ingredient brings something special to the bread. For example, the cocoa powder adds a deep chocolate taste. The butter helps keep the bread moist. The chocolate chips give bursts of chocolate in every bite. If you want a little crunch, add the walnuts. They add texture and flavor. This recipe is flexible. You can swap out some ingredients if needed. Just make sure to keep the core items like flour and sugar. For the full recipe, you can check the detailed instructions. Get ready to enjoy a treat that is sure to impress! 1. Preheat oven and prepare the loaf pan Start by setting your oven to 350°F (175°C). Grease a 9x5-inch loaf pan with butter or non-stick spray. This will help the bread come out easily. 2. Mix dry ingredients in a bowl In a medium bowl, whisk together the following: - 1 cup all-purpose flour - 1/2 cup unsweetened cocoa powder - 1 teaspoon baking powder - 1/2 teaspoon salt This mix gives your bread a rich chocolate flavor and structure. 3. Mix wet ingredients in another bowl In a large bowl, combine these ingredients: - 1/2 cup unsalted butter, melted - 1 cup granulated sugar Stir them together until smooth. Then add: - 2 large eggs - 1 teaspoon vanilla extract Beat this mixture until it is light and fluffy. 1. Fold wet ingredients into dry ingredients Gradually add the dry mix to the wet mix. Use a spatula to fold it together gently. Be careful not to overmix; you want to keep it fudgy. 2. Add in hot fudge sauce and chocolate chips Now, stir in: - 1/4 cup hot fudge sauce - 1/2 cup chocolate chips If you love nuts, you can add 1/4 cup chopped walnuts too! Mix gently until just combined. 1. Pour batter into the prepared pan Pour your rich batter into the greased loaf pan. Use a spatula to smooth the top. 2. Baking time and tips for checking doneness Place the pan in the oven and bake for 35-40 minutes. To check if it's done, insert a toothpick into the center. It should come out with a few moist crumbs. This shows your hot fudge brownie bread is ready! Now, you can find the Full Recipe to enjoy every step of making this sweet treat! To make the best hot fudge brownie bread, avoid overmixing. Overmixing can make the bread tough. Mix just until the flour disappears. This keeps your bread soft and fudgy. Also, use high-quality chocolate. Good chocolate adds depth to flavor. Choose chocolate with at least 60% cocoa for rich taste. You will notice the difference when you take a bite. Pair your hot fudge brownie bread with ice cream. Vanilla ice cream works best. The cold cream balances the warm bread. You can also top it with whipped cream. A drizzle of warm hot fudge sauce adds even more flavor. This extra touch makes your treat feel special. What if your bread is dry? You can fix this by adding more fudge. A few tablespoons can help. If it’s undercooked, bake it a little longer. Keep checking with a toothpick. If it's too sweet, try reducing the sugar next time. You can also add a pinch of salt. This will balance out the sweetness. For the best results, follow the Full Recipe for guidance. {{image_2}} You can easily change ingredients in this recipe to suit your needs. For a gluten-free option, use almond or coconut flour instead of all-purpose flour. Both work well and keep the bread tasty. You can also find gluten-free baking blends that combine various flours, which can be an easy swap. For dairy-free choices, use coconut oil or a dairy-free butter in place of regular butter. Instead of hot fudge sauce, look for dairy-free versions made from coconut or almond milk. These swaps keep the rich taste while making it suitable for more diets. To make the bread even more exciting, you can add flavors. A dash of cinnamon gives a warm kick to your treat. If you enjoy nutty flavors, a teaspoon of almond extract can enhance the sweetness. Adding berries, like raspberries or blueberries, can bring a fresh twist. Chopping up nuts, like pecans or hazelnuts, adds crunch and depth to the flavor. These extras let you create a unique version of hot fudge brownie bread. You don’t have to stick to one shape. Making mini loaves or cupcakes is fun and perfect for sharing. They bake faster and look cute on a plate. If you want to take it up a notch, transform the bread into a brownie sundae. Slice the loaf and warm it slightly. Top each slice with a scoop of vanilla ice cream and a drizzle of hot fudge sauce. This makes for a delightful dessert that impresses everyone. For the [Full Recipe], check the earlier section. Enjoy exploring these variations! To keep your hot fudge brownie bread fresh, use an airtight container. This prevents air from making it dry. You can also wrap it tightly in plastic wrap. Storing it at room temperature works well for short periods. For longer storage, the fridge is best. To keep the bread moist, always seal it well. Adding a slice of bread to the container can help maintain its softness. You can freeze the brownie bread to enjoy later. First, let it cool completely. Then, wrap it tightly in plastic wrap. After that, place it in a freezer bag. This helps prevent freezer burn. The bread can stay fresh in the freezer for up to three months. When you’re ready to eat it, thaw it overnight in the fridge. This keeps the texture nice. When it’s time to reheat, do it gently. The best method is to use an oven. Preheat it to 350°F (175°C) and warm the bread for about 10 minutes. This keeps it soft and gooey. You can also use a microwave, but be careful. Heat it in short bursts of 10 seconds to avoid drying it out. Serve it warm for the best taste. Drizzle with extra hot fudge for a treat! How can I make hot fudge brownie bread vegan? You can swap eggs with flaxseed meal. Mix one tablespoon of flaxseed meal with three tablespoons of water. Let it sit for five minutes to thicken. Use vegan butter in place of unsalted butter. Finally, choose a dairy-free hot fudge sauce. Can I use cocoa powder instead of melted chocolate? Yes, you can. However, melted chocolate gives a richer taste. If using cocoa powder, add a bit more fat to balance the recipe. You can mix cocoa powder with a little vegetable oil or melted vegan butter. What can I do if my bread is too crumbly? If your bread is crumbly, it might need more moisture. You can add a splash of milk or a little more hot fudge sauce to the batter. Make sure to mix just until combined to keep it tender. - Caloric content per slice: Each slice contains about 250 calories. - Overview of key nutrients: This bread offers healthy fats from butter and walnuts, a good amount of carbs from sugar and flour, and some protein from eggs. - Online retailers or local bakeries: You can find hot fudge brownie bread at local bakeries or online stores like Amazon. Many gourmet shops also sell it. - Reviews of popular brands and options available: Look for brands like "Bread & Butter" or "Sweet Treats Bakery." Both get great reviews for their rich flavor and moist texture. Try to buy from shops that prioritize quality ingredients for the best experience. You learned how to make hot fudge brownie bread with simple steps and tips. Start with quality ingredients for the best taste. Baking is fun, and you can add your twist by trying different flavors or serving styles. Store any leftovers properly to keep them fresh. Remember, cooking is all about creativity. Enjoy each bite and share your treats with friends! Your hot fudge brownie bread will impress everyone who tries it. Happy baking!
THE BEST Hot Fudge Brownie Bread Irresistible Treat
Are you ready to indulge in a treat that blends the best of brownies and bread? This Hot Fudge Brownie Bread is rich, fudgy, and
- 1 cup (2 sticks) unsalted butter, softened - 3/4 cup brown sugar, packed - 1/4 cup granulated sugar - 1 large egg - 1 teaspoon vanilla extract - 2 1/4 cups all-purpose flour - 1 teaspoon baking soda - 1/2 teaspoon salt - 1 cup semi-sweet chocolate chips - 1/2 cup chopped walnuts or pecans (optional) These ingredients are key to making the best soft chocolate chip cookies. Each one plays a role in taste and texture. If you run out of an ingredient, don’t worry! Here are some easy swaps: - Butter: Use coconut oil or margarine instead. - Sugars: Try using all brown sugar for a richer flavor. - Egg: Replace it with a flax egg (1 tablespoon flaxseed meal + 2.5 tablespoons water). - Flour: Use whole wheat flour for a heartier cookie. - Chocolate Chips: Substitute with white chocolate or dark chocolate. These swaps keep your cookies tasty and soft. What kind of butter should I use? Use unsalted butter for the best flavor. It allows you to control the salt content. Can I use different types of chocolate chips? Yes! You can use milk chocolate, dark chocolate, or even butterscotch chips. Do I have to use nuts? No, nuts are optional. Cookies taste great without them. Why is baking soda used? Baking soda helps cookies rise and keeps them soft. Is there a way to make this recipe gluten-free? Yes, use a gluten-free all-purpose flour blend for a gluten-free version. For the full recipe, check the Ultimate Soft Chocolate Chip Cookies . Start by preheating your oven to 350°F (175°C). This ensures even baking. While your oven heats, line two baking sheets with parchment paper. This keeps the cookies from sticking and makes clean-up easy. In a large mixing bowl, add 1 cup of softened unsalted butter, 3/4 cup of brown sugar, and 1/4 cup of granulated sugar. Use a mixer to cream them together. Mix until it becomes light and fluffy, which takes about 2-3 minutes. Then, add in 1 large egg and 1 teaspoon of vanilla extract. Beat everything together until fully combined. In a separate bowl, mix 2 1/4 cups of all-purpose flour, 1 teaspoon of baking soda, and 1/2 teaspoon of salt. Whisk these dry ingredients together. Gradually add this mix to your wet ingredients. Stir until just combined. Be careful not to overmix. Finally, gently fold in 1 cup of semi-sweet chocolate chips and optional nuts if you’re using them. Using a cookie scoop or spoon, drop rounded tablespoons of dough onto the baking sheets. Make sure to space them about 2 inches apart. Bake in your preheated oven for 10-12 minutes. Look for lightly golden edges. The centers should still look soft. Once done, take them out and let them cool on the baking sheets for 5 minutes. Then, move them to a wire rack to cool completely. Enjoy your delicious cookies! For the full recipe, check the link above. To make soft and chewy cookies, the butter must be at room temperature. Cold butter will not mix well, making cookies hard. Soft butter blends nicely with sugars. This helps create a light and fluffy dough. Chilling the dough is also key. After mixing, let the dough sit in the fridge for at least 30 minutes. This step firms up the dough and helps the cookies keep their shape. It also deepens the flavors as they rest. Baking time is crucial. Aim for a temperature of 350°F (175°C). Bake for 10-12 minutes. You want the edges golden, but the centers should look soft. Remember, cookies keep cooking after you take them out. If your oven runs hot, check the cookies at 9 minutes. For a softer bite, slightly underbake them. Just a minute or two can make a big difference in texture. One common mistake is overmixing the dough. Mixing too much develops gluten, making cookies tough. Mix just until the dry ingredients are combined. Another mistake is skipping the chilling step. This can lead to flat cookies. Always let the dough chill. Lastly, don’t forget to space the cookies on the sheet. They need room to spread and bake evenly. For more on perfecting these cookies, check out the Full Recipe. {{image_2}} You can add fun flavors to your cookies. Try adding mint extract for a fresh twist. Just use 1/2 teaspoon instead of vanilla. For coconut lovers, mix in 1/2 cup of shredded coconut. This gives a chewy texture and a tropical taste. You can also add a touch of coffee for a deeper flavor. Just mix in 1 teaspoon of instant coffee granules into the wet mix. These small changes can make your cookies shine. Want to make these cookies gluten-free? Swap all-purpose flour for a gluten-free blend. Look for one that has xanthan gum. For a vegan version, replace the egg with 1/4 cup of applesauce. Use vegan butter in place of regular butter. This keeps the cookies soft and tasty. Check the chocolate chips too. Many brands offer dairy-free options, so look for those to keep it vegan. Mixing in different types of chocolate can create unique flavors. Use dark chocolate chips or white chocolate chunks. You can also try adding dried fruit, like cranberries or cherries. These add sweetness and a chewiness that pairs well with chocolate. For a nutty crunch, add in walnuts or pecans. You can use 1/2 cup for a great texture. Get creative and find your favorite mix! For the full recipe, check out the Ultimate Soft Chocolate Chip Cookies. Enjoy baking! To keep your cookies fresh, store them in an airtight container. Layer parchment paper between the cookies to prevent sticking. Place the container in a cool, dry place. If you want to keep them soft, add a slice of bread to the container. The cookies will absorb moisture from the bread, staying chewy and delicious. Freezing cookies is simple and a great option for later. First, let the cookies cool completely. Then, place them in a single layer on a baking sheet. Freeze for about an hour until firm. After that, transfer them to a freezer-safe bag or container. Make sure to label the bag with the date. Frozen cookies can last up to three months. When you're ready to enjoy them, just thaw at room temperature. To reheat your cookies, preheat the oven to 350°F (175°C). Place the cookies on a baking sheet. Heat them for about 5-7 minutes. This will bring back their soft texture. You can also microwave them for about 10-15 seconds. Just be careful not to overheat, or they will become hard. Enjoy your warm, soft cookies any time! Soft cookies come from a mix of butter, sugar, and flour. Using more brown sugar helps keep them soft. Brown sugar has moisture, which adds chewiness. Also, underbaking cookies slightly keeps them soft. You want the edges to be set, but the center should look a bit shiny. These cookies stay fresh for about a week. Store them in an airtight container at room temperature. If you want them to last longer, you can freeze them. They can stay in the freezer for up to three months. Just let them thaw at room temperature when you're ready to eat. Yes, you can use white sugar, but it may change the texture. White sugar makes cookies crisp instead of soft. If you want a mix, try half brown and half white sugar. This way, you get a nice balance of soft and chewy. To avoid overbaking, watch your cookies closely. When the edges turn golden, take them out. The centers should look soft. Let them sit on the pan for a few minutes. They will continue to cook as they cool. Set a timer to help you remember. For the full recipe, check out the Ultimate Soft Chocolate Chip Cookies . This recipe has all the steps to make perfect cookies every time! In this blog post, we covered everything you need for the perfect cookies. We detailed the key ingredients and substitutions. You learned step-by-step instructions on mixing and baking. We shared tips for achieving a soft, chewy texture. You also discovered fun variations and storage methods. Baking cookies is simple when you follow these guidelines. Enjoy experimenting with flavors and techniques. Happy baking!
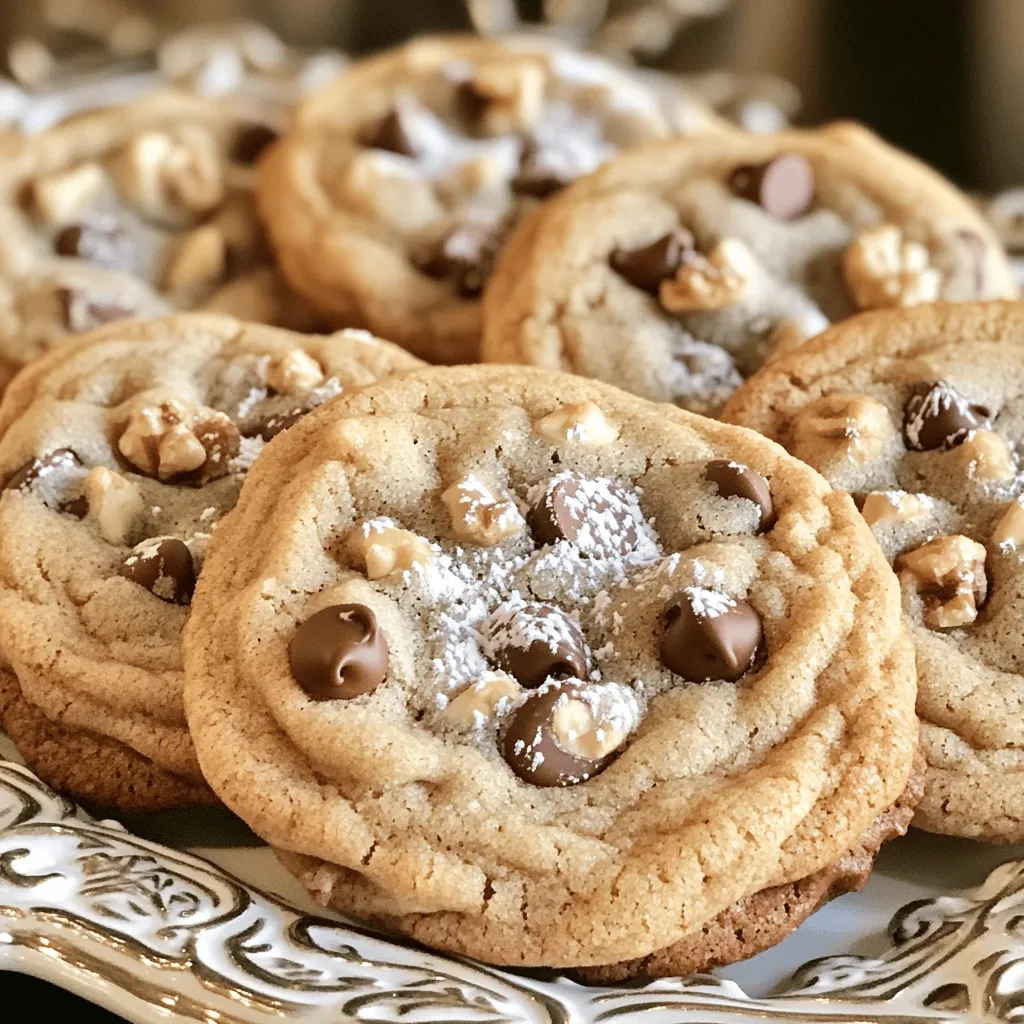
The Best Soft Chocolate Chip Cookies Simple and Tasty
Who doesn’t love a soft chocolate chip cookie? Imagine biting into a warm, chewy delight with melty chocolate. In this post, I’ll share my simple
To make delicious Strawberry Crunch Cheesecake Cones, gather these fresh ingredients: - 1 cup fresh strawberries, diced - 1 tablespoon sugar - 1 teaspoon lemon juice - 1 cup cream cheese, softened - 1/2 cup powdered sugar - 1 teaspoon vanilla extract - 1 cup heavy whipping cream - 1/2 cup crushed graham crackers - 1/4 cup toasted coconut flakes - 4 sugar cones Each ingredient plays a key role. The fresh strawberries give a sweet and tangy flavor. The sugar and lemon juice help bring out the strawberry taste. Cream cheese and powdered sugar mix create the smooth filling. Heavy whipping cream adds fluffiness, making it light. The crushed graham crackers and toasted coconut flakes add a crunchy texture on top, adding to the fun. For the full recipe, check out the steps that follow. First, grab a small bowl. Add your diced strawberries, sugar, and lemon juice. This mix brings out the sweet flavor of the berries. Stir it gently to combine. Let the mixture sit for about 10 minutes. This process is called maceration. The strawberries will become juicy and sweet. Take a separate mixing bowl. Beat the softened cream cheese, powdered sugar, and vanilla extract together. Mix until the blend is smooth and creamy. In another bowl, whip the heavy cream. Keep mixing until stiff peaks form. This step adds lightness to the filling. Now, gently fold the whipped cream into the cream cheese mixture. Do this slowly, ensuring they combine well. Now it’s time to bring it all together. Once your strawberries have released their juices, fold them into the cheesecake filling. Make sure to mix them evenly. Next, take the sugar cones. Fill each cone with the cheesecake mixture. You can use a spoon or a piping bag for this task. Finish by sprinkling crushed graham crackers and toasted coconut flakes on top of each cone. These toppings add flavor and a nice crunch. Serve them right away for the best taste. You can also chill them for up to 30 minutes before serving. For the full recipe, check out the details above. To make the best cheesecake filling, you want a creamy and smooth texture. Start by softening the cream cheese. This helps it mix well with the sugar. If it’s too thick, you may end up with lumps. Beat the cream cheese until it’s fluffy. When adding strawberries, mix them in gently. You want to keep the chunks intact. This way, each bite has bits of strawberry. Ensure that the filling has an even strawberry distribution. This balance makes each cone delightful. For a fun and pretty display, stand the cones in a tall glass. This keeps them upright. You can also use a cone holder if you have one. To make it even better, add a fresh strawberry on top of each cone. It makes them pop! Pair these cones with a cool drink, like lemonade. The tartness balances the sweet cheesecake. You can also serve with whipped cream on the side. It adds extra creaminess and flavor. To save time, prepare the filling the day before. Store it in the fridge overnight. This allows the flavors to mix well. You can also chop the strawberries ahead of time. Just keep them in the fridge until you need them. Using store-bought ingredients can cut down on prep time. Look for pre-made sugar cones or whipped cream. These options can make your life easier without losing taste. For a full guide on making these delicious treats, check the Full Recipe. {{image_2}} You can change the fruits in your Strawberry Crunch Cheesecake Cones. Try using blueberries, raspberries, or peaches. Each fruit brings a different taste to the cones. You can also use a mix of fruits for fun flavors. Toppings are another way to make your cones unique. Instead of graham crackers, try crushed cookies or nuts. For a sweet twist, drizzle chocolate syrup or caramel over the top. Add whipped cream for extra fluffiness. If you need gluten-free options, use gluten-free cones. You can find them at most stores. For the filling, use gluten-free graham crackers or nuts to make a base. For dairy-free and vegan adaptations, swap cream cheese with a plant-based cream cheese. Coconut cream works great too. Use a dairy-free whipped topping in place of heavy cream. This way, everyone can enjoy these tasty cones! You can find the Full Recipe to guide your changes. To keep your filled cones fresh, store them in an airtight container. Lay a piece of wax paper between the cones to stop sticking. This helps keep their crunch. Make sure to eat them within 24 hours for the best taste. If you want to chill them before serving, place them in the fridge for about 30 minutes. This enhances the flavors and makes each bite cool and refreshing. You can freeze the cheesecake filling for later use. Just scoop it into a safe freezer bag. Squeeze out the air and seal it tight. It will last up to two months in the freezer. When you’re ready, thaw it in the fridge overnight for easy use. For serving, fill the cones right before eating. This keeps the cones crisp. If they sit too long, they may get soggy. Enjoy your Strawberry Crunch Cheesecake Cones at their best! For the full recipe, check out the earlier section. Yes, you can make the filling ahead of time. I recommend preparing the cheesecake mix up to one day in advance. Just store it in the fridge in an airtight container. Fill the cones right before serving to keep them crisp. If you wait too long, the cones may get soggy. You can find pre-made Strawberry Crunch Cheesecake Cones at some grocery stores. Check the frozen dessert aisle or the bakery section. Stores that focus on sweets may also have them. If you can't find them, making them at home is easy and fun. Just follow the Full Recipe for a tasty treat. To keep the cones crunchy, fill them just before serving. You can also coat the inside of the cones with a thin layer of chocolate. This acts as a barrier and helps keep moisture out. Store filled cones upright in the fridge. Avoid stacking them, as this can lead to sogginess. You can use leftover ingredients to make other fun desserts. Use extra cream cheese to whip up a dip for fruits. You can also blend the leftover strawberries with yogurt for a parfait. Another idea is to create mini cheesecake cups using the same filling and toppings. Get creative and enjoy! You now know how to make delicious Strawberry Crunch Cheesecake Cones. We covered essential ingredients, step-by-step instructions, and helpful tips. Remember to choose fresh strawberries and whip your cream just right. Consider flavor variations and dietary needs to customize your treat. Store any leftovers properly, so nothing goes to waste. Enjoy making this fun dessert! It's easy, tasty, and perfect for any occasion. Now, get creative and enjoy sharing your sweet creations with others!
Strawberry Crunch Cheesecake Cones Delightful Treat
Are you looking for a fun and tasty dessert? Strawberry Crunch Cheesecake Cones are the perfect sweet treat! With fresh strawberries, creamy cheesecake filling, and
To make Creamy Mini Lemon Cheesecakes, you need specific ingredients. Here’s what you will use: - 1 cup graham cracker crumbs - 1/4 cup unsalted butter, melted - 2 tablespoons sugar - 16 oz cream cheese, softened - 1/2 cup sugar - 1/4 cup sour cream - 2 large eggs - 1 teaspoon vanilla extract - Zest of 1 lemon - 1/4 cup freshly squeezed lemon juice - Optional: Fresh berries and mint for garnish These ingredients create a rich and tangy flavor that everyone loves. If you need substitutions, here are some ideas: - Graham cracker crumbs: Use crushed digestive biscuits or vanilla wafers. - Unsalted butter: Coconut oil works well if you want a dairy-free option. - Sugar: You can use honey or maple syrup for a natural sweet flavor. - Sour cream: Greek yogurt gives a similar taste and texture. - Cream cheese: Dairy-free cream cheese is a great option for a vegan version. These swaps can still make tasty cheesecakes. You’ll need some basic tools to make this recipe easy: - Muffin tin - Mini cupcake liners - Mixing bowls - Electric mixer - Measuring cups and spoons - Rubber spatula - Cooling rack Having these tools ready will help you create your delicious mini cheesecakes. For the complete recipe, check the Full Recipe section! First, preheat your oven to 325°F (160°C). Grab a muffin tin and line it with mini cupcake liners. In a medium bowl, mix 1 cup of graham cracker crumbs, 1/4 cup melted unsalted butter, and 2 tablespoons of sugar. Stir until it looks like wet sand. Now, take this mixture and press it firmly into the bottom of each muffin liner. This step is key for a good crust. Next, in a large bowl, beat 16 oz of softened cream cheese with an electric mixer. Mix until it's smooth and creamy. Then, add 1/2 cup sugar, 1/4 cup sour cream, 1 teaspoon vanilla extract, the zest of 1 lemon, and 1/4 cup freshly squeezed lemon juice. Combine these well. Now, add in 2 large eggs, one at a time. Mix gently after each one. Be careful not to overmix. This filling will be rich and creamy. Now, pour the cheesecake filling over your crusts. Fill each cup about 3/4 full. Place the muffin tin in the preheated oven. Bake for 18 to 20 minutes. You want the edges to set while the center jiggles slightly. After baking, turn off the oven and crack the door. Let the cheesecakes cool slowly for about 30 minutes. Remove them and let them cool to room temperature. Finally, refrigerate for at least 3 hours before serving. For the full recipe, check out the details above. To get a smooth and creamy texture, start with softened cream cheese. Cold cream cheese makes lumps. Use a hand mixer for the best results. Beat the cream cheese until it's fluffy. This takes about two minutes. Add other ingredients one at a time. Mix gently after adding each one. Overmixing can cause cracks in your cheesecake. Let the cheesecake filling rest before pouring it into your crust. This helps the bubbles escape. One common mistake is skipping the cooling step. Allow cheesecakes to cool slowly in the oven. This helps them set without cracking. Don’t open the oven door too early. Sudden temperature changes can ruin your mini cheesecakes. Always use fresh lemon juice and zest for the best flavor. Old ingredients can dull your taste. Lastly, avoid overbaking. Cheesecakes should jiggle slightly in the middle when done. Presentation matters! Garnish each cheesecake with fresh berries and mint. This adds color and freshness. Use a small dollop of whipped cream for extra flair. Arrange your cheesecakes on a nice platter. This makes them look more inviting. Serve them chilled for the best taste. For a fun touch, drizzle some lemon sauce over the top. This makes your mini cheesecakes pop. Check out the Full Recipe for more tips on serving! {{image_2}} You can easily change the flavor of your mini cheesecakes. Try using different fruits or extracts. For a berry twist, use mashed strawberries or blueberries instead of lemon. Chocolate lovers can add melted chocolate for a rich taste. You can even try a pumpkin spice version for fall. The options are endless! If you want a vegan version, swap the cream cheese for cashew cream or a store-bought vegan cream cheese. Use coconut milk or almond milk in place of sour cream. For eggs, you can use flaxseed meal or applesauce. This way, everyone can enjoy these tasty treats! To make your mini cheesecakes more fun, try serving them in unique ways. Use clear cups for a beautiful layer effect. Top them with fresh berries and mint for a colorful look. You can also serve them with a drizzle of fruit sauce or chocolate. Pair with a refreshing drink, like iced tea or lemonade. These ideas will surely impress your guests! To keep your creamy mini lemon cheesecakes fresh, store them in the fridge. Use an airtight container to avoid drying out. You can place parchment paper between layers to prevent sticking. They will stay good for about five days in the fridge. If you want to save some for later, freezing works well. Wrap each mini cheesecake in plastic wrap. Then, place them in a freezer-safe bag or container. They can last up to three months in the freezer. When ready to enjoy, move them to the fridge to thaw overnight. For the best taste, serve cheesecakes cold. If you want to warm them slightly, do so gently. Place them in a preheated oven at 200°F (93°C) for about 10 minutes. Keep an eye on them to avoid overheating. Add fresh berries or mint just before serving for a nice touch. For the full recipe, refer to the original instructions. To keep your cheesecakes smooth, bake them gently. Start by preheating your oven to the right temperature. Place a pan of water on the bottom rack. This adds moisture and helps prevent cracks. Also, avoid overmixing your batter. Mix just until the ingredients are combined. Lastly, let the cheesecakes cool slowly in the oven. Cracking often happens when they cool too fast. Yes, you can! While lemon gives a fresh taste, other fruits work well too. Try lime for a zesty twist or orange for a sweeter flavor. Just remember to adjust the amount of juice to keep the balance. The zest will add extra flavor, so use the zest from your chosen fruit as well. If you lack mini muffin liners, here are some easy fixes. You can grease the muffin tin well with butter or cooking spray. This will help the cheesecakes release easily. Another option is to use parchment paper. Cut small squares, press them into the tin, and fill them as usual. Both methods work great for keeping your mini cheesecakes intact. For the full recipe, check out the details above! These creamy mini lemon cheesecakes are fun and easy to make. We covered all the key ingredients, tools, and tips. Avoid common mistakes for the best texture. Explore flavors with fun variations and great serving ideas. Store extras well to enjoy later. Now, you can create your perfect mini cheesecakes confidently. Dive into this recipe and impress friends and family. Enjoy the tasty journey of making these treats!
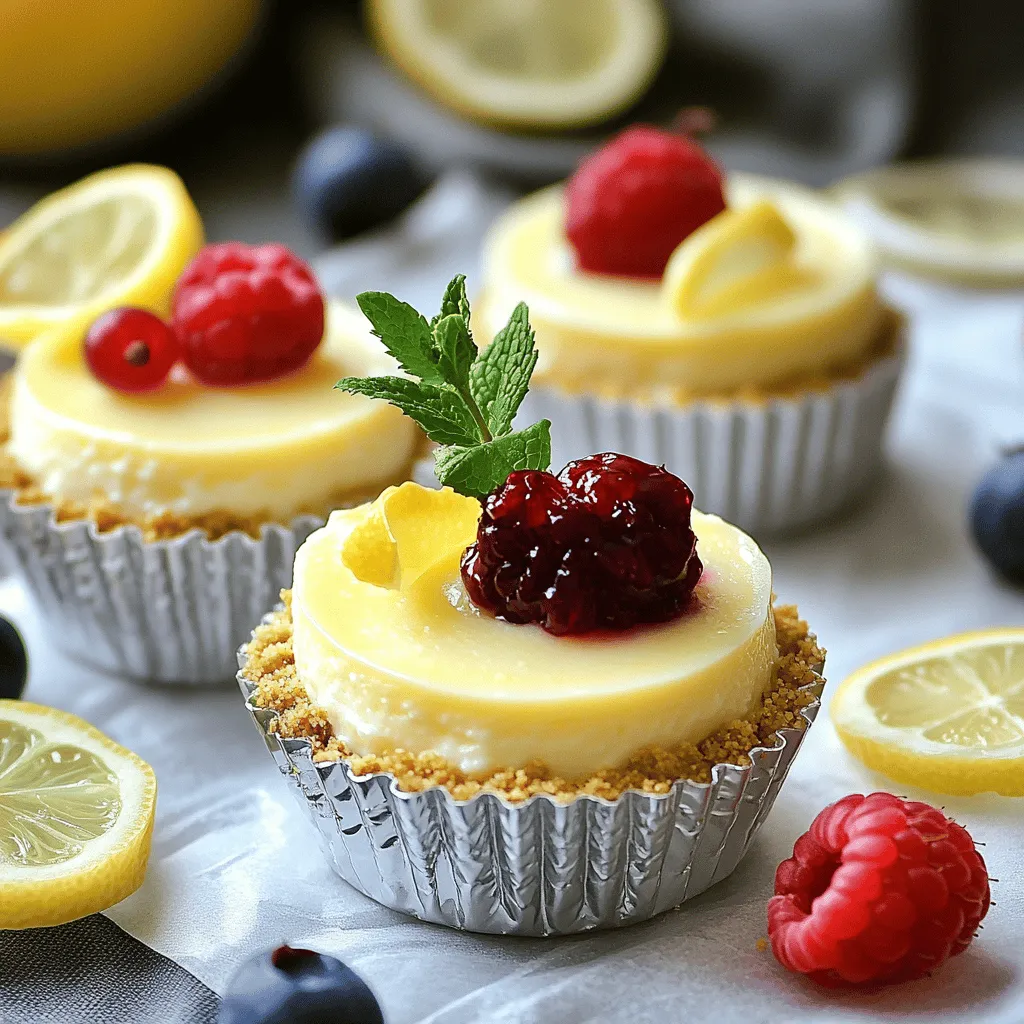
Creamy Mini Lemon Cheesecakes Easy and Tasty Treat
If you’re craving something sweet and tangy, you must try these creamy mini lemon cheesecakes! They’re easy to make and bursting with flavor. I’ll guide
- 1 cup all-purpose flour - 1/2 teaspoon baking powder - 1/4 teaspoon baking soda - 1/4 teaspoon salt - 1/2 cup unsalted butter, softened - 1/2 cup granulated sugar - 1/4 cup honey - 2 large eggs - 1 teaspoon vanilla extract - 1/2 cup cream cheese, softened - 1 large ripe peach, peeled and diced - 1/4 teaspoon cinnamon - 1/4 cup powdered sugar for frosting When selecting peaches, look for ones that are soft but not mushy. They should have a sweet aroma. If you want to make sure they ripen well, store them at room temperature for a few days. You can also use frozen peaches if fresh ones are not available. Just make sure to thaw and drain them well before using. For those with dietary needs, you can substitute the all-purpose flour with gluten-free flour. If you want a vegan option, replace eggs with flax eggs and use plant-based cream cheese. Honey can be swapped with maple syrup for a vegan-friendly treat, too. Don’t forget to check the Full Recipe for detailed steps to bake these delightful cupcakes! 1. Preheat oven and prepare the muffin pan: Start by setting your oven to 350°F (175°C). Line a 12-cup muffin pan with cupcake liners. This makes for easy removal later. 2. Mixing wet and dry ingredients: In a medium bowl, whisk together the flour, baking powder, baking soda, and salt. Set this bowl aside. In a large bowl, cream together the softened butter, granulated sugar, and honey. Mix until the mixture is light and fluffy. Then, add the eggs one at a time. Don’t forget to add the vanilla extract and cream cheese, mixing until it is smooth. 3. Incorporating peaches and cinnamon: Gradually add the dry ingredients to the wet mixture. Mix until just combined. Now, gently fold in the diced peach and cinnamon. This step adds a lovely flavor and texture to your cupcakes. 1. Proper baking time and temperature: Divide the batter evenly among your cupcake liners. Fill each one about two-thirds full. Place the muffin pan in the preheated oven and bake for 18-20 minutes. 2. Toothpick test for doneness: To check if your cupcakes are done, insert a toothpick into the center. If it comes out clean, they are ready. If not, give them a few more minutes. 3. Cooling and frosting technique: After baking, let the cupcakes cool in the pan for 5 minutes. Then, transfer them to a wire rack to cool completely. For the frosting, beat the powdered sugar into the remaining cream cheese until smooth. Once the cupcakes cool, frost them generously. This step adds a creamy finish that pairs perfectly with the peaches. For the full recipe, please refer to the complete section above. Enjoy your baking adventure! To make perfect Honey Peach Cream Cheese Cupcakes, start with room-temperature ingredients. This step is key for a smooth batter. Cold butter or eggs can lead to lumps. Next, use the creaming technique. Beat the butter and sugar together until they are light and airy. This process adds air and helps the cupcakes rise well. Mix slowly when adding dry ingredients. Overmixing can make the cupcakes tough instead of soft. For a smooth frosting, ensure your cream cheese is soft. This helps it blend well with the sugar. Beat the powdered sugar into the cream cheese until it is creamy and smooth. If you want a lighter frosting, try mixing in a bit of whipped cream. This adds fluffiness without losing flavor. You can also switch up the frosting. Try a honey glaze or a peach buttercream for a fun twist. You can find the full recipe to create these delightful treats and impress your friends! {{image_2}} You can add fun twists to Honey Peach Cream Cheese Cupcakes. Try mixing in nuts or spices to make them special. For example, chopped pecans or walnuts add a nice crunch. You can also sprinkle in a bit of nutmeg or cardamom for extra warmth. If you want to explore other fruit options, berries work great too. Blueberries or raspberries can replace peaches for a berry delight. You can even mix different fruits for a fruity surprise. If you need gluten-free options, use a gluten-free flour blend. Many blends work well for cupcakes. Ensure the baking powder is gluten-free too. For vegan substitutions, swap eggs with flax eggs. Mix 1 tablespoon of ground flaxseed with 3 tablespoons of water and let it sit. Use a vegan cream cheese for the frosting. Coconut oil can replace butter for a dairy-free treat. These tweaks allow anyone to enjoy Honey Peach Cream Cheese Cupcakes. Check the Full Recipe to see how these variations fit in. To keep your Honey Peach Cream Cheese Cupcakes fresh, store them in an airtight container. You can place them at room temperature for up to two days. If you plan to keep them longer, refrigerate them. Make sure to separate frosted and unfrosted cupcakes. Frosted ones can dry out faster, so it's best to store them in the fridge. Always cover them with plastic wrap to keep moisture in. - Frosted cupcakes: Store in the fridge, covered. - Unfrosted cupcakes: Store at room temperature, in an airtight container. Freezing is a great way to enjoy these cupcakes later. First, freeze the unfrosted cupcakes. Place them on a baking sheet and put them in the freezer until firm, about an hour. Then, wrap each cupcake in plastic wrap and place them in a freezer bag. For the frosting, store it in a separate airtight container. It can also freeze well. - Thawing tips: When ready to eat, remove the cupcakes and frosting from the freezer. Let them thaw in the fridge overnight. This keeps them moist and tasty. Frost them right before serving for the best experience. Follow these steps, and your delicious Honey Peach Cream Cheese Cupcakes will stay fresh and delightful! For the full recipe, check the recipe section. How to make cupcakes moist? To make your cupcakes moist, use room temperature butter and eggs. Cream the butter and sugar well to add air. Also, avoid over-mixing the batter. This helps keep the moisture locked in. Can I use canned peaches instead of fresh? Yes, you can use canned peaches. Drain them well and chop them into small pieces. Fresh peaches have better flavor and texture, but canned peaches work in a pinch. What if I don’t have honey on hand? If you don’t have honey, you can use maple syrup or agave syrup as a substitute. These options add sweetness and a unique flavor to your cupcakes. How to adjust the recipe for more servings? To make more cupcakes, simply double or triple the ingredient amounts. This recipe makes 12, so adjust based on how many you want to serve. Tips for adapting for mini cupcakes For mini cupcakes, fill the liners only halfway. Bake them for about 12-15 minutes. Keep an eye on them to prevent over-baking. This blog post covered how to make delicious peach cupcakes. You learned about key ingredients, how to select ripe peaches, and even some substitutes. Step-by-step instructions guided you from preheating the oven to frosting your treats. I shared tips for getting the best texture and variations to try, like gluten-free and vegan options. Lastly, proper storage and freezing methods help keep your cupcakes fresh. Making peach cupcakes can be fun and easy. With these details, you can bake with confidence and impress everyone!
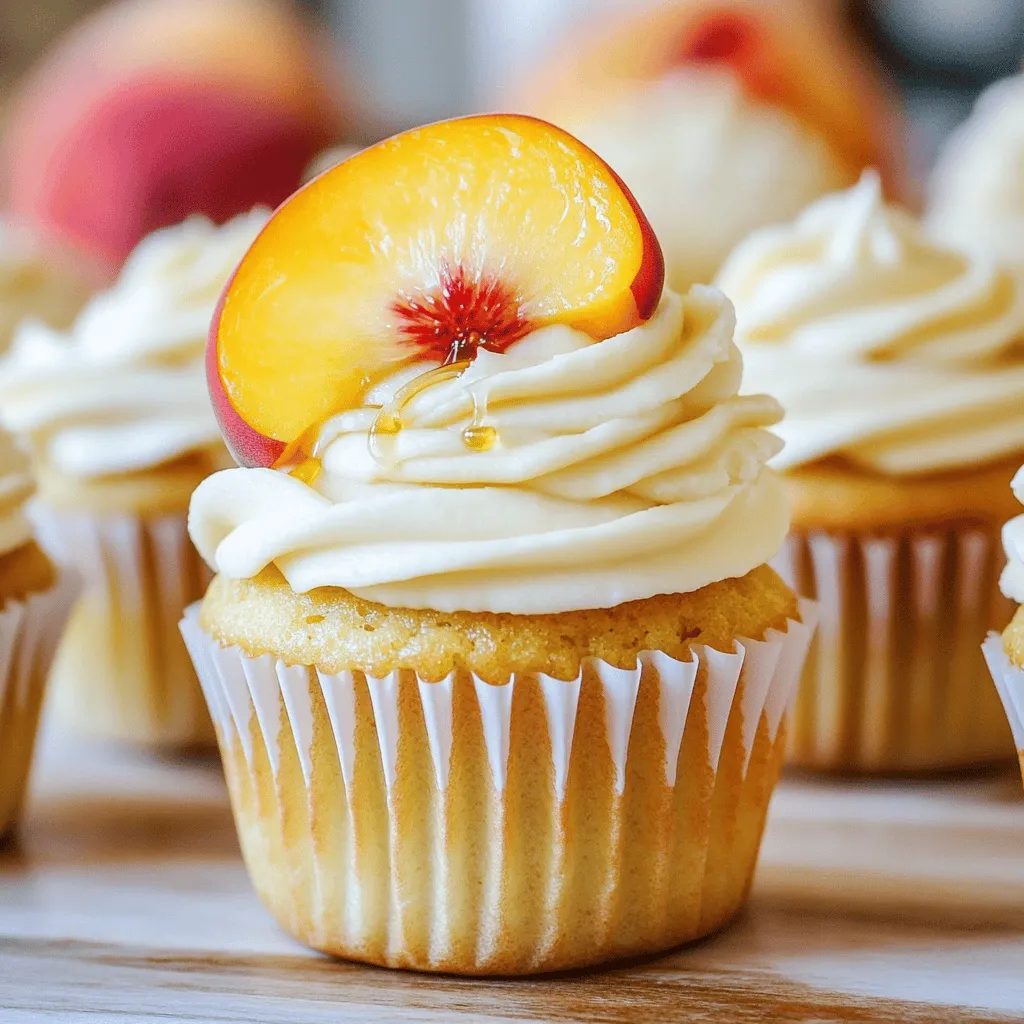
Honey Peach Cream Cheese Cupcakes Delightful Treat
Looking for a sweet treat that combines juicy peaches and creamy goodness? You’ll love my Honey Peach Cream Cheese Cupcakes! This recipe is not just
To make Biscoff cookie butter cinnamon rolls, you need a few simple ingredients. Each one plays a key role in creating sweet and fluffy rolls. Here’s the list of what you’ll need: - 4 cups all-purpose flour - 1/4 cup granulated sugar - 1 packet (2 1/4 teaspoons) active dry yeast - 1 teaspoon salt - 1 cup whole milk, warmed - 1/4 cup unsalted butter, melted - 2 large eggs - 1/2 cup Biscoff cookie butter - 1 tablespoon ground cinnamon - 1/2 cup brown sugar, packed - 1/4 cup powdered sugar (for icing) - 1 tablespoon milk (for icing) - Optional: crushed Biscoff cookies for topping These ingredients work together to create rolls that are soft, sweet, and full of flavor. Using Biscoff cookie butter gives them a unique twist that makes them special. This recipe is sure to impress your family and friends. For the full recipe, check out the instructions later in this article. - Combine 2 cups of flour, sugar, yeast, and salt in a large bowl. - Mix in warmed milk, melted butter, and eggs. Stir until combined. - Gradually add remaining flour, one cup at a time. Knead until smooth and elastic. - Roll out the dough into a rectangle, about 12 by 18 inches. - Spread Biscoff cookie butter evenly over the dough. - In a small bowl, mix brown sugar and cinnamon, then sprinkle it over the cookie butter. - Starting from one edge, roll the dough tightly into a log. Slice it into 12 even rolls. - Place the rolls in a greased baking dish and let them rise for 30 minutes. - Preheat your oven to 350°F (175°C). - Bake the rolls for 25 to 30 minutes, or until they are golden brown. Follow the full recipe for precise measurements and additional tips. - Water temperature for yeast activation: Use warm water, around 110°F. This helps the yeast wake up and grow. Too hot can kill it, while too cold won't activate it. - Proper kneading techniques: Knead the dough on a floured surface for about 5 to 7 minutes. Use the heel of your hand to push the dough, then fold it over. This builds gluten, making your rolls soft and fluffy. - Tips for dough rising: Place the dough in a warm spot. Cover it with a cloth to keep it cozy. Let it rise until it doubles in size, which usually takes about an hour. - Best time to drizzle icing: Wait until the rolls cool a bit after baking. This helps the icing stay on top instead of melting away into the rolls. - Options for enhancing flavors: You can add a splash of vanilla extract or a pinch of cinnamon to your icing. This gives it an extra kick that pairs well with the cookie butter. - How to achieve the right icing consistency: Mix the powdered sugar with milk until smooth. Aim for a thick, but pourable texture. If it’s too thick, add a bit more milk. If too thin, add more powdered sugar. With these tips, your Biscoff cookie butter cinnamon rolls will turn out perfect every time! For the complete recipe, check out the full recipe section. {{image_2}} You can make these rolls even more fun. Here are some ideas: - Adding nuts or chocolate chips: Chop up walnuts or pecans, and mix them in. For a sweet twist, sprinkle in some chocolate chips. Both add great texture and flavor. - Experimenting with flavored icing: Try mixing in vanilla or almond extract with the icing. You can also add a little cocoa powder for a chocolate icing. - Seasonal variations: For fall, add pumpkin spice to the filling. In winter, consider a hint of peppermint extract for a festive touch. These rolls shine at any meal. Here are some serving tips: - Pairing with coffee or tea: These rolls taste great with a warm cup of coffee or a nice herbal tea. The sweet and spicy flavors complement each other perfectly. - Ideal occasions for serving: Serve them at brunch, holiday gatherings, or cozy family breakfasts. They also make great gifts for friends. - Creative plating ideas: For a fancy touch, stack the rolls in a tiered stand. You can also drizzle icing over the top and add a sprinkle of crushed Biscoff cookies for decoration. By exploring these variations and serving ideas, you can enjoy Biscoff cookie butter cinnamon rolls in new and exciting ways! For the full recipe, check out the details above. To store leftover Biscoff cookie butter cinnamon rolls, let them cool first. Place them in an airtight container. This keeps the rolls fresh and soft. You can keep them at room temperature for up to two days. If you want them to last longer, store them in the fridge. Just make sure to wrap them in plastic wrap first. For long-term storage, freezing is your best bet. After the rolls cool, wrap each one in plastic wrap. Then, place them in a freezer bag or a container. They can stay frozen for up to three months. When you want to enjoy them, simply take out a roll and let it thaw in the fridge overnight. To reheat, preheat your oven to 350°F (175°C). Unwrap the rolls and place them on a baking sheet. Heat for about 10-15 minutes. This warms them up and makes them soft again. Enjoy your delightful treat! For the complete recipe, refer to the Full Recipe. To make Biscoff cookie butter at home, you need just a few simple steps. Start with crushed Biscoff cookies. Blend them in a food processor until they become a fine powder. Then, add a bit of vegetable oil and a pinch of salt. Blend again until it turns into a creamy spread. You can adjust the oil for your desired texture. This homemade version tastes just as good as the store-bought kind! Yes, you can swap out the butter! If you want a lighter option, use coconut oil. It gives a nice flavor too. For a dairy-free choice, try using margarine or vegan butter. Each option will change the taste slightly, but they all work well in the recipe. Just remember to melt it if it’s solid before mixing. Absolutely! These cinnamon rolls freeze nicely. After baking, let them cool completely. Then, wrap them tightly in plastic wrap or foil. Place them in an airtight container or freezer bag. They can last up to three months in the freezer. When you’re ready to enjoy them, just thaw and reheat! The best way to reheat cinnamon rolls is in the oven. Preheat your oven to 350°F (175°C). Place the rolls on a baking sheet and cover them with foil. Heat for about 10-15 minutes until warm. You can also microwave them for a quick fix. Just heat for 15-20 seconds. Be careful not to overheat, or they may become tough. To make vegan Biscoff cookie butter cinnamon rolls, use plant-based ingredients. Replace dairy milk with almond, soy, or oat milk. Instead of eggs, use flaxseed or chia egg. For the butter, opt for vegan butter or coconut oil. The rolls will still be soft and delicious despite these swaps! Here are some common mistakes to watch for: - Using cold ingredients: Always use warm milk and melted butter. - Not kneading enough: Knead until the dough is smooth and elastic. - Skipping the rise: Allow the dough to rise properly for fluffiness. - Cutting uneven rolls: Make sure to slice evenly for even baking. - Not checking the oven temperature: Use an oven thermometer for accuracy. These tips will help you create the best cinnamon rolls ever! For the complete recipe, you can check the Full Recipe section above. This blog post shared how to make delicious Biscoff cinnamon rolls. You learned the right ingredients, from flour to Biscoff cookie butter. I guided you through dough prep, shaping rolls, and baking them to golden perfection. Tips and tricks helped ensure your rolls turn out great every time. Plus, you saw fun variations, serving ideas, and storage methods. Now, it’s time to enjoy your sweet creation! You have all the tools to impress anyone with these rolls. Happy baking!
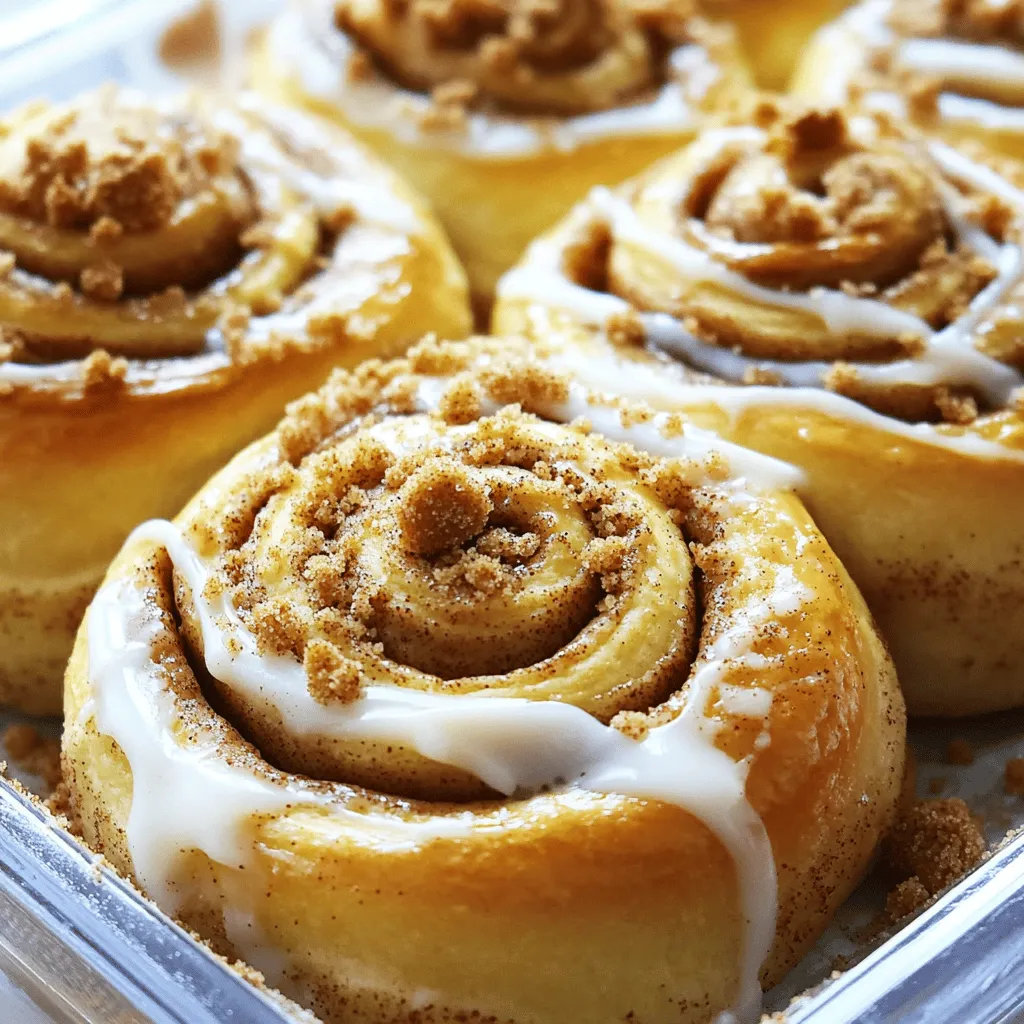
Biscoff Cookie Butter Cinnamon Rolls Delightful Treat
Are you ready to elevate your breakfast game? These Biscoff Cookie Butter Cinnamon Rolls are not just any treat; they are a warm hug for
- 2 ripe bananas, mashed - 2 cups all-purpose flour - 3/4 cup granulated sugar - 1/2 cup brown sugar, packed - 1/4 cup unsalted butter, softened - 1/2 cup milk - 2 large eggs - 1 teaspoon vanilla extract - 1 tablespoon baking powder - 1 teaspoon baking soda - 1/2 teaspoon salt - 1 tablespoon ground cinnamon - 1/2 cup pecans or walnuts, chopped (optional) To make these rolls, you need ripe bananas. They give the dough moisture and sweetness. The all-purpose flour forms the base. Sugar adds sweetness and a nice caramel crust when baked. Butter gives richness. Milk and eggs help bind everything together. Baking powder and baking soda make the rolls rise. Salt brings out the flavors, while cinnamon adds warmth. - 8 oz cream cheese, softened - 1/4 cup unsalted butter, softened - 2 cups powdered sugar - 1 teaspoon vanilla extract - 1-2 tablespoons milk (for consistency) The cream cheese frosting adds a sweet and tangy kick. Softened cream cheese and butter create a smooth base. Powdered sugar sweetens the mix and gives it a fluffy texture. Vanilla extract enhances the flavor. The milk helps you reach your desired creaminess. - 1/2 cup pecans or walnuts, chopped - Ground cinnamon for garnish Chopped nuts add crunch and flavor. You can use pecans or walnuts based on your taste. Ground cinnamon as a garnish makes the rolls look pretty and adds extra aroma. For the full recipe, you can refer to the [Full Recipe]. 1. Preheat your oven to 350°F (175°C). Grease a 9x13 inch baking dish. 2. In a large mixing bowl, combine the mashed bananas, softened butter, and granulated sugar. Stir until creamy. 3. Mix in the eggs, milk, and vanilla extract until fully combined. 1. In another bowl, whisk together the flour, baking powder, baking soda, salt, and half of the ground cinnamon. 2. Gradually add the dry mix to the wet ingredients. Stir gently until just combined. Avoid overmixing. 1. Turn the dough out onto a floured surface. Roll it into a rectangle about 1/4 inch thick. 2. Spread softened butter over the dough. Sprinkle the cinnamon sugar mixture evenly on top. 1. Starting from the longer edge, carefully roll the dough into a tight log. 2. Slice the log into 12 equal rolls. Place the rolls in the greased baking dish. 3. Let the rolls rise for about 20 minutes while the oven finishes preheating. 4. Bake the rolls for 25-30 minutes. Keep an eye on them until they turn golden brown. To make the best banana bread cinnamon rolls, start with the dough. You want to mix it just enough. Overmixing makes the rolls tough. Stir until the flour is just incorporated. This keeps the rolls light and fluffy. Also, bananas can vary in moisture. If your bananas are very ripe, you may need less flour. Watch the dough's texture; it should be soft and slightly sticky. Adjust the flour as needed to get it right. Next, let’s talk about the cream cheese frosting. A smooth frosting is key to tasty rolls. Start with softened cream cheese and butter. Beat them together first. Then, slowly add powdered sugar. Mix until it is creamy. If the frosting is too thick, add a tablespoon of milk. This helps you reach the right consistency. You want it to spread easily over warm rolls. Presentation can make your rolls look even more tempting. Once you frost your rolls, think about a little extra touch. Drizzle more frosting on top. A sprinkle of cinnamon adds a nice look and taste. For a fun twist, garnish with banana slices or nuts. If you serve these rolls at a party, consider stacking them on a cake stand. This way, they look fancy and inviting. You can find the full recipe linked here for all the details you need. {{image_2}} You can make these rolls even more fun by adding some extra flavors. Try mixing in chocolate chips or dried fruits like raisins or cranberries. These sweet bites will surprise you with a burst of flavor. You can also switch up the nuts. Use pecans, walnuts, or even sunflower seeds. Each nut brings its own crunch and taste to the rolls. If you want a healthier twist, consider using whole wheat flour instead of all-purpose flour. This change adds more fiber and nutrients. You can also cut back on sugar. Use honey or maple syrup for natural sweetness. This swap helps reduce refined sugar while still keeping the taste great. Make your rolls special for the season! In autumn, add pumpkin spice to the dough for a cozy flavor. You can mix in ground ginger, nutmeg, or cloves for a warm touch. For a fresh taste in spring or summer, add citrus zest. Lemon or orange zest will brighten up the rolls and make them light and airy. Feel free to check out the Full Recipe for more ideas on how to customize your Banana Bread Cinnamon Rolls with Cream Cheese Frosting! To keep your banana bread cinnamon rolls fresh, store them in an airtight container. Place parchment paper between layers to prevent sticking. You can refrigerate them for up to four days. If you plan to eat them later, try to avoid leaving them out. They taste best when kept cool. If you want to freeze the rolls, do it before baking. Wrap each roll tightly in plastic wrap. Then place them in a freezer-safe bag. They can stay frozen for up to three months. When you're ready to enjoy them, thaw in the fridge overnight. Reheat them in the oven at 350°F (175°C) for about 10-15 minutes. This makes them warm and soft again. These rolls are best served warm or at room temperature. Warm rolls enhance the cream cheese frosting's flavor. If you have leftover rolls, you can reheat them in the microwave for about 15 seconds. This will make them soft and delicious. Enjoy them fresh for the best taste! For the full recipe, check the main section. Yes, you can use frozen bananas. They are great for baking. Frozen bananas are often softer and sweeter. They also mix well into the dough. Just thaw and mash them before use. This saves you from wasting overripe bananas. Plus, they add moisture to your rolls. To check if the rolls are done, look for a golden brown color. You can also use a toothpick. Insert it into the center of a roll. If it comes out clean, the rolls are ready. The edges should pull away slightly from the pan. This shows they are baked correctly. Trust your eyes and the toothpick method for perfect rolls. Yes! You can make this recipe dairy-free easily. Use coconut oil or a dairy-free butter substitute for the butter. For the cream cheese, try a dairy-free cream cheese option. You can also use almond or oat milk instead of regular milk. Your rolls will still taste great without dairy. This recipe transforms simple ingredients into delicious banana rolls. You can mix ripe bananas, flour, and sugars to create the dough. Making the cream cheese frosting adds a sweet touch. Remember to avoid overmixing for the best texture and try adding variations like chocolate chips or nuts. Store extras in the fridge for later enjoyment. With these easy steps, you can bake delightful rolls sure to please everyone. Enjoy creating your own tasty treats!
Banana Bread Cinnamon Rolls with Cream Cheese Frosting
If you love the cozy taste of banana bread, wait until you try these Banana Bread Cinnamon Rolls with Cream Cheese Frosting! This easy recipe
- 1 cup strawberries, hulled and halved - 1 cup blueberries - 1 cup pineapple chunks - 1 cup kiwi, peeled and sliced - 1 cup grapes, halved - 8 oz cream cheese, softened - 1/2 cup Greek yogurt - 1/4 cup powdered sugar - 1 teaspoon vanilla extract - 1 tablespoon fresh lemon juice - 1/2 cup granola To make this cheesecake fruit salad, I love using fresh fruits. Strawberries, blueberries, pineapple, kiwi, and grapes add bright colors and sweet flavors. Each fruit brings its own unique taste and texture. The juicy strawberries and sweet pineapple are always a hit. Next, I prepare the creamy mixture. I combine softened cream cheese, Greek yogurt, powdered sugar, vanilla extract, and lemon juice. This mix creates a rich and smooth base. The Greek yogurt adds a nice tang, making it light yet creamy. Lastly, I sometimes add granola on top for a crunchy finish. It adds great texture and taste, but it’s optional. You can enjoy the salad without it or sprinkle some on just before serving. This way, the granola stays crispy. You can find the Full Recipe above to make this delightful dish! To start, gather your ingredients. In a large bowl, mix the softened cream cheese, Greek yogurt, powdered sugar, vanilla extract, and lemon juice. Use an electric mixer to beat this mixture until it is smooth and creamy. This creamy base is the heart of the salad and gives it that cheesecake flavor! Next, prepare your fruits. Wash and cut the strawberries, blueberries, pineapple, kiwi, and grapes as needed. In a separate bowl, mix all the fruits together. This step is fun and colorful! Make sure each fruit is cut into bite-sized pieces for easy eating. Now comes the fun part! Gently fold the creamy mixture into the bowl of fruit. Make sure all the fruit gets coated, but be careful not to mash the fruit. If you like a little crunch, stir in half of the granola. This adds texture to the dish. Finally, transfer the cheesecake fruit salad to a serving bowl. You can also divide it into individual cups for a pretty presentation. Sprinkle the remaining granola on top just before serving to keep it crunchy. For the full recipe, check out the details above! To get the best texture for your cheesecake fruit salad, start by beating the cream cheese mixture until smooth. This step is key to a creamy base. Use an electric mixer for great results. Next, gently fold the creamy mixture into the fruit. This keeps the fruit intact and fresh. You don’t want to mash the fruits; they add color and taste. When it comes to presentation, using a glass bowl or clear cups works wonders. This shows off the vibrant colors of the fruits. For an extra touch, garnish the salad with fresh mint. It adds a lovely pop of green and a burst of freshness. Your guests will love the look and flavor. Serve the cheesecake fruit salad immediately for the best taste. If you want, you can chill it for a short time. This makes it refreshing on a hot day. Just remember, the creaminess and fruit flavors shine best when served fresh. Enjoy your delightful treat! {{image_2}} You can change the fruits in your cheesecake fruit salad. Use seasonal fruits for the best taste. In summer, try peaches or cherries. In fall, apples and pears work great. You can even mix in citrus fruits like oranges or tangerines. They add a nice zing to the flavor. To make your salad even tastier, consider adding a splash of orange juice. It brightens up the creamy mix. You can also add orange zest for a stronger flavor. Fresh mint leaves can give a refreshing touch. Just sprinkle them on top or mix them in with the fruit. If you want a vegan version, swap cream cheese and Greek yogurt for non-dairy yogurt. There are many tasty options now. For a lighter treat, use low-sugar alternatives for the creamy base. You can find sugar-free options for powdered sugar too. These changes keep the flavor while fitting different diets. To keep your cheesecake fruit salad fresh, store it in the fridge. Use an airtight container to prevent air from getting in. This helps maintain the creamy texture and the fruit's freshness. Avoid stacking heavy items on top of the container. This keeps your salad from getting squished. Remember to cover it well if you have granola mixed in. Granola can get soggy if mixed too early. You can store the salad in the fridge for up to three days. After that, the fruit may start to lose its color and taste. The creamy mixture also loses its fresh texture over time. If you see any signs of spoilage, it’s best to throw it out. Always check for any off smells or discoloration when you take it out. Freezing cheesecake fruit salad is not the best idea. The cream cheese mixture may separate once thawed. The fruits can also become mushy after freezing. If you want to save some for later, try freezing the creamy mixture separately. You can then mix it with fresh fruit right before serving. This way, you keep the best taste and texture. Yes, you can make cheesecake fruit salad ahead of time. To prep in advance, follow these tips: - Mix the creamy base and store it in the fridge. - Chop your fruit and keep it separate until serving time. - Combine the fruit and creamy mixture just before serving. This keeps everything fresh. I love using a mix of fresh fruits in this salad. Here are some great options: - Strawberries - Blueberries - Pineapple - Kiwi - Grapes You can also swap fruits based on what you like or what’s in season. For example, try mango or peaches for a twist. To keep the granola crunchy, add it right before serving. Here are some techniques: - Stir half of the granola into the salad for texture. - Sprinkle the rest on top as a final touch. This way, the granola stays crisp and does not get soggy. Enjoy your cheesecake fruit salad! For the full recipe, check the main section. This blog post explored how to make a delicious cheesecake fruit salad. We discussed the key ingredients, including fresh fruits and a creamy mixture. I shared step-by-step instructions for preparing and assembling the salad. You learned tips for texture and presentation, and variations to switch up flavors. In summary, making this salad is easy and fun. Enjoy experimenting with different fruits. With these steps and tips, you can create a delightful dish. Serve it fresh, and it will please everyone!
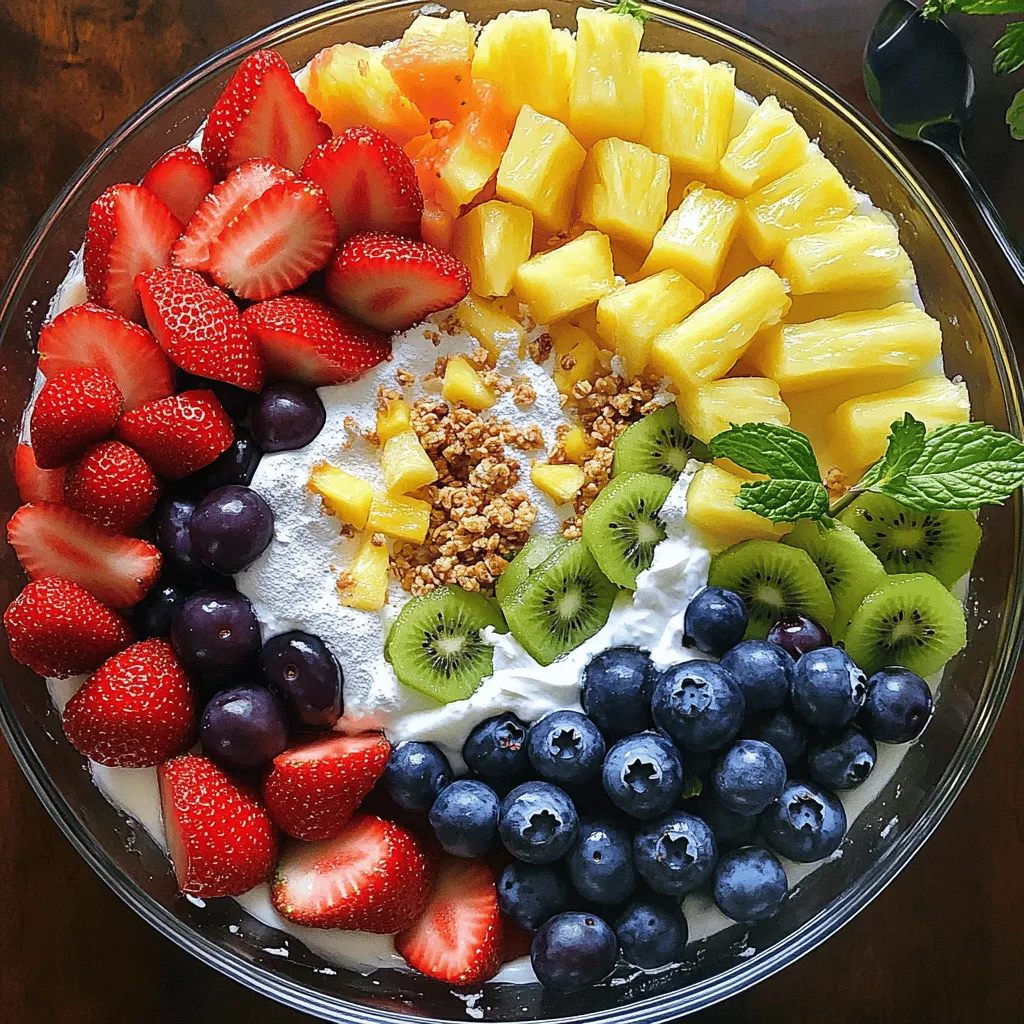
Cheesecake Fruit Salad Easy and Creamy Delight
Ready for a treat that combines the best of dessert and fruit salad? This Cheesecake Fruit Salad is a simple, creamy delight you can whip