Desserts
![To make this Easy Cinnamon Roll Coffee Cake, gather these ingredients: - 2 cups all-purpose flour - 1 cup granulated sugar - 1 tablespoon baking powder - ½ teaspoon salt - ½ cup unsalted butter, melted - 1 cup milk - 2 large eggs - 1 teaspoon vanilla extract - 1 tablespoon ground cinnamon - ½ cup brown sugar, packed - ½ cup chopped pecans (optional) - 1 cup powdered sugar (for glaze) - 2 tablespoons milk (for glaze) You can make simple swaps if needed. For a gluten-free version, use a gluten-free flour blend. If you need a dairy-free cake, try almond or oat milk instead of regular milk. You can also replace eggs with a flaxseed mixture (1 tablespoon flaxseed meal + 2.5 tablespoons water = 1 egg). For the butter, coconut oil works well too, giving a different flavor. Just melt it as you would the butter. If you prefer less sugar, reduce the granulated sugar or brown sugar, but keep in mind this may alter the texture slightly. To add some fun, consider these options: - Chopped pecans: They add a nice crunch and flavor. - Chopped apples: Mix in about 1 cup of diced apples for a fruity twist. - Chocolate chips: A half-cup of chocolate chips can make it extra sweet. - Raisins or cranberries: These dried fruits add a burst of sweetness. Feel free to mix and match! Each addition brings its own charm to the cake. For the full recipe, check out the detailed instructions above. To make this easy cinnamon roll coffee cake, you need a few tools. Grab a large mixing bowl, a whisk, a 9x13-inch baking pan, and measuring cups. First, preheat your oven to 350°F (175°C). While the oven heats up, grease your baking pan. This helps the cake come out easily after baking. Now, let's mix the ingredients. In a large bowl, whisk together these dry ingredients: - 2 cups all-purpose flour - 1 cup granulated sugar - 1 tablespoon baking powder - ½ teaspoon salt Make sure they blend well. In another bowl, mix the wet ingredients: - ½ cup unsalted butter, melted - 1 cup milk - 2 large eggs - 1 teaspoon vanilla extract Stir this mixture until it's smooth. Next, pour the wet mixture into the dry ingredients. Stir just until combined; avoid overmixing. It’s okay if some lumps remain. Now, let’s prepare the cinnamon filling. In a separate bowl, mix: - ½ cup brown sugar, packed - 1 tablespoon ground cinnamon This will create a sweet, spicy filling for your coffee cake. Spread half of the cake batter into your prepared pan. Then, sprinkle the cinnamon-brown sugar mixture evenly over the batter. If you like, add: - ½ cup chopped pecans (optional) Spoon the remaining batter on top. Gently spread it out to cover the filling. Use a knife or skewer to create a marbled effect. Be careful not to mix too much. Now, it’s time to bake! Place the pan in the oven and bake for 25 to 30 minutes. To check if it's done, insert a toothpick into the center. If it comes out clean, your cake is ready. While your cake bakes, mix the glaze. Combine: - 1 cup powdered sugar - 2 tablespoons milk Stir until smooth. Once the cake is done, let it cool in the pan for about 10 minutes. Drizzle the glaze over the warm cake. Allow it to cool completely before slicing. Enjoy your delicious cinnamon roll coffee cake! For the full recipe, see the main section above. To get that beautiful swirl in your Easy Cinnamon Roll Coffee Cake, use a knife or skewer. After you add the batter, gently swirl through the layers. Do this lightly to avoid mixing too much. You want a marbled look, not a blended color. Practice makes perfect, so don’t worry if it’s not perfect the first time! There are a few common mistakes you should watch for. First, don’t overmix the batter. Stir it just enough for the wet and dry parts to combine. Overmixing leads to a tough cake. Second, be careful not to skip the cooling time. If you cut it too soon, it may crumble. Lastly, remember to check for doneness with a toothpick. If it comes out clean, your cake is ready! This coffee cake pairs well with a hot drink. Try it with coffee or tea for a warm start to your day. You can also serve it with a scoop of vanilla ice cream for a sweet treat. For a twist, add fresh berries or whipped cream on top. These toppings add color and flavor, making your cake even more delightful. For a full recipe, check out the [Full Recipe]. {{image_2}} You can change this easy cinnamon roll coffee cake to fit the seasons. For fall, add pumpkin spice to the batter. Just mix in one teaspoon of pumpkin spice with the dry ingredients. You can also use pumpkin puree in place of some milk. For winter, try a chocolate twist! Add cocoa powder to the batter or sprinkle chocolate chips on top. You can mix 1/3 cup of cocoa powder into the dry mixture and adjust the sugar. If you need gluten-free options, use a gluten-free flour blend. Look for a brand that works well for baking. Replace the regular milk with almond or oat milk for a dairy-free version. You can make this cake vegan by using flax eggs. Mix one tablespoon of ground flaxseed with three tablespoons of water. Let it sit for five minutes to thicken before adding it to the wet ingredients. Serve this cake in fun ways! For a dessert style, add a scoop of ice cream on top. The warm cake with cold ice cream creates a great mix. For breakfast, pair it with fresh fruit or yogurt. You can also serve it with flavored coffee or tea for a cozy morning. Consider cutting the cake into small squares for a brunch buffet. This makes it easy for guests to grab and enjoy! Try these variations to make your easy cinnamon roll coffee cake unique. For the full recipe, check out the earlier sections of this article. To keep your cake fresh, store it in an airtight container. Make sure it cools down first. Place a piece of parchment paper between the cake and the lid to absorb moisture. This helps maintain its texture. You can keep it at room temperature for up to three days. If you want it to last longer, refrigerate it. Just remember, the fridge may dry it out a bit. If you want to save some cake for later, freezing works great. First, cut the cake into slices. Wrap each slice in plastic wrap tightly. Then, place the wrapped slices in a freezer bag. This keeps out air and prevents freezer burn. You can freeze the cake for up to three months. When you’re ready to enjoy it again, just thaw it in the fridge overnight. To reheat your cake, do it gently. Preheat your oven to 350°F (175°C). Place the cake on a baking sheet and cover it with aluminum foil. Bake for about 10-15 minutes. This warms it without making it dry. If you prefer the microwave, heat it in short bursts of 15 seconds. Check to ensure it is warm but not hot. Enjoy your Easy Cinnamon Roll Coffee Cake warm, just like fresh out of the oven! You can find the full recipe [Full Recipe]. Yes, you can prepare this cake a day ahead. Bake it, let it cool, and store it. Wrap it in plastic wrap to keep it fresh. You can also make the glaze ahead and store it in the fridge. Just drizzle it on before serving. If you want to skip eggs, use substitutes like applesauce or mashed banana. Each egg can be replaced with 1/4 cup of applesauce. You can also use a flax egg. Mix one tablespoon of flaxseed meal with three tablespoons of water. Let it sit for a few minutes until it thickens. Check if the cake is done by inserting a toothpick into the center. If it comes out clean or with a few crumbs, it’s ready. The edges should pull away from the pan slightly, and the top will look golden brown. Yes, you can double the recipe. Use a larger baking pan, like a 12x17-inch pan. Ensure to adjust the baking time. Check for doneness a few minutes earlier than the original recipe suggests. If you lack an ingredient, substitutions often work. Use yogurt or sour cream instead of milk. For flour, you can try whole wheat flour. If you don’t have butter, use coconut oil or a vegetable oil. The cake will still taste great! For the full recipe, check the recipe section above. This blog post shared all you need to know about making a fantastic coffee cake. We explored ingredients, preparation steps, and baking tips. You learned about fun variations and how to store your cake. Always remember to avoid common mistakes for the best results. With these simple guides, you can impress anyone with your baking. Now, go ahead and create something delicious! Enjoy every bite and share it with family and friends.](https://grilledflavors.com/wp-content/uploads/2025/05/01cf8549-4b61-4d46-96be-b23a06b293c8.webp)
Easy Cinnamon Roll Coffee Cake Perfect for Breakfast
Start your day right with my Easy Cinnamon Roll Coffee Cake! This sweet, fluffy cake combines classic cinnamon roll flavors into a simple, delicious treat.
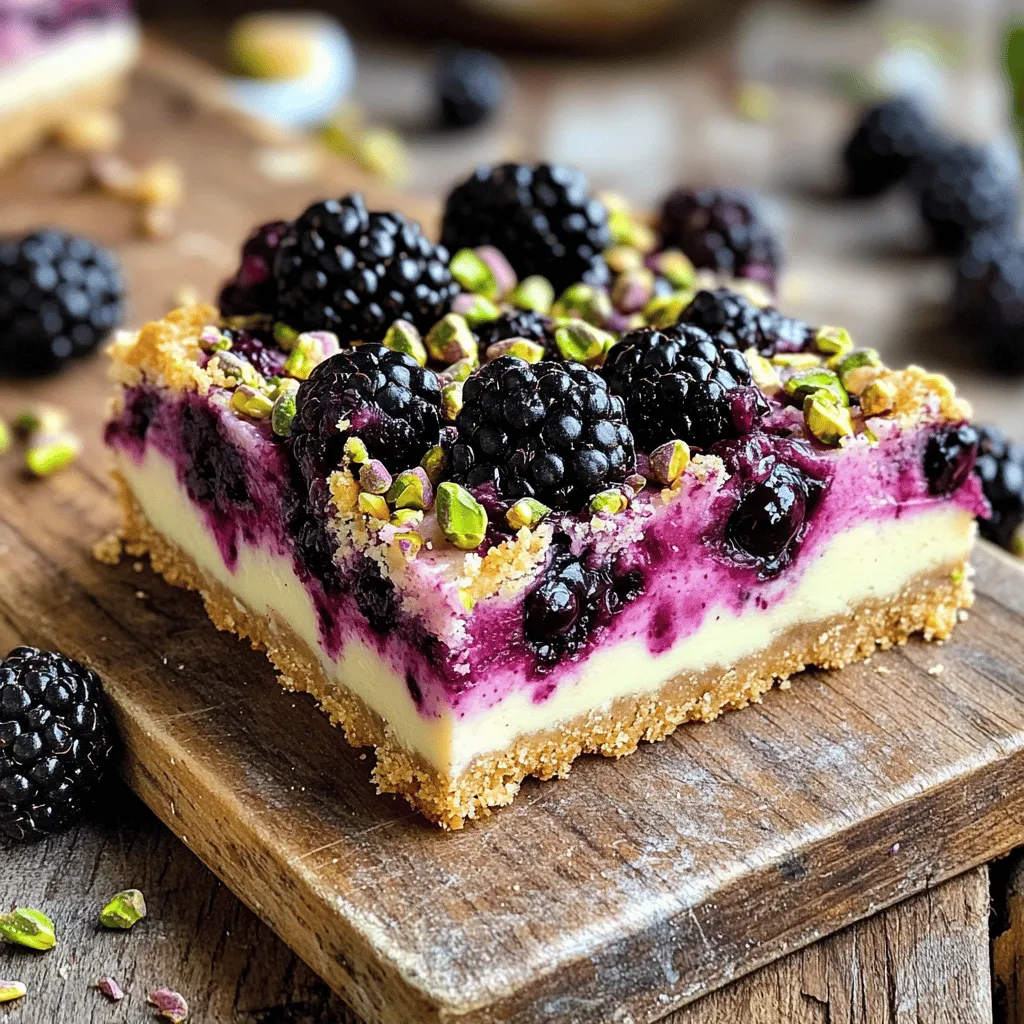
Blackberry Pistachio Dream Bars Irresistible Treat
Are you ready to indulge in a treat that combines tart blackberries and crunchy pistachios? My Blackberry Pistachio Dream Bars are about to become your
![To make Banana Pudding Rice Krispie Treats, gather these simple ingredients. Each one plays a key role in creating this delightful snack. - 6 cups Rice Krispies cereal - 1 cup mini marshmallows - 1/2 cup unsalted butter - 1 cup banana pudding mix - 1/2 cup milk - 1 teaspoon vanilla extract - 1 cup sliced ripe bananas - 1/2 cup whipped cream (optional) - Crushed graham crackers (for garnish) These ingredients blend to form a sweet, chewy treat. The Rice Krispies add crunch. Mini marshmallows bring sweetness and stickiness. Unsalted butter helps everything stick together. The banana pudding mix gives flavor and creaminess. Milk adds moisture for a soft texture. Vanilla extract enhances the taste. Ripe bananas add freshness and fruity notes. Whipped cream can top the treats for extra fun. Finally, crushed graham crackers provide a nice crunch on top. You can find the full recipe in the recipe section. This list is easy to follow and fun to prepare! 1. Melting the butter and marshmallows Start by grabbing a large saucepan. Place it over low heat. Add the unsalted butter. Let it melt slowly. Once the butter melts, add the mini marshmallows. Keep stirring until they melt completely. The mixture should be smooth and creamy. 2. Mixing in the banana pudding and cereal Remove the saucepan from the heat. Now, add the banana pudding mix and milk. Stir well to combine. You want a thick, creamy mixture. Next, add the Rice Krispies cereal. Mix it in gently. Make sure every piece of cereal is coated with the gooey goodness. 3. Folding in the bananas Take your ripe bananas and slice them into small pieces. Gently fold them into the mixture. Be careful not to mash the bananas. You want them to stay chunky for texture and flavor. 1. Preparing the baking pan Grab a 9x13-inch baking pan. Lightly grease it with butter or cooking spray. This helps the treats come out easily later. 2. Pouring and pressing the mixture Pour the Rice Krispies mixture into the prepared pan. Use a spatula to press it down firmly. Make sure it forms an even layer. This step is key for nice, even treats. 3. Cooling and cutting the treats Let the mixture cool at room temperature for about 30 minutes. Once it is set, cut it into squares. If you want, add a dollop of whipped cream and sprinkle crushed graham crackers on top. This adds a nice crunch and extra flavor. For the full recipe, check out the details above. Enjoy your Banana Pudding Rice Krispie Treats! To make the best Banana Pudding Rice Krispie Treats, follow these simple tips: - Ensure marshmallows are fully melted: Start with low heat when melting butter. Add mini marshmallows right after the butter melts. Stir until they turn smooth and creamy. This step is key for the best texture. - Properly fold in ingredients to maintain texture: When mixing in the Rice Krispies, use a gentle hand. Stir carefully to coat every piece. When adding bananas, fold them in slowly to keep them intact. This helps keep your treats light and fluffy. Make your treats even more fun with these serving ideas: - Ideas for topping and presentation: After cutting the treats into squares, consider adding a dollop of whipped cream on top. Sprinkle crushed graham crackers for a nice crunch. You can even place a slice of banana on top for a cute touch. - Pairing with a beverage or complementary dessert: These treats go well with milk or a banana smoothie. You could also serve them with a scoop of vanilla ice cream. The creamy flavors will balance nicely with the banana pudding taste. Enjoy making and sharing these delicious Banana Pudding Rice Krispie Treats! For the full recipe, don't forget to check out the details above. {{image_2}} You can change the flavor of your Banana Pudding Rice Krispie Treats easily. Here are some fun ideas: - Adding chocolate chips: Mix in 1 cup of chocolate chips for a sweet twist. The chocolate pairs well with banana. It adds a rich layer of flavor to each bite. - Incorporating nuts or coconut: You can add 1/2 cup of chopped nuts or shredded coconut. Nuts give a nice crunch. Coconut adds a tropical flair, making your treats even more exciting. You can adapt this recipe to fit different diets. Here are a couple of adjustments you can try: - Gluten-free alternatives: Use gluten-free Rice Krispies. This keeps your treats safe for those with gluten issues. Always check the label to ensure they are certified gluten-free. - Vegan adjustments: Replace the butter with coconut oil or vegan butter. Use plant-based milk instead of cow's milk. This way, you can enjoy the treats without animal products. These variations and adjustments make the recipe fun and accessible for everyone. For the complete recipe, check out the [Full Recipe]. To keep your Banana Pudding Rice Krispie Treats fresh, store them properly. You can keep them at room temperature for a short time. Place them in an airtight container. This helps prevent them from getting hard or stale. Make sure to separate layers with parchment paper. This keeps them from sticking together. If you want to store them longer, refrigeration is a great option. Place the treats in the fridge in an airtight container. This helps them last a bit longer. Just remember to let them sit at room temperature for a few minutes before serving. This will make them softer and easier to enjoy. These treats are best enjoyed fresh, but they can last a while. At room temperature, they stay good for about 2 to 3 days. In the fridge, they can last up to a week. Check for signs of spoilage, like a change in smell or texture. If they become hard or dry, it’s time to toss them. Enjoy them while they are still soft and tasty! Can I use instant banana pudding instead? Yes, you can use instant banana pudding. It adds a strong banana flavor. Mix it into the melted marshmallow and butter as you would with the regular pudding mix. How can I make these treats without marshmallows? You can replace marshmallows with peanut butter or melted chocolate. These options will still bind the Rice Krispies together. Just warm them until they are smooth and mix them in. Can I freeze Banana Pudding Rice Krispie Treats? Yes, you can freeze these treats. Wrap them tightly in plastic wrap and place them in a freezer bag. They can last up to two months in the freezer. Troubleshooting common issues If your treats are too sticky, try adding a bit more Rice Krispies. If they fall apart, mix in more melted butter or marshmallow. This will help them stick better. Suggestions for enhancing flavor and texture Add a pinch of cinnamon or nutmeg for warmth. You can also mix in mini chocolate chips for a sweet twist. Top with crushed graham crackers for extra crunch. This blog covered how to make delicious Banana Pudding Rice Krispie Treats. You learned the key ingredients, preparation steps, and tips for great results. We explored fun variations and storage methods too. These treats are easy to make and always a hit. Feel free to be creative with flavors and toppings. Whether you share them or enjoy them yourself, these treats will bring joy. Happy cooking!](https://grilledflavors.com/wp-content/uploads/2025/05/3b18d958-1ef7-43f3-ac55-c055efff6558.webp)
Banana Pudding Rice Krispie Treats Simple Snack Delight
Are you ready for a tasty treat that’s easy to make? Look no further than Banana Pudding Rice Krispie Treats! This fun snack combines the
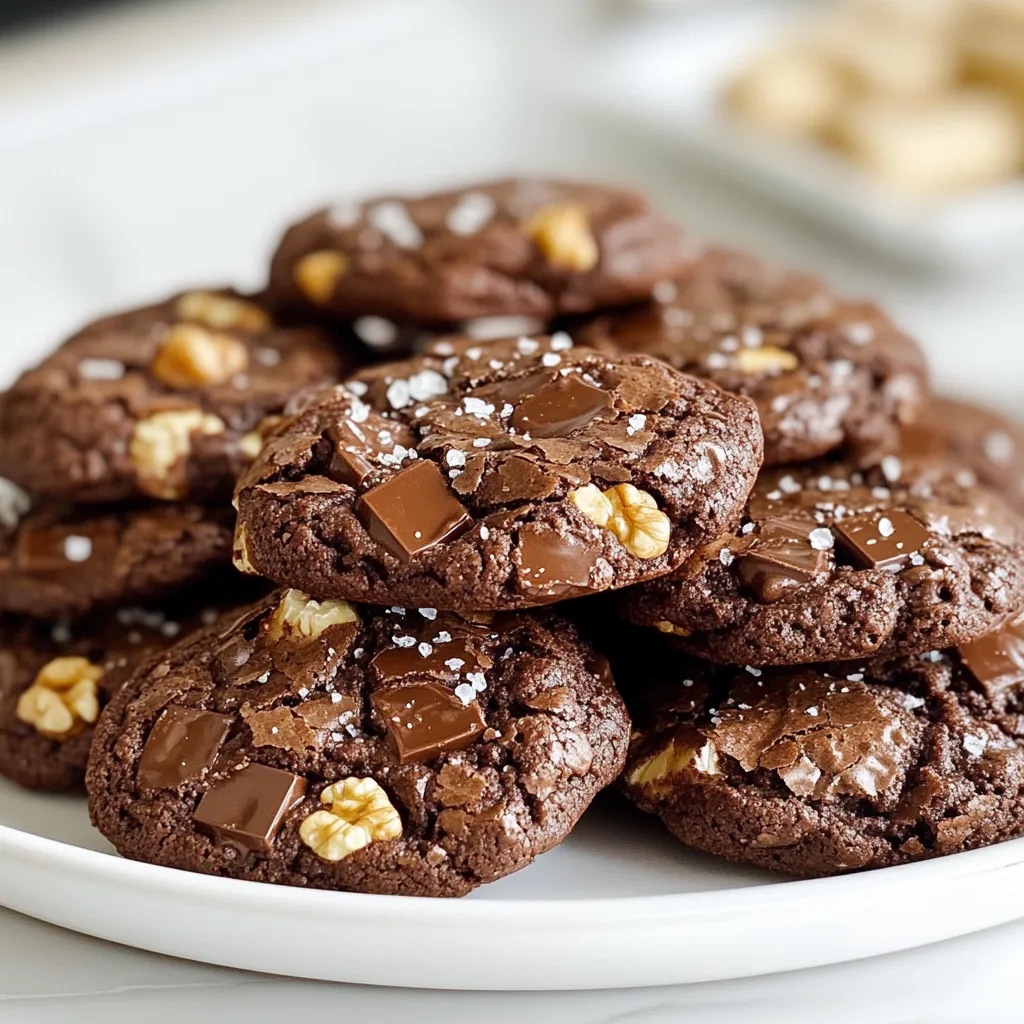
Brownie Cookies Scrumptious Treat You Will Love
If you love brownies, you’re in for a treat! Brownie cookies combine rich chocolate flavor and chewy goodness in each bite. In this article, I’ll
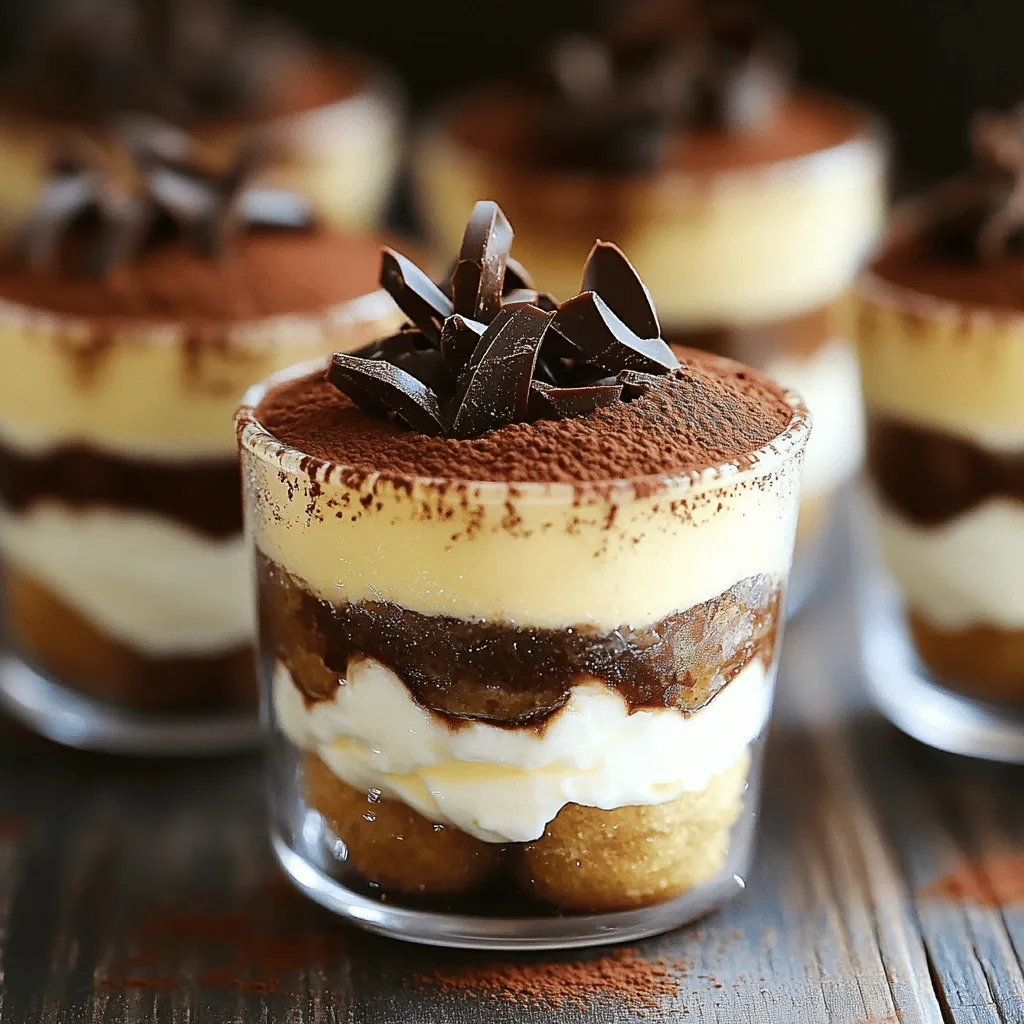
Mini Tiramisu Cups Delightful and Easy to Make
If you love coffee and dessert, you’ll adore these Mini Tiramisu Cups! They’re simple to make and packed with flavor. With just a few ingredients,
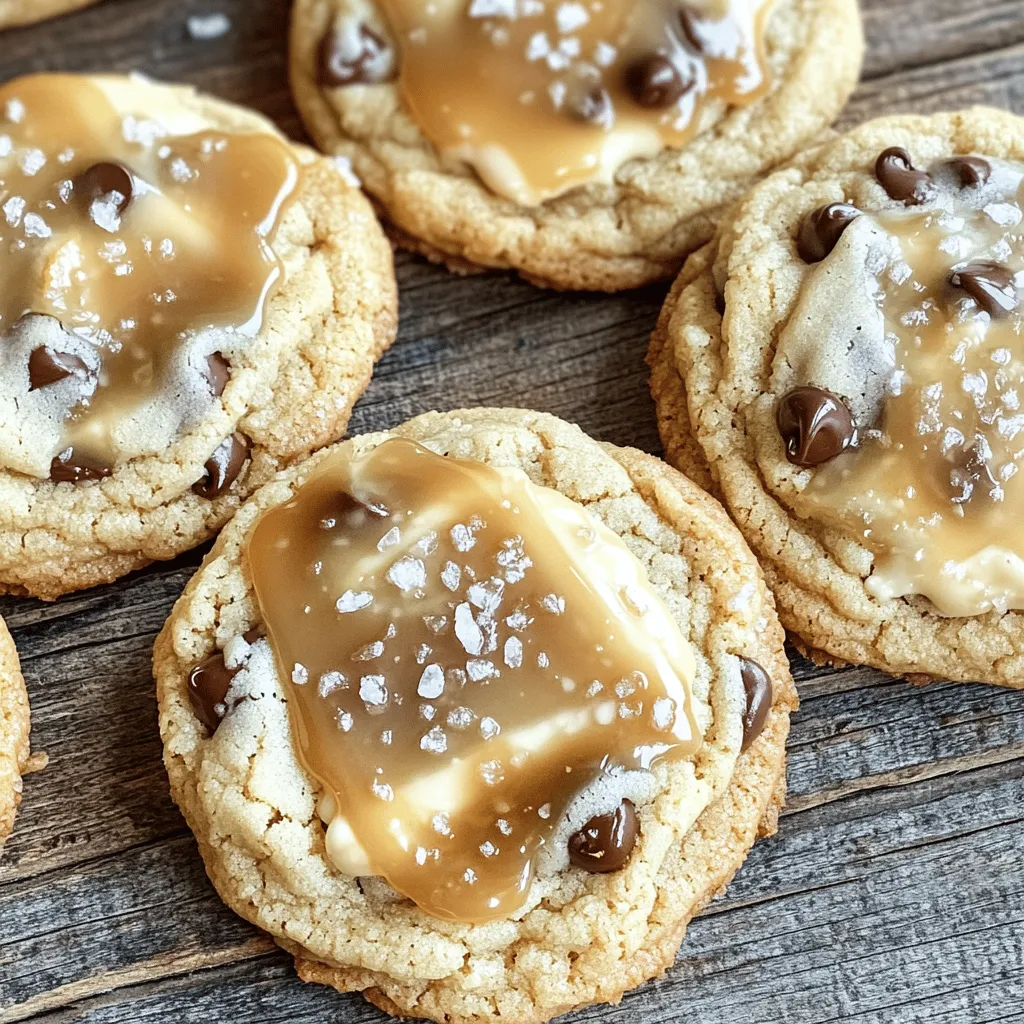
Salted Caramel Cheesecake Cookies Irresistible Treat
If you crave a sweet treat that combines creamy cheesecake and buttery caramel, you’re in luck! These Salted Caramel Cheesecake Cookies will make your taste
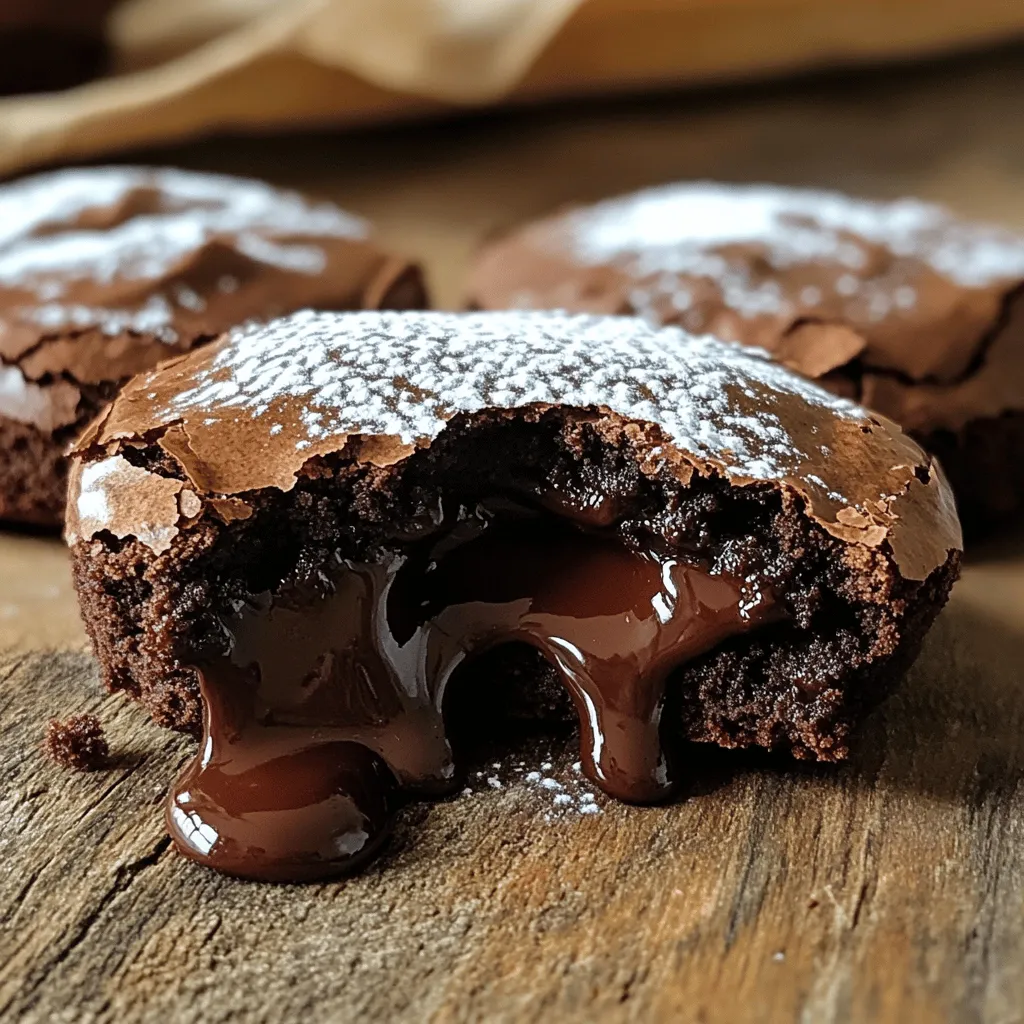
Chocolate Lava Brownie Cookies Irresistible Treat
If you love warm, gooey desserts, you will adore Chocolate Lava Brownie Cookies. These treats combine the rich taste of a brownie with the fun
 for detailed steps to create this delightful dessert. - Preheat the oven to 350°F (175°C). - Grease and flour an 8-inch round cake pan. - In a large bowl, combine flour, sugar, cocoa powder, baking powder, baking soda, and salt. - Mix in melted butter, eggs, milk, and vanilla extract until just blended. - Pour the batter into the prepared pan. - Bake for 25-30 minutes. Check with a toothpick; it should come out clean. - Let the cake cool completely in the pan. Transfer to a wire rack afterward. - For dark chocolate mousse, melt dark chocolate in a double boiler or microwave. Stir until smooth. - In a bowl, whip 1 cup of heavy cream until soft peaks form. Add 1 tablespoon of sugar and 1/2 teaspoon of vanilla extract. Continue whipping to stiff peaks. - Fold the melted chocolate into the whipped cream until mixed well. Set aside. - For milk chocolate mousse, melt milk chocolate and repeat the same steps. - For white chocolate mousse, melt white chocolate and follow the same steps again. - Slice the cooled chocolate cake in half horizontally. - Place the bottom layer on a plate. Spread the dark chocolate mousse evenly over it. - Add the top layer of the cake. Spread the milk chocolate mousse over this layer. - Finally, spread the white chocolate mousse on top. Smooth the sides for a neat finish. - Chill the cake in the fridge for at least 4 hours or overnight to set the mousses well. Enjoy the rich flavors of this Triple Chocolate Mousse Cake with your family or friends. For the full recipe, check out the detailed instructions in the earlier sections. To ensure even baking, make sure your oven is preheated. Grease and flour the cake pan well. This stops the cake from sticking. When baking, always check for doneness using a toothpick. Insert it in the center of the cake. If it comes out clean, the cake is ready. For the perfect mousse, you need to whip the cream until it forms soft peaks. This helps give the mousse a light texture. When folding chocolate into the whipped cream, be gentle. Start by mixing a small amount of whipped cream into the chocolate. Then, fold the chocolate mixture back into the whipped cream. This keeps the mousse airy and smooth. Garnishing with chocolate shavings adds a nice touch to your cake. You can use a vegetable peeler to create curls from a chocolate bar. For serving, slice the cake cleanly, and add a dollop of whipped cream on each slice. This makes it look elegant and inviting. For the complete process, check out the Full Recipe. {{image_2}} You can add fun flavors to the mousse cake. Try using flavor extracts like mint or orange. A little mint extract in the dark mousse gives a fresh taste. Orange extract adds a bright twist to the milk mousse. You can also layer in fruit. Fresh raspberries or strawberries work well. Fruit purees add a burst of flavor and color. If you need a gluten-free cake, use a gluten-free flour mix. This keeps the cake moist and tasty. For a dairy-free option, swap the heavy cream with coconut cream. Use dairy-free chocolate for all the mousse layers. These swaps help everyone enjoy the cake. You can serve the cake in different ways. Individual servings look nice for a party. Just cut the cake into slices. Place each slice on a small plate. You can also serve it as a whole cake. For garnishing, try chocolate shavings or curls. A sprinkle of fresh berries can make it pop for special events. For the full recipe, check out the details above. To store your Triple Chocolate Mousse Cake, wrap it tightly in plastic wrap. This keeps the cake moist and the mousse fresh. You can also place it in an airtight container. This method prevents drying out and keeps the cake from absorbing any fridge odors. Keep the cake in the fridge until you're ready to serve. This dessert is best eaten cold, as it enhances the rich flavors and creamy texture. Freezing the cake is a great option if you want to save some for later. To freeze, slice the cake into portions. Wrap each piece in plastic wrap, then place them in a freezer bag. This helps prevent freezer burn. For the mousse layers, freeze them in small containers or ice cube trays. To thaw, move the cake to the fridge overnight. Avoid thawing at room temperature, as it may affect the mousse's texture. The cake can stay fresh in the fridge for up to five days. After that, the chocolate flavor may fade. Look for signs like a change in color or texture. If the mousse feels grainy or watery, it’s best to toss it. Trust your senses; if it smells off, don’t eat it. Always check before serving to ensure a delightful experience. You can tell if your chocolate cake is done by checking a toothpick. Insert a toothpick in the center of the cake. If it comes out clean or with a few crumbs, the cake is ready. If it has wet batter, bake it a little longer. The top should also look firm and slightly spring back when touched. Yes, you can make the mousse ahead of time. Prepare the mousse layers a day before serving. Just cover them tightly and keep them in the fridge. When you are ready, assemble the cake. This way, the flavors meld nicely and make a richer taste. If you need a substitute for heavy cream, use coconut cream or silken tofu. Both can create a nice texture. For coconut cream, chill a can overnight, then scoop out the cream. Blend it until smooth. For silken tofu, blend until creamy. These options work well and are great for different diets. Chill the mousse cake for at least 4 hours, but overnight is best. This time allows the mousse layers to set properly. It also helps the flavors mix well. If you are in a hurry, aim for 4 hours to ensure it holds its shape when cut. Absolutely! You can use various chocolates to change the flavor. For a bolder taste, try dark chocolate with higher cocoa content. White chocolate can be swapped for a sweet touch. Feel free to experiment with flavors like mint or orange chocolate. Just make sure to keep the total amount the same as in the Full Recipe. You've learned how to craft a rich chocolate cake with light mousse layers. Each ingredient plays a key role, and following the steps carefully makes a big difference. Remember to use tips for even baking and perfect mousse. Variations let you get creative, while proper storage keeps your dessert fresh. Your chocolate delight awaits! Enjoy every slice and share it with friends for extra joy.](https://grilledflavors.com/wp-content/uploads/2025/05/98916e23-c6c8-4be9-8ca7-70a6426f9f1e.webp)
Triple Chocolate Mousse Cake Rich and Decadent Dessert
Indulge in a slice of heaven with my Triple Chocolate Mousse Cake! This rich and decadent dessert combines three types of chocolate in a dreamy
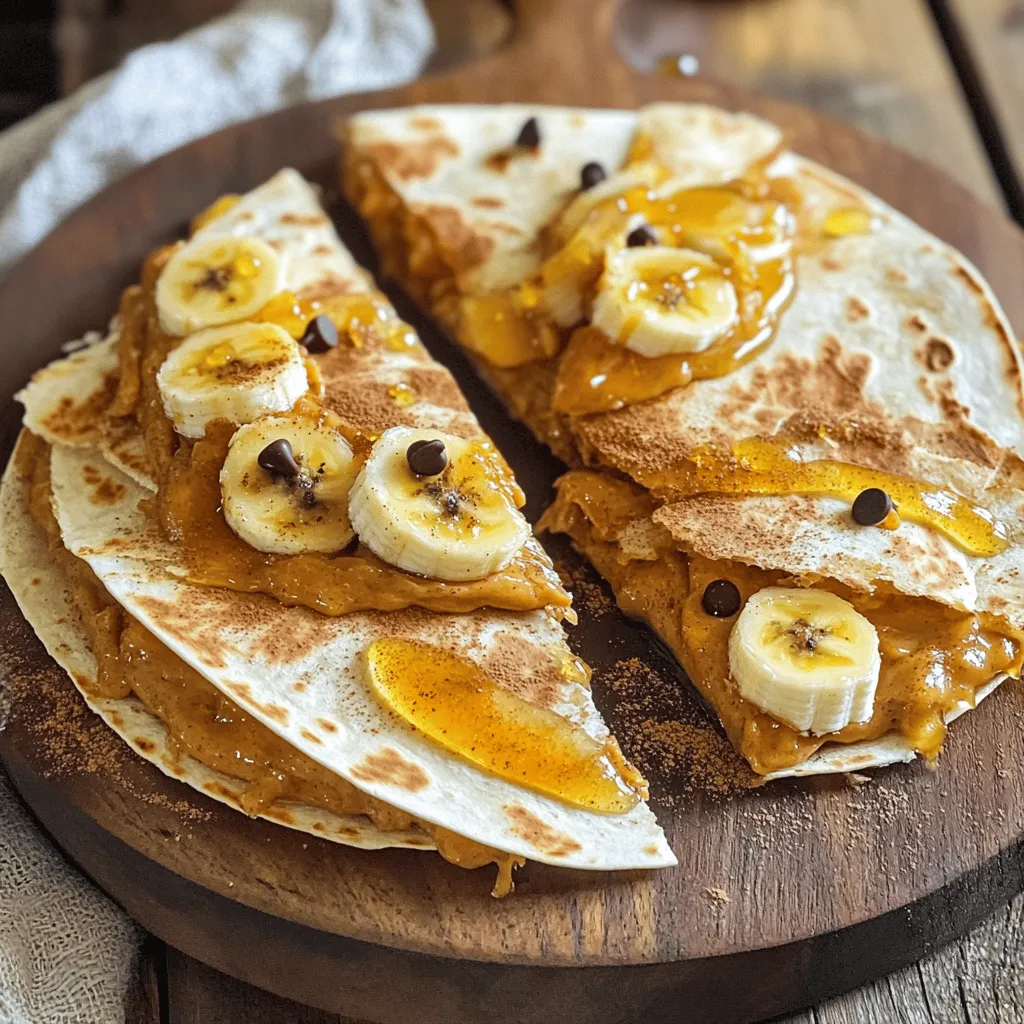
Peanut Butter Quesadilla Irresistible and Easy Recipe
Craving a sweet twist on a classic dish? Try my Peanut Butter Quesadilla! This fun recipe is quick and easy, perfect for any time of
![To make soft cinnamon roll cookies, you will need these key ingredients: - 2 ½ cups all-purpose flour - 1 cup unsalted butter, softened - 1 teaspoon ground cinnamon Each of these ingredients plays a crucial role in creating the perfect texture and flavor. - All-purpose flour gives structure to the cookies and balances the moisture. - Unsalted butter adds richness and a creamy texture. Using unsalted lets you control the salt level. - Ground cinnamon is the star spice. It provides that warm, cozy flavor we love in cinnamon rolls. You can customize your cookies with some fun add-ins: - Chocolate chips: They add a sweet touch and a gooey texture. - Nuts (e.g., pecans or walnuts): They bring crunch and a nutty flavor. Feel free to mix and match these options to create your dream cookie. The full recipe will guide you through the steps to make these delicious treats! First, you need to prepare your baking sheet. I like to line it with parchment paper. This helps the cookies not stick. Next, preheat your oven to 350°F (175°C). Now, let’s measure and mix the dry ingredients. Grab a medium bowl. In it, whisk together: - 2 ½ cups all-purpose flour - 1 teaspoon baking powder - ½ teaspoon baking soda - ½ teaspoon salt - 1 teaspoon ground cinnamon Set this bowl aside for later. In a large mixing bowl, cream together the softened butter and granulated sugar. Use an electric mixer on medium speed for about 2-3 minutes. You want it to be light and fluffy. Now, it’s time to add the egg and vanilla. Add in: - 1 large egg - 2 teaspoons vanilla extract Mix until everything is fully combined. Gradually, add the dry ingredients from the first bowl into the wet mixture. Mix just until combined. Be careful not to overmix; this helps keep the cookies soft. Now, let’s roll out the cookie dough. Dust your surface with a little flour. Roll the dough into a rectangle, about 1/4 inch thick. Next, make the filling. In a small bowl, mix together: - 1 cup brown sugar, packed - 2 tablespoons ground cinnamon Sprinkle this mixture evenly over the rolled-out dough. Starting from one end, carefully roll the dough tightly into a log. Slice this log into 1-inch thick pieces. Place the slices on your prepared baking sheet. Bake the cookies for 10-12 minutes. They should be lightly golden around the edges. After baking, let them cool on the sheet for 5 minutes. Then, transfer them to a wire rack to cool completely. Finally, make the glaze by mixing: - ½ cup powdered sugar - 2 tablespoons milk Drizzle the glaze over the cooled cookies. Enjoy your soft cinnamon roll cookies! For the full recipe, check out [Full Recipe]. To make soft and chewy cookies, use room temperature butter. This helps create a light and fluffy base. Cream the butter and sugar well, but stop when they look mixed. Adding the egg and vanilla helps keep the dough moist. Avoid overmixing the dough. When you combine the wet and dry ingredients, mix just until you see no flour. Overmixing can make the cookies tough. You want them to be soft and tender. For even baking, make sure your oven is preheated to 350°F (175°C). Using parchment paper on your baking sheet helps prevent sticking. Place the cookies a few inches apart to allow room for spreading. Understanding your oven's temperature is key. Use an oven thermometer to check if your oven runs hot or cold. Adjust your baking time based on your oven's true temperature. This can make a big difference in how your cookies turn out. For the full recipe, check the detailed instructions above. Enjoy your baking! {{image_2}} You can easily switch up the flavors of your soft cinnamon roll cookies. Here are two fun ideas: - Pumpkin spice cinnamon roll cookies: Add 1 cup of pure pumpkin puree to the dough. Replace some cinnamon with pumpkin spice. This gives your cookies a warm, fall flavor. - White chocolate raspberry version: Mix in 1 cup of white chocolate chips and 1 cup of fresh raspberries. This adds a sweet and tangy twist that pairs beautifully with the cinnamon. Pair your soft cinnamon roll cookies with the right drinks for a great treat. Here are some ideas: - Pairing cookies with beverages: Serve these cookies with coffee, tea, or warm milk. The flavors blend nicely. - Ideas for cookie platters or gifts: Arrange your cookies on a pretty platter. You can also package them in cute boxes for gifts. Adding a little note makes it personal and special. For the full recipe and more tips, check out the [Full Recipe]. To keep your soft cinnamon roll cookies fresh, you need the right storage method. Here’s how: - At Room Temperature: Place the cookies in an airtight container. This will help lock in moisture and keep them soft. Line the bottom with parchment paper to avoid sticking. You can stack them, but separate layers with more parchment paper to keep them from squishing. - In the Freezer: For long-term storage, freeze the cookies. Wrap each cookie in plastic wrap, then place them in a freezer bag. This way, they won’t get freezer burn. They can last up to three months. When you want to enjoy them, just let them thaw at room temperature. Understanding how long your cookies stay fresh is key to enjoying them at their best. - Freshness: When stored properly at room temperature, these cookies can last about one week. You might notice them getting a bit drier after a few days. - Signs of Staleness: If your cookies feel hard or crumbly, they have likely gone stale. Another sign is if they lose their aroma. Trust your senses! If they don’t smell good, it's best to toss them out. For the full recipe, check out the instructions above. Enjoy your cookies! Can I use whole wheat flour instead of all-purpose? Yes, you can use whole wheat flour. However, the cookies may be denser. If you want a lighter texture, mix half whole wheat and half all-purpose flour. This way, you keep some chewiness while adding fiber. How can I make these cookies vegan? To make them vegan, replace the egg with a flax egg. Mix one tablespoon of ground flaxseed with three tablespoons of water. Let it sit until it thickens. Use vegan butter instead of unsalted butter. This will keep the flavor rich and delicious. Why are my cookies not soft? If your cookies are not soft, it may be due to overbaking. Always check them a minute or two before the time is up. Another reason could be using cold butter. Make sure your butter is softened for the best texture. What to do if cookies spread too much while baking? If your cookies spread too much, try chilling the dough before baking. Place the rolled dough in the fridge for 30 minutes. This will help the cookies keep their shape better while baking. Also, ensure you measure your flour correctly. Too little flour can cause spreading. You can make soft cinnamon roll cookies that delight everyone. I covered the key ingredients, from flour to cinnamon. I shared easy instructions to help you bake them perfectly. Remember, mixing gently leads to soft cookies. Experiment with flavors, like pumpkin spice or white chocolate. Store cookies properly to keep them fresh. Lastly, check FAQs to solve common baking issues. Enjoy each bite and share these tasty treats!](https://grilledflavors.com/wp-content/uploads/2025/05/d2dc009e-2956-485a-be81-f514b13cc114.webp)
Soft Cinnamon Roll Cookies Irresistible Dessert Treat
Craving a dessert that’s warm, soft, and full of flavor? You’ll love these Soft Cinnamon Roll Cookies! Picture a classic cinnamon roll wrapped in a