Desserts
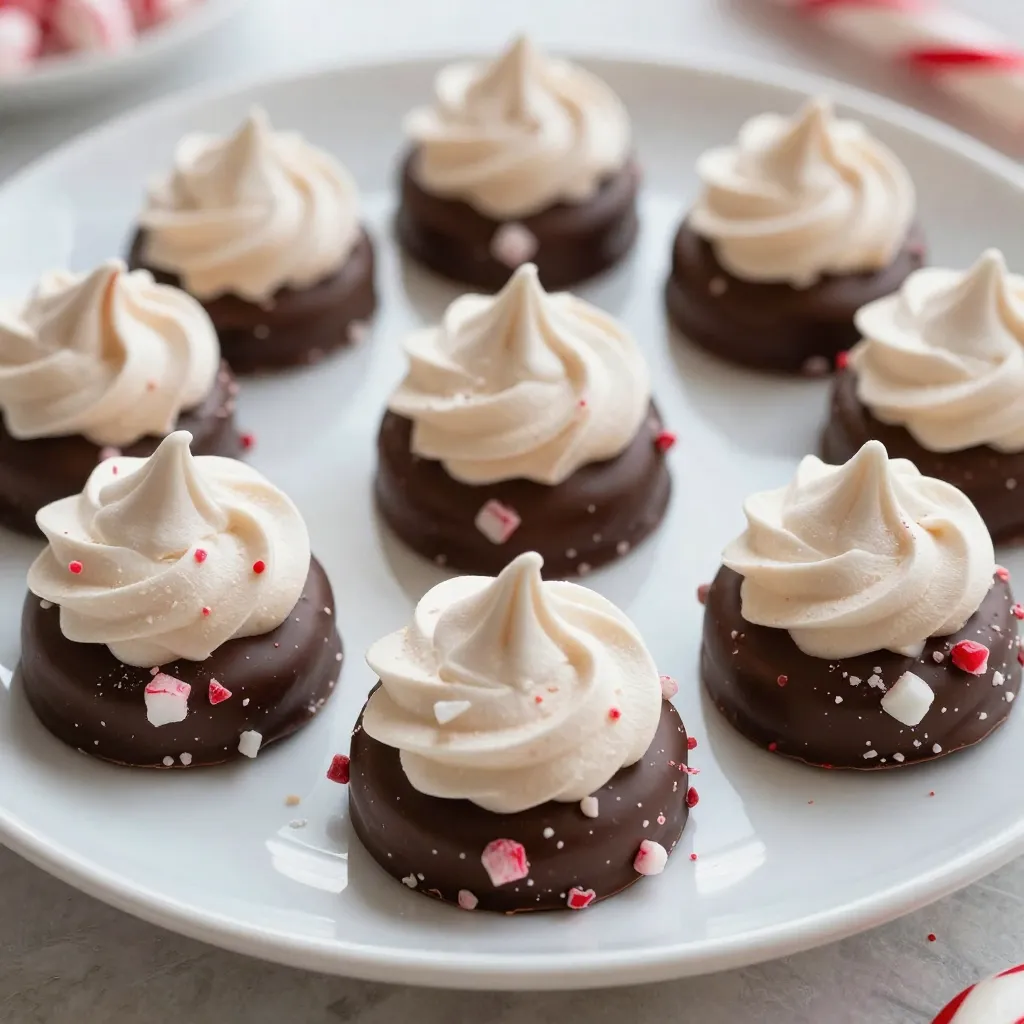
Chocolate Dipped Peppermint Meringues Festive Delight
Get ready to impress your family and friends with a festive treat: Chocolate Dipped Peppermint Meringues! These light and airy delights bring together the sweet
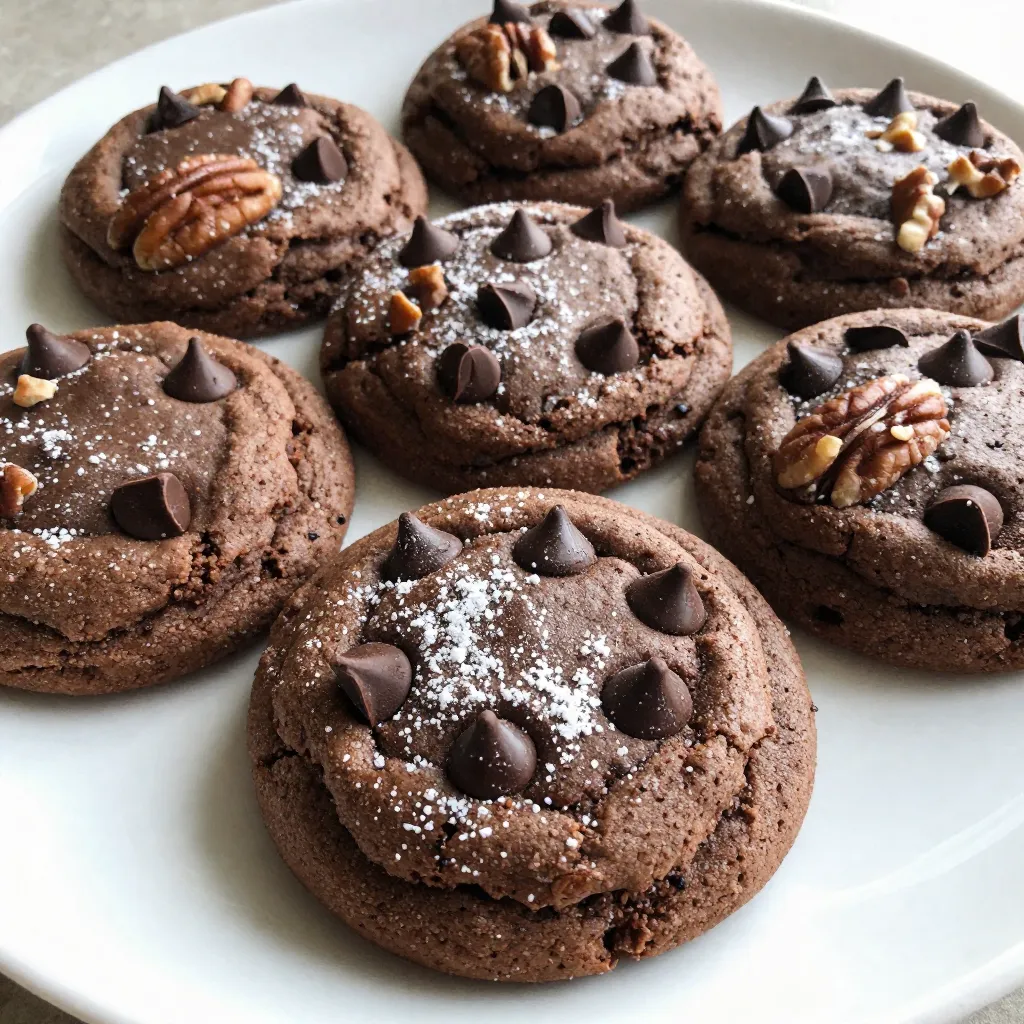
Texas Sheet Cake Cookies Delightful Treat Recipe
If you love Texas sheet cake, you’re going to adore these Texas Sheet Cake Cookies! This recipe combines the rich flavors of the classic cake
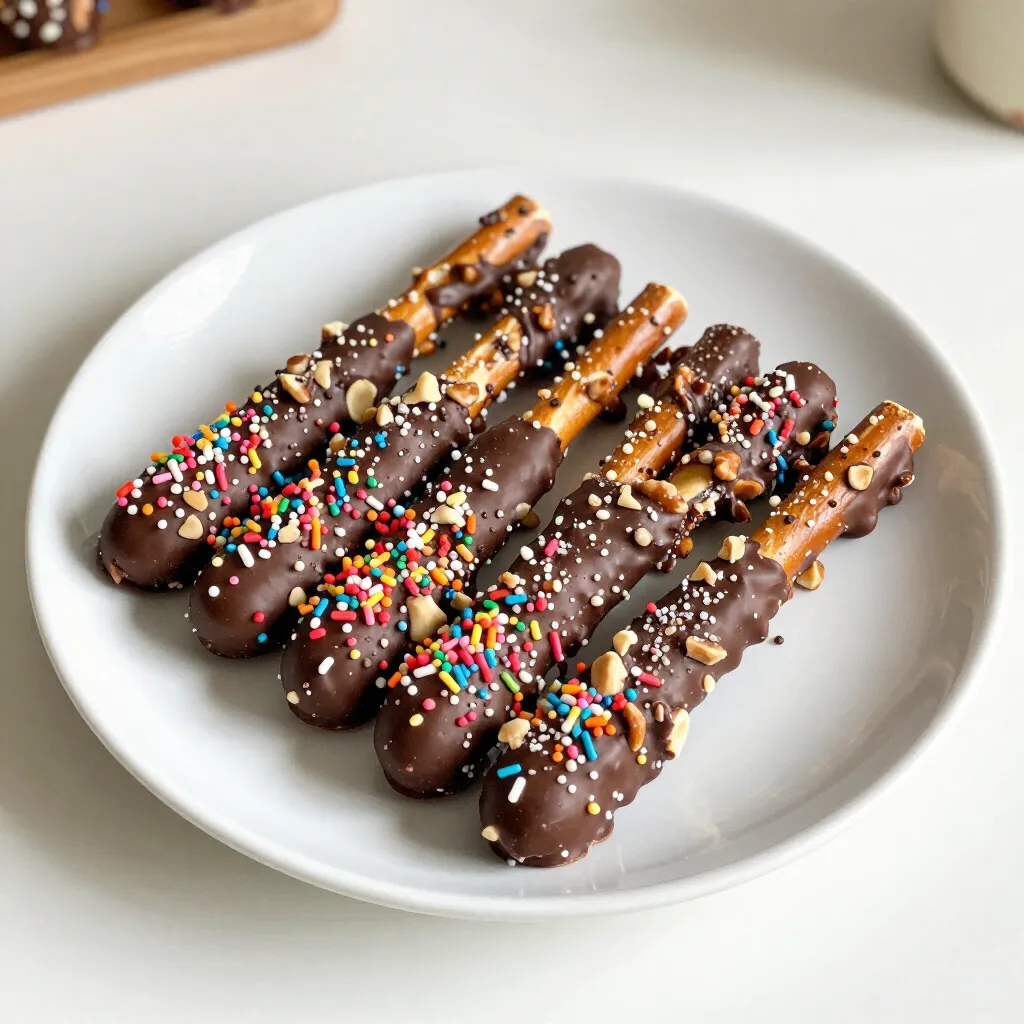
Chocolate Dipped Pretzel Rods Delightful Easy Treat
Craving a sweet and salty snack? Chocolate Dipped Pretzel Rods are the perfect solution! They’re easy to make and fun to customize, whether you’re hosting
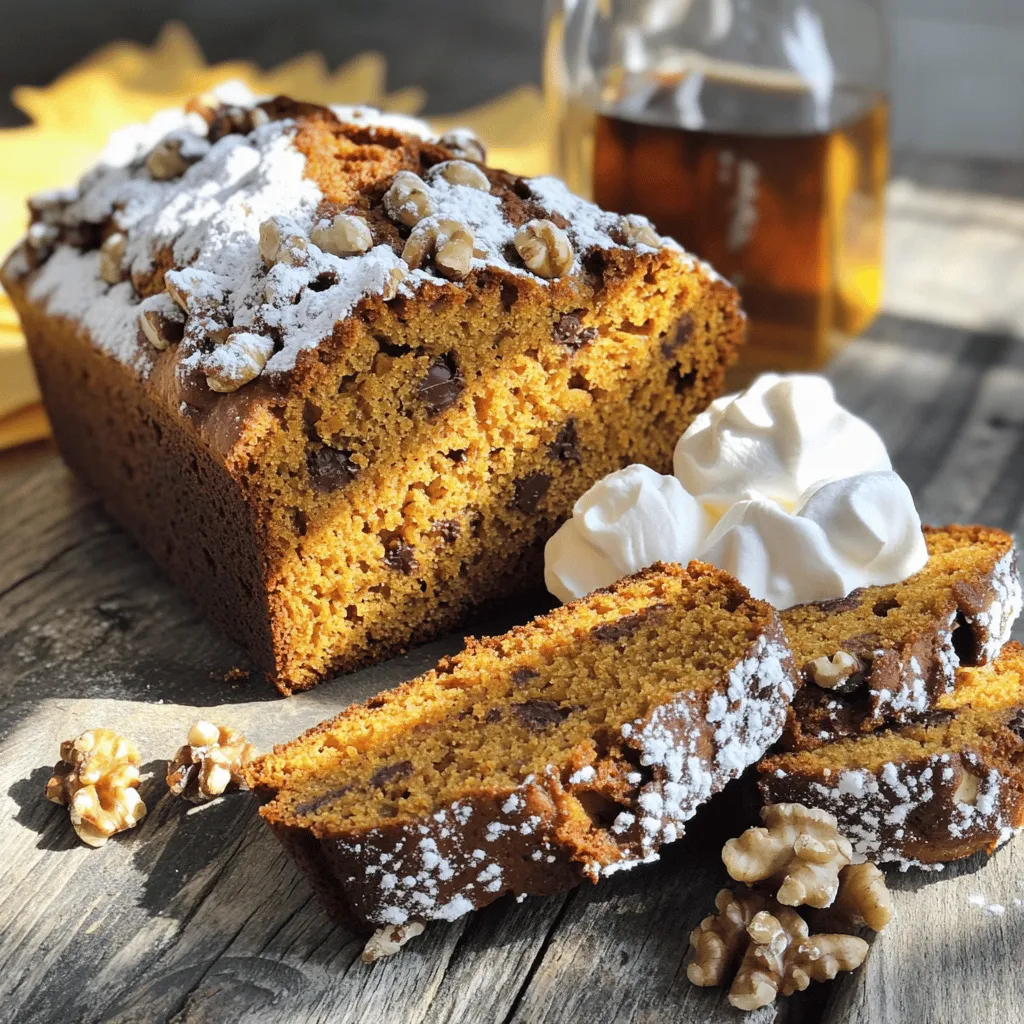
Easy Pumpkin Bread Delightful and Simple Recipe
Are you ready to fill your home with the warm, inviting aroma of pumpkin bread? This delightfully simple recipe combines soft, spiced bread with the
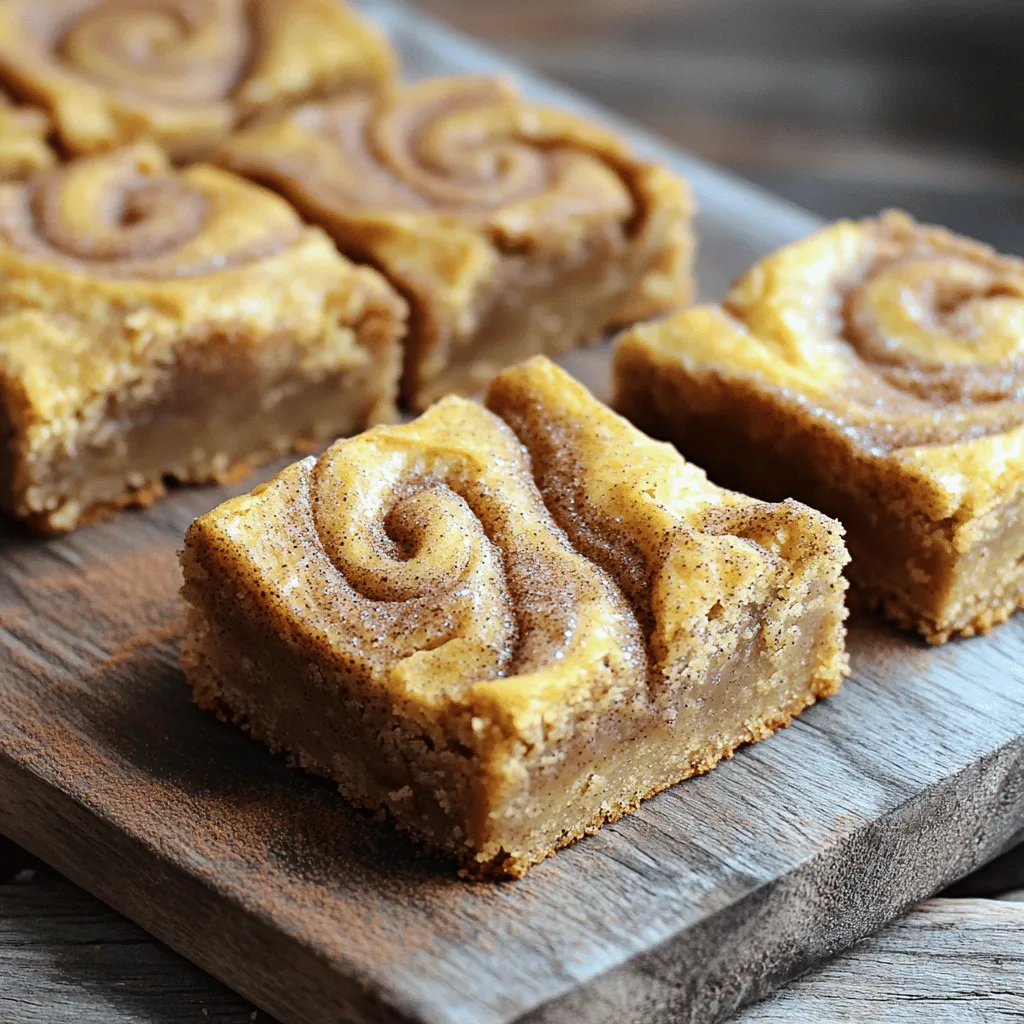
Cinnamon Swirl Snickerdoodle Blondies Easy and Tasty
Craving something sweet and easy? Let’s whip up some Cinnamon Swirl Snickerdoodle Blondies! These treats blend warm cinnamon and sugar goodness with a soft, chewy
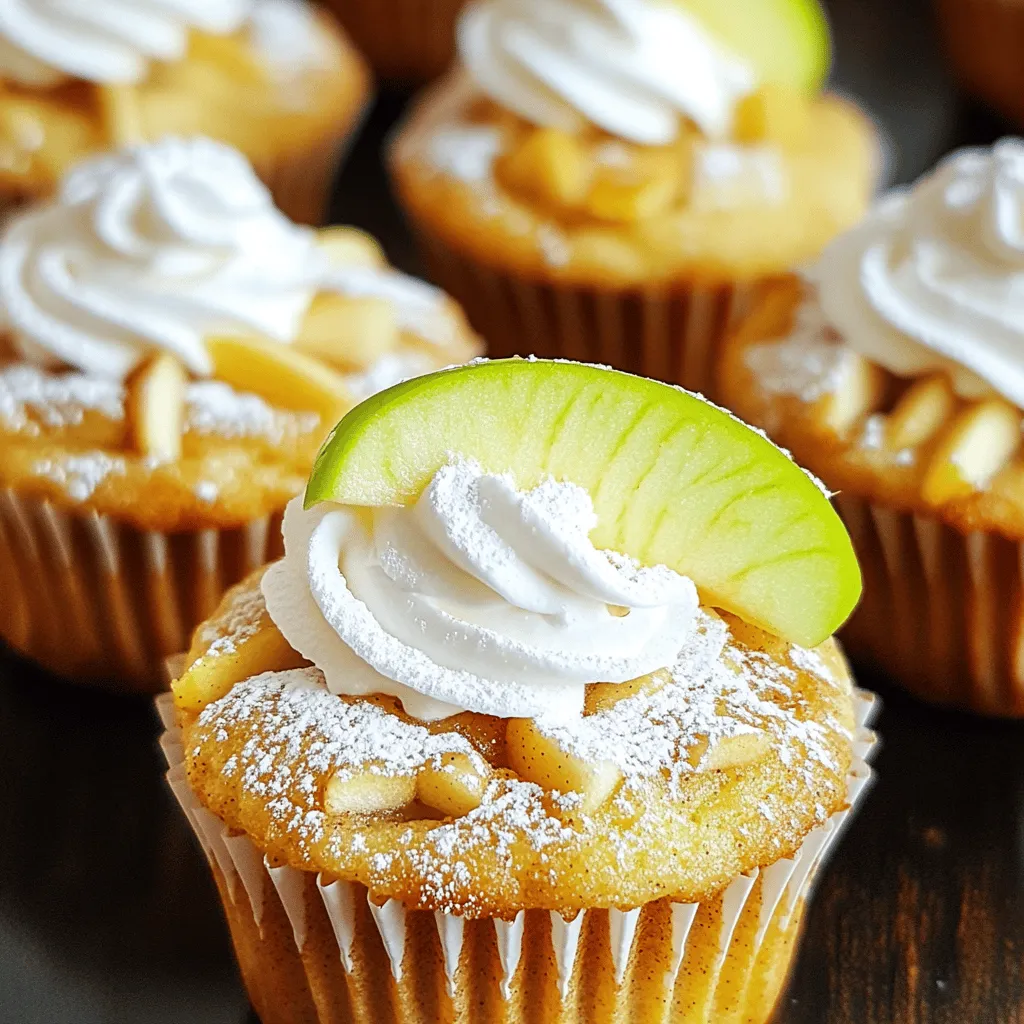
Apple Pie Cupcakes Indulge in Cozy Flavorful Treats
Welcome to the cozy world of Apple Pie Cupcakes! If you love the warm, sweet flavor of apple pie, you’ll want to try these delightful
![To make these fudgy red velvet brownies, gather these main ingredients: - 1 cup (2 sticks) unsalted butter, melted - 1 1/2 cups granulated sugar - 1/2 cup brown sugar, packed - 4 large eggs - 1 tablespoon vanilla extract - 1 tablespoon red food coloring - 1 1/4 cups all-purpose flour - 1/2 cup unsweetened cocoa powder - 1 teaspoon baking powder - 1/2 teaspoon baking soda - 1/2 teaspoon salt - 1 cup semi-sweet chocolate chips These ingredients work together to create a rich and moist brownie. The red food coloring adds that classic red velvet look. The melted butter makes the brownies soft and rich. You will also need these ingredients for the cream cheese frosting: - 1/2 cup cream cheese, softened - 1 cup powdered sugar - 1 tablespoon milk - Optional: white chocolate chips for garnish The cream cheese frosting is smooth and creamy. It adds a tangy sweetness to the brownies, making each bite delightful. You can sprinkle white chocolate chips on top for extra flair. For the full recipe, check out [Full Recipe]. 1. First, preheat your oven to 350°F (175°C). This step is key for even baking. 2. Next, grease and line a 9x13 inch baking pan with parchment paper. Leave some paper hanging over the edges for easy removal later. 1. In a large bowl, combine the melted butter, granulated sugar, and brown sugar. Whisk them together until smooth. 2. Add four eggs, one at a time, mixing well after each addition. Then, stir in the vanilla extract and red food coloring. Mix until everything is bright and well blended. 1. In a separate bowl, sift together the all-purpose flour and cocoa powder. This helps to avoid lumps for a smooth batter. 2. Add baking powder, baking soda, and salt to this mix. These ingredients help the brownies rise and add flavor. 1. Gradually mix the dry ingredients into the wet ingredients. Stir gently until just combined. Do not over-mix, or the brownies will be tough. 2. Now, fold in the semi-sweet chocolate chips. These will melt slightly, giving your brownies a rich texture. 1. Pour the brownie batter into the prepared pan. Spread it evenly using a spatula. 2. Bake in the preheated oven for 25-30 minutes. To check for doneness, insert a toothpick in the center. It should come out with a few moist crumbs. 1. While the brownies bake, prepare the cream cheese frosting. In a mixing bowl, beat the softened cream cheese until smooth. 2. Gradually mix in the powdered sugar and milk. Beat until the frosting is creamy and well combined. 1. Once the brownies cool for at least 10 minutes, spread the frosting evenly on top. 2. For an extra treat, sprinkle white chocolate chips on top. This adds sweetness and looks great. For the complete recipe, check the Full Recipe page. Enjoy this delightful treat! To get that rich, fudgy texture, you must underbake the brownies slightly. Bake them for 25-30 minutes, but check at the 25-minute mark. Insert a toothpick, and if it comes out with a few moist crumbs, they are ready. Overbaking will lead to dry brownies. Even mixing is also key. After adding the dry ingredients, mix gently until just combined. This helps keep the brownies dense and fudgy. You can enhance the flavor by adding nuts or different types of chocolate. Chopped walnuts or pecans add a nice crunch. You can also use dark chocolate chips for a richer taste. Adjusting sweetness is simple too. If you prefer sweeter brownies, increase the sugar slightly. For a more intense cocoa flavor, add an extra tablespoon of cocoa powder. When making the cream cheese frosting, aim for a smooth consistency. Start by beating the cream cheese until it’s fluffy. Gradually add powdered sugar and milk. This mix should be creamy and easy to spread. You can get creative with frosting designs. Use a piping bag for swirls or simple patterns. Add white chocolate chips on top for a fun visual touch. Check the Full Recipe for more details on the frosting process. {{image_2}} You can make red velvet swirl brownies by adding cream cheese to the batter. Swirl the cream cheese mixture into the brownie mix before baking. This adds flavor and a beautiful look. You can also adjust the colors by using more or less red food coloring. For decorations, consider adding sprinkles or a drizzle of white chocolate on top. If you want a gluten-free version, simply swap the all-purpose flour for a gluten-free blend. There are many great mixes available that work well in brownies. Be sure to choose a blend that includes xanthan gum for the best texture. This way, you can still enjoy fudgy brownies without gluten. For a vegan version, replace the eggs with flaxseed or applesauce. To make flaxseed eggs, mix one tablespoon of ground flaxseed with three tablespoons of water. Let it sit for a few minutes to thicken. For the butter and cream cheese, use plant-based alternatives. This keeps the brownies moist and delicious while being completely vegan. Store your brownies in an airtight container. This keeps them fresh. You can also place them in the fridge. They will last up to one week this way. If you want them to stay soft, let them cool completely before storing. Avoid stacking them, as this can cause them to stick together. To freeze brownies, cut them into squares first. Wrap each square tightly in plastic wrap. Then place them in a freezer bag. They can last up to three months in the freezer. When you want to eat them, take out a square and let it thaw at room temperature. For best texture, don’t microwave them to thaw. To enjoy your brownies warm, preheat your oven to 350°F (175°C). Place the brownies on a baking sheet and warm them for about 10 minutes. This helps keep them fudgy. You can also use a microwave. Heat for about 10-15 seconds. Check to ensure they do not dry out. Enjoy them with a scoop of ice cream for a tasty treat! Fudgy brownies have a rich, soft texture. Key ingredients that create this texture include butter, sugar, and eggs. The melted butter adds moisture, while the sugars help with that chewy bite. The eggs bind everything together, making it dense. The recipe also calls for cocoa powder, which adds depth. To keep them fudgy, avoid overbaking. Just bake until a toothpick shows moist crumbs. Yes, you can make these brownies ahead. They stay fresh for about 3 to 4 days at room temperature. Store them in an airtight container to keep them soft. If you want to keep them longer, freeze them. Wrap the cooled brownies tightly in plastic wrap, then put them in a freezer bag. They can last up to three months this way. If you want a red velvet look without food coloring, you have options. Beet juice is a great natural choice. It gives a nice color and adds some sweetness. Another option is pomegranate juice, which also works well. Just remember, these alternatives may change the flavor a bit. To check for doneness, use a toothpick. Insert it into the center of the brownies. If it comes out with a few moist crumbs, they’re ready. If it’s wet with batter, they need more time. Always avoid a clean toothpick, as this means they are overbaked. The edges should look set, while the center remains slightly soft. Absolutely! Adding nuts can give your brownies a nice crunch. Walnuts or pecans work well. You can also mix in chocolate chips for extra chocolatey goodness. If you want a fun twist, try adding peanut butter or caramel swirls. Just remember to keep the balance, so the brownies don’t become too heavy. For the full recipe, check out the detailed steps. You learned how to make delicious brownies from scratch. We covered key ingredients, step-by-step instructions, and helpful tips. With variations for everyone, like gluten-free and vegan, everyone can enjoy these treats. Pay attention to baking times for that perfect fudgy texture. Store them properly for freshness, and don’t forget to try different frosting designs. Enjoy your baking journey, and impress friends and family with these yummy brownies!](https://grilledflavors.com/wp-content/uploads/2025/08/45c2e69e-851a-4197-b798-76ac889c14f1.webp)
The Best Fudgy Red Velvet Brownies Delightful Treat
If you love rich, chocolatey treats, then you’ll adore these fudgy red velvet brownies! With a unique blend of cocoa and vibrant color, they’re perfect
![- 1 cup graham cracker crumbs - 8 oz cream cheese, softened - 1 cup pumpkin puree For your no-bake pumpkin mini cheesecakes, the main ingredients are simple yet flavorful. Graham cracker crumbs make a perfect, crunchy base. Cream cheese gives the cheesecake its rich, creamy texture. The pumpkin puree brings in that classic fall flavor. - Whipped cream - Ground cinnamon Toppings can elevate your mini cheesecakes. Whipped cream adds a light touch to each bite. Ground cinnamon gives a warm aroma and enhances the pumpkin flavor. You can sprinkle it just before serving for a festive look. - Alternative sweeteners - Gluten-free crust options If you want to change things up, consider using alternative sweeteners like honey or maple syrup. They can add unique flavors and reduce refined sugar. For a gluten-free option, you can use gluten-free graham cracker crumbs or crushed nuts for the crust. This way, everyone can enjoy these tasty treats! For the complete recipe, refer to the [Full Recipe]. First, we will mix the crust ingredients. In a bowl, combine graham cracker crumbs, melted butter, and brown sugar. Mix until the crumbs are evenly coated. This gives the crust a sweet flavor. Next, we form the bases. Spoon about one tablespoon of the mixture into each mini cheesecake cup. Press down firmly to create a flat base. This step is key for a good texture. After that, place the cups in the fridge to set while we prepare the filling. Now, let’s make the cheesecake filling. In a large bowl, beat the softened cream cheese with an electric mixer. Mix until it is smooth. Then, add pumpkin puree, powdered sugar, vanilla extract, and pumpkin spice. Combine these ingredients until they form a creamy mixture. The next step is whipping the cream. In a separate bowl, whip the heavy cream until stiff peaks form. This will add lightness to the filling. Carefully fold the whipped cream into the pumpkin mixture until they blend well. Now it’s time to fill the cups. Take the mini crusts out of the fridge. Spoon or pipe the pumpkin cheesecake filling over each crust. Fill them generously for a delightful treat. Finally, we need to chill the mini cheesecakes. Return the filled cups to the fridge. Let them set for at least four hours, but overnight is best. This allows the flavors to meld. For the full recipe, check out the link above. Using room temperature ingredients is key. When your cream cheese is soft, it blends smoothly. This helps avoid lumps in your filling. Always take your cream cheese out early. Let it sit at room temperature for about 30 minutes. Folding in whipped cream is another important step. Once you whip the cream, it should be fluffy and light. Gently mix it into the pumpkin mixture. This keeps the filling airy. If you stir too hard, you risk losing that light texture. For a stunning presentation, arrange the mini cheesecakes on a pretty platter. You can add a sprinkle of crushed graham crackers around them. This adds color and texture. Pair your mini cheesecakes with warm drinks. A spiced chai or a pumpkin latte works well. The flavors blend perfectly. You can also serve them with a scoop of vanilla ice cream for a treat. One common mistake is overmixing the filling. Mixing too long makes the texture dense. Be gentle when incorporating the ingredients. Stop mixing as soon as it’s smooth. Another mistake is not chilling long enough. These cheesecakes need at least four hours to set. For the best taste and texture, chill them overnight. This allows the flavors to meld and firm up nicely. For the full recipe, check the section above. {{image_2}} You can easily change the flavor of your mini cheesecakes. A fun twist is to add chocolate or caramel swirls. Just melt some chocolate or caramel, and swirl it into the cheesecake filling before you chill it. This adds a rich flavor and makes it extra fancy. You can also use different spices. If you want a warmer taste, try adding nutmeg or allspice. This gives your cheesecakes a unique kick that everyone will love. If you or your guests have dietary needs, you can still enjoy these treats. To make a vegan version, replace cream cheese with a plant-based option. Use coconut cream in place of heavy cream for a creamy texture. For those who need dairy-free and nut-free options, look for nut-free cream cheese. You can also use oat or coconut-based creams. These swaps keep the taste delicious while meeting dietary needs. Changing the serving size is simple with this recipe. If you want to make a larger cake, use a springform pan. Just pour the filling over the crust and adjust the chilling time. A larger cake may need more time to set. If you want smaller bites, use mini muffin tins instead. Fill each cup lightly for bite-sized treats. This makes them perfect for parties or quick snacks. For the full recipe, check the earlier section. To keep your no-bake pumpkin mini cheesecakes fresh, store them in the fridge. Place them in an airtight container. This prevents them from drying out or absorbing other smells. You can also cover them with plastic wrap. If you want to store them longer, consider freezing. Wrap each cheesecake tightly in plastic wrap, then place them in a freezer-safe bag. This helps maintain their flavor and texture. These mini cheesecakes last about 4 to 5 days in the fridge. After this time, they may start to lose their taste. If you freeze them, they can last up to three months. Signs of spoilage include a sour smell or a change in texture. If you see any mold, throw them away immediately. You won’t need to reheat these cheesecakes. They are best enjoyed cold. If they seem too firm after freezing, let them sit out for 10 to 15 minutes before serving. This helps them regain their creamy texture. For more details, check out the Full Recipe for serving tips and more! Yes, you can use fresh pumpkin. Fresh pumpkin adds a bright taste. It also gives a nice texture. However, fresh pumpkin needs more time to prepare. You must cook and puree it first. This can take longer than using canned puree. Canned pumpkin is ready to use. It also has a consistent flavor. If you want a quick option, go for canned. If you love the fresh taste, use fresh pumpkin. These mini cheesecakes need to chill for at least 4 hours. For the best taste, chill them overnight. This allows the flavors to blend well. Chilling also helps the cheesecake set properly. If you skip this step, they may be too soft when served. Ensure you give them enough time to chill for a better experience. Yes, you can make these mini cheesecakes ahead of time. They are perfect for meal prep. Just store them in the fridge until you are ready to serve. You can make them one or two days in advance. This makes your event stress-free. Ensure to cover them well to keep them fresh. When serving, add whipped cream and cinnamon on top for a lovely touch. For the full recipe, check the details above. In this blog post, we covered how to make no-bake pumpkin mini cheesecakes. You learned about key ingredients like graham crackers, cream cheese, and pumpkin puree. We discussed optional toppings and substitutions to fit your needs. I shared step-by-step instructions, tips for texture, and serving ideas. These cheesecakes are not just tasty; they’re easy to make. With some creativity, you can customize them to suit any occasion. Enjoy your delicious treat, and remember to share it with friends!](https://grilledflavors.com/wp-content/uploads/2025/08/2d36d16d-b677-4a36-bccb-d7e5705a2f2c.webp)
No-Bake Pumpkin Mini Cheesecakes Simple and Delicious
If you’re looking for a quick and easy dessert that packs a punch of flavor, these No-Bake Pumpkin Mini Cheesecakes are just the treat for
![For these delightful pies, gather these main ingredients: - 1 ½ cups rolled oats - 1 cup whole wheat flour - 1 teaspoon baking soda - 1 teaspoon ground ginger - 1 teaspoon ground cinnamon - ¼ teaspoon ground nutmeg - ¼ teaspoon salt - ½ cup unsalted butter, softened - ½ cup brown sugar, packed - ½ cup granulated sugar - 1 large egg - 1 teaspoon vanilla extract - ½ cup molasses These ingredients form the base of your cookies. The oats give a hearty texture, while the spices create that warm, festive flavor. To make the creamy filling, you will need: - 1 cup powdered sugar - ½ cup cream cheese, softened - 2 tablespoons unsalted butter, softened - 1 teaspoon vanilla extract This filling adds sweetness and richness to each bite. Cream cheese gives a lovely tang that balances the spice. If you have dietary needs, here are some easy swaps: - Use gluten-free flour instead of whole wheat flour. - Substitute coconut oil for butter to make it dairy-free. - Use maple syrup instead of molasses for a lighter flavor. These substitutions ensure everyone can enjoy the pies without missing out on flavor! Feel free to check the Full Recipe for more details on the baking process. Start by preheating your oven to 350°F (175°C). This heat will help cook the pies evenly. While the oven warms up, line two baking sheets with parchment paper. This step prevents sticking and makes cleanup easy. In a large bowl, combine the dry ingredients. Add 1 ½ cups of rolled oats, 1 cup of whole wheat flour, 1 teaspoon of baking soda, and spices: 1 teaspoon of ground ginger, 1 teaspoon of ground cinnamon, ¼ teaspoon of ground nutmeg, and ¼ teaspoon of salt. Whisk these together well. This blend gives the cookies their rich flavor. In a separate mixing bowl, beat together ½ cup of softened unsalted butter, ½ cup of brown sugar, and ½ cup of granulated sugar. Mix until light and fluffy, which should take about 3 minutes. Next, add 1 large egg, ½ cup of molasses, and 1 teaspoon of vanilla extract. Beat this mixture until it is well combined. Gradually add the dry mixture to the wet mixture. Stir until just combined, being careful not to over-mix. Using a cookie scoop or two tablespoons, drop balls of dough onto your prepared baking sheets. Space them about 2 inches apart. Bake in your preheated oven for 10-12 minutes. Look for slight golden edges and set centers. After baking, let the cookies cool on the sheets for 5 minutes. Then, transfer the cookies to a wire rack to cool completely. To make the cream filling, beat together 1 cup of powdered sugar, ½ cup of softened cream cheese, and 2 tablespoons of softened unsalted butter in a medium bowl. Add 1 teaspoon of vanilla extract and mix until smooth and creamy. Once your cookies are cool, spread a generous layer of this cream filling on one cookie's flat side. Sandwich it with another cookie. For the best taste, chill the assembled pies for at least 30 minutes before serving. Enjoy your delicious treats! For the complete recipe, check out the [Full Recipe]. To bake the best oatmeal cookies, focus on a few key points: - Use Fresh Ingredients: Always check your baking soda and spices for freshness. Old ingredients can affect the taste and rise. - Do Not Over-Mix: When combining wet and dry ingredients, mix gently. Over-mixing makes cookies tough. - Chill the Dough: If your kitchen is warm, chill the dough for 15-30 minutes. This helps the cookies hold shape while baking. - Check for Doneness: Cookies should be golden on the edges but soft in the center. They will firm up while cooling. The cream filling should be smooth and spreadable. Here are my tips: - Room Temperature Ingredients: Use cream cheese and butter at room temperature. This helps them mix well and become creamy. - Gradual Mixing: Start mixing on low speed, then increase as the ingredients blend. This prevents a powdered sugar cloud! - Adjust Consistency: If too thick, add a splash of milk. If too thin, add more powdered sugar. Aim for a spreadable texture. Presentation can make your cookies extra special. Here are some ideas: - Festive Plating: Use a colorful plate or platter that matches the season. This makes your cookies pop! - Add Sprinkles: For a fun touch, sprinkle powdered sugar or festive sprinkles on top. - Garnish: Place a few sprigs of holly or pine around the cookies. It adds a lovely holiday vibe. For the complete recipe, check out the full recipe section. {{image_2}} You can switch up the cream filling to keep things exciting. For a chocolate twist, add cocoa powder to the cream cheese mixture. You might also try peppermint extract for a cool, festive flavor. If you want a fruity touch, mix in some lemon zest or orange zest. Each of these flavors will add a fun twist to your gingerbread oatmeal cream pies. Making these pies gluten-free is easy. Just swap out the whole wheat flour for a gluten-free blend. Look for a mix that works well in cookies. Oats can be tricky, so make sure you use gluten-free rolled oats. This way, everyone can enjoy these treats without worry. Step up the spice game by adding more holiday flavors. Consider cloves, allspice, or cardamom to the dough. Just a pinch can bring warmth and depth. You can also play with nutmeg, increasing its amount for a stronger flavor. These spices bring the holiday spirit right into your kitchen. To keep your gingerbread oatmeal cream pies fresh, store them in an airtight container. This prevents moisture loss and keeps them soft. Place a piece of parchment paper between layers to avoid sticking. Store them at room temperature for easy access. If you want to keep them longer, use the fridge. The cool air helps maintain their texture and flavor. When stored properly, these pies last about five days at room temperature. In the fridge, they can last up to a week. Always check for any signs of spoilage, like a change in smell or texture. If they start to harden, they may still taste good but will not be as delightful to eat. Yes, you can freeze gingerbread oatmeal cream pies! For the best results, freeze them before you add the cream filling. Wrap each pie in plastic wrap and place them in a freezer-safe bag. They can stay frozen for up to three months. When you are ready to enjoy them, thaw them in the fridge overnight. Then, add the cream filling and enjoy! For the full recipe, check out the earlier section. To make gingerbread oatmeal cream pies, follow these steps: 1. Preheat your oven to 350°F (175°C). 2. Mix dry ingredients: Combine oats, flour, baking soda, ginger, cinnamon, nutmeg, and salt. 3. Cream butter and sugars: Beat softened butter, brown sugar, and granulated sugar until fluffy. 4. Add egg and molasses: Mix in the egg, molasses, and vanilla. 5. Combine mixtures: Gradually add dry ingredients to the wet mix until just combined. 6. Drop dough balls: Use a scoop to place dough onto prepared sheets. 7. Bake for 10-12 minutes until edges are golden. 8. Cool on a wire rack. 9. Make cream filling: Beat powdered sugar, cream cheese, unsalted butter, and vanilla until smooth. 10. Assemble by spreading cream on one cookie and topping with another. You can find the full recipe above. Yes, you can use quick oats. They will change the texture. Quick oats make softer cookies. Rolled oats give a chewier bite. If you use quick oats, reduce baking time slightly. To keep your pies together, follow these tips: - Chill the dough: Let the dough rest in the fridge for 30 minutes. - Do not over-mix: Combine ingredients until just mixed. - Bake fully: Ensure cookies are set but not overcooked. - Cool completely: Let cookies cool before filling. Absolutely! These gingerbread oatmeal cream pies make great gifts. They look festive and taste amazing. Package them in decorative boxes or tins. Add a personal note for a special touch. Yes, you can make the cream filling ahead of time. Store it in an airtight container in the fridge. Bring it to room temperature before using. This helps it spread easily. Gingerbread oatmeal cream pies are a fun treat that's easy to make. We covered ingredients, from the main flavors to dietary swaps, and I shared step-by-step baking tips. You learned how to store these sweets and some neat variations to try. Remember, the key is practice and finding what you love. With these simple steps, you can create delicious cookies that impress friends and family alike. Enjoy your baking journey and keep experimenting!](https://grilledflavors.com/wp-content/uploads/2025/08/77279f30-01d7-4c36-90d7-1c5617e00159.webp)
Incredible Gingerbread Oatmeal Cream Pies Delight
Get ready to treat your taste buds! In this post, I’ll show you how to make incredible gingerbread oatmeal cream pies that are perfect for
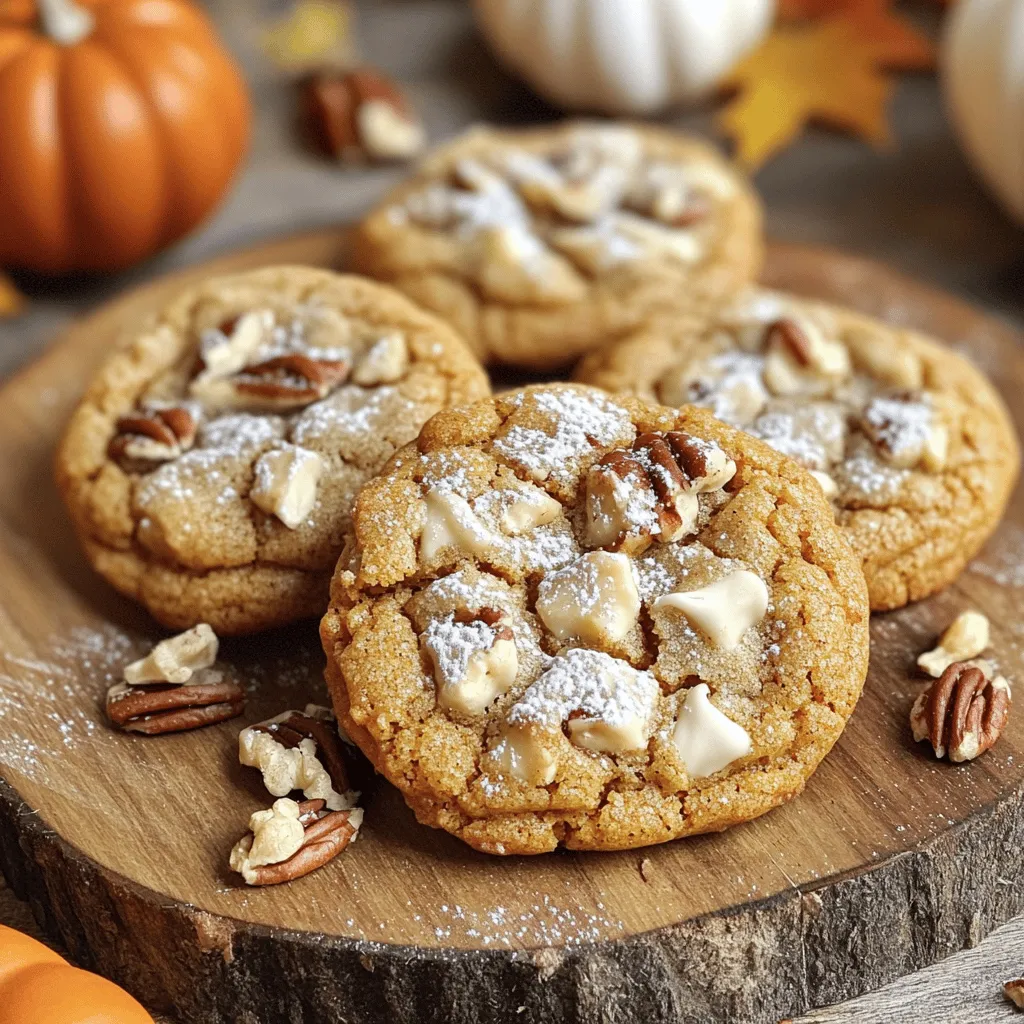
Maple Pumpkin Cookies Irresistible Autumn Treat
Are you ready to fall in love with autumn flavors? These Maple Pumpkin Cookies are a true delight, bringing together the warmth of spices and