Desserts
![- 8 oz cream cheese, softened - 1/2 cup granulated sugar - 1 teaspoon vanilla extract - 1 cup crushed graham crackers - 1/2 cup fresh raspberries, mashed - 8 oz white chocolate, melted - 1 tablespoon coconut oil (to thin the chocolate) - Pinch of salt - Extra crushed graham crackers for rolling When you make these cheesecake balls, start with high-quality ingredients. The cream cheese gives a rich base. The granulated sugar adds the right sweetness. Vanilla extract brings out all the flavors. Fresh raspberries add a fruity twist, while white chocolate coats and adds smoothness. You can add different flavorings to make your cheesecake balls unique. Consider using: - Lemon zest for a citrus touch - Almond extract for a nutty flavor - A dash of cocoa powder for chocolate lovers These add-ins can help you customize the taste. You can even try different toppings like crushed nuts or sprinkles. To make these cheesecake balls, you will need: - Mixing bowls - Hand mixer - Cookie scoop - Parchment-lined baking sheet Using the right tools makes your job easier. A hand mixer helps blend ingredients quickly. A cookie scoop ensures even-sized balls. Parchment paper keeps the balls from sticking. For the full recipe, check [Full Recipe]. Happy cooking! To start, gather your ingredients and a mixing bowl. Combine 8 oz of softened cream cheese, 1/2 cup of granulated sugar, and 1 teaspoon of vanilla extract. Beat them together with a hand mixer on medium speed. Mix until the texture is smooth and creamy. This step is key for a great cheesecake base. Next, gently fold in 1 cup of crushed graham crackers and 1/2 cup of mashed fresh raspberries. Be careful not to over-mix; you want to keep some raspberry chunks for flavor. After mixing, it’s time to roll the mixture into balls. Use your hands or a small cookie scoop for this. Aim for about 1 inch in diameter for each ball. Place them on a parchment-lined baking sheet. If your hands get sticky, wet them slightly with water. This trick helps you roll uniform balls without mess. Once you form all the balls, chill them in the fridge for about 30 minutes. This makes them firm and easier to coat. Now, let’s melt the white chocolate. In a microwave-safe bowl, mix 8 oz of melted white chocolate with 1 tablespoon of coconut oil. Heat the mixture in 30-second intervals. Stir in between until it is smooth. This step ensures your chocolate coats evenly. Dip each cheesecake ball into the melted chocolate. Use a fork to lift them out, letting excess chocolate drip off. Immediately roll each ball in extra crushed graham crackers for a crunchy touch. Finally, place the coated balls back on the baking sheet and let them set. You can chill them for about 15-20 minutes. Enjoy your delicious white chocolate raspberry cheesecake balls! For the complete recipe, refer to the Full Recipe section. To keep your cheesecake balls creamy, avoid over-mixing. Mix the cream cheese, sugar, and vanilla until smooth. Then, gently fold in the crushed graham crackers and mashed raspberries. This method keeps the raspberry chunks intact. You want bites of fruit in each ball. If you mix too much, the raspberries break down into mush. For a stunning presentation, arrange the cheesecake balls on a colorful platter. Drizzle any leftover melted white chocolate over the top. This adds elegance and flavor. Garnish with whole raspberries or fresh mint leaves for color. These simple touches make your dessert look fancy. If your chocolate is clumpy, it may have overheated. Always melt chocolate in short intervals, stirring between. This helps keep it smooth. If your cheesecake balls are crumbly, they may need more moisture. Add a touch more cream cheese for a creamier texture. Adjusting your ingredients can solve many common problems. {{image_2}} You can change the fruits in these cheesecake balls. Try strawberries or blueberries instead of raspberries. Each fruit brings a different taste. For chocolate lovers, use dark chocolate instead of white. It adds a rich flavor that pairs well with the cheesecake. You can also mix in some orange zest for a citrus twist. This gives a fresh and bright flavor. To make these cheesecake balls lighter, swap cream cheese for Greek yogurt. This change cuts calories and adds protein. You can also use a sugar substitute if you need to lower sugar intake. For a gluten-free option, use gluten-free graham crackers. This keeps the flavor while meeting dietary needs. For special occasions, add festive spices like cinnamon or nutmeg. You can also use peppermint extract for a holiday vibe. During spring, garnish with edible flowers for a beautiful touch. When serving, arrange the balls on a colorful platter. This makes a stunning presentation for any gathering. To keep your cheesecake balls fresh, place them in an airtight container. Use parchment paper between layers to prevent sticking. Store them in the fridge for the best taste and texture. They stay creamy and delicious this way. Avoid leaving them at room temperature for long. This keeps bacteria away and preserves their quality. If you want to freeze cheesecake balls, first chill them in the fridge. Once firm, place them in a freezer-safe bag, separating layers with parchment paper. They can stay frozen for about three months. When you're ready to enjoy, thaw them in the fridge overnight. This helps keep their texture nice and smooth. These cheesecake balls last about 5 to 7 days in the fridge. After that, the flavors may fade, and the texture can change. If you notice any off smells or changes, it's best to discard them. Enjoy your treats while they're fresh for the best experience! For the complete recipe, check out the Full Recipe. Yes, you can use frozen raspberries in this recipe. They work well in cheesecake balls. However, they may have more water than fresh ones. To reduce excess moisture, thaw and drain them before mashing. This helps keep your cheesecake mixture firm. If your chocolate doesn’t coat smoothly, it might be too thick. This can happen if it cools down too much. To fix this, add a bit of coconut oil while melting. Stir until it becomes smooth again. If it hardens, reheat in short bursts in the microwave. Yes, you can make these cheesecake balls ahead of time. Prepare them and store them in the fridge for up to three days. You can also freeze them for up to a month. Just remember to let them thaw in the fridge before serving. In this blog post, we explored how to create delicious cheesecake balls using simple ingredients like cream cheese, raspberries, and white chocolate. We discussed the step-by-step process for mixing, rolling, and coating the cheesecake. I also shared tips for perfect texture and serving ideas. Remember, you can customize flavors and even make healthier versions. Whether for a party or a sweet treat for yourself, these cheesecake balls are sure to please. Get creative, and enjoy every bite!](https://grilledflavors.com/wp-content/uploads/2025/05/c92b6814-812b-495e-80a6-3b8192640985.webp)
Delicious White Chocolate Raspberry Cheesecake Balls
If you love the sweet taste of white chocolate and tangy raspberries, you’ll adore these White Chocolate Raspberry Cheesecake Balls! They’re easy to make, delightful

Gooey Salted Caramel Cupcakes Indulgent and Sweet Treat
Craving something sweet and indulgent? These Gooey Salted Caramel Cupcakes are just what you need! Bursting with rich flavor and a soft, gooey center, they’re
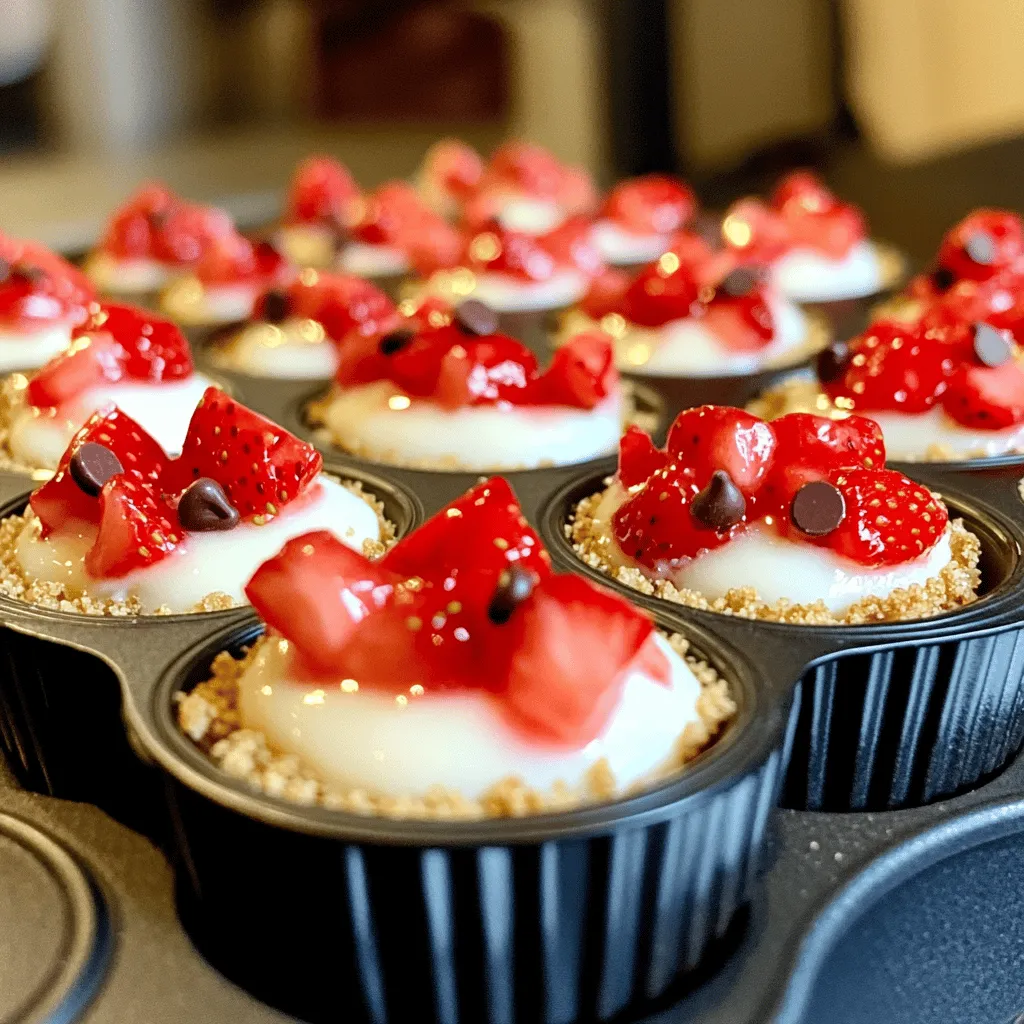
Strawberry Cheesecake Crunch Bites Tasty and Easy Treat
Looking for a sweet treat that’s both tasty and easy to make? You’ve come to the right place! Today, I’ll guide you through creating delicious
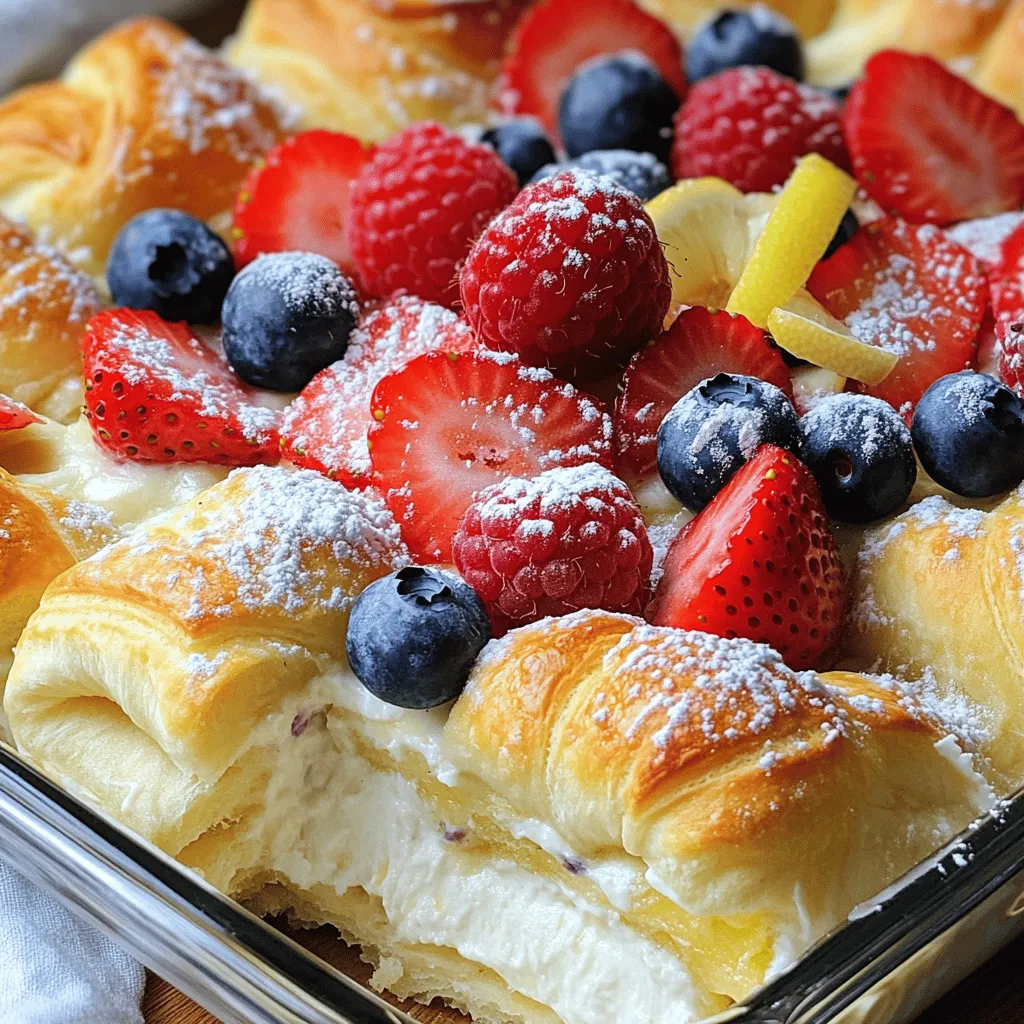
Cheesecake Crescent Rolls Casserole Delightful Treat
Are you ready to indulge in a sweet twist on your favorite dessert? This Cheesecake Crescent Rolls Casserole is a fun and easy treat that
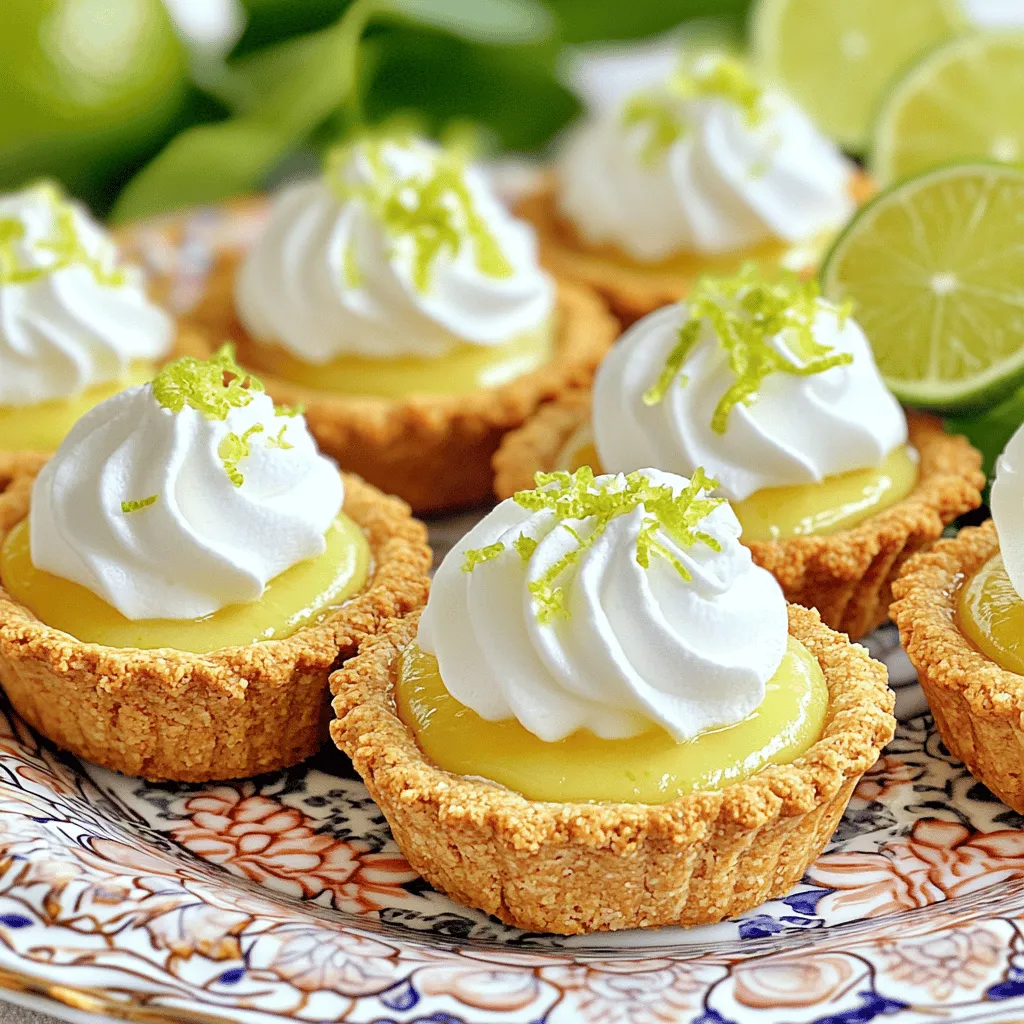
Mini Key Lime Pies Delightful and Easy Recipe
Are you ready for a tasty treat? Mini Key Lime Pies are the perfect balance of sweet and tangy. In this post, I’ll share a
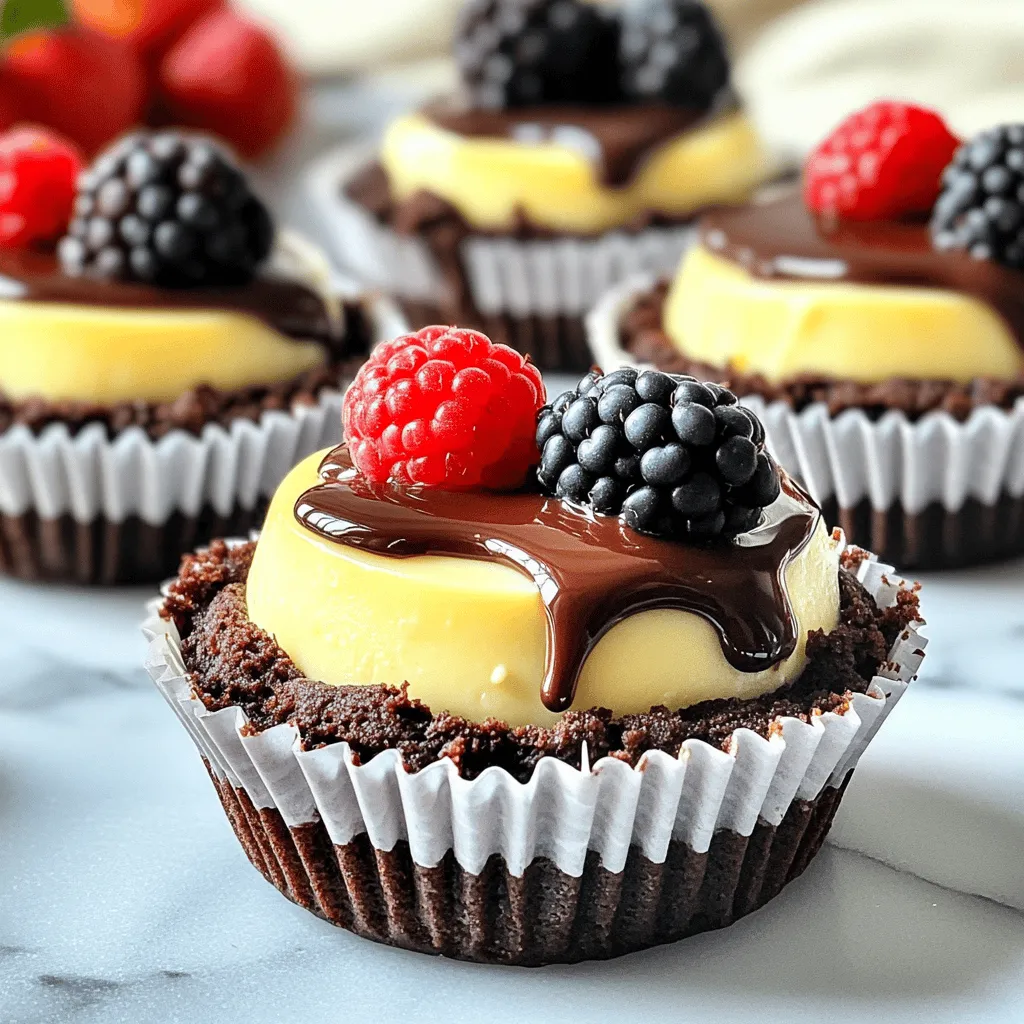
Brownie Bottom Mini Cheesecakes Rich and Decadent Delight
Are you ready to indulge in something truly delicious? These Brownie Bottom Mini Cheesecakes are the perfect blend of rich brownie and creamy cheesecake. They’re

Key Lime Cheesecake Simple and Delicious Recipe
Are you ready to make a Key Lime Cheesecake that wows everyone? My simple and delicious recipe will guide you step-by-step. I’ll show you the
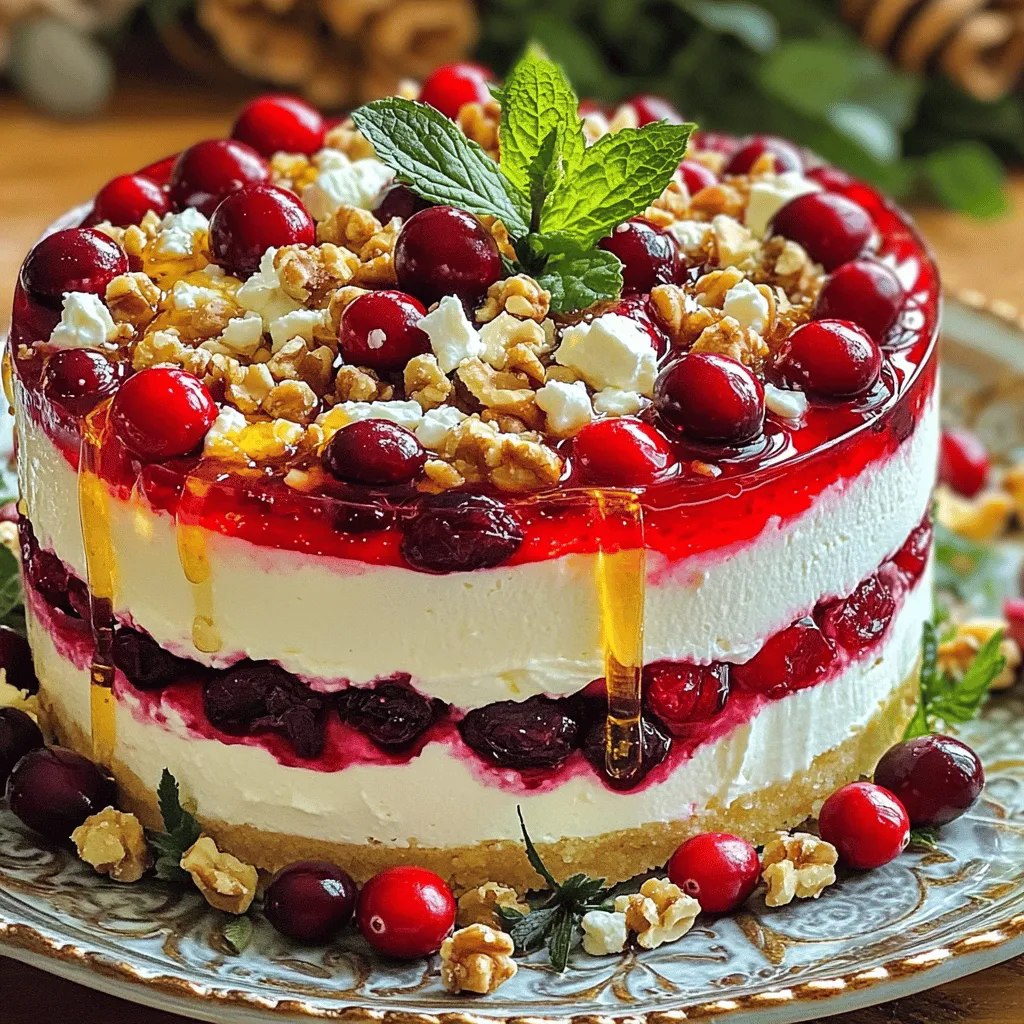
Cranberry Feta Cream Cheese Cake Delightful and Easy
If you’re on the hunt for a unique dessert, this Cranberry Feta Cream Cheese Cake is for you! It combines tart cranberries with creamy feta
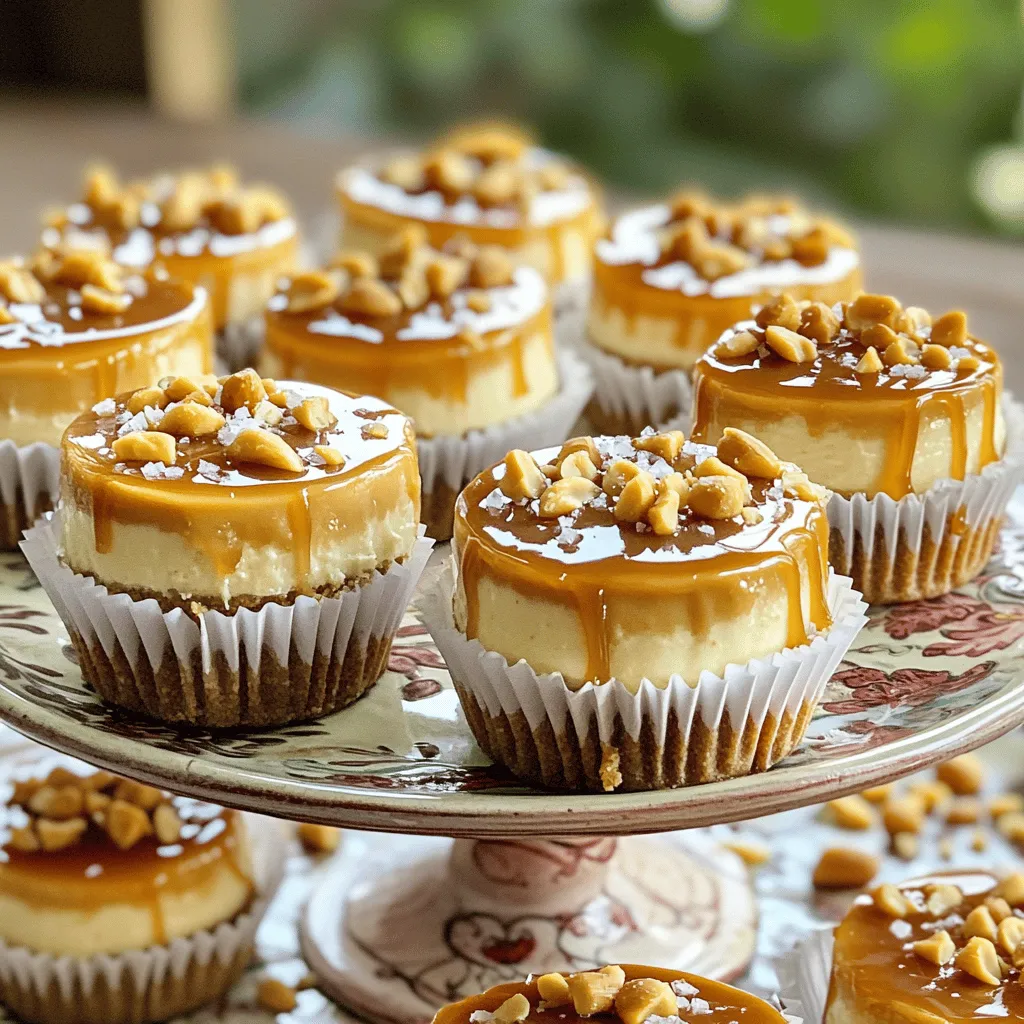
Irresistible Peanut Butter Caramel Mini Cheesecakes Delight
Are you ready to indulge in a sweet treat that satisfies every craving? My Irresistible Peanut Butter Caramel Mini Cheesecakes are a dream come true.
![- 200g digestive biscuits, crushed - 100g unsalted butter, melted - 600g cream cheese, softened - 200g powdered sugar - 300ml heavy cream, whipped - 2 teaspoons vanilla extract - 100g honeycomb, crushed - 50g dark chocolate, grated (optional for garnish) To make a Crunchy Honeycomb Cheesecake, you need simple yet tasty ingredients. First, the base starts with crushed digestive biscuits. These give the cheesecake a nice crunch and buttery flavor. Next, you use unsalted butter to hold the crust together. For the filling, cream cheese is key. It makes the cheesecake creamy and rich. Powdered sugar adds sweetness, while heavy cream gives it a light texture. Vanilla extract boosts the flavor, making it even better. Honeycomb, the star of this dessert, adds a delightful crunch and sweetness. You can also use dark chocolate as a garnish. It adds a nice touch of bitterness, balancing the sweetness. Gather these ingredients and you're ready to create a delightful dessert! For the full recipe, check out the detailed instructions. 1. Combine crushed biscuits with melted butter. Take your crushed digestive biscuits and mix them well with the melted butter in a bowl. This mixture will form the base of your cheesecake. 2. Firmly press mixture into springform pan. Use your hands or a flat object to press the biscuit mix into the bottom of a 9-inch springform pan. Ensure it is compact so that it holds its shape. 3. Refrigerate to set crust. Place the pan in the fridge for about 30 minutes. This helps the crust to firm up and makes it easier to add the filling later. 1. Beat cream cheese until smooth. In a separate bowl, use an electric mixer to beat the softened cream cheese. Mix it until it becomes creamy and smooth. 2. Gradually add powdered sugar and mix. Slowly add the powdered sugar to the cream cheese. Continue mixing until everything is well combined and fluffy. 3. Fold in whipped cream and vanilla extract. Carefully add the whipped heavy cream and vanilla extract to the cream cheese mixture. Gently fold them in to keep the mixture light and airy. 1. Fold in crushed honeycomb. Gently mix in the crushed honeycomb. Reserve some for topping the cheesecake later. 2. Pour mixture into crust and smooth the top. Carefully pour the cream cheese mix over the set biscuit crust. Use a spatula to smooth the top so it looks nice. 3. Refrigerate until set. Cover the cheesecake with plastic wrap and refrigerate for at least 4 hours or overnight. This helps the cheesecake set properly. For the full recipe, check out the complete instructions. To make a great cheesecake, start by softening the cream cheese. Cold cream cheese can make your mixture lumpy. Let it sit at room temperature for about 30 minutes. This makes mixing easier and gives a smooth texture. When you mix the cream cheese with sugar, use a gentle hand. After you add the whipped cream, fold it in slowly. This keeps the mixture light and fluffy. Use a spatula to fold, and be careful not to stir too hard. You want air in your cheesecake for that perfect bite. Presentation is key for any dessert. Serve your cheesecake on chilled plates for a nice touch. Drizzle some honey over each slice. Add extra honeycomb pieces around the plate for a fun look. For toppings, think about using fresh berries or a scoop of vanilla ice cream. The sweet and creamy flavors pair well. A sprinkle of grated dark chocolate adds a rich finish. These ideas will make your cheesecake shine at any gathering. For the full recipe, check out the [Full Recipe]. {{image_2}} You can switch up the flavor of your Crunchy Honeycomb Cheesecake in exciting ways. - Adding fruit or chocolate flavors: Try mixing in fresh fruit like strawberries or raspberries. These fruits add a sweet and tart taste that pairs well with the creamy filling. You can also stir in cocoa powder or melted chocolate for a rich chocolate cheesecake. This adds depth and a fun twist to the classic flavor. - Swapping honeycomb for other crunchy toppings: If you want a different crunch, consider using crushed cookies or nuts. Crushed pretzels can add a salty touch, while toasted almonds or hazelnuts bring a great nutty flavor. Feel free to experiment with various toppings to find your perfect match. Adjusting your cheesecake recipe for various occasions is easy. - Scaling the recipe for different occasions: If you need to serve a crowd, simply double the ingredients. Use a larger springform pan to hold the extra batter. For smaller gatherings, halve the recipe and use a smaller pan. This way, you get the right amount for any event. - Tips on portioning and serving: When it's time to serve, use a hot knife to cut through the cheesecake. This helps get clean slices. If you want smaller portions, cut the cheesecake into bite-sized squares. This makes it perfect for parties or gatherings. Enjoy the fun of sharing this delightful dessert! To keep your Crunchy Honeycomb Cheesecake fresh, refrigerate leftovers. Place slices in an airtight container. This will help maintain its creamy texture. You can also cover the cheesecake with plastic wrap. This prevents it from absorbing other odors in the fridge. If you want longer-lasting cheesecake, freezing is a good option. Wrap the cheesecake tightly in plastic wrap. Then, wrap it again in aluminum foil. This double layer protects it from freezer burn. When you want to enjoy it again, thaw in the fridge overnight. The shelf life of your cheesecake depends on how you store it. When refrigerated, it stays fresh for about 4 to 5 days. If you have leftovers, try to eat them within this time. If you freeze it, the cheesecake can last up to 2 months. However, for the best taste and texture, I recommend eating it sooner. Always check for any signs of spoilage before enjoying your cheesecake. Honeycomb is a sweet treat made by bees. It has a crunchy texture and a rich flavor. You can find honeycomb in specialty food stores or online. Some local farmers’ markets also sell it. If you can’t find it, you can use crushed honeycomb candy instead. It gives a similar taste and texture. Yes, you can make this cheesecake in advance. It tastes even better after it sits in the fridge. I suggest making it a day ahead. Simply follow the full recipe and store it in the fridge. Cover it well with plastic wrap. This keeps it fresh and prevents any odors from other foods. Absolutely! If you need a gluten-free option, use gluten-free biscuits for the crust. For a vegan version, replace cream cheese with dairy-free cream cheese. Use coconut cream instead of heavy cream. You can also use maple syrup instead of powdered sugar for sweetness. These swaps still give you a tasty cheesecake! This blog post covered the key steps to making a tasty cheesecake. You learned about ingredients, from digestive biscuits to honeycomb, and how to create a smooth filling. I shared helpful tips to perfect the texture and ideas for serving. You can even explore variations for different tastes. Don’t forget about proper storage to keep your cheesecake fresh. Now you have the tools to create a delicious dessert at home. Have fun baking and enjoy sharing your great creations!](https://grilledflavors.com/wp-content/uploads/2025/05/1a48e007-b290-4693-946b-6f99d2f0cdbe.webp)
Crunchy Honeycomb Cheesecake Delightful Dessert Recipe
Are you ready to indulge in a dessert that will wow your friends and family? This Crunchy Honeycomb Cheesecake is the perfect mix of creamy