Desserts
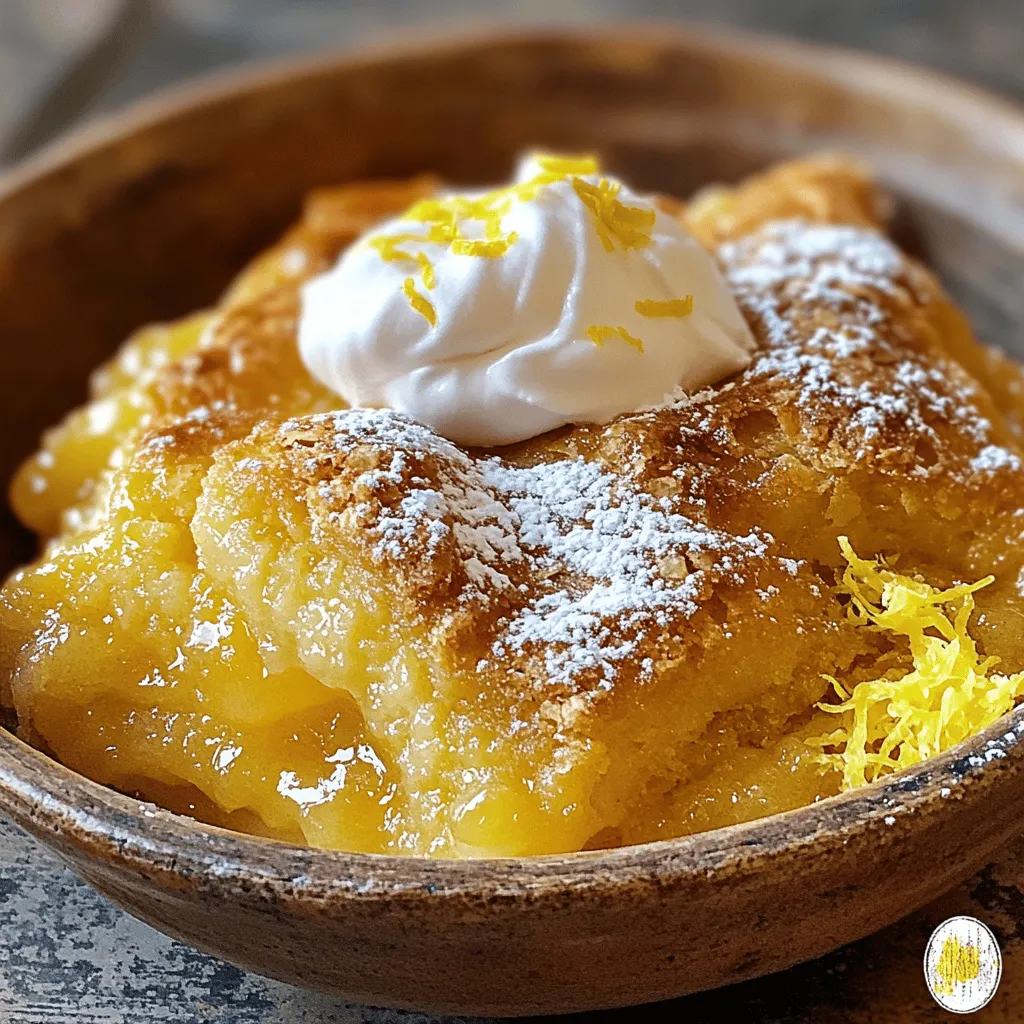
Magic Lemon Cobbler Delightful and Easy Dessert Recipe
Are you ready to wow your friends and family with a dessert that’s both simple and magical? This Magic Lemon Cobbler combines zesty lemon flavors
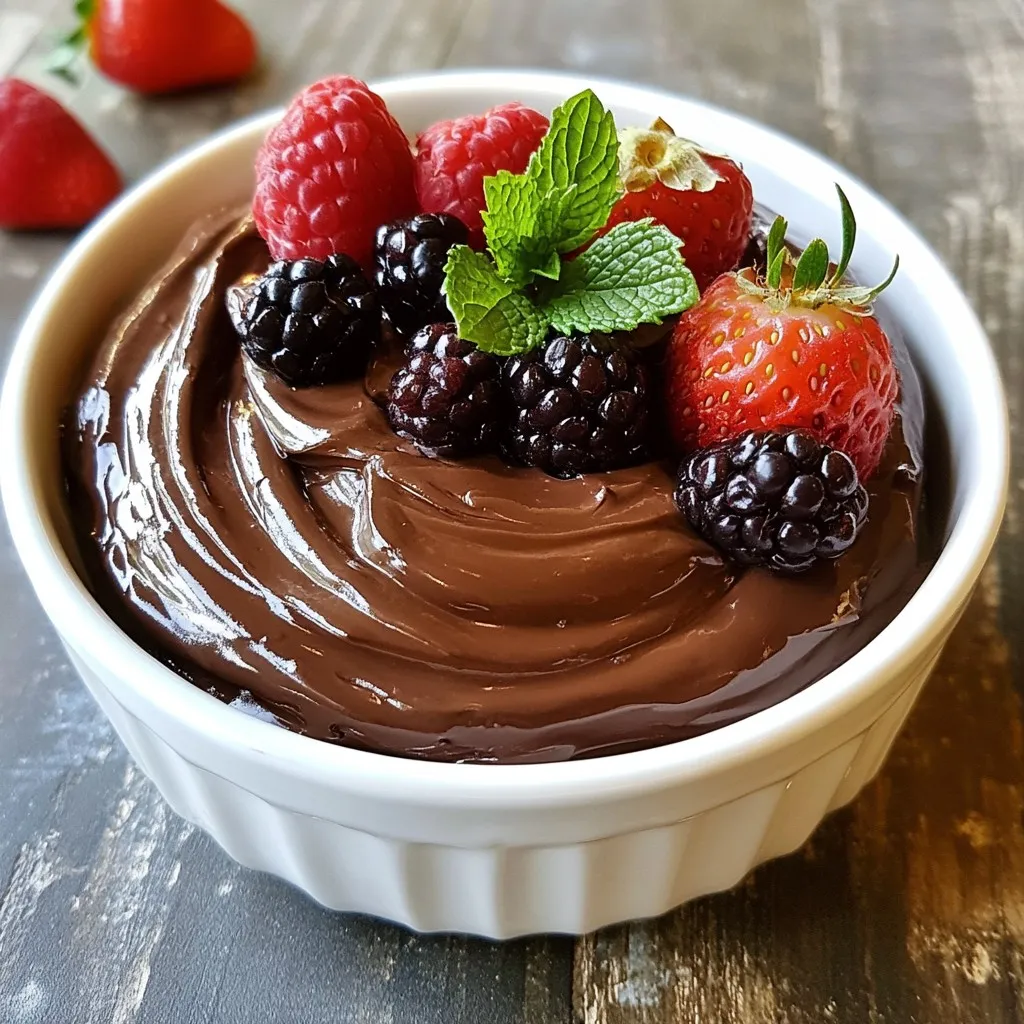
Avocado Chocolate Mousse Rich and Creamy Delicacy
If you love chocolate but want a healthy twist, you’ll adore avocado chocolate mousse. This rich and creamy treat is not just indulgent; it’s also

Coconut Macaroons with Dark Chocolate Delightful Treat
Are you ready to treat yourself? These Coconut Macaroons with Dark Chocolate are a must-try! Simple to make, they combine sweet coconut with rich chocolate
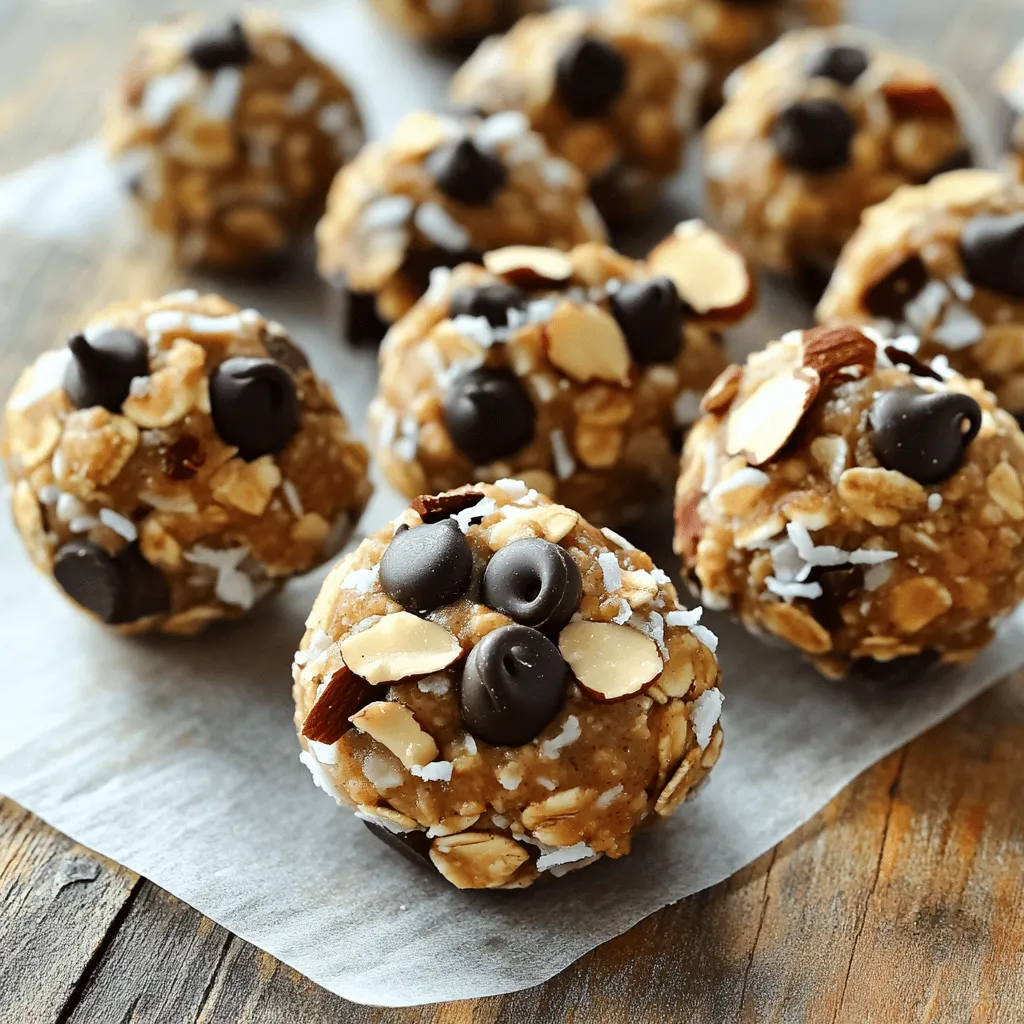
Almond Joy Energy Bites Simple and Tasty Snack Recipe
Craving a tasty snack that’s both simple to make and packed with energy? Look no further! My Almond Joy Energy Bites give you the sweet,
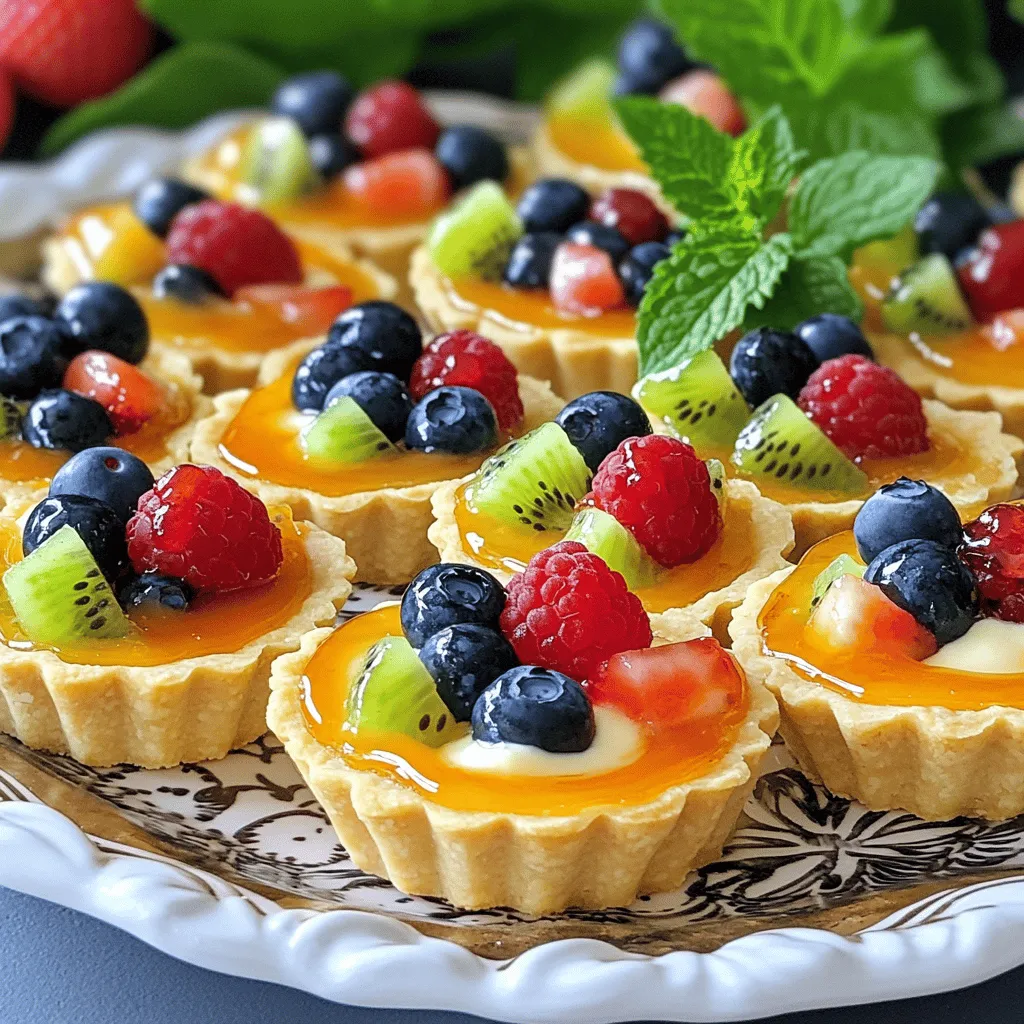
Mini Fruit Tarts with Cream Cheese Filling Delight
Get ready to impress your friends and family with Mini Fruit Tarts! These delightful bites are packed with flavor and topped with vibrant fruits. I’ll
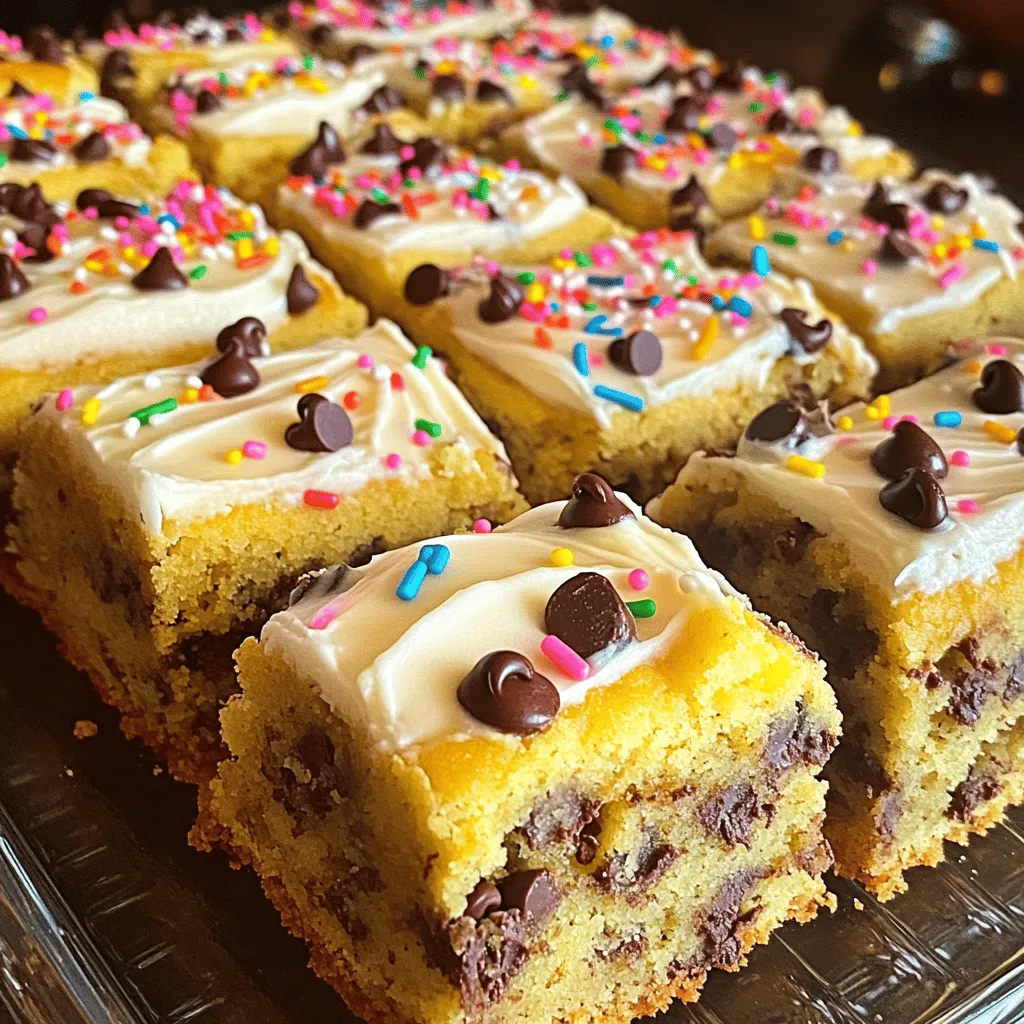
Chocolate Chip Cookie Cake Irresistible Dessert Treat
Are you ready for a dessert that will blow your mind? My Chocolate Chip Cookie Cake is the perfect blend of gooey goodness and classic

Pumpkin Chocolate Chip Muffins Easy and Tasty Treat
Get ready for a warm, cozy treat that blends the best of fall flavors! These Pumpkin Chocolate Chip Muffins are not just easy to make;
![To make fudgy chewy brookies, you need simple ingredients. Here’s the list: - 1 cup all-purpose flour - 1/2 teaspoon baking powder - 1/4 teaspoon salt - 1/2 cup unsweetened cocoa powder - 1/2 cup granulated sugar - 1/2 cup brown sugar, packed - 1/2 cup unsalted butter, melted - 1 large egg - 1 teaspoon vanilla extract - 1 cup semi-sweet chocolate chips - 1 cup chocolate chip cookie dough (store-bought or homemade) These items create a rich brownie base and a chewy cookie topping. Quality matters in baking. Using fresh, high-quality ingredients makes a big difference. For example, fresh butter enhances flavor and texture. Good chocolate chips melt beautifully and add richness. When you use the best ingredients, your brookies will taste amazing. You can swap some ingredients if needed. Here are a few options: - For all-purpose flour, try oat flour or almond flour for a gluten-free option. - Instead of unsweetened cocoa powder, you can use Dutch-processed cocoa for a deeper flavor. - Use coconut oil or margarine instead of unsalted butter if you're dairy-free. - For a vegan option, replace the egg with a flax egg (1 tablespoon ground flaxseed + 2.5 tablespoons water). These substitutions allow you to enjoy brookies no matter your dietary needs. Start by preheating your oven to 350°F (175°C). This heat makes the brownies rise and bake well. Next, grab an 8x8 inch baking pan. Line it with parchment paper. Leave some paper hanging over the edges. This makes it easy to lift the brookies out later. In a bowl, mix together the dry ingredients first. Combine 1 cup of flour, 1/2 teaspoon of baking powder, 1/4 teaspoon of salt, and 1/2 cup of cocoa powder. Whisk them well until they blend nicely. In another bowl, mix the wet ingredients. Combine 1/2 cup of granulated sugar, 1/2 cup of brown sugar, and 1/2 cup of melted butter. Stir until the mix is smooth. Then, add 1 large egg and 1 teaspoon of vanilla extract. Beat this mixture well. Gradually stir the dry mix into the wet mix. Keep mixing until just combined. Finally, fold in 1 cup of semi-sweet chocolate chips. Pour the brownie batter into the lined pan. Spread it evenly across the bottom. Now, take 1 cup of cookie dough. Flatten it into small discs. Place these discs on top of the brownie layer. Cover as much of the surface as you can. Use a spatula to swirl the cookie dough gently into the brownie batter. This creates a beautiful marbled look. Now, place the pan in the oven and bake for 25-30 minutes. To check if they are done, stick a toothpick in the center. It should come out with moist crumbs, not wet batter. After baking, let the brookies cool in the pan for 10 minutes. Lift them out using the parchment paper and transfer them to a wire rack. Let them cool completely before cutting into squares. Enjoy your delicious fudgy chewy brookies! For the complete recipe, check out the Full Recipe. To get that fudgy texture, use less flour. Stick to the recipe's exact amounts. Make sure to mix the batter just until combined. Over-mixing can lead to a cake-like texture, which we don’t want. Also, avoid baking too long. Check the brookies around 25 minutes. The toothpick should come out with moist crumbs. This means they are perfectly fudgy! If your brookies turn out dry, it’s likely from overbaking. Always set a timer and check them early. If too crumbly, you might have added too much flour. Use a kitchen scale for accurate measurements. If they stick to the pan, ensure the parchment paper hangs over the edges. This makes it easy to lift them out after baking. For a lovely presentation, cut the brookies into neat squares. Serve them on a rustic wooden board for charm. A scoop of vanilla ice cream on the side elevates the dish. Dust with powdered sugar right before serving for a pretty finish. You can also drizzle some chocolate sauce over the top for extra indulgence. Follow the [Full Recipe] for all the details! {{image_2}} You can add nuts to your brookies for extra crunch. I love using walnuts or pecans. Just chop them into small pieces. Mix about 1/2 cup of nuts into the brownie batter. This gives your brookies a great texture. The nuts add a nice contrast to the soft brownie and cookie layers. Experimenting with extracts can create fun flavors. You can swap vanilla extract for almond or peppermint. A few drops of these extracts will change the taste. Try adding a dash of espresso powder for a coffee kick. This will deepen the chocolate flavor. Be careful not to add too much, as it can be strong. You can easily make brookies gluten-free or vegan. For gluten-free, replace all-purpose flour with a gluten-free blend. Make sure the blend has xanthan gum for best results. For a vegan option, substitute the egg with a flax egg. To make a flax egg, mix one tablespoon of ground flaxseed with three tablespoons of water. Let it sit for five minutes to thicken. You can also use vegan butter instead of regular butter. These swaps let everyone enjoy these tasty treats. For the full recipe, check the [Full Recipe] section. Store your leftover brookies in an airtight container. Keep them at room temperature for up to three days. If you want to keep them fresh longer, refrigerate them. Wrap each brookie in plastic wrap to keep them moist and tasty. Freezing brookies is a great way to save them for later. First, let the brookies cool completely. Then, wrap each one in plastic wrap. Place them in a freezer-safe bag or container. They can last up to three months in the freezer. When you want one, just thaw it at room temperature. To reheat your brookies, use the oven for best results. Preheat your oven to 350°F (175°C). Place the brookies on a baking sheet. Heat them for about 5-10 minutes. This will make them warm and gooey again. You can also use the microwave. Heat one brookie for about 10-15 seconds. This will make it soft but be careful not to overheat! Enjoy your brookies warm! Brookies are a blend of brownies and cookies. They have a rich brownie base topped with cookie dough. This dessert brings together two of the best treats into one. The result is fudgy, chewy, and incredibly delicious. You get the best of both worlds in every bite. Yes, you can use box brownie mix if you like. Just follow the instructions on the box for mixing. Then, add the cookie layer on top as directed in the Full Recipe. This shortcut saves time while still giving you tasty brookies. To check if your brookies are done, insert a toothpick in the center. If it comes out with moist crumbs, they are ready. If it comes out wet, give them a few more minutes. Keep an eye on them to avoid overbaking; you want them fudgy, not dry. You can skip the chocolate chips if you prefer. Use your favorite mix-ins instead, like nuts or dried fruit. You might also add white chocolate chips for a different flavor. Feel free to get creative and make a version you love. For best results, let the brookies cool completely before cutting. Use a sharp knife to cut them into squares. A gentle sawing motion works well to avoid squishing them. You can serve them warm or at room temperature with ice cream if you like! Fudgy chewy brookies mix two favorite treats perfectly. We discussed quality ingredients and substitutions that elevate flavor. I shared clear steps to ensure success, along with tips to avoid mistakes. You can also explore fun variations like nutty or gluten-free options. Storing and reheating brookies keeps them fresh. Enjoy experimenting and sharing these tasty treats. Making brookies is easy, fun, and rewarding! Keep baking and enjoy every bite.](https://grilledflavors.com/wp-content/uploads/2025/05/dc82c059-1856-4ef8-9089-b94fea50beae.webp)
Fudgy Chewy Brookies Irresistible Dessert Recipe
If you love rich desserts, you need to try my Fudgy Chewy Brookies! This cookie-brownie combo gives you the best of both worlds. Imagine biting
![To make Easy Boston Cream Pie Cookie Bites, gather these simple ingredients: - 1 cup all-purpose flour - 1/2 teaspoon baking powder - 1/4 teaspoon salt - 1/2 cup unsalted butter, softened - 1/2 cup granulated sugar - 1 large egg - 1 teaspoon vanilla extract - 1/2 cup vanilla pudding mix (instant) - 1 cup milk - 1/2 cup semi-sweet chocolate chips - 1 tablespoon coconut oil - A pinch of powdered sugar for dusting These ingredients come together to create the perfect treat. The all-purpose flour gives the cookies a soft texture. Baking powder helps them rise, while salt enhances the flavor. The butter and sugar mix creates a creamy base. This helps the cookies stay moist and rich. The egg adds structure, and the vanilla extract gives a lovely aroma. For the creamy filling, we use instant vanilla pudding mix mixed with milk. The chocolate chips melt into a delicious glaze. Finally, a touch of coconut oil makes the chocolate shine. Once you have all your ingredients ready, you can follow the [Full Recipe] to create these delightful treats that everyone will love. 1. Preheat your oven to 350°F (175°C). Line a baking sheet with parchment paper. 2. In a medium bowl, whisk together the flour, baking powder, and salt. Set aside. 3. In a large mixing bowl, beat the softened butter and granulated sugar until creamy. 1. Add the egg and vanilla extract into the butter mix. Stir until well combined. 2. Gradually add the dry ingredients to the wet mix. Stir until just combined. 3. Scoop small balls of dough onto the prepared baking sheet. Press them down slightly to flatten. 4. Bake for 10-12 minutes or until the edges are lightly golden. Allow to cool on the baking sheet for a few minutes. Transfer to a wire rack to cool completely. 5. While the cookies cool, prepare the vanilla pudding. In a bowl, whisk together the instant pudding mix and milk until thickened. Refrigerate for 15 minutes. 1. Once the cookies cool, spread a dollop of vanilla pudding on half of the cookies. 2. Top with the remaining cookies to create cookie sandwiches. 3. For the chocolate glaze, melt the semi-sweet chocolate chips with coconut oil in a microwave-safe bowl. Heat in 30-second intervals until smooth. 4. Dip the tops of the cookie bites in the chocolate glaze. Allow excess to drip off and place them back on the parchment paper to set. 5. Once the glaze has hardened, dust the tops with a pinch of powdered sugar for a nice touch. For the full recipe, check the main article. Happy baking! To get the right cookie texture, start with softened butter. This step helps create a creamy mix. Cream the butter and sugar well, making it light and fluffy. Ensure your oven is fully preheated before baking. This helps the cookies rise evenly. To prevent cookies from spreading too much, chill your dough for 30 minutes. This keeps the cookies thicker. Also, keep the cookie balls about an inch apart on the baking sheet. This way, they won’t stick together while baking. To achieve perfect pudding thickness, use instant pudding mix. Mix it with cold milk and whisk for about two minutes. Let it sit for 15 minutes in the fridge. This waiting time helps it thicken up nicely. If it’s too thick, add a bit more milk. If it's too runny, just whisk for a little longer. For the best ways to dip and coat the cookie bites, melt the chocolate chips and coconut oil together. Use a microwave-safe bowl, heating in short bursts. Stir until smooth and shiny. Dip the tops of the cookie bites carefully. Let excess chocolate drip back into the bowl. Place them back on parchment paper to set without sticking. This creates a lovely, smooth glaze. {{image_2}} You can add fun flavors to your cookie bites. Try using different extracts like almond or coconut. Just a teaspoon can change the taste! You can also mix in different chocolates. Dark chocolate chips add a rich flavor. Or use white chocolate for a sweeter touch. Both options will make your treats unique. If you need gluten-free cookie bites, swap the flour for gluten-free flour. This keeps the taste and texture close to the original. For a dairy-free version, use coconut milk in the pudding. You can also replace butter with a dairy-free spread. These simple swaps make this recipe fit for everyone. Make your cookie bites festive for special occasions. For Halloween, add orange food coloring to the glaze. You can sprinkle candy corn on top for extra fun! During the holidays, mix in some crushed candy canes for a minty twist. Themed variations can make any celebration more special. To keep your Easy Boston Cream Pie Cookie Bites fresh, store them in an airtight container. This will help them stay soft and tasty. You can layer the cookie bites with parchment paper to avoid sticking. If you want to keep them for a longer time, you can freeze them. Just wrap each cookie bite in plastic wrap and place them in a freezer bag. At room temperature, these cookie bites last about 3 to 4 days. If you keep them in the fridge, they can last up to a week. The pudding filling may make them a bit softer over time, but they still taste great. Just make sure to check for any signs of spoilage before enjoying. If you want to enjoy your cookie bites warm, you can reheat them easily. Place them in the microwave for about 10 to 15 seconds. This will warm them up without melting the chocolate glaze. You can also pop them in a preheated oven at 300°F (150°C) for a few minutes. This method keeps the texture nice and fresh. How to make the cookies fluffier? To make cookies fluffier, use cold butter instead of softened. Cold butter helps create more air when mixed. You can also add an extra egg white for lift. Can I use homemade pudding instead of instant? Yes, you can use homemade pudding. Make sure it is thick before using. It will add a fresh taste and smooth texture to your bites. What’s the best way to freeze Boston Cream Pie Cookie Bites? To freeze the cookie bites, place them in a single layer on a baking sheet. Once frozen, transfer them to a freezer bag. They last well for up to three months. Why did my cookies spread too much? Cookies spread too much if the dough is too warm. Chill the dough for 30 minutes before baking. This helps keep their shape during baking. How do I avoid a runny pudding filling? To avoid runny pudding, let it set in the fridge for at least 15 minutes. You can also mix in a bit of cornstarch to help thicken it. Best coffee or beverages to pair with the cookie bites I recommend pairing these cookie bites with a rich coffee or a vanilla latte. The flavors enhance each other and create a balanced treat. Creative ways to serve at gatherings Serve them on a tiered stand for a festive look. You can also sprinkle extra powdered sugar on top for a touch of elegance. Add fresh berries around for color and flavor. For the full recipe, check out the details above. You’ve learned how to make delicious Boston Cream Pie Cookie Bites. We covered the ingredients, step-by-step instructions, and tips for success. Remember to experiment with different flavors and make it your own. Store them properly to keep them fresh. Don’t hesitate to try variations or address common questions. Enjoy making these sweet treats and share them with friends and family. Happy baking!](https://grilledflavors.com/wp-content/uploads/2025/05/181aa09d-75d2-463e-a268-e36879337ea6.webp)
Easy Boston Cream Pie Cookie Bites Delightful Treat
Are you ready to enjoy a delightful treat that combines the classic flavors of Boston cream pie with the fun of cookies? These Easy Boston
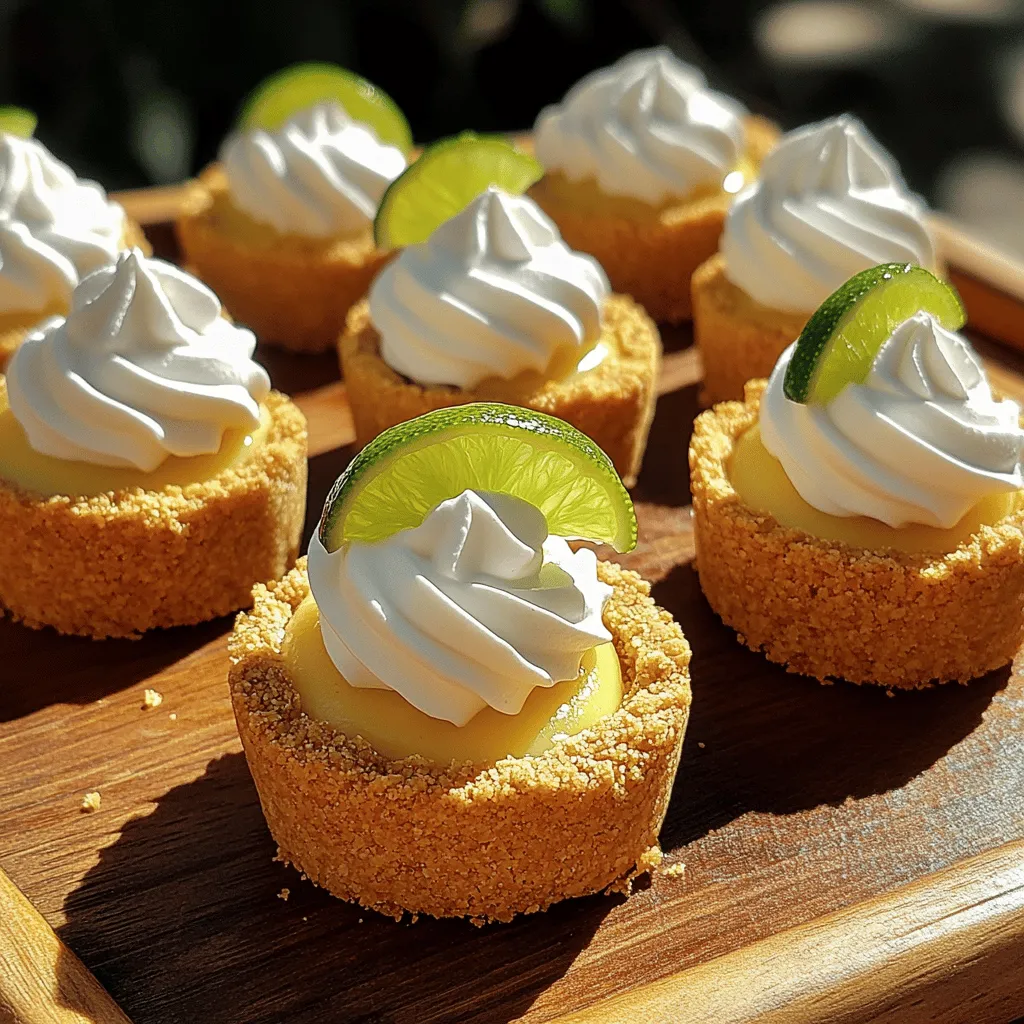
Key Lime Pie Mini Desserts Delightful and Refreshing
If you’re craving a sweet treat that’s both cute and tangy, look no further! Key lime pie mini desserts offer all the zesty goodness of