Desserts

To make this delightful peach cobbler dump cake, gather these key items: - 2 cans (15 oz each) sliced peaches in syrup, drained - 1 box (15.25 oz) yellow cake mix - 1/2 cup unsalted butter, melted - 1/2 teaspoon cinnamon - 1/4 teaspoon nutmeg - 1 cup brown sugar These ingredients create the sweet and rich base for our recipe. The peaches add juiciness and flavor, while the cake mix gives it a nice texture. The spices bring warmth to every bite. You can enhance your dump cake with these optional ingredients: - 1 cup chopped pecans or walnuts Adding nuts gives a nice crunch and depth of flavor. You can mix them in with the cake or sprinkle them on top for added texture. For the perfect finish, consider these tasty toppings: - Vanilla ice cream - Whipped cream These toppings add creaminess that pairs well with the warm cake. The cold ice cream or fluffy whipped cream contrasts nicely with the hot dessert. Enjoying this cake with a scoop of vanilla ice cream makes it a true treat. {{ingredient_image_1}} To start, gather your ingredients. You will need two cans of sliced peaches, a box of yellow cake mix, and some butter. If you want extra flavor, grab cinnamon, nutmeg, and brown sugar. You might also like to add chopped pecans or walnuts. 1. Preheat your oven to 350°F (175°C). 2. Take a 9x13 inch baking dish. Spread the drained peaches evenly across the bottom. 3. Sprinkle cinnamon and nutmeg over the peaches. This adds a nice warm flavor. 4. Pour the yellow cake mix evenly over the peaches. Make sure it covers all the peaches well. 5. Drizzle the melted butter over the cake mix. Let some areas soak, but keep the top mostly dry for a crisp finish. 6. Finally, sprinkle the brown sugar on top. If you want, add chopped nuts for crunch. Now, place the baking dish in the preheated oven. Bake for 45-50 minutes. The cake should turn golden brown, and the edges will be bubbly. Keep an eye on it to avoid burning. Once done, take it out and let it cool for about 10 minutes. Serve it warm. For a special treat, add a scoop of vanilla ice cream or a dollop of whipped cream on top. This makes the dessert feel extra special! To make your Peach Cobbler Dump Cake even better, try adding a pinch of salt. This small step can bring out the sweetness of the peaches. You can also mix in some vanilla extract into the melted butter for a richer taste. If you love spice, consider adding more cinnamon or a dash of ginger. Chopping the pecans or walnuts adds a nice crunch, but toasting them first will deepen their flavor. One common mistake is pouring the melted butter too evenly over the cake mix. You want some dry cake mix on top. This helps create that crispy layer we all love. Also, don’t skip draining the peaches. If you leave too much syrup, the cake may become soggy. Lastly, avoid opening the oven door too soon. This can lead to uneven baking and a flat top. For a perfect dump cake, use a good quality cake mix. Not all mixes are the same. Some have more flavor and texture. Make sure to check your oven temperature with a thermometer. Oven temps can vary, affecting your bake time. Finally, let it cool for about 10 minutes after baking. This helps set the cake and makes it easier to serve. Enjoy with a scoop of vanilla ice cream for a delightful treat! Pro Tips Use Fresh Peaches: For an extra burst of flavor, consider using fresh peaches in season instead of canned. Just slice and prepare them similarly. Mix it Up: Experiment with different cake mixes, like spice or chocolate, to give your dump cake a unique twist! Storage Tip: Keep leftover dump cake in an airtight container in the fridge for up to 3 days. Reheat before serving for the best taste. Serving Suggestions: Top with a drizzle of caramel sauce or a sprinkle of powdered sugar for added sweetness and presentation. {{image_2}} You can change the fruit in this dump cake. Try using sliced apples, pears, or berries. Each fruit gives a new taste. For example, blueberries add a sweet burst. Cherries bring a nice tartness. Choose fruits you love for a personal touch. You can make this dessert gluten-free. Use a gluten-free cake mix instead of yellow cake mix. For dairy-free, swap the butter with coconut oil or a dairy-free spread. This way, everyone can enjoy the cake without worry. You don't have to stick with yellow cake mix. Chocolate cake mix creates a rich twist. Spice cake mix works great for a warm flavor. Even lemon cake mix adds a bright note. Feel free to experiment with different mixes for fun flavors. To store leftovers of your peach cobbler dump cake, let it cool first. Place any uneaten cake in an airtight container. Keep it in the fridge. It will last about 3 to 5 days. Make sure to cover it well to avoid drying out. You can also wrap it in plastic wrap. If you want to freeze the dump cake, it’s easy! Cut it into portions first. Wrap each piece tightly in plastic wrap. Then, place them in a freezer bag. Label the bag with the date. Your cake will stay fresh for up to 3 months. When you’re ready to enjoy, just thaw it in the fridge overnight. To reheat your peach cobbler dump cake, preheat your oven to 350°F (175°C). Place a piece in an oven-safe dish. Cover it with foil to keep it moist. Heat for about 15-20 minutes. If you want it warm fast, you can use the microwave. Heat for 30 seconds to a minute, checking often. Enjoy it warm for the best taste! Yes, you can use fresh peaches! Just peel and slice about six ripe peaches. You will want enough to equal about 30 ounces. Toss the fresh slices with a little sugar to help release their juices. This will make your dump cake even more delicious. Fresh peaches add a lovely texture and flavor. Check the dump cake after 45 minutes. The top should be golden brown, and the edges should be bubbly. You can also insert a toothpick in the center. If it comes out clean, your cake is ready. Let it rest for about 10 minutes before serving. Serving suggestions are fun! Vanilla ice cream is a classic choice. It melts beautifully on warm cake. You can also use whipped cream for a light touch. For extra crunch, try adding chopped pecans or walnuts on top. Enjoy your dessert with a side of joy! Peach Cobbler Dump Cake is easy to make and full of flavor. We covered ingredients, step-by-step instructions, and helpful tips. You learned about variations, storage, and common questions. Remember, use fresh or canned peaches for the best results. Keep these tips in mind for the ideal dessert. Enjoy this simple treat with family or friends, and share your creations!
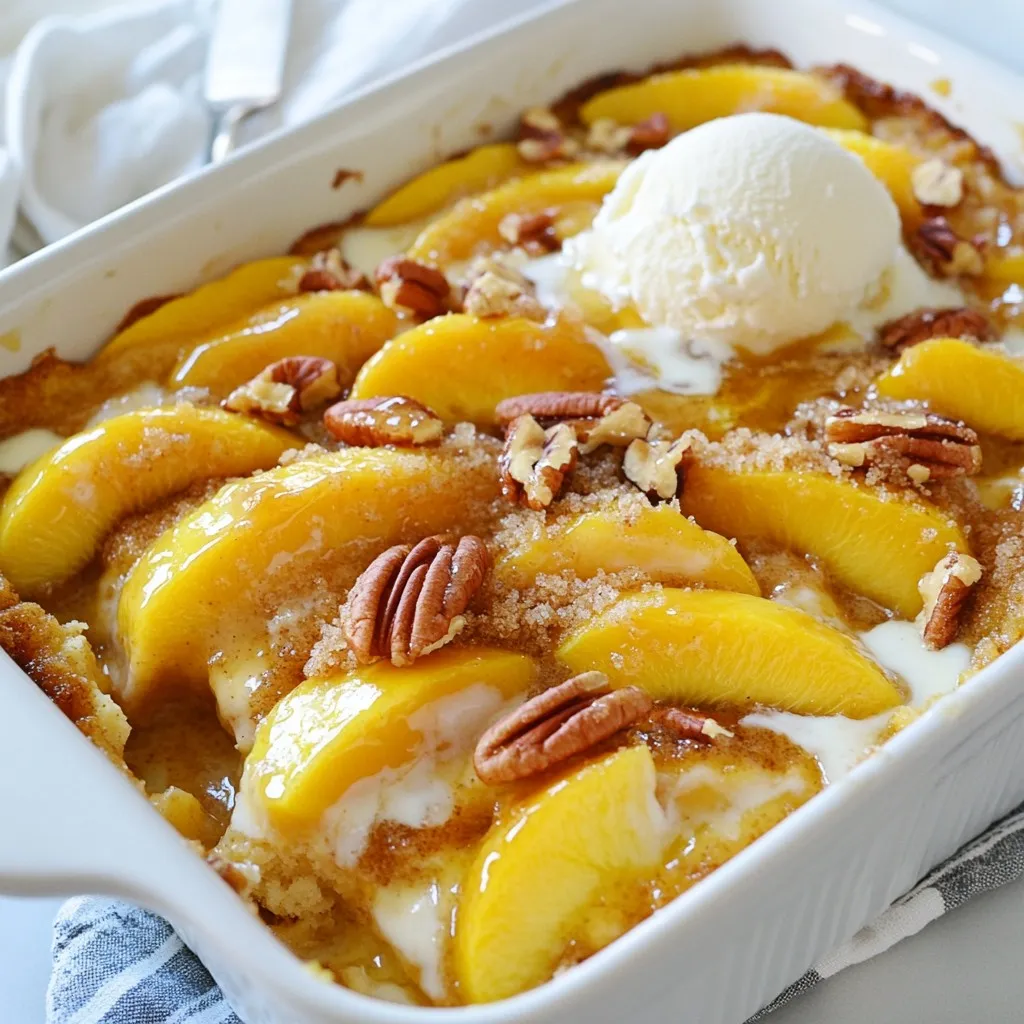
Peach Cobbler Dump Cake Delightful and Easy Recipe
If you love desserts that are easy to make and even better to eat, you’ll love this Peach Cobbler Dump Cake recipe! It combines sweet,
- 1 cup unsalted butter, softened - 3/4 cup brown sugar, packed - 1/2 cup granulated sugar - 1 large egg - 1 teaspoon vanilla extract - 2 cups all-purpose flour - 1/2 teaspoon baking soda - 1/4 teaspoon salt - 1 cup white chocolate chips - 1 cup dried cranberries - Zest of 1 orange (optional, for added flavor) These ingredients create a chewy and delicious cookie. The unsalted butter gives a rich flavor. The mix of brown and granulated sugar adds sweetness and depth. The egg brings moisture and helps the cookie rise. Vanilla extract gives a warm, inviting taste. Flour is the base for the dough. Baking soda helps the cookies rise for that perfect texture. A pinch of salt balances the sweetness. The white chocolate chips melt beautifully and add creaminess. Dried cranberries provide a tart contrast to the sweet chocolate. Lastly, adding orange zest can brighten the flavors. It gives an extra zing and freshness. Feel free to try this option for a unique twist! This mix of flavors makes each bite a delight. {{ingredient_image_1}} 1. Preheat the oven and prepare the baking sheet Start by preheating your oven to 350°F (175°C). Grab a baking sheet and line it with parchment paper. This makes cleanup easy and helps cookies bake evenly. 2. Creaming the butter and sugars In a large bowl, take 1 cup of softened unsalted butter. Add 3/4 cup of packed brown sugar and 1/2 cup of granulated sugar. Mix them together until the mixture is light and fluffy. This step is key for a chewy texture. 3. Mixing the wet ingredients Now, crack in 1 large egg and pour in 1 teaspoon of vanilla extract. Stir until everything is well combined. This adds moisture and flavor to your cookies. 4. Combining dry ingredients with wet ingredients In a separate bowl, whisk together 2 cups of all-purpose flour, 1/2 teaspoon of baking soda, and 1/4 teaspoon of salt. Gradually add this dry mix to the wet ingredients. Stir gently until just combined. Be careful not to over-mix; this keeps your cookies soft. 5. Folding in treats and optional zest Finally, fold in 1 cup of white chocolate chips, 1 cup of dried cranberries, and the optional zest of 1 orange. This adds a bright flavor and lovely color to your dough. 1. Dropping dough onto the baking sheet Using a tablespoon or cookie scoop, drop rounded balls of dough onto your prepared baking sheet. Space them about 2 inches apart to give them room to spread. 2. Baking time and temperature Place the baking sheet in the preheated oven. Bake for 10-12 minutes. Look for lightly golden edges, while the centers should still look a bit soft. This helps create that chewy texture. 3. Cooling the cookies Once baked, remove the cookies from the oven. Let them cool on the baking sheet for about 5 minutes. Then, transfer them to a wire rack to cool completely. This helps them firm up without getting too hard. How to achieve the perfect texture To get chewy cookies, do not overmix the dough. Mix until just combined. This keeps your cookies soft and tender. Measuring ingredients accurately Use a kitchen scale for precise measurements. If using cups, spoon flour into the cup then level it off. Avoid scooping directly, as it packs the flour. Using quality chocolate and cranberries Choose high-quality white chocolate chips. They melt better and taste richer. For cranberries, select plump dried ones. They add a nice chewiness to each bite. Presentation tips for festive occasions Serve your cookies on a decorative platter. Add a sprinkle of powdered sugar for a festive touch. You can also add some fresh cranberries or mint leaves for color. Pairing with beverages These cookies pair well with milk or a warm cup of tea. They also complement a fruity sparkling water. The flavors of the cookies shine with these drinks. Pro Tips Chill the Dough: For thicker cookies, chill the cookie dough in the refrigerator for at least 30 minutes before baking. This helps prevent spreading and results in a chewier texture. Use Fresh Ingredients: Ensure your dried cranberries are fresh and moist for the best flavor. If they seem dry, soak them in warm water for a few minutes before adding to the dough. Experiment with Flavors: Feel free to add spices like cinnamon or nutmeg for a warm, festive twist. A pinch of nutmeg can elevate the flavor profile of your cookies. Store Properly: To keep cookies fresh longer, store them in an airtight container at room temperature. You can also freeze the cookies for up to three months for a later treat. {{image_2}} You can make your white chocolate cranberry cookies even better. Try adding nuts or spices. Chopped walnuts or pecans add a nice crunch. They also bring a rich flavor that pairs well with the sweetness of white chocolate. If you like spice, add a pinch of cinnamon or nutmeg. This change gives your cookies a warm twist. Want to change the chocolate? Substitute white chocolate with dark chocolate. Dark chocolate has a richer taste. It balances well with the tartness of cranberries. This swap will delight chocolate lovers and fans of bold flavors. If you need gluten-free cookies, use almond flour instead of all-purpose flour. Almond flour makes the cookies soft and chewy. You can also use a gluten-free blend, which works well in this recipe. Just check the package for specific ratios. For a vegan version, swap the butter with coconut oil. Use a flax egg instead of a real egg. Mix one tablespoon of ground flaxseed with three tablespoons of water. Let it sit for a few minutes to thicken. This will help bind your ingredients. You can also find dairy-free white chocolate chips for a fully vegan treat. To keep your white chocolate cranberry cookies fresh, use an airtight container. This method helps to lock in moisture. Place parchment paper between layers if you stack them. This prevents sticking and keeps them soft. Store the container at room temperature. Avoid areas with direct sunlight or heat. These cookies stay fresh for about one week when stored properly. For longer enjoyment, you can freeze them. Wrap each cookie in plastic wrap and place them in a freezer bag. They can last up to three months in the freezer. When ready to eat, let them thaw at room temperature. Enjoy the same chewy goodness! Can I use fresh cranberries instead of dried? Yes, you can use fresh cranberries. However, they are much more tart. This changes the flavor. You may want to add a bit more sugar to balance it out. Fresh cranberries also add moisture. This can affect the cookie's texture, making it less chewy. How can I prevent cookies from spreading too much? To prevent spreading, chill your dough for at least 30 minutes. Cold dough holds its shape better. Make sure your butter is softened, not melted. Softened butter helps with mixing but keeps the dough firmer. Also, use parchment paper to help with even baking. What should I do if my cookie dough is too dry or wet? If your dough is too dry, add a splash of milk or water. Start with one tablespoon. If it's too wet, add a little more flour. Mix well after each addition. The dough should be soft but not sticky. This helps achieve the perfect cookie texture. These white chocolate cranberry cookies blend sweet and tart flavors perfectly. You learned the key ingredients like butter, sugars, and cranberries, and I shared easy steps for baking. I also covered tips for texture and storage to keep them fresh. Whether you add nuts for crunch or adjust recipes for dietary needs, these cookies can be your new favorite. Try these methods to bring joy to every bake. Enjoy your baking journey!
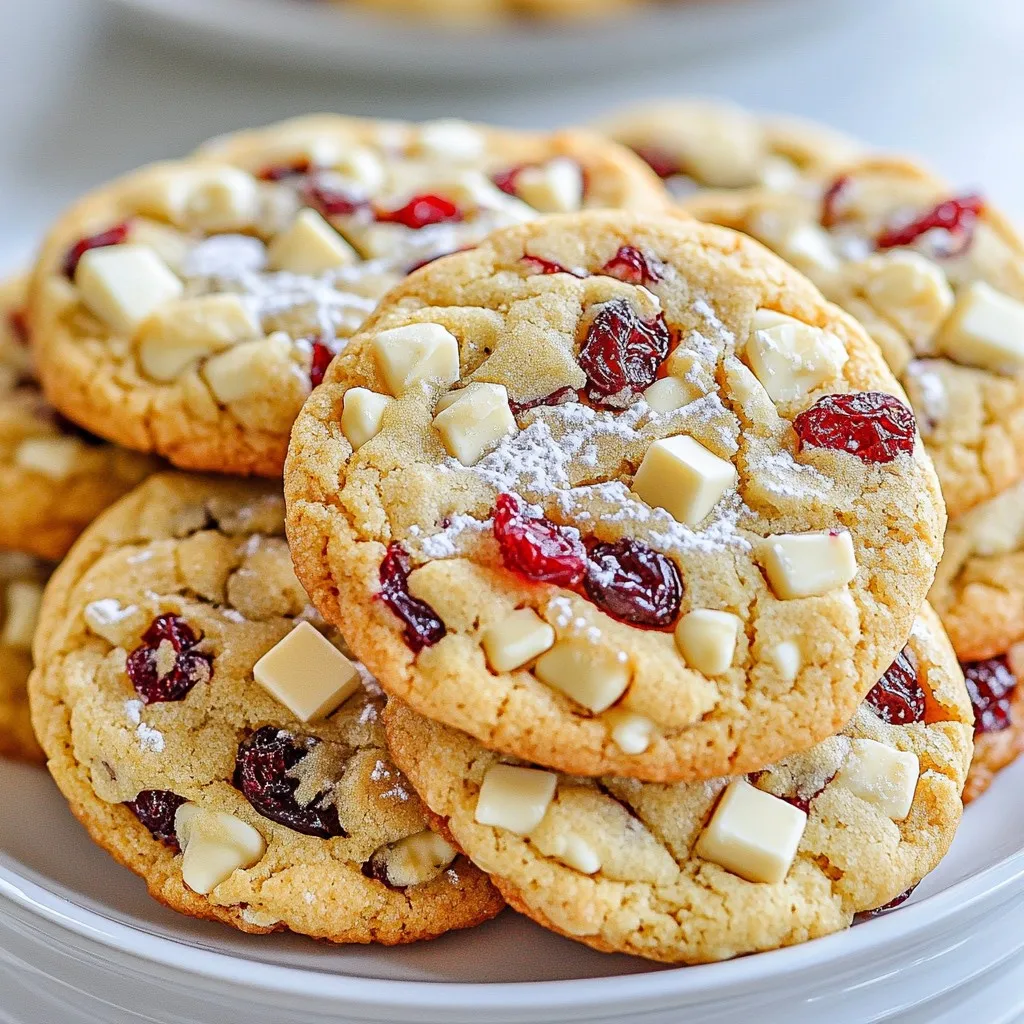
White Chocolate Cranberry Cookies Chewy and Delicious
Get ready to bake some magic in your kitchen with my White Chocolate Cranberry Cookies! These chewy delights, packed with sweet white chocolate and tangy
To make pumpkin cheesecake bars, you need a few simple ingredients. Here’s what you will need: - 1 ½ cups graham cracker crumbs - ½ cup unsalted butter, melted - 2 tablespoons sugar - 2 (8 oz) packages cream cheese, softened - ¾ cup sugar - 2 large eggs - 1 cup pumpkin puree - 1 teaspoon vanilla extract - 1 teaspoon ground cinnamon - ½ teaspoon ground nutmeg - ¼ teaspoon ground ginger - ¼ teaspoon salt Each ingredient plays a key role in creating the perfect flavor and texture. The graham cracker crumbs form a tasty crust, while the cream cheese provides creaminess. The pumpkin puree gives a warm and inviting flavor, and the spices add a lovely aroma. Using fresh ingredients will always yield the best results. Make sure your cream cheese is softened for easy mixing. This ensures a smooth filling without lumps. If you want to make these bars gluten-free, simply swap graham cracker crumbs with gluten-free crumbs. This way, everyone can enjoy this delicious treat! {{ingredient_image_1}} - Preheat oven to 350°F (175°C). - Line a 9x9 inch baking dish with parchment paper. This makes it easy to lift the bars out later. - Combine 1 ½ cups graham cracker crumbs, ½ cup melted butter, and 2 tablespoons sugar. - Mix until it looks crumbly. - Press the mixture evenly into the bottom of the baking dish. - Bake for 10 minutes, then take it out and let it cool slightly. - In a large bowl, beat 2 packages of softened cream cheese with ¾ cup sugar until it is smooth. - Add 2 large eggs, one at a time, mixing well after each. - Next, mix in 1 cup pumpkin puree, 1 teaspoon vanilla extract, 1 teaspoon ground cinnamon, ½ teaspoon ground nutmeg, ¼ teaspoon ground ginger, and ¼ teaspoon salt. - Blend until all ingredients are well combined and smooth. - Pour the pumpkin cheesecake mixture over the cooled crust. - Spread it evenly with a spatula. - Bake in the preheated oven for 30-35 minutes. Check for doneness by inserting a toothpick into the center. It should come out clean. - Let the bars cool at room temperature for about 1 hour. - After that, refrigerate them for at least 2 hours to firm up. - Once chilled, lift the parchment paper to remove the bars from the dish and slice into squares. To get the best texture, you need to properly soften your cream cheese. Take it out of the fridge at least 30 minutes before you start. This helps it mix smoothly with the sugar. If your cream cheese is cold, it can lead to lumps in your batter. Next, avoid overmixing the batter. Once you add the eggs, mix just enough to combine. Overmixing can make the bars too airy and cause them to crack while baking. For a delightful touch, you can garnish each bar with whipped cream. A sprinkle of cinnamon adds warmth and beauty. You can also serve these bars with a scoop of vanilla ice cream for a special treat. A cup of coffee or spiced tea pairs nicely with them too. One big mistake is not cooling the crust properly. Make sure to let it cool slightly before adding the filling. If you skip this step, the filling can become too runny. Another common error is overbaking the cheesecake bars. Keep an eye on them as they bake. They should be set in the center but still slightly jiggly. This ensures they remain creamy and delicious. Pro Tips Cool Completely: Make sure to allow the bars to cool completely at room temperature before refrigerating. This helps them set properly and enhances the texture. Use Fresh Spices: For the best flavor, consider using fresh ground spices instead of pre-ground. They can significantly elevate the taste of your cheesecake bars. Chill Longer: If you have the time, let the bars chill overnight. This allows the flavors to meld together beautifully and results in a firmer texture. Garnish Wisely: When serving, top with a dollop of whipped cream and a sprinkle of cinnamon or nutmeg for an extra touch of flavor and presentation. {{image_2}} You can easily change the taste of your pumpkin cheesecake bars. Try adding a drizzle of chocolate or caramel on top. It gives a sweet touch and makes the bars look fancy. You can also mix in nuts or chocolate chips into the filling. This adds a nice crunch and rich flavor. If you need a gluten-free option, use gluten-free graham cracker crumbs for the crust. This way, everyone can enjoy these tasty bars. For a vegan version, swap the cream cheese for a plant-based cream cheese. You can replace the eggs with flaxseed meal mixed with water. This keeps the bars creamy and delicious without using animal products. To change up the flavor, play with the spices. You can add cardamom or cloves for a new taste. If you want a fresh twist, use real pumpkin instead of canned puree. Just roast the pumpkin, then blend it until smooth. This gives your bars a fresh flavor and makes them even more special. To keep your pumpkin cheesecake bars fresh, store them in the refrigerator. Place the bars in an airtight container. If you prefer, you can also wrap them tightly with plastic wrap. This keeps them moist and tasty. If you want to freeze them, slice the bars first. Wrap each slice in plastic wrap, then place them in a freezer-safe bag. This method prevents freezer burn. You can enjoy these bars later on! In the fridge, these bars last about 5 to 7 days. Always check for any signs of spoilage. If you see mold or notice an off smell, it’s best to discard them. Signs that the bars have gone bad include a change in color or texture. If they feel sticky or slimy, do not eat them. If you want to enjoy your bars warm, you can safely reheat them. Use the microwave for quick warming. Place a slice on a microwave-safe plate and heat for about 10 to 15 seconds. Check that it is warm but not too hot. You can also reheat in the oven. Set the oven to 350°F (175°C) and warm for about 5 to 10 minutes. Enjoy them warm, and feel free to add a little whipped cream on top! To slice pumpkin cheesecake bars cleanly, first chill them well. After chilling, lift the bars out using the parchment paper. Use a sharp knife and dip it in hot water before cutting. Wipe the knife with a towel after each cut. This helps prevent the filling from sticking and ensures neat slices. For presentation, serve bars on dessert plates with whipped cream and a sprinkle of cinnamon. Yes, you can make these bars ahead of time. I recommend making them a day before you plan to serve them. This allows the flavors to blend well. After baking, cool them at room temperature, then refrigerate for at least two hours. You can keep them in the fridge for up to four days. If you want to freeze them, wrap each bar tightly in plastic wrap. They can last up to three months in the freezer. If you don’t have pumpkin puree, you can use butternut squash puree. It has a similar texture and flavor. Another option is to use sweet potato puree. Both are great alternatives. You can even make your own puree by roasting pumpkin or squash, then blending it until smooth. Just ensure any substitute is thick and not watery. Absolutely! If you prefer a different crust, you can try an oatmeal crust. Simply mix oats, butter, and brown sugar. Alternatively, you can use a cookie crust made from crushed gingersnaps or chocolate cookies. Each option gives the bars a unique flavor and texture. Just make sure the crust is firm enough to hold the filling. These pumpkin cheesecake bars use simple, tasty ingredients. We covered crust, filling, and baking steps. I shared tips for great texture and delicious garnishes. Variations let you mix things up, while storage info ensures freshness. Enjoy your baking adventure, and share these bars with friends! The joy of making and tasting these treats is all yours. Remember, practice makes perfect. Happy baking!
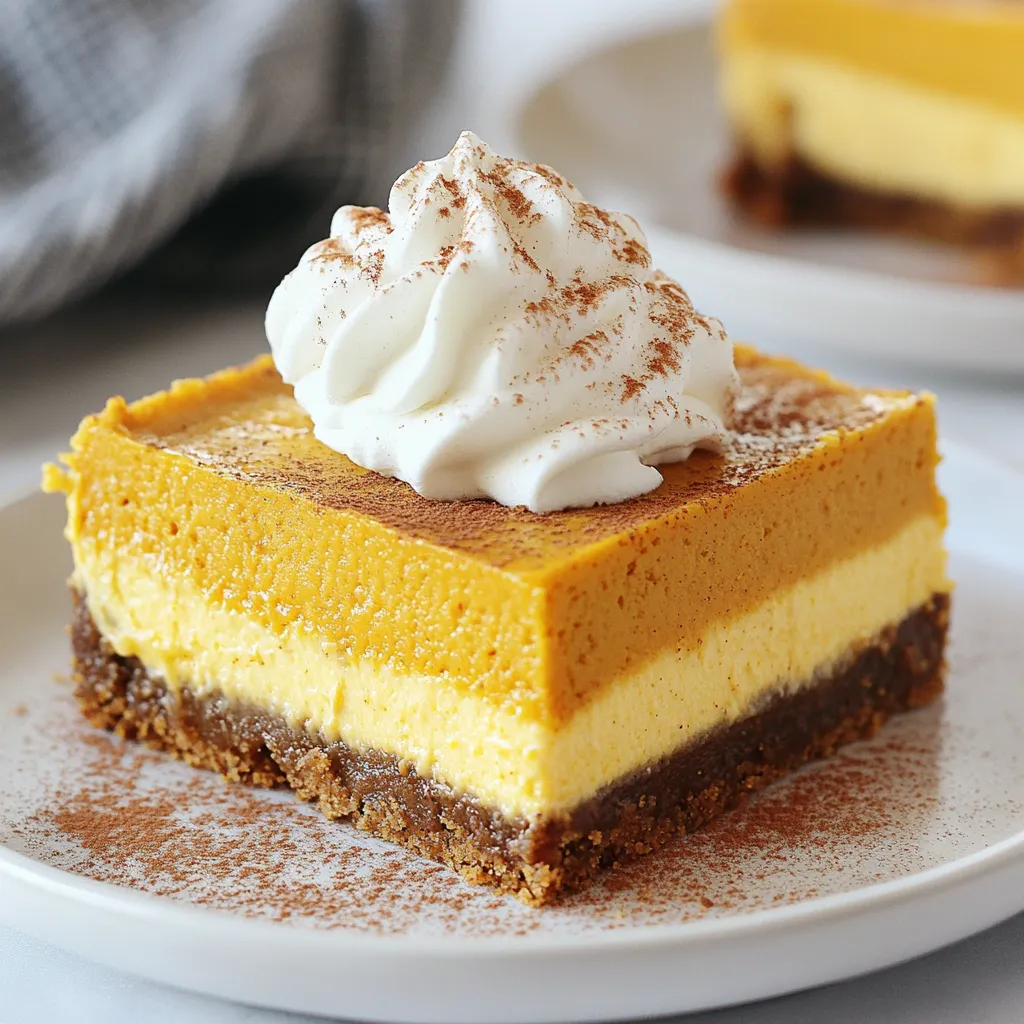
Pumpkin Cheesecake Bars Delightful and Simple Recipe
Are you ready to indulge in a creamy, spiced treat? These Pumpkin Cheesecake Bars are not only delicious but also super simple to make! With
To make these tasty macaroons, gather the following items: - 2 ½ cups shredded unsweetened coconut - 1 cup sweetened condensed milk - 1 teaspoon vanilla extract - ¼ teaspoon salt - 1 cup dark chocolate chips - 1 tablespoon coconut oil - Sea salt flakes for garnish (optional) Using unsweetened coconut gives the macaroons a pure coconut flavor. Sweetened condensed milk adds sweetness and keeps them moist. Vanilla extract enhances the flavor and makes each bite better. The salt helps balance the sweetness. Dark chocolate chips add richness when you dip the macaroons. Coconut oil helps the chocolate melt smoothly and gives a nice shine. If you have allergies or preferences, you can make some changes: - Use sweetened coconut if you prefer a sweeter taste. - For dairy-free options, try using dairy-free chocolate chips. - If you can't have coconut, you could use almond flour instead of shredded coconut, but the texture will change. - For a nut-free version, check that your chocolate is nut-free as well. These easy adjustments allow everyone to enjoy these delicious treats! {{ingredient_image_1}} Start by preheating your oven to 325°F (160°C). This step is key to getting a nice golden color. Next, grab a mixing bowl. Add 2 ½ cups of shredded unsweetened coconut. To this, pour in 1 cup of sweetened condensed milk. Then, add 1 teaspoon of vanilla extract and ¼ teaspoon of salt. Mix everything well until it is fully combined. The mixture should be sticky and thick, perfect for forming the macaroons. Now, it's time to form the macaroons. Use your hands to shape small mounds, about 1.5 inches wide. Place them on a lined baking sheet. Be sure to space them about 1 inch apart. This space helps them bake evenly. Bake in your preheated oven for 20 to 25 minutes. Look for a nice golden brown color to know they are done. Once baked, remove them from the oven and let them cool completely on the sheet. Cooling is important, as it helps them hold their shape. While the macaroons cool, prepare the chocolate. Take 1 cup of dark chocolate chips and 1 tablespoon of coconut oil. Place them in a microwave-safe bowl. Microwave the bowl in 30-second intervals. Stir the mixture each time until it is smooth and melted. Be careful not to overheat. Once the macaroons are cool, dip the bottoms into the melted chocolate. Let any excess chocolate drip off before placing them back on the parchment paper. If you want, sprinkle sea salt flakes on top while the chocolate is still wet. This adds a nice touch of flavor. Finally, place the dipped macaroons in the fridge for 30 minutes to let the chocolate harden. To make great macaroons, follow these tips: - Use unsweetened coconut for a rich flavor. - Measure coconut and sweetened condensed milk accurately. - Mix the ingredients until just combined for a good texture. - Shape the macaroons into even mounds for uniform baking. - Give them space on the baking sheet to help them rise. - Bake until golden brown, but don’t overbake them. Melting chocolate is key for a smooth dip. Here’s how: - Use dark chocolate chips for a rich taste. - Add coconut oil to keep the chocolate smooth and shiny. - Microwave in short bursts of 30 seconds. - Stir between each burst to avoid burning the chocolate. - If you prefer, melt chocolate on a double boiler for more control. Serve your macaroons with style. Try these ideas: - Arrange them on a colorful platter for a beautiful display. - Drizzle extra melted chocolate over the top for flair. - Add some sea salt flakes on top for a sweet-salty mix. - Pair them with coffee or tea for a delightful treat. - Wrap them in clear bags for gifts or party favors. Pro Tips Use Fresh Coconut: For an even more intense coconut flavor, try using fresh grated coconut instead of shredded. Just ensure it is well-drained before mixing. Chill Before Dipping: Chilling the macaroons in the refrigerator for 10-15 minutes before dipping them into chocolate can help them hold their shape better. Experiment with Chocolate: Feel free to use milk chocolate or white chocolate instead of dark chocolate for a different flavor profile. Storage Tips: Store the finished Coconut Bliss Bites in an airtight container in the refrigerator for up to a week to maintain their freshness. {{image_2}} You can add fun flavors to your macaroons. Try mixing in almond or orange extracts. Just a teaspoon can change the taste. This little twist makes each bite exciting. If you like something fruity, try lemon zest. It adds a fresh kick! While dark chocolate is rich, you can switch it up. White chocolate makes a sweet contrast. Melt it just like dark chocolate for easy dipping. You can even mix both chocolates for a fun look. This way, you get the best of both worlds! Get creative with fillings! Add a dollop of peanut butter inside each macaroon. You can also sprinkle crushed nuts on top for crunch. Try drizzling caramel or chocolate on the finished macaroons. These small changes make your treats stand out. To keep your chocolate dipped coconut macaroons fresh, store them in an airtight container. Layer parchment paper between the macaroons to prevent sticking. Place the container in a cool, dry spot, away from sunlight. This method locks in moisture and flavor, ensuring tasty bites every time. You can freeze these macaroons for longer storage. First, let them cool completely. Then, place them in a single layer on a baking sheet. Freeze until firm, about an hour. After that, transfer them to a freezer-safe bag or container. Remove as much air as possible to avoid freezer burn. They last up to three months in the freezer. When stored properly, dipped macaroons stay fresh for about one week at room temperature. If kept in the fridge, they can last up to two weeks. Check for any signs of spoilage, like changes in texture or smell. Enjoy your sweet treats while they are at their best! Yes, you can use sweetened coconut. It will add more sugar to your macaroons. If you choose sweetened coconut, reduce the amount of sweetened condensed milk slightly. This helps balance the sweetness. Sweetened coconut gives a richer flavor. Just remember, it may change the texture a bit. Look for a golden brown color on the tops. This usually takes about 20 to 25 minutes. The edges might darken slightly too. If they look too pale, give them a few more minutes. Keep an eye on them to avoid burning. Remove them from the oven when they have a nice color. The best way to melt chocolate is in the microwave. Use a microwave-safe bowl and combine dark chocolate chips with coconut oil. Heat in 30-second bursts. Stir well between each burst. This helps the chocolate melt evenly. You can also use a double boiler if you prefer. Just be sure not to get water in the chocolate. This can make it seize up. We explored how to make delicious macaroons using simple steps and tasty ingredients. We learned about key ingredients, how to prepare and bake them, and creative ideas for flavors. I shared tips for perfecting your macaroons and how to store them well. Remember to experiment with flavors and toppings to make the recipe your own. With these insights, you are ready to impress your friends and family with your homemade treats. Enjoy the sweet rewards of your hard work!
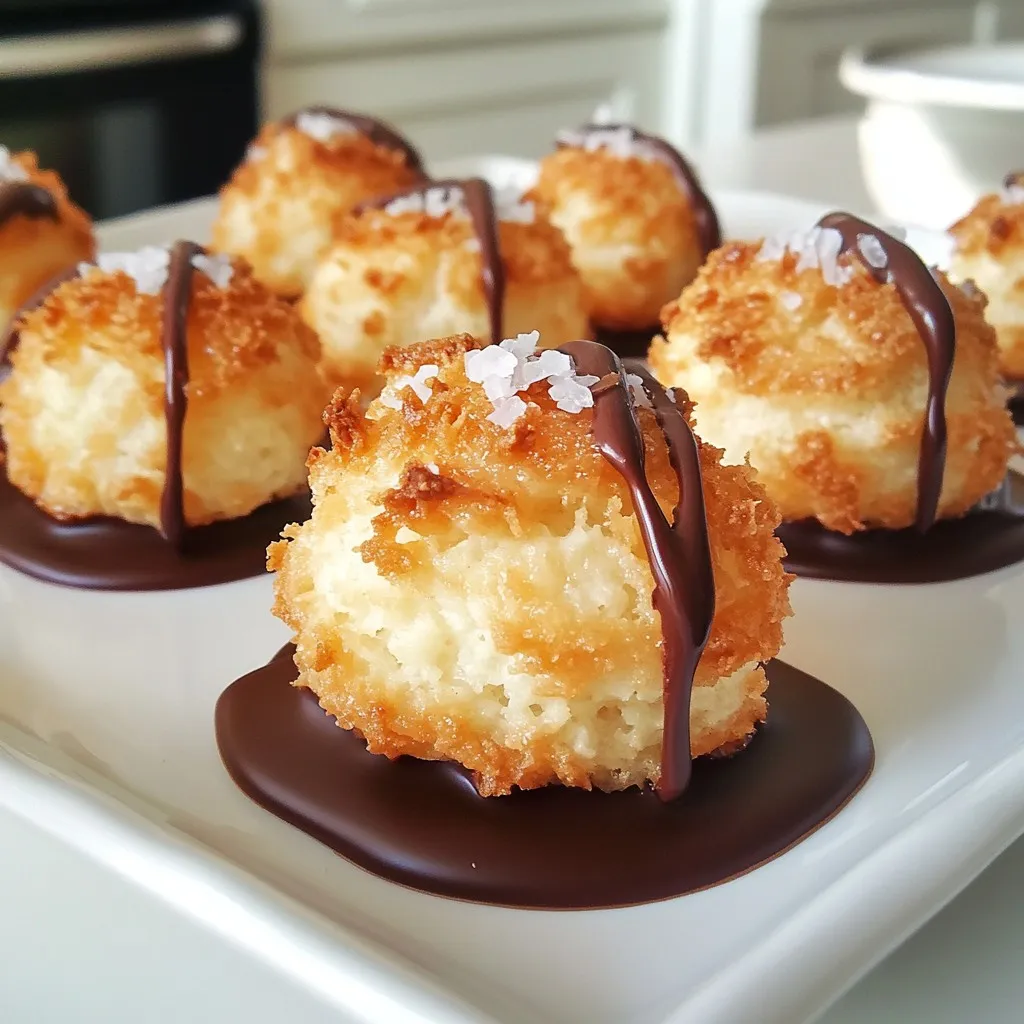
Chocolate Dipped Coconut Macaroons Easy and Tasty Treat
Are you ready to satisfy your sweet tooth? Chocolate dipped coconut macaroons are the perfect mix of chewy and sweet, and they’re super easy to
To make a tasty brownie batter dip, you will need: - 1 cup all-purpose flour - 1/2 cup unsweetened cocoa powder - 1 cup brown sugar - 1/2 cup granulated sugar - 1/2 cup unsalted butter, softened - 1 teaspoon vanilla extract - 1/4 teaspoon salt - 1 cup cream cheese, softened - 1/4 cup milk (add more if needed for consistency) - 1/2 cup chocolate chips - Assorted dippers (graham crackers, fruits, pretzels, etc.) For this dip, you will need a few basic tools: - Mixing bowls - Hand mixer - Whisk - Spatula - Serving bowl You can swap ingredients based on what you have: - Use whole wheat flour for a healthier choice. - Substitute coconut sugar for brown sugar for a unique taste. - If you want a dairy-free option, try vegan cream cheese and butter. - For a richer flavor, add extra chocolate chips or nuts. - You can replace milk with a plant-based milk for a different twist. These tips help you create your perfect brownie batter dip! {{ingredient_image_1}} Start by gathering your ingredients. In a large mixing bowl, add the softened butter and cream cheese. Use a hand mixer and beat them on medium speed. Mix until the mixture is smooth and creamy. This step is key for a great texture. Next, add the brown sugar and granulated sugar. Pour in the vanilla extract too. Continue mixing until everything is well combined. In a separate bowl, whisk together the flour, cocoa powder, and salt. Make sure there are no clumps in the dry mix. Gradually add this dry mixture to your wet ingredients. Add a little bit at a time, mixing well after each addition. This helps to keep the batter smooth. Once combined, slowly pour in the milk. Mix until you reach a dip-like consistency. If it feels too thick, add more milk a bit at a time. To get the perfect dip, start with the right milk amount. If it seems thick, don't worry; just add more milk. Mixing gently helps keep the batter fluffy. After reaching your desired consistency, fold in the chocolate chips. Use a spatula to distribute them evenly. Finally, transfer the dip to a serving bowl. Chill it in the refrigerator for at least 30 minutes. This helps the flavors mix well and the dip set slightly. Enjoy your brownie batter dip with your favorite dippers! To make your brownie batter dip extra creamy, start with softened butter and cream cheese. Mixing them well at first is key. Use a hand mixer for best results. If the dip feels thick, add a bit more milk. This small change makes a big difference in texture. Mix your wet ingredients first, then add the dry ones. This method helps blend everything well. When adding the dry mix, do it slowly. Stir gently after each addition to avoid lumps. It’s important to keep the air in the mix for a light texture. For serving, use a fun bowl to hold the dip. A decorative bowl catches the eye. Top the dip with extra chocolate chips for a treat. Arrange assorted dippers like fruits, graham crackers, and pretzels around the bowl. This not only looks great but also makes it easy for guests to grab their favorites. Pro Tips Use Room Temperature Ingredients: Ensure that your butter and cream cheese are at room temperature for a smoother blend. This helps in achieving a creamy texture without lumps. Adjust Consistency Wisely: If your dip is too thick, add a splash of milk incrementally. Stir well after each addition until you reach your desired consistency. Chill for Best Flavor: Allow the dip to chill for at least 30 minutes before serving. This helps the flavors meld together and enhances the overall taste. Creative Dippers: Experiment with different dippers like sliced apples, strawberries, or even pretzels for a delightful contrast between sweet and salty. {{image_2}} Want to mix things up? You can add fun flavors to your brownie batter dip. Try adding 1/2 cup of creamy peanut butter for a nutty twist. This will make the dip rich and delicious. You can also stir in chopped nuts like walnuts or pecans for crunch. Just fold them in gently to keep the dip smooth. Looking for a lighter option? You can use Greek yogurt instead of cream cheese. This swap will give your dip a creamy texture with less fat. Use 1 cup of plain Greek yogurt and skip the butter. You can also reduce sugar by using a sugar substitute if you want. This way, you get a treat that’s yummy and a bit healthier. Seasonal flavors can make your brownie batter dip special. For fall, add 1 teaspoon of pumpkin spice for a warm, cozy taste. You can also mix in 1/2 cup of mashed pumpkin puree. This adds flavor and makes the dip thicker. In summer, try adding crushed fresh berries for a fruity twist. Each season brings a new way to enjoy this dessert delight. To store leftover brownie batter dip, place it in an airtight container. Cover it tightly to keep out air. This helps keep the dip fresh and delicious. Make sure to chill it in the fridge right after serving. If the dip feels too thick after chilling, add a splash of milk. Stir it gently until you reach your desired consistency. You can also microwave it briefly. Heat it in 10-second bursts, checking often to avoid overheating. In the fridge, brownie batter dip lasts about 5 days. If you want to keep it longer, freeze it. In the freezer, it stays fresh for up to 3 months. Just remember to thaw it in the fridge before serving. Yes, you can eat Brownie Batter Dip raw. The ingredients are safe to eat. I use softened cream cheese, butter, and sugars. These do not contain raw eggs, making it safe for you to enjoy. Just remember, it’s rich and sweet! You have many tasty options for dipping. Here are some great choices: - Fruits like strawberries, bananas, or apples - Pretzels for a salty crunch - Marshmallows for a fun twist - Cookies like vanilla wafers or chocolate chip Try mixing and matching for fun flavors! I recommend not leaving it out for more than two hours. After that, it may not stay fresh. If it’s a warm day, keep it chilled. Always return it to the fridge after serving to keep it safe. Yes, you can make Brownie Batter Dip ahead of time! I often prepare it the night before. Just store it in the fridge in an airtight container. The flavors will blend and taste even better the next day. When ready to serve, give it a quick stir! You learned how to make a tasty Brownie Batter Dip. We covered ingredients, tools, and tips. Steps showed you how to mix and serve it right. You can explore fun flavor variations, too. Plus, I shared ways to store leftovers. Try it out for your next party or snack. This dip is sure to please everyone! Enjoy creating this sweet treat and make it your own.
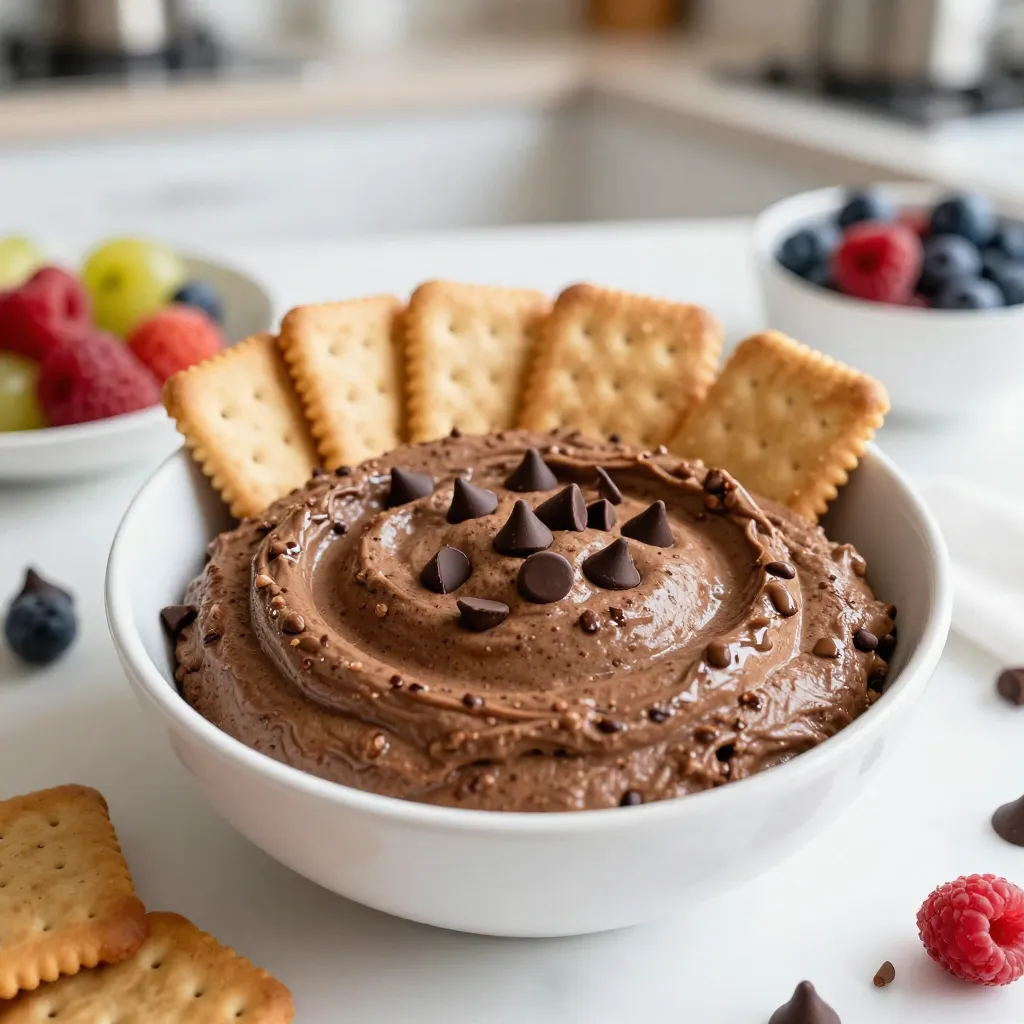
Brownie Batter Dip Irresistible Dessert Delight
Are you ready to dive into a sweet treat that’s perfect for any gathering? Brownie Batter Dip is your answer! This creamy and rich dessert
Fresh strawberries are the star of this smoothie. Use one cup of hulled strawberries for the best flavor. Ripe, juicy strawberries make the drink sweet and tasty. A ripe banana adds creaminess and natural sweetness. It helps blend the other flavors well. You only need one banana for this recipe. Choose one cup of almond milk or any milk you like. Almond milk keeps it light and creamy. You can try oat milk or coconut milk for a twist. Cocoa powder gives the smoothie its rich chocolate taste. Use two tablespoons to ensure a deep, chocolaty flavor. It pairs perfectly with strawberries. Two tablespoons of Greek yogurt add smoothness and protein. This makes the smoothie extra creamy. You can also use dairy-free yogurt if you prefer. Add one tablespoon of honey or maple syrup for sweetness. Adjust it to your taste. A half teaspoon of vanilla extract gives a lovely aroma and taste. {{ingredient_image_1}} First, gather all your ingredients. You need: - 1 cup fresh strawberries, hulled - 1 ripe banana - 1 cup almond milk (or any milk of your choice) - 2 tablespoons cocoa powder - 2 tablespoons Greek yogurt - 1 tablespoon honey or maple syrup - 1/2 teaspoon vanilla extract - Ice cubes (optional) Wash the strawberries and remove the stems. Peel the banana and break it into pieces. This makes blending easier. Next, place the strawberries, banana, and almond milk into your blender. Add in the cocoa powder, Greek yogurt, honey or maple syrup, and vanilla extract. If you like your smoothie thick, add some ice cubes. Blend on high until the mixture is smooth and creamy. Make sure there are no lumps. This should take about 30 seconds. After blending, taste your smoothie. If it needs more sweetness, add a bit more honey or syrup. Blend again for a few seconds to mix it well. You can also add more milk if it’s too thick for your liking. Pour the smoothie into glasses. For a nice touch, garnish with whole strawberries on top or a sprinkle of cocoa powder. Enjoy your tasty chocolate covered strawberry smoothie right away! To find the best strawberries, look for bright red color. The berries should feel firm but not hard. Avoid any with bruises or soft spots. The fresher the strawberries, the better the taste. In season, strawberries are sweet and juicy, perfect for this smoothie. If you want a thicker smoothie, use ice cubes. You can add a little more Greek yogurt as well. Frozen strawberries are another great option. They make the drink cold and creamy. Blend until smooth for the best texture. Honey or maple syrup are great choices for sweetening. If you want less sugar, try using stevia or agave. You can also skip sweeteners or add a ripe banana for natural sweetness. Adjust the amount based on your taste. To ensure a smooth texture, blend in the right order. Start with the liquid first, then add fruits and powders. Blend on high speed for at least 30 seconds. Stop to scrape down the sides of the blender as needed. This will help mix everything evenly. Pro Tips Use Frozen Strawberries: For a creamier texture and a colder smoothie, consider using frozen strawberries instead of fresh ones. Sweetness Adjustment: Always taste your smoothie before serving. You can adjust the sweetness by adding more honey or maple syrup as needed. Vegan Option: To make this smoothie vegan, simply use maple syrup instead of honey and ensure your Greek yogurt is plant-based. Boost Nutritional Value: Add a handful of spinach or a scoop of protein powder for an extra nutritional boost without altering the flavor significantly. {{image_2}} You can boost your smoothie with protein powder. This makes it more filling. I like to use chocolate or vanilla protein powder. It blends well with the flavors. Just add one scoop to your mix before blending. While almond milk is great, you can try other milks too. Dairy milk, coconut milk, or oat milk all work well. Each one adds a unique taste. Choose the one you like best or have at home. You can mix in other fruits for fun flavors. Try blueberries or raspberries for a berry twist. Mango adds a tropical vibe. Just keep the amount similar to what the recipe calls for. To make this smoothie vegan, swap Greek yogurt for a plant-based option. You can use coconut yogurt or silken tofu. Also, use maple syrup instead of honey. This way, everyone can enjoy this tasty treat! If you have extra smoothie, pour it into an airtight container. Seal it well. Store it in the fridge for up to two days. Make sure to shake or stir it before drinking. The smoothie may separate in the fridge, but that's normal. You can freeze your smoothie too! Pour the smoothie into ice cube trays or freezer-safe bags. This is great for quick snacks. When you're ready to enjoy, blend the frozen cubes with a splash of milk for a fresh drink. It will taste just like the day you made it. To keep your smoothie tasty and smooth, avoid adding too much air. When blending, use a low speed at first. This will help mix the ingredients without making it too frothy. If you freeze it, use it within a month for the best flavor. Yes, you can use frozen strawberries. They will make your smoothie cold and thick. Just toss them in the blender like fresh ones. Frozen strawberries add a nice chill and blend well. To make this smoothie dairy-free, simply swap Greek yogurt for a dairy-free option. Use almond yogurt or coconut yogurt instead. This keeps your smoothie creamy without any dairy. A good substitute for Greek yogurt is regular yogurt or a dairy-free yogurt. You can try coconut yogurt or soy yogurt. Both options keep your smoothie smooth and tasty. Yes, you can make this smoothie ahead of time. Just blend and store it in the fridge. Enjoy it within one day for the best taste and freshness. A chocolate covered strawberry smoothie has about 250 calories per serving. This can change based on your sweetener choice and yogurt type. Check your ingredients for exact calorie counts. This blog post covered how to make a tasty chocolate-covered strawberry smoothie. We talked about fresh ingredients like strawberries and bananas, plus almond milk and cocoa powder. You learned the steps for blending, adjusting sweetness, and garnishing. I shared tips for choosing fruit and making your smoothie creamy. Remember, you can mix it up with different fruits or dairy-free options. Enjoy your smoothie, and don’t hesitate to change it to fit your taste!
Chocolate Covered Strawberry Smoothie Delightful Treat
Indulging in a chocolate-covered strawberry smoothie is a feast for your senses. It’s rich, creamy, and easy to make. You need just a few fresh
For this strawberry cheesecake ice cream, you need: - 2 cups fresh strawberries, hulled and sliced - 1 cup cream cheese, softened - 1 cup heavy cream - ½ cup whole milk Fresh strawberries bring a bright flavor. Make sure to pick ripe ones. Cream cheese adds a rich texture. Heavy cream and whole milk keep the ice cream creamy and smooth. You will also need: - 1 tablespoon sugar - ½ cup powdered sugar - 1 teaspoon vanilla extract - A pinch of salt Sugar helps to sweeten the strawberries. Powdered sugar blends well into the cream mix. Vanilla extract adds depth. The pinch of salt balances the sweetness. Finally, don’t forget: - ½ cup graham cracker crumbs Graham cracker crumbs give the ice cream a classic cheesecake taste. You can add other flavors, like lemon zest or almond extract, for a fun twist. These ingredients create a delightful mix of flavors and textures that make every bite a treat! {{ingredient_image_1}} To start, you need to prepare the strawberries. Take 2 cups of fresh strawberries and slice them. Place the sliced strawberries in a small bowl. Add 1 tablespoon of sugar on top. Let the strawberries sit for about 15 minutes. This process is called macerating. It helps the strawberries become sweeter and juicier. You will see the sugar dissolve into the juice of the strawberries. This juice adds a lot of flavor to your ice cream. Next, we mix the base for our ice cream. In a large mixing bowl, add 1 cup of softened cream cheese. Use an electric mixer to beat it until it becomes smooth. This step is key for a creamy texture. Now, it’s time to add the other ingredients. Pour in 1 cup of heavy cream, ½ cup of whole milk, ½ cup of powdered sugar, and 1 teaspoon of vanilla extract. Mix these together on medium speed. Keep mixing until everything is well combined and smooth. Now, gently fold in the macerated strawberries and their juice into the cream mixture. This is where the fruity flavor comes in. Finally, stir in ½ cup of graham cracker crumbs. This gives your ice cream that classic cheesecake crust taste. Now comes the fun part—churning! Pour your mixture into an ice cream maker. Follow the manufacturer’s instructions for churning. Usually, it takes about 20-25 minutes to reach a soft-serve consistency. Once it’s ready, transfer the ice cream into an airtight container. This will help keep it fresh. Freeze the ice cream for at least 4 hours or until it is firm enough to scoop. Proper freezing is important to achieve the best texture. Enjoy your homemade strawberry cheesecake ice cream! To get the right texture, start by mixing the cream cheese until it is very smooth. This helps avoid lumps. When adding heavy cream and milk, mix at medium speed. This makes the mixture light and airy. To prevent ice crystals, churn the ice cream well. Aim for a soft-serve texture in the ice cream maker. Once you finish churning, put it in an airtight container. Freeze it for at least four hours. This keeps the texture creamy. For a beautiful presentation, scoop the ice cream into bowls or cones. Top it with fresh strawberries and a sprinkle of graham cracker crumbs. This adds color and crunch. You can also serve it with whipped cream for extra richness. A drizzle of chocolate or caramel sauce can take it to the next level! One common mistake is not letting the cream cheese soften enough. If it is too cold, it will not blend well. Another issue is not macerating the strawberries long enough. This step is key for enhancing their flavor. Lastly, don’t skip the churning step. It is vital for a creamy ice cream. Skipping it can lead to a hard, icy texture. Pro Tips Use Fresh Strawberries: Fresh, ripe strawberries will enhance the flavor of your ice cream. Look for berries that are bright red and firm for the best results. Chill Your Ingredients: Make sure your cream cheese and other dairy ingredients are well-chilled before mixing. This helps the ice cream churn better and achieve a creamy texture. Don't Skip the Maceration: Allowing the strawberries to macerate with sugar not only enhances their flavor but also helps release their juices, making for a more flavorful ice cream base. Churn Properly: Follow the manufacturer's instructions for your ice cream maker carefully. Over-churning can lead to icy texture, while under-churning may leave it too soft. {{image_2}} You can mix in other fruits to make your ice cream special. How about bananas, blueberries, or raspberries? They add different tastes and colors. You can also try flavor extracts like almond or lemon for a twist. Just keep it simple and fun! If you want a dairy-free treat, use vegan cream cheese and coconut cream instead of regular cream. Almond milk works great too. These swaps keep the texture creamy while making it suitable for everyone. You won’t miss the dairy at all. No ice cream maker? No problem! You can still make this ice cream. Just whip the cream until soft peaks form. Then fold it into the cream cheese mixture with the strawberries. Pour it into a container and freeze. Check it after a few hours. It should be firm but creamy! To keep your strawberry cheesecake ice cream fresh, use an airtight container. This helps prevent freezer burn, which can ruin the texture. Make sure the lid fits well. You can also layer plastic wrap over the ice cream before sealing the lid. This extra step keeps air out. Store the container in the back of your freezer, where it's coldest. Avoid placing it near the door, as it often gets warmer. Homemade ice cream tastes best within two weeks. After that, it can lose flavor and texture. If stored well, you can keep it for up to a month. Just remember to check for any ice crystals or changes in color. These signs mean it’s time to toss it out. Always trust your taste buds! If your ice cream softens, don’t worry! You can refreeze it. Just make sure to stir it well to break up any ice crystals. Then, place it back in the airtight container. Refreeze it as soon as possible to help maintain its creamy texture. If you notice it becoming too icy, it might be best enjoyed as a soft-serve treat! Serve Strawberry Cheesecake Ice Cream in bowls or cones. Top each serving with extra sliced strawberries and a sprinkle of graham cracker crumbs. This adds a nice crunch and looks great too. You can also drizzle some chocolate sauce over the top for extra sweetness. If you want to make it fancy, use a whipped cream dollop. Enjoy it on a hot day for a refreshing treat! Yes, you can make this ice cream ahead of time. Once you finish churning, transfer it to an airtight container. Freeze it for at least four hours until it is firm. This makes it easy for parties or gatherings. Just take it out about five minutes before serving. This allows it to soften slightly, making it easier to scoop. If you need substitutes, here are some good options: - Use Greek yogurt instead of cream cheese for a lighter taste. - Coconut cream can replace heavy cream for a dairy-free option. - Almond milk or oat milk can work instead of whole milk. - For sweeteners, honey or maple syrup can replace sugar. These swaps keep the flavor great while catering to different diets! In this post, we explored how to make homemade strawberry cheesecake ice cream. We covered the key ingredients, like fresh strawberries and cream, along with sweeteners and crust components. I shared step-by-step instructions for mixing, churning, and freezing the ice cream. You learned tips for achieving perfect texture and common mistakes to avoid. I also suggested variations and storage info to keep your creation fresh. Enjoy making this treat and experimenting with flavors. Your ice cream journey starts now!
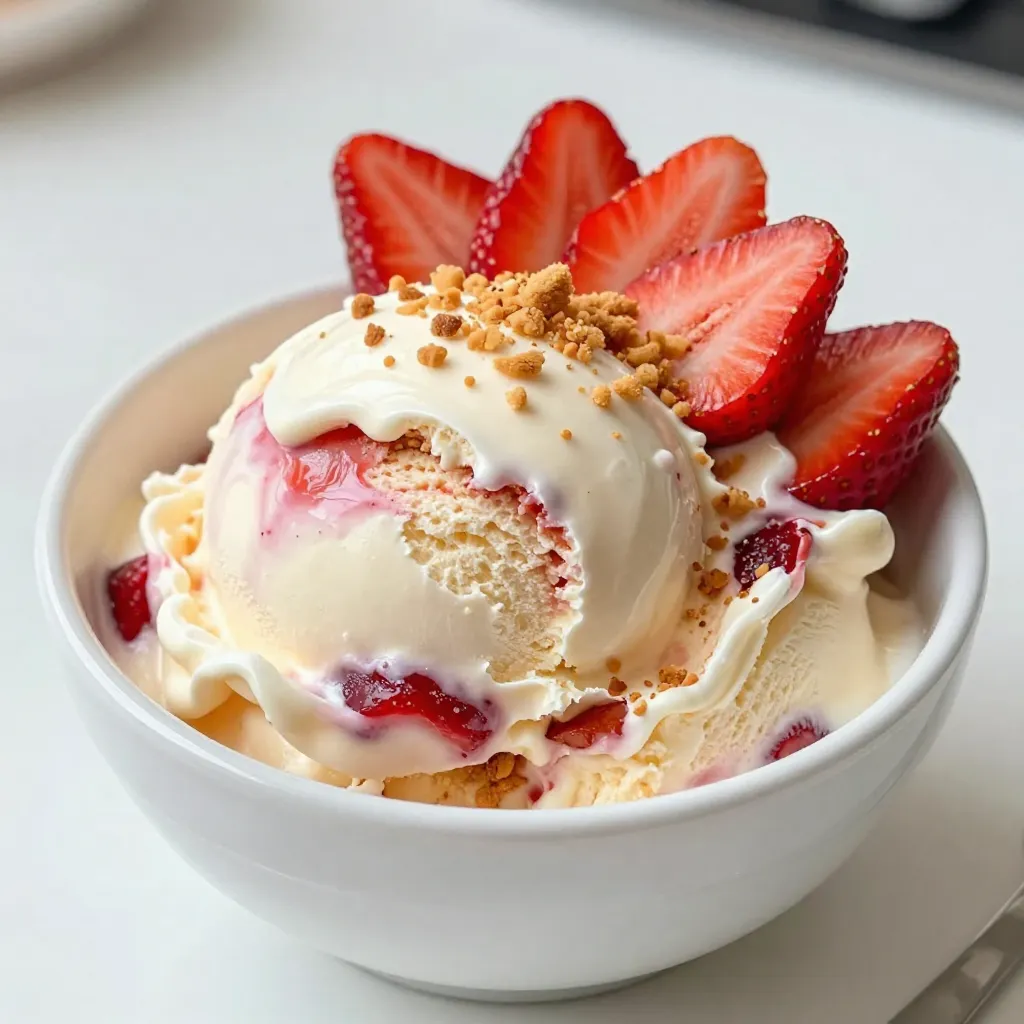
Strawberry Cheesecake Ice Cream Delightful Homemade Treat
Indulging in a bowl of Strawberry Cheesecake Ice Cream is a treat you’ll love. With fresh strawberries and creamy goodness, this recipe is easy to
- 2 cups mixed berries (strawberries, blueberries, raspberries) - 2 tablespoons chia seeds - 2-3 tablespoons honey or maple syrup - 1 tablespoon lemon juice - Pinch of salt - Additional sweeteners - Spices (e.g., cinnamon or vanilla) - Other fruit combinations To make Berry Chia Jam, you need simple and fresh ingredients. The main stars are mixed berries. You can choose strawberries, blueberries, and raspberries. These fruits bring bright colors and sweet flavors. Chia seeds are next. They help thicken the jam and add health benefits. Honey or maple syrup gives sweetness. You can adjust the amount based on your taste. Lemon juice adds a nice zing, balancing the sweetness. Lastly, a pinch of salt brings out all the flavors. You can also add extra touches. If you like, mix in more sweeteners or spices. A sprinkle of cinnamon gives warmth. Vanilla can add a lovely scent. You can even try other fruits. Blackberries or cranberries work well too. This flexibility makes the jam fun and personal. You get to play with flavors and create your perfect blend! {{ingredient_image_1}} Start by adding 2 cups of mixed berries and 1 tablespoon of lemon juice to a medium saucepan. The mix can include strawberries, blueberries, and raspberries. Cook this over medium heat for about 5 minutes. Stir it occasionally. You want to see the berries break down and release their juices. This step makes a great base for the jam. Once the berries soften, it's time to add 2-3 tablespoons of honey or maple syrup. Mix well to blend the sweetener into the berries. Taste the mixture; adjust the sweetness if you want. Use a fork or a potato masher to mash the berries. You can choose how smooth you want it. Leave some chunks for texture if you prefer. Now, stir in 2 tablespoons of chia seeds and a pinch of salt. This is where the magic happens! Mix everything thoroughly. Lower the heat and let the mixture simmer for 5-10 minutes. Stir it often until it thickens. When done, remove it from the heat and let it cool for a bit. Pour the jam into a clean jar. Allow it to cool at room temperature, then refrigerate for at least 1 hour. This helps it thicken even more. Enjoy your homemade berry chia jam! To adjust sweetness, start by tasting your jam after mixing in honey or maple syrup. If it needs more sweetness, add another half tablespoon. Always remember, you can add but can't take away. Mix well after each addition. This way, you can find the perfect balance that suits your taste. For a thicker jam, let it simmer longer. Keep stirring often to prevent sticking. If you'd like it even thicker, add one more tablespoon of chia seeds. They absorb liquid and create a nice texture. If the jam becomes too thick, stir in a splash of water or more lemon juice to loosen it up. Berry chia jam pairs wonderfully with many foods. Spread it on fresh bread or crackers for a tasty snack. You can also use it in yogurt or oatmeal. For a lovely presentation, serve it in a small jar with a label. Add a few whole berries on top for a pop of color. This simple touch makes it look beautiful on any table. Pro Tips Choose Fresh Berries: Opt for ripe and fresh berries for the best flavor and sweetness in your jam. Adjusting Sweetness: Start with less sweetener and gradually increase it to suit your taste preference, as the natural sweetness of berries can vary. Texture Preference: For a chunkier jam, mash the berries lightly; for a smoother consistency, mash them more thoroughly. Storage Tips: Store the jam in an airtight container in the refrigerator for up to two weeks, or freeze it for longer preservation. {{image_2}} Chia seeds are tiny but mighty. They are packed with fiber, omega-3 fatty acids, and protein. In just one ounce, you can find about 11 grams of fiber. This fiber helps with digestion and keeps you full longer. Omega-3s support heart health and brain function. Chia seeds also contain protein, which is essential for muscle repair and growth. When mixed with berries, chia seeds become even more nutritious. Berries are rich in antioxidants. These compounds help fight free radicals in your body. This means they can help reduce your risk of chronic diseases. Eating chia seeds with berries gives you a powerhouse of nutrients in one bite. Berry chia jam is a smart choice for a healthy diet. It has low sugar and is nutrient-dense. You can make it at home, which means you control the ingredients. Store-bought jams often have added sugars and preservatives. By making your own, you avoid those unhealthy extras. This jam is a great way to enjoy sweet flavors without guilt. It makes breakfast or snacks tastier and healthier. You can spread it on whole-grain toast or mix it into yogurt. Using this jam means you get all the flavor with far fewer calories. Mixed berries, like strawberries, blueberries, and raspberries, are full of vitamins. Strawberries have vitamin C, which helps your immune system. Blueberries are known for their brain-boosting benefits due to their high antioxidant levels. Raspberries provide fiber and vitamin K, which supports bone health. These berries also have anti-inflammatory properties. This means they can help reduce swelling and pain in the body. Eating mixed berries regularly can lead to better overall health. Adding them to your chia jam not only enhances its flavor but also packs a nutritional punch. Berry chia jam is fun because you can mix and match berries. You can use just one type of berry or try a mix. For example, blackberries bring a sweet and tangy taste. Cranberries add a tart kick. Each berry has its own unique flavor. This allows you to create your favorite jam. You can even try using seasonal berries for a fresh twist! To make your jam even better, think about adding herbs or zest. Fresh mint can give a cool taste. Just chop a little mint and stir it in. Citrus zest, like lemon or orange, adds a bright flavor. This small change can make a big difference in taste. It can take your jam from good to great! If you want to cut sugar, there are many options. Agave nectar is sweeter than honey and works well. Stevia is a zero-calorie sweetener that can be added easily. Coconut sugar is another good choice. It has a lower glycemic index than regular sugar. These alternatives let you enjoy a tasty jam without all the sugar. You can use them based on your taste and health needs. Berry Chia Jam lasts about one week in the fridge. Store it in a clean jar with a lid. You can also freeze it for up to three months. Just make sure to leave some space in the jar for the jam to expand when frozen. Yes, you can use frozen berries! They work great in this recipe. Just thaw them first and drain any extra liquid. Frozen berries may take a bit longer to cook and break down. Remember to adjust the sweetness since frozen berries can be sweeter than fresh ones. This recipe is not ideal for canning. It lacks the high sugar content that helps preserve jams. If you want to can it, you need to add more sugar. Always follow safe canning practices. Use sterilized jars and ensure a proper seal. This blog detailed how to make delicious berry chia jam. You learned about key ingredients, step-by-step instructions, and helpful tips. We discussed health benefits of chia seeds and berries, plus variations to mix things up. I hope you feel inspired to try this simple recipe. Enjoy your jam on toast or as a sweet treat! It’s quick, healthy, and fun to make. You can customize it to fit your taste. Enjoy creating!
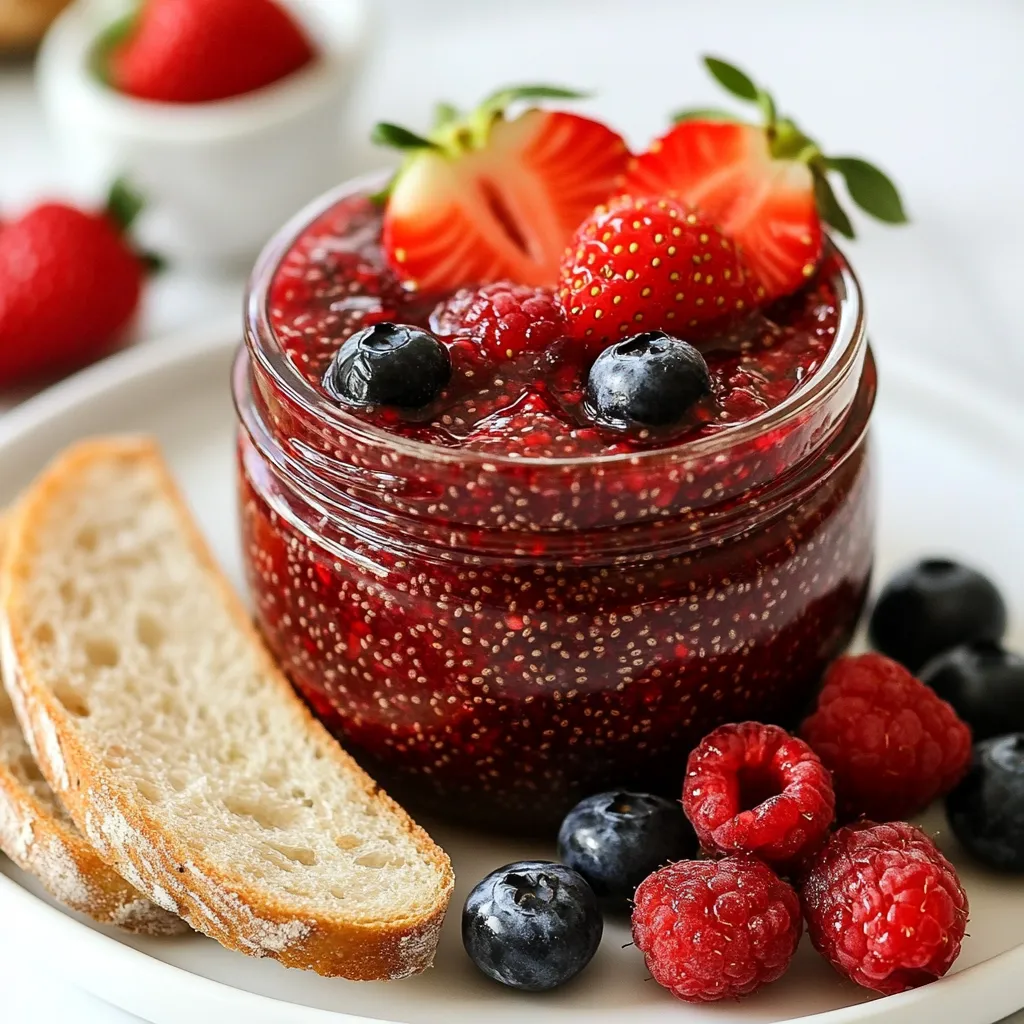
Berry Chia Jam Simple and Healthy Recipe Guide
Are you ready to make a delicious treat that’s both easy and healthy? This Berry Chia Jam recipe is a game changer for breakfast or
- 2 ripe avocados, peeled and pitted - 1/2 cup unsweetened cocoa powder - 1/4 cup maple syrup (adjust to sweetness preference) - 1/4 cup almond milk (or any non-dairy milk) - 1 teaspoon vanilla extract - A pinch of sea salt - Fresh berries (for garnish) - Mint leaves (for garnish) Each ingredient plays a key role in making this mousse rich and creamy. Avocados provide a smooth texture and healthy fats. They make the mousse creamy without dairy. Unsweetened cocoa powder gives it a deep chocolate flavor. Maple syrup adds natural sweetness, and you can adjust this to your taste. Almond milk helps blend everything smoothly and keeps it vegan. Vanilla extract enhances the chocolate flavor, while sea salt balances the sweetness. Fresh berries and mint leaves add color and freshness when you serve the mousse. You can easily swap ingredients if needed. Instead of avocados, you can use silken tofu for creaminess. If you prefer a different sweetener, try agave syrup or date syrup. For milk, soy or oat milk works well too. If you can't find cocoa powder, carob powder is a good alternative. Feel free to skip the mint and use other herbs or edible flowers for garnish. Experimenting with these substitutions keeps the mousse fun and tasty! {{ingredient_image_1}} First, gather all your ingredients. You will need ripe avocados, cocoa powder, maple syrup, almond milk, vanilla extract, and sea salt. Peel and pit the avocados. Cut them into chunks for easy blending. Place the avocado pieces in a food processor. Add the cocoa powder, maple syrup, almond milk, vanilla extract, and a pinch of sea salt. This mix gives the mousse its rich flavor. Now, blend the ingredients until smooth and creamy. Stop the processor and scrape down the sides often. This ensures everything mixes well. Taste the mousse after blending. If it needs more sweetness, add more maple syrup. Blend again until all is well combined. You want a rich, silky texture that melts in your mouth. Once blended, transfer the mousse into small bowls or glasses. Cover them and place them in the fridge. Chill for at least 30 minutes. This helps the mousse firm up and enhances the flavors. When you are ready to serve, add fresh berries on top. A sprig of mint adds color and freshness to your dessert. Enjoy your tasty vegan treat! When choosing avocados, look for a few key signs. First, check the color. A ripe avocado should be dark green or almost black. Next, gently squeeze the avocado. It should feel soft but not mushy. If it feels hard, it is not ripe yet. Also, check the stem area. If it pops off easily and you see green, it is ripe. If it is brown, the avocado is overripe. Pick ripe avocados for the best mousse. Sweetness can vary based on your taste. Start with 1/4 cup of maple syrup. Blend it into the mousse and taste it. If you want it sweeter, add more syrup, one tablespoon at a time. Blend after each addition. This way, you can find the perfect balance without making it too sweet. Remember, the chocolate flavor should shine through, so be careful with the sweetness. The right consistency makes the mousse rich and creamy. Start by blending the ripe avocados and cocoa powder well. If the mousse is too thick, add almond milk a little at a time. Blend until it is smooth and creamy. Scrape down the sides of the bowl as needed. This ensures all ingredients mix well. After blending, let the mousse chill for at least 30 minutes. This helps it firm up slightly, making it perfect for serving. Pro Tips Choose Ripe Avocados: Make sure your avocados are perfectly ripe for the best texture and flavor. They should be slightly soft to the touch but not mushy. Adjust Sweetness: Feel free to adjust the maple syrup to your taste. Start with the recommended amount and add more if you prefer a sweeter mousse. Chill for Better Flavor: Refrigerating the mousse not only firms it up but also enhances the flavors. Let it chill for at least 30 minutes before serving. Garnish Creatively: Use a variety of fresh berries and mint leaves to garnish your mousse, adding color and a fresh taste that complements the chocolate flavor. {{image_2}} You can change the flavor of your Vegan Chocolate Avocado Mousse in fun ways. Adding peanut butter gives it a nutty taste. Just blend in 2 tablespoons of creamy peanut butter. If you love coffee, try adding espresso. One shot of espresso will make it rich and bold. You can also add spices like cinnamon or chili powder for a unique twist. Just a pinch can make a big difference. There are many ways to serve this mousse. You can layer it in parfait glasses with fruit or granola. This makes it look fancy for guests. You can also use it as a filling for cakes or cupcakes. If you want a quick treat, serve it in small bowls or cups. This mousse is great for any dessert occasion. The right toppings can make your mousse even better. Fresh berries add a pop of color and sweetness. Try strawberries, raspberries, or blueberries. You can also sprinkle nuts on top for crunch. Chopped almonds or walnuts work well. For a tropical vibe, add coconut flakes. A dollop of non-dairy whipped cream also makes it creamy and rich. These toppings will impress your guests and delight your taste buds! To keep your vegan chocolate avocado mousse fresh, cover it tightly. Use plastic wrap or a lid. This prevents air from getting in and causing browning. Store it in the fridge. It’s best to enjoy it cold and creamy. If you have leftovers, eat them within two days for the best taste. You can freeze this mousse for later. First, place it in an airtight container. You can also use ice cube trays for single servings. This way, you can take out just what you need. When ready to eat, let it thaw in the fridge overnight. The mousse may lose some creaminess but will still taste great. This mousse lasts about 2-3 days in the fridge. After that, the flavor and texture may change. If you freeze it, it can last up to a month. Always check for any off smells before eating. Freshness is key for a delightful dessert experience. Yes, Vegan Chocolate Avocado Mousse is healthy. Avocados are rich in healthy fats and fiber. They help lower cholesterol and keep your heart strong. Cocoa powder adds antioxidants, which fight free radicals. Maple syrup gives a sweet touch without refined sugar. This mousse is a treat you can feel good about enjoying. Absolutely! You can make this mousse ahead of time. It keeps well in the fridge for up to three days. Just store it in an airtight container. This makes it perfect for parties or quick desserts. Just remember to add your toppings right before serving for the best look. Avocado adds creaminess to desserts without dairy. It also packs in nutrients like vitamins E, K, and C. This fruit helps you feel full longer, which can curb cravings. Plus, its mild flavor lets chocolate shine. Using avocados in desserts is a clever way to sneak in healthy ingredients while enjoying something sweet. This blog post guides you through making a delicious vegan chocolate avocado mousse. You learned about key ingredients, how to prepare, and blending techniques. Tips helped you pick ripe avocados and adjust sweetness for the best taste. Exploring variations and serving suggestions added fun to your dessert. Finally, we covered storage and longevity to keep your mousse fresh. Enjoy this creamy treat guilt-free and share the joy with others. It’s a simple yet satisfying way to indulge in dessert without sacrificing health.
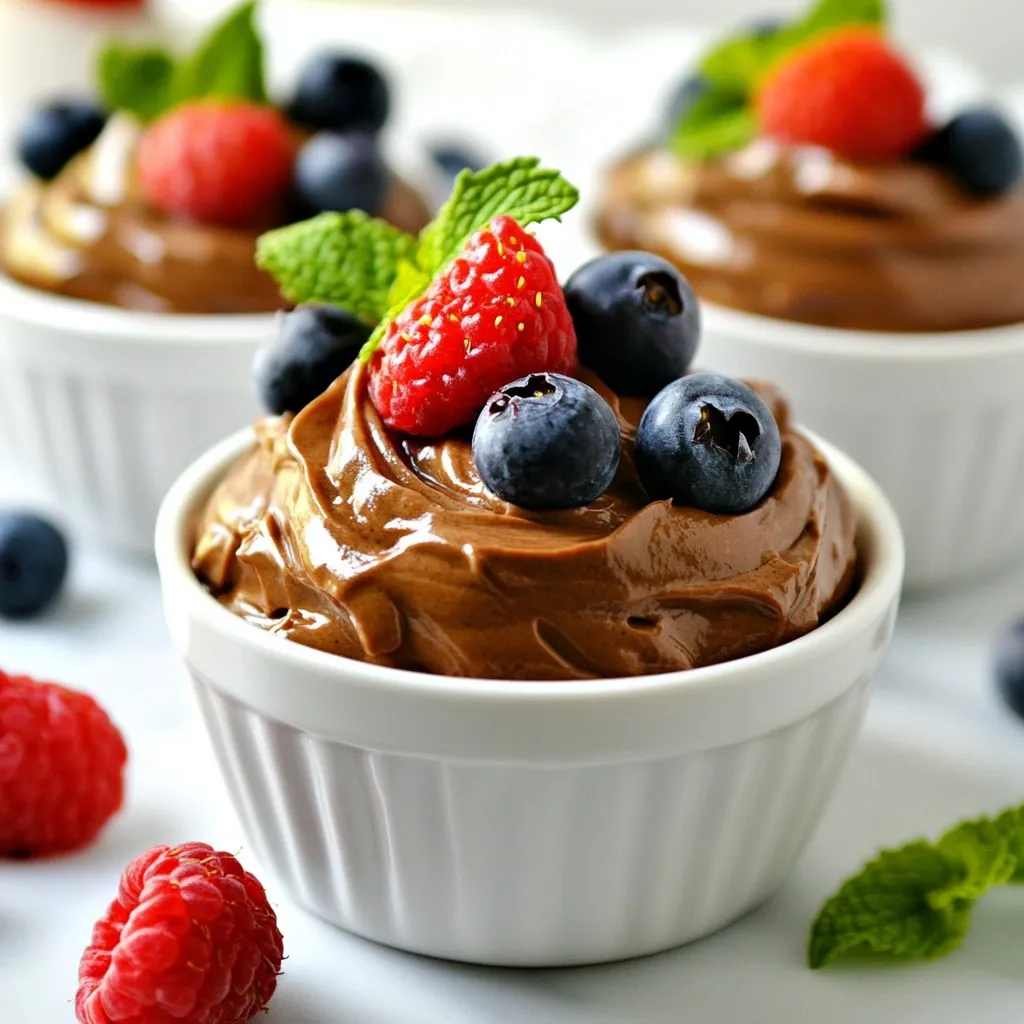
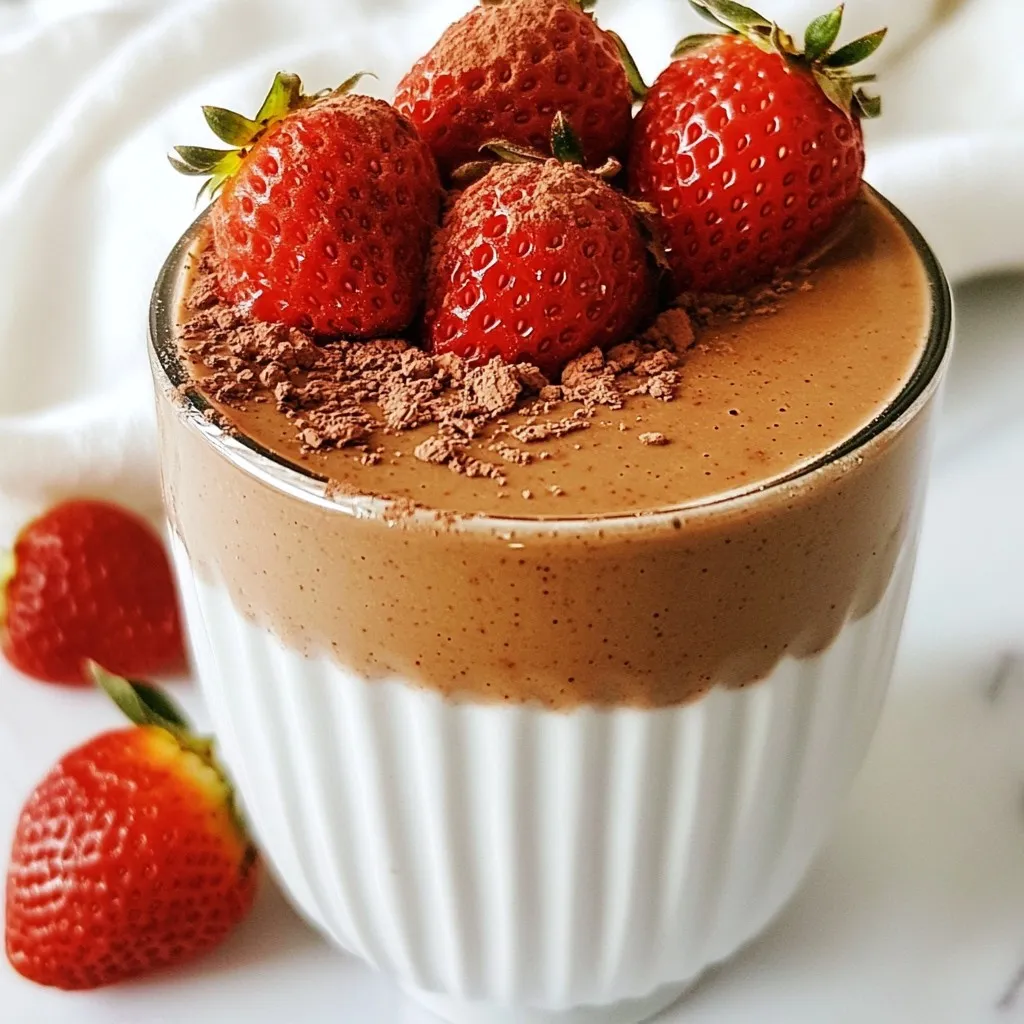
Vegan Chocolate Avocado Mousse Rich and Creamy Delight
Welcome to your new favorite dessert! Vegan Chocolate Avocado Mousse is rich, creamy, and wonderfully easy to make. With just a few simple ingredients, I’ll
To make these delightful scones, gather these simple ingredients: - 2 cups all-purpose flour - 1/2 cup granulated sugar - 1 tablespoon baking powder - 1/2 teaspoon salt - 1/2 cup unsalted butter, chilled and diced - 3/4 cup fresh cranberries, chopped (or dried cranberries) - 1 tablespoon orange zest - 1/2 cup heavy cream - 1 large egg - 1 teaspoon vanilla extract - Extra granulated sugar for sprinkling You can add a personal touch to your scones with these optional ingredients: - 1/2 cup chopped nuts (like walnuts or pecans) - 1/2 teaspoon cinnamon for warmth - 1/4 cup chocolate chips for sweetness - A drizzle of glaze made from powdered sugar and orange juice If you have dietary needs, try these substitutions: - Use whole wheat flour for a heartier scone. - Replace heavy cream with coconut cream for a dairy-free option. - Substitute the egg with a flaxseed meal mix (1 tablespoon flaxseed meal + 2.5 tablespoons water) for a vegan choice. - Use a sugar substitute to lower the sweetness without losing taste. These adjustments help you enjoy the scones while meeting your dietary goals. {{ingredient_image_1}} First, set your oven to 400°F (200°C). This heat helps the scones rise nicely. Next, grab a baking sheet and line it with parchment paper. This keeps the scones from sticking. It also makes cleanup easy. In a big bowl, whisk together the flour, sugar, baking powder, and salt. Make sure they mix well. This step is key for even flavor. The flour gives structure, while sugar adds sweetness. Baking powder helps the scones rise, and salt balances the flavors. In another bowl, whisk the heavy cream, egg, and vanilla extract. This mixture brings moisture and flavor. Next, pour this wet mix into the dry ingredients. Gently stir until just combined. Avoid overmixing; you want a slightly sticky dough. This dough will make soft and fluffy scones. Transfer the dough to a floured surface. Pat it into a disc about 1-inch thick. Now, you can cut the dough into 8 wedges. You can also use a round cutter for circular scones. Place the shaped scones on your lined baking sheet, leaving space between them. Brush the tops of the scones with a bit of extra cream. Then, sprinkle with some granulated sugar for sweetness. Bake in your preheated oven for 15-18 minutes. Look for a golden brown color on top. Once baked, let them cool on the sheet for a few minutes. After that, move them to a wire rack to cool completely. Enjoy the amazing smell as they bake! To get the best scone texture, keep these tips in mind: - Use cold butter. Cold butter helps create flaky layers. - Don’t overmix the dough. Mix until just combined for a tender scone. - Pat the dough gently. Use your hands to shape it, not a rolling pin. - Chill the dough. If possible, chill the shaped scones for 15 minutes before baking. These steps give you a light and airy scone. Here are some helpful tools for making cranberry orange scones: - Mixing bowls: Use a large bowl for dry and a smaller one for wet ingredients. - Pastry cutter: This tool helps blend the cold butter into the flour. - Baking sheet: A sturdy baking sheet ensures even baking. - Parchment paper: Line the sheet for easy cleanup and to prevent sticking. - Wire rack: Use this for cooling the scones after baking. Having the right tools makes baking easier and more fun. Cranberry orange scones taste great on their own. Try these ideas to enhance your experience: - Serve with butter: Spread a little butter on warm scones. - Add jam or cream: Pair with orange marmalade or clotted cream. - Enjoy with tea or coffee: These scones make a perfect treat with your morning drink. - Top with glaze: A simple icing made from powdered sugar and orange juice is delightful. These serving ideas bring out the best flavors in your scones. Enjoy your tasty morning treat! Pro Tips Chill Your Ingredients: Ensure the butter and cream are very cold before using. This helps create flaky layers in your scones. Don't Overmix: Mix the dough until just combined. Overmixing can lead to tough scones. Add More Zest: For a more pronounced citrus flavor, feel free to add more orange zest to the dough. Experiment with Add-Ins: Try adding nuts, chocolate chips, or different dried fruits to customize your scones. {{image_2}} Glazes can add a sweet touch to your scones. A simple glaze uses powdered sugar and orange juice. Mix them until smooth. Drizzle it on warm scones for a nice shine. You can also make a cream cheese glaze. Blend cream cheese, powdered sugar, and a splash of orange juice. This adds richness and flavor. You can switch fresh cranberries for dried ones. Dried cranberries offer a sweeter flavor. If you want a tart taste, stick with fresh. You can also swap orange zest with lemon zest for a different citrus kick. Use whole wheat flour instead of all-purpose flour for a healthier option. Adding spices can elevate your scones. A pinch of cinnamon or nutmeg gives warmth. You might also add chopped nuts for crunch. Walnuts or pecans work well with the cranberries. For a fun twist, mix in some chocolate chips. The sweetness pairs nicely with the tartness of the cranberries. To keep your scones fresh, place them in an airtight container. This helps prevent them from drying out. You can store them at room temperature for up to two days. If you want to keep them longer, consider refrigerating them. Just make sure they are sealed well to maintain moisture and flavor. If you have extra scones, freezing is a great option. First, let the scones cool completely. Then, wrap each scone in plastic wrap. After that, place them in a freezer bag or airtight container. They can last in the freezer for up to three months. When you're ready to enjoy, just thaw them in the fridge overnight. To reheat your scones, preheat your oven to 350°F (175°C). Place the scones on a baking sheet. Heat them for about 10 minutes. This method keeps them warm and soft. You can also use a microwave, but be careful. Heat them in short bursts to avoid making them tough. Enjoy your delicious scones fresh and warm! Yes, you can use frozen cranberries. They work well in scones. Just chop them while frozen. This keeps the scones moist and flavorful. However, fresh cranberries give a brighter taste. If you use frozen, expect a slight change in texture. To make the scones healthier, swap some flour for whole wheat flour. Use less sugar or a natural sweetener. You can also add oats for extra fiber. Replace heavy cream with Greek yogurt for a lighter option. These changes keep the scones tasty and nutritious. Serve cranberry orange scones warm from the oven. They pair well with butter or cream cheese. Add a drizzle of honey for sweetness. A hot cup of tea or coffee complements the scones perfectly. You can also serve them with fresh fruit for a lovely breakfast. Yes, you can prepare the dough ahead of time. Form the dough into a disc and wrap it tightly. Store it in the fridge for up to 24 hours. When ready, just slice and bake. This way, you can enjoy fresh scones with minimal effort! Cranberry orange scones are easy and fun to make. We covered the key ingredients, offered tips for texture, and shared ways to customize them. You can swap ingredients or add flavors to fit your taste. Proper storage and reheating help keep scones fresh. In the end, enjoy baking these scones and sharing them. They bring warmth and fun to any gathering. Your kitchen will smell amazing, and everyone will love the results!
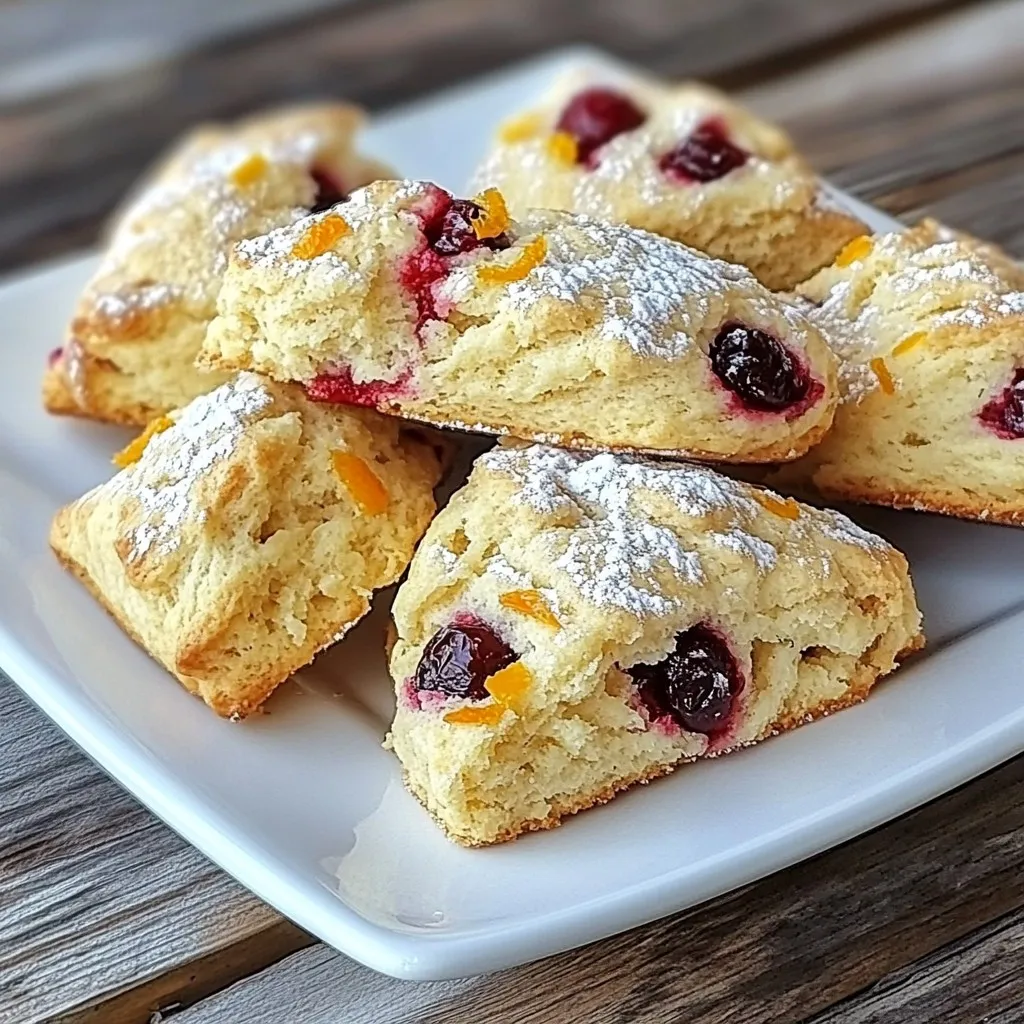
Cranberry Orange Scones Flavorful Morning Delight
Wake up your taste buds with these delightful Cranberry Orange Scones! Perfect for breakfast or brunch, these scones offer a zesty twist that will brighten