Desserts
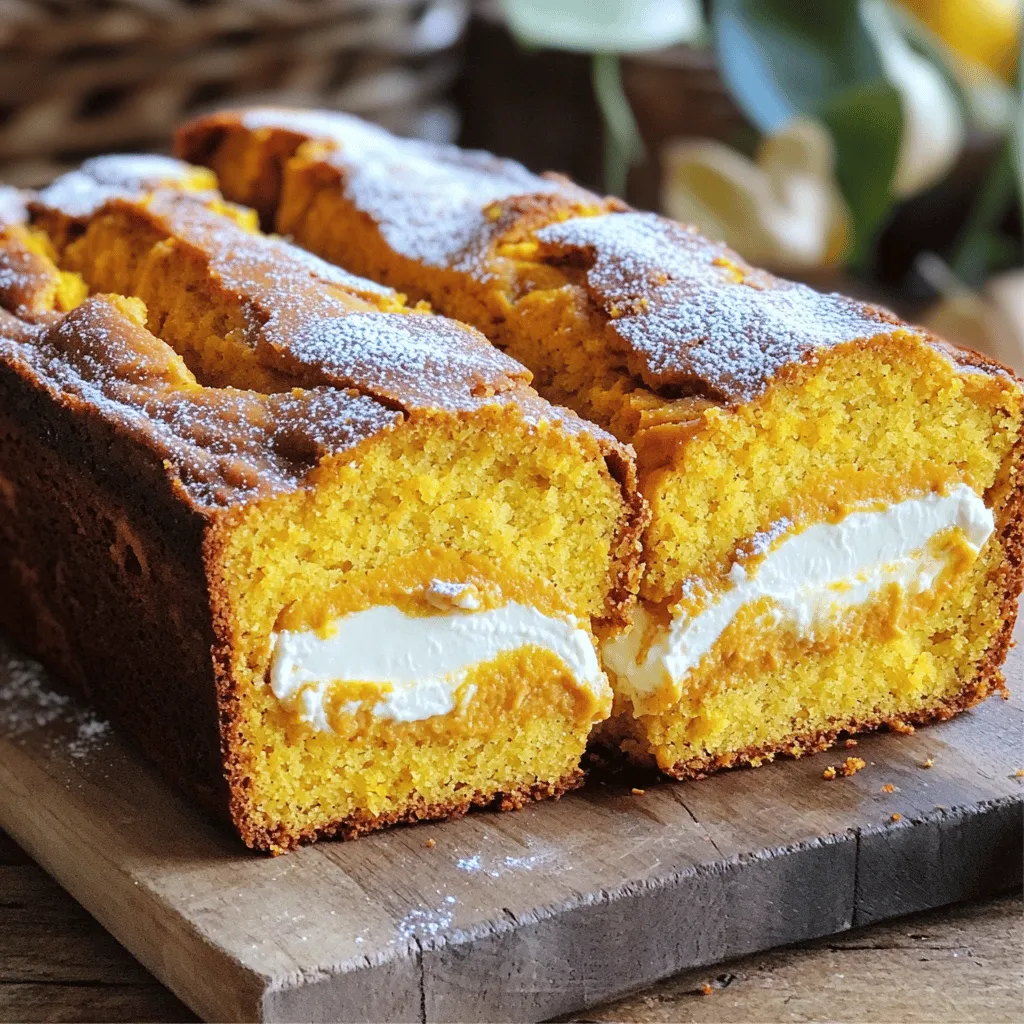
Cream Cheese Filled Pumpkin Bread Delightful and Easy
Fall is the perfect time for warm, comforting treats, and nothing beats Cream Cheese Filled Pumpkin Bread. This simple recipe combines the rich flavors of
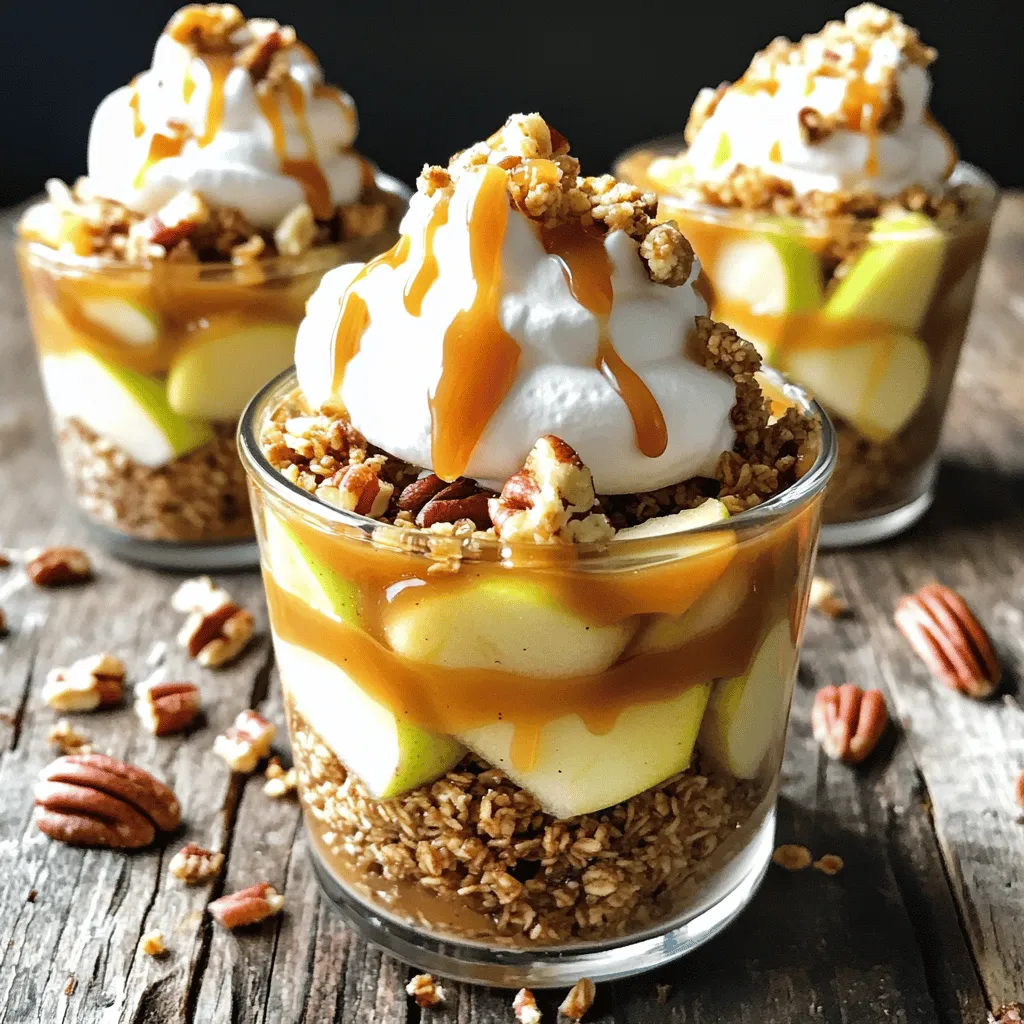
Caramel Apple Dessert Cups Delightful and Easy Treat
Craving something sweet and fun? Let me introduce you to Caramel Apple Dessert Cups! This delightful treat combines crisp apples, rich caramel, and creamy toppings,

Classic Pumpkin Spice Cake Roll Delightful Recipe Tips
Get ready to impress your friends and family with a Classic Pumpkin Spice Cake Roll! This delightful treat combines the warm flavors of pumpkin and
![- Ripe bananas: Using ripe bananas is key for flavor. They should be soft and brown for the best taste. Ripe bananas add natural sweetness and moisture to the bread. Their flavor becomes rich and deep, making every bite delicious. - Coconut oil: I love using coconut oil instead of butter or other fats. It keeps the bread moist and adds a subtle flavor. Coconut oil is also a healthier option. It has good fats that can benefit your body. - Sugar types: You can choose between brown sugar and granulated sugar. Brown sugar gives a richer, more complex flavor. It adds a hint of caramel that pairs well with bananas. Granulated sugar works too, but it offers a lighter taste. - Nuts and fruits: You can personalize your banana bread with nuts or fruits. Chopped walnuts or pecans add crunch and flavor. You can also add dried fruits like raisins or cranberries for extra sweetness. - Chocolate chips: For a fun twist, add chocolate chips to the batter. They melt while baking and create gooey pockets of chocolate. This makes the banana bread even more indulgent and tasty. It’s a great way to mix things up! For the complete guide to making this delightful treat, check out the [Full Recipe]. Start by mashing the ripe bananas. Use a fork or a potato masher. Make sure to mash them until they are smooth, with no lumps. This step is key for a soft texture. Next, mix the melted coconut oil with the mashed bananas. Stir well to combine. Now, add the beaten egg and vanilla extract. Mix until everything is blended. This ensures the egg evenly spreads through the batter. Pour the batter into your greased loaf pan. Use a spatula to smooth the top. This helps the bread rise evenly in the oven. To check for doneness, insert a toothpick into the center of the bread. If it comes out clean, your bread is ready. If it has batter on it, bake for a few more minutes. This simple test saves your bread from being undercooked. For the full recipe, check out the detailed instructions in the recipe section. To avoid overmixing the batter, mix just until the flour disappears. When you see any dry flour, stop mixing. This helps keep your banana bread soft and fluffy. Stir gently and fold the ingredients together. That way, you will have a nice crumb. For a moist crumb, use very ripe bananas. The riper the bananas, the better the flavor and moisture. Also, don’t skip the oil. It keeps the bread tender. If you want a richer taste, try using brown sugar instead of granulated sugar. This will add depth to your bread. You can add more spices for extra warmth. Try using nutmeg or cardamom along with cinnamon. A little pinch can make a big difference! Experimenting with extracts or citrus zest can also boost the flavor. Add a splash of almond or orange extract. A teaspoon of lemon or orange zest can brighten your bread, giving it a fresh taste. These little changes can make your cinnamon crunch banana bread even more exciting. For the full recipe, check the details above. Happy baking! {{image_2}} You can change the flavor of your banana bread easily. Try using nutmeg or cardamom. These spices add warmth and depth. Nutmeg gives a cozy vibe, while cardamom adds a hint of citrus. You might love how they mix with the bananas. If you want to go gluten-free, you can switch the flour. Almond flour or oat flour works well. These flours give a nice texture and flavor. Just remember to adjust the liquid in your recipe. Gluten-free flours absorb more moisture. Toppings can take your banana bread to the next level. You can add a streusel topping for a sweet crunch. Just mix flour, sugar, and butter for this. If you like nuts or seeds, sprinkle them on top. Walnuts, pecans, or sunflower seeds add great texture. Another fun option is oats. Adding oats gives a hearty crunch. You can adjust the amount of oats you use. More oats mean more crunch! Mix them with sugar and cinnamon for a tasty topping. For the full recipe, check out the complete guide. To keep your cinnamon crunch banana bread fresh, wrap it in plastic wrap. This simple step keeps moisture in and air out. Store it at room temperature for up to three days. If you want it to last longer, freeze it! Slice the bread first for quick use. Place the slices in a freezer bag, press out the air, and seal. You can enjoy this treat for up to three months. To reheat banana bread, use the microwave or oven. For the microwave, warm a slice for 10-15 seconds. This method keeps it soft and moist. If you prefer the oven, set it to 350°F. Heat the bread for about 10 minutes. This method gives it a nice crisp outside. After storage, serve your banana bread with a pat of butter or a drizzle of honey. You can also add fresh banana slices or a sprinkle of cinnamon. This makes every bite tasty! For more ideas, check out the Full Recipe for different serving styles. Can I use frozen bananas for this recipe? Yes, you can use frozen bananas. Just thaw them first. They will add great moisture. Make sure to drain any extra liquid before mashing. This keeps the batter just right. How can I make it vegan-friendly? To make this banana bread vegan, swap the egg for a flax egg. Mix one tablespoon of flaxseed meal with three tablespoons of water. Let it sit for five minutes to thicken. Use a plant-based oil instead of coconut oil. What to do if the bread is too dense or crumbly? If your bread is dense, you may have overmixed the batter. Mix just enough to combine the flour. If it’s crumbly, try adding a bit more mashed banana or an extra tablespoon of oil. This will give it more moisture. How can I adjust the recipe for a smaller loaf? To make a smaller loaf, cut the recipe in half. Use a smaller loaf pan, like 8x4 inches. Monitor the baking time. Check for doneness after 45 minutes. Adjust as needed. For more tips and the complete recipe, check the Full Recipe. Cinnamon crunch banana bread blends taste and texture with simple steps. Ripe bananas elevate flavor, while coconut oil adds richness. You can mix in nuts or chocolate chips for fun twists. Remember to mash bananas well and mix oil with eggs thoroughly. Avoid overmixing the batter for a moist loaf. Try new spices or toppings for a unique touch. Store your bread right for long-lasting goodness. With these tips, you’ll bake a delicious treat everyone will enjoy.](https://grilledflavors.com/wp-content/uploads/2025/08/df342745-580f-478e-8a8b-041254f33e09.webp)
Cinnamon Crunch Banana Bread Easy and Flavorful Treat
Are you ready to bake something that’s easy and delicious? My Cinnamon Crunch Banana Bread is the answer! This sweet treat combines ripe bananas and
Pumpkin Muffins Delightful and Simple Recipe Guide
Welcome to your ultimate guide for baking pumpkin muffins! I’ll show you how to make these tasty treats that are simple and fun. Whether you’re
![To make apple cinnamon rolls, you need a few key ingredients. Here’s what you will need: - 2 cups all-purpose flour - 1/4 cup granulated sugar - 1 packet instant yeast - 1/2 teaspoon salt - 1/4 cup unsalted butter, melted - 3/4 cup warm milk (about 110°F) - 1 large egg - 1 teaspoon vanilla extract - 2 apples, peeled, cored, and finely chopped - 1 tablespoon lemon juice - 1 tablespoon cinnamon - 1/4 cup brown sugar - 1/4 teaspoon nutmeg - 1/4 cup chopped pecans (optional) - 1 cup powdered sugar - 2 tablespoons cream cheese, softened - 1-2 tablespoons milk (for icing) Each ingredient plays a special role. The flour forms the base of the dough. Yeast helps the rolls rise. Sugar adds sweetness and flavor. Apples give a juicy bite and freshness. The spices—cinnamon and nutmeg—bring warmth and depth. The melted butter adds richness. Finally, the cream cheese in the icing makes it creamy and smooth. For the full recipe, check out the detailed steps. This combination creates rolls that are soft, sweet, and bursting with apple flavor. Enjoy the process of gathering these ingredients. You will love the delightful smell in your kitchen as you bake! Start by gathering your dry ingredients. In a large bowl, add 2 cups of all-purpose flour, 1/4 cup of granulated sugar, 1 packet of instant yeast, and 1/2 teaspoon of salt. Mix these well with a whisk. This step helps the yeast to work better later. A good mix gets air into the flour, which makes your rolls light and fluffy. Now, let’s move on to the wet ingredients. In a separate bowl, whisk together 1/4 cup of melted butter, 3/4 cup of warm milk, 1 large egg, and 1 teaspoon of vanilla extract. Make sure the milk is warm, not hot. This warmth helps the yeast wake up. Whisk until the mixture is smooth and well combined. This will bring a lovely richness to your rolls. Next, combine the wet and dry ingredients. Pour the wet mix into the dry mix and stir with a wooden spoon until a dough forms. When it comes together, turn it out onto a floured surface. Knead it for about 5 minutes. You want it to be smooth and elastic. After kneading, place the dough in a greased bowl. Cover it with a clean cloth and let it rise in a warm place. Wait about 1 hour, or until it doubles in size. This rising step is key for soft and fluffy apple cinnamon rolls. For the full recipe, check the details above! To make soft and fluffy rolls, knead the dough well. Use your hands to push and fold the dough for about five minutes. The dough should feel smooth and elastic. After kneading, let it rise in a warm spot. Cover it with a cloth so it stays moist. Wait until it doubles in size, which usually takes about one hour. This step is key for a light texture. To kick up the flavor, add spices like nutmeg or cardamom. You can also mix in some chopped pecans for crunch. They add a nice contrast to the softness of the dough. If you prefer, swap in walnuts or almonds. You can even add dried fruit like raisins or cranberries for sweetness. This gives your rolls a fun twist. For a great icing, mix powdered sugar and cream cheese. Add milk slowly until you reach a smooth consistency. It should be thick but pourable. If it is too runny, add more sugar. If it is too thick, add a splash of milk. Drizzle the icing over the rolls when they are warm. This way, it melts slightly into the rolls, making them even more delicious. For the full recipe, check out the Apple Cinnamon Rolls section. {{image_2}} You can switch up the filling for your rolls. Instead of apples, try pears, peaches, or cherries. Each fruit brings its own flavor. You can also mix in nuts like walnuts or almonds for a nice crunch. Dried fruits like raisins or cranberries work great too. If you want a chocolate twist, add chocolate chips to the mix. These changes can make your rolls unique and special. Making apple cinnamon rolls gluten-free is easy. Just swap all-purpose flour for a gluten-free blend. Look for a mix that includes xanthan gum. This helps the dough hold together. You can find gluten-free flour at most grocery stores. Follow the same steps in the recipe, and you will get soft and sweet rolls that everyone can enjoy. If you want to make vegan apple cinnamon rolls, you can replace a few ingredients. Use almond milk or oat milk instead of regular milk. For the butter, try coconut oil or a vegan spread. You can use flaxseed meal mixed with water as a substitute for the egg. Just mix one tablespoon of flaxseed meal with two and a half tablespoons of water. Let it sit until it thickens. These simple swaps keep your rolls dairy-free and egg-free while still being delicious. For the full recipe, check out the [Full Recipe]. To keep your apple cinnamon rolls fresh, store them in an airtight container. You can place a piece of wax paper between layers to avoid sticking. Make sure to let the rolls cool completely before sealing. This will help prevent sogginess. Keep them at room temperature for up to three days. If you want them to last longer, put them in the fridge. To freeze your rolls, first let them cool completely. Wrap each roll in plastic wrap tightly. Then, place them in a freezer bag or an airtight container. Label the bag with the date. Your rolls can stay frozen for up to three months. When you're ready to enjoy them, thaw in the fridge overnight. You can reheat them in the oven at 350°F for about 10-15 minutes for that fresh-baked taste. At room temperature, your apple cinnamon rolls will stay fresh for about three days. If you store them in the fridge, they can last up to a week. The fridge may dry them out a bit, so I recommend enjoying them within a few days for the best flavor. For ultimate freshness, always check for any signs of spoilage before serving. Yes, you can use pre-made dough. It saves time and effort. Store-bought dough is often very good. Look for options labeled as pizza or cinnamon roll dough. Just roll it out, add your filling, and shape it like in the recipe. For baking, I recommend using Granny Smith or Honeycrisp apples. Granny Smith apples add a nice tartness. Honeycrisp apples are sweet and juicy. You can mix different types for great flavor. Just avoid soft apples like Red Delicious, as they won't hold up in the oven. To check if the rolls are done, look for a golden brown color. They should feel firm to the touch, not doughy. You can also insert a toothpick in the center. If it comes out clean, they are ready. Keep an eye on them to avoid burning. This post covered how to make delicious apple cinnamon rolls. We looked at ingredients, mixing, and dough-making steps. I shared tips for perfect texture and flavor, plus fun variations. Storing your rolls correctly ensures they stay fresh. In the end, follow these steps for tasty rolls every time. Enjoy sharing them with friends and family! You now have all the tools to create a delightful treat. Happy baking!](https://grilledflavors.com/wp-content/uploads/2025/08/01bf53a5-023f-4767-91e6-313e9c1fac5d.webp)
Apple Cinnamon Rolls Delightfully Soft and Sweet
If you’re craving a warm, gooey treat, look no further than my Apple Cinnamon Rolls! These delightful rolls are soft, sweet, and bursting with flavor.
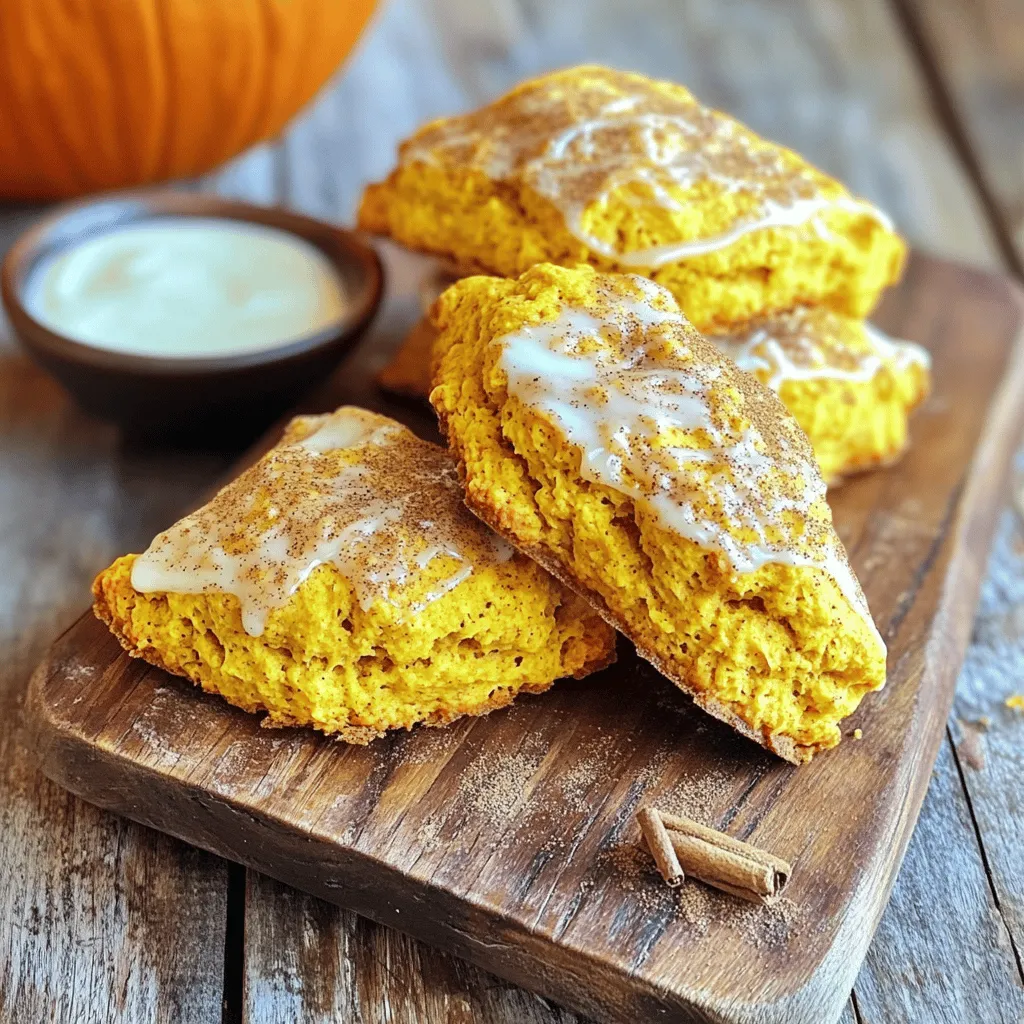
Pumpkin Scones Delightful and Easy Recipe at Home
Get ready to enjoy the cozy taste of fall! In this blog post, I’ll show you how to make delightful pumpkin scones that are easy
. - Preheat your oven to 350°F (175°C). Grease a 9x13 inch baking pan or line it with parchment paper. - In a large bowl, mix the melted butter and brown sugar until smooth. - Add the eggs one by one, stirring well after each addition. Then, mix in the vanilla extract. - In another bowl, whisk together the flour, baking powder, baking soda, salt, and cinnamon. - Gently fold in the diced apples and optional nuts into the batter. - Make sure the apples and nuts are evenly spread throughout the mixture. - Pour the batter into the prepared baking pan and spread it evenly. - Bake for 25-30 minutes. Check doneness by inserting a toothpick in the center; it should come out clean. - Allow the blondies to cool completely in the pan before frosting them. - In a medium bowl, cream the softened butter until smooth. - Gradually add the powdered sugar, maple syrup, and vanilla extract, mixing until smooth. - If the frosting is too thick, adjust the texture by adding milk, one tablespoon at a time. - Once the blondies are completely cool, spread the maple frosting evenly over the top. - Cut the blondies into squares, and they are ready to serve. Enjoy your delicious apple blondies! For the full recipe, check the section above. To make your apple blondies chewy, do not overmix the batter. Overmixing adds air and can make them dry. Mix just until the flour disappears. Choose the right apples to add flavor. I suggest using Granny Smith apples. Their tartness balances the sweetness of the brown sugar. Getting the right consistency for the maple frosting is key. Start with softened butter and beat it well. Add powdered sugar slowly, mixing as you go. If the frosting is thick, add milk one tablespoon at a time. You can enhance the flavor by adding a pinch of salt or a dash of cinnamon. These small tweaks can elevate the taste. When serving, cut your blondies into neat squares. A clean cut makes them look nicer. You can serve them plain or add a drizzle of extra maple syrup. Pair your blondies with a scoop of vanilla ice cream or a dollop of whipped cream. This adds a lovely contrast to the warm, sweet blondies. For a fun twist, sprinkle some chopped nuts on top for added texture. {{image_2}} You can change the flavor of your apple blondies by using different types of apples. Granny Smith gives a nice tartness. Honeycrisp adds sweetness and crunch. You can also mix apples to get a blend of tastes. If you want a twist, substitute walnuts or pecans with chocolate chips. Dark chocolate chips add richness. Dried fruits like cranberries or cherries can bring a chewy texture. These small swaps can make your blondies unique and fun. For a lighter version, try using applesauce in place of butter. This keeps the blondies moist and cuts down on fat. You can also reduce sugar to make them less sweet. Use half the sugar for a less sugary treat that still tastes great. Using whole wheat flour instead of all-purpose flour is another healthy swap. It adds fiber and a nutty flavor to your blondies. If you need vegan options, replace the eggs with flaxseed meal. Mix one tablespoon of flaxseed with three tablespoons of water. Let it sit for a few minutes to thicken. This works as a great egg substitute. For gluten-free blondies, you can use almond flour or a gluten-free flour blend. These options help everyone enjoy this tasty treat. For the full recipe, check the section above. To keep your apple blondies fresh, use an airtight container. You can store them at room temperature for a few days. If you need them to last longer, refrigeration works well too. Just make sure to wrap them tightly. This helps prevent them from drying out. You can freeze apple blondies easily. First, cut them into squares. Then, wrap each piece in plastic wrap. Place them in a freezer bag or container. This keeps them safe from freezer burn. When you want to enjoy them, take out a piece and let it thaw at room temperature. For the best taste, enjoy them within three months. Apple blondies last about a week at room temperature. If you store them in the fridge, they can last up to two weeks. Always check for signs of spoilage. If you see mold or an off smell, it's best to throw them away. Staying aware of these signs helps you enjoy every bite safely. For the complete recipe, don't forget to check the Full Recipe section. To create chewier blondies, use more brown sugar than white sugar. Brown sugar adds moisture, making the texture softer. You can also try adding an extra egg yolk. This yolk will make the blondies richer and more tender. Avoid overmixing your batter, as this can make them cakey. Mix just until the ingredients blend, keeping some air in the batter. Yes, you can switch up the frosting! Cream cheese frosting offers a tangy taste. Chocolate ganache adds a rich flavor that pairs well with apples. If you want something lighter, try a simple whipped cream topping. You can also add spices like cinnamon or nutmeg to the frosting for extra flavor. Each option brings a unique twist to your apple blondies! Blondies and brownies differ mainly in ingredients and flavor. Blondies use brown sugar, butter, and vanilla, which give them a sweet, butterscotch flavor. Brownies use cocoa powder and usually have a chocolate flavor. In terms of texture, blondies tend to be denser and chewier. Brownies can be fudgy or cake-like depending on the recipe. Both are delicious, but they offer different taste experiences! To check if your blondies are done, insert a toothpick into the center. If it comes out clean or with a few moist crumbs, they are ready. If the toothpick has wet batter on it, they need more time. Usually, blondies bake for 25 to 30 minutes at 350°F (175°C). Keep an eye on them to avoid overbaking, which can make them dry. In this post, we covered the key ingredients for apple blondies, including apples and nuts. I shared step-by-step instructions for making the batter, baking, and frosting your blondies. You also learned tips for perfecting your recipe and different variations to try. Remember, great blondies need patience and the right technique. Enjoy the process and share your results! Happy baking!](https://grilledflavors.com/wp-content/uploads/2025/08/471fe1d7-30fb-4f33-99ea-70304d0f2d41.webp)
Apple Blondies with Maple Frosting Irresistible Delight
Craving a sweet treat that combines warm apples and rich maple flavors? Look no further! These Apple Blondies with Maple Frosting offer a delicious twist
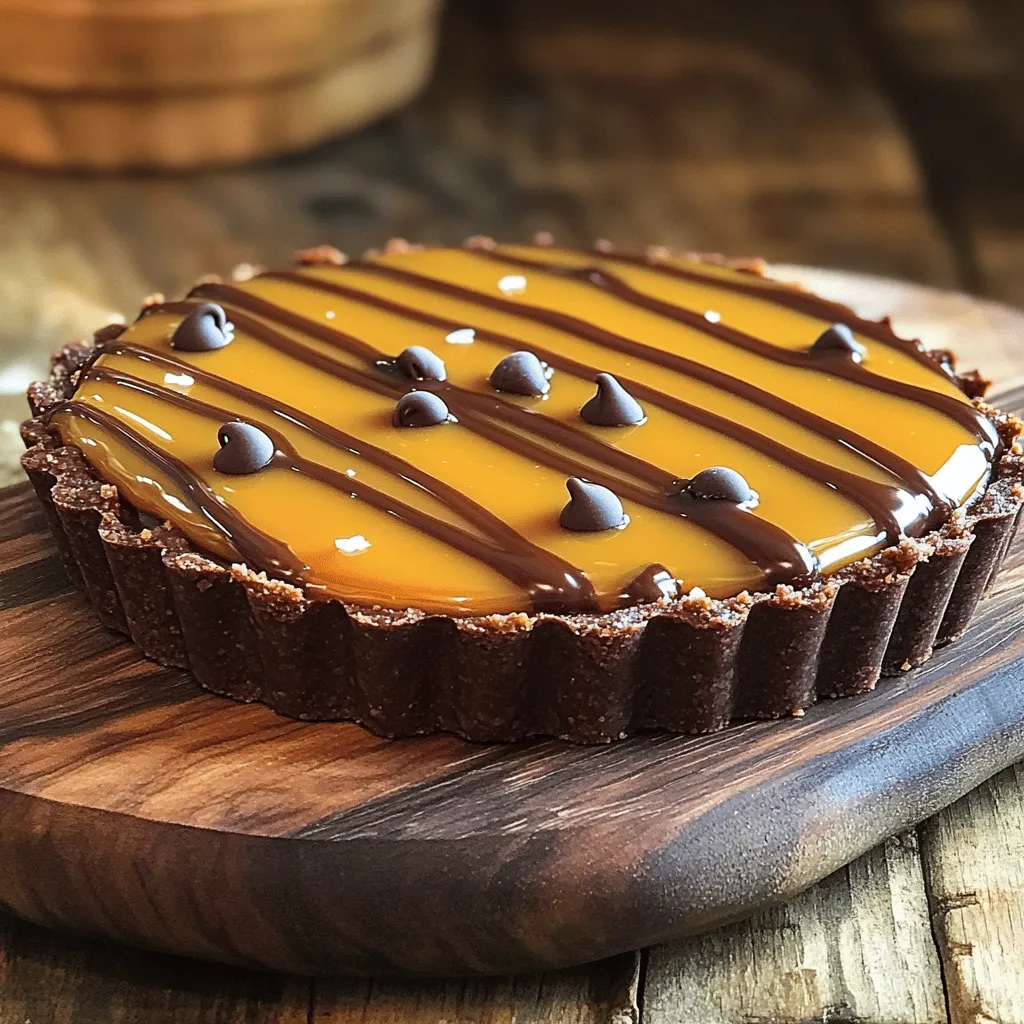
Chocolate Chip Salted Caramel Tart Divine Indulgence
Craving something sweet? This Chocolate Chip Salted Caramel Tart is your ticket to dessert heaven. With a rich chocolate crust and gooey salted caramel, every
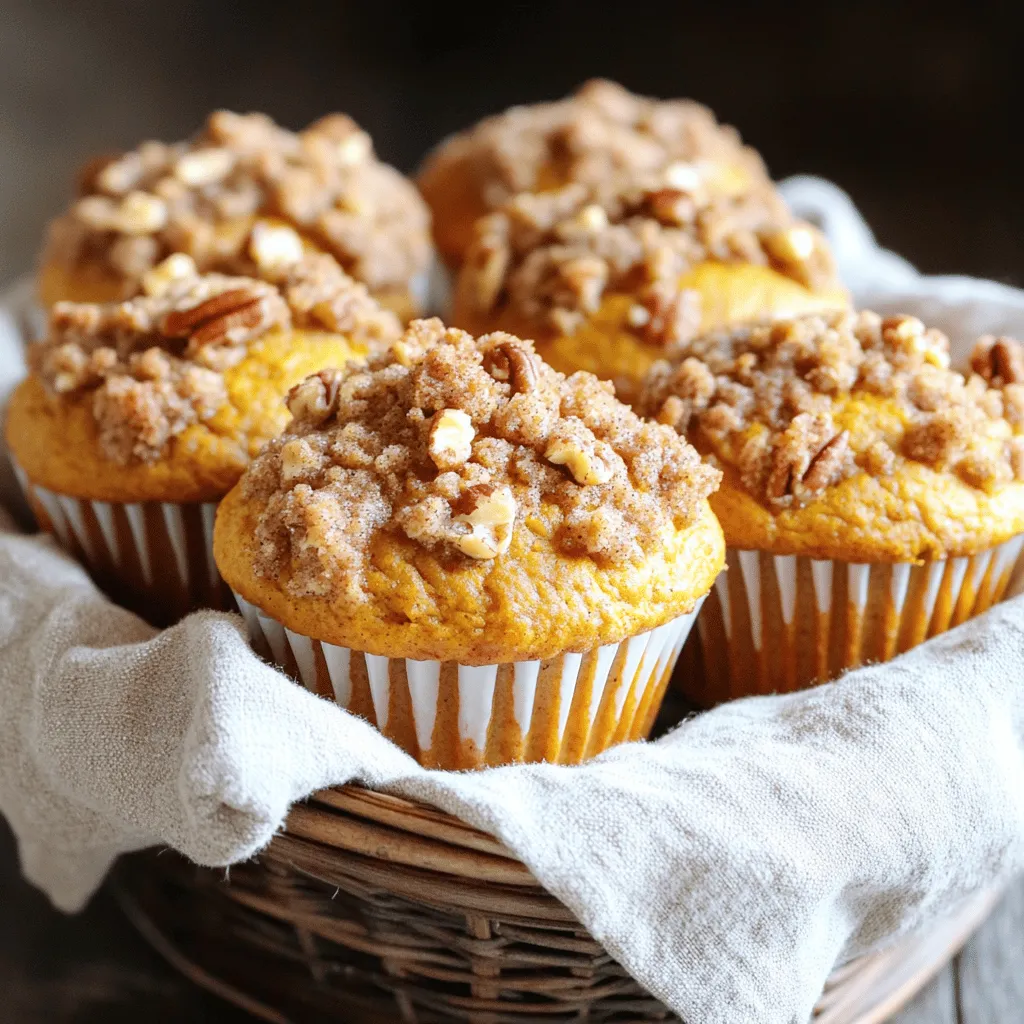
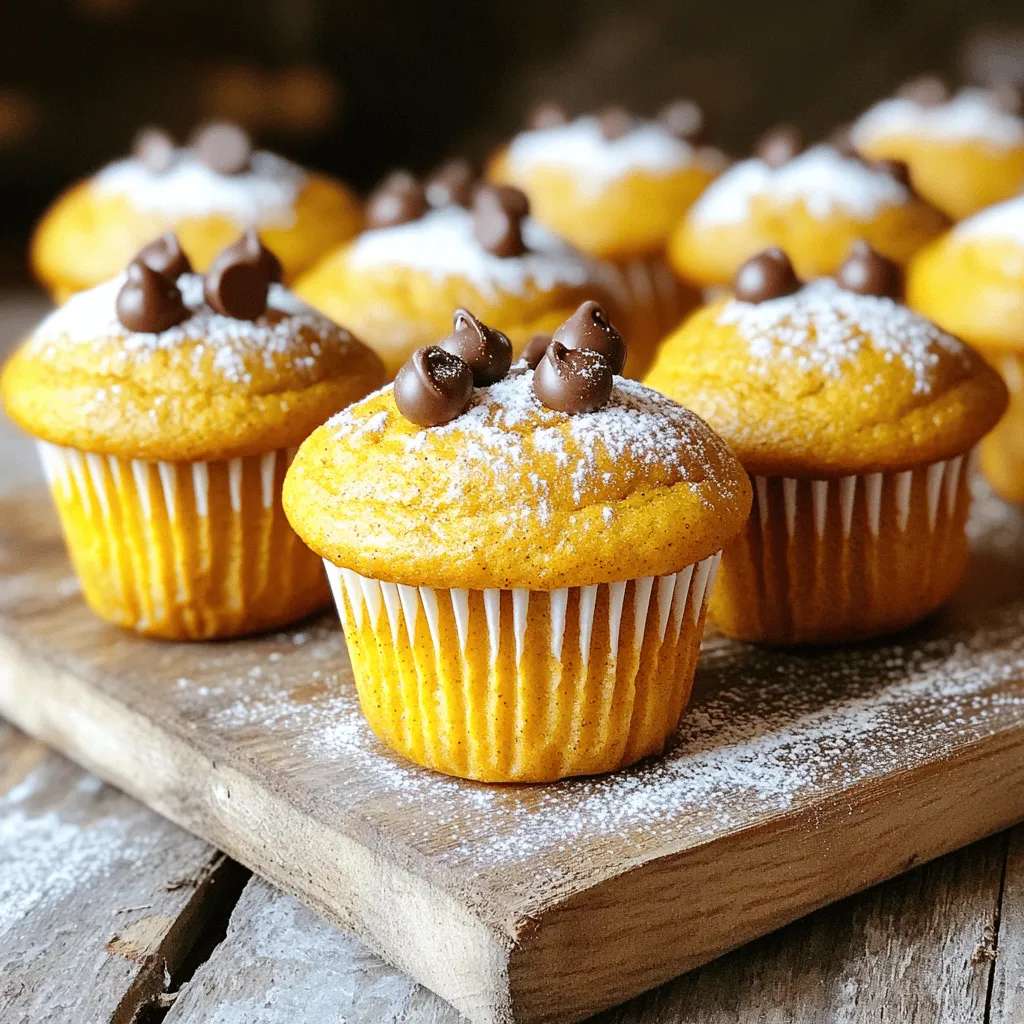
Pumpkin Streusel Muffins Irresistible Homemade Treat
Are you ready to bake something that will fill your kitchen with warmth and spice? These Pumpkin Streusel Muffins are the perfect blend of rich