Desserts
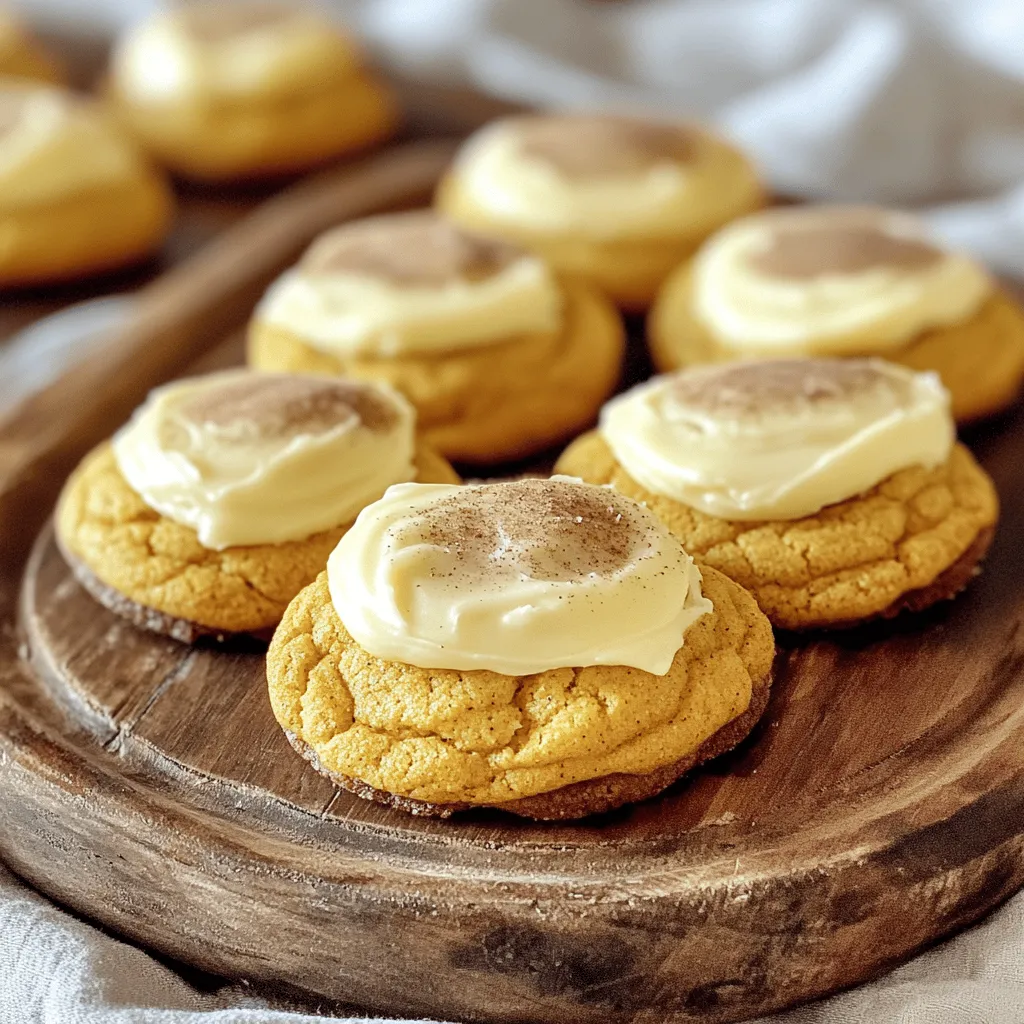
Soft Pumpkin Cookies with Cream Cheese Icing Delight
If you love the taste of fall, you will adore my Soft Pumpkin Cookies with Cream Cheese Icing. These cookies are soft, fluffy, and bursting
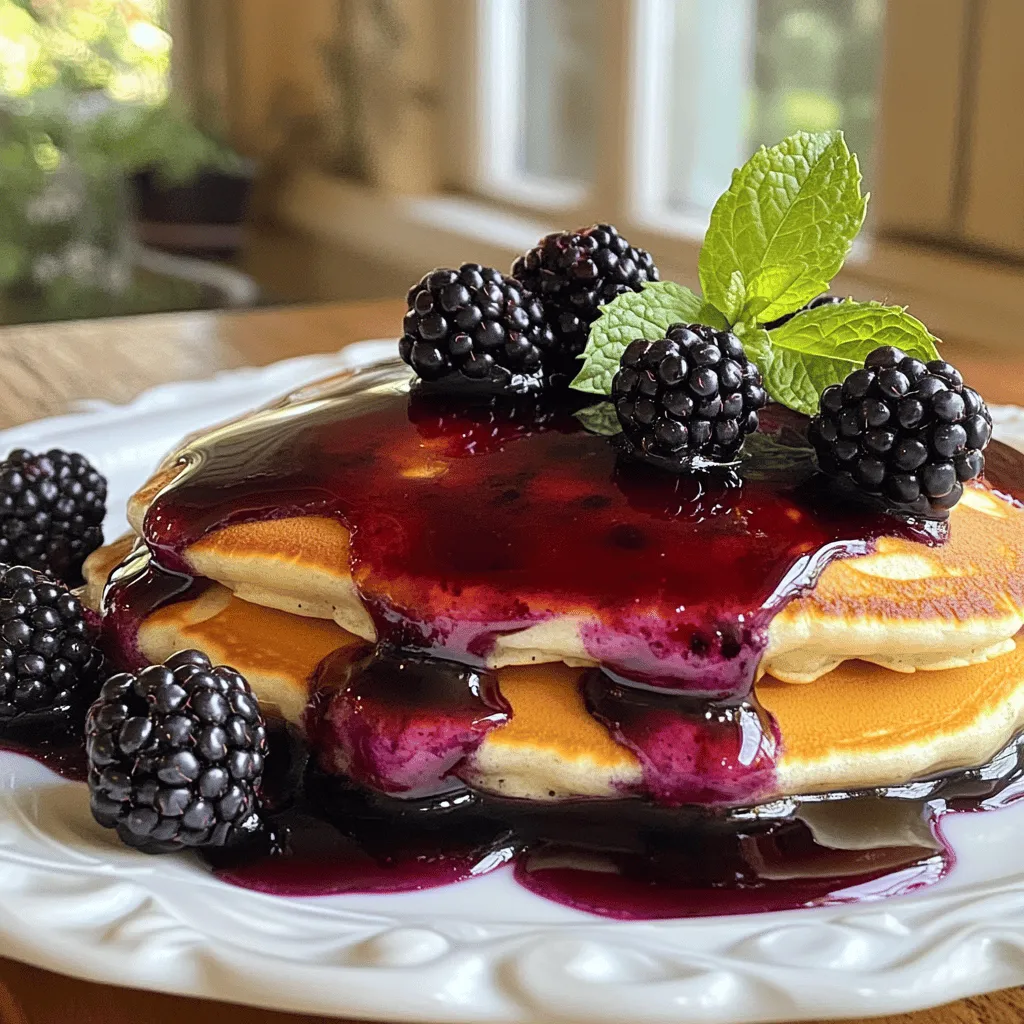
Thick Blackberry Syrup for Pancakes Delicious Recipe
Do you want to elevate your pancake game? Thick blackberry syrup is the answer. This rich, sweet topping will take your breakfast from ordinary to
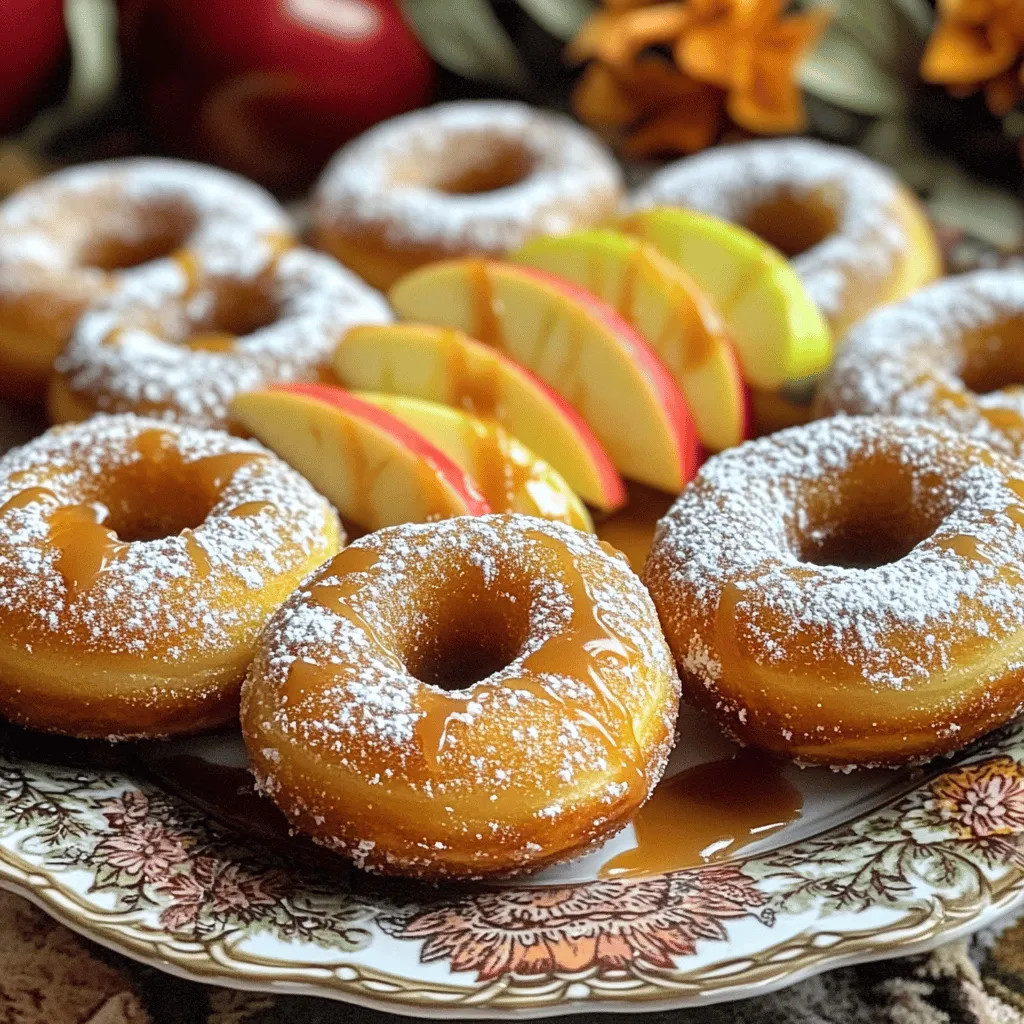
![Let’s gather what you need to make these delicious Amish apple fritters. Here’s the list: - 2 medium tart apples, peeled, cored, and diced - 1 cup all-purpose flour - 1/4 cup granulated sugar - 1 teaspoon baking powder - 1/2 teaspoon ground cinnamon - 1/4 teaspoon nutmeg - 1/4 teaspoon salt - 1 large egg - 1/2 cup milk - 1 teaspoon vanilla extract - Oil for frying - Powdered sugar for dusting Each ingredient plays a key role. The tart apples bring a nice balance to the sweet batter. Flour gives the fritters body. Sugar adds the sweetness you crave. Baking powder makes them fluffy and light. Cinnamon and nutmeg give that warm, spiced flavor. The egg and milk create a rich batter that binds everything. The oil is crucial for frying. It needs to be hot to get those perfect golden fritters. Finally, powdered sugar gives that sweet finish. Don’t forget to check the [Full Recipe] for all the steps! - Combine dry ingredients in a mixing bowl. - Whisk wet ingredients separately in another bowl. - Gradually mix wet ingredients into dry ingredients. Stir until smooth. - Fold in the diced apples gently. This helps keep them intact. - Heat oil to 350°F (175°C) in a deep skillet. - Drop batter into hot oil using a spoon or small scoop. - Fry until golden brown on both sides. Each side takes about 3-4 minutes. - Dust with powdered sugar for a sweet touch. - Optional: serve with caramel sauce or whipped cream for extra flavor. For more details on the ingredients and full preparation, check the Full Recipe. Enjoy your homemade Amish apple fritters! - Choosing the right apples for flavor Use tart apples like Granny Smith. Their flavor shines through in fritters. They add a nice contrast to the sweet batter. - Ensuring the oil is at the correct temperature Heat the oil to 350°F (175°C). This temp cooks the fritters evenly. If the oil is too cool, they soak up too much grease. If too hot, they burn quickly. - Avoiding overcrowding the pan while frying Fry only a few fritters at a time. This helps them cook evenly. Overcrowding lowers the oil's temp, making them soggy. - Overmixing the batter Mix the batter just until the dry and wet ingredients combine. Overmixing makes fritters tough. You want them light and airy. - Not letting fritters drain properly after frying After frying, place fritters on paper towels. This helps remove excess oil. Otherwise, they can become greasy and lose their crunch. These tips will guide you to perfect, delicious Amish apple fritters every time. For the complete recipe, check out the Full Recipe section. {{image_2}} You can make Amish apple fritters even more fun. Here are some tasty ideas to try: - Incorporating nuts like walnuts or pecans: Chopped nuts add a nice crunch. They mix well with the soft apples. Just fold in about half a cup for great texture. - Adding dried fruits like raisins: Raisins bring in a sweet chewiness. Mix in a half cup with your batter. It gives each bite more flavor and surprise. - Experimenting with spices such as clove or ginger: Want a twist? Add a pinch of ground clove or ginger. These spices can warm up the taste. They add a lovely depth to your fritters. You can change how you serve these fritters for more fun. Here are two ideas to try: - Serving with a glaze instead of powdered sugar: Drizzle a simple glaze over your fritters. Mix powdered sugar with milk until smooth. This makes them look fancy and adds sweetness. - Transforming into apple fritter sandwiches: Take two fritters and fill them with ice cream or whipped cream. This creates a fun dessert sandwich. It’s a great way to enjoy them on a warm day. These variations will give your Amish apple fritters a unique twist. Don’t be afraid to get creative! For the full recipe, check out the details above. To keep your apple fritters fresh, store them in an airtight container. This helps maintain their flavor and texture. You can place parchment paper between layers to avoid sticking. Refrigerate the fritters if you do not eat them within a few hours. They stay good for about 2 to 3 days in the fridge. When you want to enjoy your fritters again, reheating is key. For the best texture and flavor, use an oven. Preheat it to 350°F (175°C). Place the fritters on a baking tray and heat for about 10 minutes. This method helps restore their crispiness. You can also use a microwave, but this method may make them soft. If you choose the microwave, heat them in short bursts of 15-20 seconds. Check often to avoid overheating. Enjoy your fritters warm, and don't forget to dust them with powdered sugar! For the full recipe, check out the earlier section. Amish apple fritters are a sweet treat made with fresh apples. They hold a special place in Amish culture, known for their homemade goodness. These fritters are soft and fluffy, often dusted with powdered sugar. They bring warmth and comfort, perfect for sharing with family and friends. Yes, you can use various apples. Tart apples like Granny Smith work well. Other good choices include Honeycrisp or Fuji. Each type will change the flavor slightly, so feel free to experiment! To check if the fritters are done, look for a golden brown color. You can also test one by breaking it open. The inside should be cooked and not doughy. Fry them for about 3-4 minutes on each side. You can prepare the batter ahead of time. Store it in the fridge for up to two hours. This can save you time when you’re ready to fry. Just remember to mix it again before using. Yes, you can bake Amish apple fritters. Preheat your oven to 375°F (190°C). Place them on a baking sheet lined with parchment paper. Bake for about 15-20 minutes, or until golden brown. This method is healthier, but the fritters will have a different texture. For the full recipe, check the earlier section! You learned how to make delicious apple fritters with simple steps. From choosing tart apples to frying them just right, every detail matters. Remember to avoid common mistakes like overmixing. Feel free to experiment with flavors and serving ideas. Whether you eat them warm with powdered sugar or add a glaze, these fritters will be a hit. Store leftovers properly and enjoy them later. Have fun making these treats and sharing them with others. Happy cooking!](https://grilledflavors.com/wp-content/uploads/2025/07/036dbe3e-be85-4bf5-ba19-528adebbf130.webp)
Amish Apple Fritters Simple and Tasty Treat
Are you ready to treat yourself to a delicious snack? Amish apple fritters are simple and tasty delights that are perfect for any occasion. With

Whipped Pumpkin Spice Honey Butter Delightful Spread
Get ready to elevate your fall spreads with my Whipped Pumpkin Spice Honey Butter! This delightful mix of creamy butter, sweet pumpkin, and warm spices
Easy Baked Apple Cider Donuts Irresistibly Soft Treat
Are you ready to savor the fall flavor in a soft, warm bite? These Easy Baked Apple Cider Donuts are the perfect treat for any
![To make Chai-Spiced Snickerdoodles, gather these simple ingredients: - 2 ¾ cups all-purpose flour - 1 teaspoon baking soda - 1 teaspoon cream of tartar - ½ teaspoon salt - 1 teaspoon ground cinnamon - ½ teaspoon ground cardamom - ½ teaspoon ground ginger - ¼ teaspoon ground cloves - 1 cup unsalted butter, softened - 1 ½ cups granulated sugar - 2 large eggs - 1 teaspoon vanilla extract - ¼ cup granulated sugar (for rolling) - 1 tablespoon ground cinnamon (for rolling) Each ingredient plays a key role. The flour gives the cookies structure. Baking soda and cream of tartar create the perfect rise. The spices add warmth and flavor, making every bite special. Butter and sugar combine to form a creamy base. Eggs add moisture and richness. Vanilla enhances the cookie's sweet notes. Finally, the rolling mixture of sugar and cinnamon gives a delightful crunch. Using high-quality spices makes a big difference. Fresh spices will give your cookies a vibrant flavor. Check your pantry to ensure they are not old. With these ingredients ready, you are all set to create delicious Chai-Spiced Snickerdoodles. For the complete process, refer to the Full Recipe. 1. Preheat your oven to 350°F (175°C). Line a baking sheet with parchment paper. 2. In a large bowl, whisk together: - 2 ¾ cups all-purpose flour - 1 teaspoon baking soda - 1 teaspoon cream of tartar - ½ teaspoon salt - 1 teaspoon ground cinnamon - ½ teaspoon ground cardamom - ½ teaspoon ground ginger - ¼ teaspoon ground cloves 3. In another bowl, cream together: - 1 cup unsalted butter, softened - 1 ½ cups granulated sugar Mix until light and fluffy. 4. Beat in 2 large eggs, one at a time. Then add 1 teaspoon vanilla extract. Mix well. 5. Gradually add the dry mixture to the wet mixture. Mix until just combined. Do not overmix. 6. In a small bowl, mix: - ¼ cup granulated sugar - 1 tablespoon ground cinnamon This will be for rolling the cookies. 7. Using a cookie scoop, form dough balls. Roll each ball in the cinnamon-sugar mixture until fully coated. 8. Place the rolled dough balls on the prepared baking sheet. Space them about 2 inches apart. 9. Bake for 10-12 minutes. The edges should be lightly golden. The centers may look slightly underbaked. They will set as they cool. 10. Let the cookies cool on the baking sheet for 5 minutes. Then, transfer them to a wire rack to cool completely. You can find the Full Recipe for more details! To get the best texture, don't overmix the dough. Mix just until combined. This keeps the cookies soft. Aim for a baking time of 10-12 minutes. The edges should be golden while the centers remain soft. They will firm up as they cool. For a stronger chai flavor, add more spices like cardamom or ginger. You can also swap some granulated sugar for brown sugar. Brown sugar adds moisture and a rich taste that enhances the snickerdoodles. Serve snickerdoodles warm with a cup of chai. Dust them with extra cinnamon for a beautiful look. For gatherings, stack them on a plate and add a small bowl of chai on the side. This creates a cozy and inviting display. For the complete preparation, check out the Full Recipe. {{image_2}} You can easily change the flavors in your Chai-Spiced Snickerdoodles. One fun option is adding white chocolate chips. They bring a sweet and creamy taste that pairs well with the spices. Just fold in about one cup of chips when you mix the dough. Another great idea is to switch up the spices. You might add nutmeg for a warm twist. You could also try some allspice or even a hint of cayenne for heat. These changes let you create a cookie that fits your taste. If you need a gluten-free option, almond flour works well. Replace the all-purpose flour with 2 ½ cups of almond flour. This change keeps the cookies soft and delicious. For a vegan version, use egg substitutes like flaxseed meal or applesauce. Combine one tablespoon of flaxseed with three tablespoons of water to replace one egg. This makes the cookies just as tasty while meeting dietary needs. You can adapt this recipe for different seasons. In fall, add pumpkin spice to the dough. A teaspoon of pumpkin spice gives a cozy flavor that matches the season. During the holidays, try adding peppermint extract. Just a teaspoon will give your cookies a festive twist. You might also add crushed peppermint candies for extra crunch. These seasonal swaps keep your snickerdoodles exciting all year round. For the full recipe, check out the [Full Recipe]. Store your chai-spiced snickerdoodles at room temperature. Use an airtight container to keep them fresh. This helps retain their soft texture and flavor. Try to separate layers with parchment paper. This prevents sticking and keeps cookies nice. To freeze your baked cookies, let them cool completely first. Then, place them in an airtight container or freezer bag. You can also wrap them tightly in plastic wrap. When you want to enjoy them, thaw at room temperature. For the best taste, heat them in the oven for a few minutes. Chai-spiced snickerdoodles last about a week at room temperature. Look for signs of spoilage like an off smell or hard texture. If they become dry or crumbly, it's time to toss them. For maximum enjoyment, eat them fresh within the first few days. What are Chai-Spiced Snickerdoodles? Chai-Spiced Snickerdoodles are a twist on the classic snickerdoodle cookie. They combine warm chai spices with a soft, chewy texture. The blend of cinnamon, cardamom, ginger, and cloves gives them a unique flavor. These cookies are perfect for any occasion, especially with a cup of chai. Can I make these cookies ahead of time? Yes, you can make Chai-Spiced Snickerdoodles ahead of time. You can prepare the dough and chill it in the fridge for up to three days. When you’re ready, scoop and bake them fresh. They’ll taste great, and you’ll have warm cookies ready to enjoy. Why are my cookies flat? Flat cookies often happen due to too much butter or not enough flour. Make sure to measure your ingredients carefully. Also, ensure your butter is softened, but not melted. This helps create a nice structure. How do I fix overbaked cookies? If your cookies are overbaked, they might be dry. To fix this, store them in an airtight container with a slice of bread. The bread adds moisture back to the cookies. This will help soften them over time. What pairs well with Chai-Spiced Snickerdoodles? These cookies pair wonderfully with a steaming cup of chai. The spices in the cookie enhance the drink's flavor. You can also serve them with milk or hot chocolate for a cozy treat. How to spice up a cookie platter for guests? To spice up a cookie platter, add variety. Include different cookies like chocolate chip or oatmeal raisin. Decorate with colorful sprinkles or edible flowers for a festive touch. This will make your cookie platter visually appealing and exciting for guests. To make chai-spiced snickerdoodles, start by gathering your ingredients. You will need flour, spices, butter, sugar, eggs, and vanilla. 1. Preheat your oven to 350°F (175°C) and line a baking sheet with parchment paper. 2. Whisk the dry ingredients in a bowl. This includes flour, baking soda, cream of tartar, salt, and spices. 3. In another bowl, cream the softened butter and sugar until light and fluffy. 4. Add eggs one by one, then mix in the vanilla. 5. Gradually mix the dry ingredients into the wet mixture. Be careful not to overmix. 6. Roll the dough into balls and coat them in a cinnamon-sugar mix. 7. Place the balls on the baking sheet, spaced apart. 8. Bake for 10-12 minutes until golden. Remember, they will continue to bake as they cool. 9. Let the cookies cool on the sheet for 5 minutes, then move them to a wire rack. This recipe yields about 24 cookies. Enjoy them warm with a cup of chai. You can find the full recipe online for more details! This blog post covered everything you need for Chai-Spiced Snickerdoodles. We explored the ingredients, the step-by-step process, and tips for perfect cookies. Understanding storage, variations, and common questions helps make these treats even better. Baking should be fun and rewarding. With this guide, you can impress yourself and your guests. Enjoy creating flavorful cookies that warm hearts and homes.](https://grilledflavors.com/wp-content/uploads/2025/07/4a95cd93-2ea7-4df7-9ce4-84c67d1fe308.webp)
Chai-Spiced Snickerdoodles Delightful Cookie Recipe
If you crave cookies with a twist, you’ll love my Chai-Spiced Snickerdoodles. This delightful recipe combines the classic snickerdoodle with warm chai spices. Imagine soft,
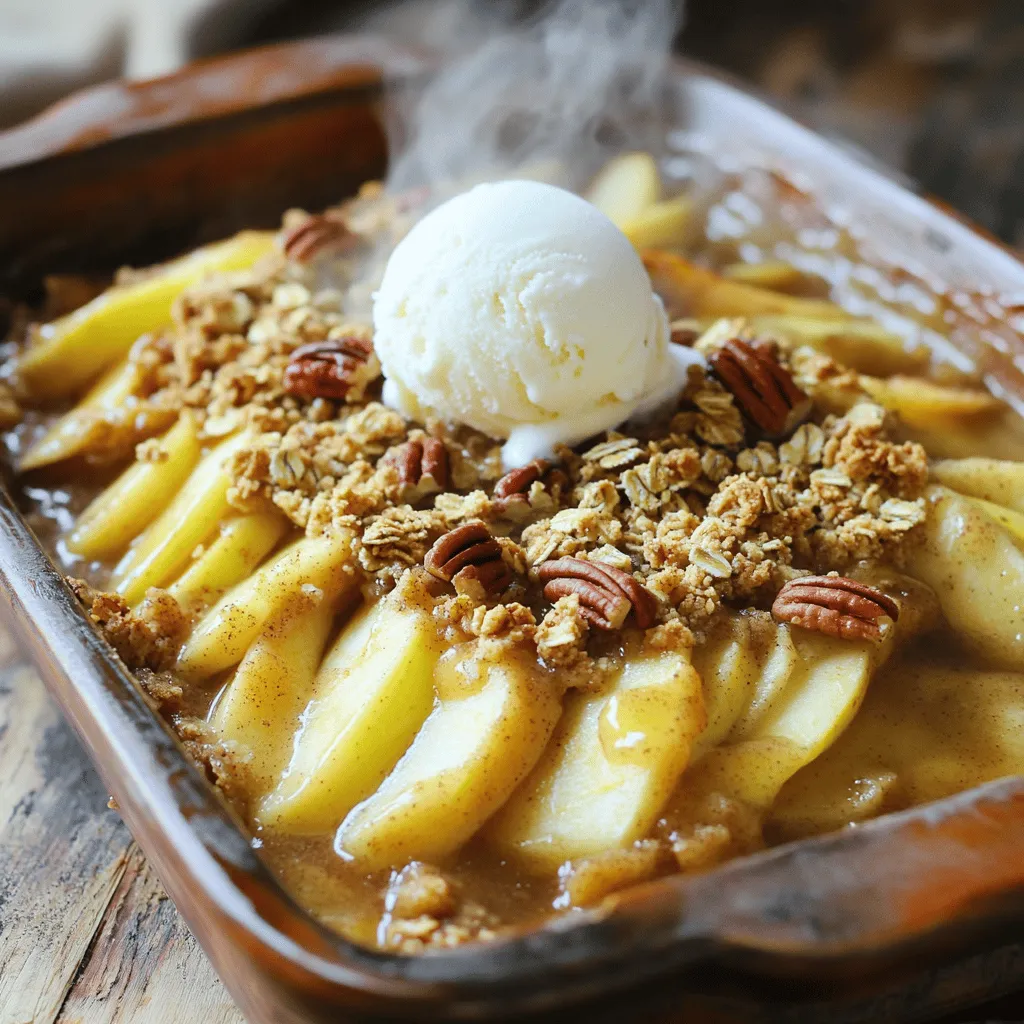
Insanely Good Fall Apple Desserts to Delight You
Fall is here, and that means it’s apple season! If you’re ready to bake something delicious, you need to try these insanely good fall apple
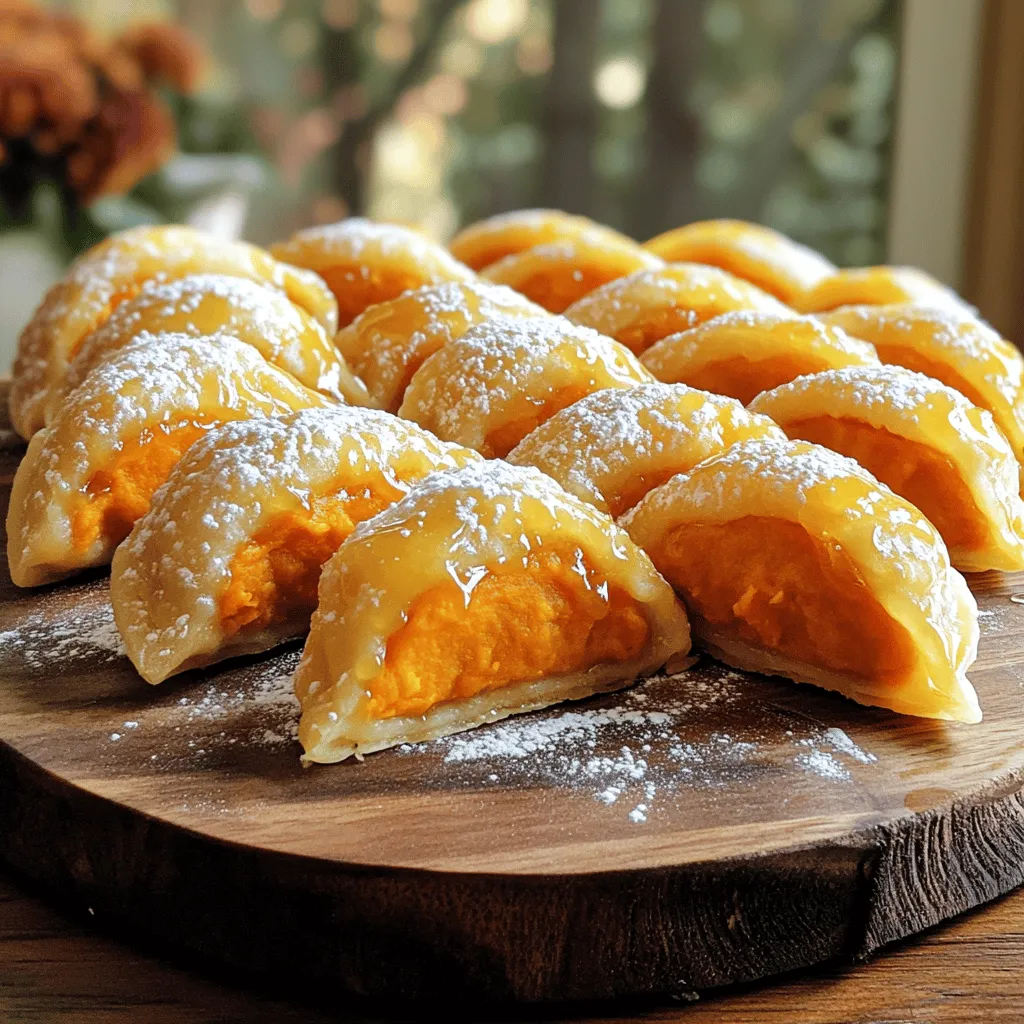
Maple Dumplings Soft and Flavorful Comfort Food
If you crave a sweet, soft treat that warms your heart, you’re in the right place! Maple dumplings are a delightful comfort food bursting with
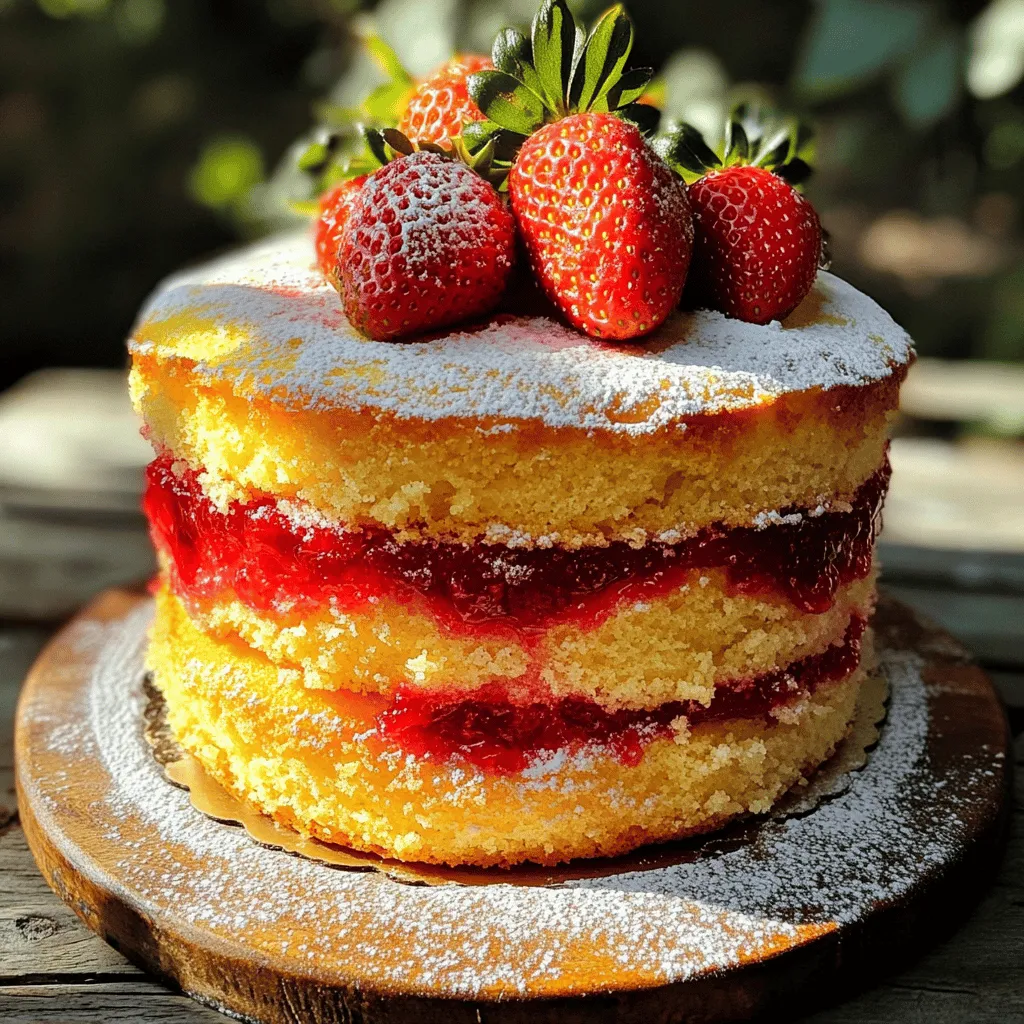
Lemon Strawberry Jam Cake Irresistible Dessert Idea
Looking for a dessert that combines sweet and tangy flavors? Look no further! The Lemon Strawberry Jam Cake is a delicious option that’s sure to
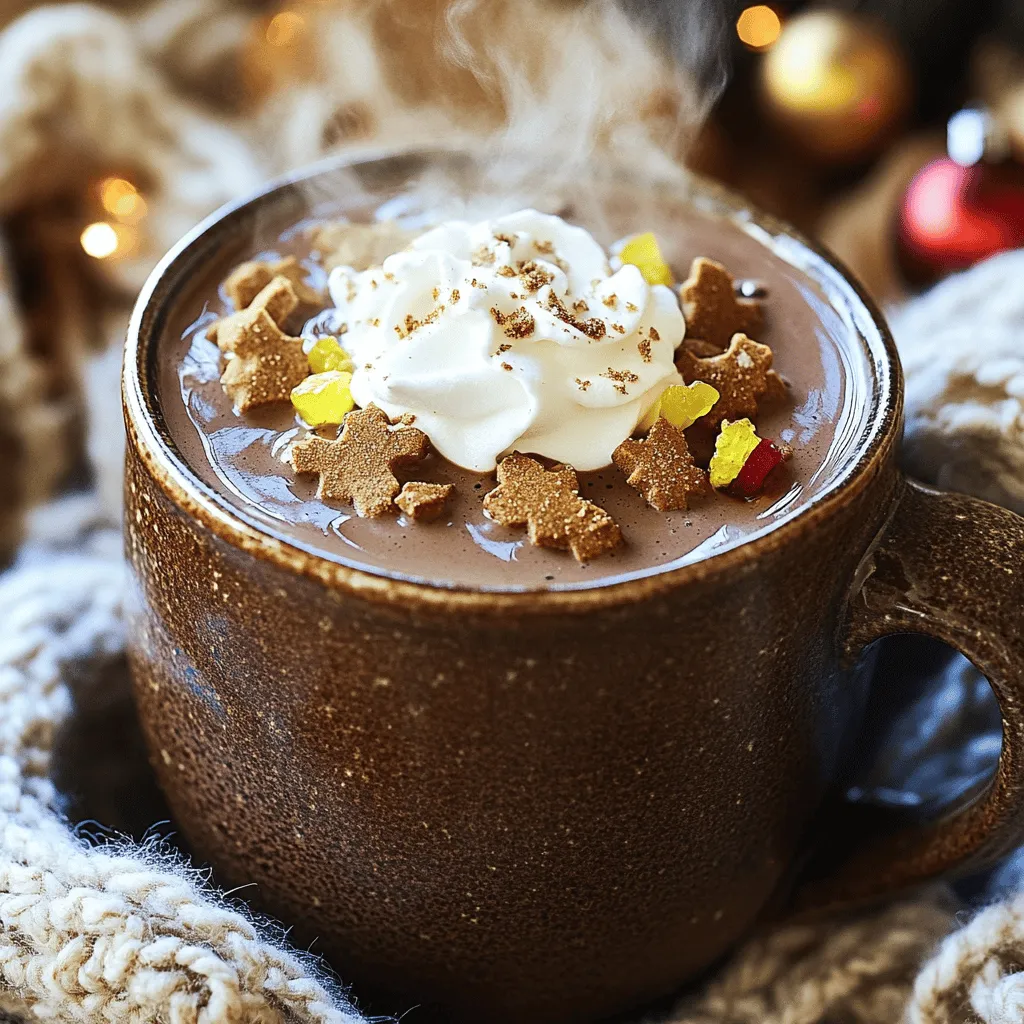
Cozy Up with Gingerbread Hot Chocolate Delight
Get ready to warm up with my rich and creamy Gingerbread Hot Chocolate Delight! This drink combines the cozy flavors of ginger and spices for