Dinner
![- 4 salmon fillets (6 oz each) - 1/4 cup honey - 2 tablespoons low sodium soy sauce - 1 tablespoon Dijon mustard - 2 cloves garlic, minced - 1 tablespoon fresh ginger, grated - 1 tablespoon sesame oil - Salt and pepper to taste - 2 green onions, sliced (for garnish) - Sesame seeds (for garnish) Salmon is a superfood. It is rich in omega-3 fatty acids. These healthy fats help your heart and brain. Salmon also provides protein, vitamin D, and selenium. Eating salmon can boost your mood and support your immune system. When picking salmon, look for bright, shiny skin. Fresh salmon should not smell fishy. If possible, get wild-caught salmon. It often has better flavor and less fat than farmed salmon. Ask your fishmonger for the freshest options. If you need a gluten-free option, use tamari instead of soy sauce. Tamari gives a similar flavor without gluten. For those allergic to mustard, try using lemon juice. It adds a nice tang to the dish. To start, we need to make the marinade. In a small bowl, mix together the honey, soy sauce, Dijon mustard, minced garlic, grated ginger, and sesame oil. Whisk until everything blends well. This mix will give your salmon a sweet and savory flavor. You should marinate the salmon for at least 30 minutes. If you like a stronger taste, let it sit for up to 2 hours. Always refrigerate the salmon while it marinates. This keeps it safe and lets the flavors soak in. For cooking, you can choose either grilling or broiling. Grilling Instructions: Preheat your grill to medium-high heat. Remove the salmon from the marinade, but save the marinade for later. Season the salmon with salt and pepper. Place the salmon skin-side down on the grill. Grill it for about 6 to 8 minutes. Baste it occasionally with the reserved marinade for extra flavor. Broiling Instructions: If you prefer broiling, preheat your oven’s broiler to medium-high. Line a baking sheet with aluminum foil. Put the salmon skin-side down on the sheet. Broil for about 6 to 8 minutes, basting halfway through with the reserved marinade. To tell when the salmon is done, check if it flakes easily with a fork. The fish should be opaque and not translucent. If it's cooked through, remove it from the grill or oven. Let the salmon rest for a few minutes after cooking. This helps the juices settle. For a nice finish, garnish with sliced green onions and sesame seeds. This adds color and a little crunch to your dish. Enjoy your honey glazed salmon! For the complete recipe, refer to the Full Recipe section. To get the best glaze, you want it thick but pourable. Mix the honey, soy sauce, and Dijon mustard well. If it seems too thin, simmer it on low heat until it thickens. Stir often so it does not burn. When basting, do it often but gently. Use a brush to coat the salmon with the glaze while cooking. This adds flavor and keeps the fish moist. You can add spices to the glaze for more depth. Try garlic powder, paprika, or black pepper. Fresh herbs like thyme or parsley also work well. Serve honey glazed salmon with rice or steamed veggies. These sides balance the sweet glaze. A light salad can also freshen the meal. Overcooking salmon ruins its taste and texture. Cook until it flakes easily with a fork. This usually takes about 6-8 minutes. Don’t marinate the salmon for too long. Thirty minutes is perfect. If you go over two hours, the fish can become mushy. Stick to the time for the best result. {{image_2}} You can add a kick to your honey glazed salmon. Try a spicy version with chili flakes. This adds heat and depth. Mix in half a teaspoon of chili flakes into your marinade. Adjust the amount based on your spice level. Citrus-infused honey glaze can brighten the dish. Add orange or lemon zest to your marinade. This gives the salmon a fresh and vibrant taste. You can also squeeze in some juice for extra flavor. You can bake your honey glazed salmon in the oven. Preheat to 400°F (200°C) and place the salmon on a lined baking sheet. Bake for about 12-15 minutes or until cooked through. This method keeps the fish moist. Another fun way is to use foil packets. Place salmon and marinade in a sheet of foil. Seal it up tight, then bake or grill it. This method locks in the flavors and makes cleanup easy. Serve honey glazed salmon with fresh veggies. Try roasted asparagus or sautéed spinach on the side. These greens add color and nutrition to your meal. For family meals, serve the salmon over rice or quinoa. This creates a filling and tasty dish. You can also slice the salmon for easy serving. Want to meal prep? Cook extra salmon and store it in the fridge. It stays great for up to three days. Use it in salads or sandwiches throughout the week. For the full recipe, check the earlier section. After enjoying your honey glazed salmon, store any leftovers in the fridge. Place the salmon in an airtight container. This keeps the fish fresh and tasty. It lasts up to three days in the refrigerator. Ensure the container is sealed well to avoid odors from other foods. If you want to keep the salmon longer, freeze it. Wrap the salmon tightly in plastic wrap or foil. Then, place it in a freezer bag. Squeeze out any air before sealing. Properly stored, it can last up to three months in the freezer. To thaw, transfer the salmon to the fridge overnight. For quicker thawing, use cold water. After thawing, reheat it gently in the oven or on the stove. You can make many dishes with leftover honey glazed salmon. Flake it into salads for a protein boost. Add it to pasta for a tasty twist. You can also use it in tacos or wraps. For a fun breakfast, mix it with scrambled eggs. Try these ideas to enjoy every bite of your delicious salmon. Check out the Full Recipe for inspiration! You should marinate the salmon for at least 30 minutes. This time allows the fish to soak up the sweet and savory flavors. For a stronger taste, marinate for up to 2 hours. Just remember not to go over that time. The fish may get too salty if you do. Yes, you can use frozen salmon. Just make sure to thaw it first. The best way to thaw salmon is in the fridge overnight. If you’re in a rush, you can place it in a sealed bag and run it under cold water. After thawing, pat the salmon dry before marinating. This helps the marinade stick better. Honey glazed salmon pairs well with many sides. Here are a few tasty options: - Steamed broccoli - Brown rice - Quinoa salad - Roasted asparagus - Mashed sweet potatoes These sides add color and nutrition to your meal. They also balance the sweetness of the salmon. For the complete recipe, check out the [Full Recipe]. It has everything you need to make this dish perfect. In this blog post, I shared a delicious honey glazed salmon recipe. You learned about the key ingredients, tips for preparing the marinade, and cooking methods. I also included helpful storage tips and how to use leftovers creatively. Remember, cooking salmon can be simple and rewarding. With the right tips, you can impress your family and friends. Enjoy trying out different flavors and methods. Happy cooking!](https://grilledflavors.com/wp-content/uploads/2025/07/22c821dd-7fde-4f49-b85f-02b13b410fe5.webp)
Honey Glazed Salmon Flavorful and Simple Recipe
Picture this: buttery, flaky salmon drizzled in a sweet and sticky honey glaze. It’s simple to make, yet bursting with flavor. In this post, I’m
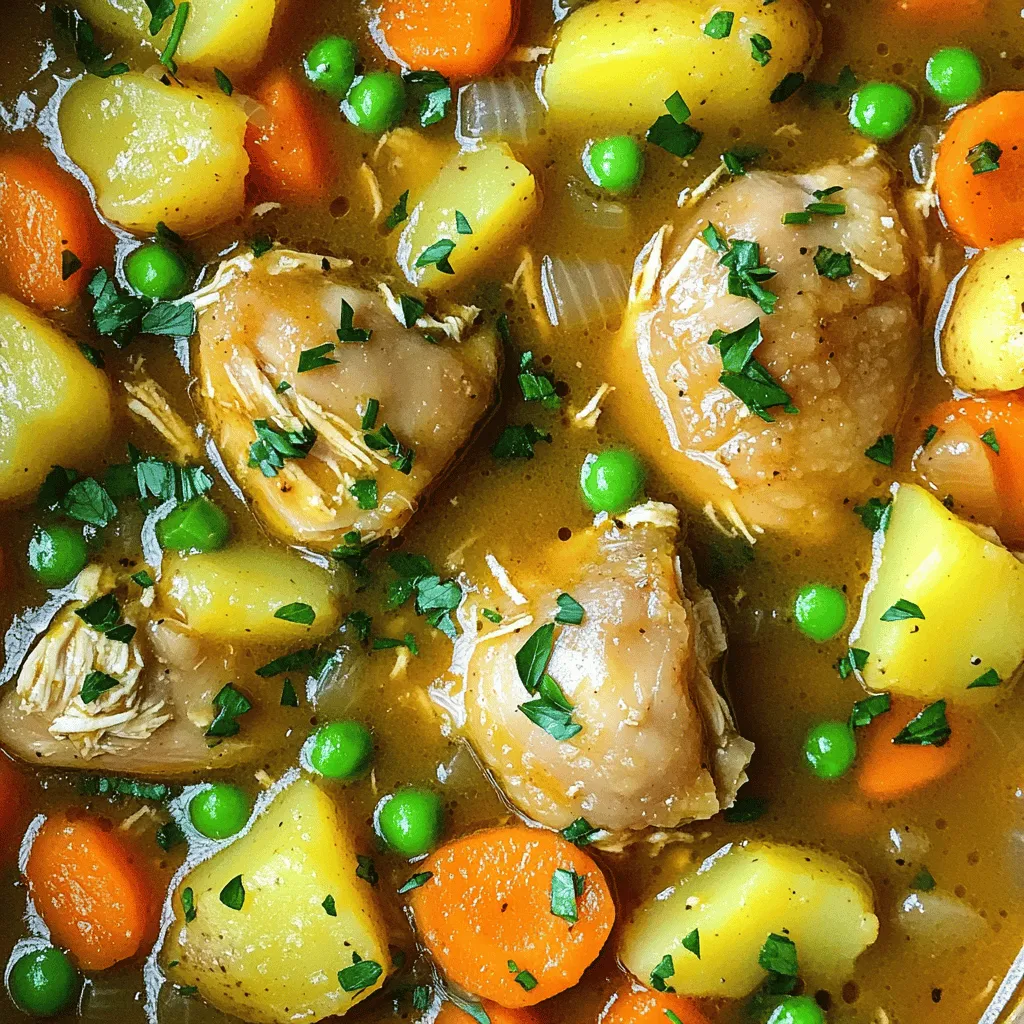
Savory Slow Cooker Chicken Stew Easy Comfort Meal
Are you craving a warm, hearty meal that practically cooks itself? This Savory Slow Cooker Chicken Stew is your answer. Packed with tender chicken, fresh
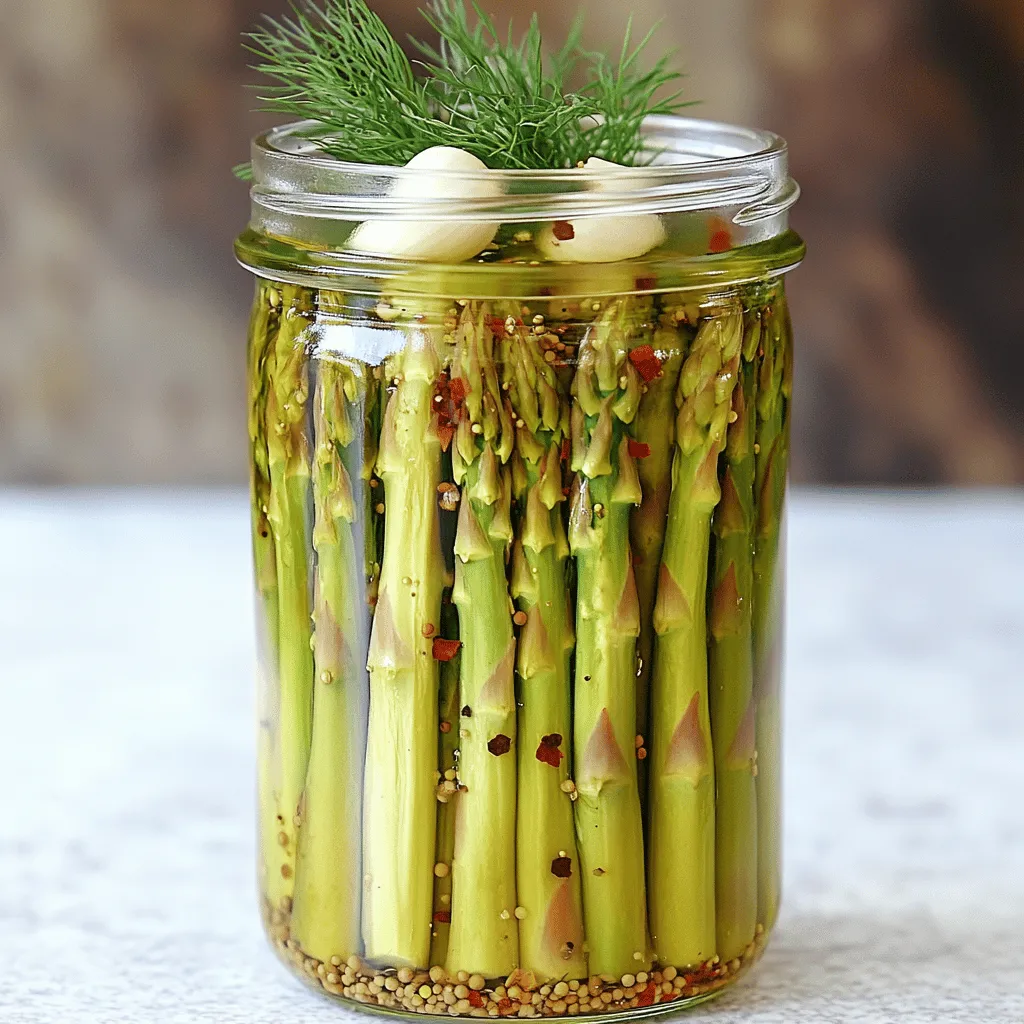
Pickled Refrigerator Asparagus Crunchy and Tangy Treat
Looking for a crunchy and tangy treat that adds flair to any meal? Homemade pickled refrigerator asparagus is your answer! I will guide you through
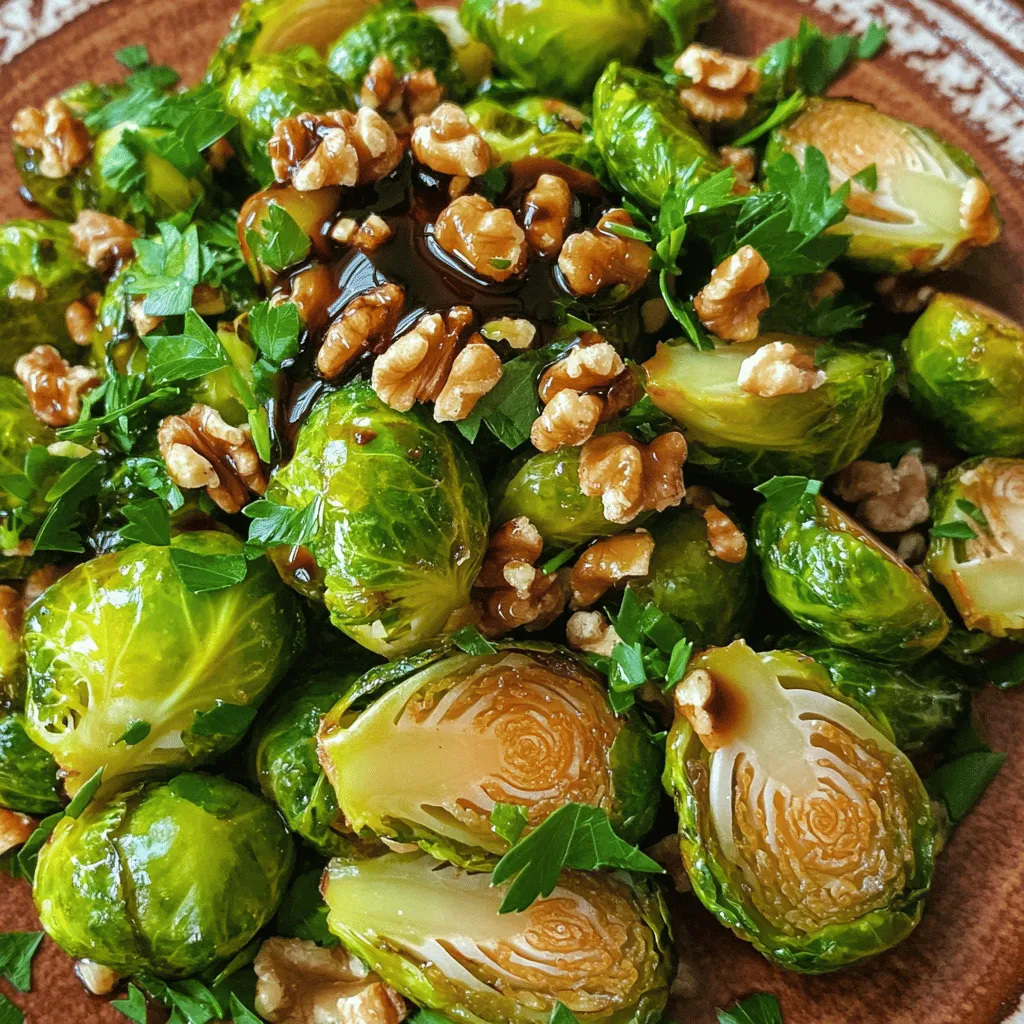
Brussels Sprouts with Balsamic Honey Tasty Roast Recipe
Looking for a simple yet delicious side dish? Try my Brussels Sprouts with Balsamic Honey recipe! This tasty roast combines sweet and tangy flavors that
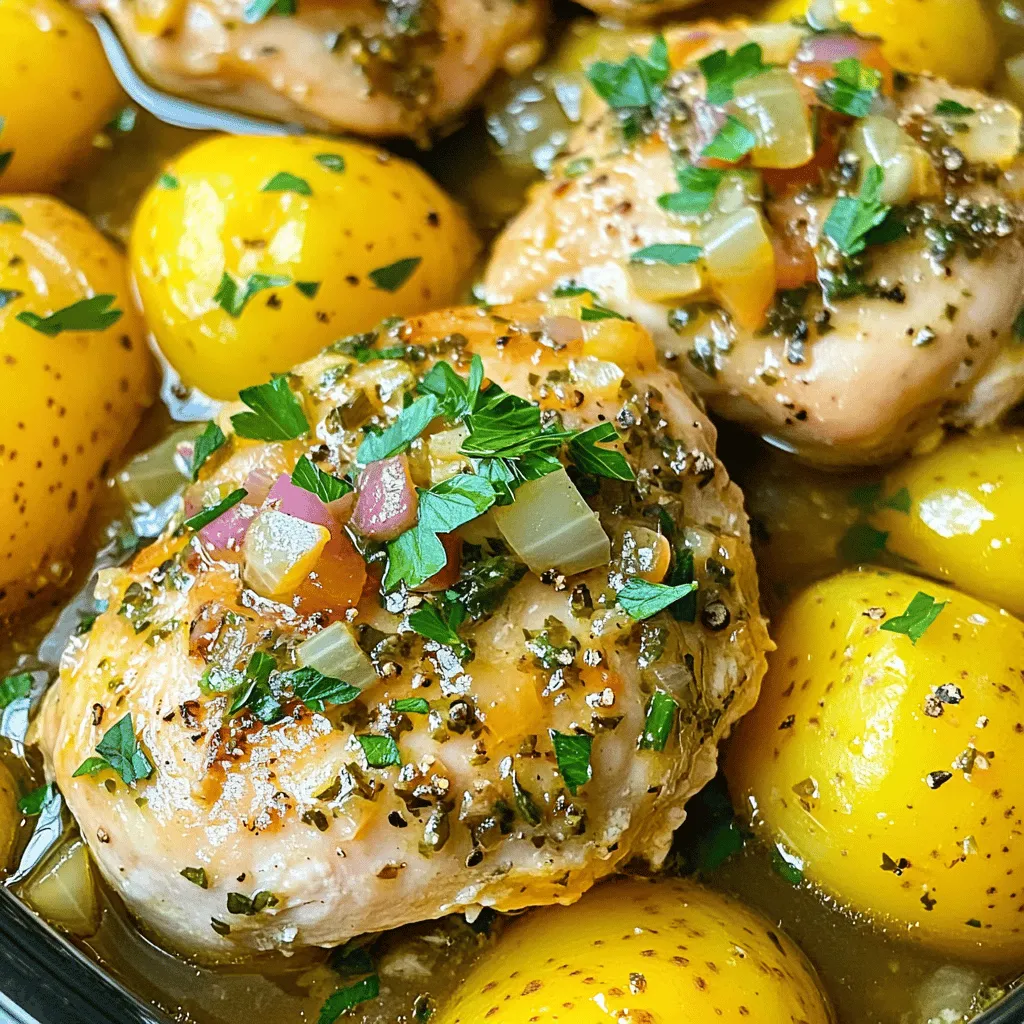
Crockpot Garlic Herb Chicken & Potatoes Delight
Get ready to fill your kitchen with the warm, savory scent of my Crockpot Garlic Herb Chicken & Potatoes Delight! This easy recipe combines tender
![Gather these items for your One Pan Balsamic Chicken and Asparagus: - 4 boneless, skinless chicken breasts - 1 bunch of fresh asparagus, trimmed - 1/4 cup balsamic vinegar - 2 tablespoons honey - 2 tablespoons olive oil - 4 cloves garlic, minced - 1 teaspoon dried oregano - Salt and pepper to taste - Fresh basil leaves for garnish (optional) Using fresh ingredients is key in this dish. Fresh chicken makes it juicy and tender. Fresh asparagus adds a nice crunch and bright color. The balsamic vinegar should smell strong and sweet. Fresh garlic gives a bold, rich flavor. Each fresh item enhances the meal's taste and appeal. You can swap some ingredients if needed. Try chicken thighs instead of breasts for more flavor. If you can't find fresh asparagus, use green beans or broccoli. Maple syrup can replace honey for a different sweetness. For a vegan option, use tofu and a plant-based honey substitute. Feel free to mix and match! Start by making the marinade. In a bowl, mix the balsamic vinegar, honey, olive oil, minced garlic, dried oregano, salt, and pepper. Whisk it all together until it blends well. This marinade gives the chicken a rich, tangy flavor. You can taste it to see if it needs more salt or sweetness. Now, you need to marinate the chicken. Place the chicken breasts in a large baking dish. Pour the marinade over the chicken, making sure each piece gets coated. This step is key for flavor! Let it sit for at least 15 minutes. If you have more time, you can marinate it longer in the fridge for even more taste. When you're ready, preheat your oven to 400°F (200°C). While the oven heats, arrange the trimmed asparagus around the chicken in the same dish. Drizzle any leftover marinade over the asparagus. Bake everything for 20-25 minutes. Check that the chicken reaches an internal temperature of 165°F (75°C). The asparagus should be tender yet still bright. Once done, let it rest for 5 minutes, then serve warm. Enjoy your One Pan Balsamic Chicken and Asparagus! For complete details, refer to the Full Recipe. To keep your chicken juicy, start with fresh, high-quality chicken breasts. Marinate them well in the balsamic mixture. This adds flavor and moisture. Bake the chicken at 400°F (200°C) for 20 to 25 minutes. Use a meat thermometer to check for 165°F (75°C) inside. Let the chicken rest for five minutes after baking. This helps the juices redistribute, making it tender. For perfect asparagus, choose firm, bright green stalks. Trim the ends to remove the tough parts. When you bake it, place it around the chicken, so it cooks evenly. It should be tender but still crisp. Avoid overcooking, or it will become mushy. You want that nice snap when you bite into it. Serve the chicken and asparagus right from the pan for a rustic look. A sprinkle of fresh basil adds color and flavor. Pair this dish with rice or crusty bread to soak up the sauce. You can also serve it with a light salad for a complete meal. This recipe is great for family dinners or easy weeknight meals. Enjoy the vibrant flavors and simple prep! For more details, check out the Full Recipe. {{image_2}} You can add more veggies to this dish. Carrots, bell peppers, or zucchini work well. Just chop them into bite-sized pieces. Add them to the baking dish with the chicken and asparagus. This makes your meal colorful and packed with nutrients. You can also try adding cherry tomatoes for a burst of flavor. If you want to switch proteins, try using salmon or shrimp. Both cook quickly and absorb the balsamic flavor. If using salmon, adjust the cooking time to about 15-20 minutes. For shrimp, just 10-12 minutes is enough. You can also use tofu for a vegetarian option. Make sure to press it to remove extra water before marinating. To boost the flavor, think about adding fresh herbs. Thyme or rosemary can bring a nice touch. You can also sprinkle some red pepper flakes for heat. For a sweet twist, add sliced strawberries or peaches during baking. These fruits caramelize and add a lovely flavor contrast. Check the [Full Recipe] for more tips on making this dish your own. Store any leftover balsamic chicken and asparagus in an airtight container. Allow the dish to cool to room temperature first. This helps keep the flavors fresh. You can store it in the fridge for up to three days. Be sure to keep the chicken and asparagus together for the best taste. When it's time to eat your leftovers, reheat them in the oven. Preheat your oven to 350°F (175°C). Place the chicken and asparagus in an oven-safe dish. Cover with foil to keep moisture in. Heat for about 15-20 minutes or until warmed through. You can also use a microwave if you're in a hurry. Just cover the dish to prevent drying out. If you want to save your dish for later, freezing is a good option. First, let the chicken and asparagus cool completely. Then, place them in a freezer-safe bag or container. Squeeze out as much air as possible to avoid freezer burn. You can freeze it for up to three months. When ready to eat, thaw in the fridge overnight and reheat as mentioned above. For the detailed cooking process, check out the Full Recipe. Yes, you can use other types of vinegar. Red wine vinegar or apple cider vinegar work well. Each option brings its own taste. Experiment with what you have at home for a unique flavor. The chicken is done when it reaches an internal temperature of 165°F (75°C). You can check this with a meat thermometer. The juices should run clear, not pink. Cut into the thickest part to be sure. Yes, you can prep this dish a day in advance. Marinate the chicken and store it in the fridge. Cook the chicken and asparagus right before serving. This keeps them fresh and tasty. For the full recipe, check the earlier sections. This post shared a simple chicken recipe with fresh ingredients. We covered how to prepare, marinate, and bake the dish. I offered tips for juicy chicken and perfect asparagus. We looked at variations, storage tips, and answered common questions. Cooking at home can be fun and rewarding. Use these steps to create a tasty meal. Fresh ingredients make a big difference! Enjoy trying new flavors and techniques. Your kitchen can be a place of joy and creativity.](https://grilledflavors.com/wp-content/uploads/2025/07/3c9422d3-8c69-47e8-b6ff-645f8e43a1c6.webp)
One Pan Balsamic Chicken And Asparagus Recipe
Are you ready to impress your family with an easy and tasty meal? This One Pan Balsamic Chicken and Asparagus recipe is packed with flavor
. - Heat 2 tablespoons of olive oil in a large pot over medium heat. Add the finely chopped onion. Sauté for about 5 minutes until it turns soft and clear. - Next, add 2 cloves of minced garlic. Cook for another minute. This step adds a rich flavor to your chowder. - Pour in 4 cups of vegetable broth. Bring the mixture to a rolling boil. - Add 3 medium diced potatoes. Reduce the heat and let it simmer for about 10 minutes. The potatoes should be soft and tender by now. - Stir in 3 diced zucchinis and 1 cup of corn. Let the chowder simmer for another 5-7 minutes. This helps the zucchinis cook through without losing their crunch. - Now, add 1 cup of coconut milk, 1 teaspoon of dried thyme, and 1 teaspoon of smoked paprika. Season with salt and pepper to taste. Allow it to simmer for another 3-5 minutes. This melds the flavors together beautifully. - Use an immersion blender to blend the chowder. You can blend it until creamy or leave it chunky, depending on your preference. Check out the Full Recipe for detailed cooking times and tips! For the best zucchini chowder, focus on cooking temperatures. Sauté the onion on medium heat. This helps it become soft and sweet. When simmering, keep the heat low. This allows the flavors to blend well without burning. To achieve the perfect blend consistency, use an immersion blender. Blend until it’s creamy but still have some chunks. If you like it chunkier, blend less. Adjust the texture based on your taste. Presentation matters. Serve the chowder in deep bowls. Garnish with fresh parsley and a drizzle of olive oil. This adds flavor and brightens the dish. A sprinkle of smoked paprika also looks nice. Pair the chowder with crusty bread or a light salad. A fresh green salad balances the chowder's warmth. Bread soaks up the delicious broth, making each bite enjoyable. If the chowder tastes bland, adjust the seasoning. Add more salt or pepper a little at a time. Taste as you go to avoid overdoing it. Fresh herbs can also boost flavor. If your chowder is too thick, add more vegetable broth or coconut milk. Stir well and heat through. This keeps the flavors intact while adjusting the texture. Enjoy your creamy, comforting bowl of zucchini chowder! For the full recipe, check out the Zucchini Chowder Delight section above. {{image_2}} You can easily swap out some veggies in your zucchini chowder. Try carrots, celery, or bell peppers. These add more color and taste. If you want a different creamy texture, use heavy cream or yogurt instead of coconut milk. A non-creamy chowder works well too! You can skip the coconut milk for a lighter version. To spice things up, add cayenne pepper or red pepper flakes for heat. A little goes a long way! Fresh herbs can brighten your chowder. Try basil, dill, or cilantro for a refreshing twist. They add depth and make your bowl look beautiful. You can make this chowder vegan by using only vegetable broth and skipping any dairy. For a vegetarian option, stick to the coconut milk. If you need it gluten-free, just check your broth for any hidden gluten. Most vegetable broths are safe, but it's always good to verify. Enjoy your bowl of chowder, no matter your diet! Store your zucchini chowder in airtight containers. This keeps it fresh and tasty. You can keep it in the fridge for up to three days. Make sure it cools down before sealing. This helps prevent condensation. Always check for signs of spoilage before eating. To freeze zucchini chowder, let it cool completely. Pour it into freezer-safe containers. Leave some space at the top for expansion. You can freeze it for up to three months. When you're ready to eat, move it to the fridge overnight to thaw. Reheat it on the stove over low heat. Stir often to avoid burning. You can also use a microwave, but be careful not to overheat. Zucchini chowder lasts about three days in the fridge. When freezing, it stays good for three months. Look for changes in color or smell to know if it’s bad. If it smells sour or has mold, throw it away. Always trust your senses to keep your meals safe and delicious. Zucchini chowder is a thick, creamy soup. It features fresh zucchini, corn, and potatoes. This dish has a rich flavor from herbs and spices. Coconut milk adds creaminess without dairy. Each bowl bursts with comfort. You can enjoy it warm, perfect for any season. Yes, you can prepare zucchini chowder in advance. Cook the chowder and cool it down. Store it in an airtight container in the fridge. It stays fresh for about three days. You can also freeze it for up to three months. When ready to eat, just reheat it on the stove. To thicken your chowder, add more potatoes or blend it longer. You can also mix in a little cornstarch. For a thinner chowder, add more vegetable broth or coconut milk. Adjust the texture to your liking. A smooth blend gives a creamy feel, while chunky bits add texture. Zucchini chowder pairs well with crusty bread. You can also serve it with a fresh salad. A sprinkle of cheese on top adds flavor. For something extra, try a dollop of sour cream. These sides enhance the meal and make it more filling. Zucchini chowder is a healthy and tasty choice. This blog taught you how to make it with simple steps. You learned about key ingredients like zucchini, corn, and potatoes. We also covered tips for cooking, serving, and storage. Feel free to try variations to suit your taste. Enjoy making this chowder and share it with others. Your kitchen can be a place of fun and flavor!](https://grilledflavors.com/wp-content/uploads/2025/07/8d60e2e9-649e-4aad-a130-bead1458ee51.webp)
Zucchini Chowder Hearty and Comforting Bowl Recipe
Zucchini chowder is a warm, tasty dish packed with fresh veggies and creamy goodness. It’s perfect for any season and makes a comfy meal. You

Crockpot Coconut Curry Chicken Flavorful and Easy Dish
Are you ready to whip up a delicious and easy meal? Let’s dive into the world of Crockpot Coconut Curry Chicken. This dish blends rich
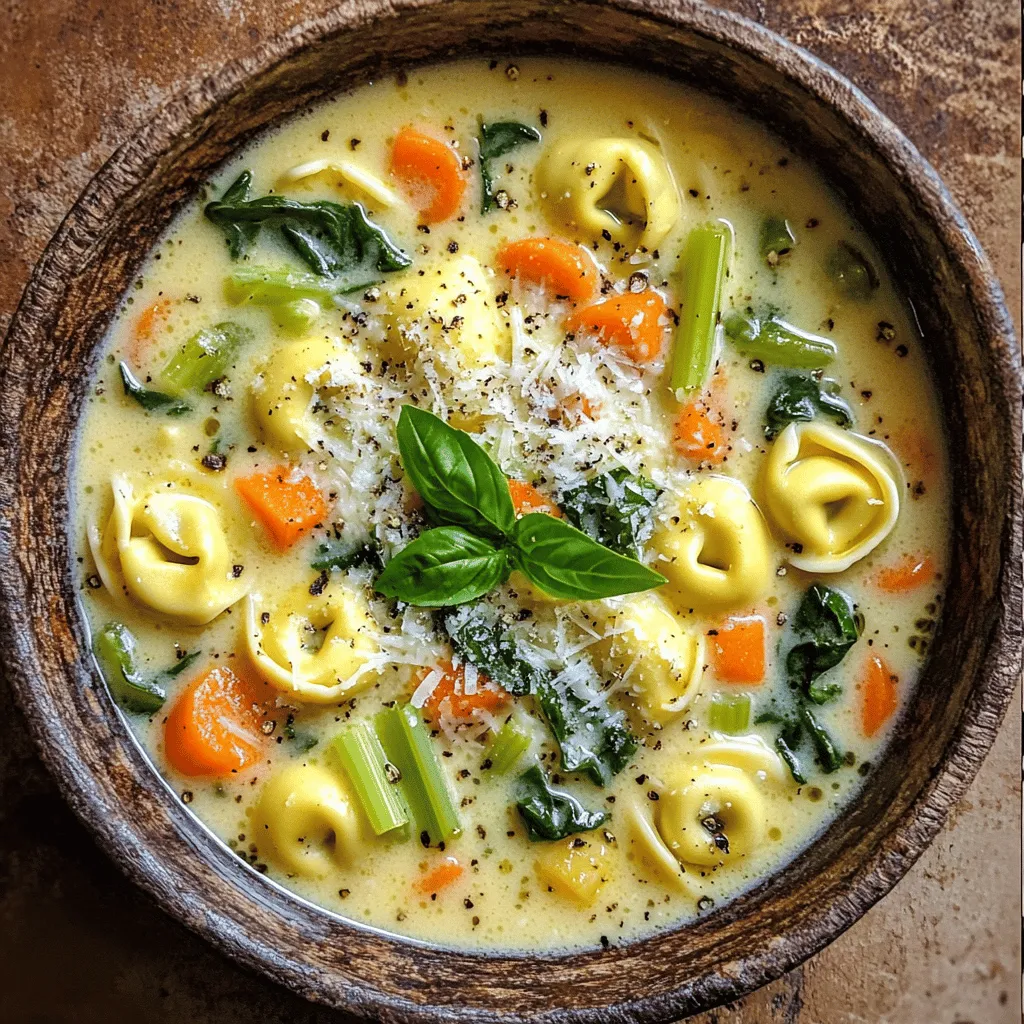
Creamy Tortellini Soup Hearty and Comforting Dish
Craving a hearty and comforting meal? This Creamy Tortellini Soup is your perfect answer! It’s rich, flavorful, and easy to make. With just a few
![- 2 medium acorn squashes - 2 tablespoons olive oil - 1 teaspoon smoked paprika - 1 teaspoon garlic powder - ½ teaspoon ground cumin - ½ teaspoon ground cinnamon - Salt and pepper to taste - Fresh parsley, chopped for garnish - Optional: A pinch of cayenne pepper for heat When roasting squash, acorn squash shines. Its sweet, nutty flavor is hard to beat. Other great options include butternut, spaghetti, and delicata squash. Each brings its own taste and texture. Acorn squash has thick skin, which caramelizes nicely. This gives a lovely crunch that you will love. Plus, its shape is perfect for stuffing or serving as halves. Getting measurements right is key for great taste. For larger servings, multiply each ingredient. For instance, if cooking for eight, use four squashes and double the oil and spices. This keeps the flavor strong and balanced. Always check your measurements with measuring cups or spoons. Accurate amounts make sure every bite is as tasty as the first. First, grab your acorn squashes. Cut each squash in half. Use a spoon to scoop out the seeds. Make sure to remove all the seeds for even cooking. Next, line a baking sheet with parchment paper. This helps with easy cleanup and prevents sticking. In a small bowl, combine the olive oil, smoked paprika, garlic powder, ground cumin, and ground cinnamon. Add salt and pepper to taste, and mix well. If you like heat, add a pinch of cayenne pepper. Taste the blend to see if you want more spice. Adjust as needed to match your flavor preference. Now, preheat your oven to 425°F (220°C). This temperature helps to achieve a nice crispy texture. Once the oven is ready, brush the inside of each squash half with the spice mixture. Place the squashes cut side down on your baking sheet. Roast them for about 25 to 30 minutes. The squashes should be tender and the skin slightly caramelized. After the first roast, carefully flip the squash halves cut side up. Return them to the oven for an extra 10 to 15 minutes. This step makes the edges crispy and tasty. Keep an eye on them to prevent burning. Once done, remove from the oven and let cool slightly before serving. For a finishing touch, sprinkle with fresh parsley. Enjoy this crispy roasted squash delight! For detailed instructions, check the Full Recipe. To get that crunchy texture, timing and heat matter. Roast your acorn squashes at 425°F (220°C). This high heat helps create a golden-brown crust. Start by roasting them cut side down for about 25-30 minutes. After that, flip them cut side up. Roast for another 10-15 minutes until you see crispy edges. To check if they are done, poke the squash with a fork. If it goes in easily, they are ready. Watch out for two big mistakes: over-roasting and under-seasoning. Over-roasting can turn your squash mushy. Keep an eye on the time and check for doneness. Also, don’t skimp on seasoning. A good mix of spices brings out the squash's flavor. Use salt, pepper, and your spice blend. This makes a big difference. Serve your crispy roasted squash with a side of grains or salads. They pair well with quinoa or arugula for a healthy meal. For a fancy touch, drizzle some olive oil on top. Add a sprinkle of fresh parsley too. You can even add a dollop of Greek yogurt or feta cheese for extra flavor. This makes your dish pop on the table. For the complete recipe, check out the [Full Recipe]. {{image_2}} You can enhance your roasted squash with extra spices. Here are some great ideas: - Cayenne Pepper: Adds a nice kick. Just a little goes a long way. - Turmeric: Gives a warm color and earthy flavor. - Cumin: Adds depth and a nutty taste. - Cinnamon: Gives a sweet note that pairs well with squash. Herbs also boost flavor. Try these: - Thyme: Offers a fresh, herbal taste. - Rosemary: Adds a woodsy aroma and flavor. - Sage: Complements the sweetness of the squash well. If you want to switch up your squash, consider these options: - Butternut Squash: Creamy and sweet. You may need to adjust cooking time. - Spaghetti Squash: Great for a lower-carb option. Cook it a bit longer. - Pumpkin: Adds a fall flavor. It cooks quickly, so watch it closely. Different squashes may need different cooking times. Always check for tenderness before removing from the oven. You can easily make this recipe vegan and gluten-free: - Vegan: This recipe is already vegan! Just skip any dairy toppings. - Gluten-Free: All ingredients are gluten-free. Enjoy without worry. For nutritional substitutions, consider: - Olive Oil: Swap for avocado oil for a different flavor. - Seasoning: Use low-sodium options for a healthier choice. These tweaks can fit your dietary needs while keeping the dish delicious. For the full recipe, check the [Full Recipe]. To store your crispy roasted squash, place it in an airtight container. Make sure it cools to room temperature first. You can keep it in the fridge for about 3 to 5 days. If you want to save it longer, consider freezing. Proper storage keeps flavors fresh and prevents spoilage. To freeze roasted squash, let it cool completely. Cut it into smaller pieces if needed. Use a freezer-safe bag or container. Remove as much air as possible to avoid freezer burn. It can last up to 3 months in the freezer. When ready to eat, thaw it in the fridge overnight. Reheat in the oven or microwave until warmed through. Watch for changes in color or smell. If the squash looks dull or has a sour odor, it’s best to discard it. Mold is another clear sign of spoilage. Always follow safety guidelines. When in doubt, throw it out. Enjoy your crispy roasted squash knowing it’s safe and tasty! For the full recipe, check out [Full Recipe]. The best squash for roasting is acorn squash. Its sweet taste and nice texture work well. But you can also use butternut squash, spaghetti squash, or even delicata squash. Each has its own flavor and texture. Butternut squash is creamy and sweet. Spaghetti squash is great for a low-carb option. Delicata squash has a nice, edible skin that adds to the dish. Choose what you like best! To get that perfect crunch on your squash, follow these tips: - Use high heat: Set your oven to 425°F (220°C). This helps the squash get crispy. - Cut evenly: Make sure your squash pieces are the same size. This helps them cook evenly. - Dry the squash: Pat the squash dry with a towel. Removing moisture makes it crispy. - Don’t crowd the pan: Leave space between the pieces on the pan. This helps them roast, not steam. - Flip halfway: Flip the squash halfway through cooking for even crispiness. Yes, this recipe is perfect for meal prep! Roasted squash can last in the fridge for about 4-5 days. You can add it to salads, grain bowls, or wraps. Try mixing it with quinoa and greens for a healthy lunch. You can even toss it into soups for added flavor. The options are endless! In this article, we explored how to roast acorn squash for tasty meals. We covered ingredients, the roasting process, and tips for perfect results. Remember to measure carefully and avoid common mistakes like over-roasting. Try out different squash varieties and seasonings to keep it fun and fresh. Store leftovers wisely and watch for spoilage. Roasted squash can elevate your dishes and impress guests. With these steps, you can create a delicious dish that your family will love. Enjoy cooking and experimenting with flavors!](https://grilledflavors.com/wp-content/uploads/2025/07/8588f761-f079-44dd-b32a-19f985ed52e6.webp)
Best Crispy Roasted Squash Perfectly Crunchy Delight
Are you ready to elevate your side dish game? In this post, I’ll show you how to make the best crispy roasted squash that is