Dinner
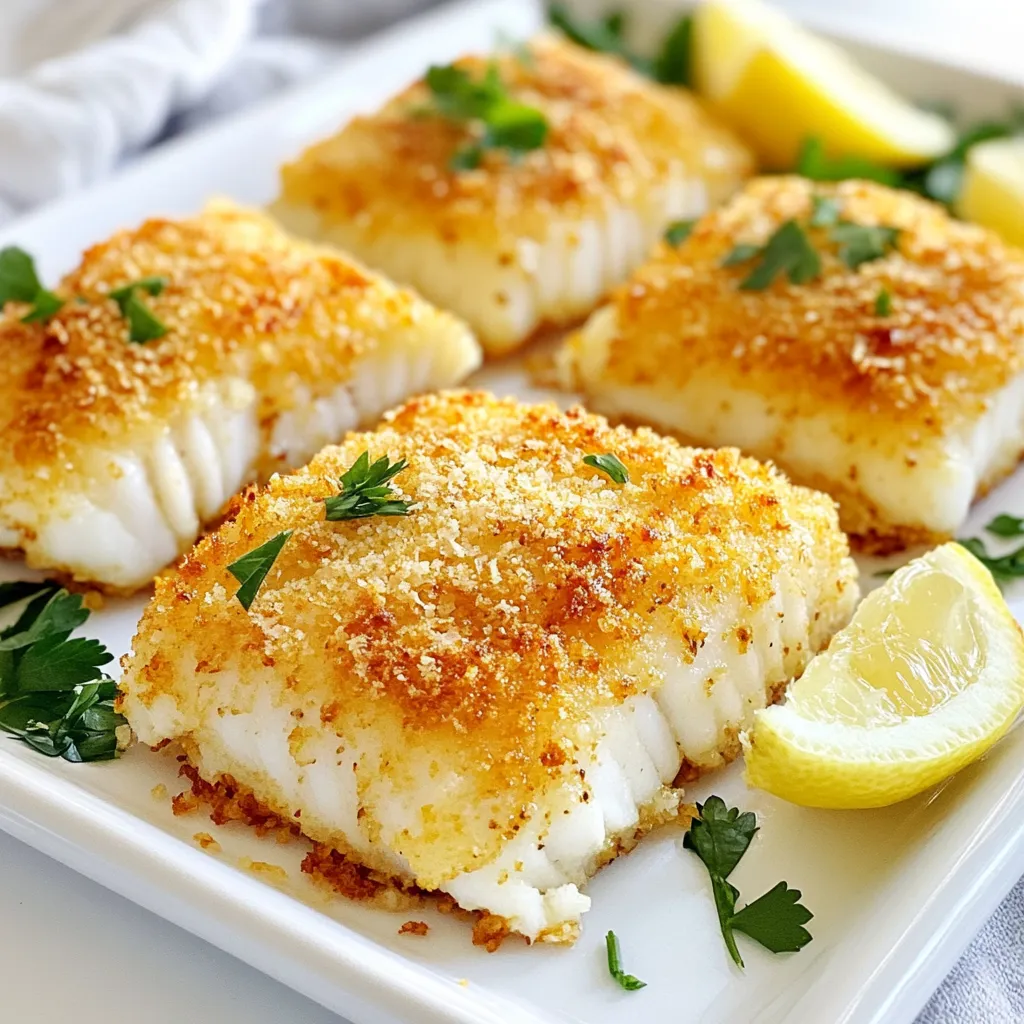
Crispy Parmesan Air Fryer Cod Tasty and Quick Meal
Looking for a quick and tasty meal? You’ll love my Crispy Parmesan Air Fryer Cod! It’s simple to make and packed with flavor. In just
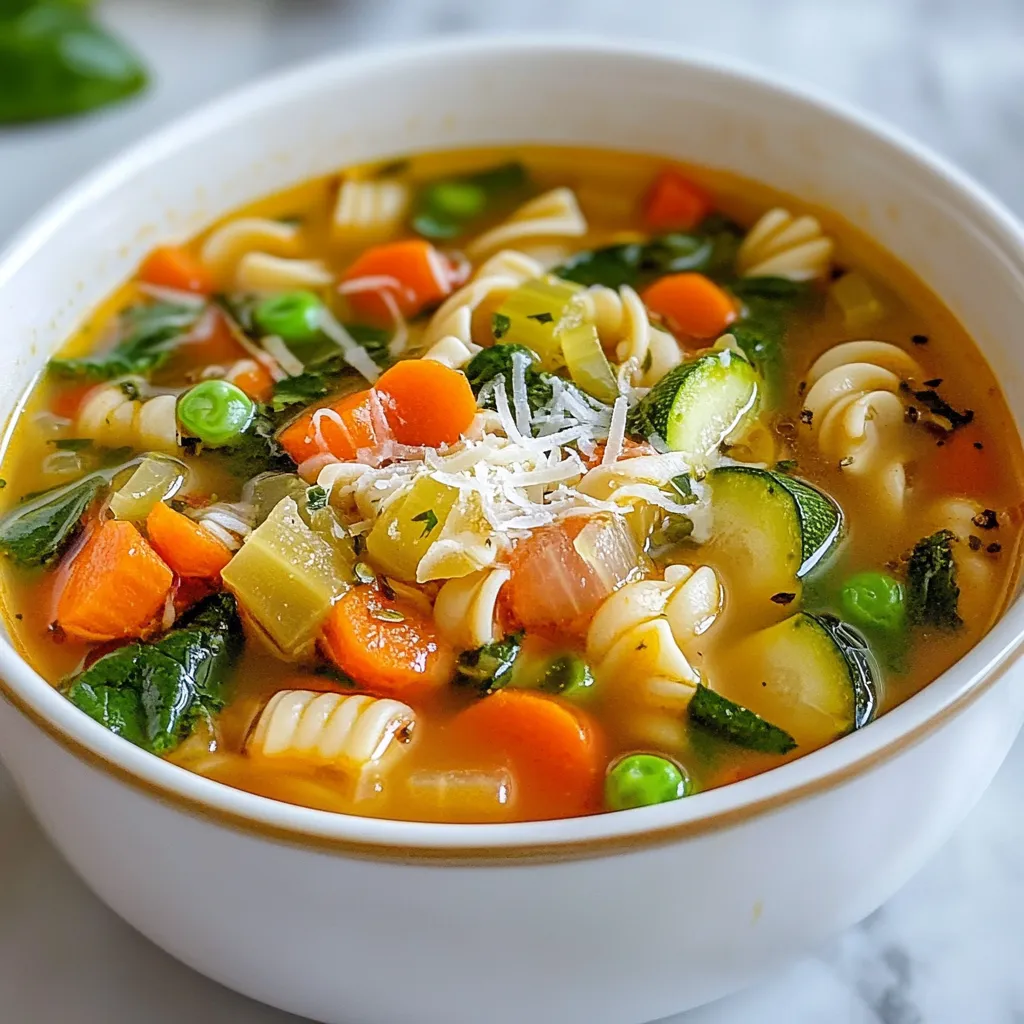
Olive Garden Copycat Minestrone Simple and Flavorful
If you love Olive Garden’s minestrone soup, then you’re in for a treat! This copycat recipe is simple, flavorful, and perfect for any home cook.
![To make Broccoli Cheese Stuffed Chicken, you will need fresh and simple ingredients. Here’s what to gather: - 4 boneless, skinless chicken breasts - 1 cup broccoli florets, blanched - 1 cup shredded cheddar cheese - 1/2 cup cream cheese, softened - 1/4 cup garlic, minced - 1/4 teaspoon black pepper - 1/4 teaspoon salt - 1 tablespoon olive oil - 1/2 cup breadcrumbs (optional for topping) - Fresh parsley for garnish Start by blanching the broccoli florets. This means you should boil them for just a few minutes and then cool them in ice water. This keeps the bright green color and a nice crunch. For cheese, I love using sharp cheddar for its bold flavor. You can also try mild cheddar or a mix of cheeses. Cream cheese adds creaminess and binds everything together. This mix makes every bite creamy and cheesy! By preparing these ingredients, you set yourself up for a tasty meal. You’ll love how easy it is to create this dish with these fresh items. For the full recipe, check the main page. Preparation of chicken breasts Start by preheating your oven to 375°F (190°C). Next, take the chicken breasts and place them on a cutting board. Slice a pocket into each breast. Be careful not to cut all the way through. This pocket will hold the tasty filling. Stuffing each chicken breast In a bowl, combine the blanched broccoli, cheddar cheese, cream cheese, minced garlic, black pepper, and salt. Mix this well. Now, take the filling and stuff it into each chicken breast. Make sure to pack it in tightly. You want each bite to be full of flavor. Cooking instructions in skillet and baking Heat olive oil in a large oven-safe skillet over medium heat. Once the oil is hot, add the stuffed chicken breasts to the skillet. Cook for about 3-4 minutes on each side. Look for a golden brown color. If you want a crunchy topping, sprinkle breadcrumbs on top now. Transfer the skillet to the preheated oven. Bake for 20-25 minutes. The chicken must reach an internal temperature of 165°F (75°C) to be safe. After baking, let the chicken rest for 5 minutes. This helps keep the juices in. Finally, garnish with fresh parsley before serving. For the full recipe, check the earlier section. To make your stuffed chicken perfect, start with the right technique. When you slice the chicken, be gentle. Make a pocket, but don’t cut all the way through. This keeps the filling inside. For a golden crust, heat your skillet well. Use medium heat and add olive oil. Cook each side for 3-4 minutes until it turns brown. You can also sprinkle breadcrumbs on top for a crunchy finish. Seasoning is key. Try adding herbs like thyme or paprika for extra flavor. You can also mix in some hot sauce for a little kick. This will make your dish even more tasty. For the full recipe, check the earlier section. Enjoy cooking! {{image_2}} Customization can make your Broccoli Cheese Stuffed Chicken even better! Here are some fun ideas. You can swap broccoli with other tasty veggies. Spinach works great and adds color. Mushrooms add a nice earthy taste. Feel free to mix and match! Cheddar cheese is classic, but you can try others. Mozzarella melts beautifully and gives a stringy texture. Cream cheese adds creaminess, while feta gives a tangy kick. Experiment to find your favorite! If you need gluten-free options, use crushed gluten-free crackers instead of breadcrumbs. For a low-carb dish, skip the breadcrumbs altogether. You can also try zucchini or eggplant instead of chicken for a veggie twist. These variations can help you create a dish that fits your taste. For more details, check out the Full Recipe for Broccoli Cheese Stuffed Chicken! To keep your broccoli cheese stuffed chicken fresh, use airtight containers. Glass containers work best as they do not retain odors. Plastic containers are also fine, just ensure they are tightly sealed. You can store leftovers in the fridge for three to four days. For longer storage, place them in the freezer. In the freezer, they will stay good for about three months. When you are ready to eat, reheating is key. For the best taste and texture, use an oven. Preheat the oven to 350°F (175°C). Place the chicken in a baking dish and cover it with foil. Heat for about 20 minutes or until it is warmed through. If you're in a hurry, you can use a microwave. Just be careful not to overcook it. Microwave in short bursts, checking often to avoid drying it out. Enjoy your delicious leftovers! For the full recipe, click [Full Recipe]. Can I make this dish ahead of time? Yes, you can prepare Broccoli Cheese Stuffed Chicken in advance. You can stuff the chicken and store it in the fridge for up to 24 hours. This way, you save time on busy days. Just bake it before serving to ensure it's fresh. What can I serve with Broccoli Cheese Stuffed Chicken? This dish pairs well with many sides. Some great options are: - Steamed rice - Mashed potatoes - Roasted vegetables - A fresh garden salad These sides balance the cheesy flavor and add nutrition. How can I tell if the chicken is cooked through? To check if the chicken is fully cooked, use a meat thermometer. The internal temperature should reach 165°F (75°C). If you don't have a thermometer, cut into the chicken. The juices should run clear, and the meat should no longer be pink. Enjoy your meal with confidence! For the full recipe, check out my Cheesy Broccoli Delight Chicken. This article covered how to make delicious Broccoli Cheese Stuffed Chicken. We explored the key ingredients, including specific kinds of cheese and veggie prep. I shared step-by-step instructions to guide your cooking. You learned tips to avoid tears when stuffing the chicken and how to get a perfect crust. I also offered fun variations and storage tips to enjoy leftovers. Final thoughts: This dish is easy to customize. You can try new flavors and ingredients. Enjoy creating your perfect stuffed chicken!](https://grilledflavors.com/wp-content/uploads/2025/06/4c18a98c-6fe6-4c7f-bab7-ba5dfb0666b2.webp)
Broccoli Cheese Stuffed Chicken Tasty and Easy Recipe
If you’re looking for a delicious dinner option that’s simple to make, you’ve clicked on the right post! My Broccoli Cheese Stuffed Chicken is packed

Korean Fried Chicken Crispy and Flavorful Delight
If you crave a crispy and flavorful bite, Korean fried chicken is your answer! I’ll show you how to make this tasty dish at home,

Extra Crispy Spicy Fried Chicken Recipe Delight
Are you ready to spice up your dinner table? In this Extra Crispy Spicy Fried Chicken Recipe Delight, I’ll show you how to create a

The Best Oven Fried Chicken Crispy and Flavorful Recipe
Do you crave crispy, flavorful fried chicken without the mess of deep frying? I have just the recipe for you! My Best Oven Fried Chicken

Dave’s Tomato Pie Deliciously Crafted for You
Are you ready to savor a slice of something special? Dave’s Tomato Pie blends fresh ingredients with simple steps to create a dish that’s both
. It includes all the steps and details you need to make this dish at home. You now have all the tools to make delicious fried chicken. We covered the essential ingredients, from chicken thighs to spices. You'll know how to marinate, fry, and get that crispy texture. Remember the tips for flavor and storage to keep your chicken tasty. If you're feeling adventurous, try different cuts or spice levels. Fried chicken can be your go-to meal, perfect for any occasion. Enjoy your cooking and the great meals ahead!](https://grilledflavors.com/wp-content/uploads/2025/06/81088206-5a10-4b82-9c68-52f415180940.webp)
Crispy KFC-Style Chicken Flavorful and Easy Recipe
Craving crispy KFC-style chicken that’s full of flavor? You’re in the right place! With just a few simple ingredients and easy steps, you can make

Spicy Vegan Street Tacos Flavorful and Satisfying Meal
Are you ready to make mouth-watering spicy vegan street tacos? These tasty treats are packed with flavor and are simple to create. I’ll guide you

Fried Chicken Without Buttermilk Crispy and Flavorful Treat
Fried chicken is a favorite for many, but what if you’re out of buttermilk? No need to worry! I’ve got the perfect recipe that guarantees