Dinner
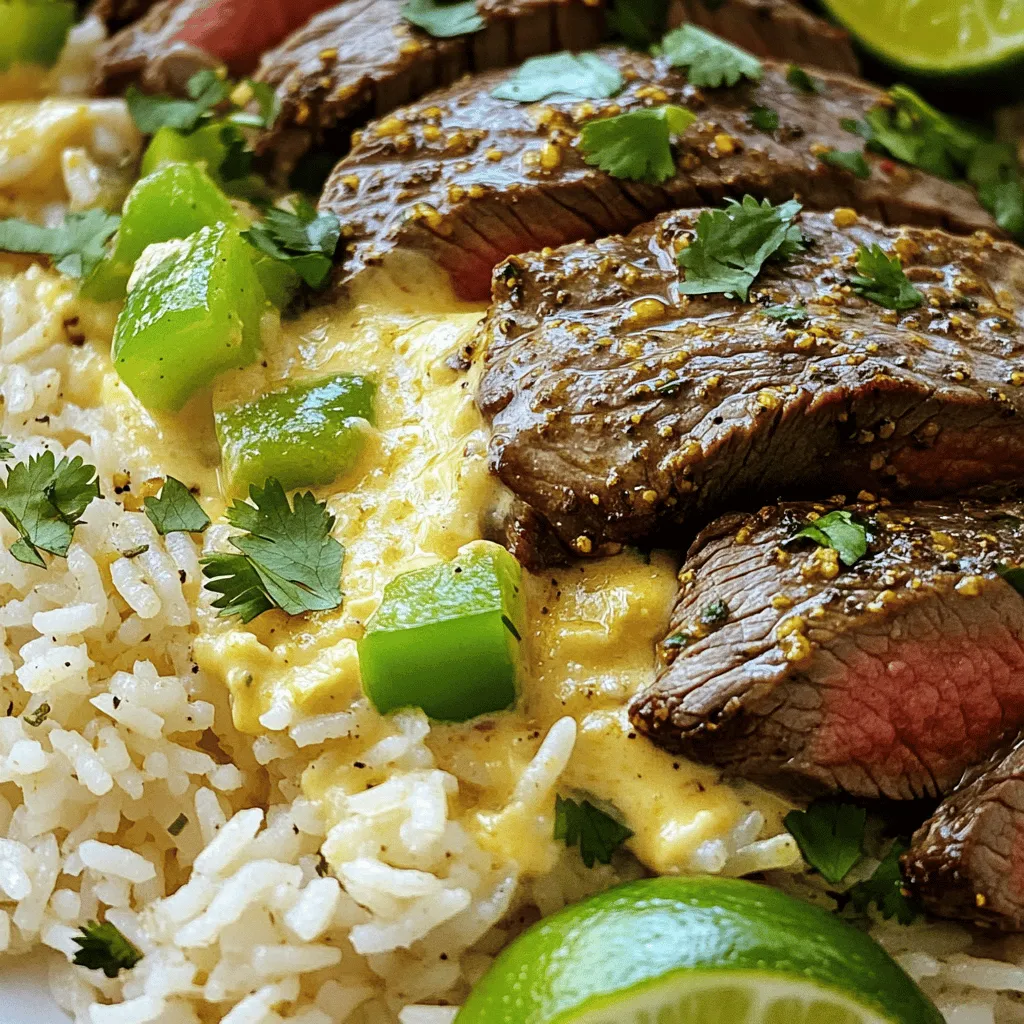
Steak & Queso Rice Flavorful Comfort Food Recipe
Craving a dish that’s both hearty and packed with flavor? Try my Steak & Queso Rice! This recipe combines tender steak, cheesy goodness, and fluffy
![For a delicious Cajun Potato Soup, you need these key ingredients: - 4 large russet potatoes, peeled and diced - 1 large onion, chopped - 3 cloves garlic, minced - 1 green bell pepper, chopped - 1 celery stalk, chopped - 4 cups vegetable broth - 1 cup heavy cream or coconut cream for a dairy-free option - 2 teaspoons Cajun seasoning - 1/2 teaspoon smoked paprika - Salt and pepper to taste - 2 tablespoons olive oil - Fresh parsley, chopped (for garnish) - Crumbled cornbread or croutons (for topping) Not all ingredients are a must. Here are some good swaps: - Potatoes: Sweet potatoes work well for a sweeter flavor. - Heavy cream: Use almond milk or oat milk for a lighter option. - Cajun seasoning: Blend your own mix of paprika, garlic powder, and cayenne pepper. - Vegetable broth: Chicken broth can add more depth if you prefer. Garnishes can elevate your soup. Here are some tasty ideas: - Chopped green onions for a bit of crunch. - Shredded cheese for creaminess. - A sprinkle of cayenne for heat. - Extra fresh herbs like thyme or chives for a fresh touch. These ingredient options and substitutes help you craft a flavorful and hearty dish that suits your taste. For the full recipe, check out the linked details. To make Cajun potato soup, start by gathering your ingredients. You will need russet potatoes, onion, garlic, green bell pepper, celery, vegetable broth, heavy cream or coconut cream, Cajun seasoning, smoked paprika, salt, pepper, olive oil, parsley, and croutons. 1. Heat olive oil in a large pot over medium heat. 2. Add the chopped onion, green bell pepper, and celery. Cook for about 5 minutes. The veggies should soften but not brown. 3. Next, stir in the minced garlic. Cook for 1-2 minutes until you smell its aroma. 4. Add the diced potatoes, vegetable broth, Cajun seasoning, and smoked paprika. Bring it all to a boil. 5. Once boiling, lower the heat to simmer and cover the pot. Cook for about 20 minutes. Check if the potatoes are tender with a fork. After cooking, it’s time to blend the soup. You can use an immersion blender for a smooth texture. Just place it in the pot and blend until creamy. If you don’t have one, carefully transfer small amounts to a regular blender. Blend until smooth and pour it back into the pot. Serve your soup hot in bowls. Garnish with chopped parsley for a fresh touch. Top with crumbled cornbread or croutons for crunch. This dish is hearty and perfect for chilly days. For the full recipe, check back to ensure every detail is perfect! To boost the flavor of your Cajun potato soup, use fresh herbs. Thyme and bay leaves add depth. You can also adjust your Cajun seasoning. If you like heat, add more. For a smoky taste, try adding more smoked paprika. A touch of lemon juice brightens the soup and balances the richness. One common mistake is overcooking the potatoes. Cook them just until tender. This keeps your soup creamy, not mushy. Another mistake is not blending enough. Blend until smooth for a nice texture. Lastly, taste your soup before serving. Adjust salt and pepper until it’s just right. You can make this soup ahead of time. It stores well in the fridge for up to three days. If you're making it early, stop before adding cream. This helps keep the soup fresh. When ready to serve, reheat gently and stir in the cream. You’ll enjoy a warm, hearty dish with rich flavors. For the complete recipe, check out the Full Recipe section. {{image_2}} You can add proteins to Cajun potato soup for more flavor. Smoked sausage works great. Slice it and sauté it with vegetables. Chicken is another option. Cook diced chicken breast until golden before adding it to the soup. Both choices make the dish heartier and more filling. For a vegetarian or vegan version, skip the meat. Use vegetable broth and coconut cream for a creamy touch. You can also add beans, like black beans or kidney beans, for protein. This keeps the soup hearty and satisfying without meat. If you want a low-carb version, swap potatoes for cauliflower. Cauliflower gives the soup a creamy texture. You can also add more vegetables like zucchini or spinach. These changes keep the soup delicious while cutting down on carbs. To keep your Cajun potato soup fresh, let it cool first. Then, pour it into an airtight container. Store it in the fridge for up to three days. Make sure to label the container with the date. This way, you’ll know when to enjoy it again! When you're ready to eat the soup, gently heat it on the stove. Use medium heat and stir often. This will prevent burning. You can also reheat it in the microwave. Just cover the bowl and heat in short intervals. Stir in between to ensure even heating. Want to save some for later? You can freeze the soup! Pour it into freezer-safe containers. Leave some space at the top for expansion. It will stay good for about three months. To reheat, let it thaw overnight in the fridge before warming it up. Enjoy the flavors anytime! You can find the full recipe [Full Recipe]. Cajun potato soup is a warm and hearty dish. It combines potatoes, spices, and rich cream. The soup has a thick and creamy texture. The Cajun seasoning gives it a unique kick. You’ll enjoy flavors of garlic, onion, and bell pepper. This dish warms you up on cold days. It’s perfect for family dinners or gatherings. You can thicken your Cajun potato soup in several ways. Try mashing some of the potatoes in the pot. This makes the soup creamier. Another option is to add a little cornstarch. Mix cornstarch with cold water before adding it to the soup. Allow it to cook for a few minutes to thicken. You could also add more heavy cream for extra richness. Yes, you can use instant potatoes in this recipe. Instant potatoes save time and are easy to use. Simply follow the package instructions to prepare them. Add them to your soup after cooking the broth and vegetables. This shortcut works well if you’re in a hurry. To make Cajun potato soup gluten-free, check your ingredients. Use gluten-free vegetable broth and Cajun seasoning. Most spices are gluten-free but always check labels. You can also use cornstarch as a thickener instead of flour. This way, you keep the soup thick and delicious. Cajun cuisine comes from the Acadian people in Louisiana. They blended French cooking with local ingredients. This style uses spices, herbs, and fresh seafood. Cajun food is known for its bold flavors and hearty dishes. It celebrates the culture and history of the region. Many classic Cajun dishes are stews, gumbos, and jambalayas. Cajun potato soup fits right into this flavorful tradition. For the full recipe, check the cooking details provided. This post shared key steps for making delicious Cajun potato soup. We explored ingredients, substitutes, and garnishes to personalize your dish. The cooking process and blending techniques help you achieve the best texture and taste. I also shared tips, variations, and storage advice to make your cooking experience easier. Remember, Cajun potato soup is flexible. You can mix in proteins or go vegan. Enjoy experimenting and making this dish your own!](https://grilledflavors.com/wp-content/uploads/2025/06/a41426e6-5a07-4571-827f-83b71d821142.webp)
Cajun Potato Soup Flavorful and Hearty Dish
Looking for a dish that warms you from the inside out? Cajun Potato Soup is packed with flavor and comfort. This hearty meal combines rich
![Creating Easy Hot Honey Chicken Biscuits is simple when you have the right ingredients. Here’s what you need: - 2 cups all-purpose flour - 1 tablespoon baking powder - 1 teaspoon salt - 1/2 teaspoon baking soda - 1/4 cup unsalted butter, cold and cubed - 3/4 cup buttermilk - 1 pound chicken tenders - 1 cup buttermilk (for marinating) - 1 cup hot honey (store-bought or homemade: mix honey with a dash of cayenne pepper) - Oil for frying - Fresh chives or parsley for garnish These ingredients come together to make a tasty dish. The all-purpose flour and buttermilk are key for the biscuits. The chicken tenders soak in buttermilk, which adds moisture and flavor. Hot honey gives a sweet and spicy touch that makes this meal stand out. Using fresh herbs as a garnish makes the dish look great. You can even make your hot honey at home with just honey and a bit of cayenne pepper. This adds a fun twist to the flavor. For the full recipe, check out the detailed steps to bring all these ingredients together in a delicious way. To start, you'll want to marinate the chicken. Place the chicken tenders in a bowl and cover them with 1 cup of buttermilk. Let them soak for at least 30 minutes. For even more flavor, you can refrigerate them for up to 2 hours. This step makes the chicken tender and juicy. After marinating, drain the excess buttermilk. This helps the breading stick better when frying. Next, let's make the biscuits. In a large bowl, mix together the dry ingredients: 2 cups of all-purpose flour, 1 tablespoon of baking powder, 1 teaspoon of salt, and 1/2 teaspoon of baking soda. Now, add 1/4 cup of cold, cubed butter. Use a pastry cutter or your fingers to mix until it looks like coarse crumbs. This will give your biscuits a flaky texture. After that, stir in 3/4 cup of buttermilk until just combined. Turn the dough onto a floured surface. Gently knead it a few times until it comes together. Shape the dough into a rectangle about 1 inch thick. Use a biscuit cutter or a glass to cut out your biscuits. Preheat your oven to 425°F (220°C). Place the biscuits on a baking sheet and bake for about 12-15 minutes. They should turn golden brown. While the biscuits bake, it's time to fry the chicken. Heat oil in a deep skillet over medium-high heat. Take the chicken from the buttermilk and let the extra drip off. Fry the chicken tenders in batches for about 5-7 minutes until golden brown. Once done, place them on a paper towel-lined plate to drain excess oil. This ensures crispy chicken. Now, let’s put it all together. Once your biscuits are out of the oven and slightly cooled, slice them in half. Place a fried chicken tender on the bottom half. Drizzle it generously with hot honey. Finally, add the top half of the biscuit. For a nice touch, garnish with fresh chives or parsley. This adds color and extra flavor to your dish. For the full recipe, check the [Full Recipe]. To get the best biscuit texture, use cold butter. Cold butter helps the biscuits rise high and stay flaky. When mixing, avoid overworking the dough. Just combine until it looks a bit lumpy. For chicken, ensure it is cooked through. When frying, maintain a steady oil temperature. If the oil is too cool, the chicken will soak up oil and become greasy. Cook the chicken until it reaches an internal temperature of 165°F (75°C). Pair your hot honey chicken biscuits with fresh sides. Coleslaw or pickles add crunch and balance the sweetness. For a colorful plate, add sliced tomatoes or a light salad. When serving, stack the chicken biscuits on a nice platter. Drizzle extra hot honey on top for a tempting look. Garnish with fresh herbs like parsley or chives for a pop of color. Prep your ingredients ahead of time. Measure out the flour and other dry items the night before. This helps speed up cooking on busy weeknights. You can also use store-bought hot honey to save time. It offers great flavor without the wait. If you want to try making your own, just mix honey with a dash of cayenne pepper for a quick twist. Try these tips for a fun and simple meal! For the full recipe, check out Easy Hot Honey Chicken Biscuits. {{image_2}} You can easily change the heat level of your hot honey. If you like spice, use a hotter honey. Look for brands that add chili or cayenne. For a milder taste, choose a honey with less heat. This way, you control the kick in your dish. You can also add cheese or herbs to your biscuits. A little cheddar or pepper jack makes a nice twist. Mix in fresh herbs like chives or rosemary. They bring a fresh flavor and elevate your biscuits. You don’t have to stick to all-purpose flour. Try whole wheat or almond flour for a twist. These flours give your biscuits a unique taste and texture. Switch up your chicken, too. If you prefer, use chicken thighs or even tofu for a plant-based option. Each protein brings its own flavor to the dish. For a fun twist, try a different marinade. You could use barbecue sauce or teriyaki for a unique flavor. Each swap makes the meal new and exciting. For the full recipe, check out the complete guide to Easy Hot Honey Chicken Biscuits. You can store leftovers in the fridge for up to three days. Use airtight containers to keep them fresh. This helps prevent moisture loss and keeps flavors intact. You can freeze both biscuit dough and cooked chicken. To freeze biscuit dough, shape it into biscuits and place them on a baking sheet. Freeze them for about an hour, then transfer them to a freezer bag. For cooked chicken, let it cool completely. Place it in a freezer bag, removing as much air as possible. To reheat frozen biscuits, bake them directly from the freezer at 425°F for about 15 minutes. For the chicken, heat it in a skillet over medium heat until warmed through. This method keeps the chicken crispy and delicious. Enjoy your Easy Hot Honey Chicken Biscuits anytime! You can use milk with vinegar or lemon juice as a substitute. Mix 1 cup of milk with 1 tablespoon of vinegar or lemon juice. Let it sit for 5 to 10 minutes. This will mimic buttermilk's tangy flavor. Yes, you can use frozen chicken tenders. Just add a few minutes to the cooking time. Make sure the chicken is cooked through and reaches 165°F. This ensures your chicken is safe to eat. Hot honey is honey mixed with a spicy element. To make it, mix 1 cup of honey with a dash of cayenne pepper. You can adjust the spice level based on your taste. Use it on biscuits, fried chicken, or even pizza. To get crispy biscuits, use cold butter and handle the dough gently. Avoid overmixing, as this can make them tough. Bake at a high temperature, around 425°F, for 12-15 minutes until golden brown. This gives you a nice, flaky texture. In this blog post, we covered the key ingredients for a delicious fried chicken and biscuits dish. I shared step-by-step instructions on marinating chicken, making biscuits, and frying them. You learned valuable tips for texture and storage, plus creative variations to try. Cooking can be fun and easy, and these recipes allow for creativity. Enjoy putting these ideas into practice. You’ll impress everyone with your tasty meal!](https://grilledflavors.com/wp-content/uploads/2025/06/63fe983e-9a66-4df3-9ec9-7f46e56775ba.webp)
Easy Hot Honey Chicken Biscuits Flavorful Weeknight Meal
Looking for a quick and tasty dinner idea? Try my Easy Hot Honey Chicken Biscuits! This flavorful weeknight meal combines crispy chicken tenders with sweet

Crispy Parmesan Chicken Easy Family Dinner Recipe
Looking for an easy and tasty family dinner? Let me introduce you to my Crispy Parmesan Chicken recipe! With just a few simple ingredients, including
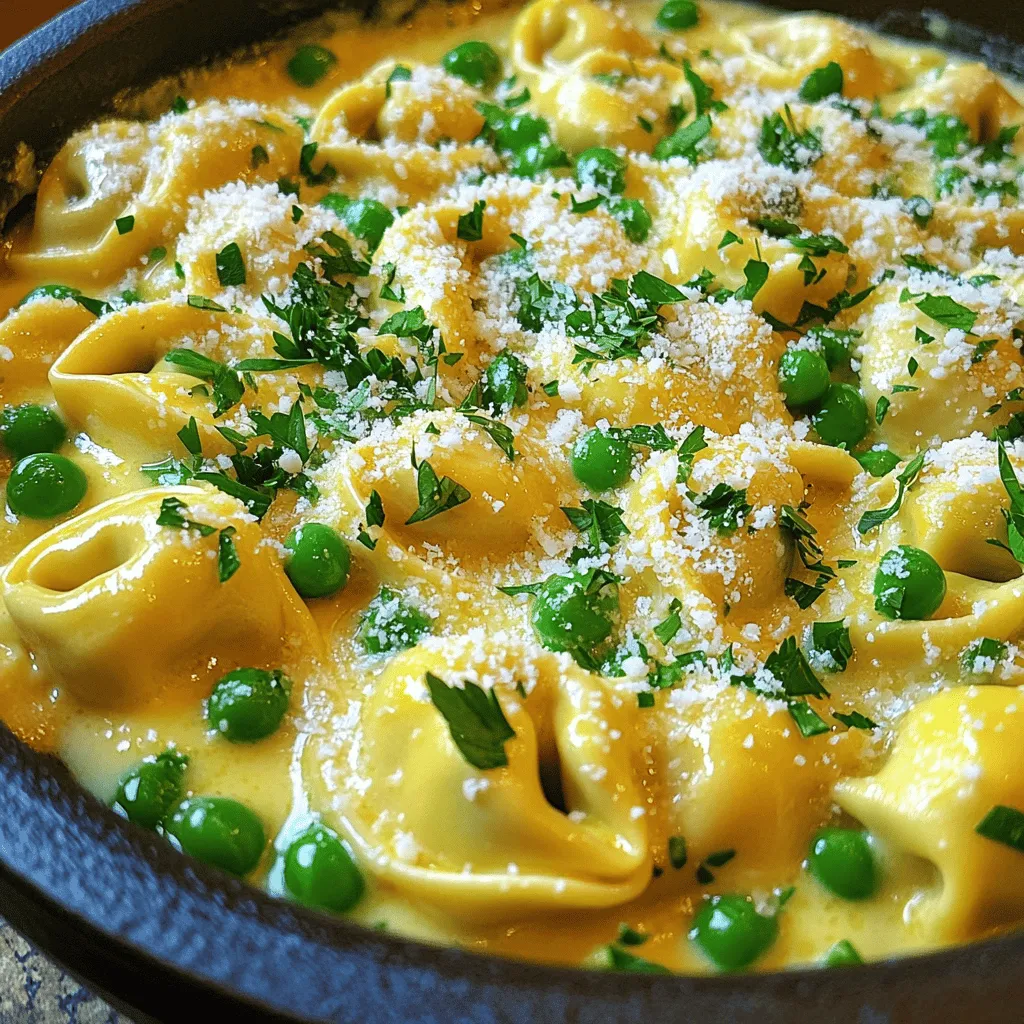
Tortellini Carbonara Creamy and Flavorful Delight
Get ready to savor a delightful dish that combines creamy richness with bold flavors: Tortellini Carbonara! This easy recipe transforms simple ingredients into a comforting
![- 1.5 lbs beef sirloin or tenderloin - 1/2 cup unsalted butter - 4 cloves garlic - 1 teaspoon dried thyme - 1 teaspoon smoked paprika - 1 tablespoon soy sauce - Ground black pepper and salt to taste - Fresh parsley for garnish To make Slow Cooker Garlic Butter Beef Bites, you need a few key ingredients. First, choose 1.5 pounds of beef sirloin or tenderloin. These cuts are tender and cook well in a slow cooker. Next, gather 1/2 cup of unsalted butter. This gives the dish its rich flavor. You will also need 4 cloves of minced garlic. Garlic adds depth and aroma to the beef. Next, you will need 1 teaspoon of dried thyme and 1 teaspoon of smoked paprika. These spices bring warmth and earthiness. Add 1 tablespoon of soy sauce to enhance the dish’s umami taste. Finally, don’t forget ground black pepper and salt. Use these to taste. Fresh parsley will brighten the dish when you serve it. - Coconut aminos for gluten-free option - Additional seasonings (e.g., red pepper flakes) You can customize this recipe to your liking. For a gluten-free option, use coconut aminos instead of soy sauce. You can also add extra seasonings, like red pepper flakes, if you want more heat. These small tweaks make your beef bites unique and delicious. For more tips and details, check out the Full Recipe. 1. Melt 1/2 cup of unsalted butter in a skillet over medium heat. 2. Add 4 minced garlic cloves and sauté them for 1-2 minutes. The smell will be great! 3. Stir in 1 teaspoon of dried thyme, 1 teaspoon of smoked paprika, and 1 tablespoon of soy sauce. 4. Add 1 teaspoon of ground black pepper and salt to taste. Mix it all well. 1. Place 1.5 lbs of cut beef sirloin or tenderloin into the slow cooker. 2. Pour the garlic butter mixture over the beef pieces. 3. Stir everything together in the slow cooker. Make sure all the beef is coated. 4. Cover the slow cooker and set it to low for 6 hours or high for 3 hours. 1. Once cooked, use a slotted spoon to serve the beef bites on a platter. 2. Drizzle some of the remaining garlic butter sauce over the beef bites. 3. Garnish with chopped fresh parsley for a nice touch. Enjoy these tasty bites straight from the slow cooker! For the complete recipe, check the [Full Recipe]. To get the most flavor from your beef, marinate it overnight. This step adds depth and richness. Use a simple mix of garlic, butter, and spices. When it comes to sides, serve these beef bites with mashed potatoes or crusty bread. They soak up the sauce well. You can also add a fresh salad for a nice crunch. Every slow cooker heats a bit differently. If your cooker runs hot, check the beef at 2.5 hours on high. For a cooler model, it may take up to 4 hours. To tell if beef bites are done, use a fork. They should be tender and easy to break apart. If they still feel tough, give them more time. For a twist, add colorful veggies like bell peppers or mushrooms. They cook well with the beef and add more flavor. When serving, pair the beef with rice or pasta. Both options soak up the garlic butter sauce perfectly. You can also try adding some fresh herbs for a pop of color and taste. {{image_2}} If you want to try a different cut of beef, you can use chuck or round. These cuts work well, but they have more connective tissue. This means they need longer cooking times to become tender. If you choose tougher cuts, add some liquid like broth or wine. This helps to break down the meat and keep it moist. You can mix up the flavors in your beef bites. Try adding herbs like rosemary or oregano for a fresh twist. You can also use spices such as cumin or coriander for a warm taste. For extra flavor, consider adding sauces like barbecue or teriyaki. Just keep in mind that some sauces can be salty, so adjust the soy sauce accordingly. Make your beef bites into a cozy stew or casserole. Just add some diced potatoes and carrots to the slow cooker. Let them cook along with the beef for a hearty meal. You can also use the beef bites as a filling for tacos or wraps. Just warm some tortillas and pile on the beef. Top with fresh veggies for a fun meal. For more ideas and a complete guide, check the Full Recipe. To keep your Slow Cooker Garlic Butter Beef Bites fresh, store them in the fridge. Place the beef bites in an airtight container. This helps keep out air and moisture. You can store them for up to three days. If you want to freeze them, wait until they cool. Divide the beef bites into smaller portions. Use freezer-safe bags or containers. Be sure to remove as much air as possible. This will help prevent freezer burn. You can freeze the beef bites for up to three months. When you are ready to enjoy your beef bites again, you have options. You can use a microwave or stovetop. For the microwave, place the beef bites in a bowl. Cover it with a microwave-safe lid or wrap. Heat in short bursts, stirring in between. This helps heat evenly. For the stovetop, use a pan over low heat. Add a splash of water or broth to keep them moist. Stir often to avoid burning. To keep the flavor and texture, avoid overheating. Reheating slowly helps maintain the dish's delicious taste. Enjoy! You can cook the beef bites for 6 hours on low or 3 hours on high. Cooking on low makes the meat very tender and full of flavor. If you are in a hurry, choose the high setting. Just keep an eye on it to ensure it doesn't overcook. Yes, you can use other meats if you want. Chicken thighs or pork tenderloin work well. Just cut them into small pieces like the beef. Keep in mind, cooking times may change. Check for doneness to make sure it's cooked through. These beef bites pair well with many sides. Try serving them with mashed potatoes for a classic combo. Rice or crusty bread also works great to soak up the garlic butter sauce. You can also add a fresh salad for a nice crunch. Absolutely! This recipe is great for meal prep. After cooking, let the beef cool fully. Store it in airtight containers in the fridge for up to four days. You can also freeze portions for up to three months. Just reheat when you're ready to eat. For the full recipe, check out the details above. This blog shared a simple recipe for Slow Cooker Garlic Butter Beef Bites. We covered key ingredients, step-by-step cooking methods, and tips for the best flavor. You can customize it to fit your taste and dietary needs. Don't forget about variations for serving or storing! Enjoy creating this dish, and feel free to experiment with flavors. Cooking can be fun and rewarding, and this recipe will impress your family and friends.](https://grilledflavors.com/wp-content/uploads/2025/06/dfc5ec96-3da2-46ff-a555-df8a5fb09d38.webp)
Slow Cooker Garlic Butter Beef Bites Flavorful Dish
Looking for a comforting, mouthwatering meal that requires little effort? My Slow Cooker Garlic Butter Beef Bites are the answer! This dish is rich with

Street Corn Chicken Rice Bowl Flavors That Satisfy
Craving a meal packed with flavor and comfort? Let’s dive into the Street Corn Chicken Rice Bowl, where juicy grilled chicken meets the sweetness of
![To make delicious Homemade Big Mac Wraps, gather these simple ingredients: - Ground beef (1 lb) - Onion powder (1 tablespoon) - Garlic powder (1 tablespoon) - Worcestershire sauce (1 tablespoon) - Flour tortillas (4 large) - Shredded lettuce (1 cup) - Diced tomatoes (1 cup) - Shredded cheddar cheese (1 cup) - Pickles, sliced (½ cup) - Big Mac sauce (½ cup) These ingredients come together to create a tasty meal you can prepare in no time. Each item plays a key role in delivering that classic Big Mac flavor. Using ground beef gives a hearty base, while onion and garlic powders add depth. The Worcestershire sauce brings in umami, enhancing the beef's taste. Flour tortillas act as the wrap, holding all the ingredients together. Fresh shredded lettuce and diced tomatoes add crunch and freshness. Cheddar cheese melts beautifully, adding creaminess. Sliced pickles provide a tangy kick. Lastly, the Big Mac sauce ties everything together with its unique flavor. With this list in hand, you’re ready to create your perfect wraps! Check out the Full Recipe for all the steps to make these tasty Homemade Big Mac Wraps. To start, I heat a large skillet over medium heat. I add 1 pound of ground beef. As it cooks, I break it apart with a spatula. This helps it brown evenly. It takes about 5-7 minutes to cook the beef until it's no longer pink. Once it’s cooked, I mix in the seasonings. I add 1 tablespoon of onion powder, 1 tablespoon of garlic powder, and 1 tablespoon of Worcestershire sauce. I also sprinkle in salt and pepper to taste. I stir well and let it cook for 2-3 more minutes. This step allows all the flavors to blend together nicely. Next, I take 4 large flour tortillas and lay one on a clean surface. I spread about ¼ cup of the beef mixture right in the center. The beef should cover a good part of the tortilla. Then, I add toppings. I sprinkle on a handful of shredded lettuce, a generous amount of diced tomatoes, and 1 cup of shredded cheddar cheese. I also add a few slices of pickles for a nice crunch. Finally, I drizzle 1 tablespoon of Big Mac sauce over everything. This sauce ties all the flavors together. Now it’s time to wrap them up! I fold the sides of the tortilla inwards. Then, I roll it tightly from the bottom upwards. This helps keep all the yummy filling inside. I repeat this for the other tortillas. If I want some extra crispiness, I place the wraps seam-side down in a heated skillet. I cook them for about 1-2 minutes on each side until they are golden brown. This makes the outside nice and crunchy. After that, I slice each wrap in half and serve them hot. Enjoy your delicious Homemade Big Mac Wraps! For a great flavor in your Homemade Big Mac Wraps, adjust your seasonings. I like to add more Worcestershire sauce for depth. You can also mix in paprika or cayenne for a little heat. When cooking the beef, use medium heat. This way, it cooks evenly and stays juicy. To keep your wrap from falling apart, use large flour tortillas. They hold the filling well. Before you fill them, warm the tortillas briefly. This makes them flexible and easier to wrap. I recommend brands like Mission or Tortilla Land for best results. For extra flavor, serve your wraps with sauces. I love ranch or chipotle sauce as dips. You can also try ketchup or mustard for a classic touch. Pair your wraps with crunchy sides like carrot sticks or a simple salad. These add freshness and balance to your meal. {{image_2}} For a lighter twist on Homemade Big Mac Wraps, swap ground beef for ground turkey or chicken. These meats have less fat while still packing flavor. You can season them the same way as beef to keep the taste. If you want to cut carbs, look for low-carb tortillas. These wraps help you enjoy the same great taste with fewer carbs. Many brands offer great options that still hold up well when you wrap them. To amp up the spice, consider adding jalapeños or other veggies. Chopped bell peppers or onions can add crunch and flavor. You can also mix in some fresh herbs for a touch of brightness. Creating your own Big Mac sauce is easy. Mix mayo, ketchup, relish, and a dash of mustard. You can add a pinch of garlic powder for extra flavor. This gives your wraps a fresh taste that you can't find in store-bought sauces. If you want to change things up, try making a Big Mac bowl or salad. Layer the beef mixture, lettuce, and toppings in a bowl. Drizzle with sauce for a fun twist. For wraps, don’t limit yourself to flour tortillas. You can use corn tortillas, lettuce leaves, or even rice paper. Each option brings a unique flavor and texture. These variations let you customize your Homemade Big Mac Wraps to fit your taste and diet. You can explore new flavors while enjoying a quick meal! For the complete recipe, check out the [Full Recipe]. To keep your Homemade Big Mac Wraps fresh, use proper refrigeration techniques. First, let the wraps cool to room temperature. Then, wrap each one in plastic wrap or foil. Place them in an airtight container. Store them in the fridge for up to three days. This method keeps them tasty and safe to eat. For long-term storage, freezing is a great option. Wrap each wrap tightly in plastic wrap. Then, place them in a freezer bag. Make sure to remove as much air as possible. You can freeze them for up to three months. When you're ready to enjoy a wrap, thaw it in the fridge overnight. Reheating your wraps can be tricky. You want to keep them crispy and warm. The best method is to use a skillet. Heat the skillet on medium heat. Add the wrap and cook for about 2-3 minutes on each side. This method helps the tortilla stay crispy. You can also use the oven. Preheat it to 350°F. Wrap the Big Mac Wraps in foil and place them on a baking sheet. Bake for about 10-15 minutes. This method warms them evenly while keeping them soft. Avoid using the microwave, as it can make the wraps soggy. Yes, you can prep these wraps in advance. Here are some tips: - Cook the beef mixture ahead of time and store it in the fridge. - Chop the veggies and keep them in airtight containers. - Assemble the wraps just before serving for the best taste. This way, you save time and still enjoy fresh wraps. If you want a twist, try these easy options: - Thousand Island dressing works well. - Homemade sauce with mayo, ketchup, and relish is great too. - Yogurt with spices can be a healthy choice. Feel free to mix and match to find your favorite! Making these wraps is quick! Here’s the breakdown: - Prep time: 15 minutes - Cooking time: 15 minutes - Total time: 30 minutes In just half an hour, you can enjoy a tasty meal! For the full recipe, check out the details above. In this post, we explored how to make tasty Big Mac wraps from scratch. You learned about the ingredients, step-by-step cooking, and ways to add flavor. Don’t forget to try different variations, like using healthier meats or adding veggies. Proper storage and reheating tips make sure nothing goes to waste. Enjoy this quick meal anytime, whether at home or on the go. Happy cooking!](https://grilledflavors.com/wp-content/uploads/2025/06/f8c63e87-80a1-4ce4-a98b-d3753d35da68.webp)
Homemade Big Mac Wraps Tasty and Quick Meal Idea
Craving a quick meal that packs a punch? Homemade Big Mac Wraps are your answer! With just a few simple ingredients and steps, you can
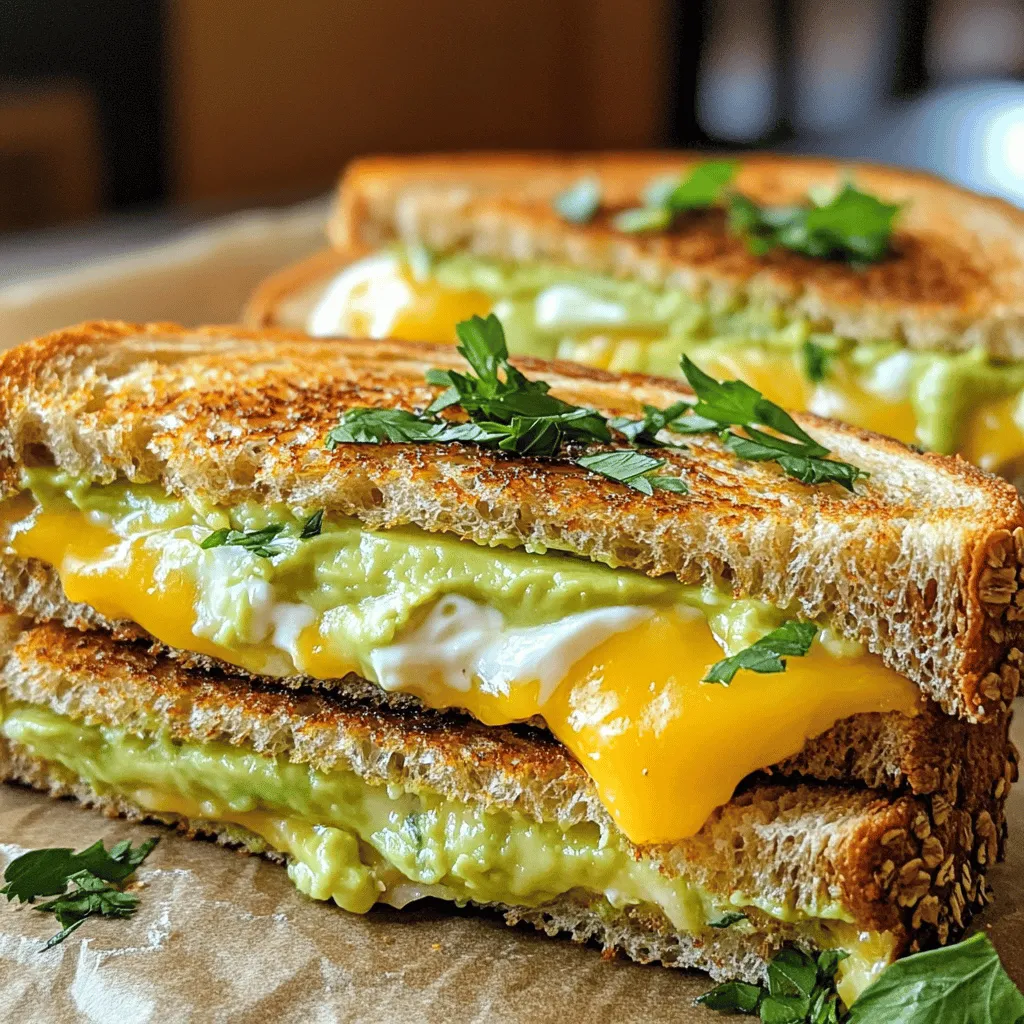
Creamy Avocado Grilled Cheese Delightful Flavor Boost
Are you ready to elevate your grilled cheese game? This Creamy Avocado Grilled Cheese packs a delightful flavor boost that you’ll crave again and again.
![Here’s what you need to make cheesy potato burritos that everyone will love. Gather these simple ingredients: - 4 medium potatoes, peeled and diced - 1 cup shredded cheddar cheese - 1/2 cup sour cream - 1/4 cup green onions, chopped - 1 teaspoon garlic powder - 1 teaspoon paprika - Salt and pepper to taste - 4 large flour tortillas - 1 cup black beans, rinsed and drained - 1 tablespoon olive oil - Optional: hot sauce for serving These ingredients combine to create a filling and tasty meal. Each item adds its own flavor and texture. The potatoes provide creaminess, while the cheese melts beautifully. The black beans add protein, making this dish satisfying. You can customize with hot sauce to add some heat if you like! If you want the full recipe, check out the details later in this article. - Boil diced potatoes in salted water until fork-tender. - Drain and cool slightly before mixing. - Mash the potatoes until smooth in a large bowl. - Add cheese, sour cream, and spices to the bowl. - Mix until smooth and creamy. - Lay a tortilla flat on your workspace. - Place a scoop of the potato mixture in the center. - Add a tablespoon of black beans on top. - Fold the sides of the tortilla over the filling. - Roll tightly from the bottom up to seal the filling. - Heat a skillet over medium heat with olive oil. - Grill the burritos for 2-3 minutes on each side. - Serve warm and drizzled with hot sauce if you like. For the complete process, check the Full Recipe. To make the best cheesy potato burritos, I suggest using Yukon Gold potatoes. They are creamy and smooth. You can adjust the seasoning based on your taste. Try adding more salt, pepper, or even a pinch of chili powder. Warm your tortillas for a few seconds in a pan or the microwave. This helps them stay soft and flexible. I like to use a spatula when assembling the burritos. It makes the process easier and keeps your hands clean. These burritos taste great with salsa or guacamole. You can also offer toppings like diced tomatoes, fresh cilantro, or sliced jalapeños. Let your guests customize their own burritos for extra fun. Enjoy these ideas while making your cheesy potato burritos! For the full recipe, check out the earlier sections. {{image_2}} You can easily switch up the beans in this recipe. Use pinto beans instead of black beans. Pinto beans add a creamy texture and mild flavor. You can also add sautéed vegetables like bell peppers and zucchini. This adds color and nutrients to your burrito. If you want a heartier meal, add cooked chorizo or chicken. Both options bring a rich taste to the burritos. For cheese, try Monterey Jack or pepper jack. These cheeses melt beautifully and add a nice kick. Want to spice things up? Add spices like cumin or smoked paprika. These spices give your burritos a warm, earthy flavor. Fresh herbs like cilantro can brighten up the dish. They add a fresh taste that complements the cheese and potatoes perfectly. Explore the Full Recipe for more ideas and combinations! Store your Cheesy Potato Burritos in airtight containers in the fridge. They taste best within 3-4 days. After that, they may lose some flavor and texture. For a quick meal, microwave the burritos for 1-2 minutes. If you prefer a crispy texture, reheat them in a skillet over medium heat. This method keeps the outside crunchy while the inside stays warm. Wrap each burrito tightly in plastic wrap. Place them in a freezer-safe bag. These burritos can be frozen for up to 2 months. When ready to enjoy, thaw overnight in the fridge before reheating. [Full Recipe] Yes, you can prepare the filling in advance and assemble when ready to eat. This makes meal prep easy and fun. I often make the filling a day before. It saves time and enhances the flavors. Just store it in the fridge until you're ready to roll those burritos. Use gluten-free tortillas for a gluten-free option. Many stores sell these. Just check the label to be sure. This way, everyone can enjoy these tasty burritos without worry. Consider sides like Mexican rice and a fresh salad. They pair well with the creamy burritos. You can also offer salsa or guacamole for some extra flavor. These sides make your meal more colorful and satisfying. Add jalapeños or hot sauce to the filling for extra heat. This gives a nice kick to the dish. You can mix in diced jalapeños or drizzle hot sauce on top. Adjust the spice level to your taste for a perfect bite. Wrap individually in foil and place in a freezer bag for optimal preservation. This keeps them fresh and tasty. When you're ready to eat, just reheat them in the oven or microwave. Enjoy your quick and easy meal! These cheesy potato burritos are simple and tasty. We boiled potatoes, mixed them with cheese and spices, and wrapped them in tortillas. You can also add your favorite beans or proteins for more flavor. Remember, you can customize these burritos to fit your taste. Enjoy them fresh, or store for later. Mix and match ingredients and serve with your favorite dips. Dive into this delicious meal anytime!](https://grilledflavors.com/wp-content/uploads/2025/06/40544d60-f36e-4139-8d8b-61318a4ee2d9.webp)
Cheesy Potato Burritos Easy and Flavorful Meal
Craving something quick, cheesy, and totally satisfying? Look no further than these easy Cheesy Potato Burritos! Packed with creamy potatoes, savory cheese, and a hint