Dinner
![- 2 pounds baby potatoes, halved - 1 cup shredded sharp cheddar cheese - 1/2 cup sour cream - 2 tablespoons ranch seasoning mix - 3 tablespoons olive oil - 1 teaspoon garlic powder - 1/2 teaspoon onion powder - Salt and pepper to taste - 1/4 cup chopped green onions for garnish To make Cheesy Ranch Potatoes, you need fresh and simple ingredients. I love using baby potatoes for their tender texture and rich flavor. You can find these at most grocery stores. The sharp cheddar cheese adds a nice kick that pairs well with the ranch seasoning. Sour cream brings creaminess to the dish. Choose a good-quality brand for the best taste. Ranch seasoning mix gives a burst of flavor that makes these potatoes stand out. You can even make your own if you have the time! The olive oil helps the potatoes crisp up in the oven. Garlic and onion powder add depth to the flavor. Lastly, don't forget salt and pepper! These are your basics to enhance all the flavors in the dish. - Mixing bowl - Baking sheet - Parchment paper - Measuring cups and spoons You’ll need some handy tools for this recipe. A mixing bowl allows you to easily toss the potatoes with the oil and spices. Use a baking sheet lined with parchment paper for easy cleanup and perfect roasting. Measuring cups and spoons help ensure you get the right amounts of each ingredient. With these ingredients and tools, you will be ready to create a tasty side dish everyone will love. For the complete recipe, check the Full Recipe section. - Preheat your oven to 400°F (200°C). This helps to cook the potatoes evenly. - Prepare the potatoes by halving them. This way, they cook faster and soak up more flavor. - Toss the potatoes with seasonings. In a mixing bowl, add olive oil, garlic powder, onion powder, ranch seasoning, salt, and pepper. Coat the potatoes well. - Spread the seasoned potatoes on a baking sheet lined with parchment paper. A single layer helps them roast better. - Roast the potatoes in the oven for 25-30 minutes. Look for a golden color and fork-tender texture. - After roasting, add cheese on top of the hot potatoes. Return them to the oven for 5-7 minutes. You want the cheese to melt and get bubbly. - Drizzle sour cream over the hot potatoes. This adds a creamy touch that balances the flavors. - Garnish with chopped green onions. They add color and a fresh taste. For the complete recipe, check the [Full Recipe]. To make your cheesy ranch potatoes really pop, try using different cheeses. Sharp cheddar gives a nice bite, but you can also use pepper jack for some spice. Mixing cheeses can create unique flavors. Adding extra spices can also boost the taste. Try paprika for smokiness or cayenne pepper for heat. Don’t be afraid to experiment! For even cooking, space the potatoes well on the baking sheet. This allows hot air to circulate, helping them cook evenly. A kitchen thermometer is a great tool for checking doneness. Aim for around 210°F (99°C) for soft, fluffy potatoes. For serving, use a rustic wooden bowl. It adds charm and makes the dish feel cozy. To keep the dish warm before serving, place it in a low oven. Set your oven to about 200°F (93°C) while you finish your meal prep. This keeps your cheesy ranch potatoes ready to enjoy! For a pop of color, sprinkle extra green onions on top right before serving. This small touch makes a big difference. Enjoy your meal! {{image_2}} You can change the type of potatoes for this dish. While baby potatoes work great, feel free to use red or Yukon gold potatoes instead. These varieties will give you a different texture and taste. You can also switch the cheese. Sharp cheddar is classic, but mozzarella or pepper jack adds a fun twist. Each cheese brings its own flavor, making the dish unique. Crispy bacon bits make this dish even better. They add crunch and a savory flavor that pairs well with the ranch. Just cook the bacon until crispy, chop it up, and mix it in before baking. You can also toss in some veggies. Bell peppers and asparagus are great choices. They add color and nutrition. Just chop them into small pieces and mix them in with the potatoes. If you need a gluten-free option, this recipe is naturally gluten-free. Just check your ranch seasoning to make sure it has no gluten. For a vegan version, use plant-based cheese and sour cream. There are many tasty vegan cheese options today. They melt well and give you that cheesy flavor without dairy. To store leftovers, let them cool first. Place the cheesy ranch potatoes in an airtight container. This helps keep them fresh. I recommend using a glass container. Glass is safe and does not absorb odors. You can store them in the fridge for up to three days. When it comes to reheating, the oven is best. Preheat your oven to 350°F (175°C). Place the potatoes on a baking sheet. Heat for about 10-15 minutes. This keeps them crispy. If you use a microwave, heat in short bursts. Check every 30 seconds. Microwaving may make them soft. You can freeze cheesy ranch potatoes, but texture may change. To freeze, let the dish cool completely. Place in a freezer-safe container, leaving space for expansion. Seal tightly. You can freeze them for up to three months. When ready to enjoy, thaw in the fridge overnight. Reheat in the oven for the best results. This keeps the flavors and texture intact. For more detailed steps, check the Full Recipe. Yes, you can make Cheesy Ranch Potatoes ahead of time. To do this, prepare the potatoes up to the roasting step. After tossing them in olive oil and seasonings, cover the bowl and store it in the fridge. You can keep them like this for up to 24 hours. When you're ready, just roast them as the recipe states. This saves time and makes meal prep easy! To add some heat to Cheesy Ranch Potatoes, you have a few options. - Add jalapeños: Chop fresh or pickled jalapeños and mix them in before roasting. - Use spicy ranch seasoning: Swap your regular ranch for a spicy version. - Sprinkle chili powder: Add a pinch of chili powder or cayenne pepper to the seasonings. These little tweaks will bring a fun kick to the dish! Cheesy Ranch Potatoes pair well with many dishes. Here are some great ideas: - Grilled chicken: Juicy chicken adds a nice protein balance. - Steak: The rich flavor of a steak complements the cheesy potatoes. - Salad: A fresh side salad brightens the meal. - Roasted veggies: Colorful roasted vegetables add health and texture. These sides will create a complete and tasty meal. For the full recipe, check the section above! This blog post walks you through the fun and tasty journey of making Cheesy Ranch Potatoes. You learned the key ingredients and tools needed, plus simple steps to prepare and cook the dish. I shared tips to boost flavor and ways to switch things up for your taste. Storing and reheating leftovers is simple too. Remember, this dish is versatile and perfect for any meal. Enjoy your cooking adventure and have fun trying new variations!](https://grilledflavors.com/wp-content/uploads/2025/06/f09dfd5a-e656-4816-af28-fc58aa830e24.webp)
Cheesy Ranch Potatoes Tasty and Easy Side Dish
Looking for a tasty side dish that’s easy to make? You’ve come to the right place! Cheesy Ranch Potatoes blend creamy cheese, savory ranch flavor,
![- 2 chicken breasts, diced - 1 cup cooked jasmine rice - 1 red bell pepper, sliced - 1 cup broccoli florets - 1 carrot, julienned - 3 green onions, chopped - 1/4 cup sweet chili sauce - 2 tablespoons soy sauce - 1 tablespoon sesame oil - 1 tablespoon vegetable oil - Salt and pepper to taste - Sesame seeds for garnish For this sweet chili chicken bowl, I focus on fresh, colorful ingredients. The chicken brings protein, while the veggies add crunch and color. Jasmine rice serves as a perfect base, soaking up all the tasty sauce. Sweet chili sauce gives the dish a delightful kick. You can adjust the sweetness by adding more or less sauce. - Large skillet or wok - Mixing bowl - Spatula or wooden spoon - Measuring cups and spoons - Storage containers - Serving bowls You need a good skillet or wok for sautéing. A mixing bowl helps with marinating the chicken. Grab a spatula to stir everything nicely. Use measuring cups for accuracy. Choose storage containers for leftovers and serving bowls for a beautiful presentation. This sweet chili chicken bowl recipe stands out because you can make it fast and easy. The full recipe helps you create a meal that’s tasty and satisfying. To start, you need to combine some key marinade ingredients. In a bowl, add diced chicken, sweet chili sauce, soy sauce, sesame oil, salt, and pepper. Mix everything well so the chicken gets coated. Cover the bowl and let it marinate for at least 15 minutes. This gives the chicken great flavor while you prep the rest. For the rice, I recommend using jasmine rice. It’s fluffy and pairs well with the chicken. Follow the package instructions to prepare it. If you prefer, you can use brown rice or even quinoa as a tasty alternative. Just keep in mind that cooking times may vary. Next, you’ll sauté the veggies. Heat vegetable oil in a large skillet over medium heat. Add the sliced red bell pepper, broccoli florets, and julienned carrot. Stir-fry these for about 5-7 minutes. You want them to stay tender-crisp. This helps keep their bright colors and crunch. Now, it’s time to cook the chicken. In the same skillet, add your marinated chicken, but be sure to discard any leftover marinade. Cook the chicken for about 8-10 minutes. Stir occasionally to ensure even cooking. You’ll know it’s done when it’s golden and no longer pink inside. After the chicken is cooked, return the sautéed vegetables to the skillet. Toss everything together gently for about 2 minutes. This helps the flavors mix well. You’ll want every bite to taste just right. When serving, create a base with the cooked jasmine rice in deep bowls. Then, pile on the sweet chili chicken and veggies for a colorful display. For a finishing touch, sprinkle chopped green onions on top. A drizzle of extra sweet chili sauce can add color and flavor. You can also add lime wedges on the side for a fresh twist. For the complete recipe, you can refer to the Full Recipe section. Enjoy your cooking! To make your sweet chili chicken bowl even better, try adding some nuts or herbs. Peanuts or cashews add a nice crunch. Fresh cilantro or basil can brighten up the dish. You can also adjust the sweetness of the sauce. If you want it sweeter, add more sweet chili sauce. For a tangy twist, squeeze in some lime juice. Using a wok can give you great results. A wok heats evenly and allows for quick cooking. If you don’t have one, a skillet works fine too. The key is to keep the heat high for quick stir-frying. This helps keep the veggies crunchy and the chicken juicy. Remember to stir constantly to get that perfect sear on the chicken. Meal prep can save you a lot of time. You can chop your veggies and marinate the chicken the night before. This makes cooking quicker on busy days. Cooking in bulk is another great idea. Make extra rice and chicken, then store them in your fridge. You can mix and match them with different veggies or sauces throughout the week. This way, you get variety without extra effort. {{image_2}} You can switch up the chicken in your sweet chili chicken bowl. For a lighter option, try turkey. It has a similar taste and texture. You can also use tofu for a vegetarian twist. Tofu absorbs flavors well, making it a great choice. For a vegan option, try tempeh. It packs a protein punch and adds a unique taste. Want more heat? Add chili flakes or sriracha to your sweet chili sauce. This makes the dish spicy and exciting. If you prefer less sugar, try using a low-sugar sweet chili sauce. You can even make your own by mixing soy sauce, rice vinegar, and a sweetener like honey or agave. Seasonal vegetables can change the flavor of your bowl. In summer, add zucchini or corn. In fall, consider butternut squash or sweet potatoes. For rice, try quinoa or cauliflower rice for a low-carb option. These swaps keep your dish fresh and fun! Check out the [Full Recipe] for all the details on making this tasty meal! To store leftovers, place the sweet chili chicken bowl in an airtight container. This keeps the flavors fresh. Make sure to let the food cool first. In the fridge, your leftovers stay good for about 3 to 4 days. Always check for any off smells before eating. If you want to freeze the bowl, use freezer-safe containers. This helps prevent freezer burn. The sweet chili chicken bowl can last up to 3 months in the freezer. When you’re ready to eat, thaw it overnight in the fridge. To reheat, warm it in a skillet over medium heat until hot. You can also microwave it, covering the bowl to keep moisture. For meal prep, you can cook the chicken and veggies in advance. Store each component in separate containers. This way, you keep the chicken and veggies fresh longer. When ready to eat, just combine everything. You can even prepare the rice ahead of time. This makes it easy to grab a quick meal during busy days. To add some heat, you can use a few simple ingredients: - 1-2 tablespoons of sriracha - Red pepper flakes - Fresh sliced jalapeños - Spicy chili sauce Mix these with your sweet chili sauce. This will give your sweet chili chicken bowl a nice kick. You can adjust the heat level to fit your taste! Yes, you can use frozen chicken in this recipe. Here are some tips: - Thaw the chicken overnight in the fridge. - If short on time, use the microwave’s defrost setting. - Cook the chicken longer to ensure it’s fully cooked through. Frozen chicken works well and saves time. You can serve your sweet chili chicken bowl with these side dishes: - Steamed broccoli - A side salad - Crispy egg rolls - Fresh fruit like mango or pineapple These sides add color and texture. The total time to make this dish is around 30 minutes. - Prep time: 15 minutes - Cook time: 15 minutes You can have a delicious meal ready in no time! Yes, you can prepare this dish in advance. Here’s how: - Marinate the chicken the night before. - Cook the rice and veggies ahead and store them in the fridge. - Combine everything just before serving. This keeps flavors fresh and saves time! Yes, this dish can be healthy. Here are some nutritional insights: - Chicken is high in protein. - Vegetables add vitamins and fiber. - Use less sauce to lower sugar content. You can also switch to brown rice for more fiber. This guide covered all you need for a sweet chili chicken bowl. We explored key ingredients, kitchen tools, and cooking methods. You learned tips for flavor boosts and variations to match your tastes. Don’t forget about proper storage to keep meals fresh. Cooking can be fun and flexible! Try new ingredients and make this dish your own. Enjoy every bite and share your creation with others!](https://grilledflavors.com/wp-content/uploads/2025/06/9f442435-1f82-427c-a262-6e966479bbfa.webp)
Savory Sweet Chili Chicken Bowl Easy Recipe Delight
Looking for a quick, tasty meal? You’ll love my Savory Sweet Chili Chicken Bowl. This easy recipe packs vibrant flavors with juicy chicken, crunchy veggies,

Creamy Smothered Chicken and Rice Easy Dinner Dish
Looking for an easy dinner that’s creamy, comforting, and packed with flavor? You’ve found it! This Creamy Smothered Chicken and Rice dish is your new

Garlic Butter Chicken Bites with Pasta Delight
Are you ready for a quick dinner that bursts with flavor? My Garlic Butter Chicken Bites with Pasta will become your new go-to recipe! In

Bourbon Style Keto Chicken Delicious and Simple Dish
Are you looking for a tasty dish that fits into your keto plan? Let me introduce you to Bourbon Style Keto Chicken! This simple yet

Cowboy Butter Chicken Linguine Flavorful and Easy Meal
Get ready to impress your taste buds with my Cowboy Butter Chicken Linguine! This dish combines tender chicken, fresh veggies, and a rich, buttery sauce

One-Pot Garlic Parmesan Pasta Easy and Creamy Recipe
Looking for a quick and creamy dish? My One-Pot Garlic Parmesan Pasta delivers rich flavor with minimal effort. Perfect for busy nights, this easy recipe
![To make a tasty cheeseburger wrap, you will need: - 1 large tortilla wrap - 1/2 pound ground beef - 1/4 cup chopped onions - 1/4 cup diced pickles - 1/2 cup shredded cheddar cheese - 1 tablespoon ketchup - 1 tablespoon mustard - 1 tablespoon mayonnaise - Lettuce leaves (for freshness) - Salt and pepper to taste - Optional: sliced tomatoes and additional toppings (like jalapeños or avocado) You can easily swap some ingredients for a personal touch. Here are a few ideas: - Ground beef: Try ground turkey, chicken, or plant-based meat. - Tortilla wrap: Use whole wheat, spinach, or gluten-free wraps. - Cheddar cheese: Switch to mozzarella, pepper jack, or vegan cheese. - Ketchup, mustard, and mayonnaise: Experiment with BBQ sauce, ranch, or a spicy aioli for new flavors. - Lettuce: Romaine, spinach, or arugula can add different tastes and textures. To make your cheeseburger wrap even better, consider these toppings: - Sliced tomatoes: Fresh and juicy, they add flavor. - Avocado: Creamy and rich, it pairs well with the wrap. - Jalapeños: For a spicy kick, slice them and add to your wrap. - Pickled onions: They offer a tangy crunch. - Sides: Pair your wrap with chips, a salad, or fresh fruit for a complete meal. Each ingredient and topping adds to the delightful flavor of this cheeseburger wrap. For the full recipe, follow the steps to create your perfect meal. First, grab a skillet and heat it over medium. Add the ground beef and cook it until it turns brown. Use a spatula to break the meat into smaller pieces as it cooks. Season it with salt and pepper. This step adds flavor to your beef. Next, toss in the chopped onions and cook for about 3-4 minutes. You want them soft and sweet. Once the onions are soft, take the skillet off the heat. Mix in the chopped pickles, ketchup, mustard, and mayonnaise. Stir everything together until it is well combined. This mixture is the heart of your cheeseburger wrap. Now, let’s make the wrap! Lay the large tortilla flat on a clean surface. Place a few lettuce leaves in the center. This adds a nice crunch and freshness. Then, spoon your cheeseburger mixture right on top of the lettuce. Be careful not to overfill; you want to wrap it easily. Sprinkle the shredded cheddar cheese over the beef mixture. If you love toppings, add sliced tomatoes or any extras like jalapeños or avocado. This is where you can get creative! To make it extra tasty, fold the sides of the wrap inwards. Then, start rolling it tightly from the bottom up. This keeps all the fillings snug inside. If you want a crispy texture, heat the skillet again. Place the wrap in the skillet for 1-2 minutes on each side. Cook until it is golden brown and crispy. Once done, slice the wrap in half diagonally. Serve it warm with a pickle on the side for that classic touch. Enjoy your amazing cheeseburger wrap! For the full recipe, check it out. To make your beef tasty, season it well. Start with salt and pepper. Use about a teaspoon of each for half a pound of beef. You can also add garlic powder for a kick. Mix the seasoning into the raw beef before cooking. This helps the flavors blend well. Cook your beef over medium heat. Brown it until it’s fully cooked. This adds great flavor and texture. To keep your wrap fresh, use fresh ingredients. Always select crisp lettuce and ripe tomatoes. Place the lettuce in the center of the wrap. This keeps moisture away from the tortilla. If you want extra crunch, add some diced pickles. Keep the wrap covered until you are ready to eat. This prevents it from drying out. You can even wrap it in foil for a fun touch. Avoid overfilling your wrap. Too much filling makes it hard to roll. Stick to a spoonful of the cheeseburger mix. Also, don’t skip toasting your wrap. Toasting adds a nice crunch and warmth. If you plan to store leftovers, wrap them tightly. This helps keep the flavors intact. Lastly, watch the cooking time. Overcooked beef can become dry. For the full recipe, check the details above. {{image_2}} You can easily swap the ground beef for plant-based meat. Use lentils or black beans for a hearty filling. These options still pack a punch of flavor. For cheese, try using vegan cheese. You can also skip the cheese and add extra veggies. Avocado, bell peppers, or even mushrooms add great taste. Add some heat to your wrap with spicy ingredients. Try jalapeños for a nice kick. You can also use hot sauce in your mixture. For extra zest, mix in some pepper jack cheese. This gives the wrap a spicy flavor that many love. Don't forget to top with spicy mayo for a creamy finish. Cheese makes everything better. While cheddar is a classic, try using Swiss or blue cheese. Each cheese adds unique flavors. For sauces, mix it up! Instead of ketchup and mustard, try barbecue sauce or ranch dressing. This will give your wrap a fresh twist. Experimenting with different combos keeps each meal exciting. For the complete recipe, check the [Full Recipe]. If you have extra cheeseburger wraps, store them smartly. Wrap each one in plastic wrap. This keeps them fresh. Place the wrapped wraps in an airtight container. Store them in the fridge. They last for about three days. Make sure to label the container with the date. This helps you keep track. To reheat your wraps, first unwrap them from plastic. You can use a microwave or a skillet. If using a microwave, place the wrap on a plate. Heat it for about 30 seconds to 1 minute. Check if it’s warm enough. If you prefer a crispy wrap, use a skillet. Heat it over medium heat for 2-3 minutes, flipping it once. This gives it a nice crunch. Freezing wraps is a great way to save time. Wrap each cheeseburger wrap in plastic wrap. Then, place them inside a freezer bag. Squeeze out the air before sealing. They can last for up to three months in the freezer. When you're ready to eat, thaw them in the fridge overnight. Reheat using the methods above. Enjoy your delicious wraps even later! For the full recipe, check out the previous sections. The best tortilla for a cheeseburger wrap is a large flour tortilla. Flour tortillas are soft and flexible, making them easy to roll. They hold the filling well without tearing. You can also use whole wheat tortillas for added fiber. If you want a gluten-free option, try corn tortillas. Just make sure they are large enough to fit the filling. Yes, you can make this recipe ahead of time. You can cook the beef and mix in the sauces earlier in the day. Store the mixture in the fridge until you are ready to assemble the wraps. You can also prepare the wraps and keep them in an airtight container. Just be sure to eat them within a day or two for the best taste. To make a cheeseburger wrap healthier, choose lean ground beef or turkey. You can also add more veggies, like spinach or peppers, for added nutrients. Use less cheese or substitute with a lower-fat option. Instead of mayonnaise, try Greek yogurt for creaminess. Whole wheat tortillas add fiber, making the wrap more filling and nutritious. In this blog post, we covered how to make a tasty cheeseburger wrap. You learned about the best ingredients, simple cooking steps, and safe storage. I shared tips to boost flavor and avoid common mistakes. You found variations for vegetarian options and spicy twists. Remember, your wrap can be simple or unique. Experiment with different toppings or cheeses. Enjoy creating your perfect cheeseburger wrap!](https://grilledflavors.com/wp-content/uploads/2025/06/f436041d-6e65-402a-8573-e6805f357436.webp)
Cheeseburger Wrap Flavorful Delight to Savor
Craving a tasty twist on a classic meal? Let me introduce you to the Cheeseburger Wrap. It combines all the flavors you love about a

Creamy Beef and Bowtie Pasta Irresistible Dinner Dish
Are you ready to delight your taste buds? My Creamy Beef and Bowtie Pasta recipe is a true crowd-pleaser. It’s rich, savory, and oh-so-easy to
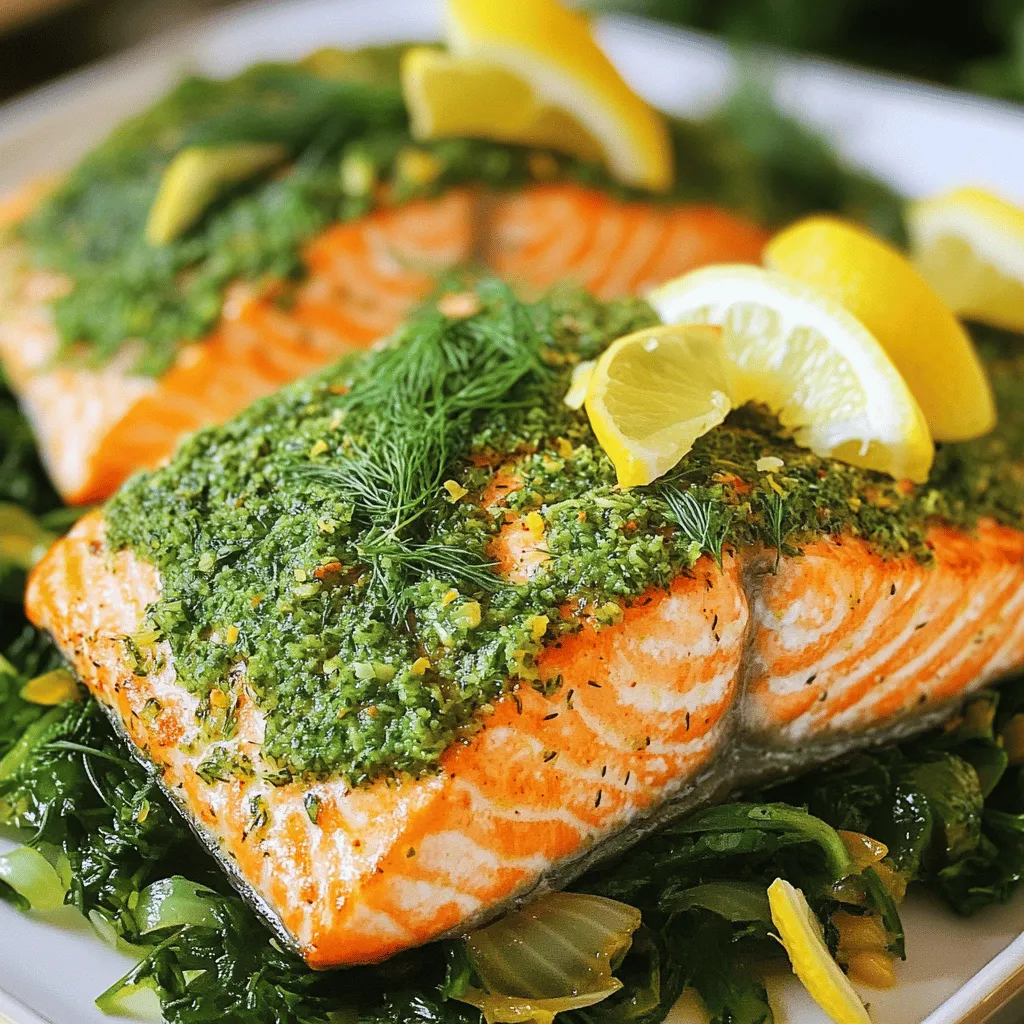
Air Fryer Salmon Recipe Simple and Flavorful Dish
Are you ready to enjoy a simple and tasty air fryer salmon recipe? I’m excited to share my go-to dish that’s packed with flavor and